Week10 : Molding & Casting
Group Work
We learned about the material, safety, point to deal with, with the Safety Data Sheet. Our group work is here.
Idea
■What I Made
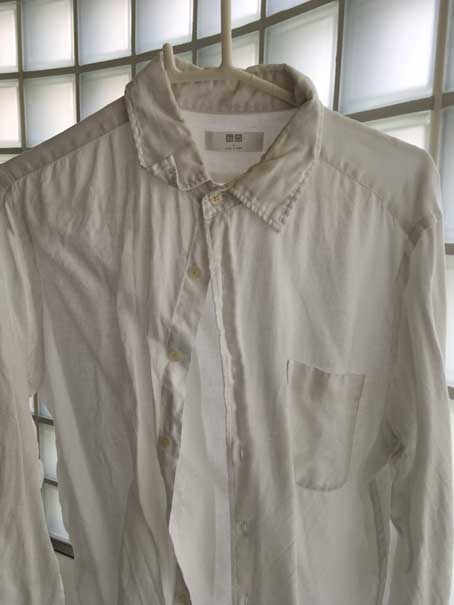
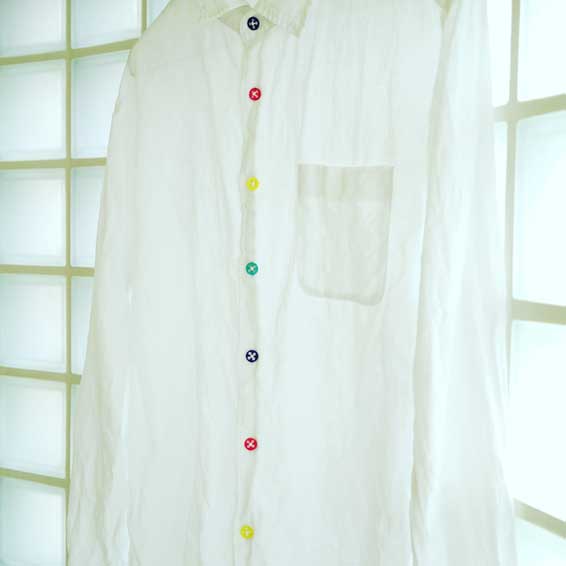
I have white shirt that was bought 3 years ago. But I'm getting bored of this shirt.So, I wanted to have some changes to this shirts.
I thought to make colored button with molding and casting to change this shirts.
I thought to make colored button with molding and casting to change this shirts.
Molding
【Design】
I designed a button model with Fusion360, at first. Before design, the endmill that would be used for milling should be decided because of the it is related with the tool path. I decided to use 2mm end mill for rough cut and 1mm endmill for finish cut. When I simulated in Fusion360 CAM, 2mm diameter hole could not make with 2mm endmill, so set hole diameter 2.2mm.
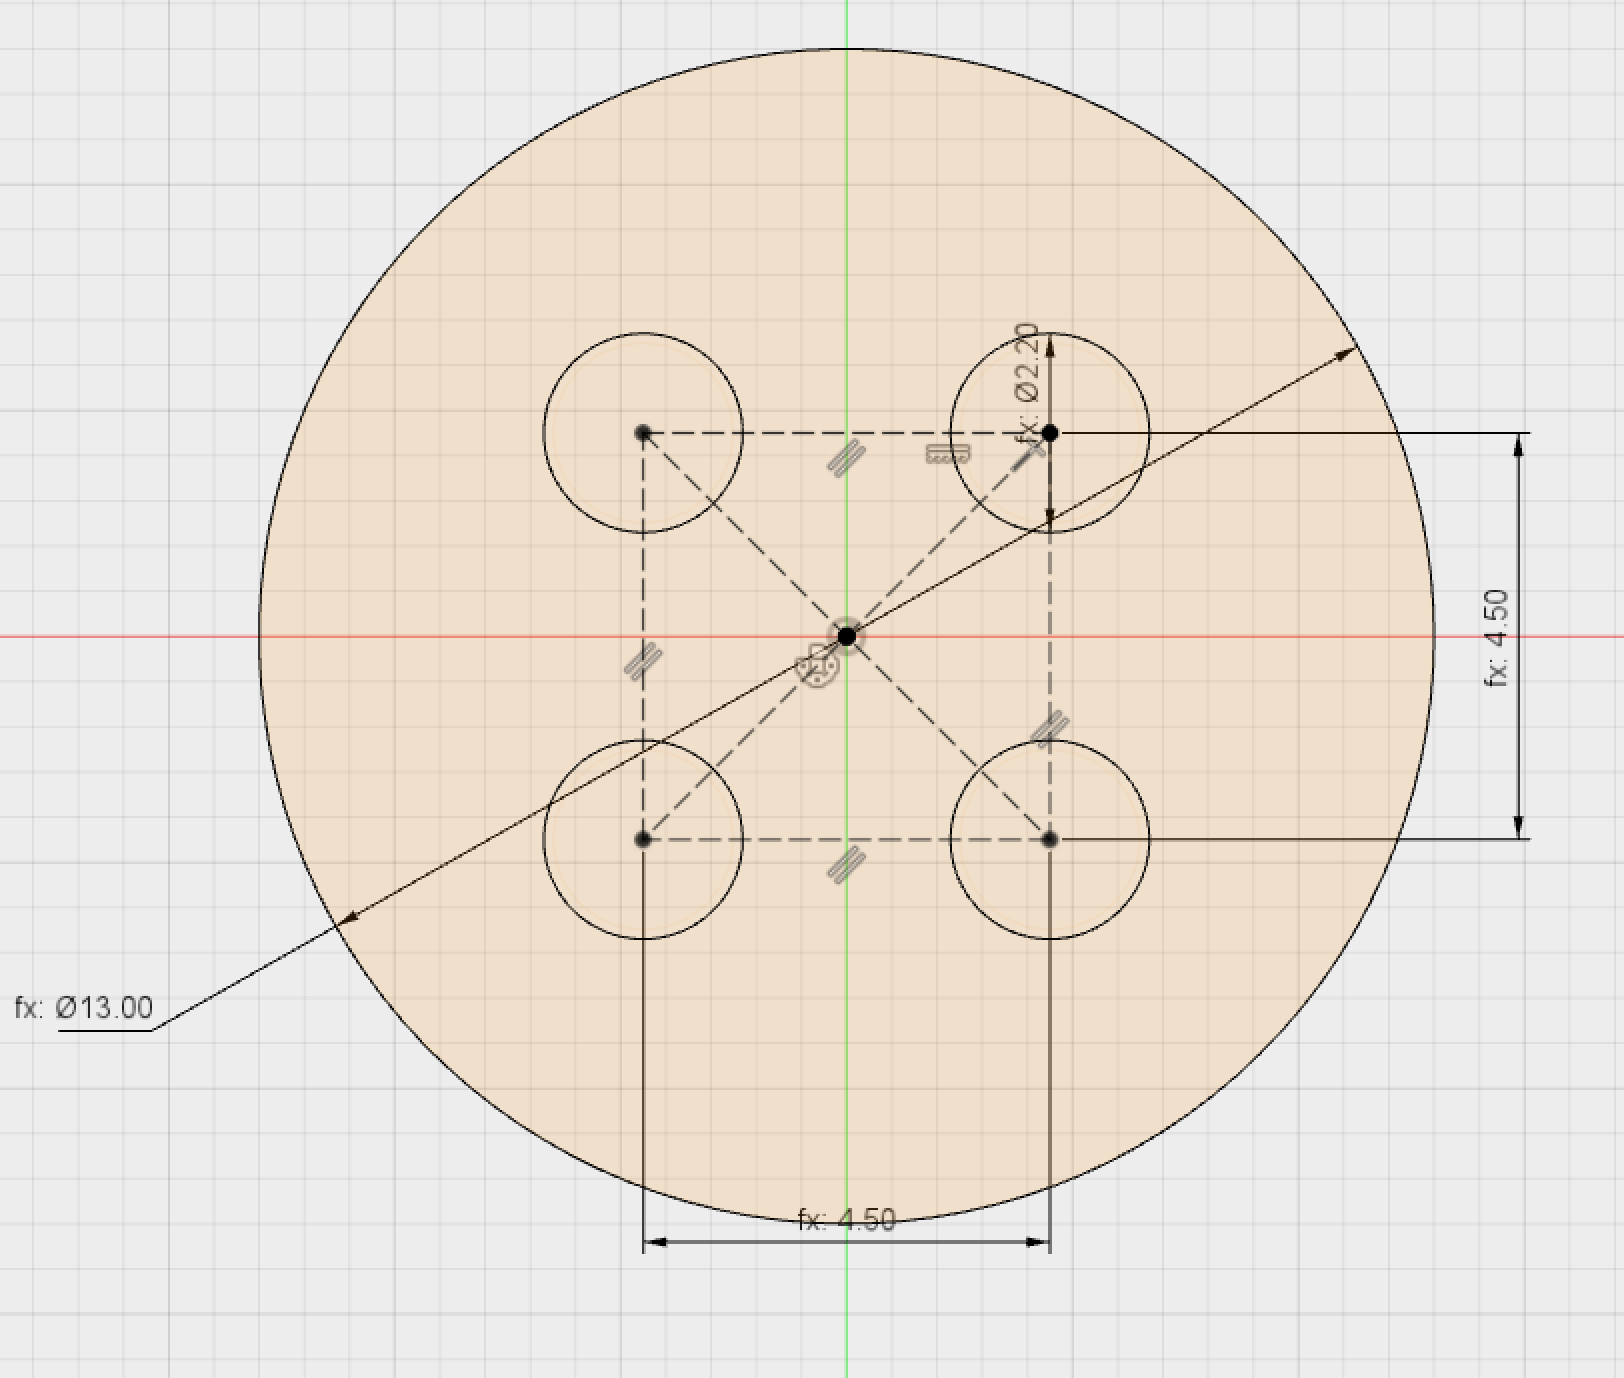
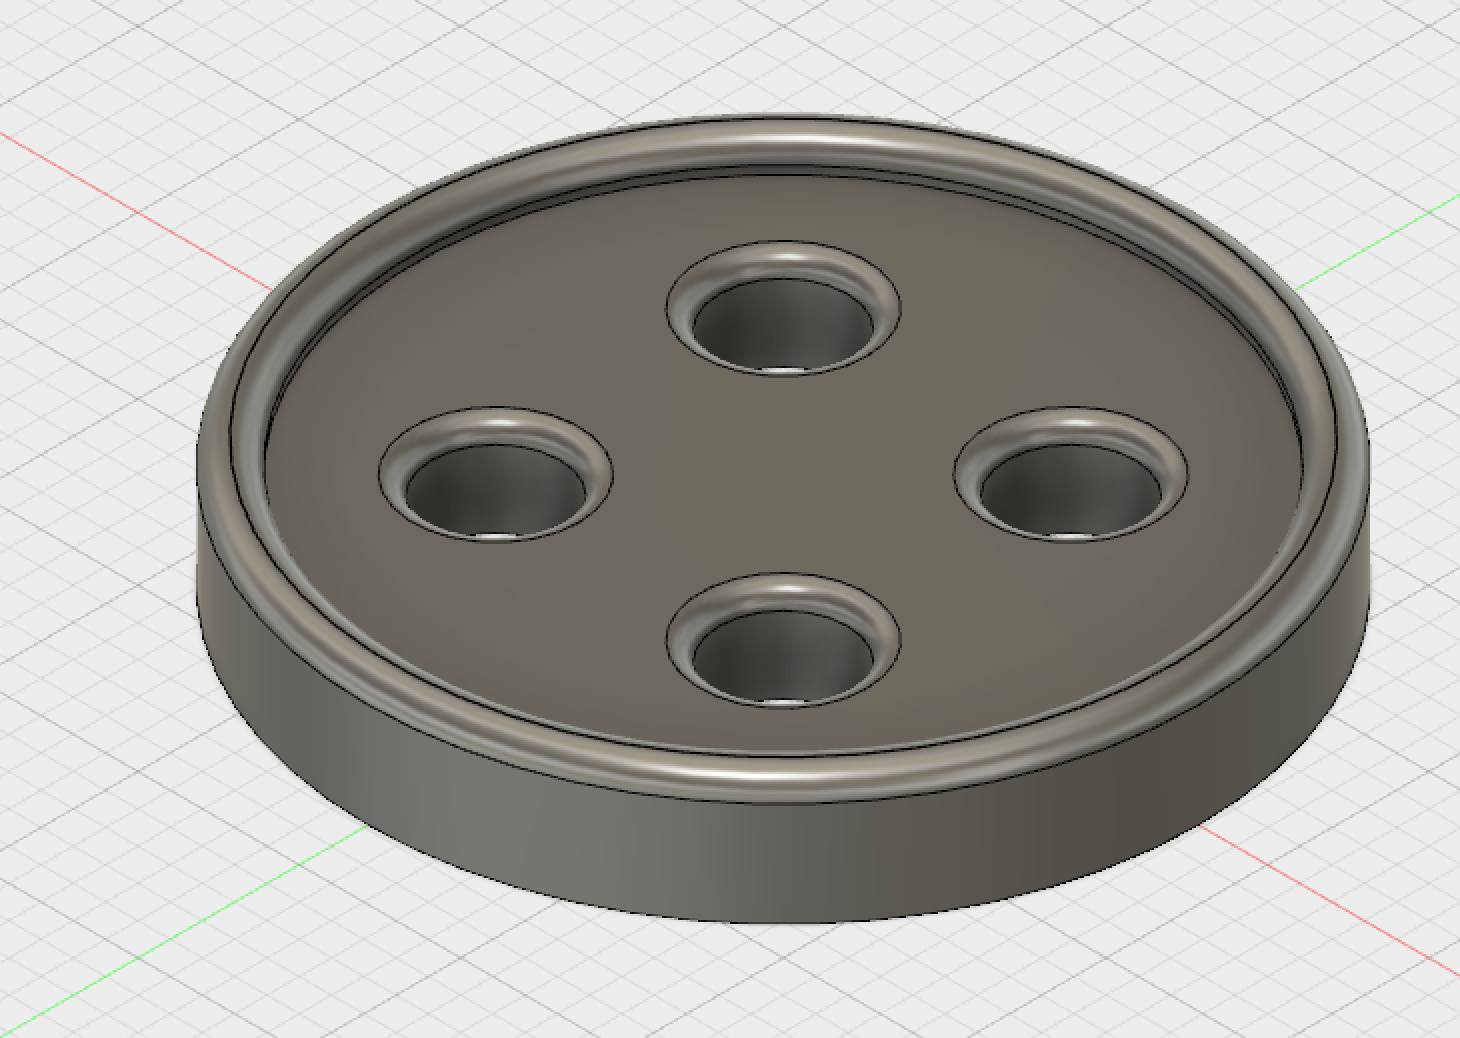
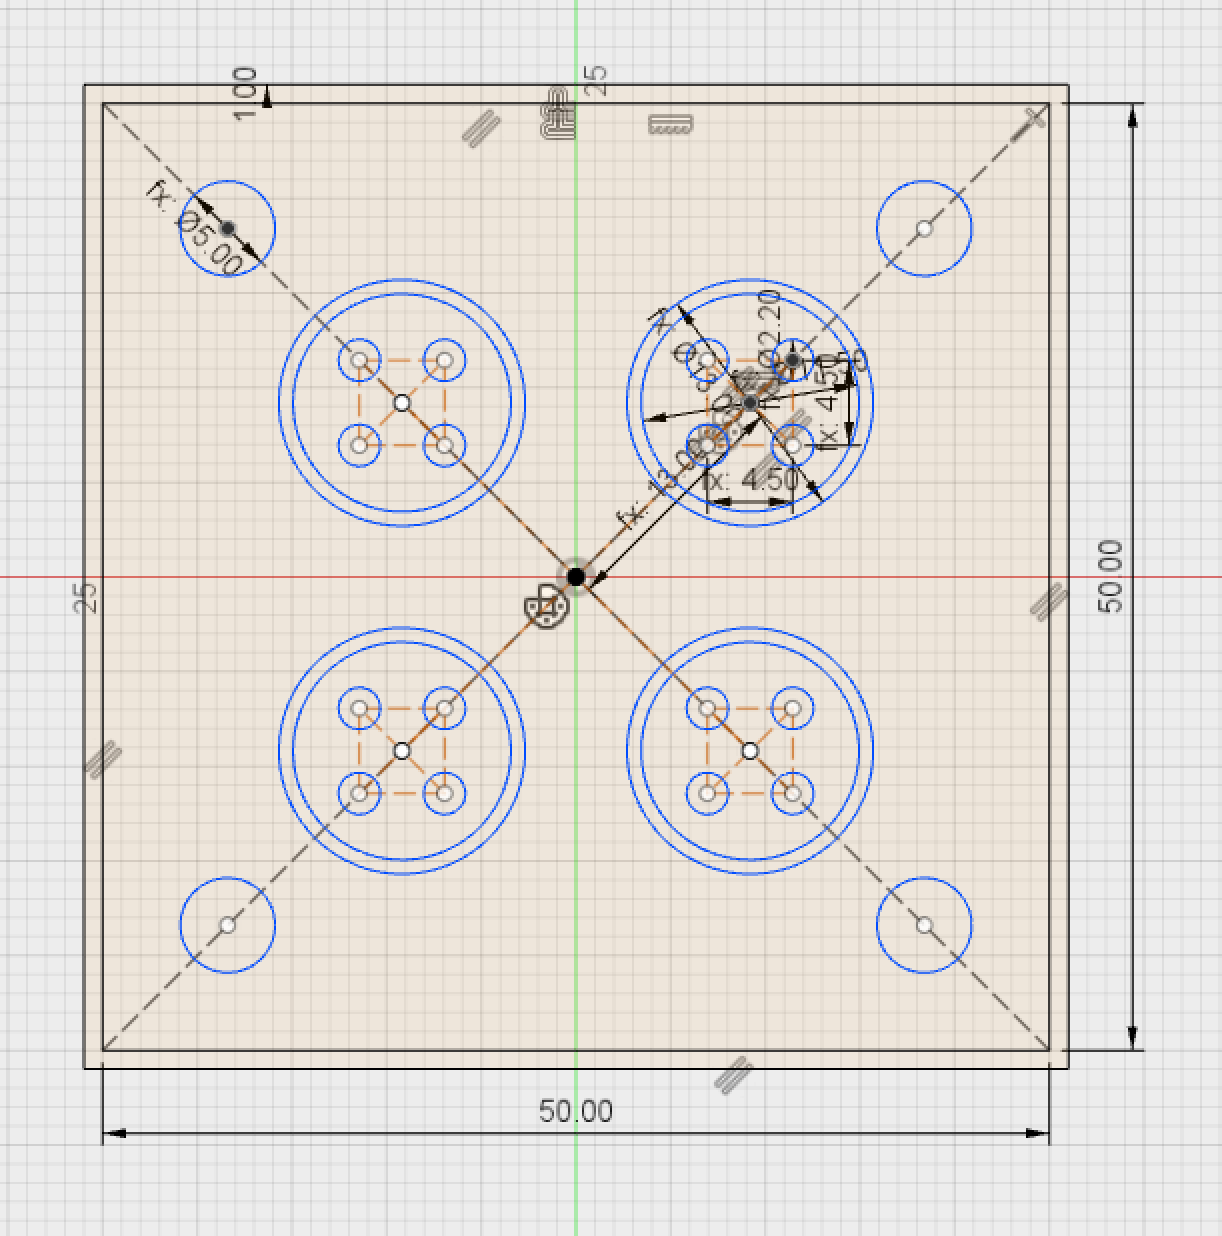
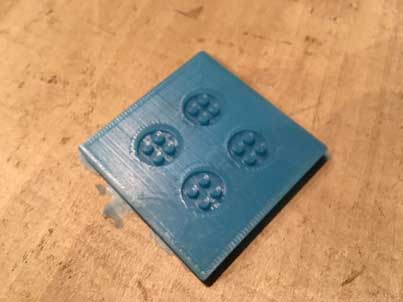
Next step, I designed a mold that has 4 piece of button.(The merit of the molding and casting is that it can be made several things at once.)At first I thought about making a mold of a pinching type, but I thought that it was too small and I could not cast the resin, so I decided to make a single side mold.
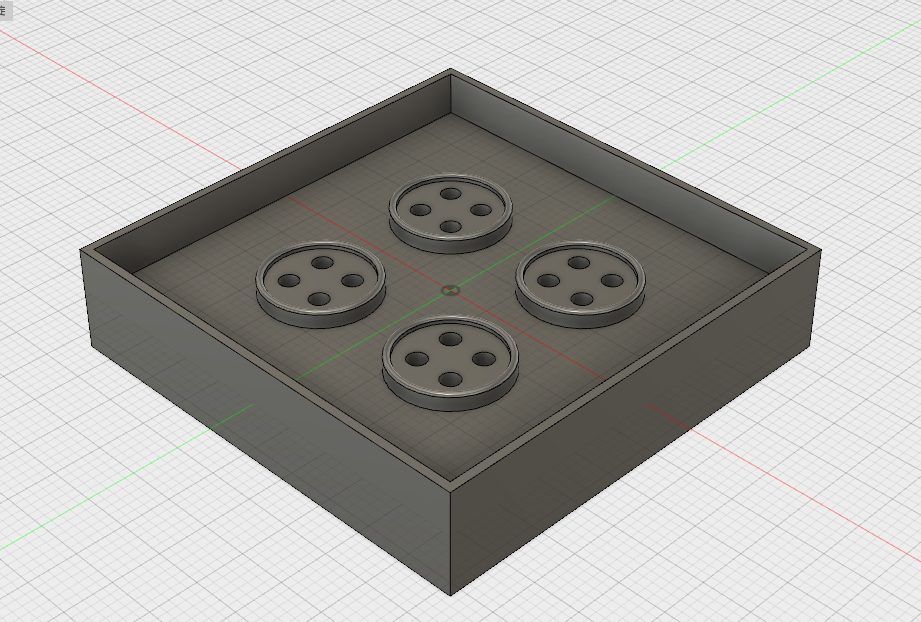
stl data is here
【CAM】
I used Fusion360 CAM. Following picture is Rough cut tool path.
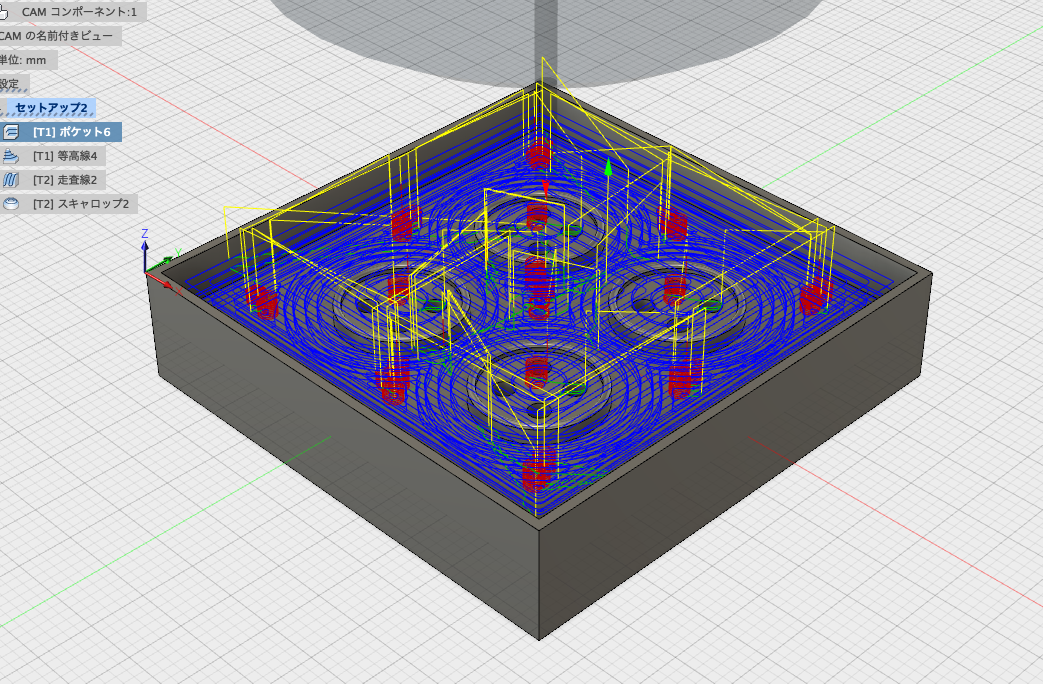
The rough cut tool path didn't contain the hole. So, I added hole tool path.
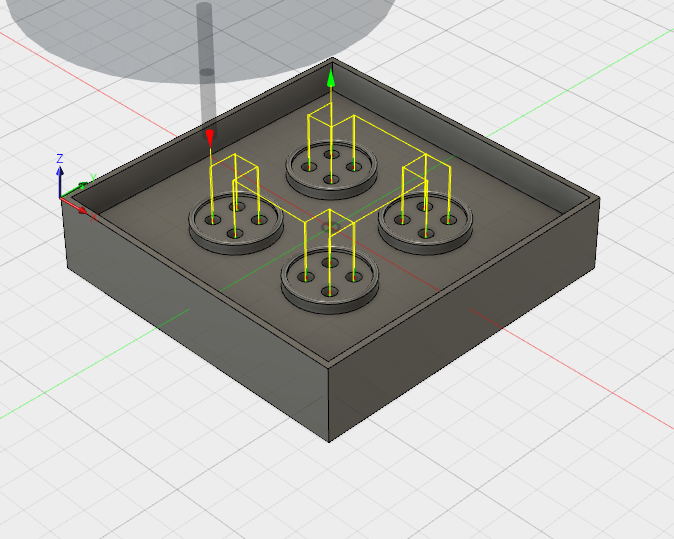
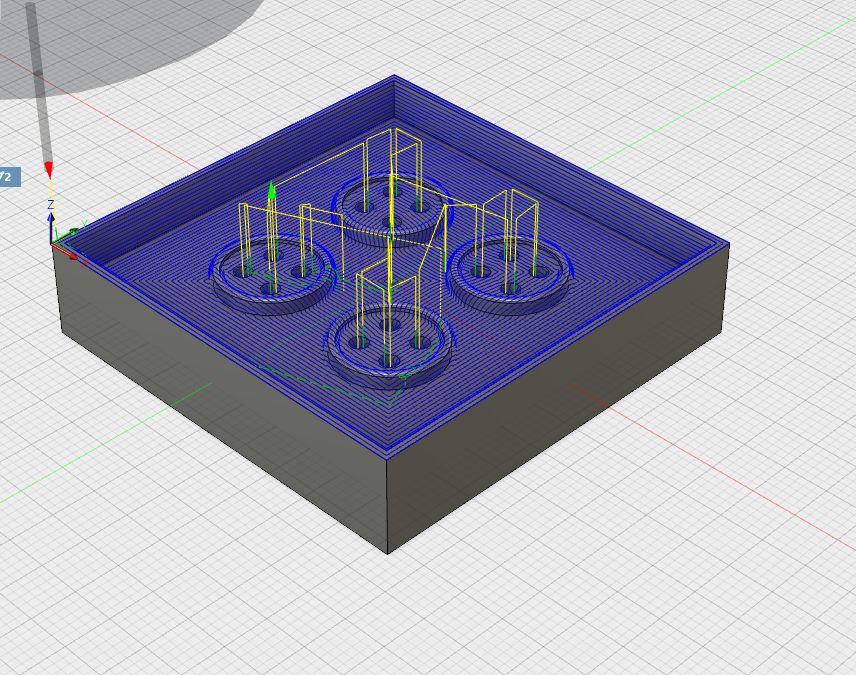
Following picture is finish cut tool path.
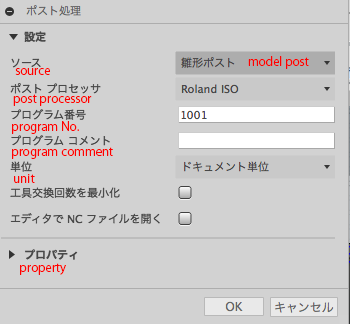
To make a nc file, post process is necessary. Post process is avarable from following icon.
My milling machin is Roland DG SRM-20. There is Roland RML post processer but the rml file that maked with this post processor was not worked in RolandDG VPanel. So, I selected Roland ISO as a post processor.

【Milling】
I milled with SRM-20
I made nc file with Fusion360 CAM. So, NCcode should be selected at the Vpanel setting.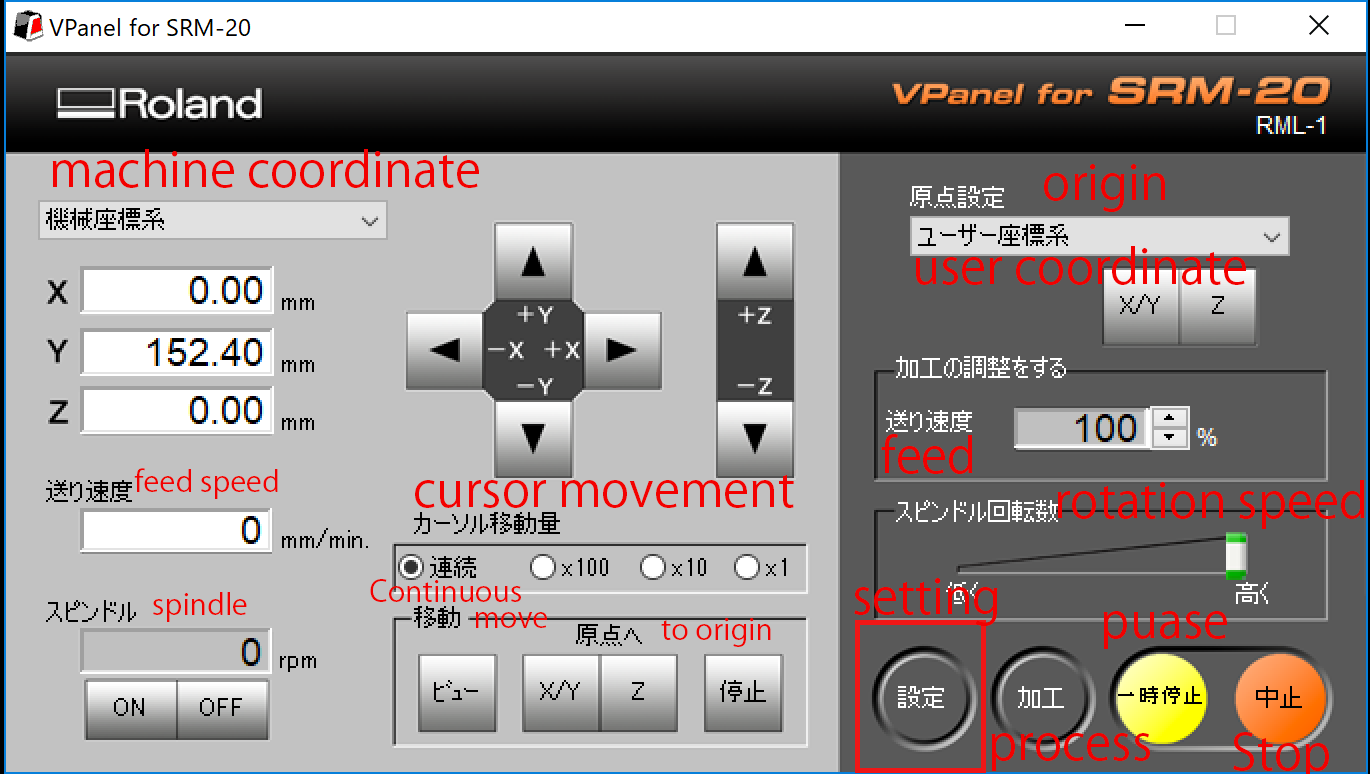
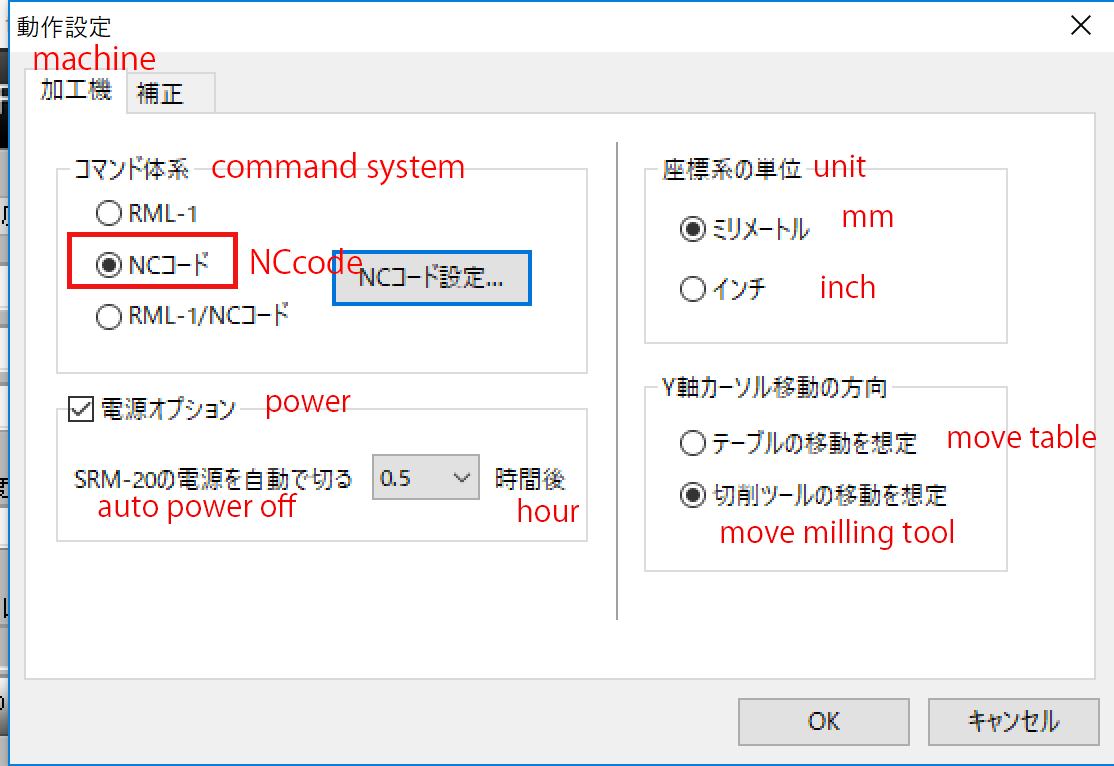
After the above setting, the same process as making circuit board would be done.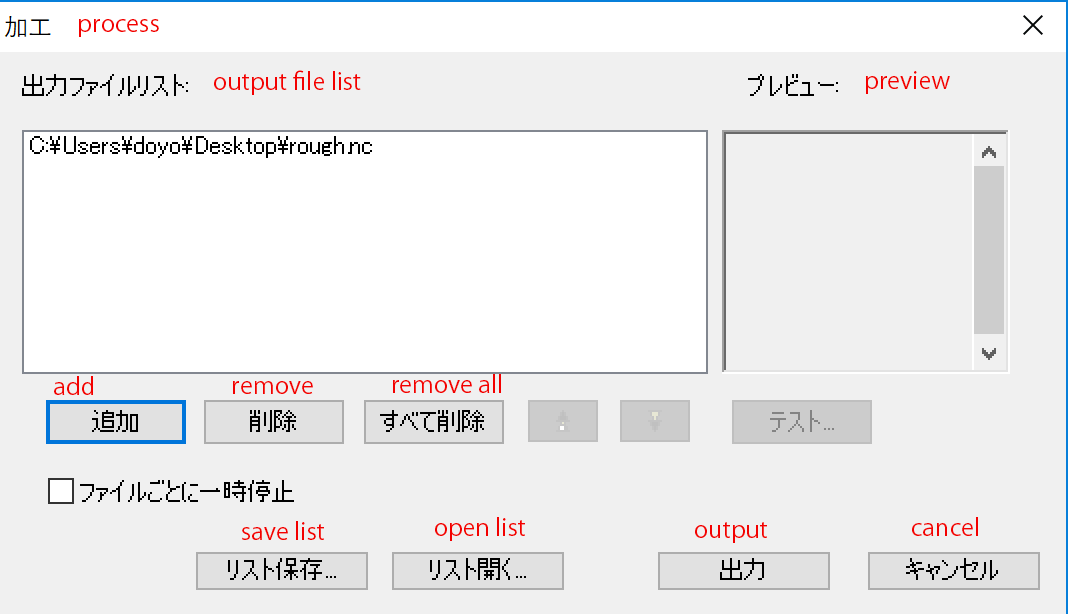
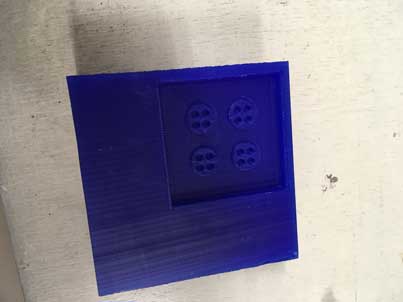
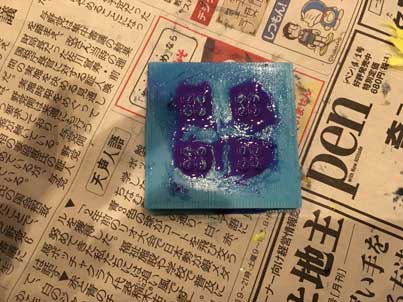
【Mold】
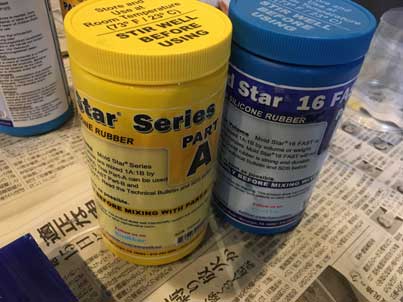
I made mold with Mold Star 16 Fast(Pot Life: 6 minute and Cure Time: 30 minute)
Safety Data Sheet is here
It was thought that some bubbles were in the portion that is marked with red circle.
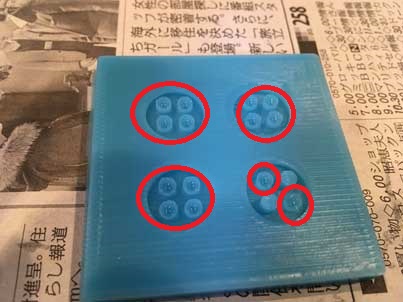
I was careful not to get bubbles in and made it again.
I designed a button model with Fusion360, at first. Before design, the endmill that would be used for milling should be decided because of the it is related with the tool path. I decided to use 2mm end mill for rough cut and 1mm endmill for finish cut. When I simulated in Fusion360 CAM, 2mm diameter hole could not make with 2mm endmill, so set hole diameter 2.2mm.
Next step, I designed a mold that has 4 piece of button.(The merit of the molding and casting is that it can be made several things at once.)At first I thought about making a mold of a pinching type, but I thought that it was too small and I could not cast the resin, so I decided to make a single side mold.
stl data is here
【CAM】
I used Fusion360 CAM. Following picture is Rough cut tool path.
The rough cut tool path didn't contain the hole. So, I added hole tool path.
Following picture is finish cut tool path.
To make a nc file, post process is necessary. Post process is avarable from following icon.
My milling machin is Roland DG SRM-20. There is Roland RML post processer but the rml file that maked with this post processor was not worked in RolandDG VPanel. So, I selected Roland ISO as a post processor.
【Milling】
I milled with SRM-20
I made nc file with Fusion360 CAM. So, NCcode should be selected at the Vpanel setting.
After the above setting, the same process as making circuit board would be done.
【Mold】
I made mold with Mold Star 16 Fast(Pot Life: 6 minute and Cure Time: 30 minute)
Safety Data Sheet is here
It was thought that some bubbles were in the portion that is marked with red circle.
I was careful not to get bubbles in and made it again.
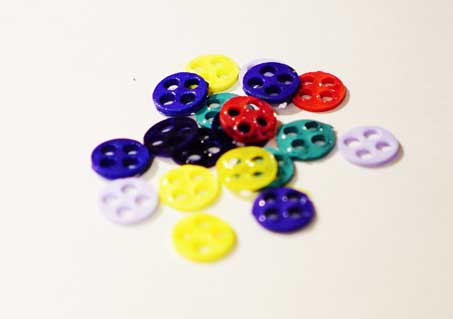
Casting
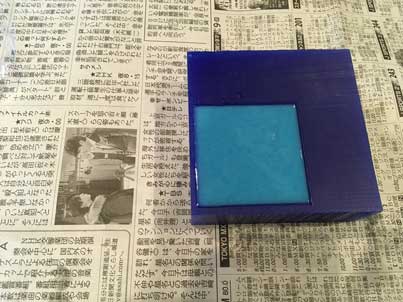
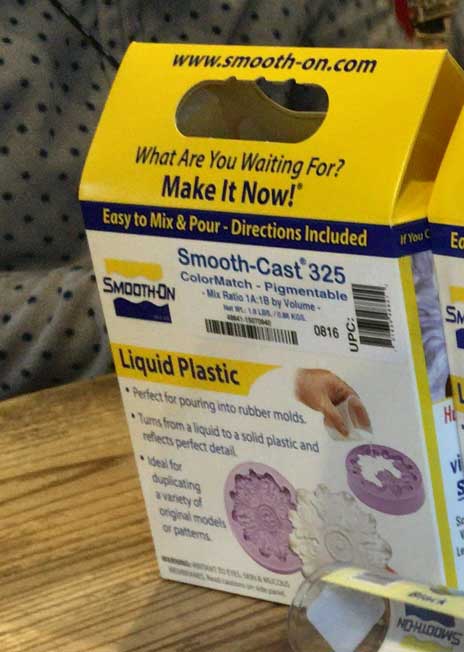
I used SMOOTH-CAST 325 for casting.(Pot Life: 2.5 minute and Cure Time: 10 minute)
Safety Data Sheet is here
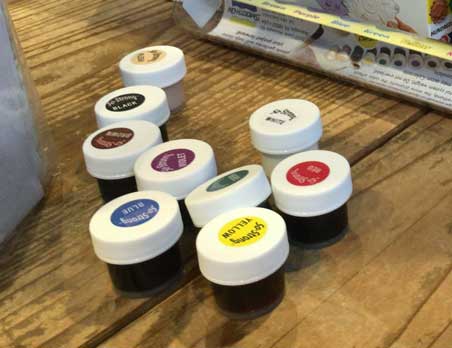
The pigment I used was SO-Strong.Safety Data Sheet is here
Add SO-Strong to Part B of smooth cast.
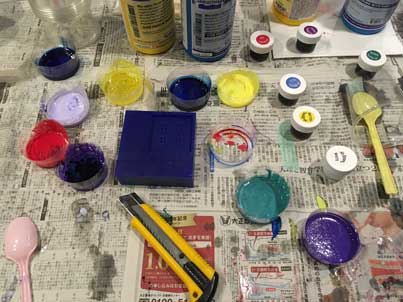
I made several color bottons.
Safety Data Sheet is here
The pigment I used was SO-Strong.Safety Data Sheet is here
Add SO-Strong to Part B of smooth cast.
I made several color bottons.
Finish
I am satisfied with this work.
Files
stl and nc data can be downloaded from here