Machine Building
This page covers the work done in 2 consecutive weeks, which are: Mechanical Design & Machine Design. In these past weeks, it was a group project to build a machine and it was different from the weekly group assignments as this was completely and entirely built on team work and managing to accomplish this task successfully by sepnding long hours troubleshooting everything together.
Ideation
We were torn between two ideas, which are:
- A cnc drawing machine that we wanted to program to draw Arabic Caligraphy.
- A Qatayef Machine.
Qatayef is the Arabian version of Pancake. It is usually served in the holy month of Ramadan. It has a special dough that can be filled with different stuffing such as: cheese, nuts and nutella! YUMMY!
With the holy month being just next week, of course this idea won the poll.

Design Work
The first thing done was a team meeting to discuss the breakdown of how we'll build our sweet sweet machine!
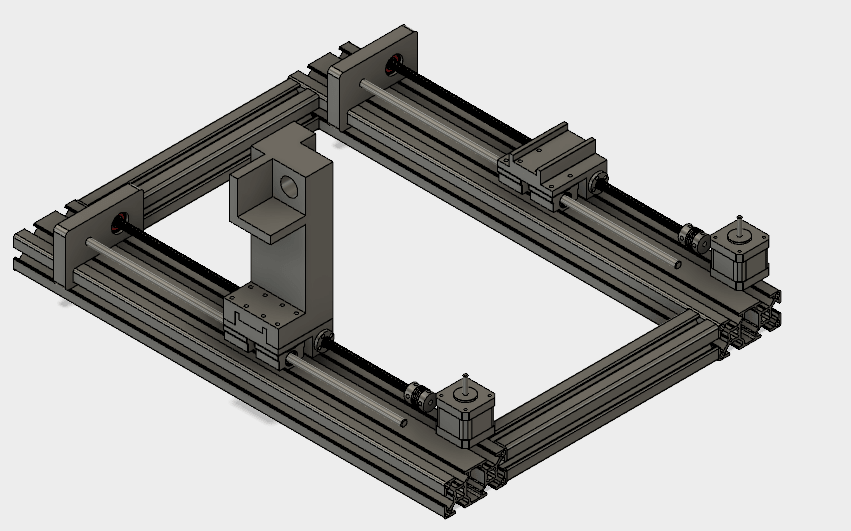
After discussing how we want the machine to be built, we drew an initial sketch of how the machine will look like.
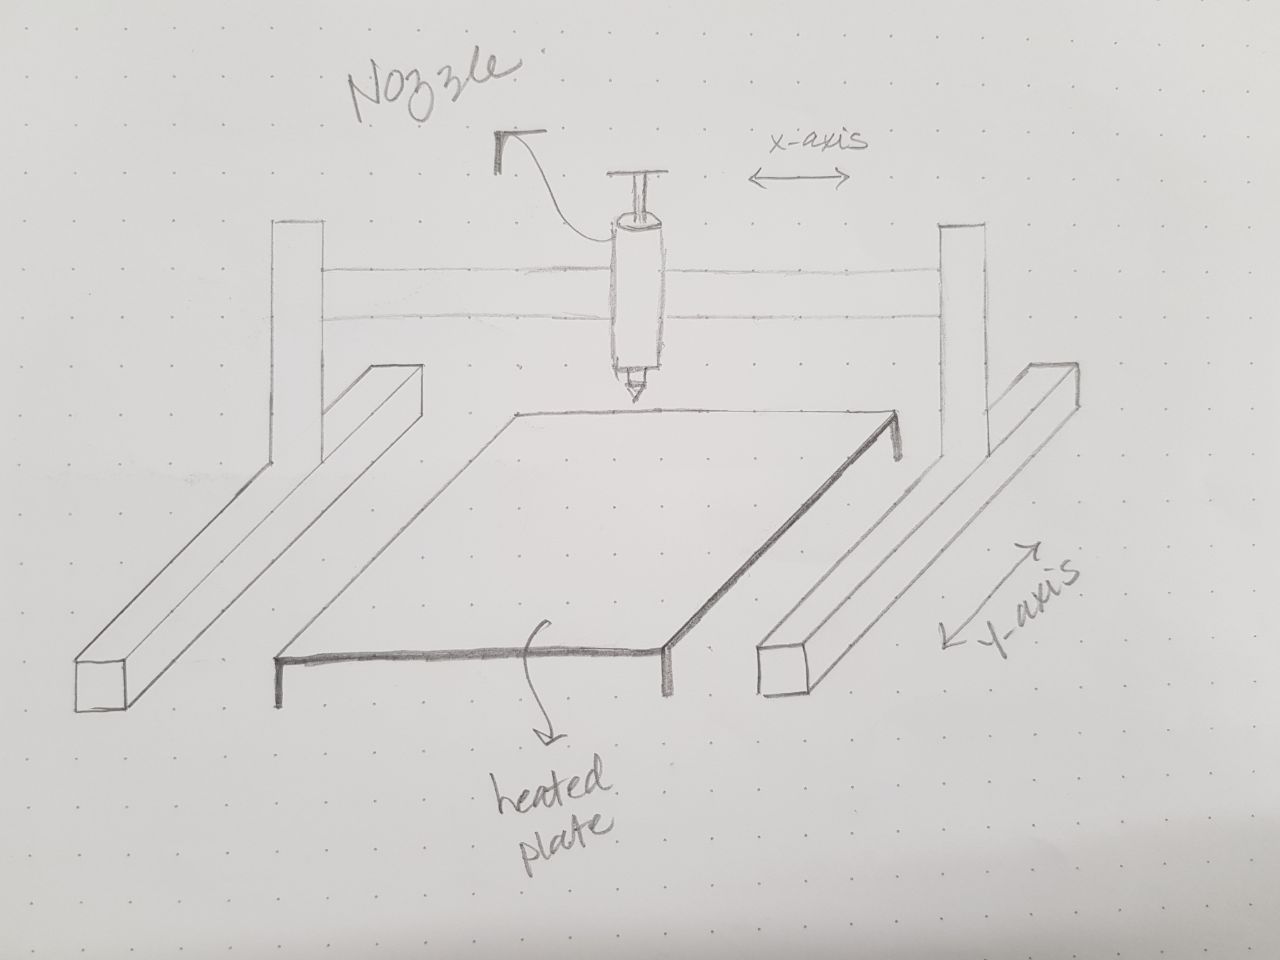
As you can see from the sketch, we have 2 motors on the y axis, one on the x axis and another one to operate and run the extruder. The heated plate should remain in place.
Our awesome team mate Isra'a was really excited to get things done and she went ahead and designed the frame and the y-axis. Then sent the file to me in step format as she was designing with solidworks and I prefer working with Fusion 360.
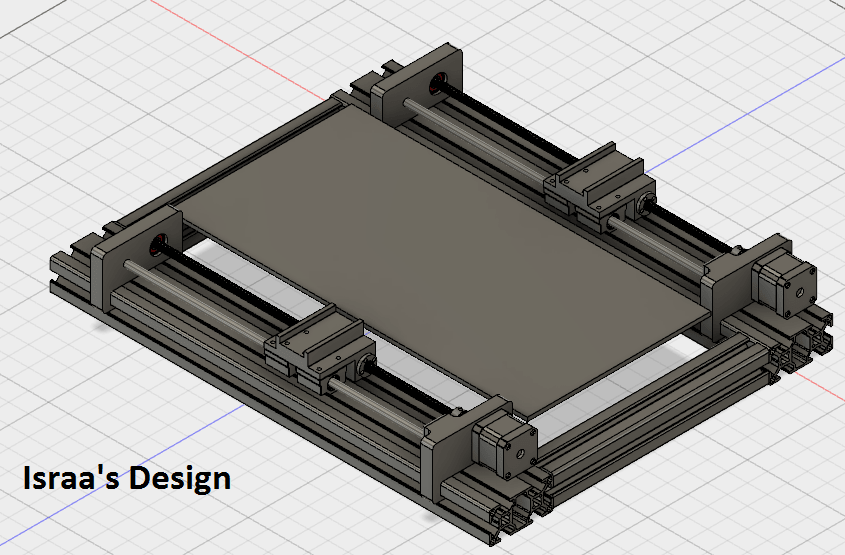
I had to design a part that would fit on Israa's design which is seen below.
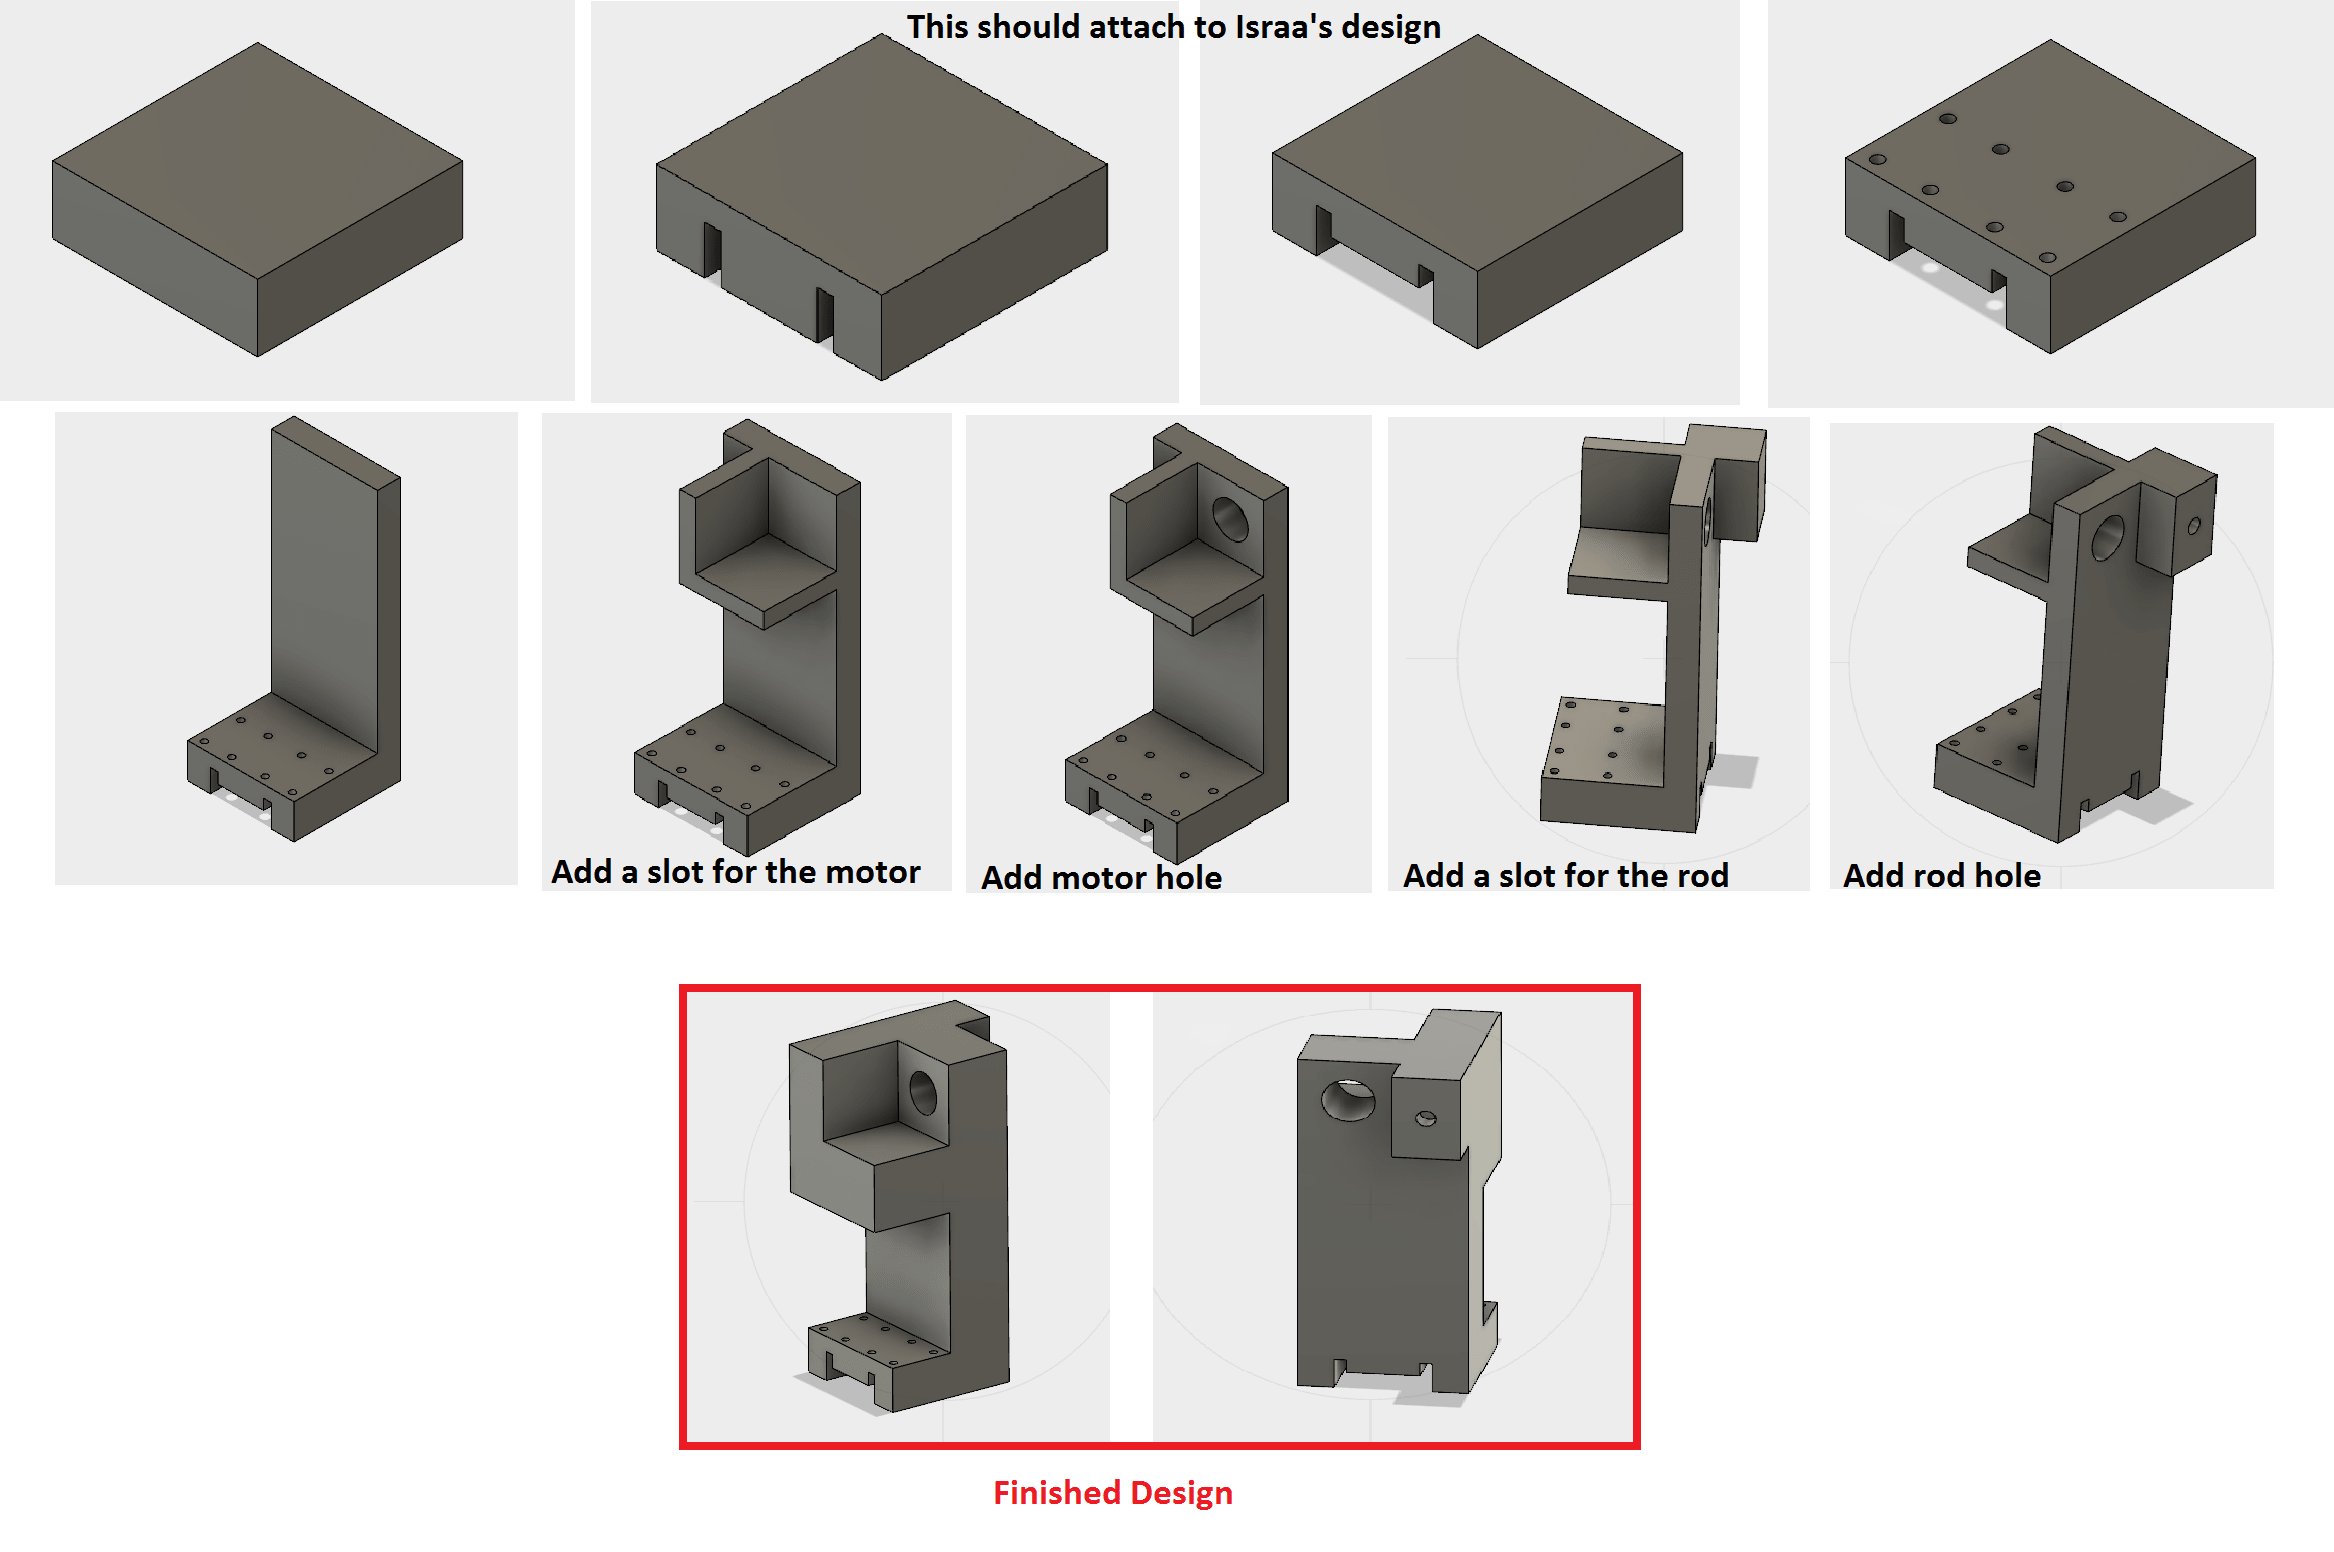
I decided to design something that could be 3D Printed, it will basically hold the motor and a rod. The design process is seen below.
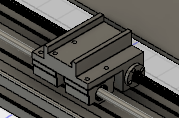
I made into a component and assembled it on Israa's original design to make sure it fits perfectly.
After showing it to my instructor Dima he mentioned that 3D Printing it would make it very heavy and the machine might not move smoothly so he suggested we design something to lasercut with the same functionality.
So I designed it using fusion as well in 2D and 3D just to make sure it fits on Israa's original design.
The lasercut design is seen below along with the part in real life.
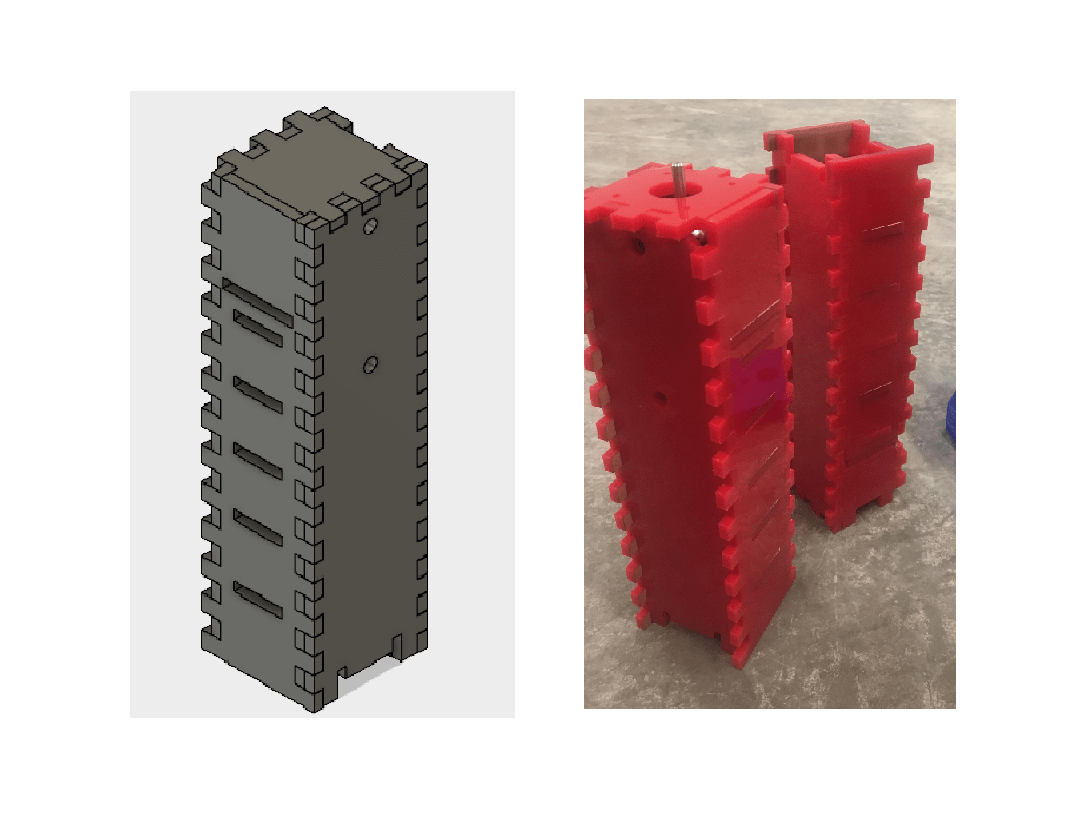
Unfortunately, it was still too heavy for the machine to move smoothly so we decided to design a tower like part that will be self supported and 3D print it using minimal infill to make it light. Our team mate Shefa'a took care of that being the architect and all.
Automation
Now that we have our lovely machine machine assembled and can be moved by hand, the next step is automating it!
I have previously built a mini kossel 3D Printer, so I'm familiar with the Marlin Open Source Firmware, and that's why I decided to use that.
I downloaded the firmware from Github and had to tweak it a bit.
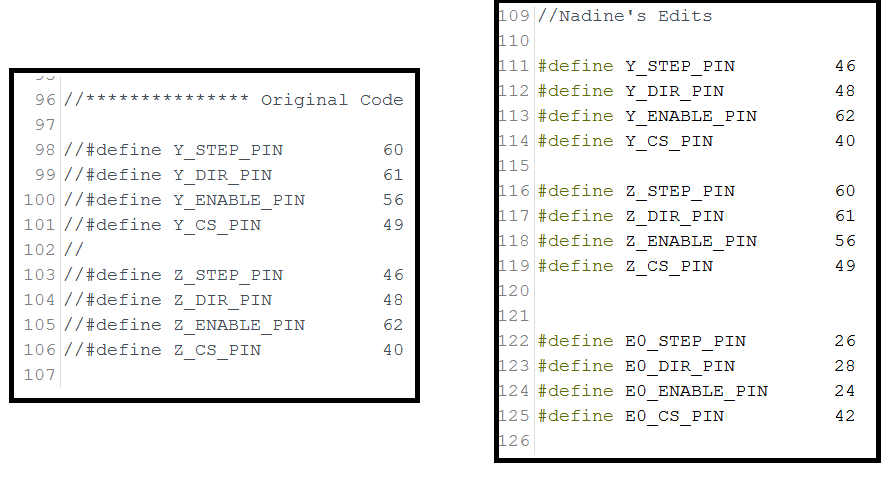
We are using an Arduino Mega with a RAMP 1.4 Sheild. On this sheild, there are two slots for motor driver for the z-axis, and one for each of the x and y axis. As I previously mentioned, we need 2 on the y-axis and one on the z and x axis.
So I had to edit the pin out in the header file called pins_RAMPS.h, the changes I made are seen below.
I uploaded the code on the Arduino Mega using the Arduino IDE and starting testing using a program called Pronterface (Printrun). The interface is quite easy and the explanation for it can be found below.
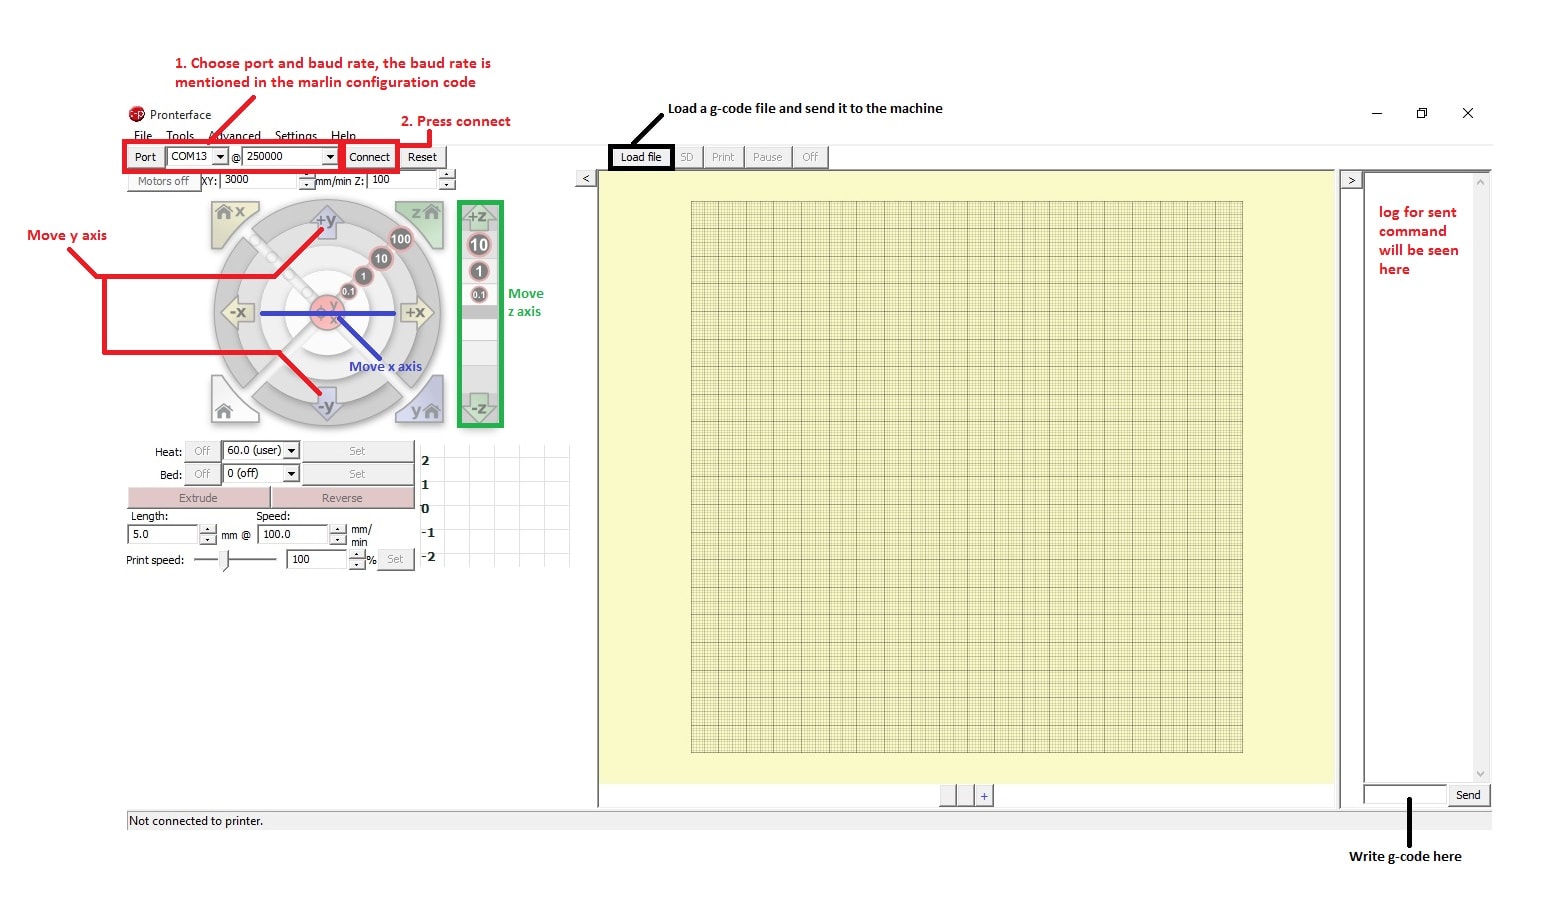
I actually managed to get the y-axis moving which means that the edits I made to the header file worked fine! YAAAY!
Unfortunately we burnt the Arduino Mega by manually moving the axes, we forgot that it will generate current in the opposite direction which would burn the board and it did.
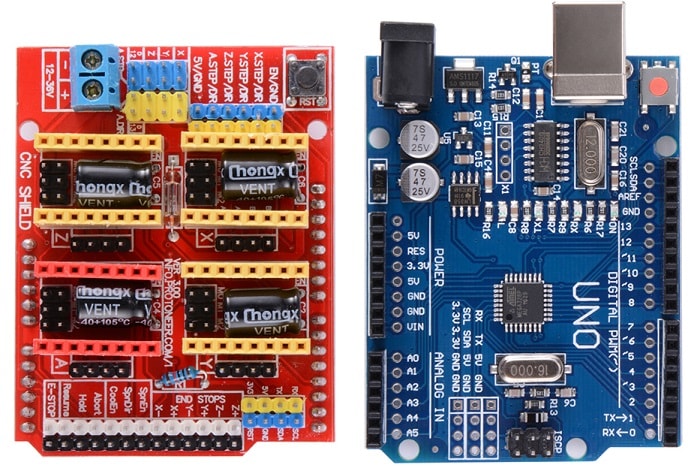
We didn't have another mega board so we had to switch everything to An Arduino Uno and a CNC Shield.
The firmware we ended up using was the GRBL CNC Firmware.
More details can be found on our group website that explains more how each of our individual work came together to build this beautiful machine.
Future Areas of imporovement
It took us 2 weeks to built this awesome machine, but if we had more time I'm positive we could have built a more nifty machine.
In my opinion, using a ready cake whip cream pump (not sure if that's what they're called) is a bad idea, we had to built our whole design on it and it wasn't operating as smoothly as we expected, so designing one ourselves and 3D Printing it using food safe material might actually be a decent idea to explore.
Our machine is quite heavy, we used linear aluminum guides to built it, so in the future I think we have to find a better way to do that, maybe even doing these guides from wood instead.
The heat plate oh what a hustle we went through! Our team mate Qusai actually suggested we make it ourselves by using a stainless steel sheet that we can have customly made but everyone told us that it would bend with heat so I actually found an old grill that was cast aside due to having electrical grill so I decided to put it in good use and add it to the machine as the heated plate.
Regarding the electronics, in this project we used commercial boards to control and automate the machine, I believe it will be a cool idea to design and make our own boards for it, we actually had that planned but we ran out of time :(
You can download my files here.
