3D Scanning & Printing Week
This week's assignment is to design and 3D print an object (small, few cm) that could not be made subtractively and to 3D scan an object (and optionally print it).
3D Printing is an Additive Manufacturing technology that turns digital design to tangible 3D objects.
There are different technologies to 3D Printing but they all follow the same principle. In our lab we have 2 types of 3D Printers, which are: FDM & SLA.
The printing time depends on the machine type and the settings you chose to print. It also depends on the size of the model you're printing. The speed, layer height and the infill are what affects the timing most.
To 3D Print something, you have to start with a digital design. It is also important to know that not everything you design can be printed. There are certain things to take into consideration when you design for 3D Printing and those restrictions differ based on the technology you want to use.
Some of the general considerations to designing for 3D Printing are mentioned below:
- Overhangs: Overhangs happen when there isn't enough support while printing. The 3D Printer prints the model layer by layer and it cannot print in air so to avoid that you either design your model to be self supported or add support while setting up the print. For FDM & SLA, they can print overhangs up to 45 degrees without the need of support.
- Wall Thickness: So every model you design to be 3d printed should always have a thickness, and there's a certain threshold for each printer that if you go below, you can't print the model. As a rule of the thumb, you can't print something less than the nozzle's diameter.
- Wraping: Wraping can happen when large flat surfaces are printed, they happen because the material go through physical changes while printing, the changes can be melting, soldified...etc.
To avoid wraping, you either avoid designing large flat surfaces or you make sure your printer is calibrated perfectly and there's sufficient adhesion between the print and the print bed.
You can also obtain a design by scanning, which we will also be doing this week.
After obtaining a design, you have to save it in STL or OBJ format, then open it with a slicer. What the slicer does is that it converts the model and settings you chose into something that the machine understands which is basically motor movements. The format of the print job should be G-Code.
The slicer I used for FDM Printing is called Cura by Ultimaker.
While the one I used for the SLA is Preform by Formlabs
I tried to keep all the design considerations in my mind while I was designing my files for this week. I decided to design a vase with a voronoi pattern on it and possibly designing a flower.
The Design Process
At first, I wanted to design a lampshade but Shifa wanted to design one so I switched to something closely similar which is a vase. This cannot be done subtractively becuase it is curved from all sides.
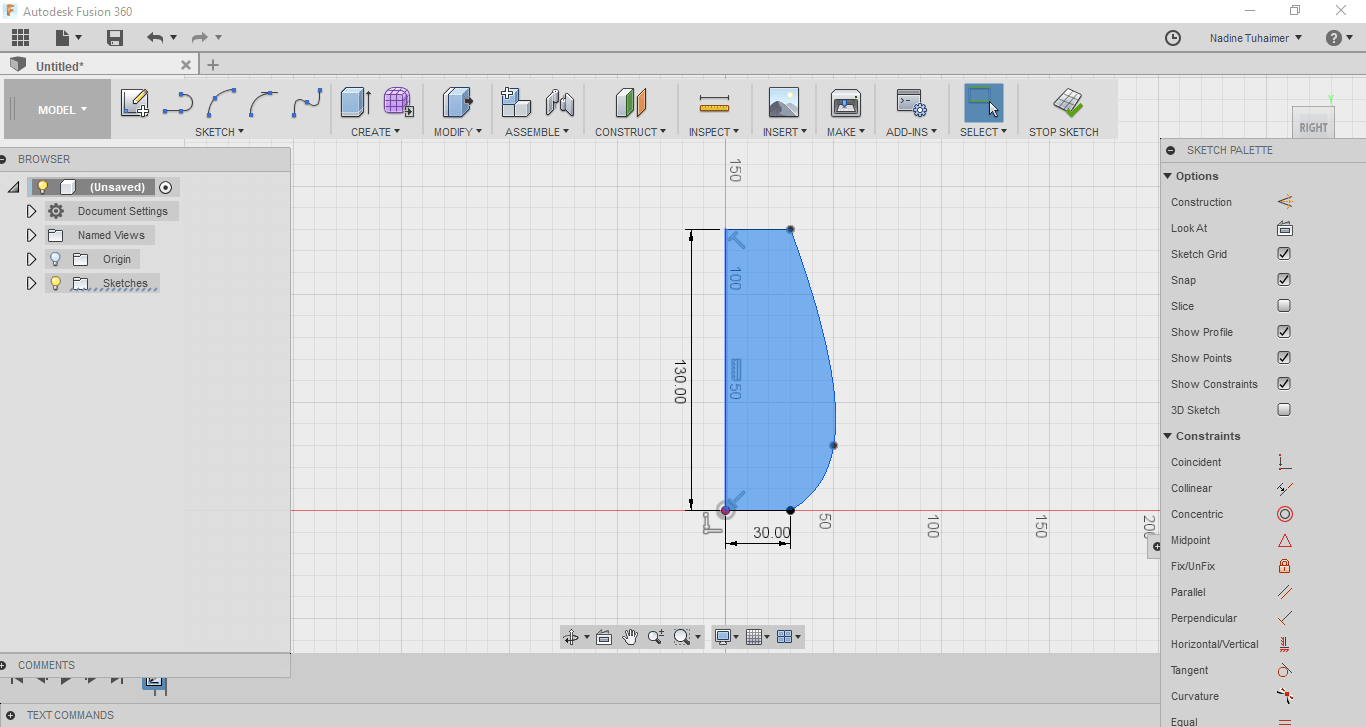
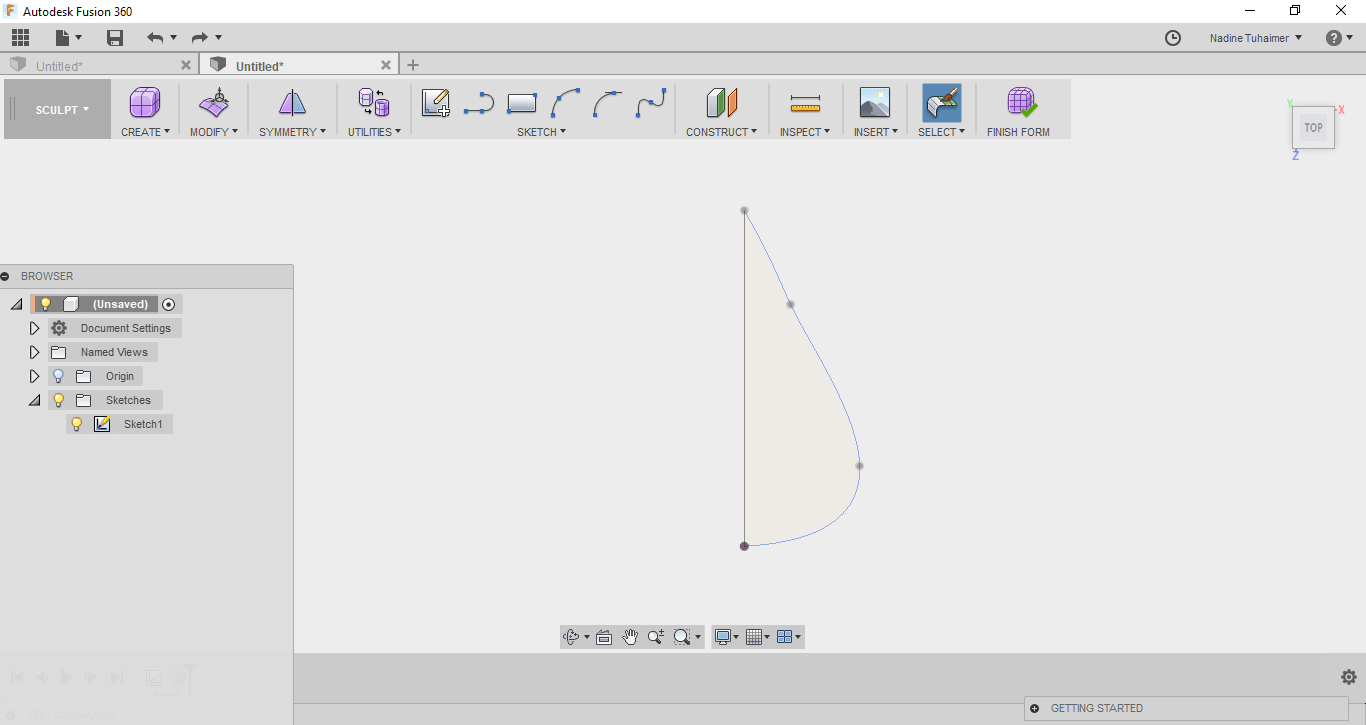
I used Fusion360 to design it and at first I drew a curved shape using the Spline Tool.
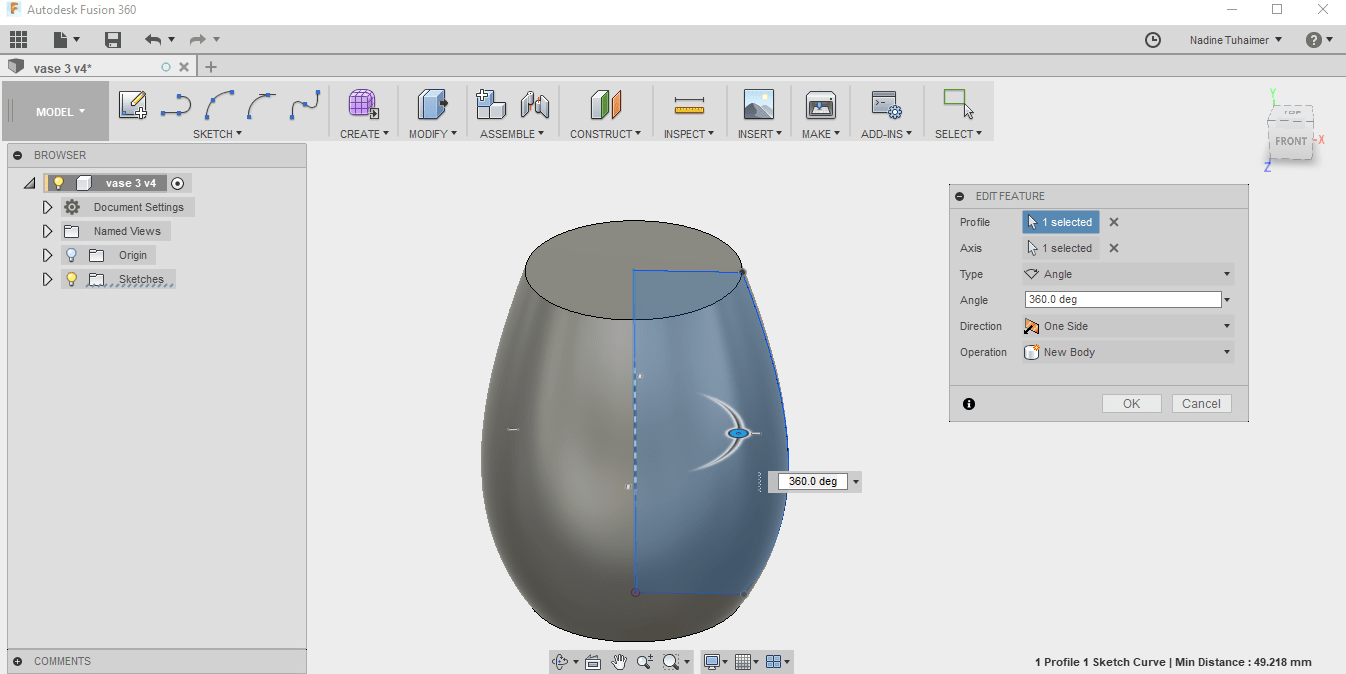
Next, I revolved the surface around an axis, I chose the line I drew.
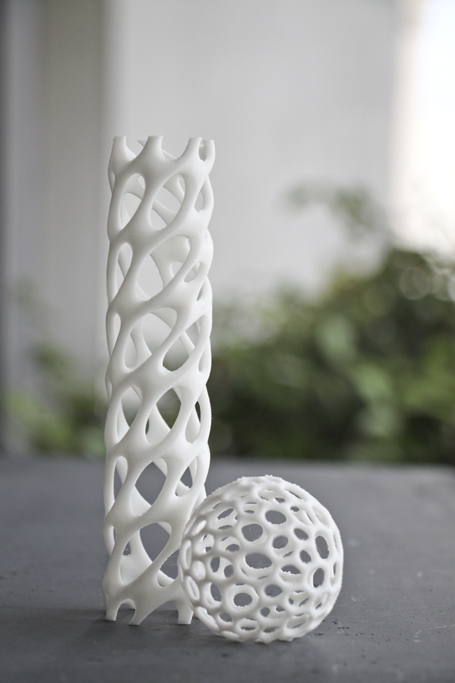
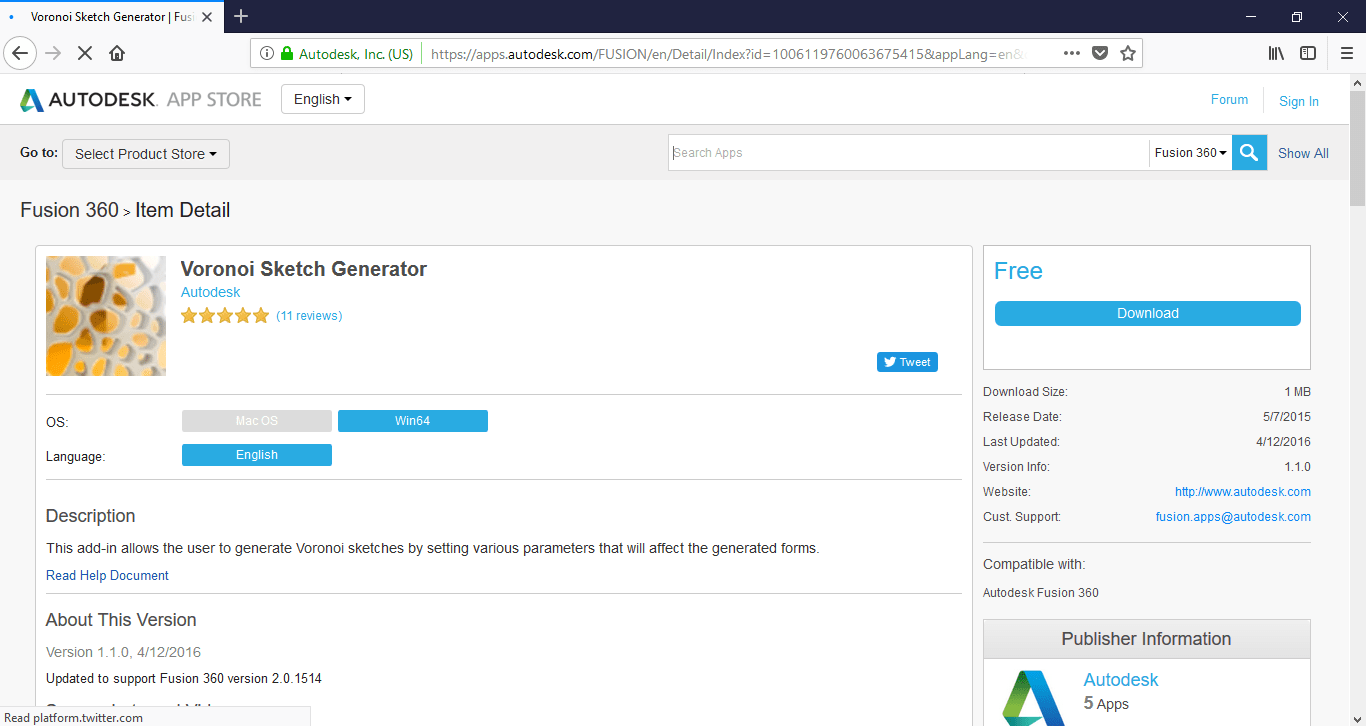
Now that the base is ready, I wanted to design a vase with a voroni pattern on it, like the one seen in the below image. At first I thought about making the small patterns myself with the spline tool then I checked the Fusion360 AppStore and I found a Vronoi Sketch Generator. So I downloaded that and used it.
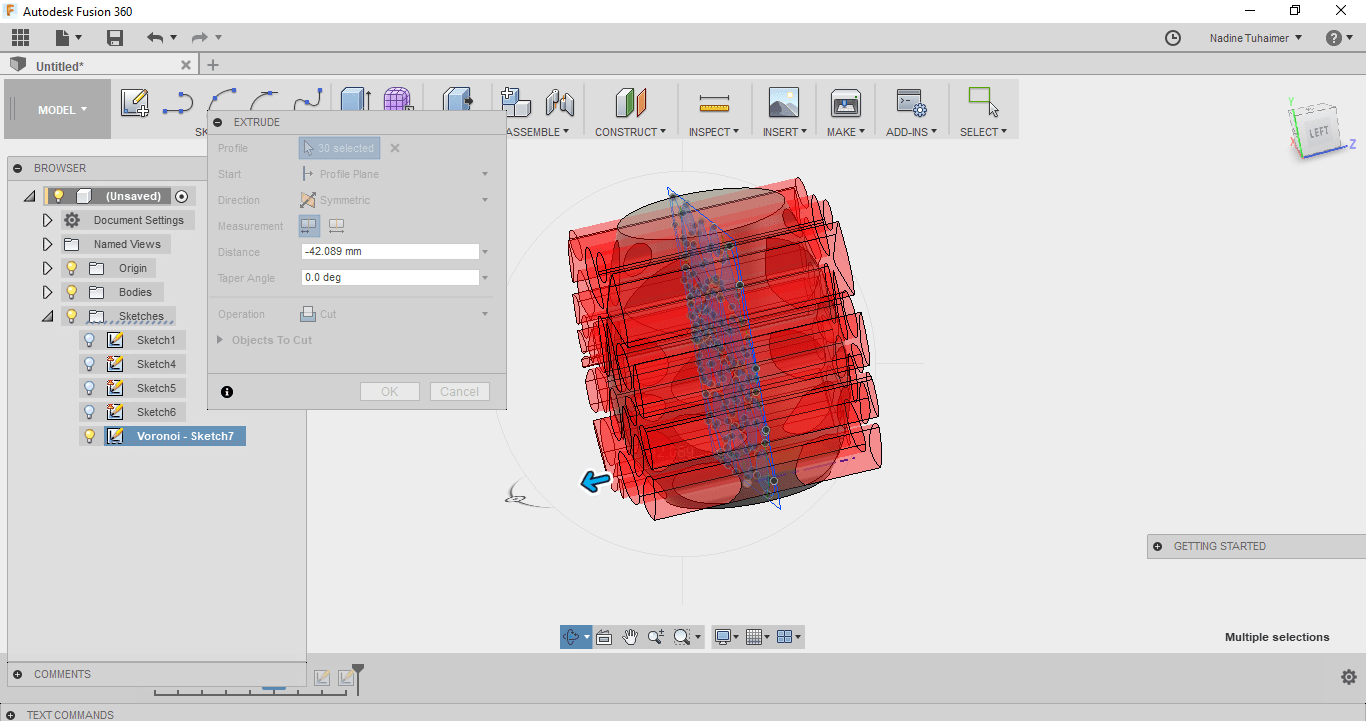
I sketched the Voronoi with the same dimensions as my design, then I extrude it cutting into my design.
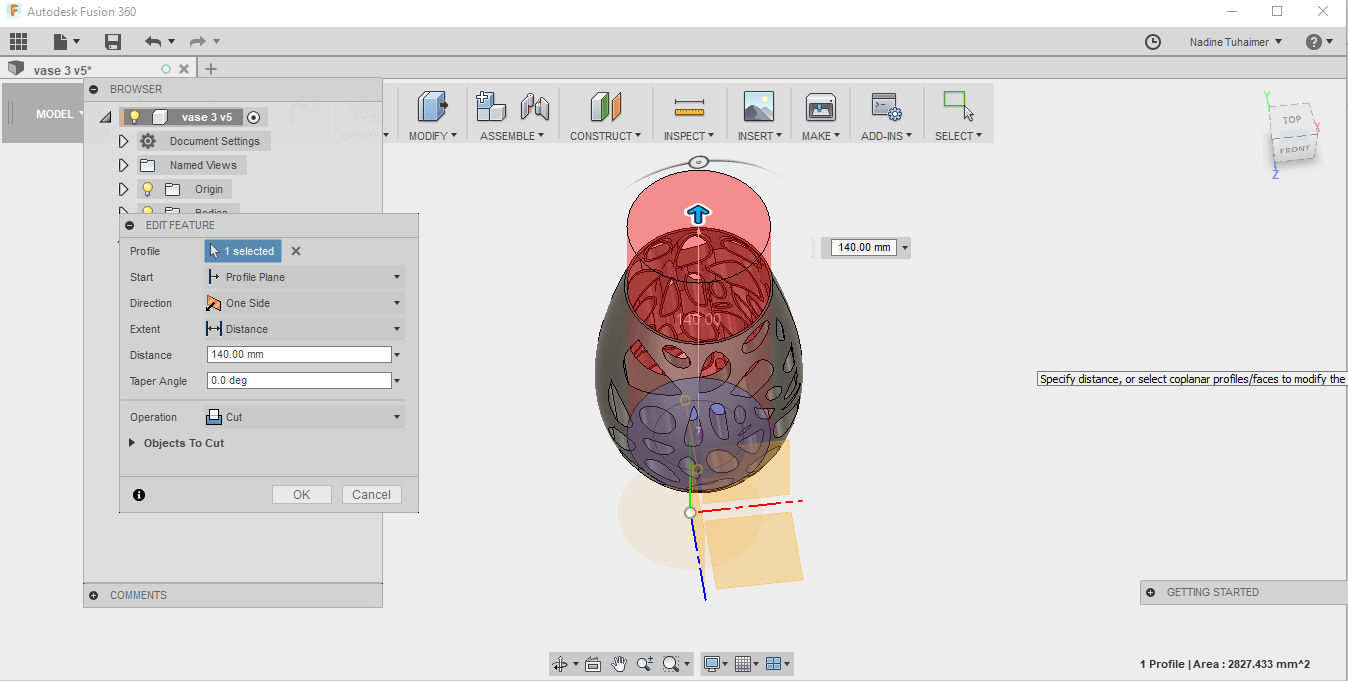
Then to make the vase hollow, I drew an inner circle at the base and cut-extruded it.
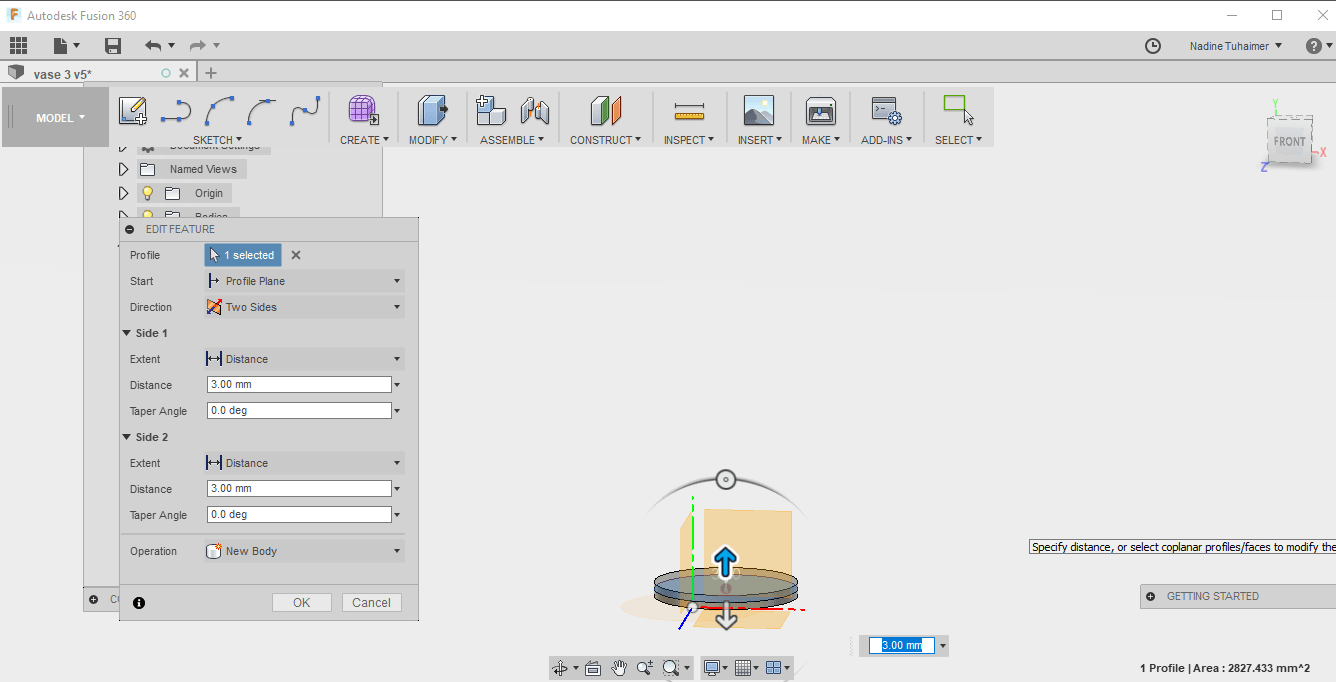
I also wanted the base for my base to be thicker, so I extruded the bottom circle just to add the thickness I want.
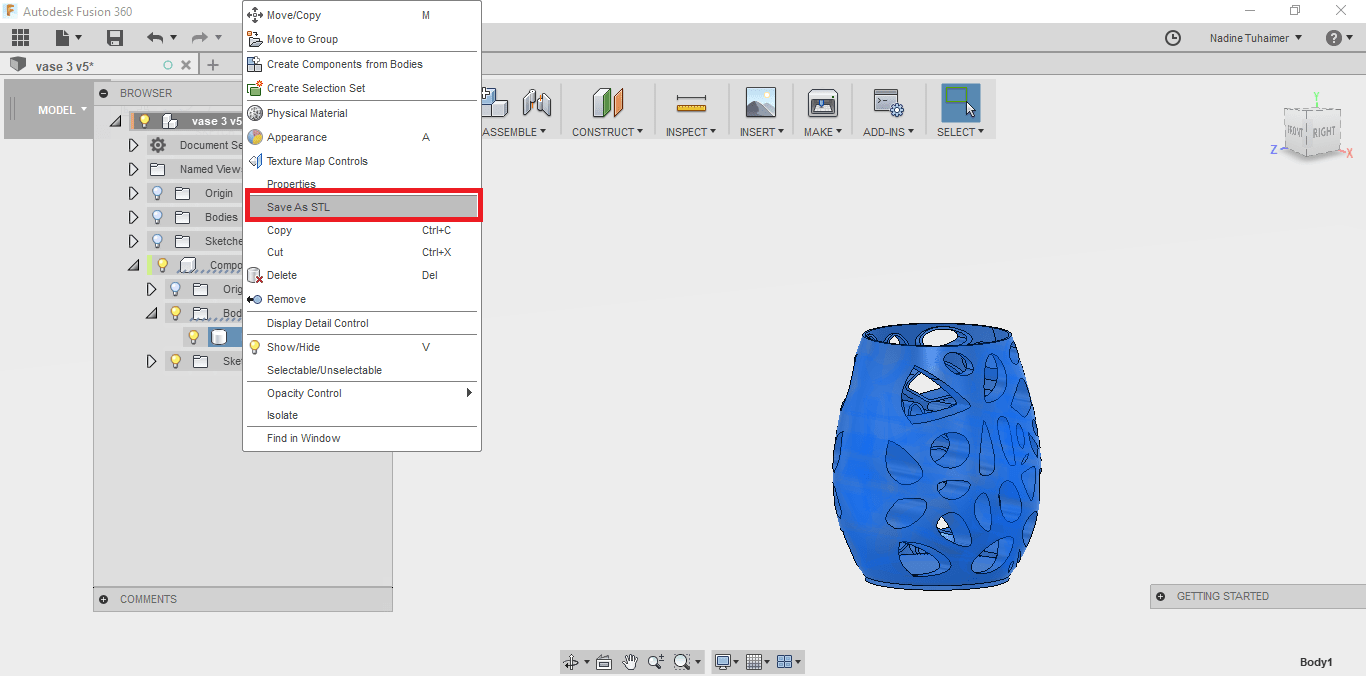
To print the design I saved it in STL Format.
Printing the Vase
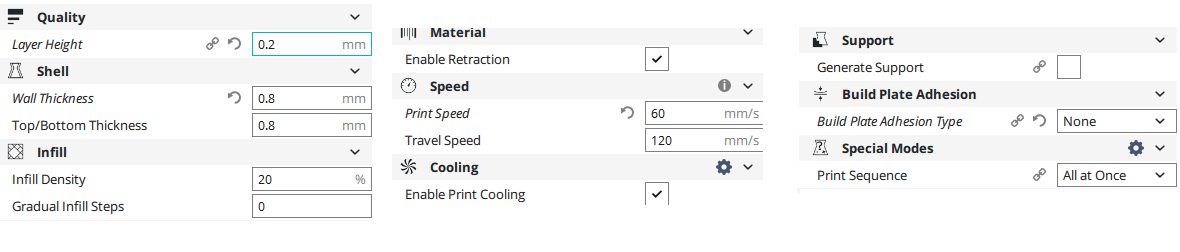
After I saved the file as STL, I opened it with Cura. I used the following settings:
- Layer Height: 0.2mm
- Wall Thickness: 0.8mm
- Top/Bottom Thickness: 0.8mm
- Infill: 20%, infill dictates how rigid your print is
- Print Speed: 60mm/s
- Material Used: PLA
- Printing Temprature: 215
- Nozzle: 0.4mm
- Print Bed Temprature: 60
I didn't use any support because my model is self supporting itself or any build plate adhesion because there aren't any large areas of flat surfaces.
I also used the layer view to see how my model will be printed and made sure it really doesn't need any support.
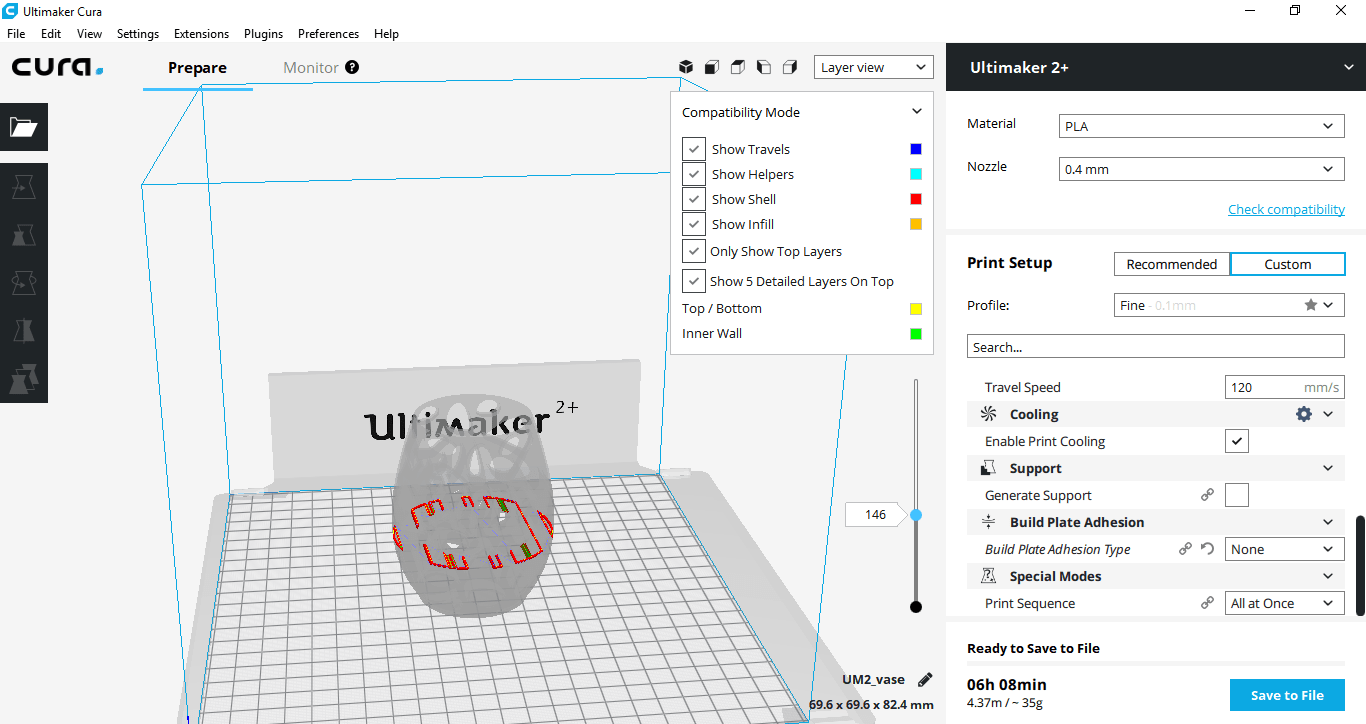
My print settings are seen below.
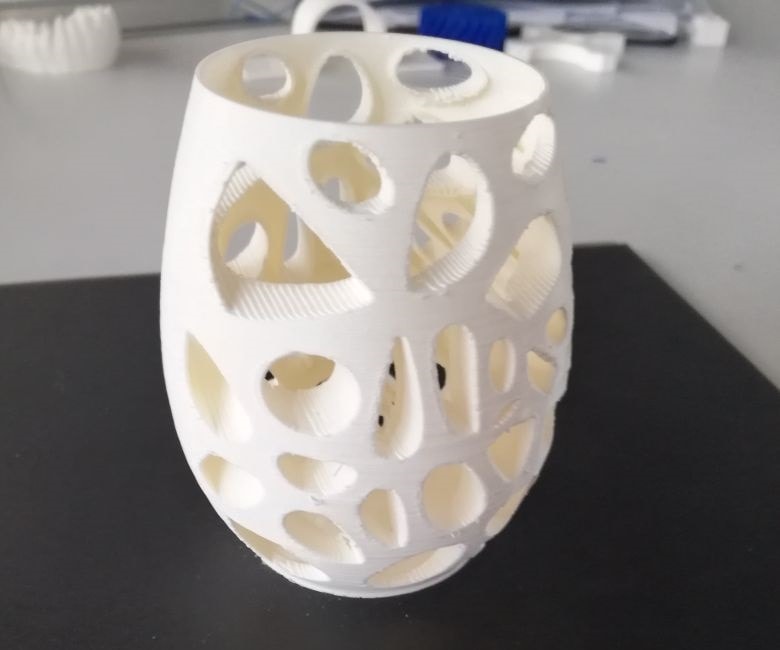
Here's how my vase looked like :)
Designing a flower
I really wanted to design and 3d print a flower, for that I also used Fusion360.
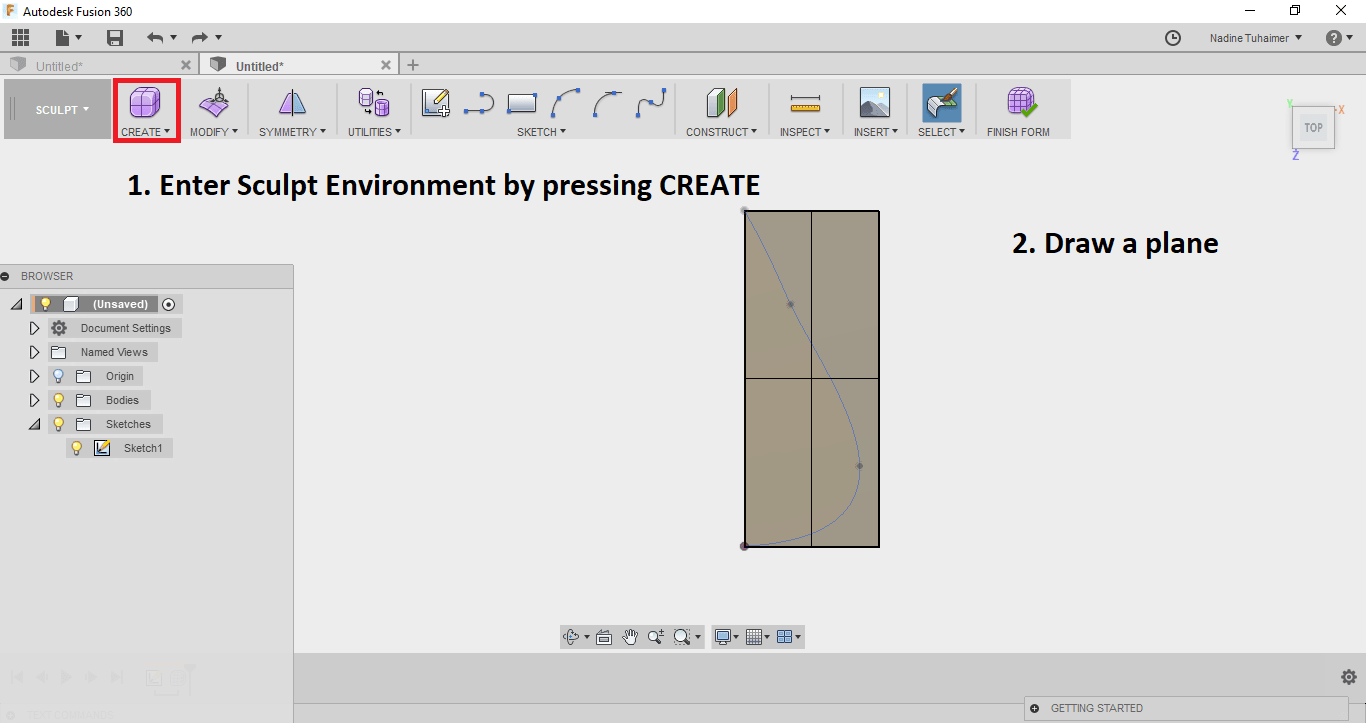
I first started drawing the first half of one petal using the Spline Tool.
Then I went to the Sculpt Environment by pressing Create. There I drew a plane on my petal.
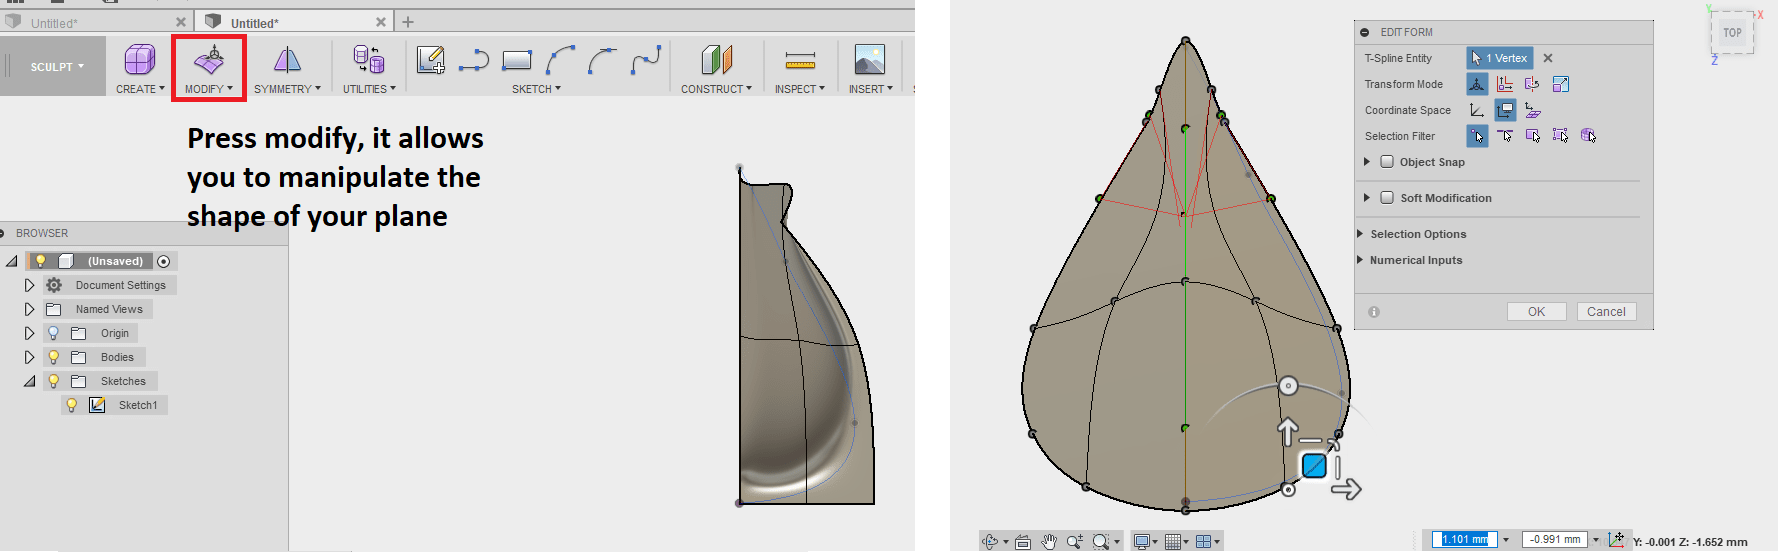
Then by pressing Modify I started modifying the shape of the plane to be as close as possible to my petal by moving nodes or edges.
After reaching a shape I'm satisfied with, I mirrored my half petal to get a full petal.
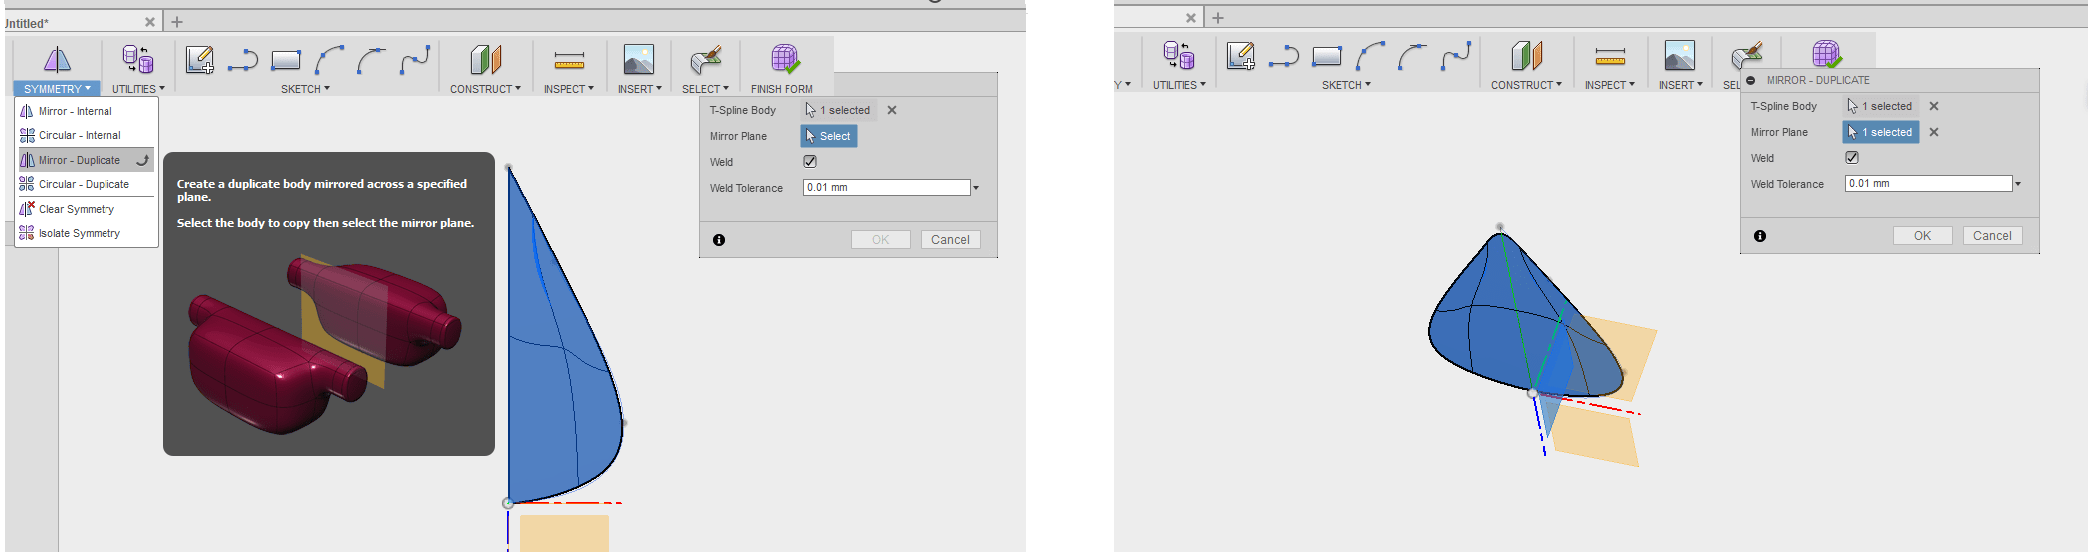
After that I moved my petal away from the origin because I don't want them to intersect when I do a circular pattern.
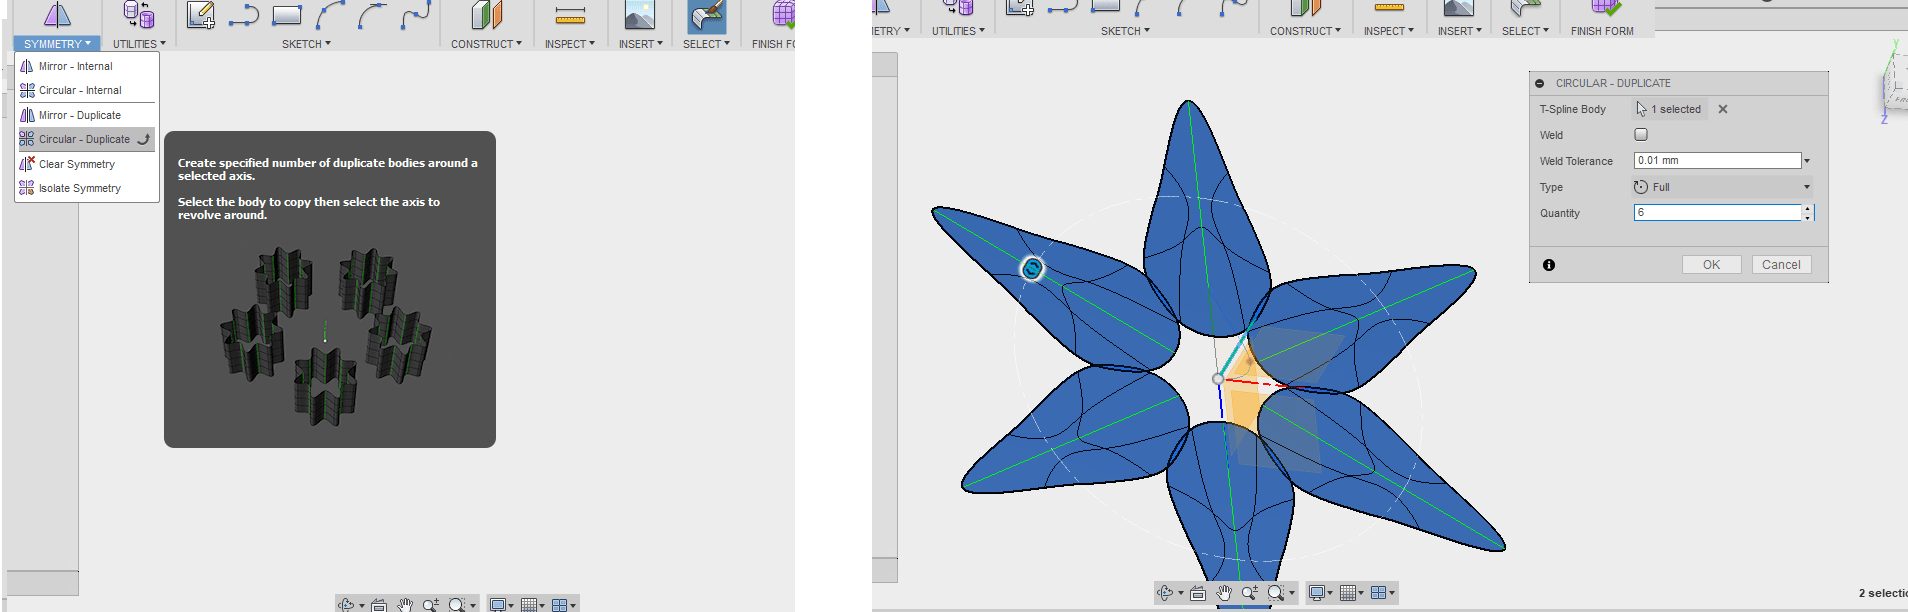
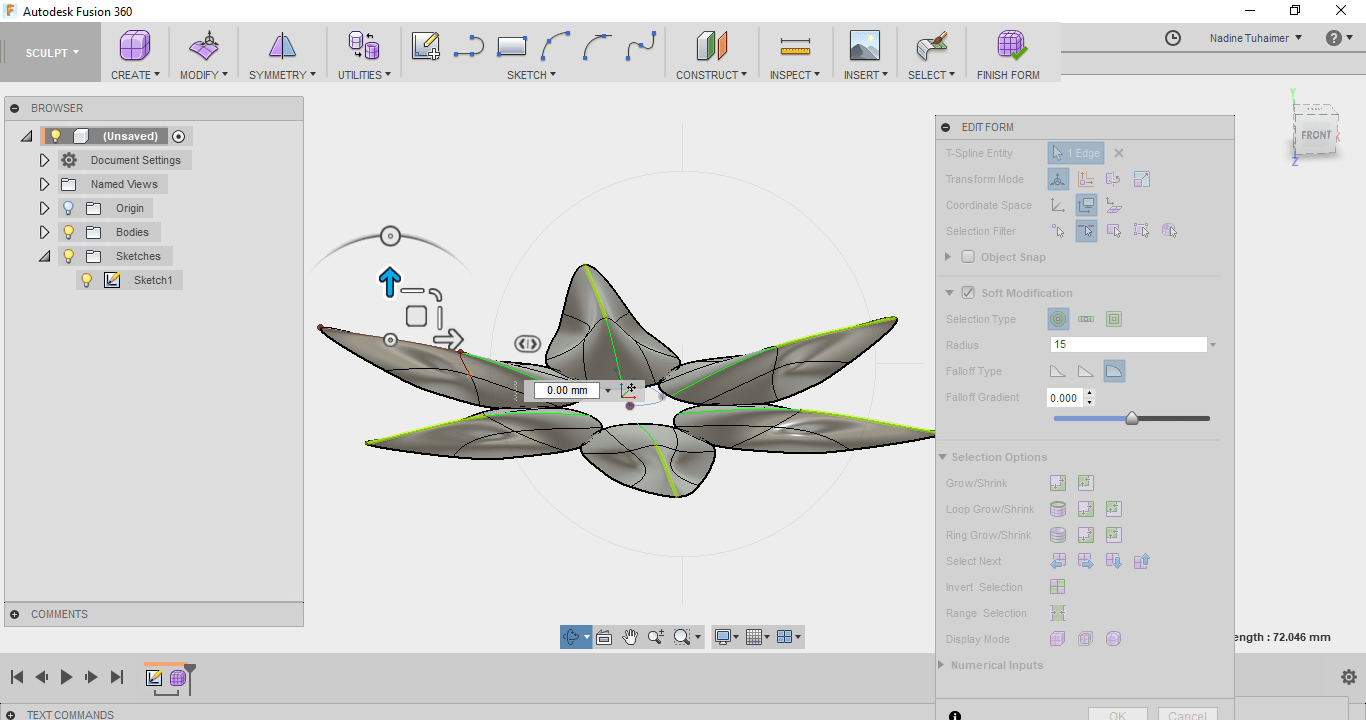
Then I started editing the form to have the shape of a flower with the curved shape of petals.
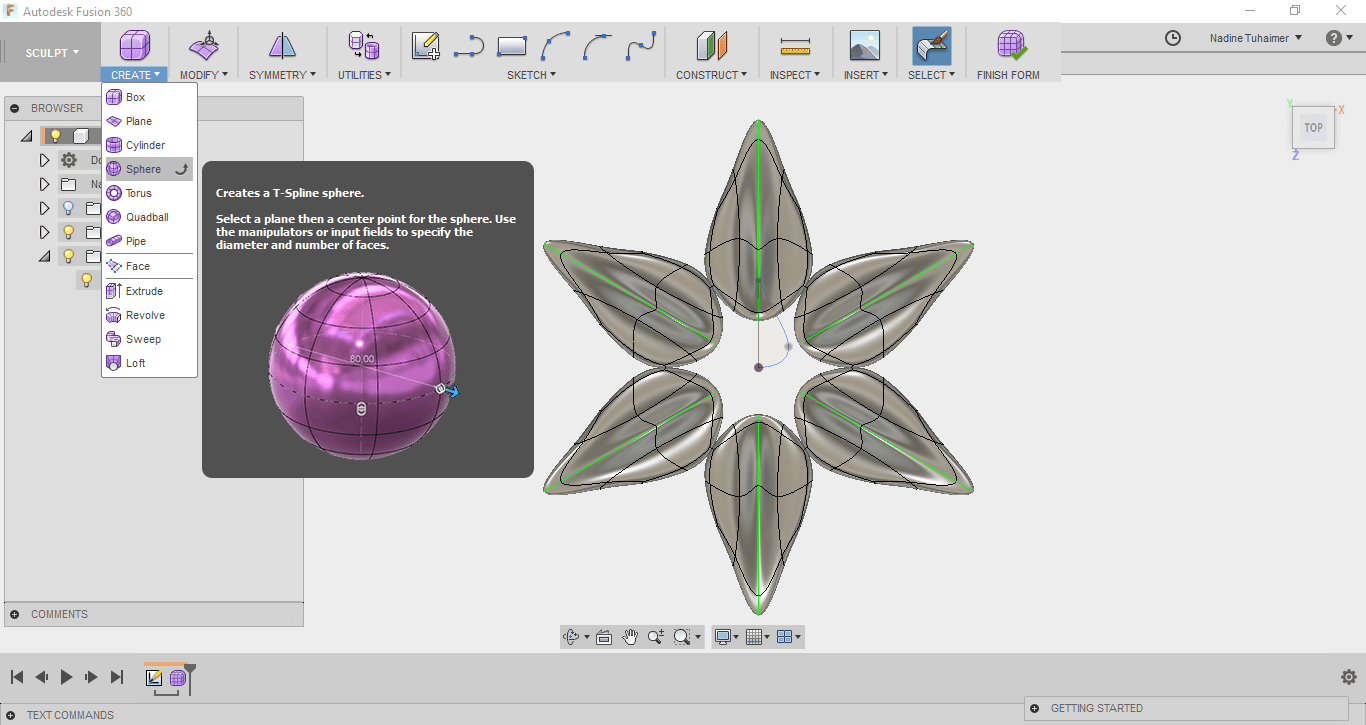
I then created a sphere in the middle of the flower - it's starting to look like a flower now :)
After that, I created a bridge to connect the petals to each other.


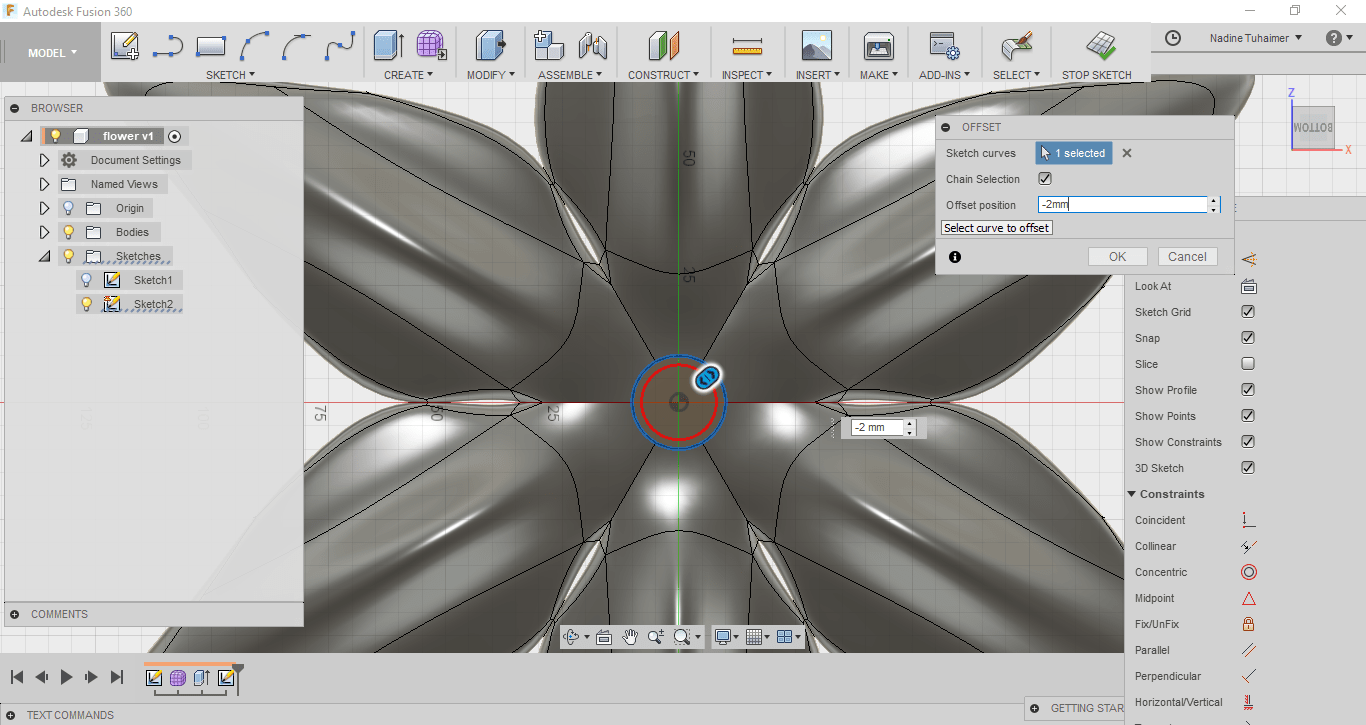
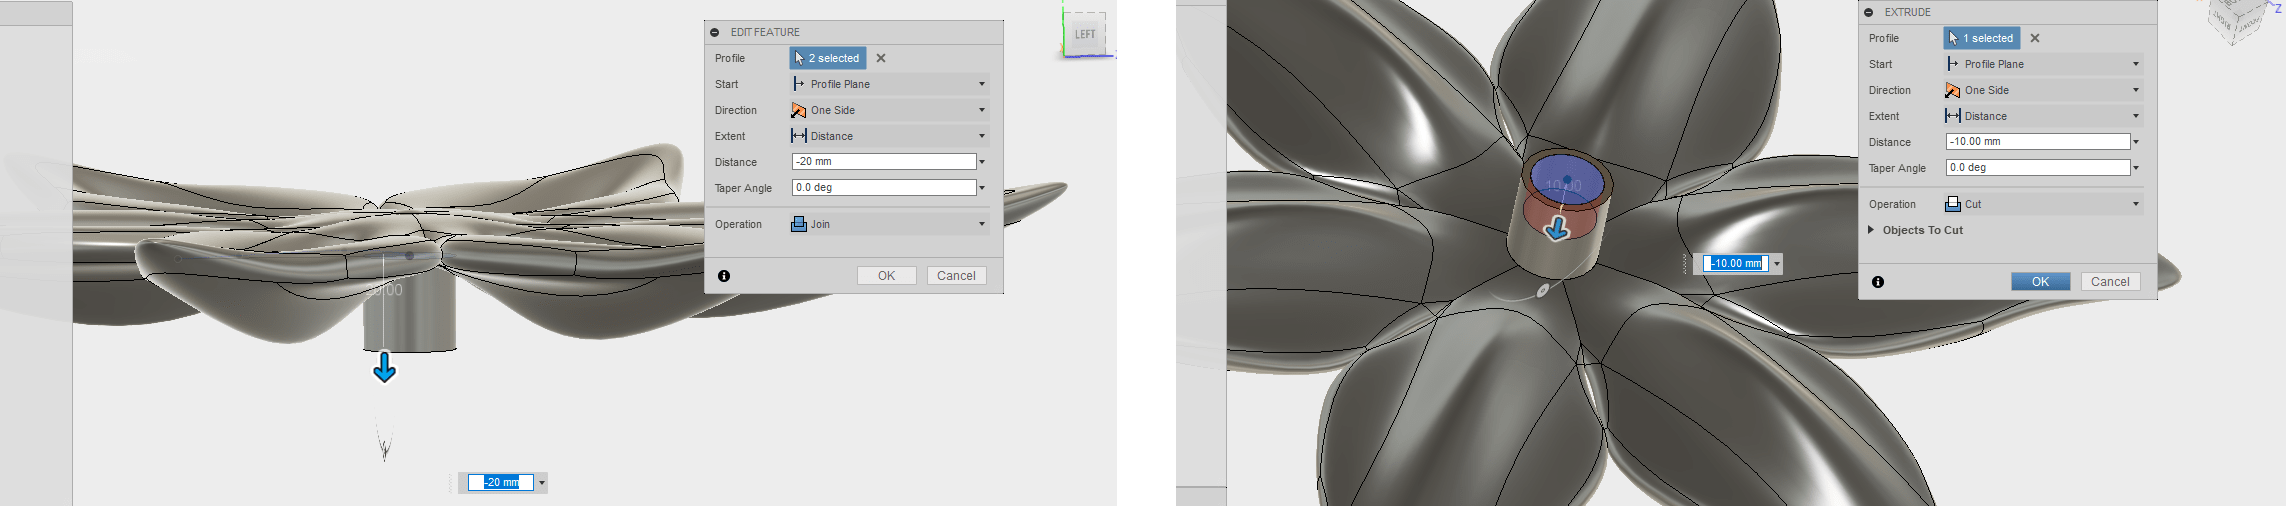
Then I drew a circle to create the part where the stem of the flower will be connected, created an offset and then extruded it.
Now that my flower is ready, I saved it as STL and opened it in Cura.
Printing the flower
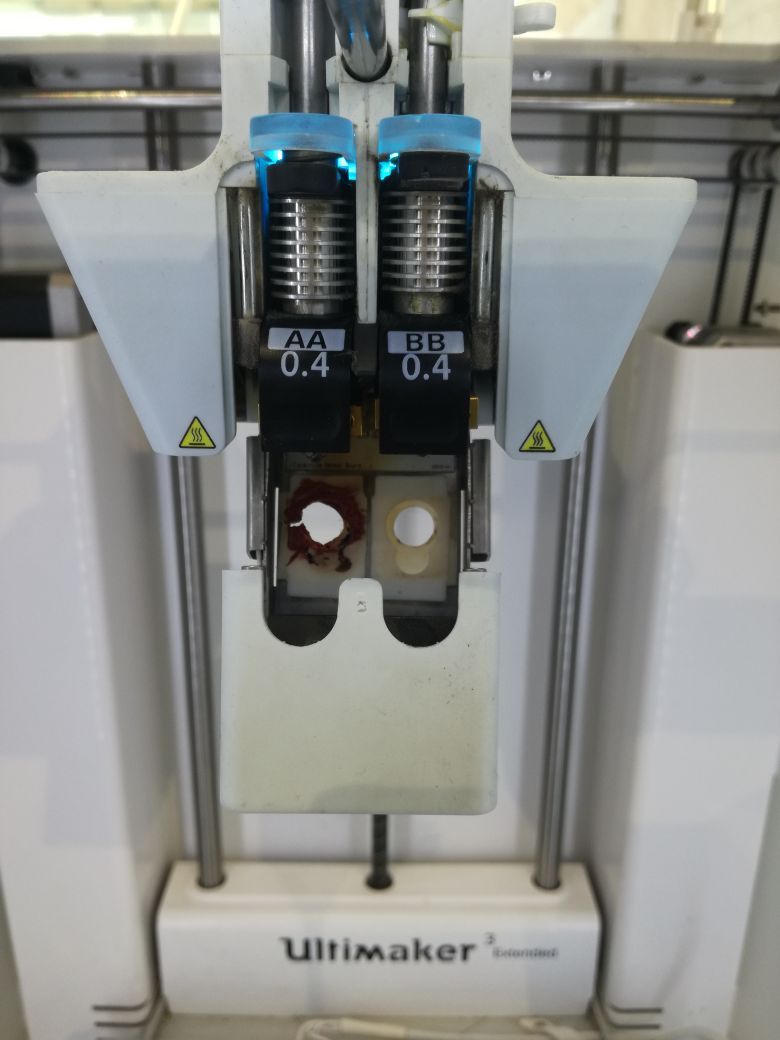
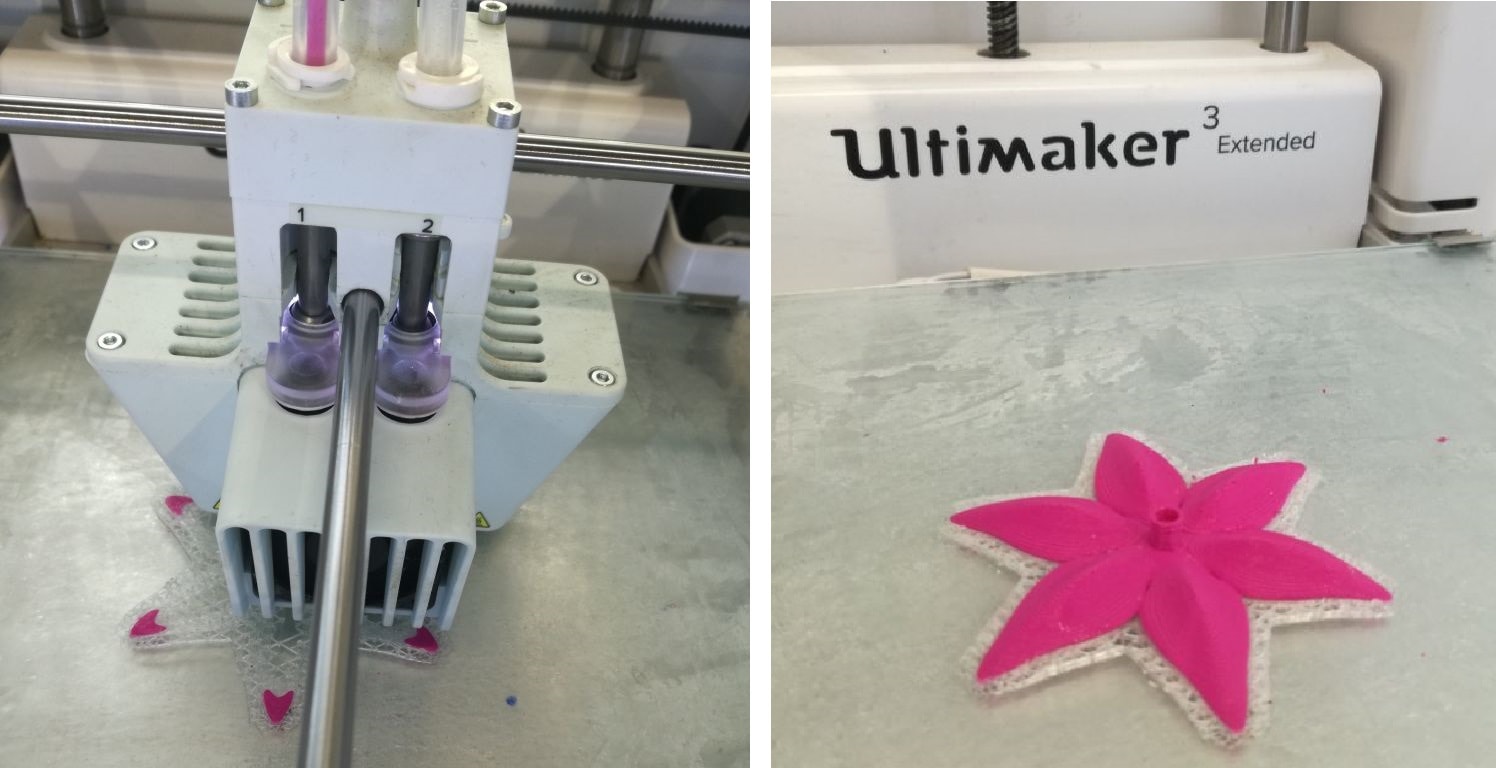
To print the flower, I decided to use the Ultimaker 3 Extended. This printer has 2 print heads, I used one of those heads which is the second one to print a material that melts in water called PVA.
This material is used for support and I used support because my flower has some curvy parts which means without support the material will be hanging in thin air.
To load the material to the printer, I followed the steps shown on the Ultimaker screen.
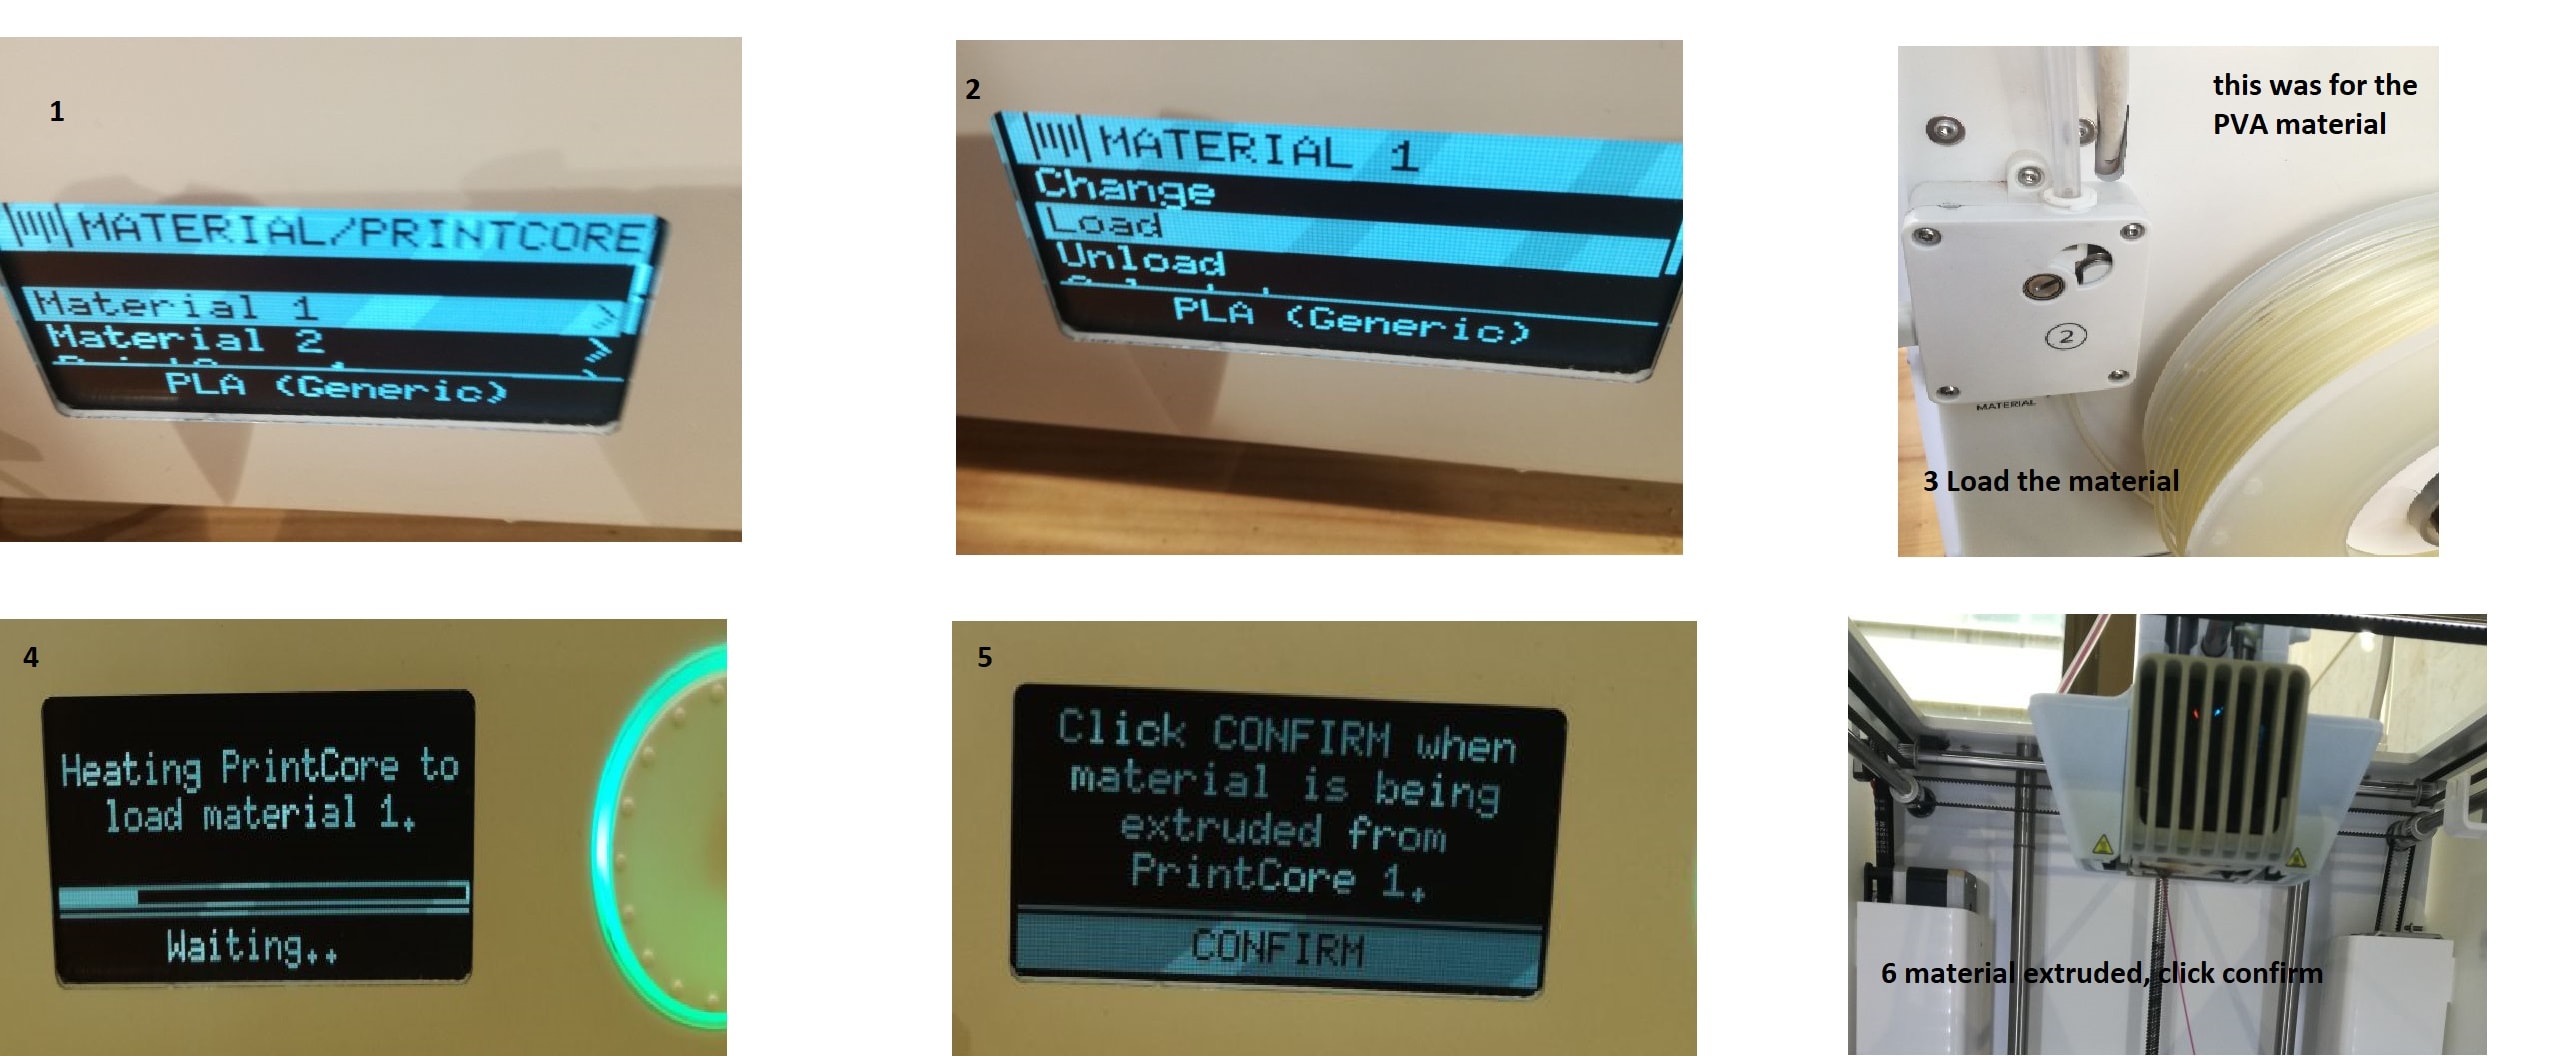
Then repeated the same steps for the other print head, it is important to know that the PVA material only goes in the second print core marked as BB.
Since the vase printed fine and I am using support, I went with the same settings as before.
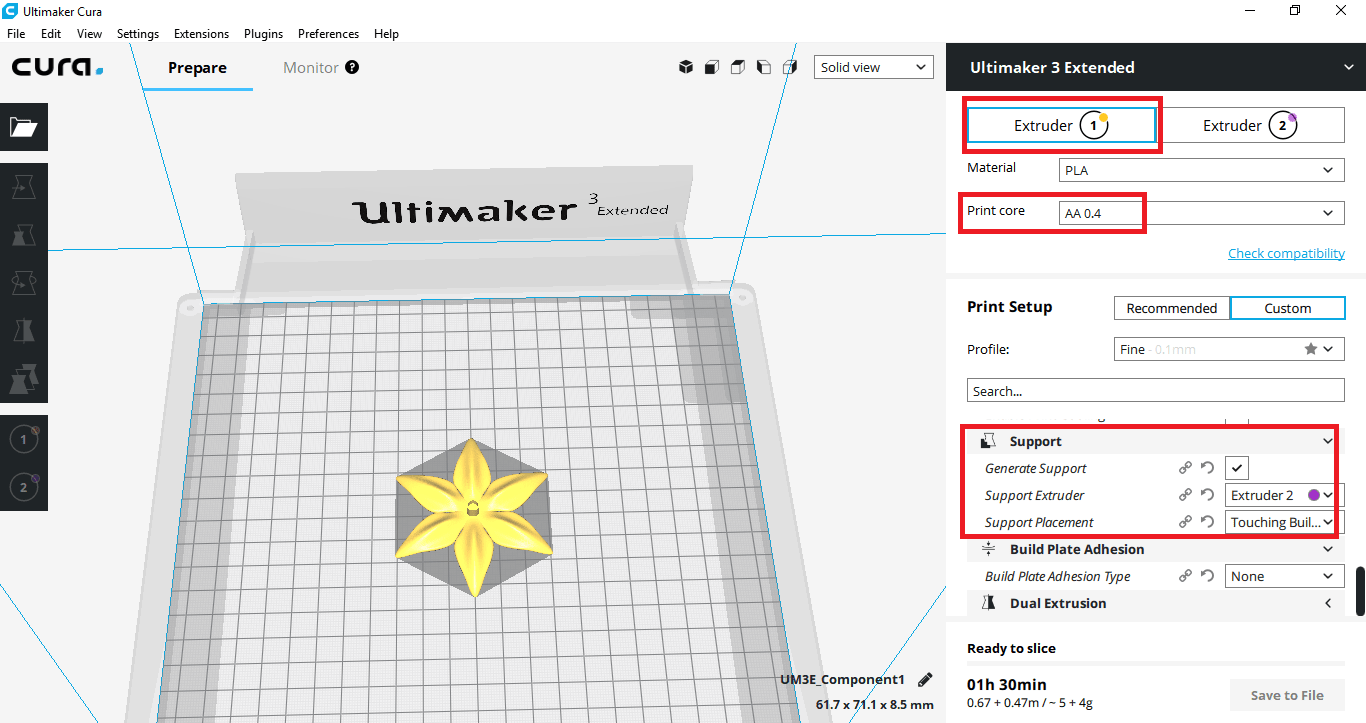
Settings of the first print head (PLA):
- Layer Height: 0.2mm
- Wall Thickness: 0.8mm
- Top/Bottom Thickness: 0.8mm
- Infill: 20%, infill dictates how rigid your print is
- Print Speed: 60mm/s
- Material Used: PLA
- Printing Temprature: 220
- Nozzle: 0.4mm
- Print Bed Temprature: 60
- Generate Support: Yes and from extruder 2 - PVA, touching build plate
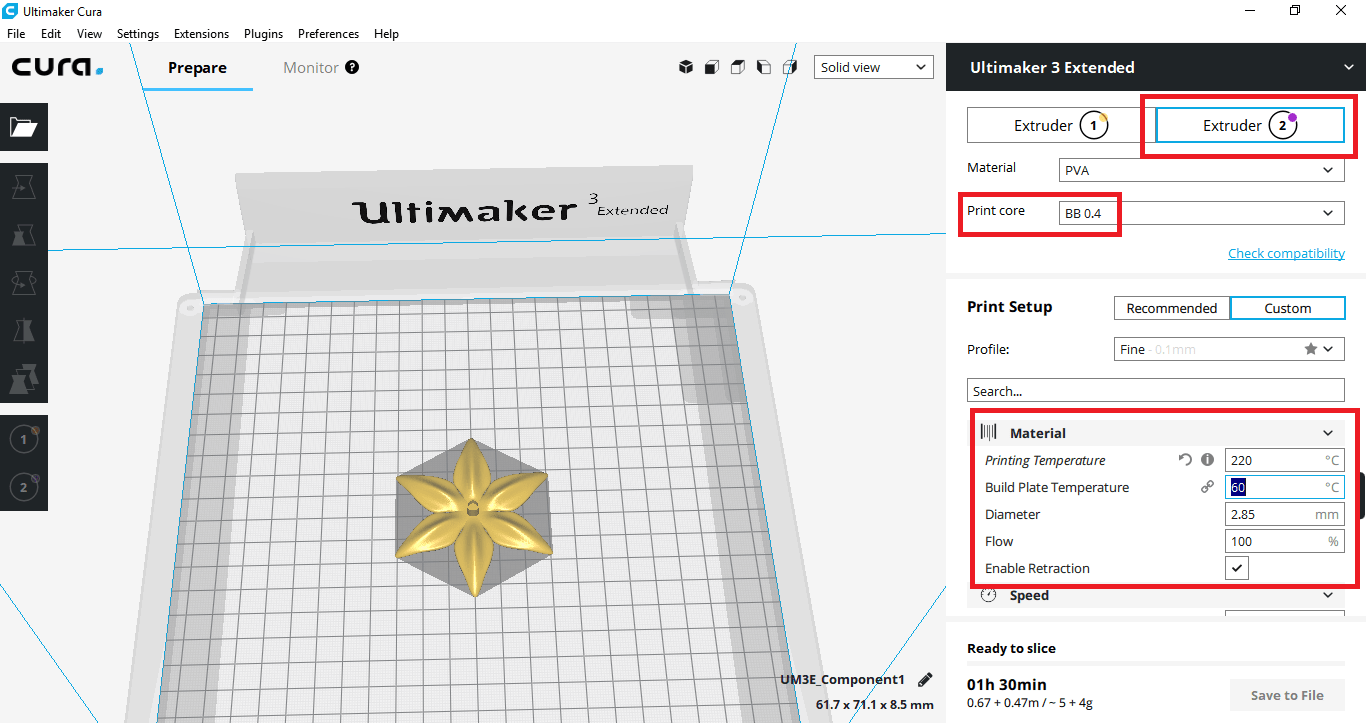
The settings I used for the second print core (PVA) are listed below:
- Layer Height: 0.2mm
- Wall Thickness: 1mm, it's just support material, we don't need it to be accurate.
- Top/Bottom Thickness: 1mm, it's just support material, we don't need it to be accurate.
- Infill: 10%
- Print Speed: 60mm/s
- Material Used: PVA
- Printing Temprature: 220
- Nozzle: 0.4mm
- Print Bed Temprature: 60
- Generate Support: Yes and from extruder 2 - PVA, touching build plate
After setting the settings, I went to layer view to see if everything is printing correctly before I actually start my print.
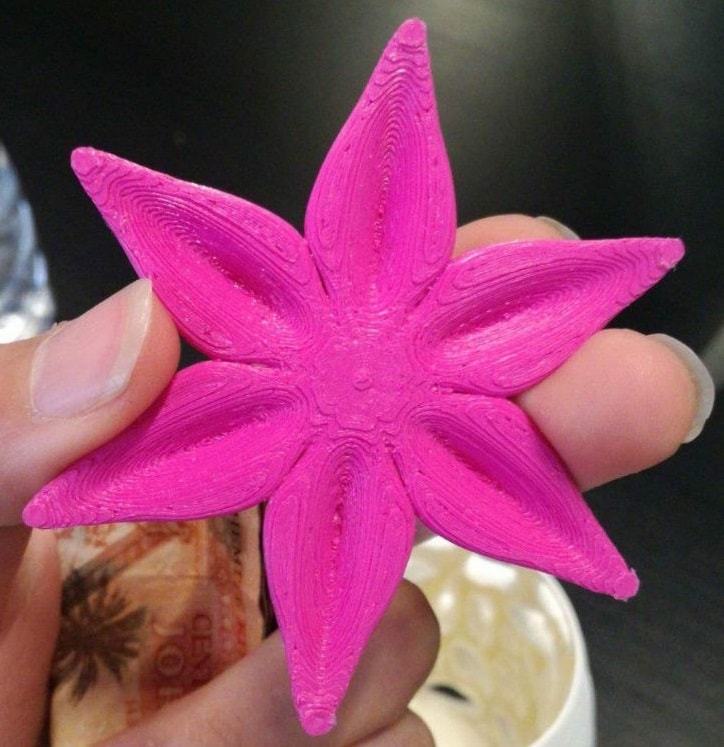
And here's how my print looked like when it finished.
Then I put it in water so that the PVA can melt, I wanted to take a time lapse of the process but I couldn't because A- I was too curious so I kept taking it out
B- It took a few hours and my battery died :(
Here's a smalll video of the melting process.
3D Scanning
Next we had to scan an object and possibly print it. My colleague Qusai and I agreed to scan each other and exchange the scans to print them.
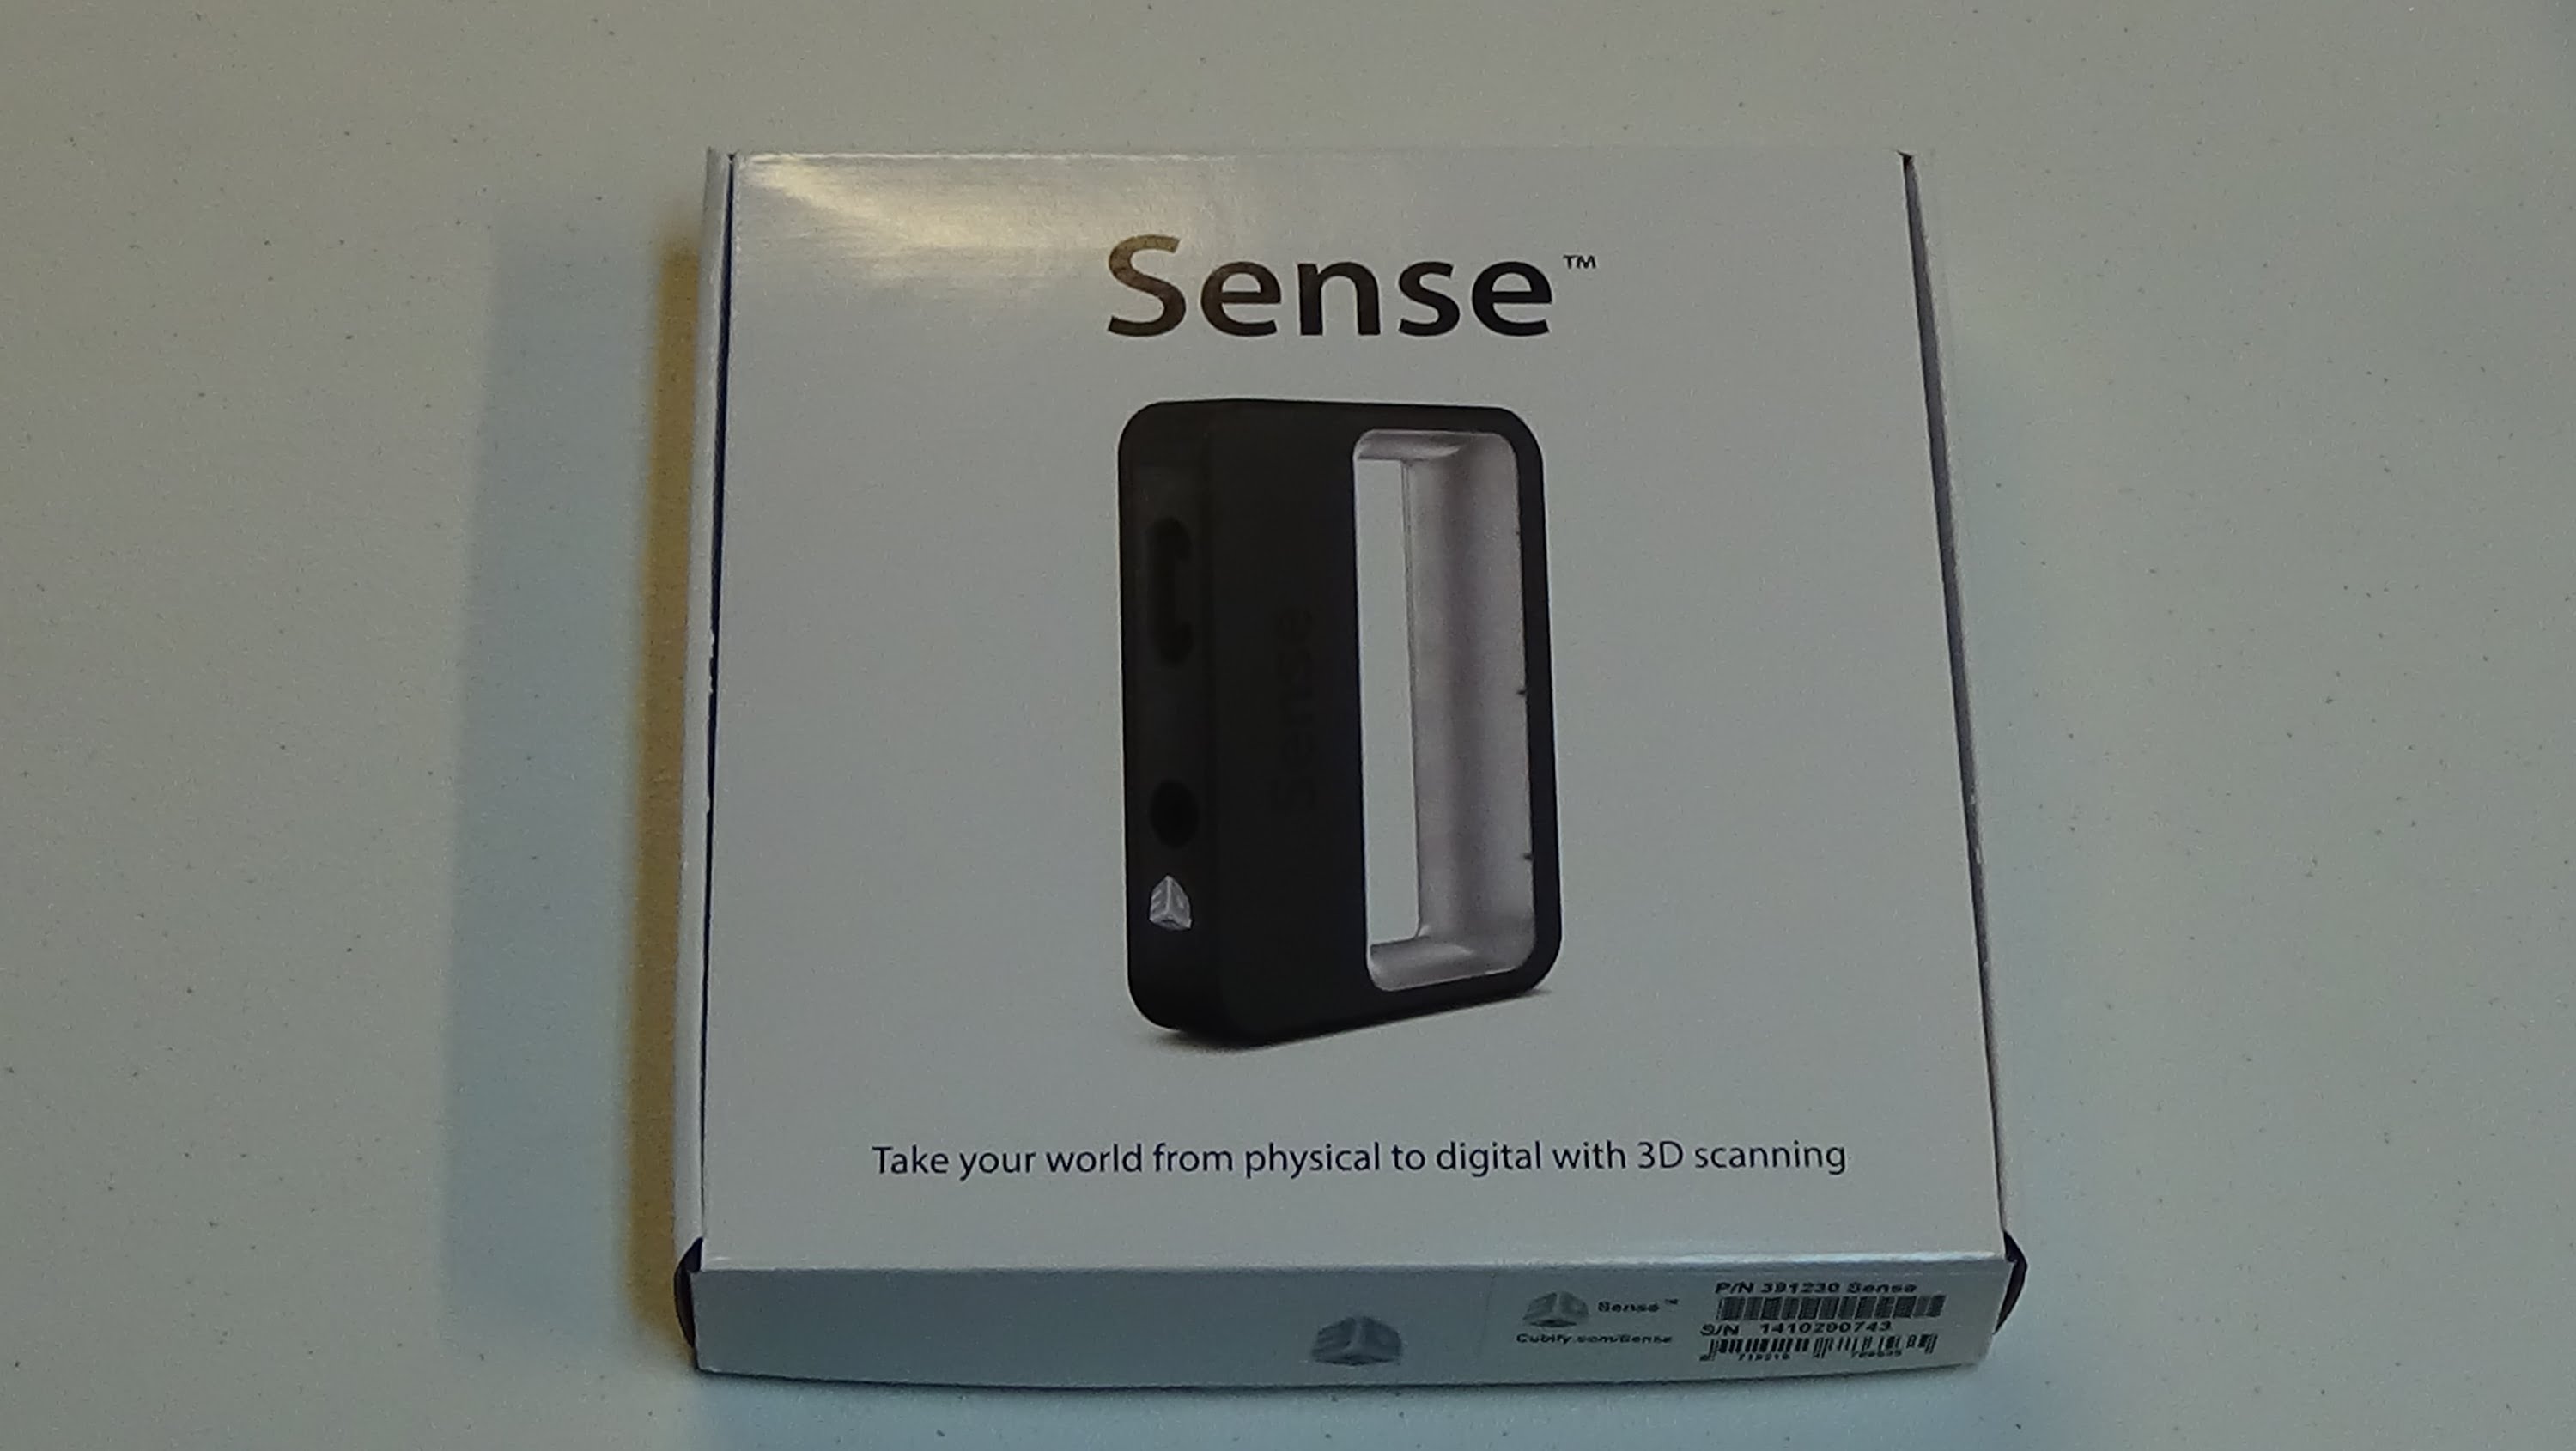
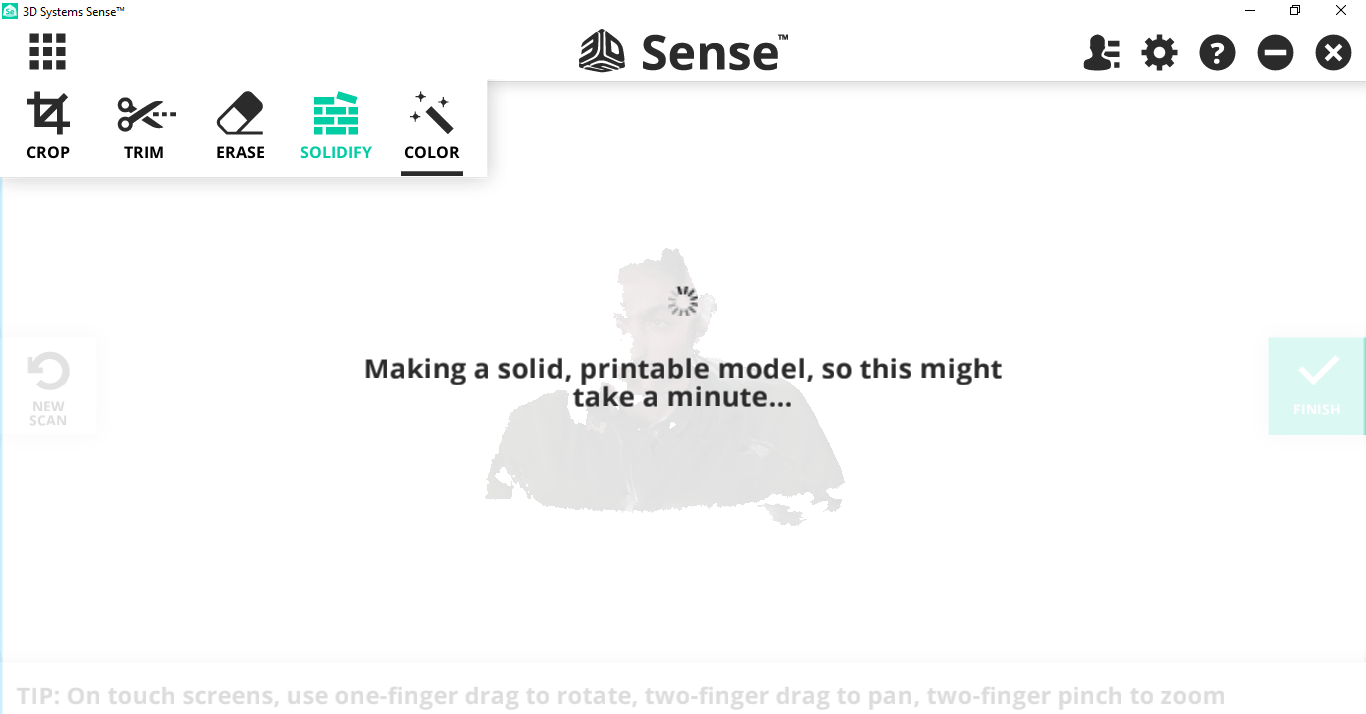
The scanner we have in the lab is the 3D Sense Scanner by 3D Systems. It is a smalll handheld device that you connect to the software to capture and create a 3D model.
I unfortunately forgot to take photos of the scanning process but here's the software interface.
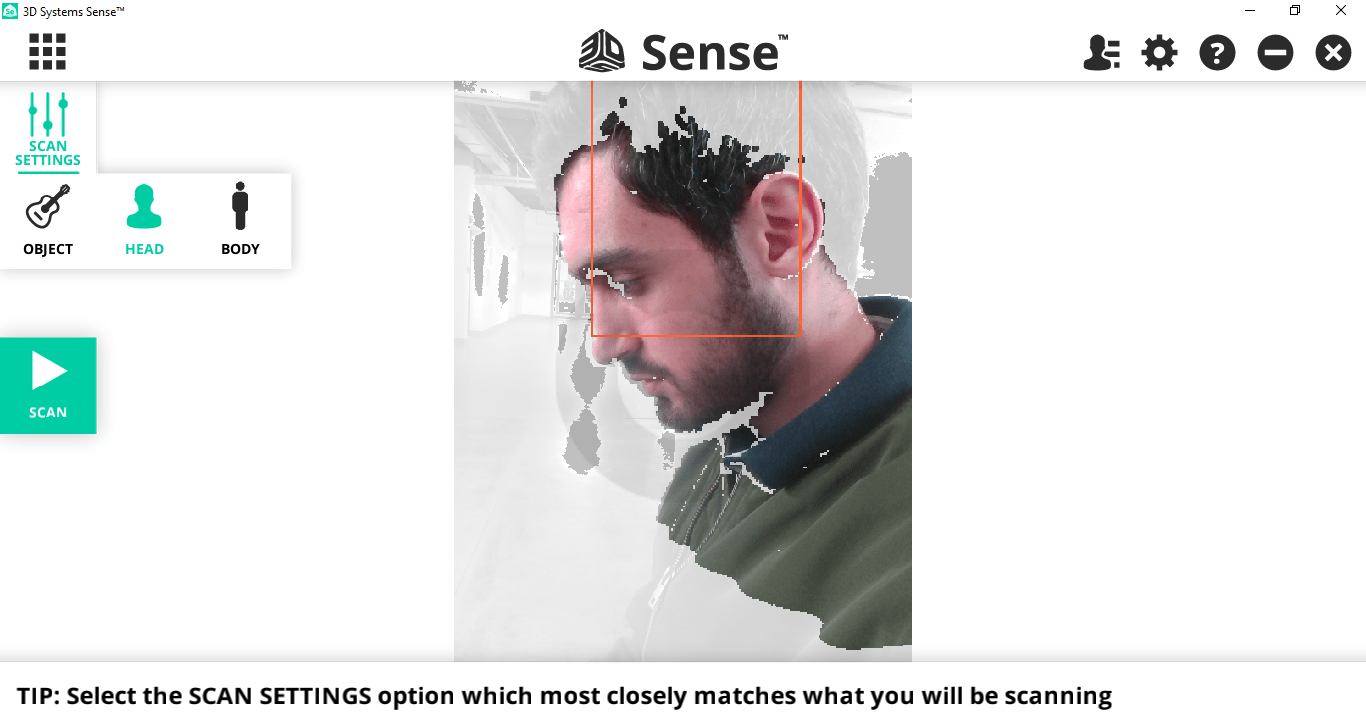
I chose Head because I was only going to scan his head, then I pressed start scan. It gives you a 3 seconds timer beofre it starts capturing.
I asked Qusai to stay still then I started slowly rotating around him to fill the white gaps that shows in the software.
My finished scan looked really good, so I only pressed Soldify to make it into a solid then exported it as an STL file so the Qusai can print it.
Here's the finished scanned model :)
Printing my scan
Qusai scanned me and gave me the stl file of my scan. I decided to print it using Stereolithography (SLA) technology. SLA creates 3D printed objects from a liquid (photopolymer) resin by using a light source to solidify the liquid material.
To print an object the print bed is dipped into a tank full of the resin material then a laser plots each layer of the object and passes through the bottom of the tank thus soldifying it. After each layer, the build platform moves a little to the top allowing more resin to flow to create the next layer.
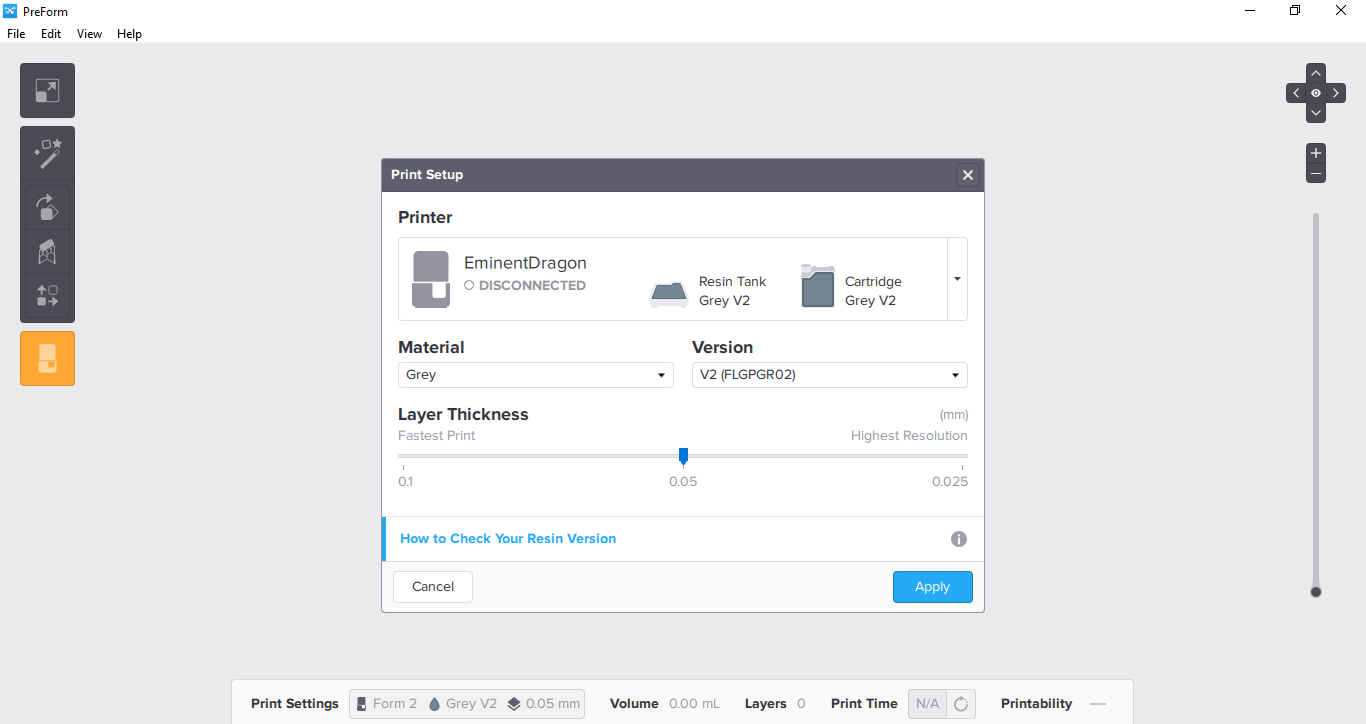
The printer we have is the Form 2 from Formlabs.
After a certain number of prints (2 liters of resin consumed), both the tank that hold the liquid material (resin) & the print bed where the model is printed have to be replaced.
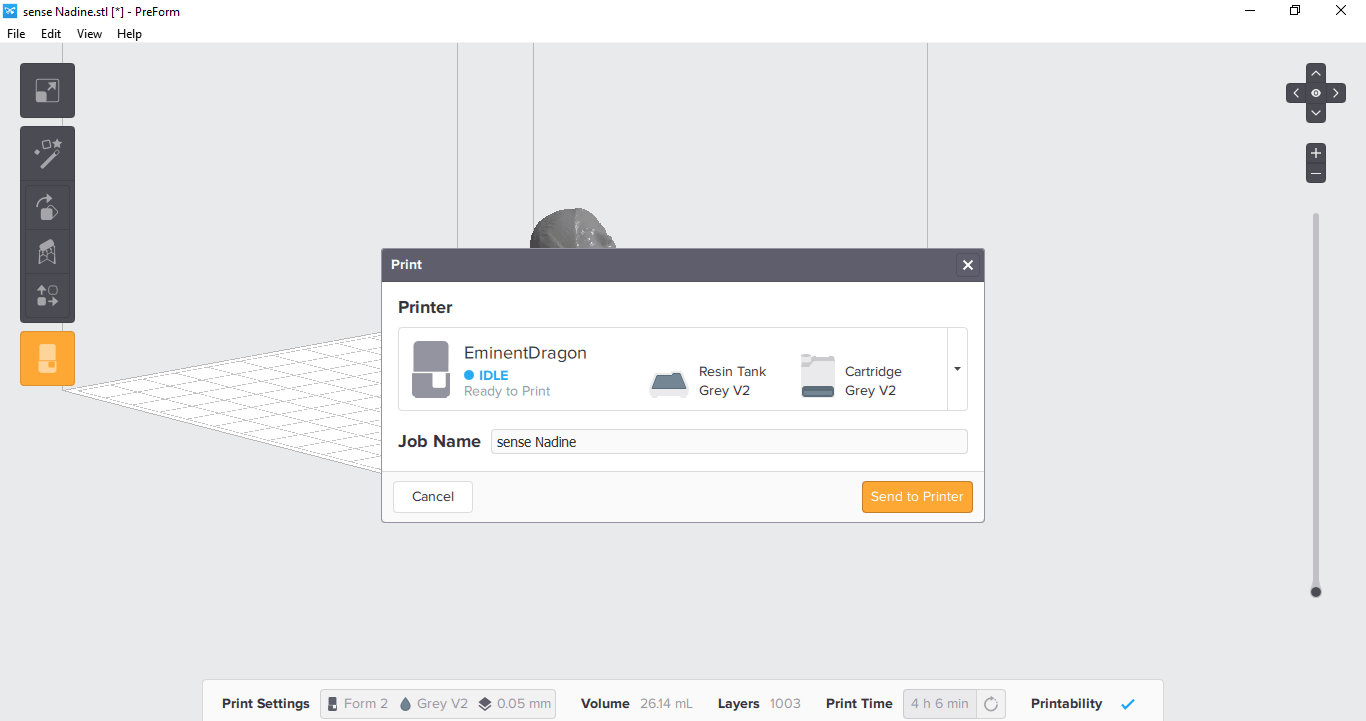
To setup the settings for my print, I downloaded the software Preform from the formlabs website.
I then opened my stl file and started placing the settings. The first thing I did was scale down my print.
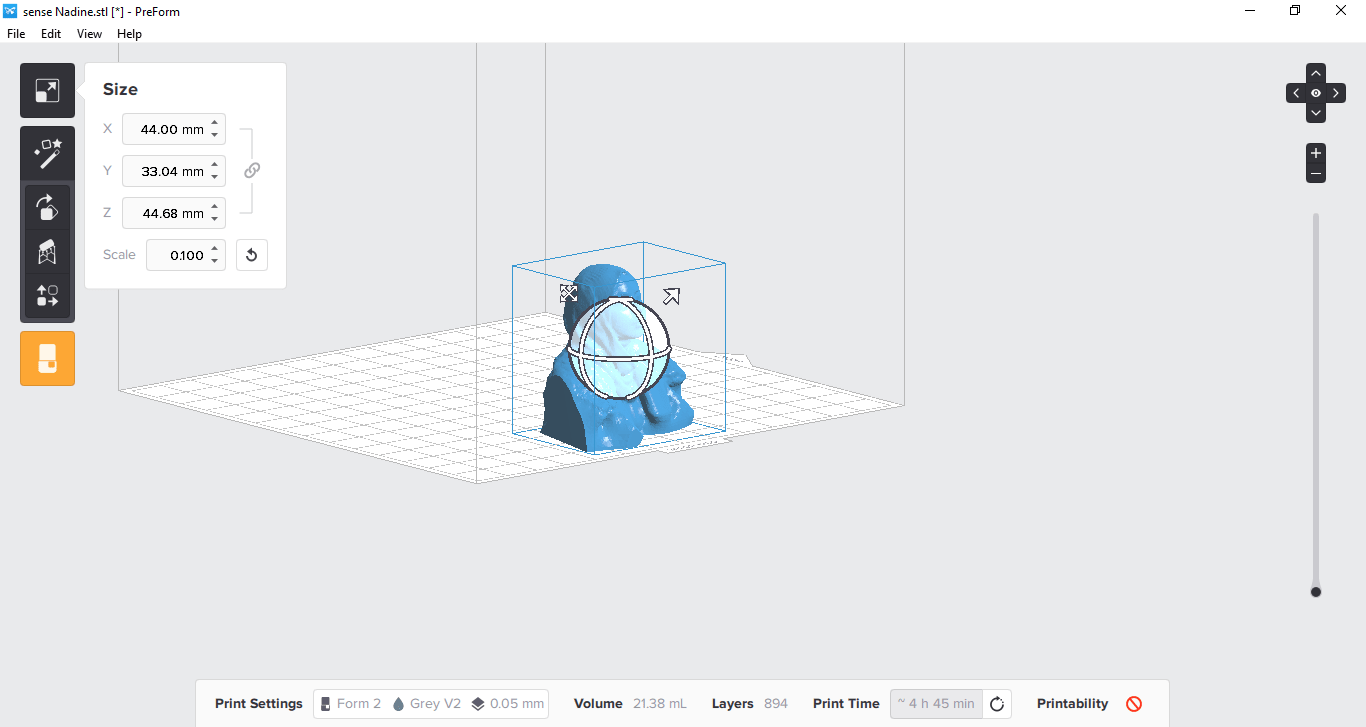
Then pressed the magic wand to auto-generate support.
It is important to know that because the print bed should be changed after sometime, the software flips the model so that it can take the least space of the bed possible so the bed doesn't die, so to speak.
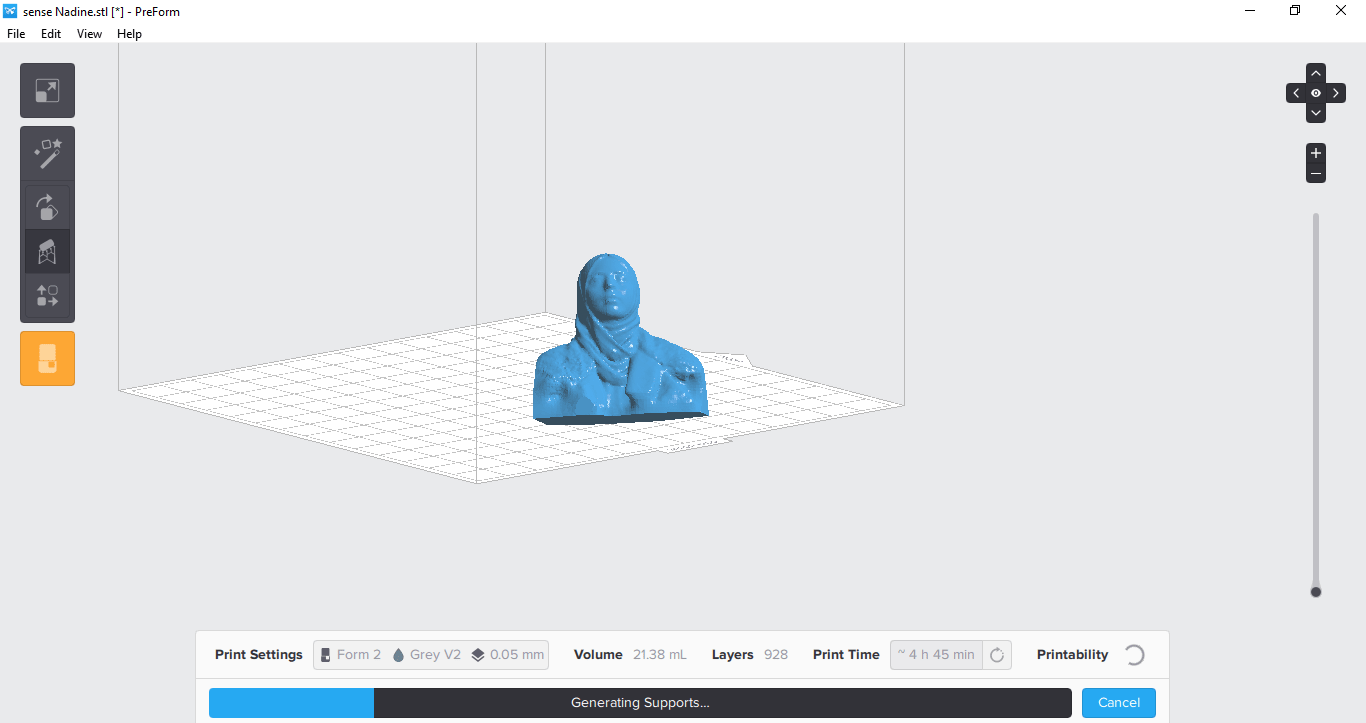
After that I changed the material to Grey and the layer thickness to 0.05mm for better resolution.
Then I calculated the print time and setup the printer by cleaning the print bed with some Ethanol and placing the correct resin material. I then connected the printer to the laptop and sent my print job.
The really cool thing about this printer other than the laser beam is that it prints the model upside down because it wants to save up space on the print bed. The model also will definitely need some post-processing to remove the support and clean the model with some ethanol.
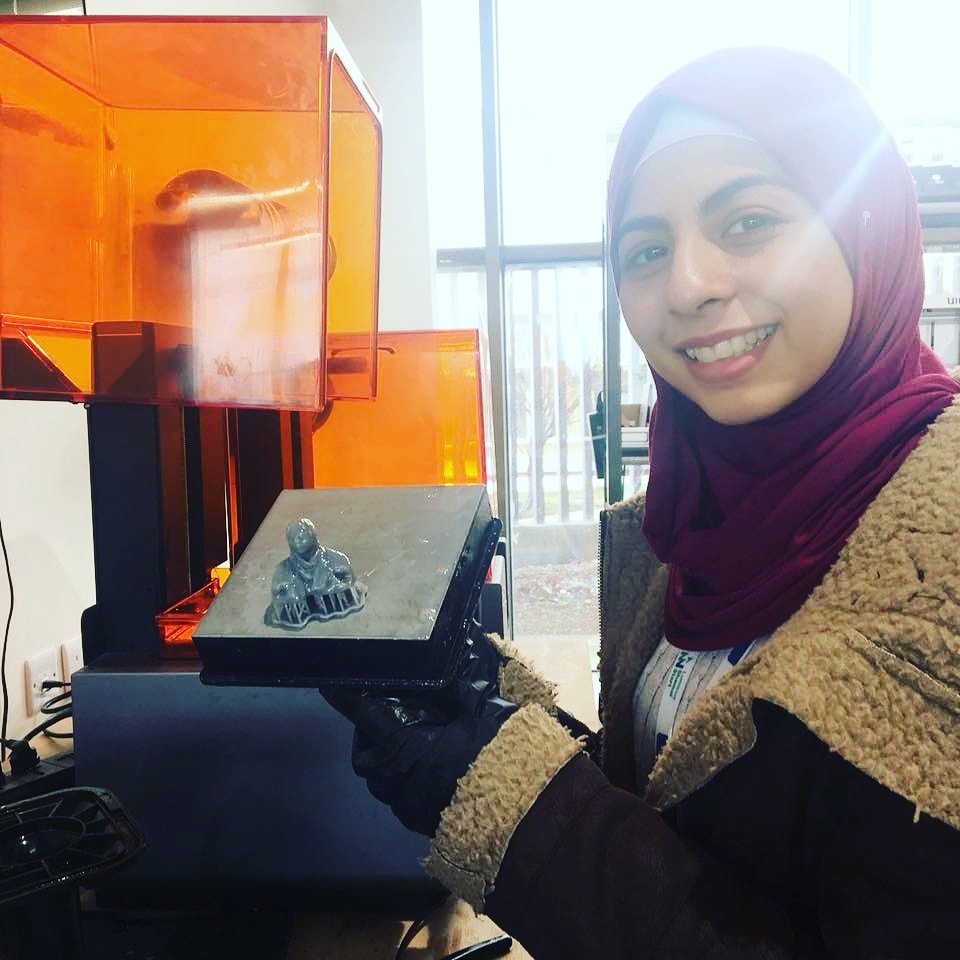
Take a look at me and mini me :)
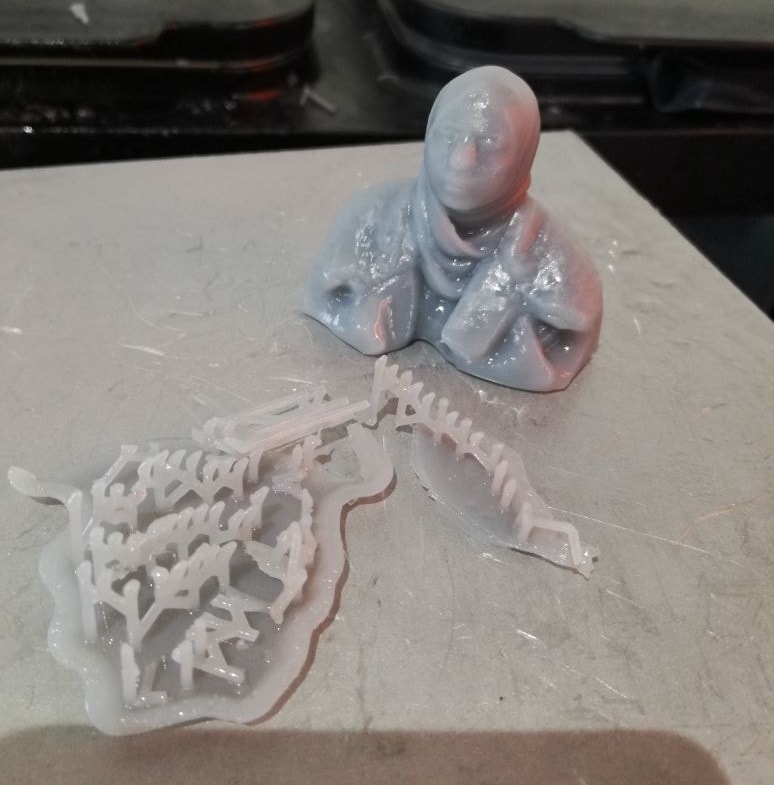
I also soaked the model in ethanol for a few minutes to get a better finish. Here's how it looks without the support and after soaking it in alcohol.
Learnings & Problems Faced
This week I used 3 different 3D Printers, Ultimaker 2+, Ultimker 3 and the Form 2.
For more accurate result, it's preferred to use SLA Technology. But you can also get really good results using FDM Technology by lowering layer height and using a smaller nozzle. It's important to mention that more accurate results means it'll take longer for the print job to finish. The vase was pretty straight forward as the design was self-supporting itself, but for the flower, it needed support to have the curve printed correctly.
This week, I didn't really face much problems since my colleague Qusai is a 3D Printing Expert and he gave me advise on the settings I should use, recommended the machine and the material to use. I thought it was a really fun and easy week!
You can download my files here:
