In this week we should use a new digital fabrication process to produce something different from previous weeks. My tasks in this week are:
I want to make necklaces and keychains using a laser cutter which will draw patterns of wanted shapes, then cut the pieces of wood and acrylic after that I will manually embroider them.
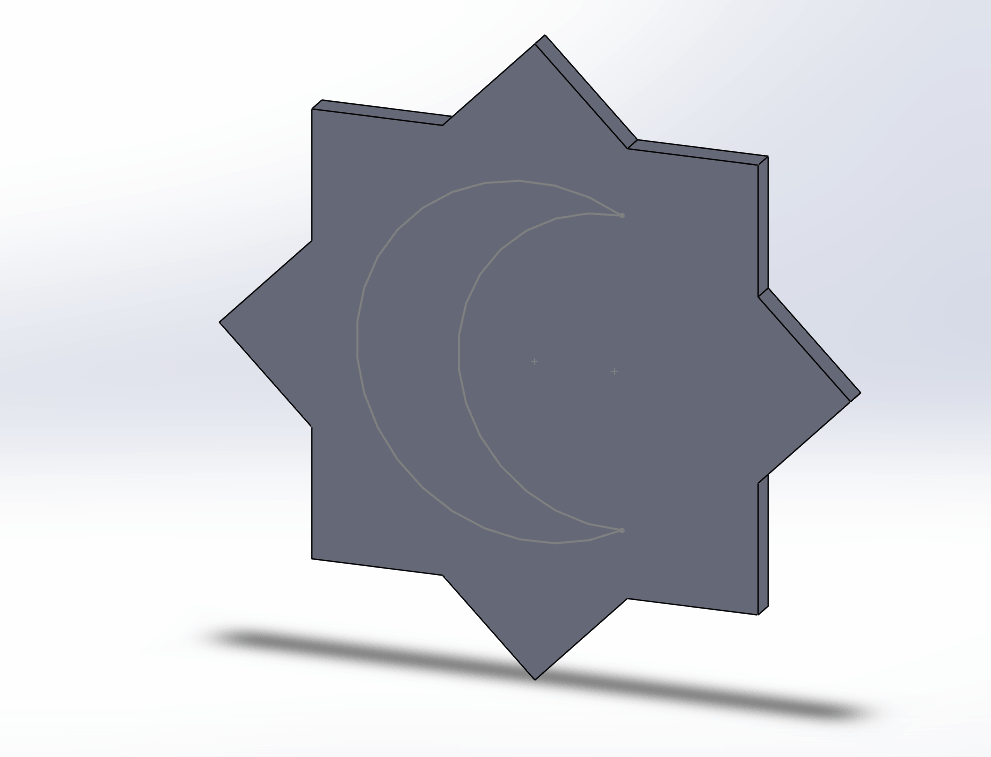
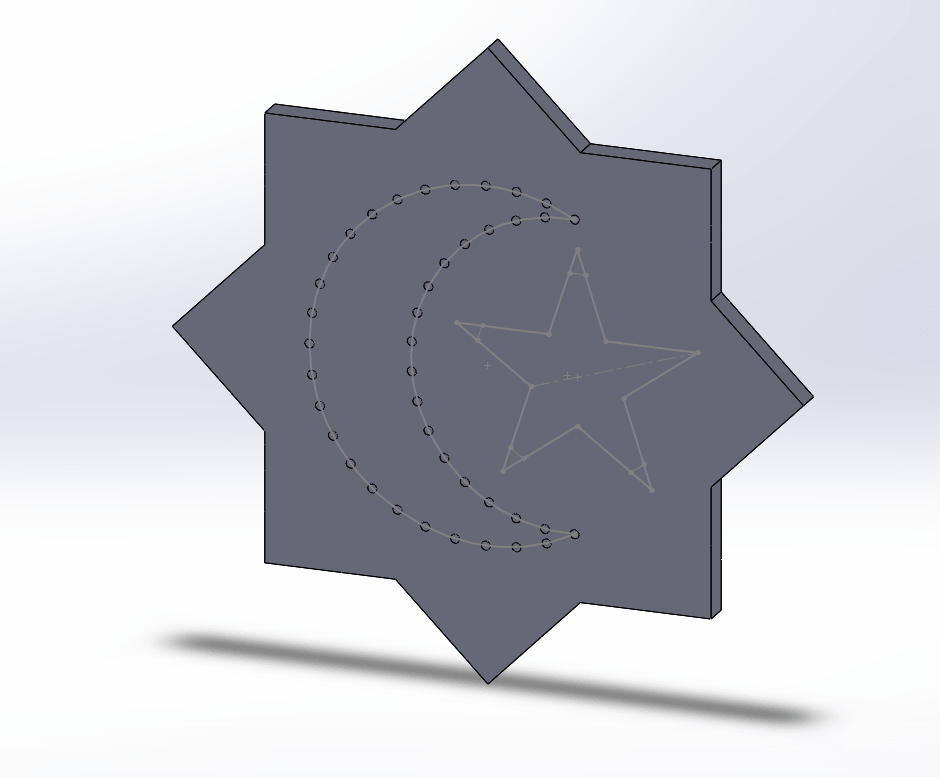
Start with desiging on solidworks following these steps:
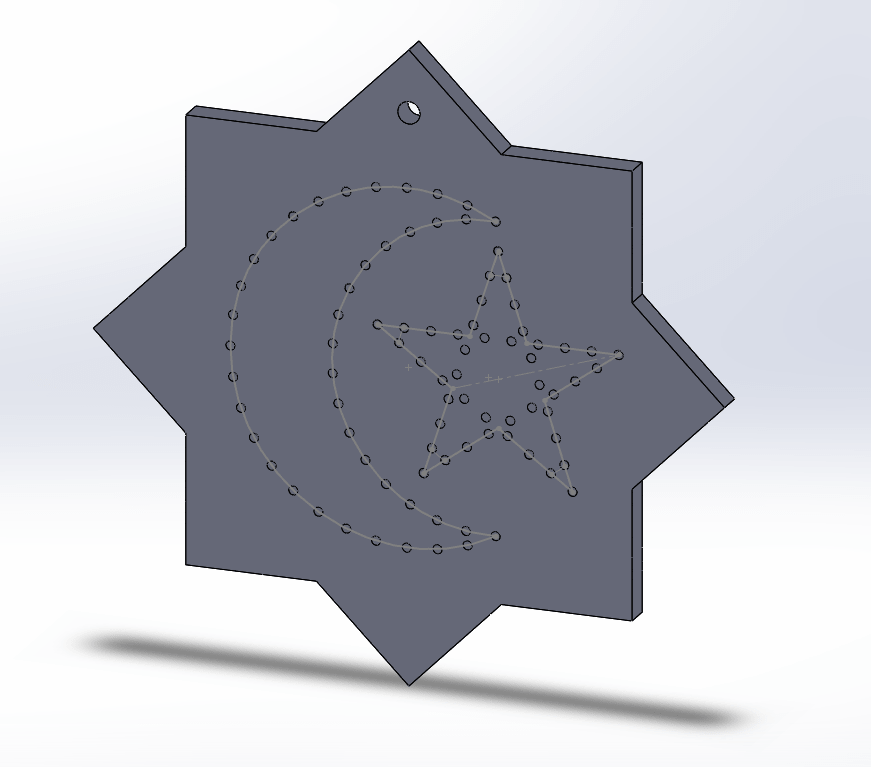
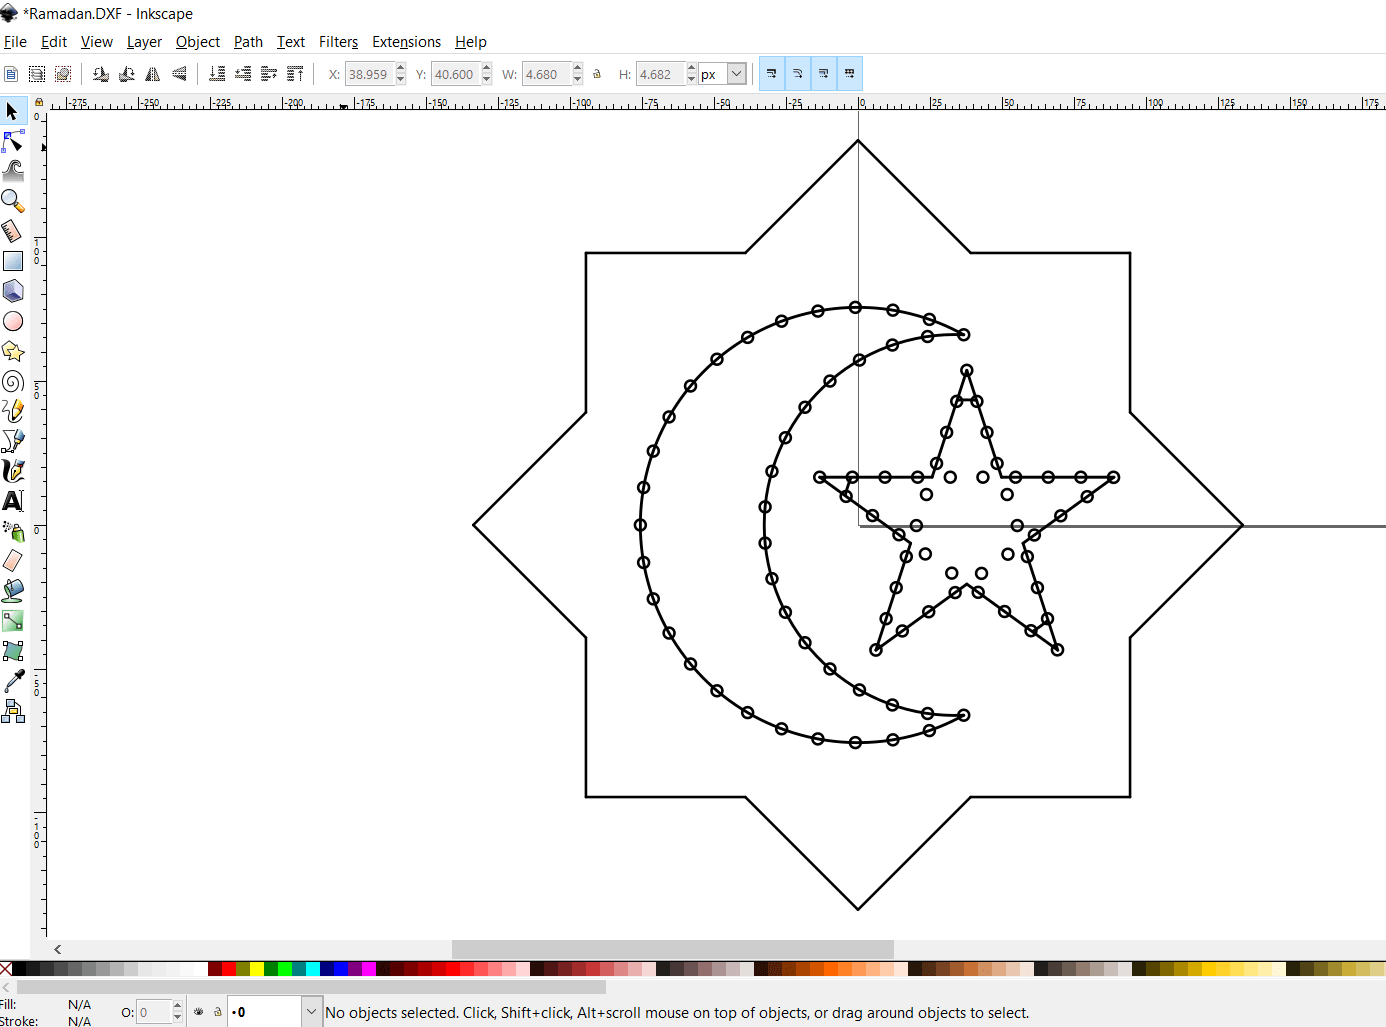
Then export fornt view of the design as a .dxf file. After that move to Inkscape to fix laser settings:
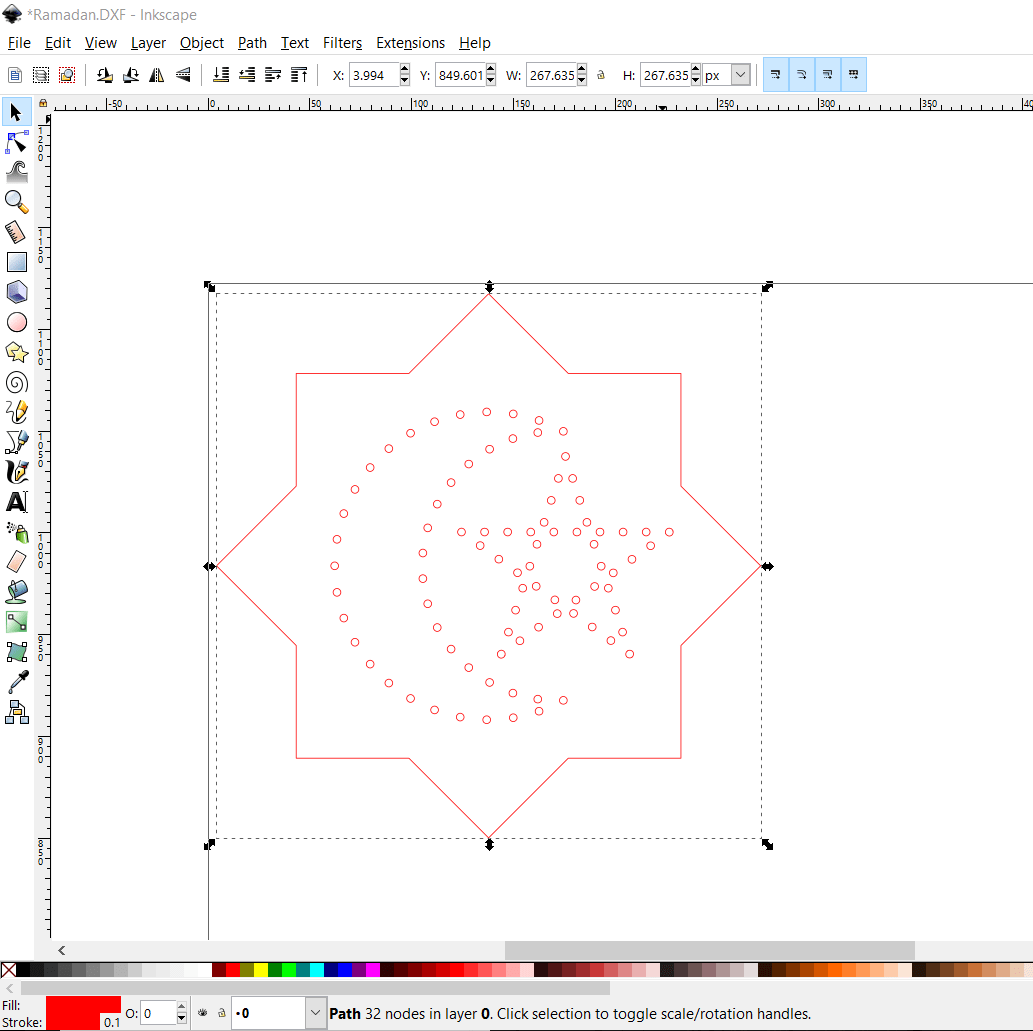
The file now ready to cut I used both MDF wood 3mm and acrylic 2mm using suitable settings for each one
MDF: Power= 100 , Speed= .8, Frequancy= 50000
Acrylic: Power= 100 , Speed= .6, Frequancy= 2000
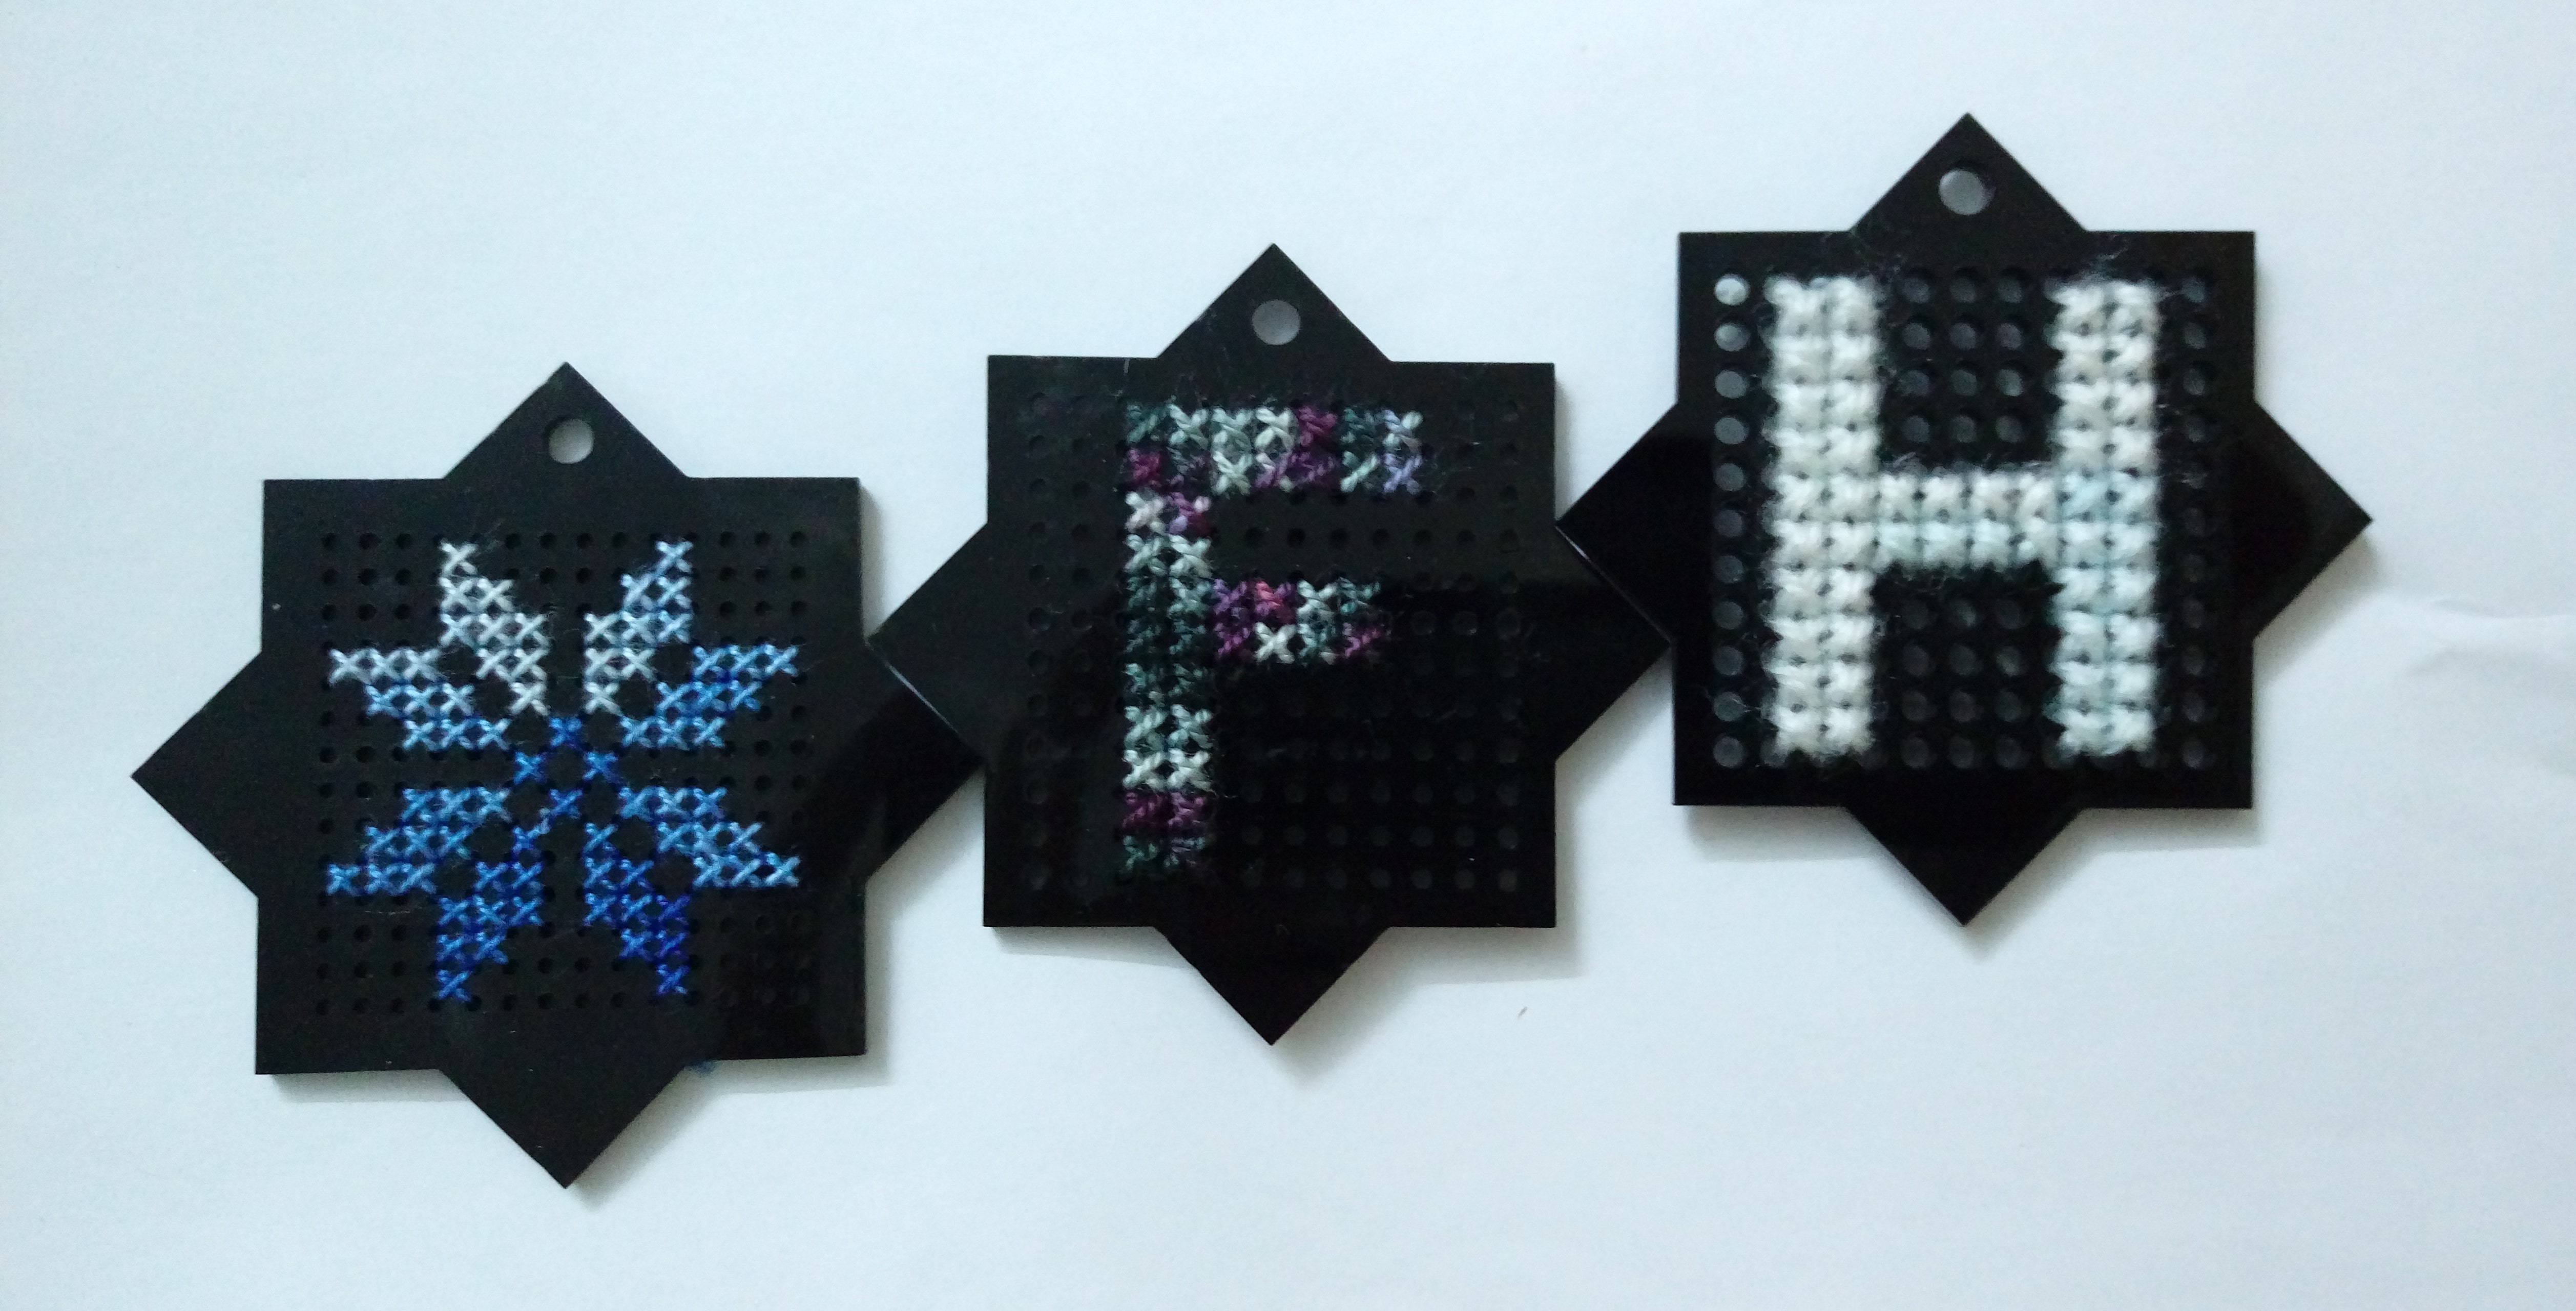
One of results after cutting:
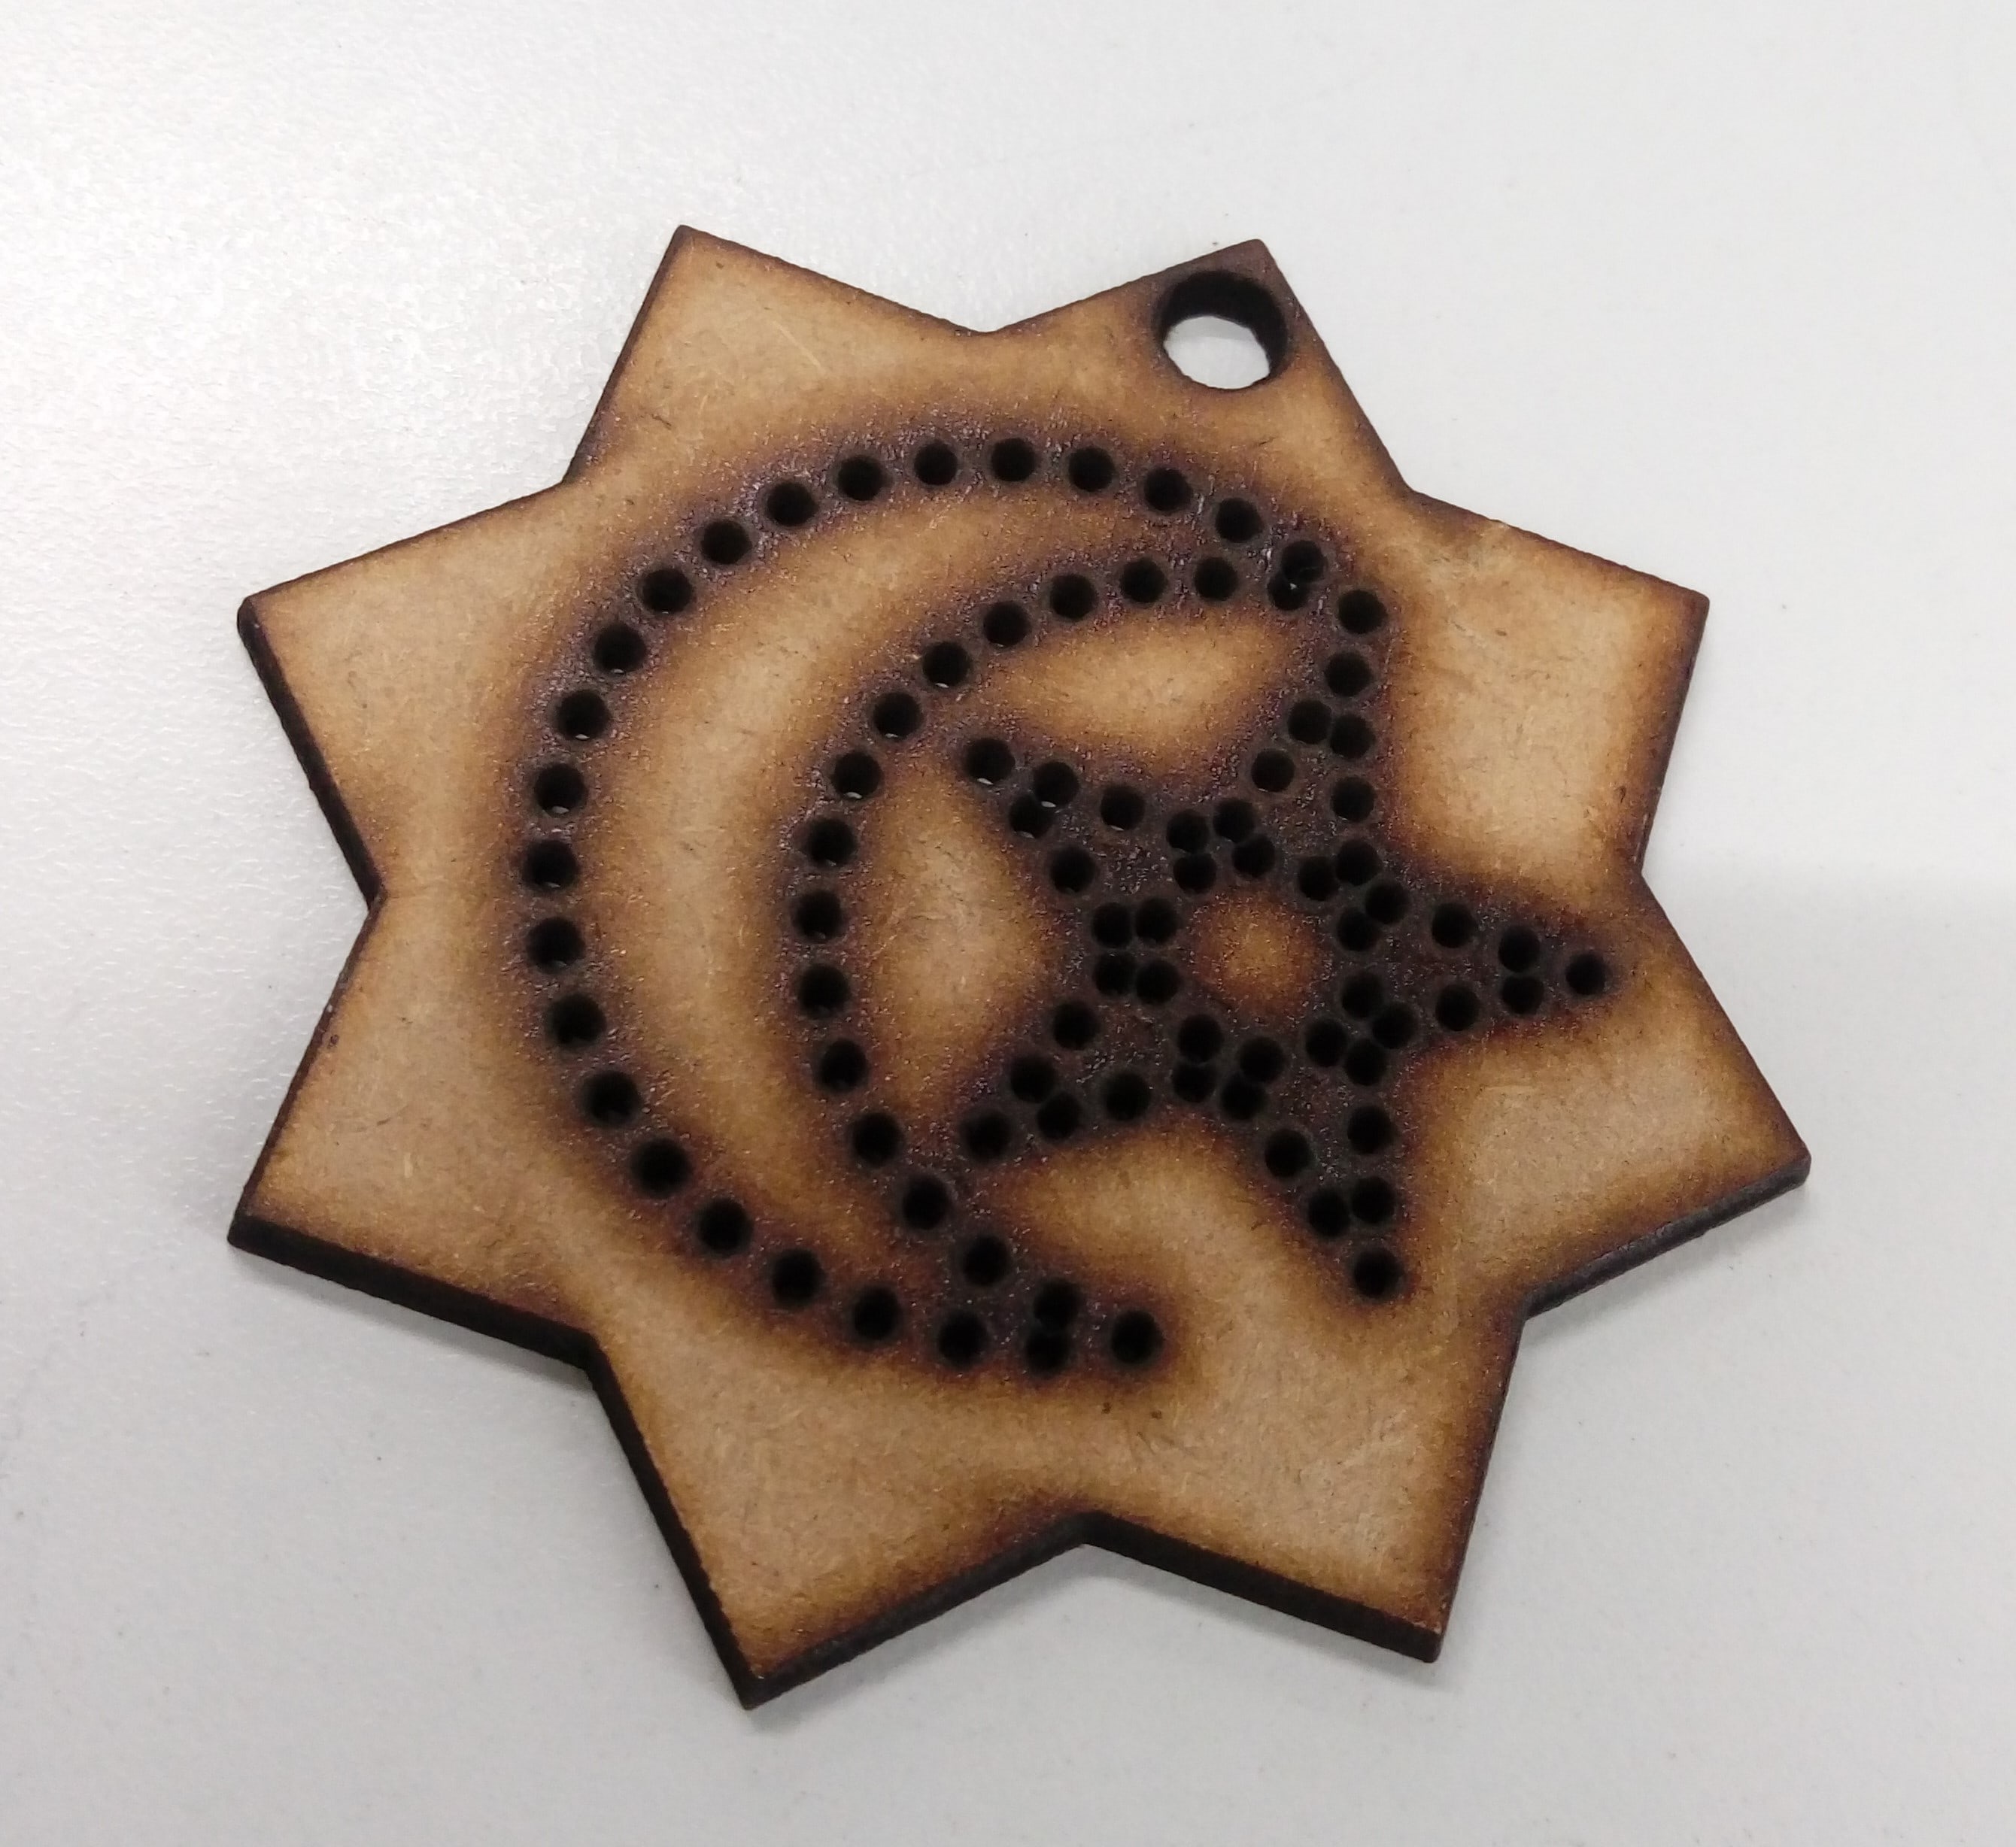
I also designed and cut another piece with just holes to freely embroider anything on it
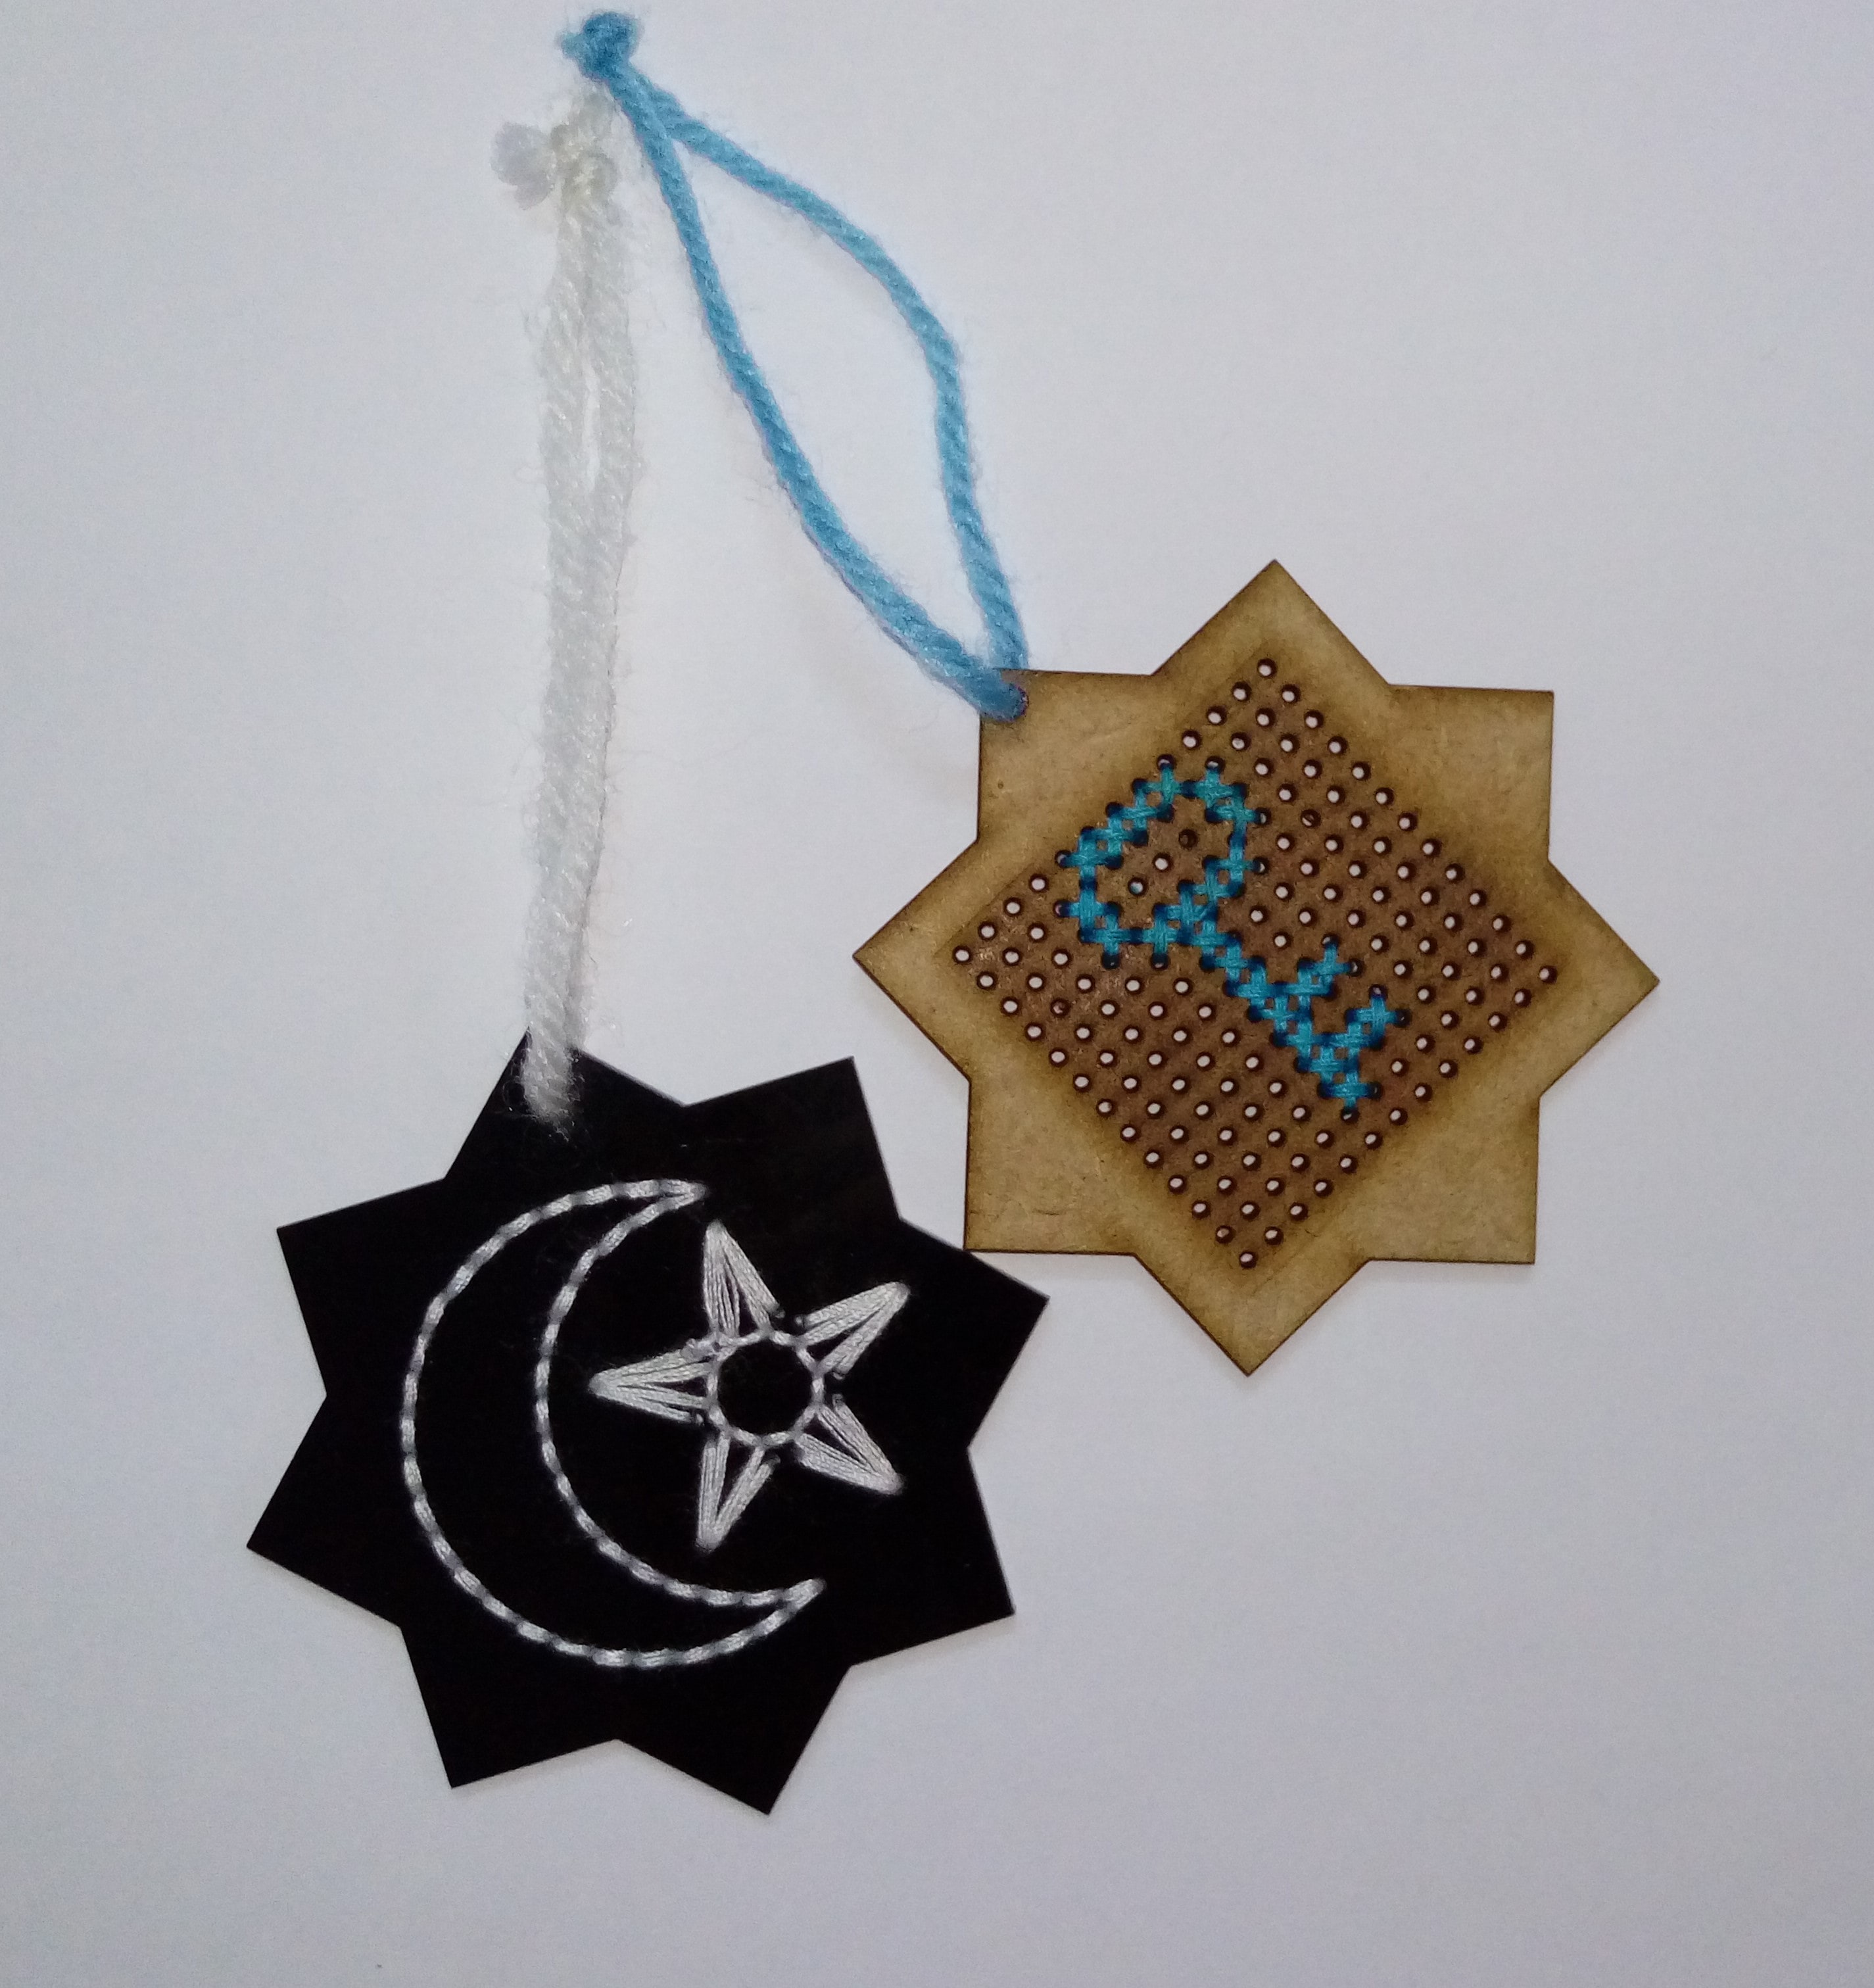
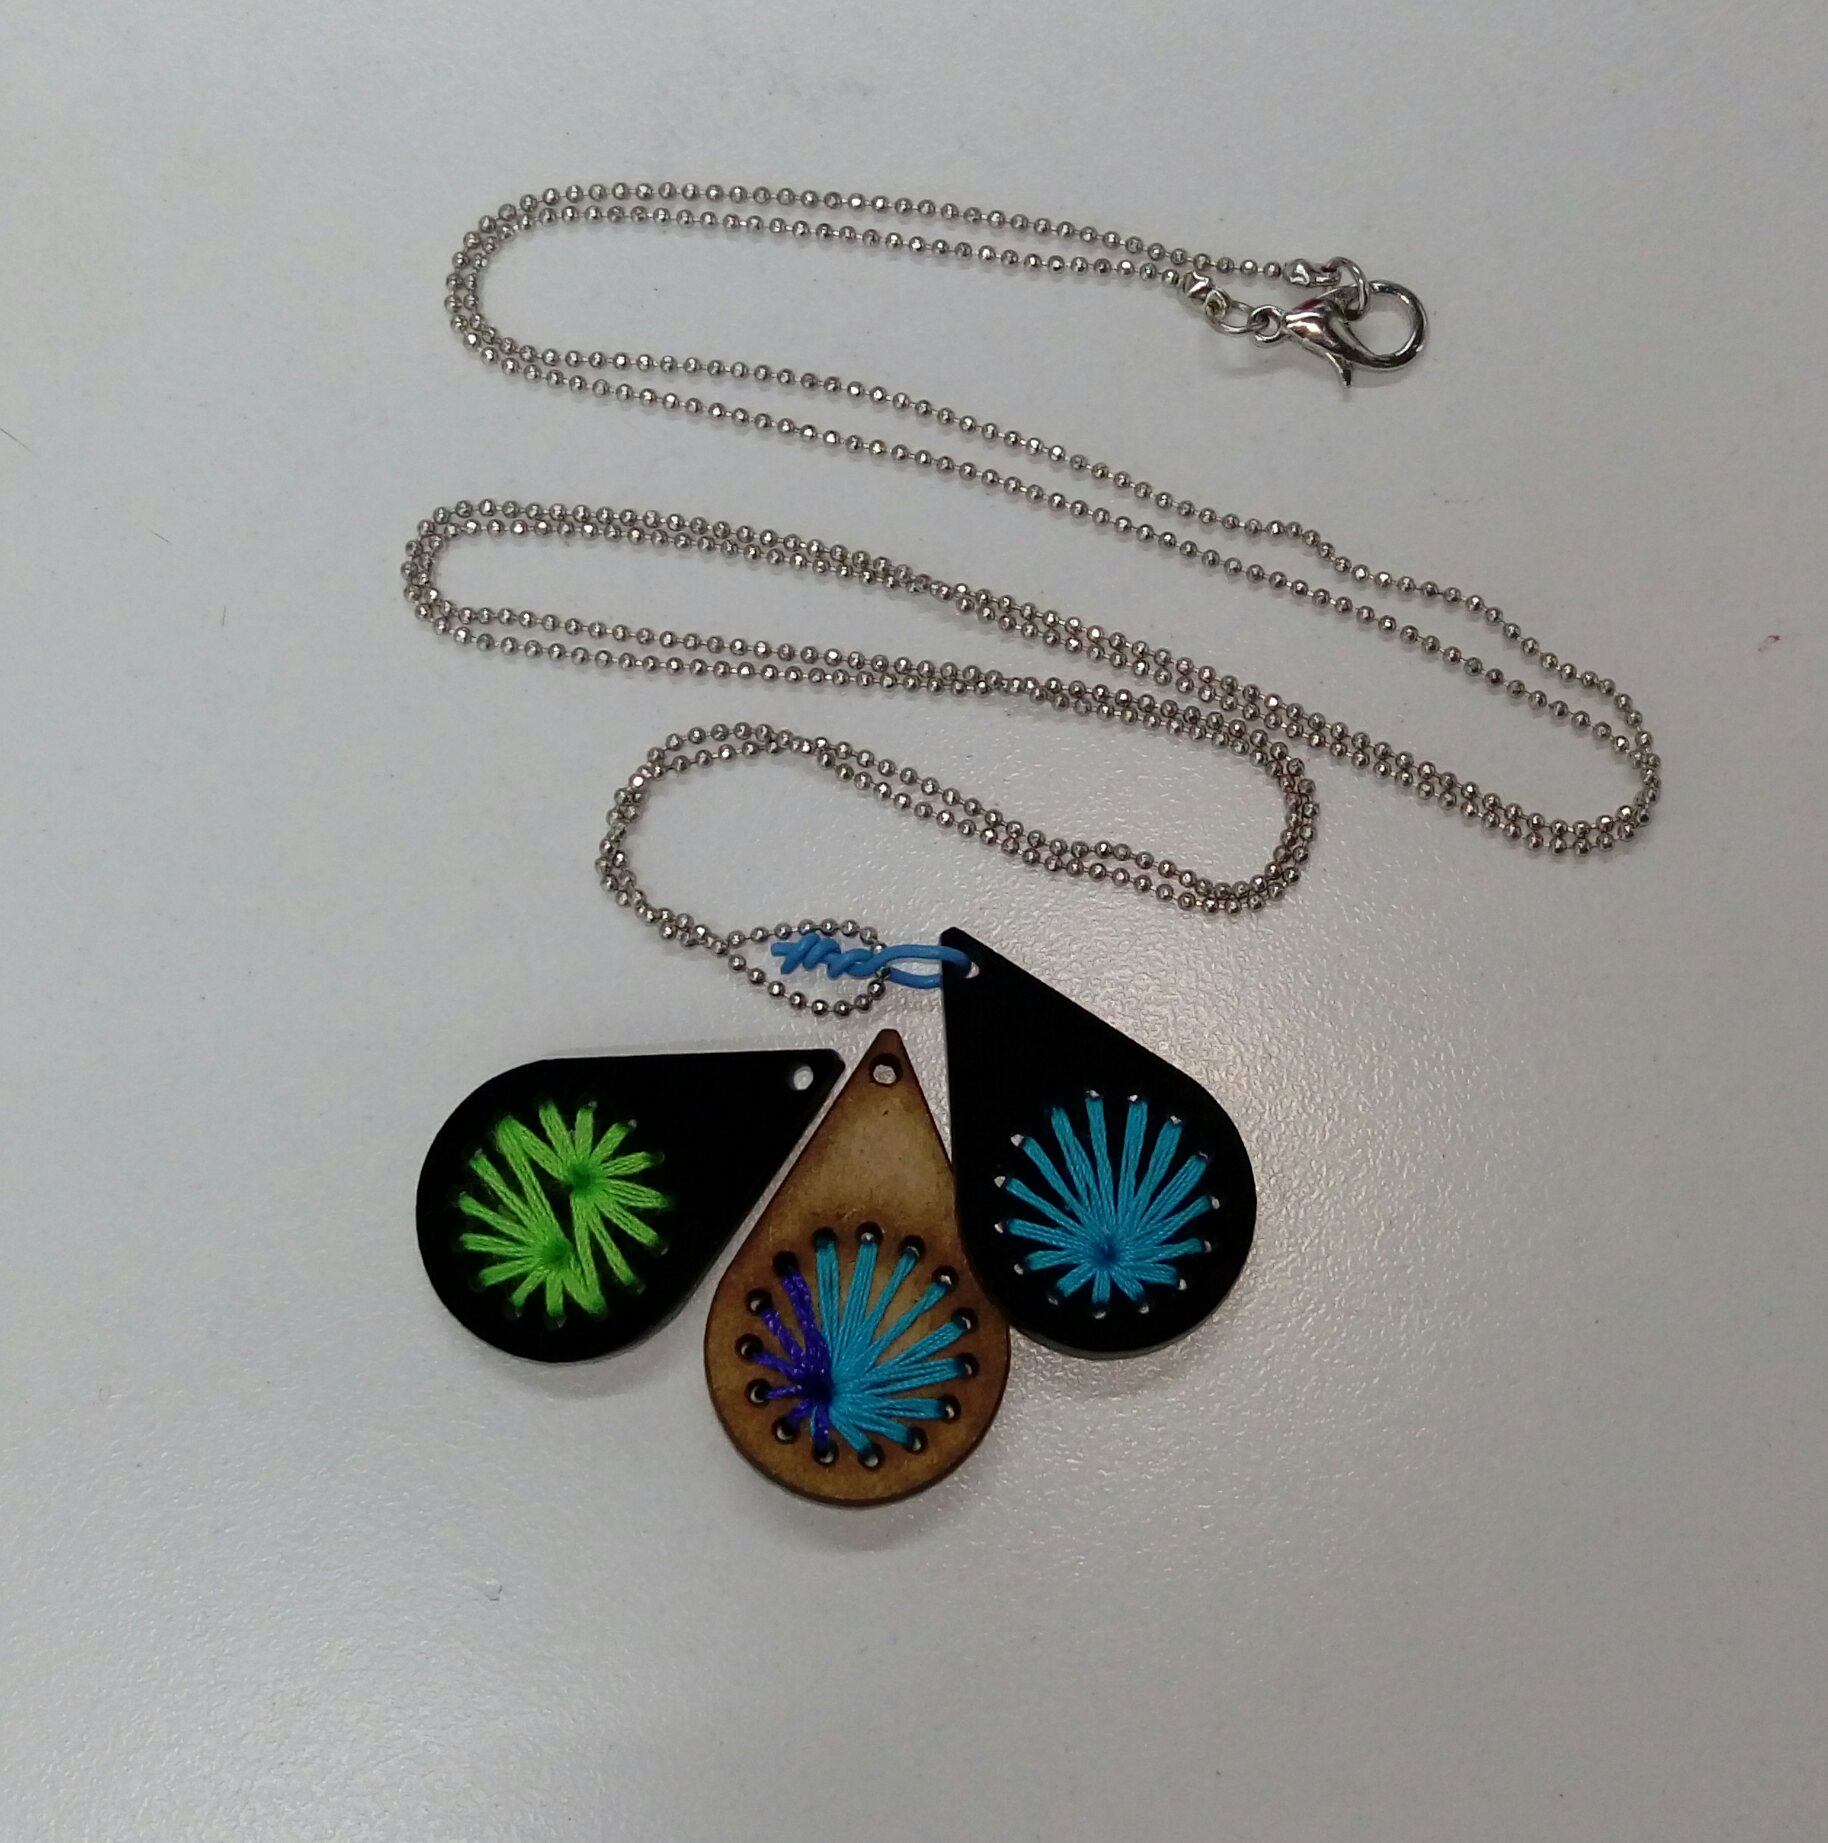
Finally, I manually embroidered some of cutted pieces and made cute keychaines:
I repeatied the same procedure to produce these necklaces:
In the previous part I randomly determined the holes' diameters and the stitch sizes. In this section, I chose to work with cross stitch and I tried to use different needle sizes with different threads' sizes, then I tried to make relations in my designs between needle size, hole's diameter and stitch's size.
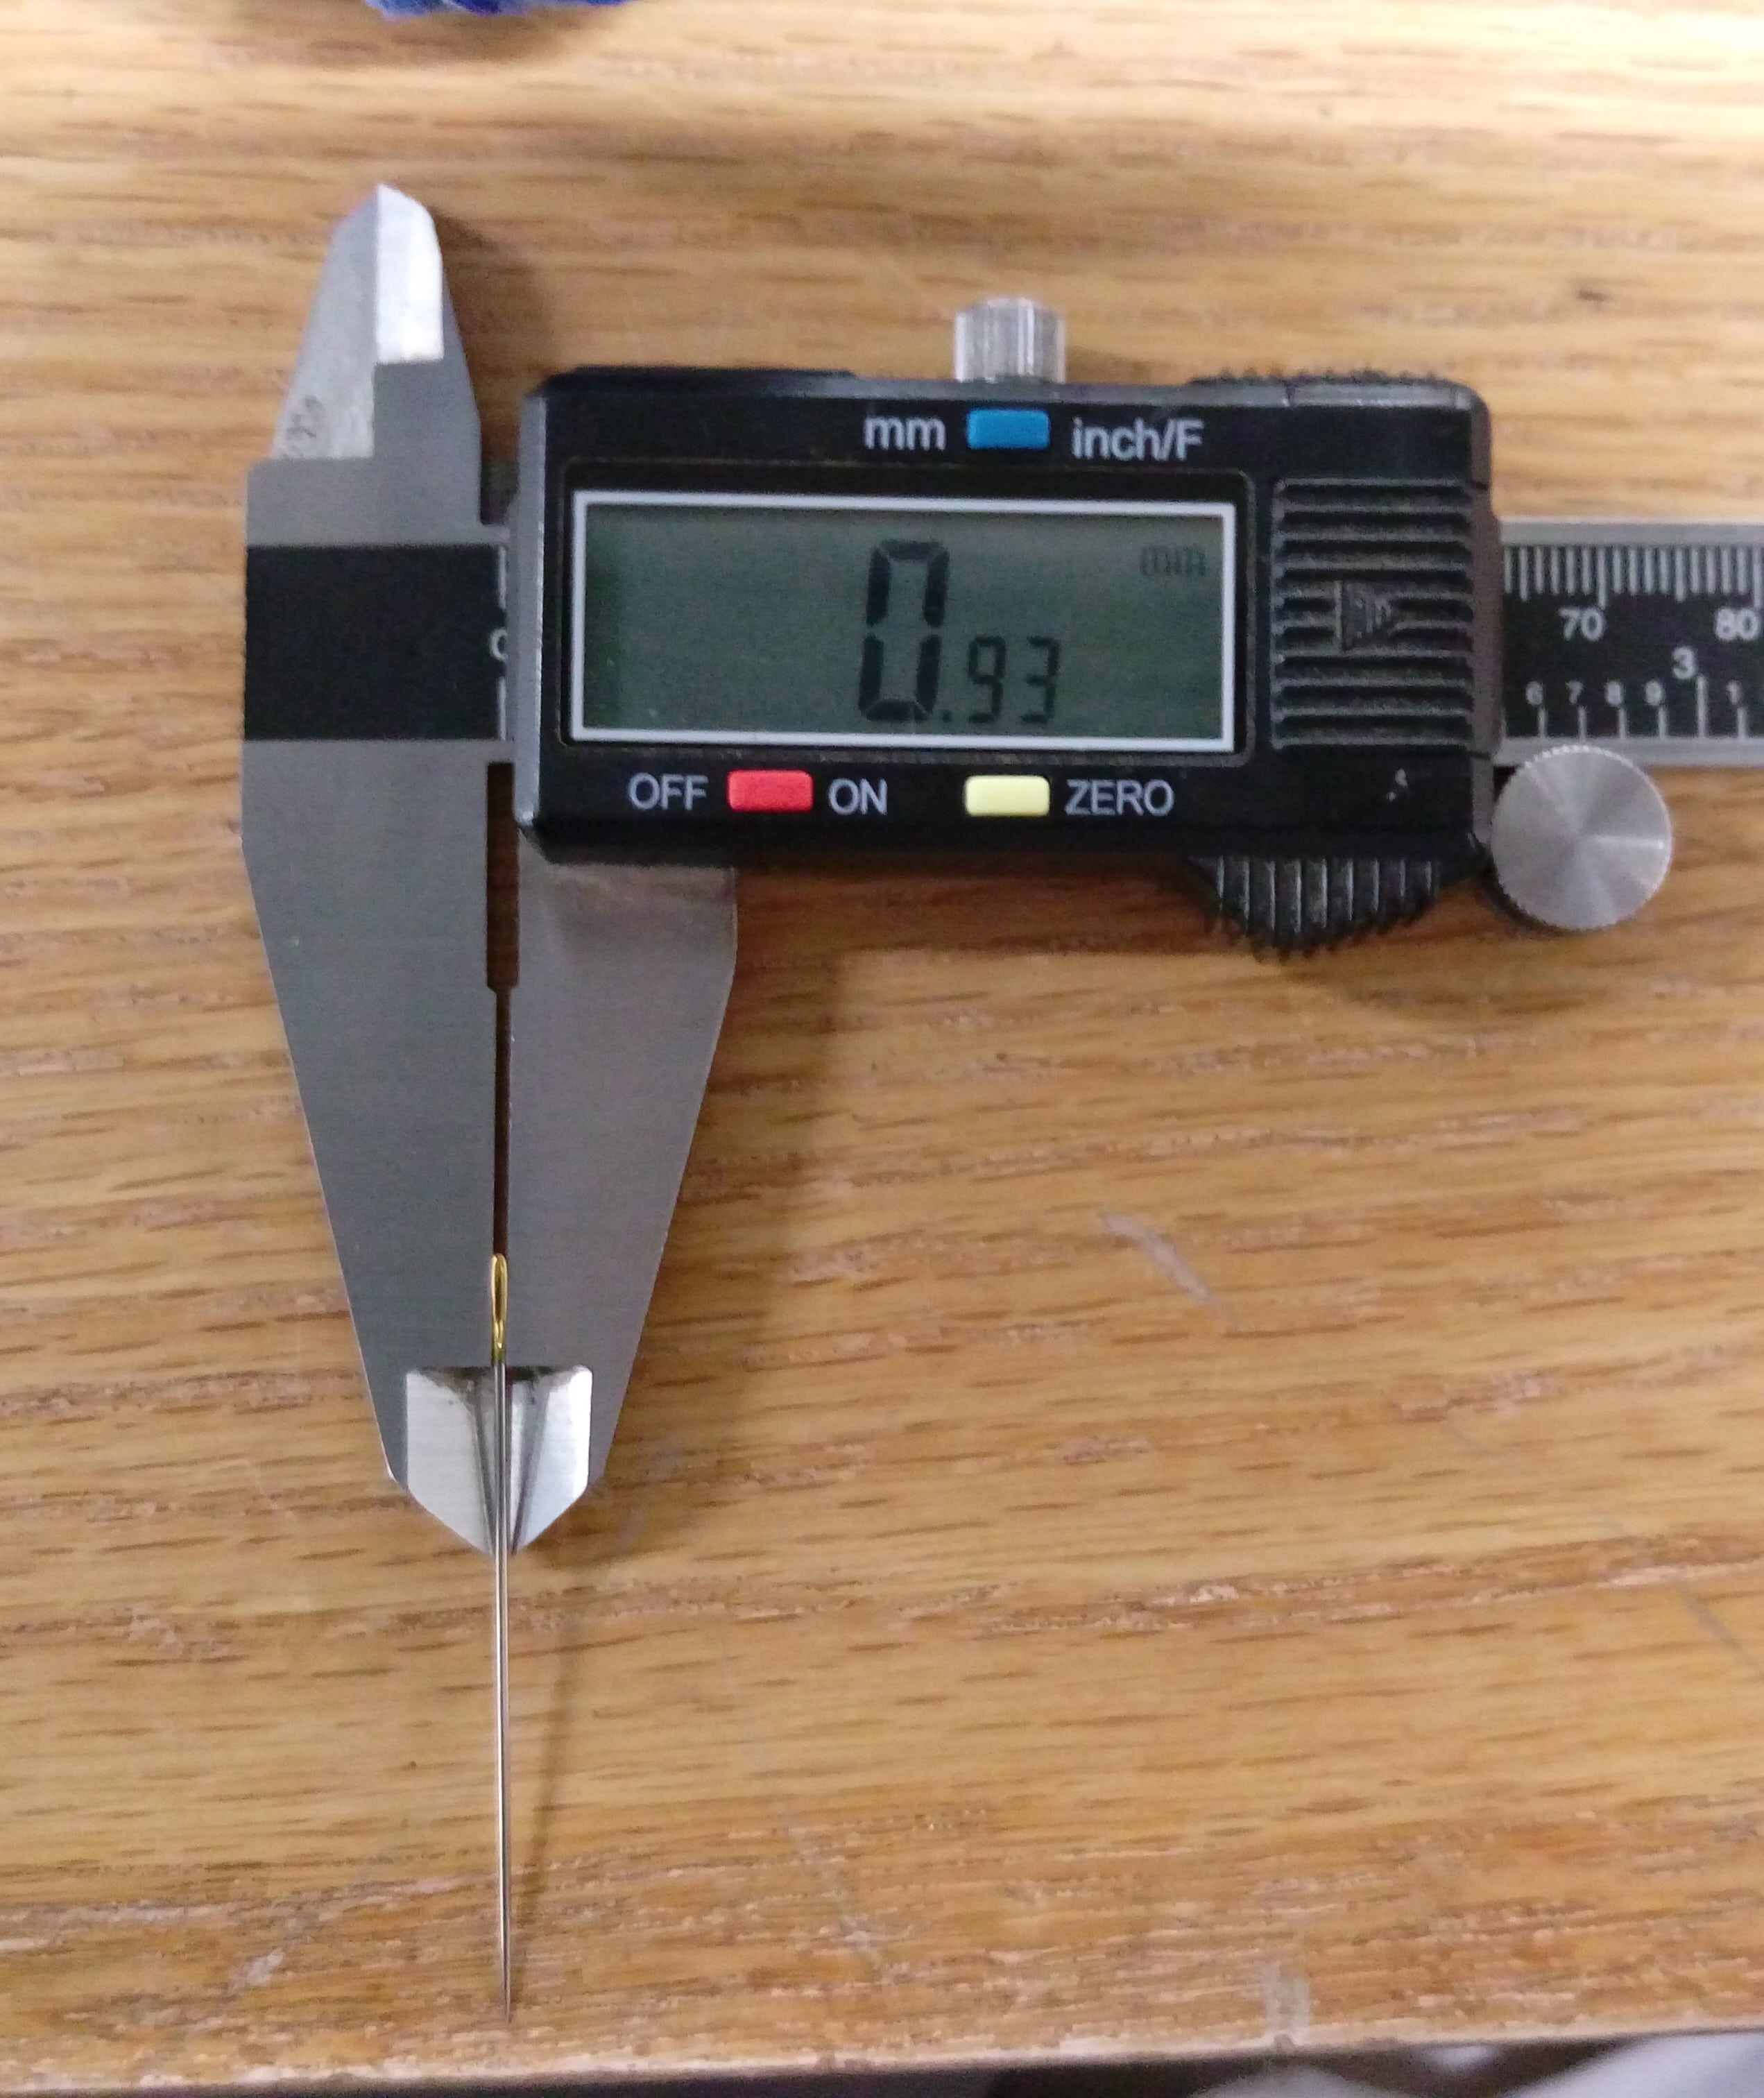
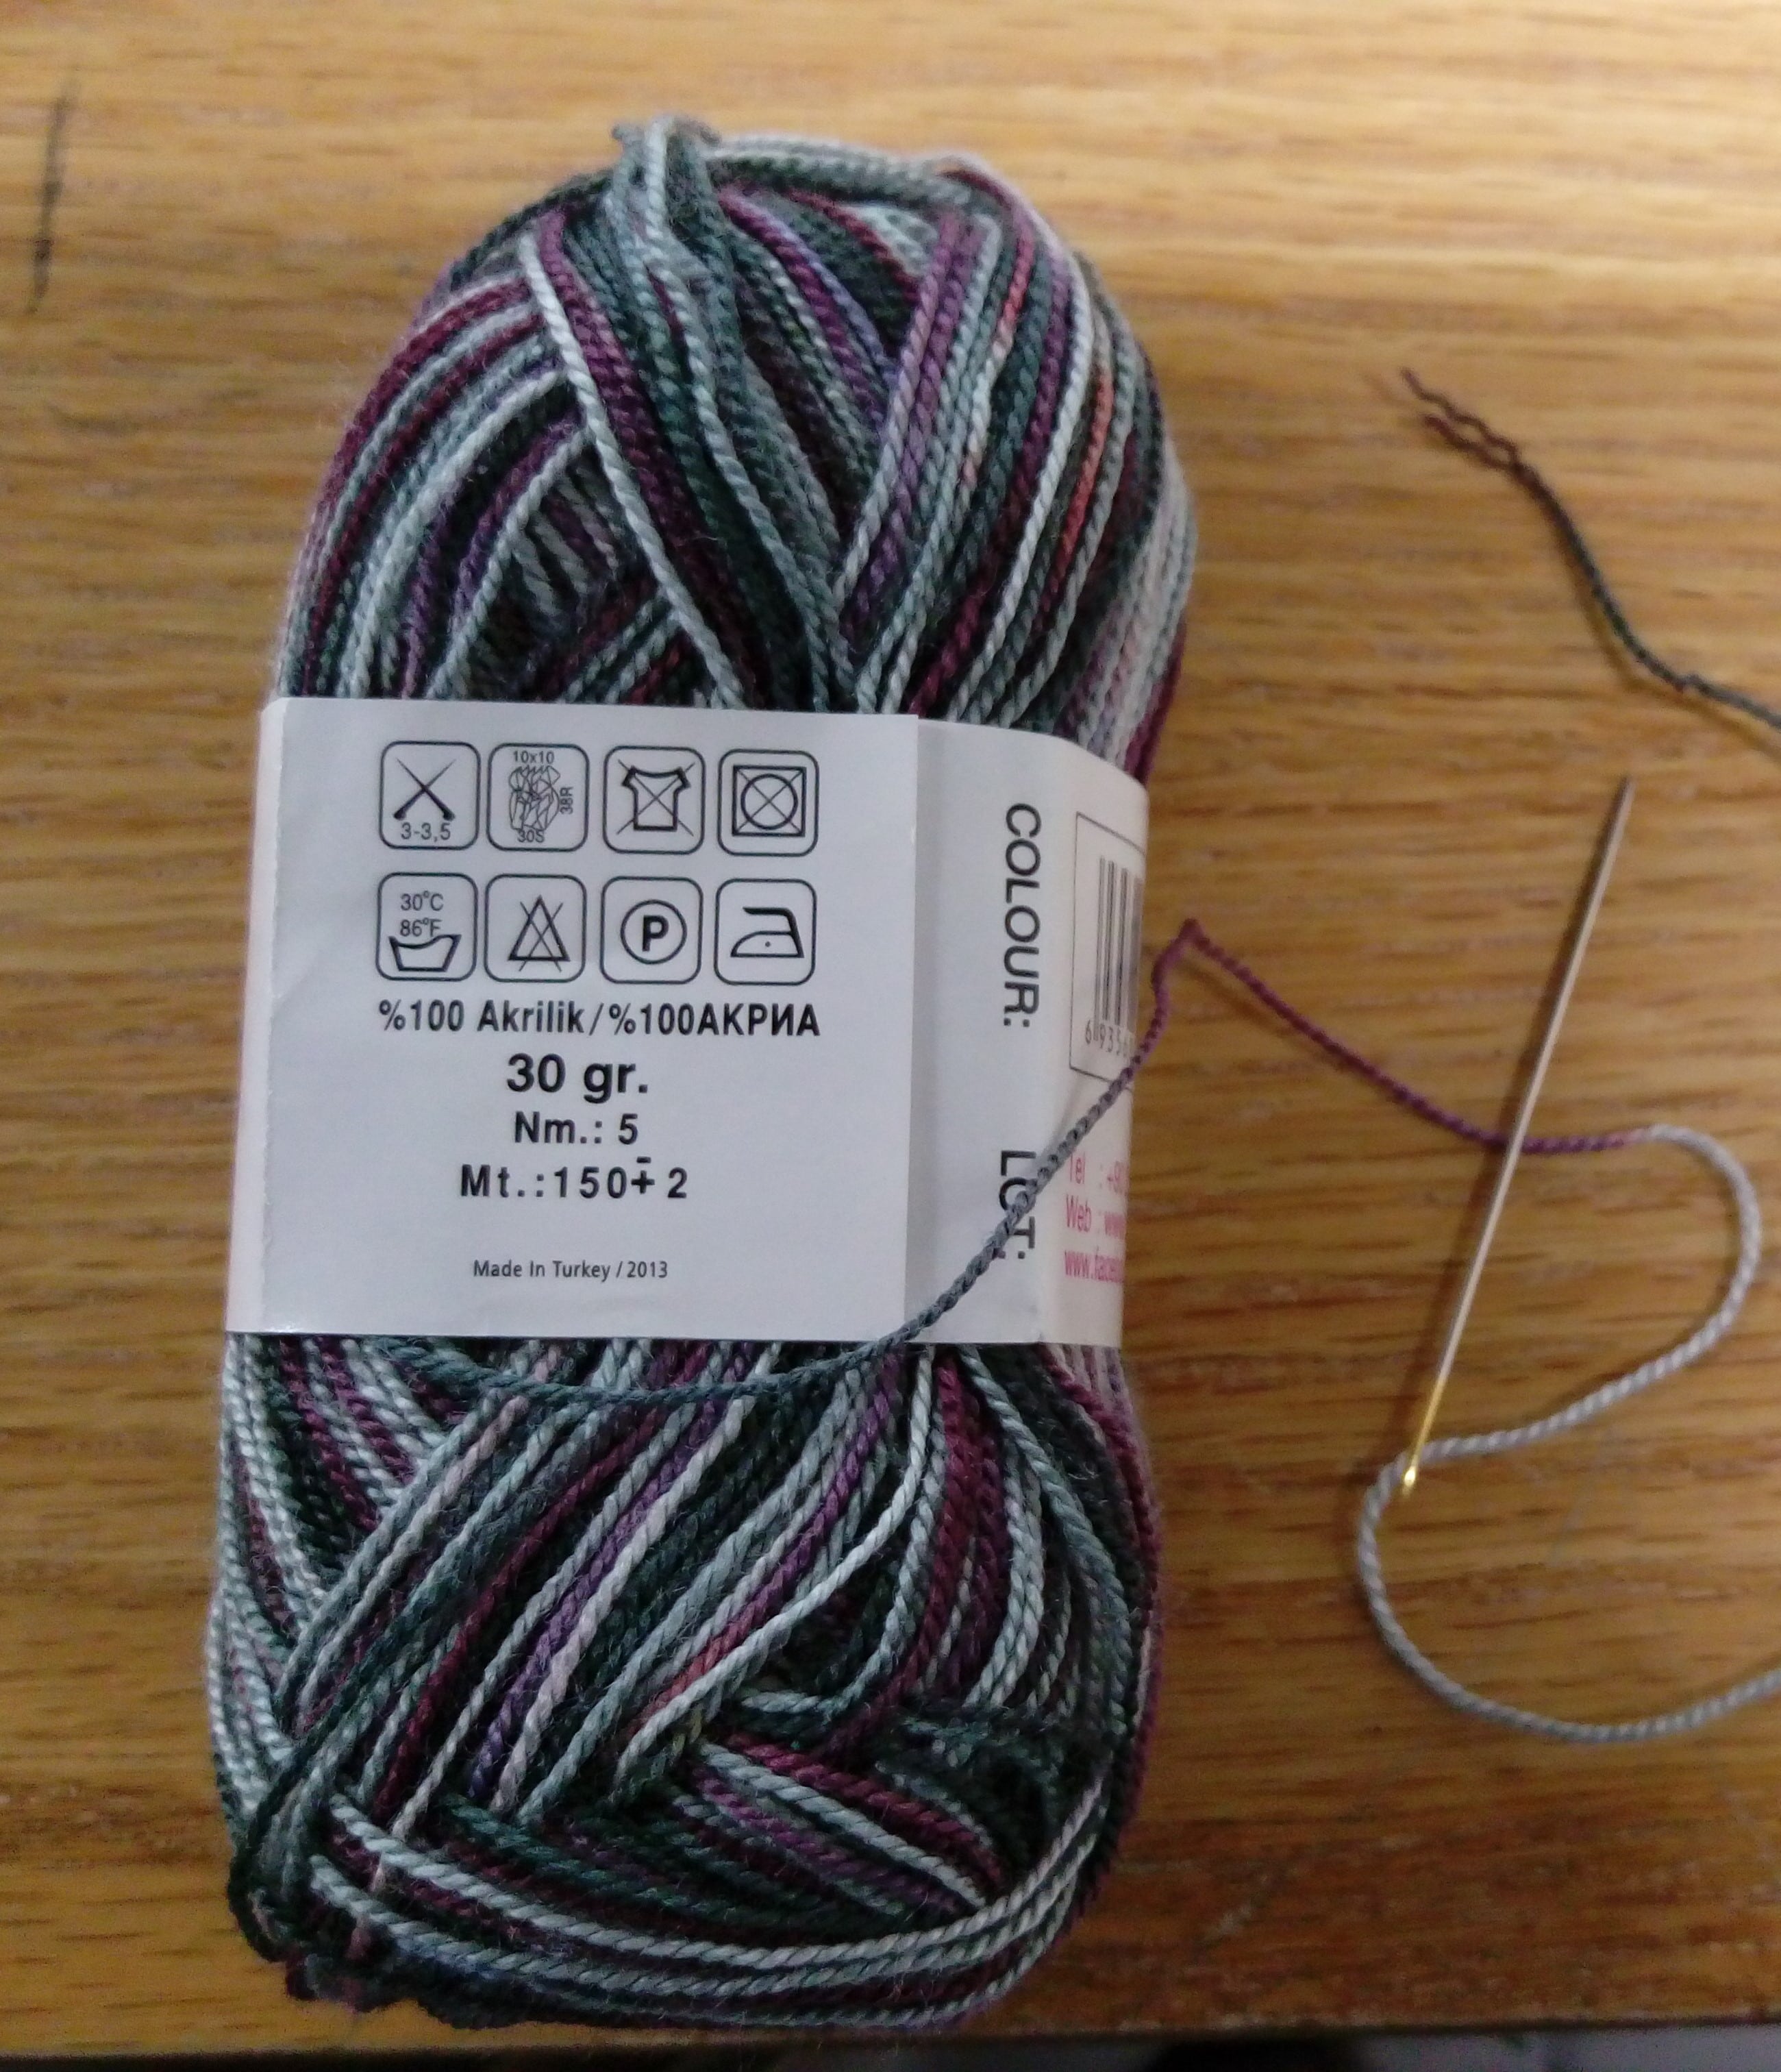
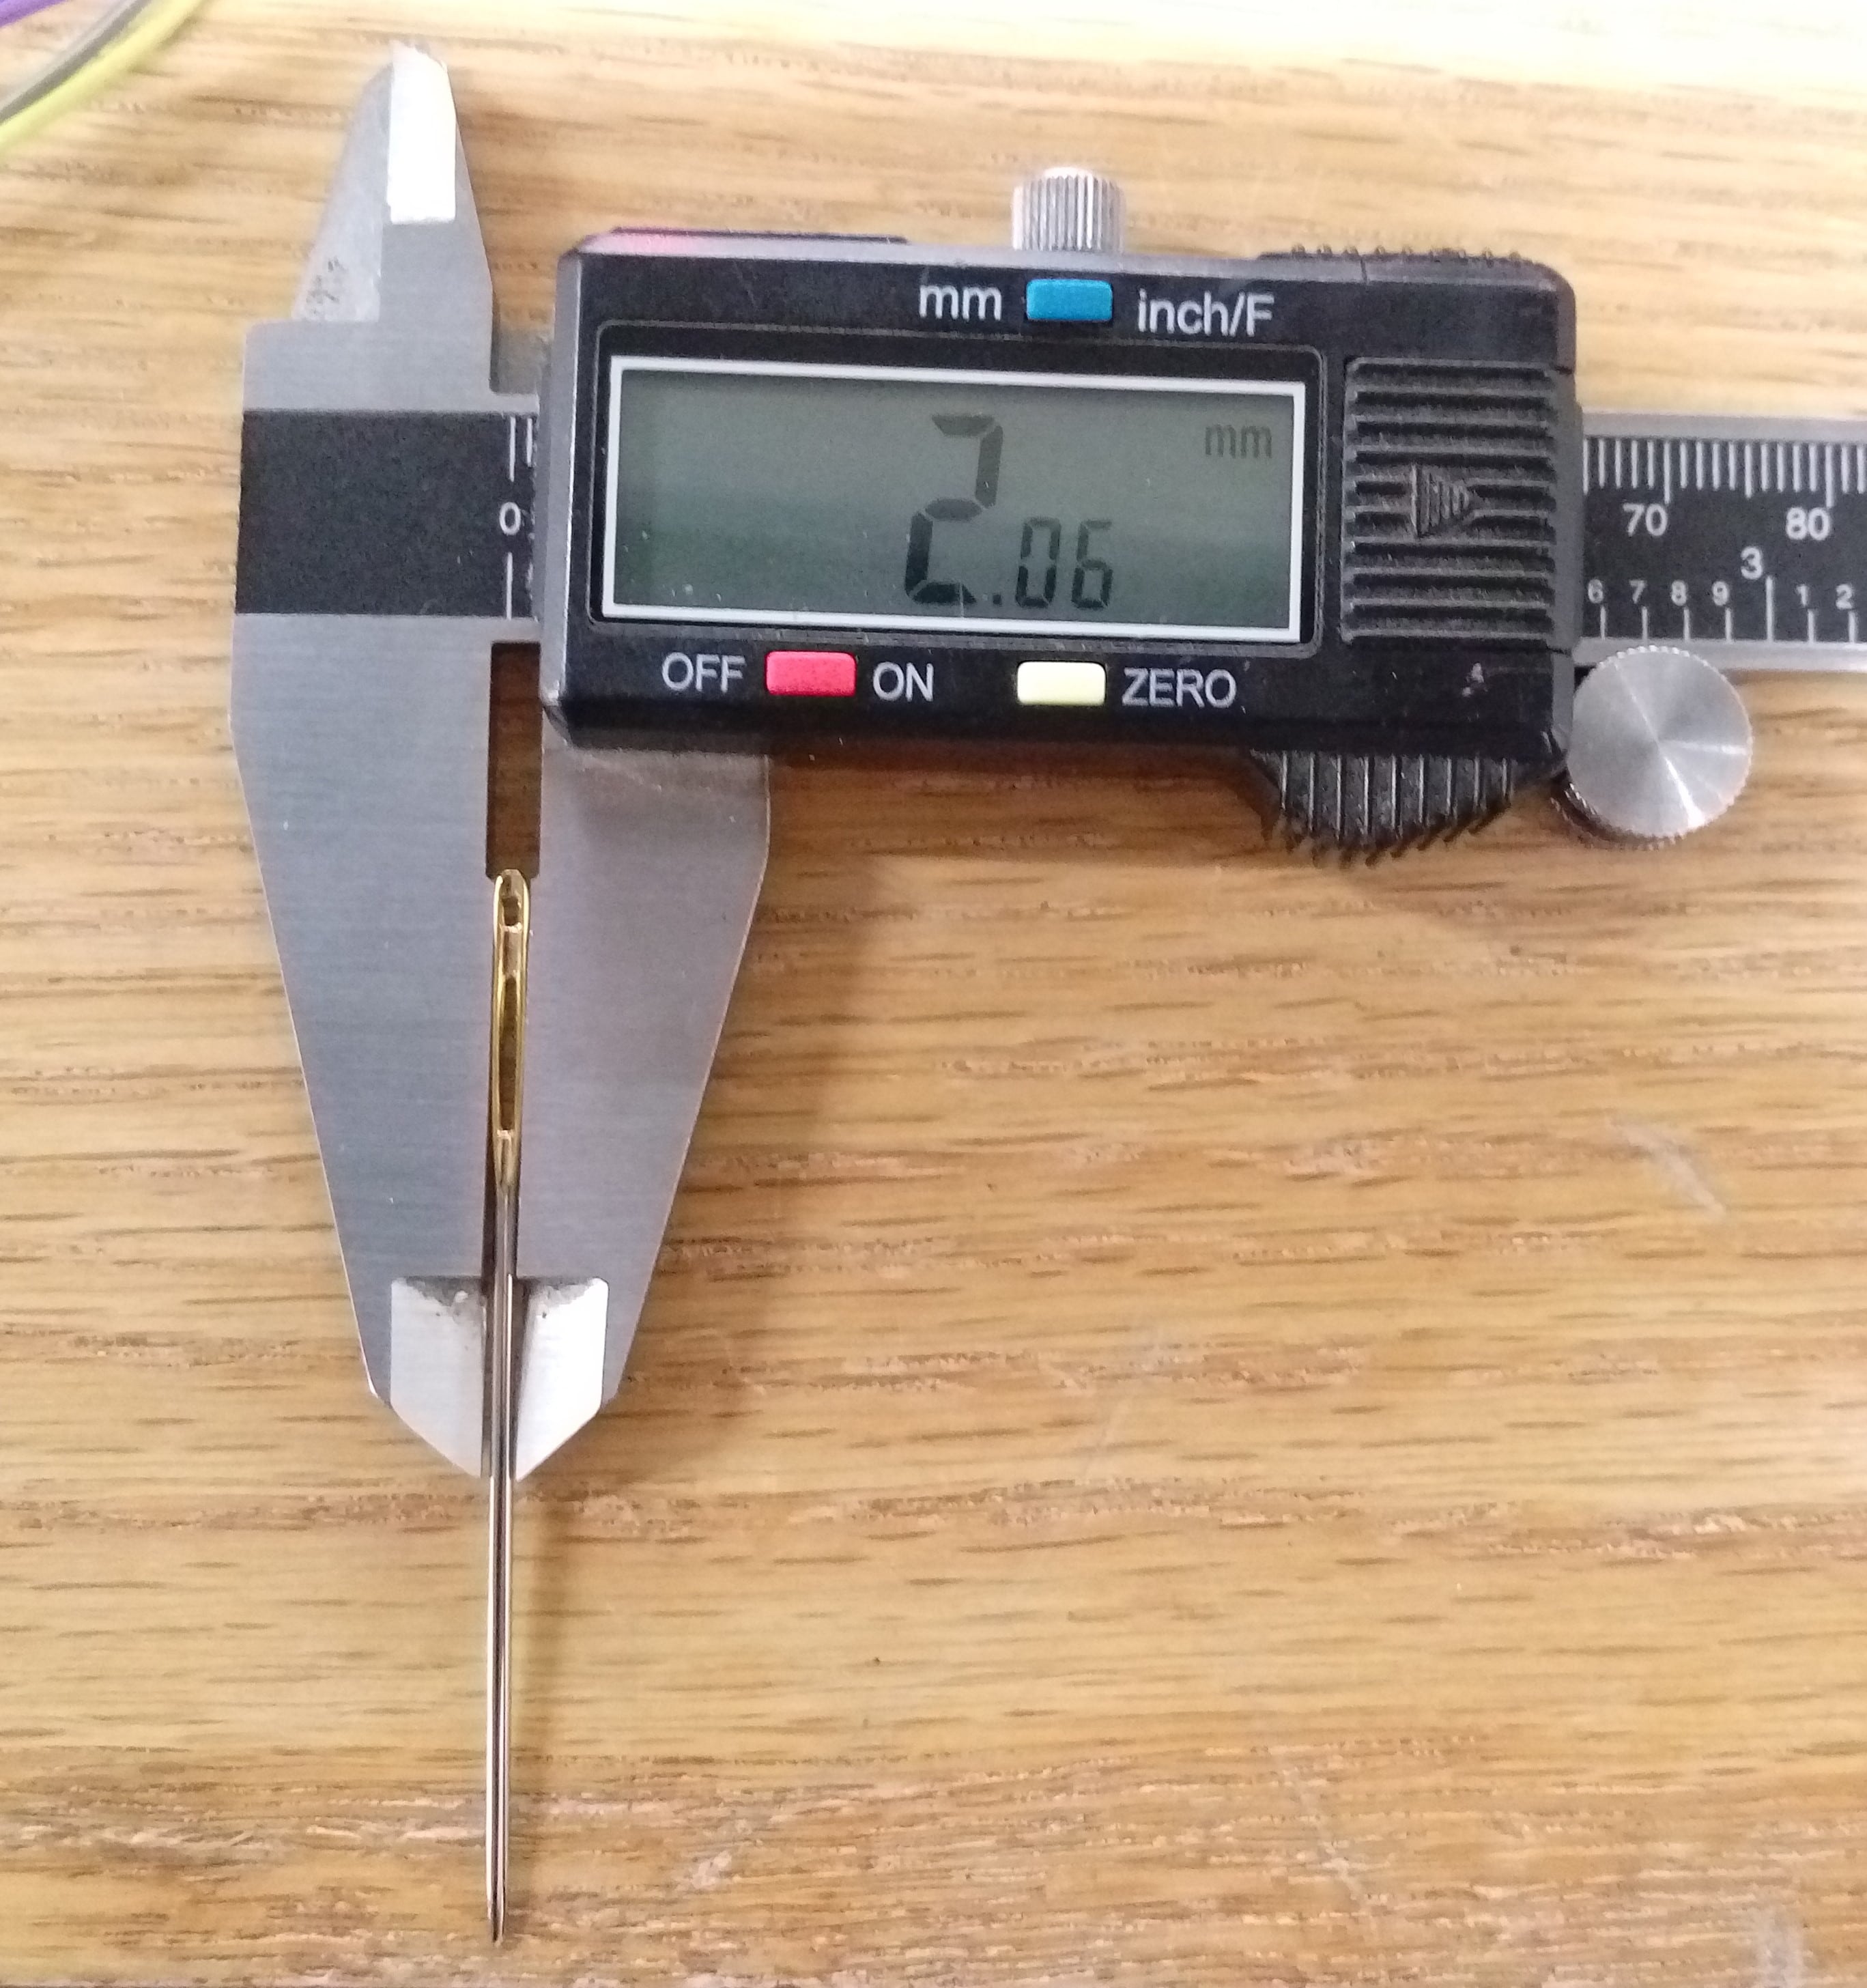
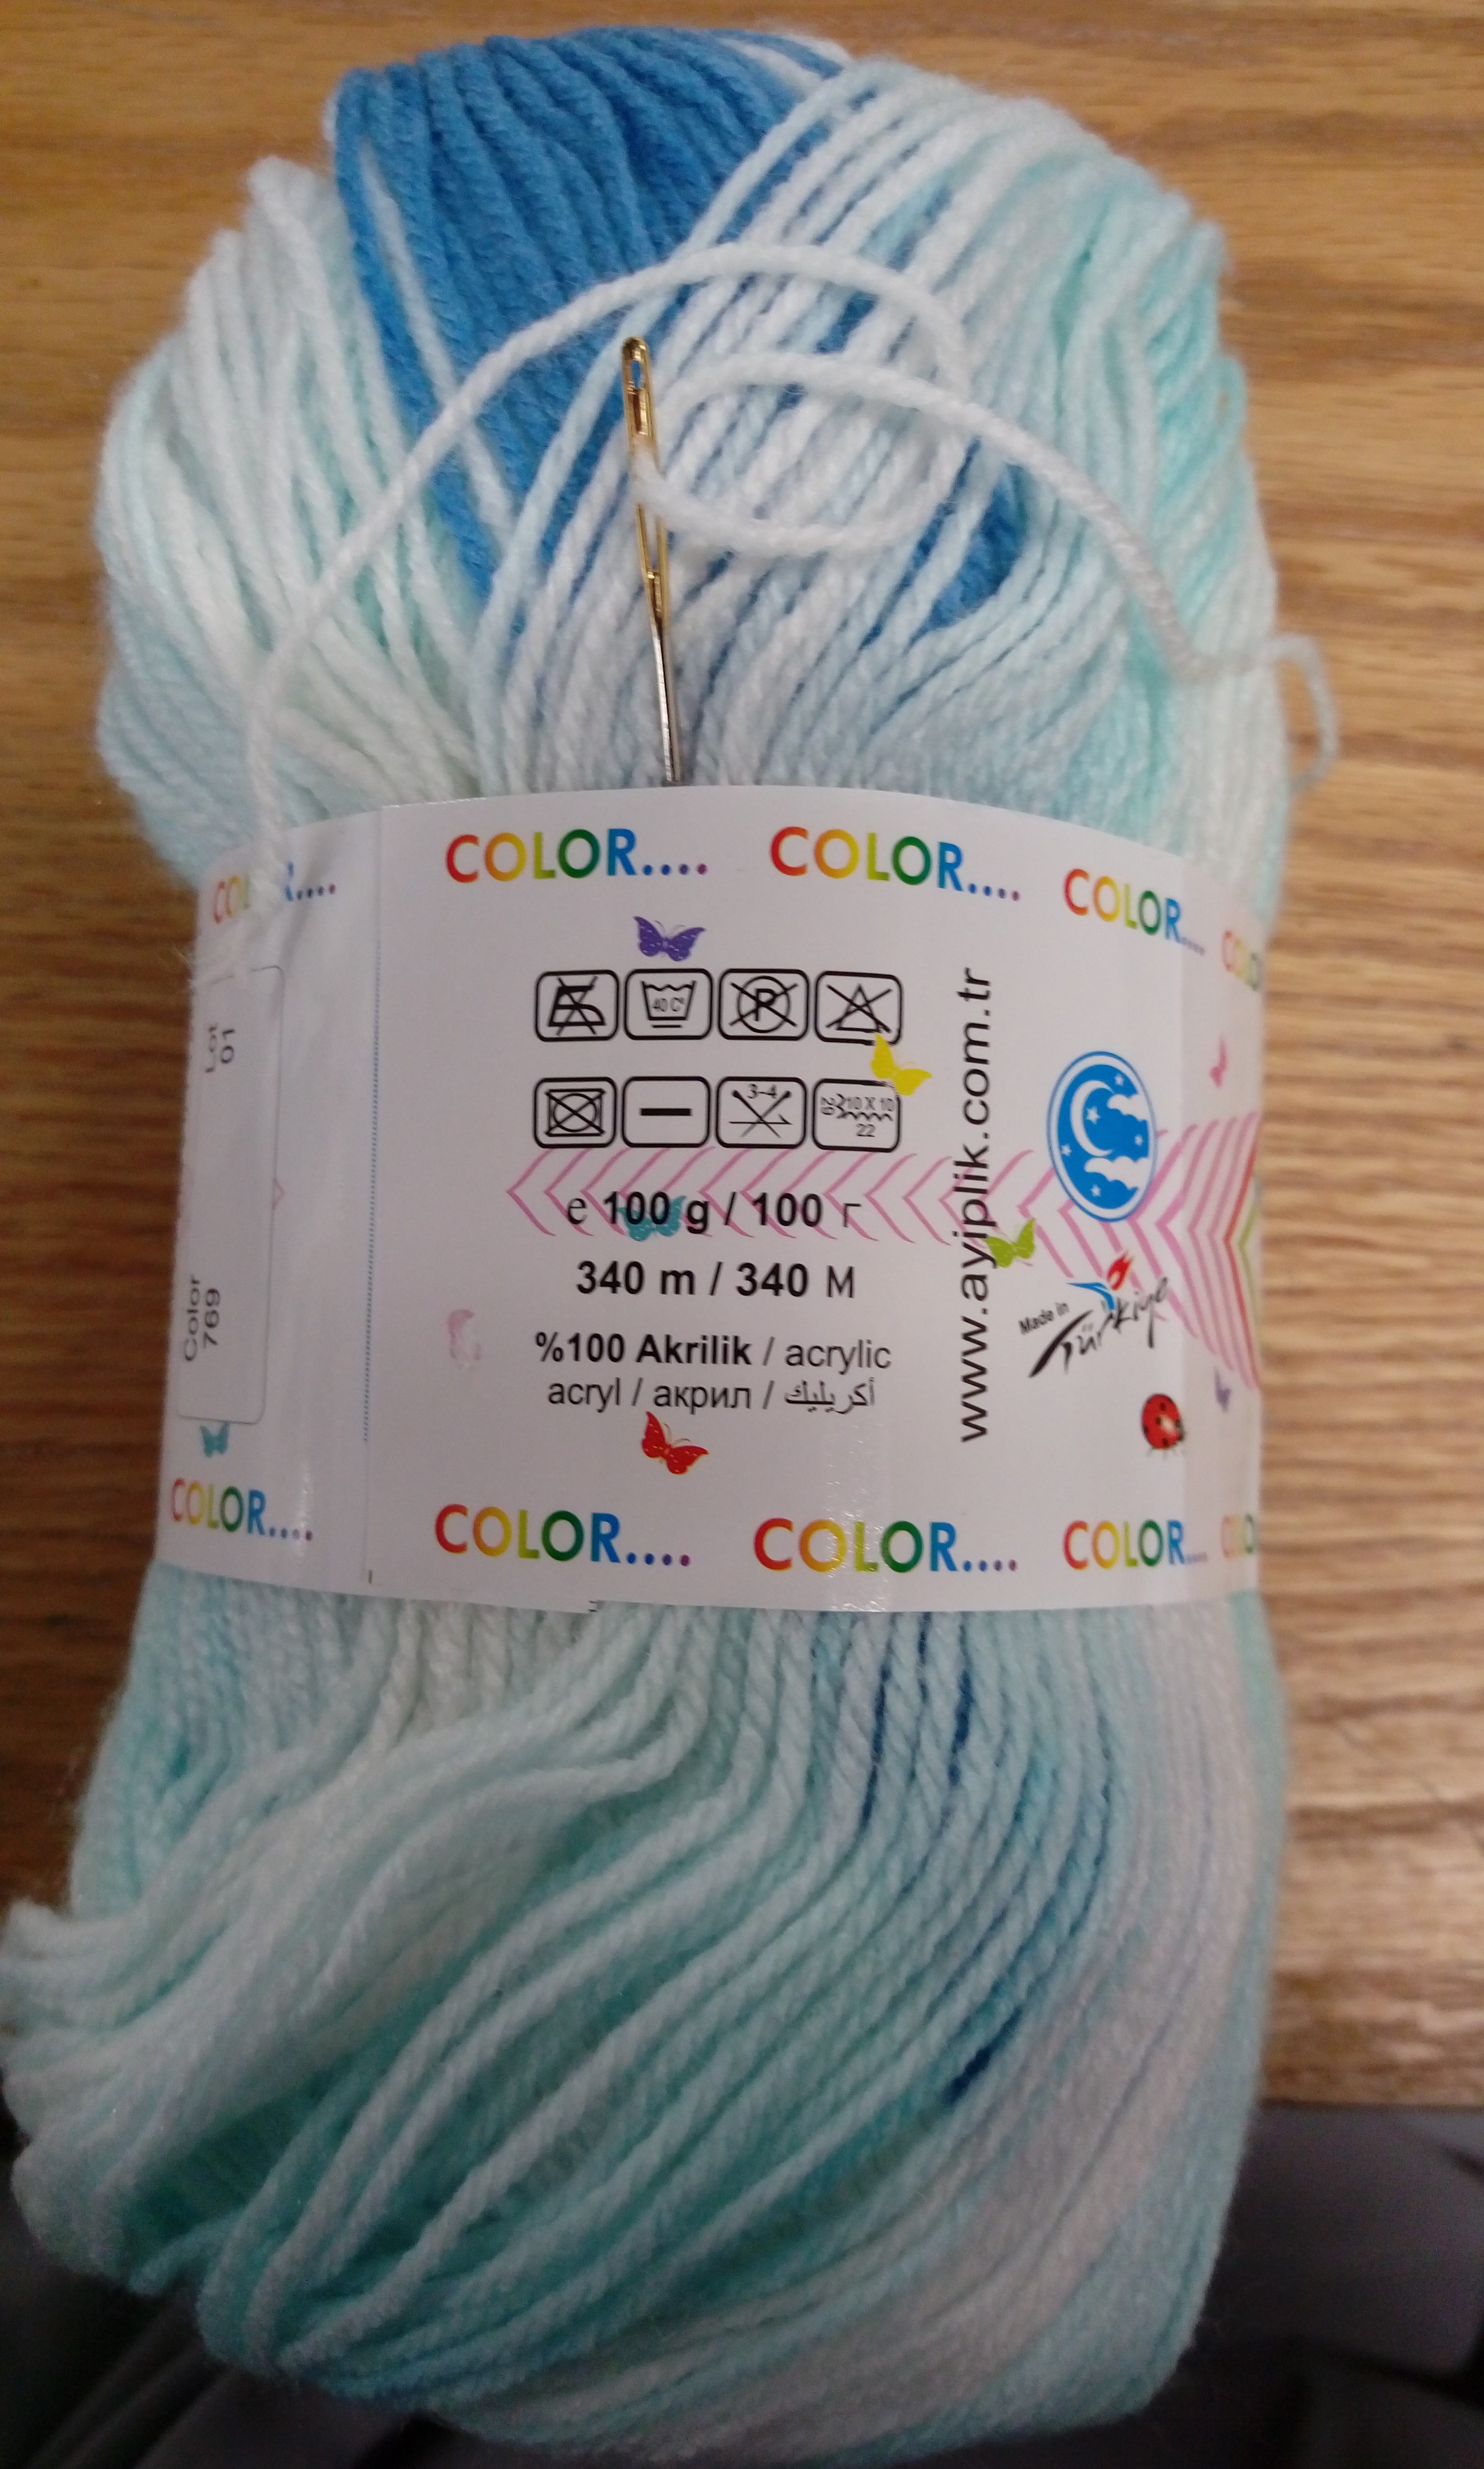
I used three different threads and needles as shown in the following pictures.
The first group has shown thread and needle size:
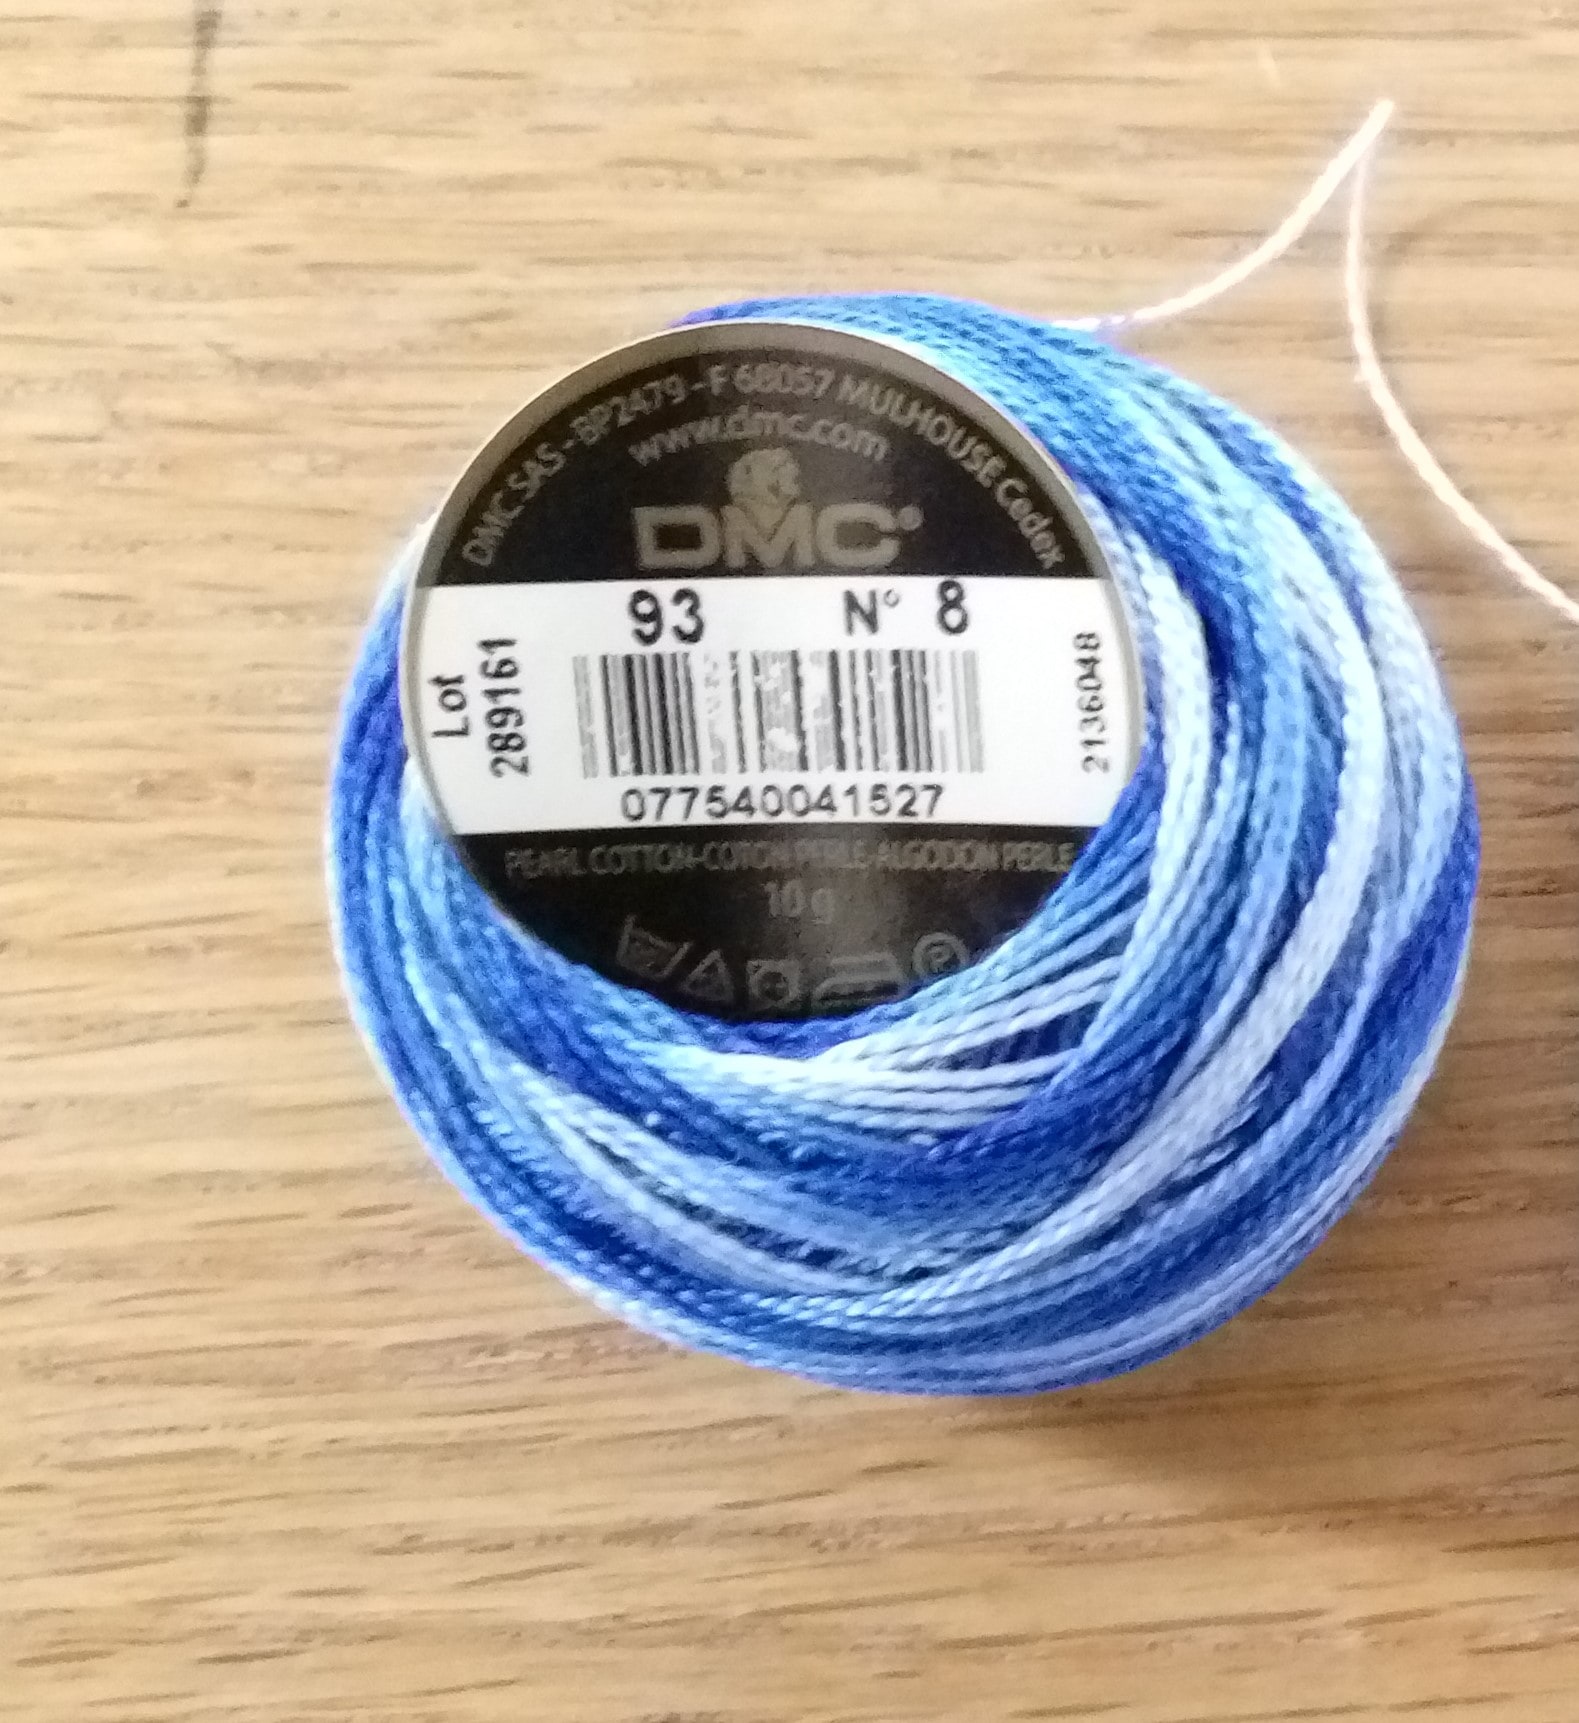
The Second group has shown thread and needle size:
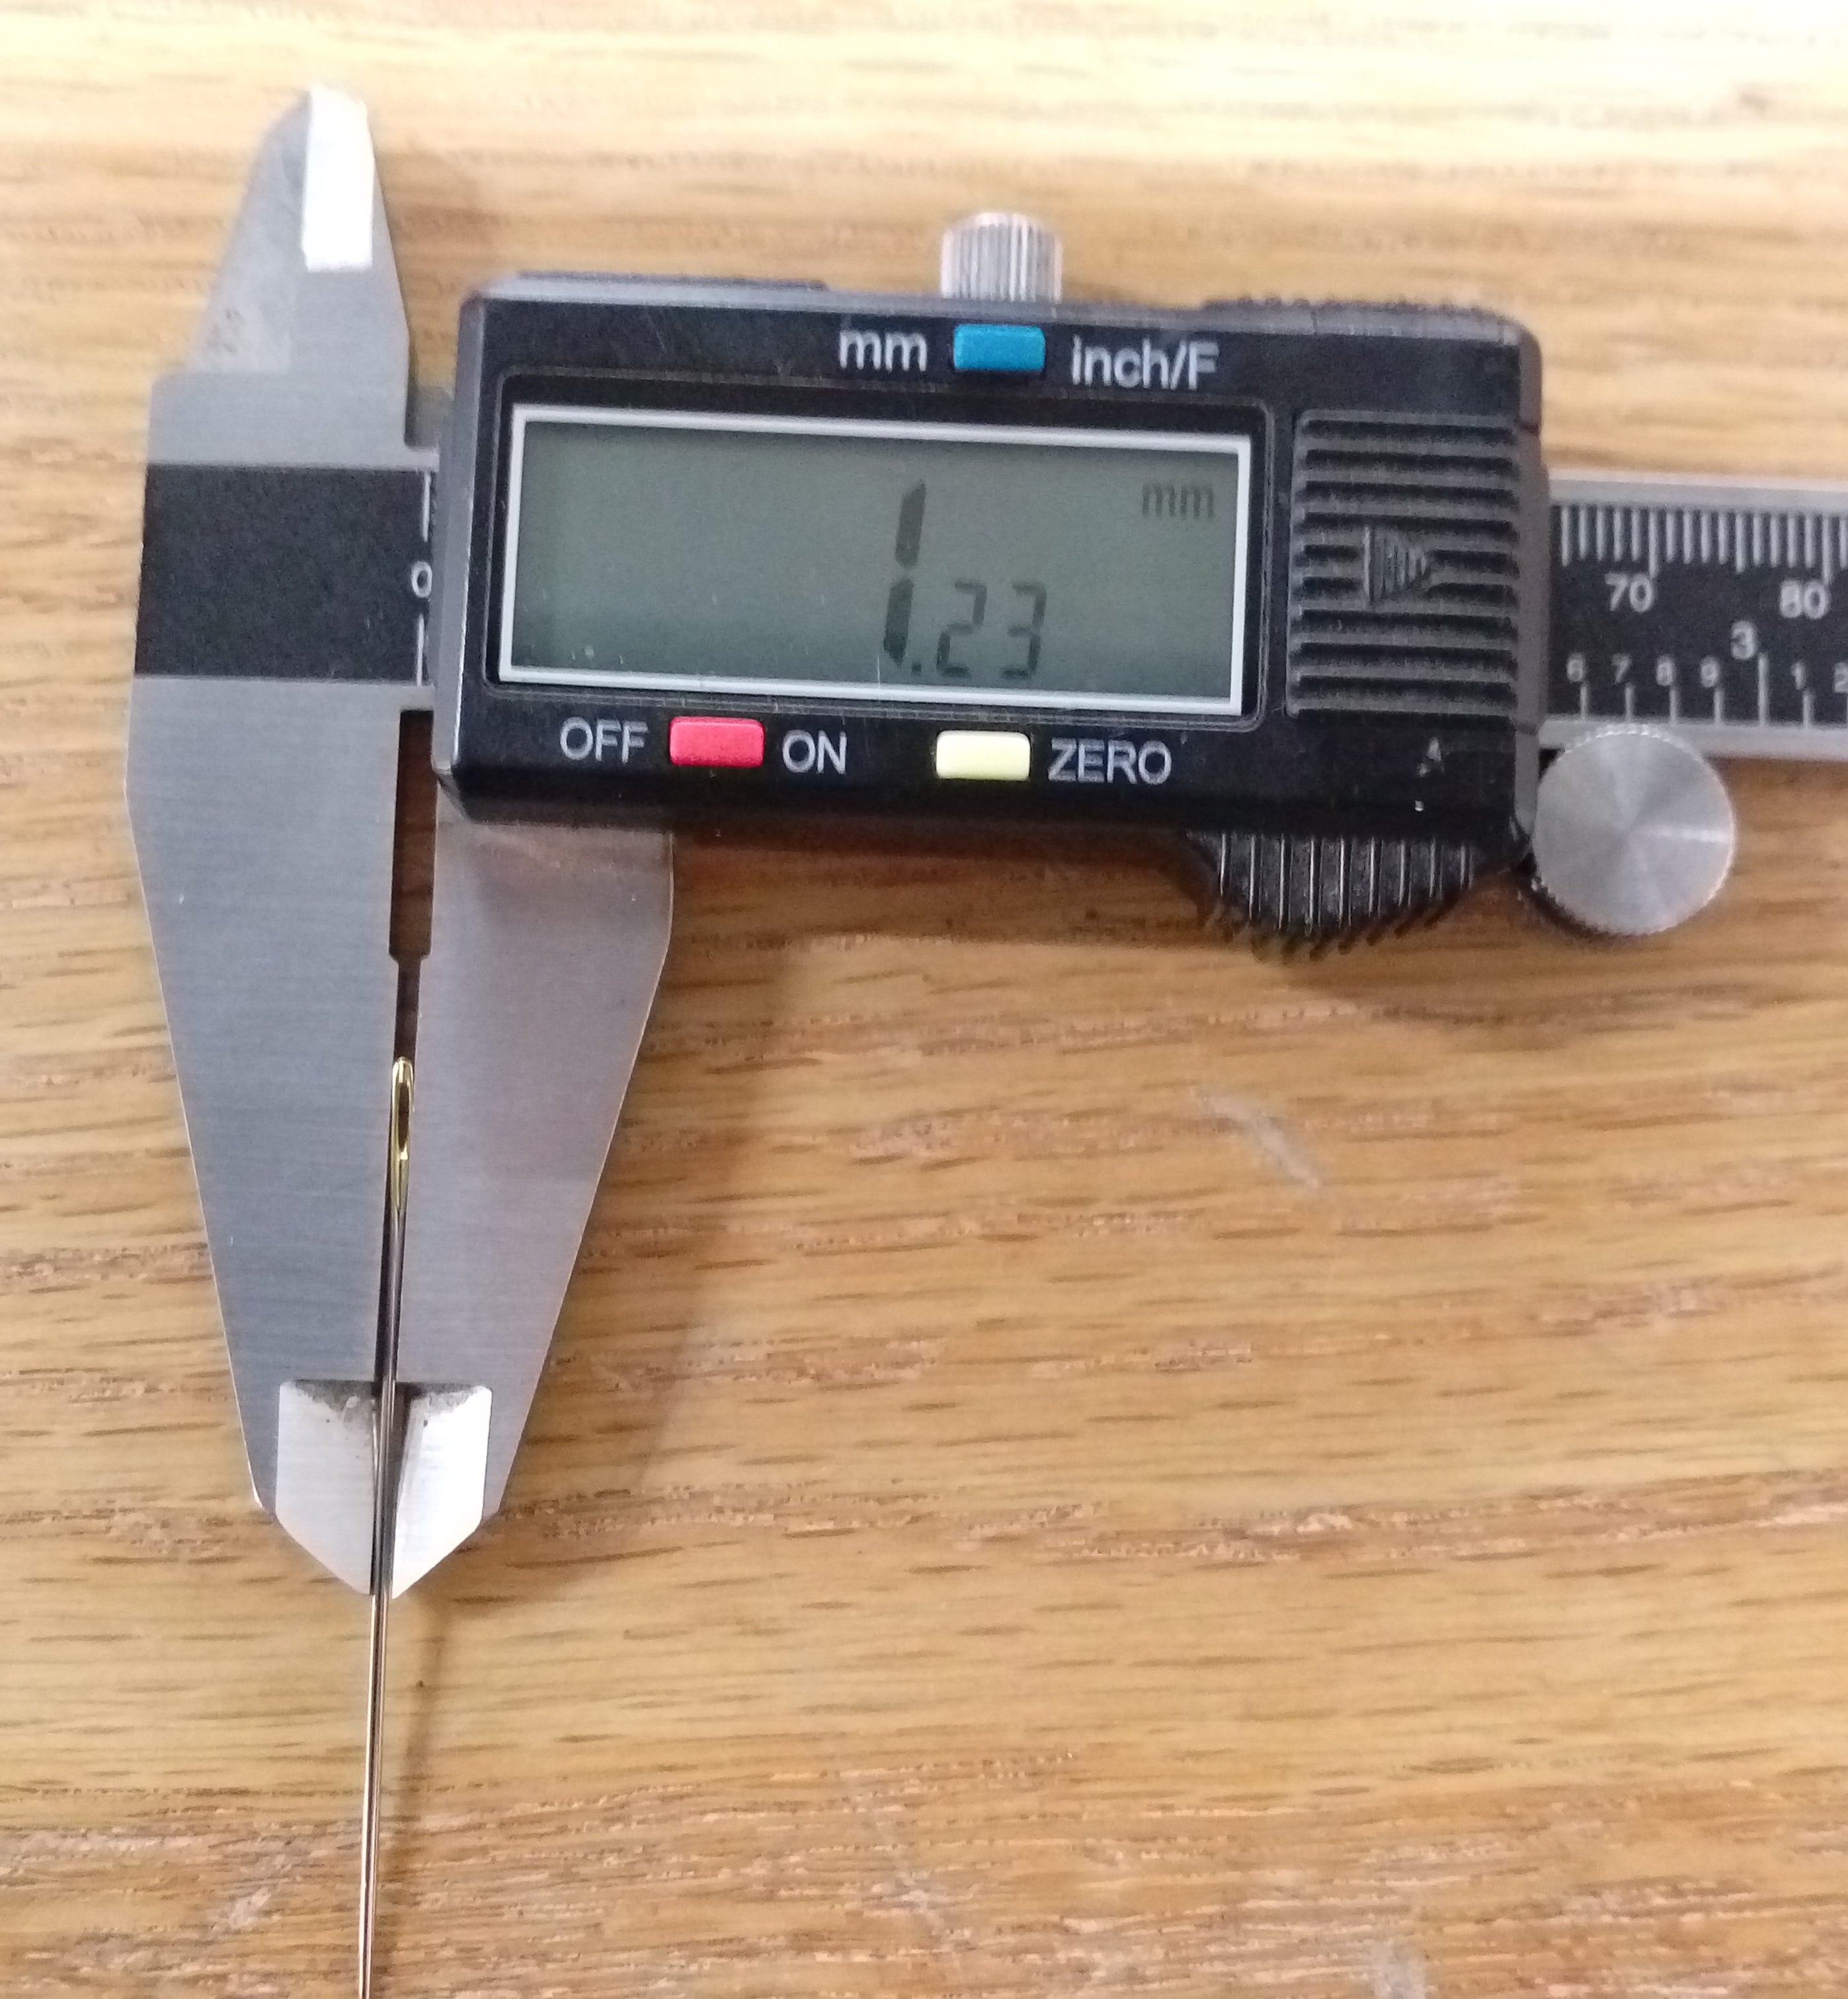
The third group has shown thread and needle size:
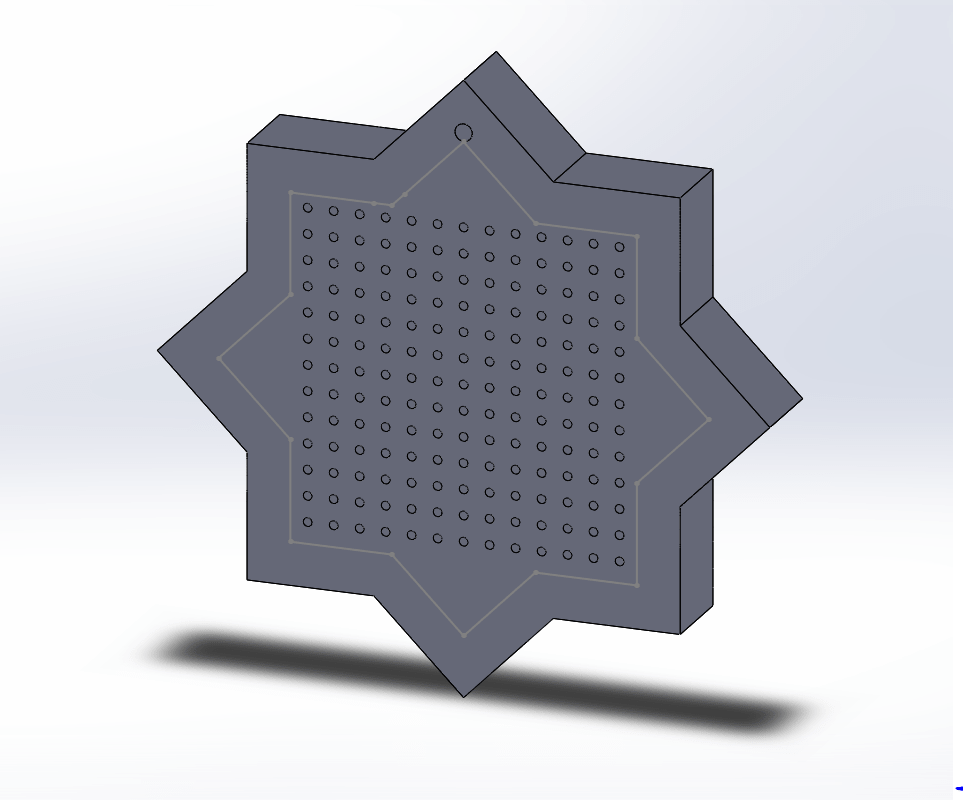
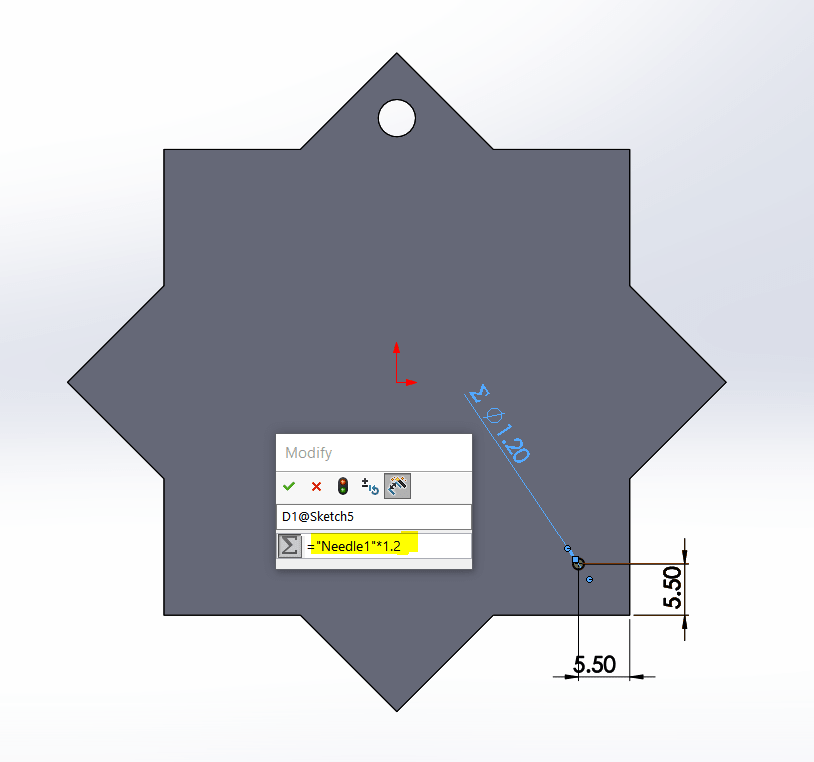
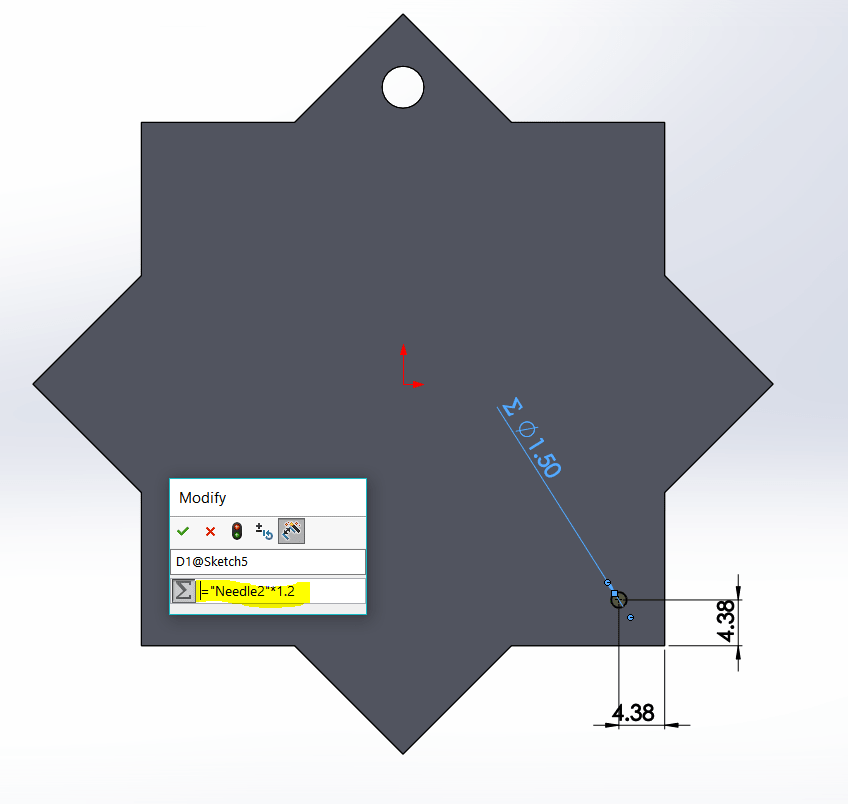
I moved to SOLIDWORKS to modify the part I designed in the previous section. I kept the outer dimension with no change and I made a separate design for each needle size. To do that in Equations I defined each needle size as a Global Variable.
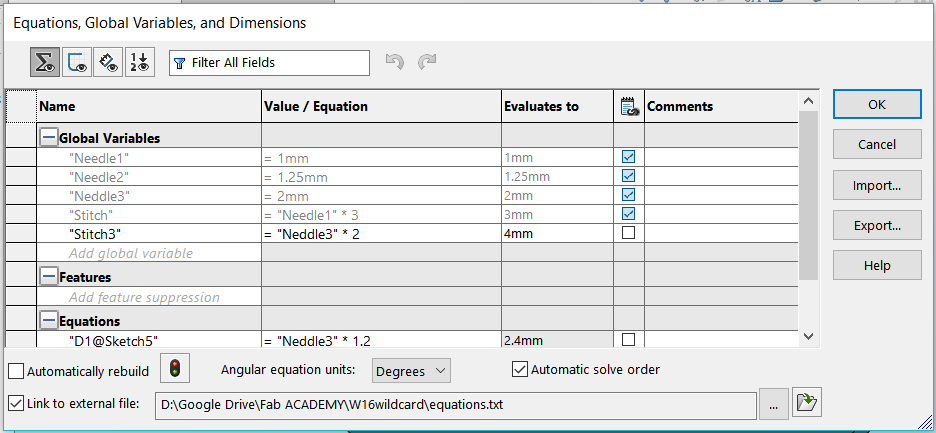
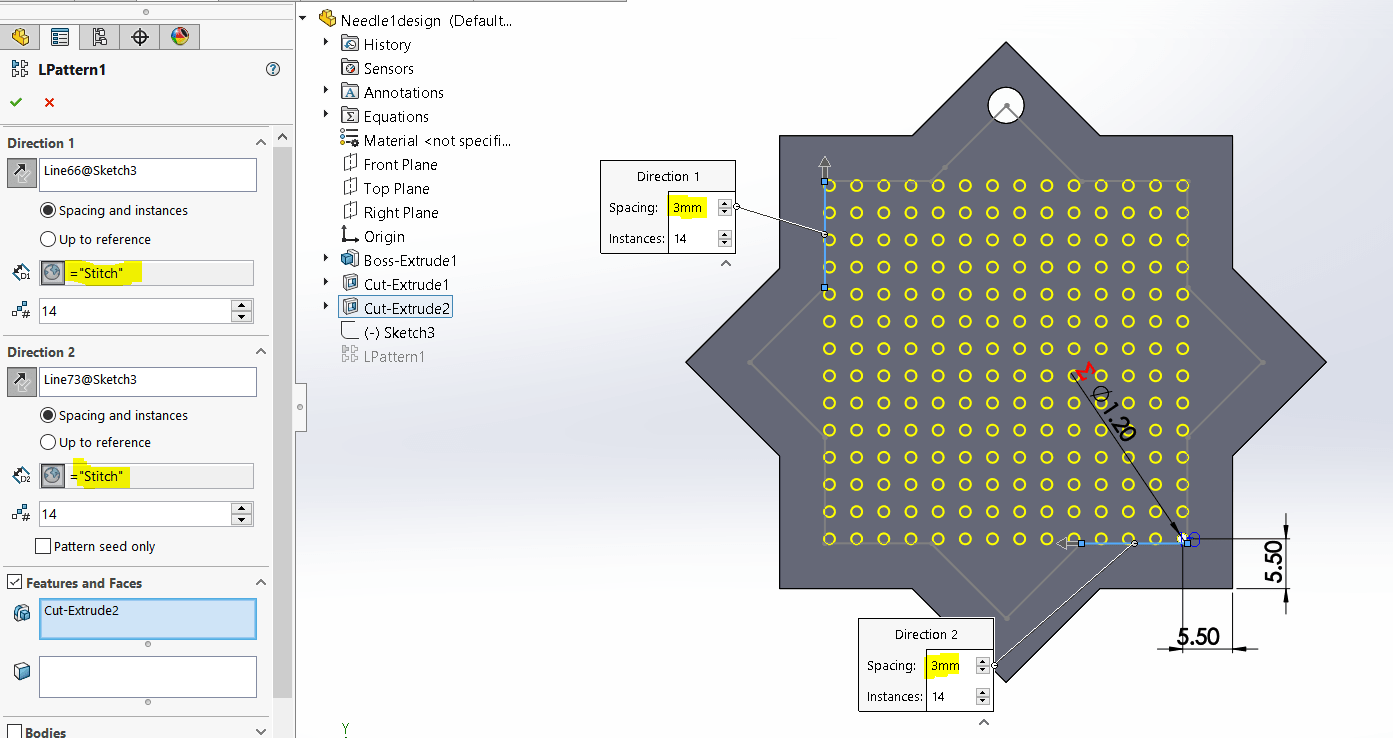
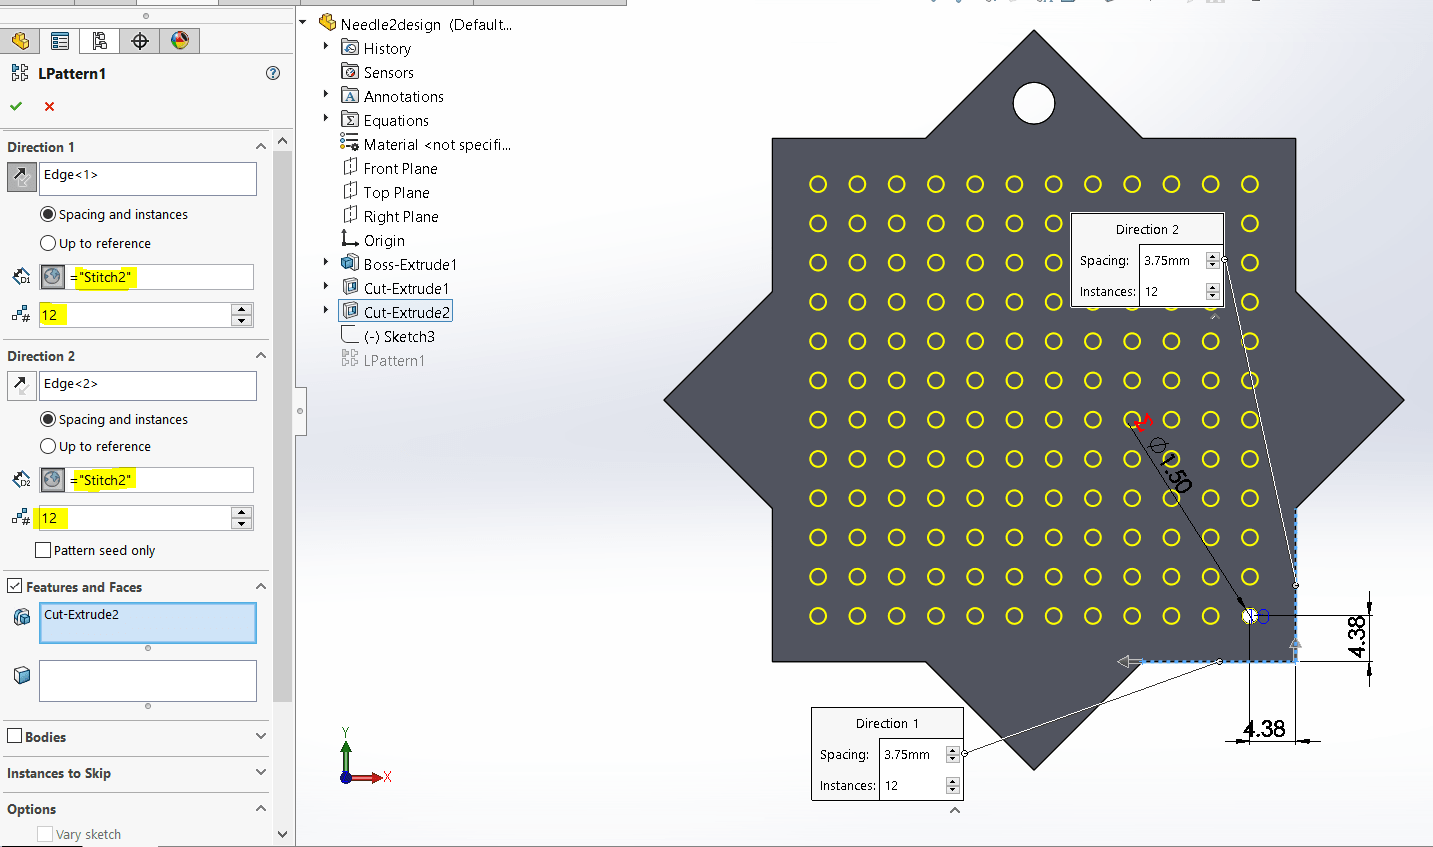
Then I used these variables to design the pattern of holes for each needle size.
The design of the first needle size 1mm
Design for the second needle size 1.25mm
Design for the third needle size 2mm
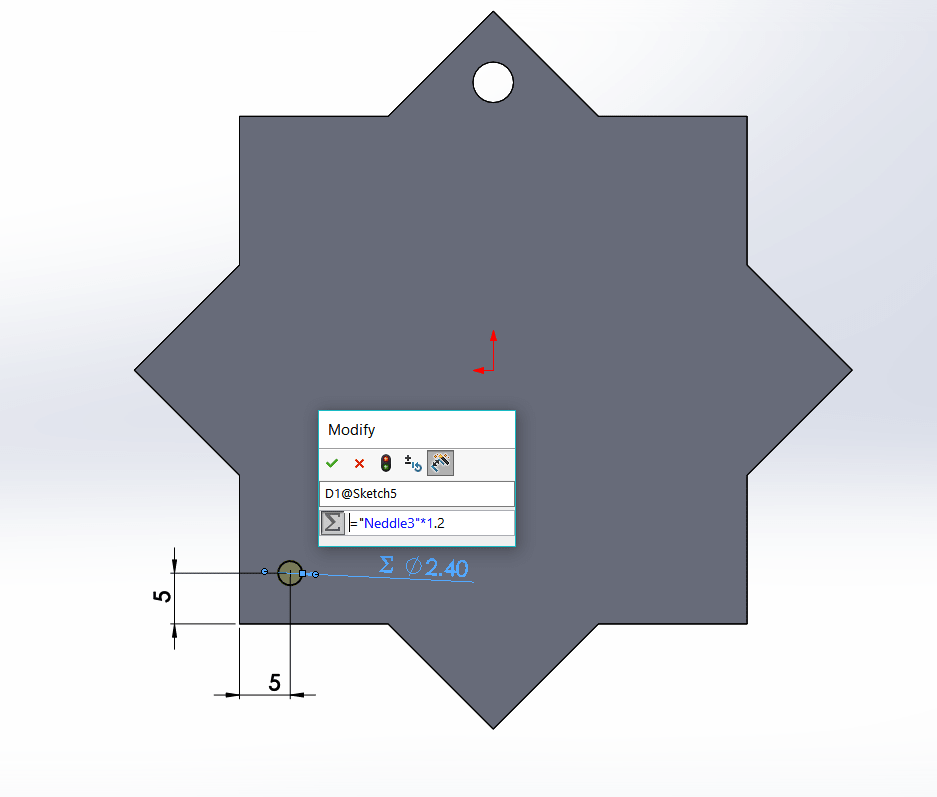
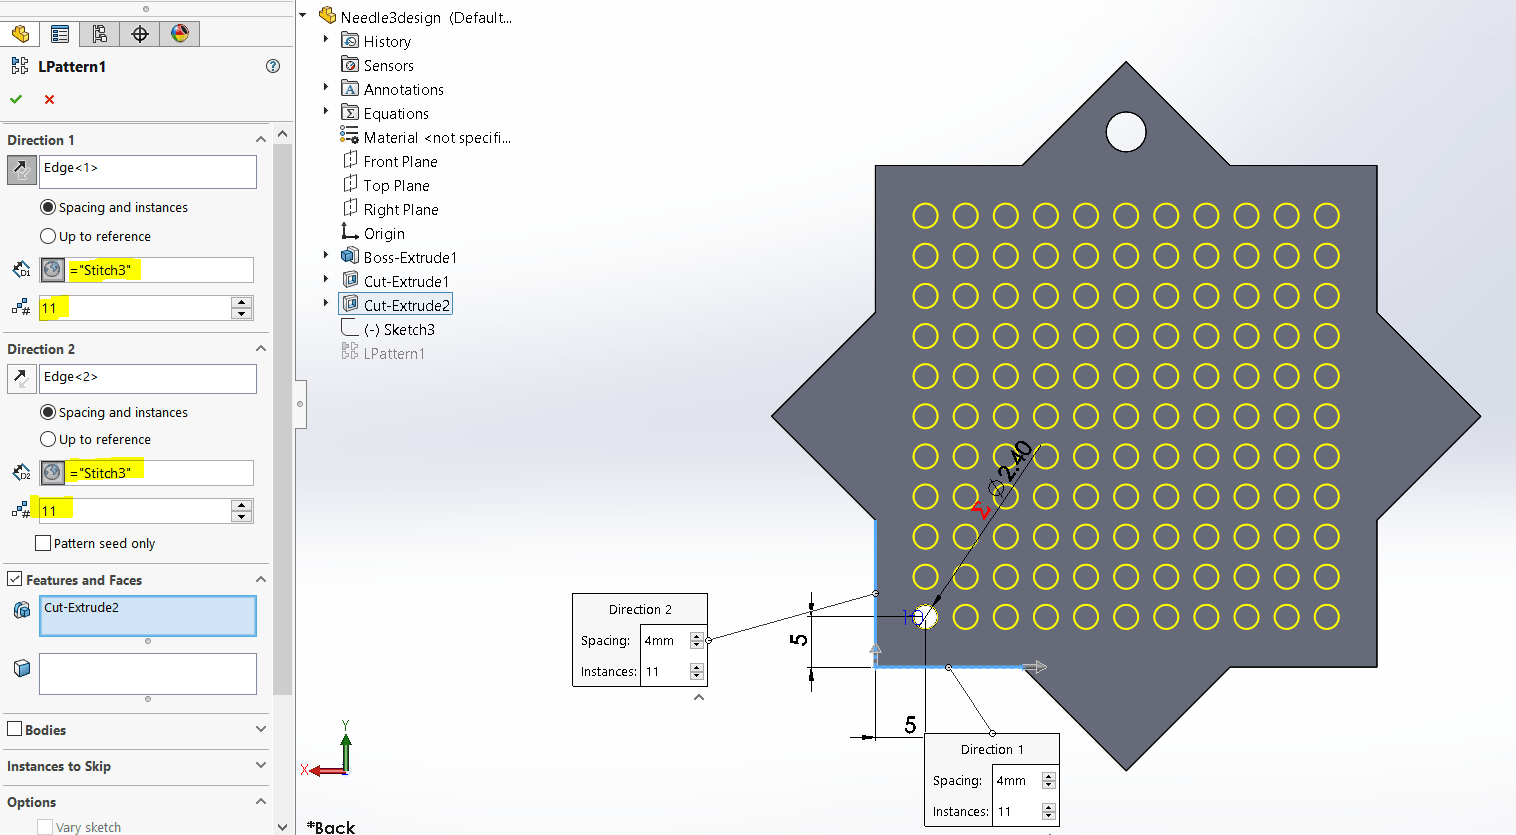
I could easily change any of previous designs by just change any of global variables. When I cut any piece and found that I need a bigger hole or stitch I could do that without problems :) .
Then I moved to laser machine and cut some pieces to try if my designs will be fine or not. I used the same acrylic I used in the previous work with the same settings. Then I tried if needles fit with holes. Hopfuly the results were very good:
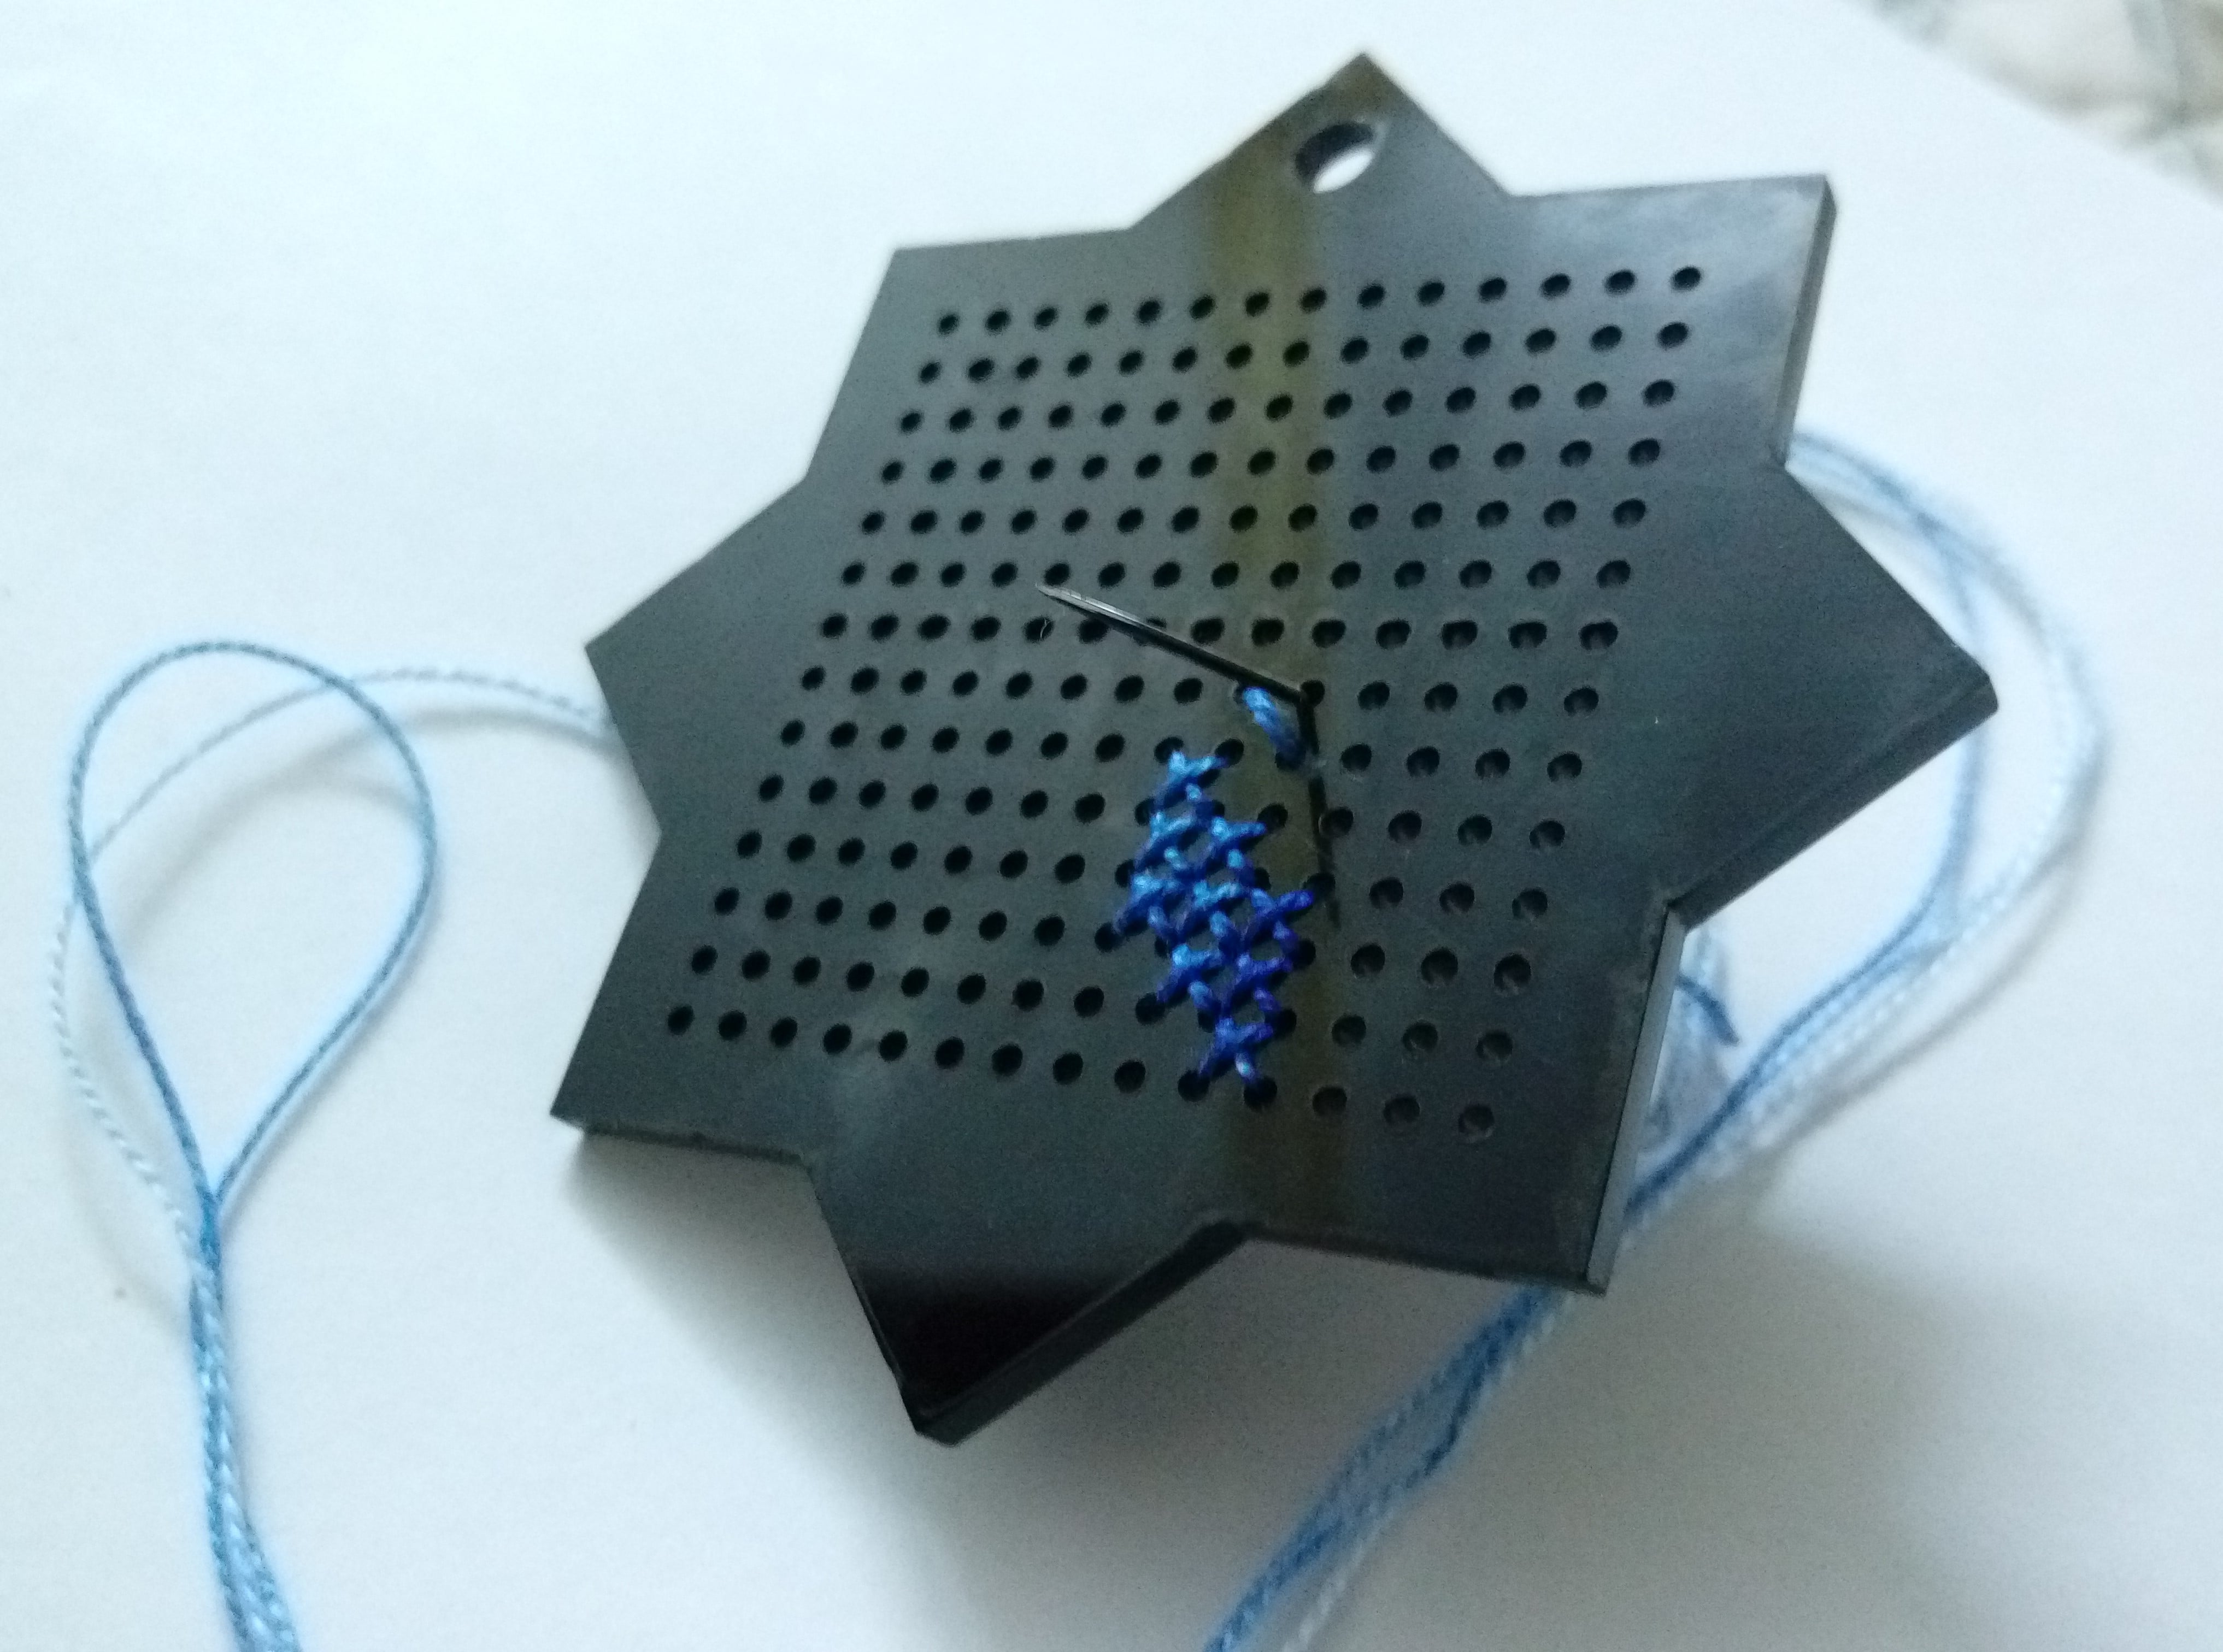

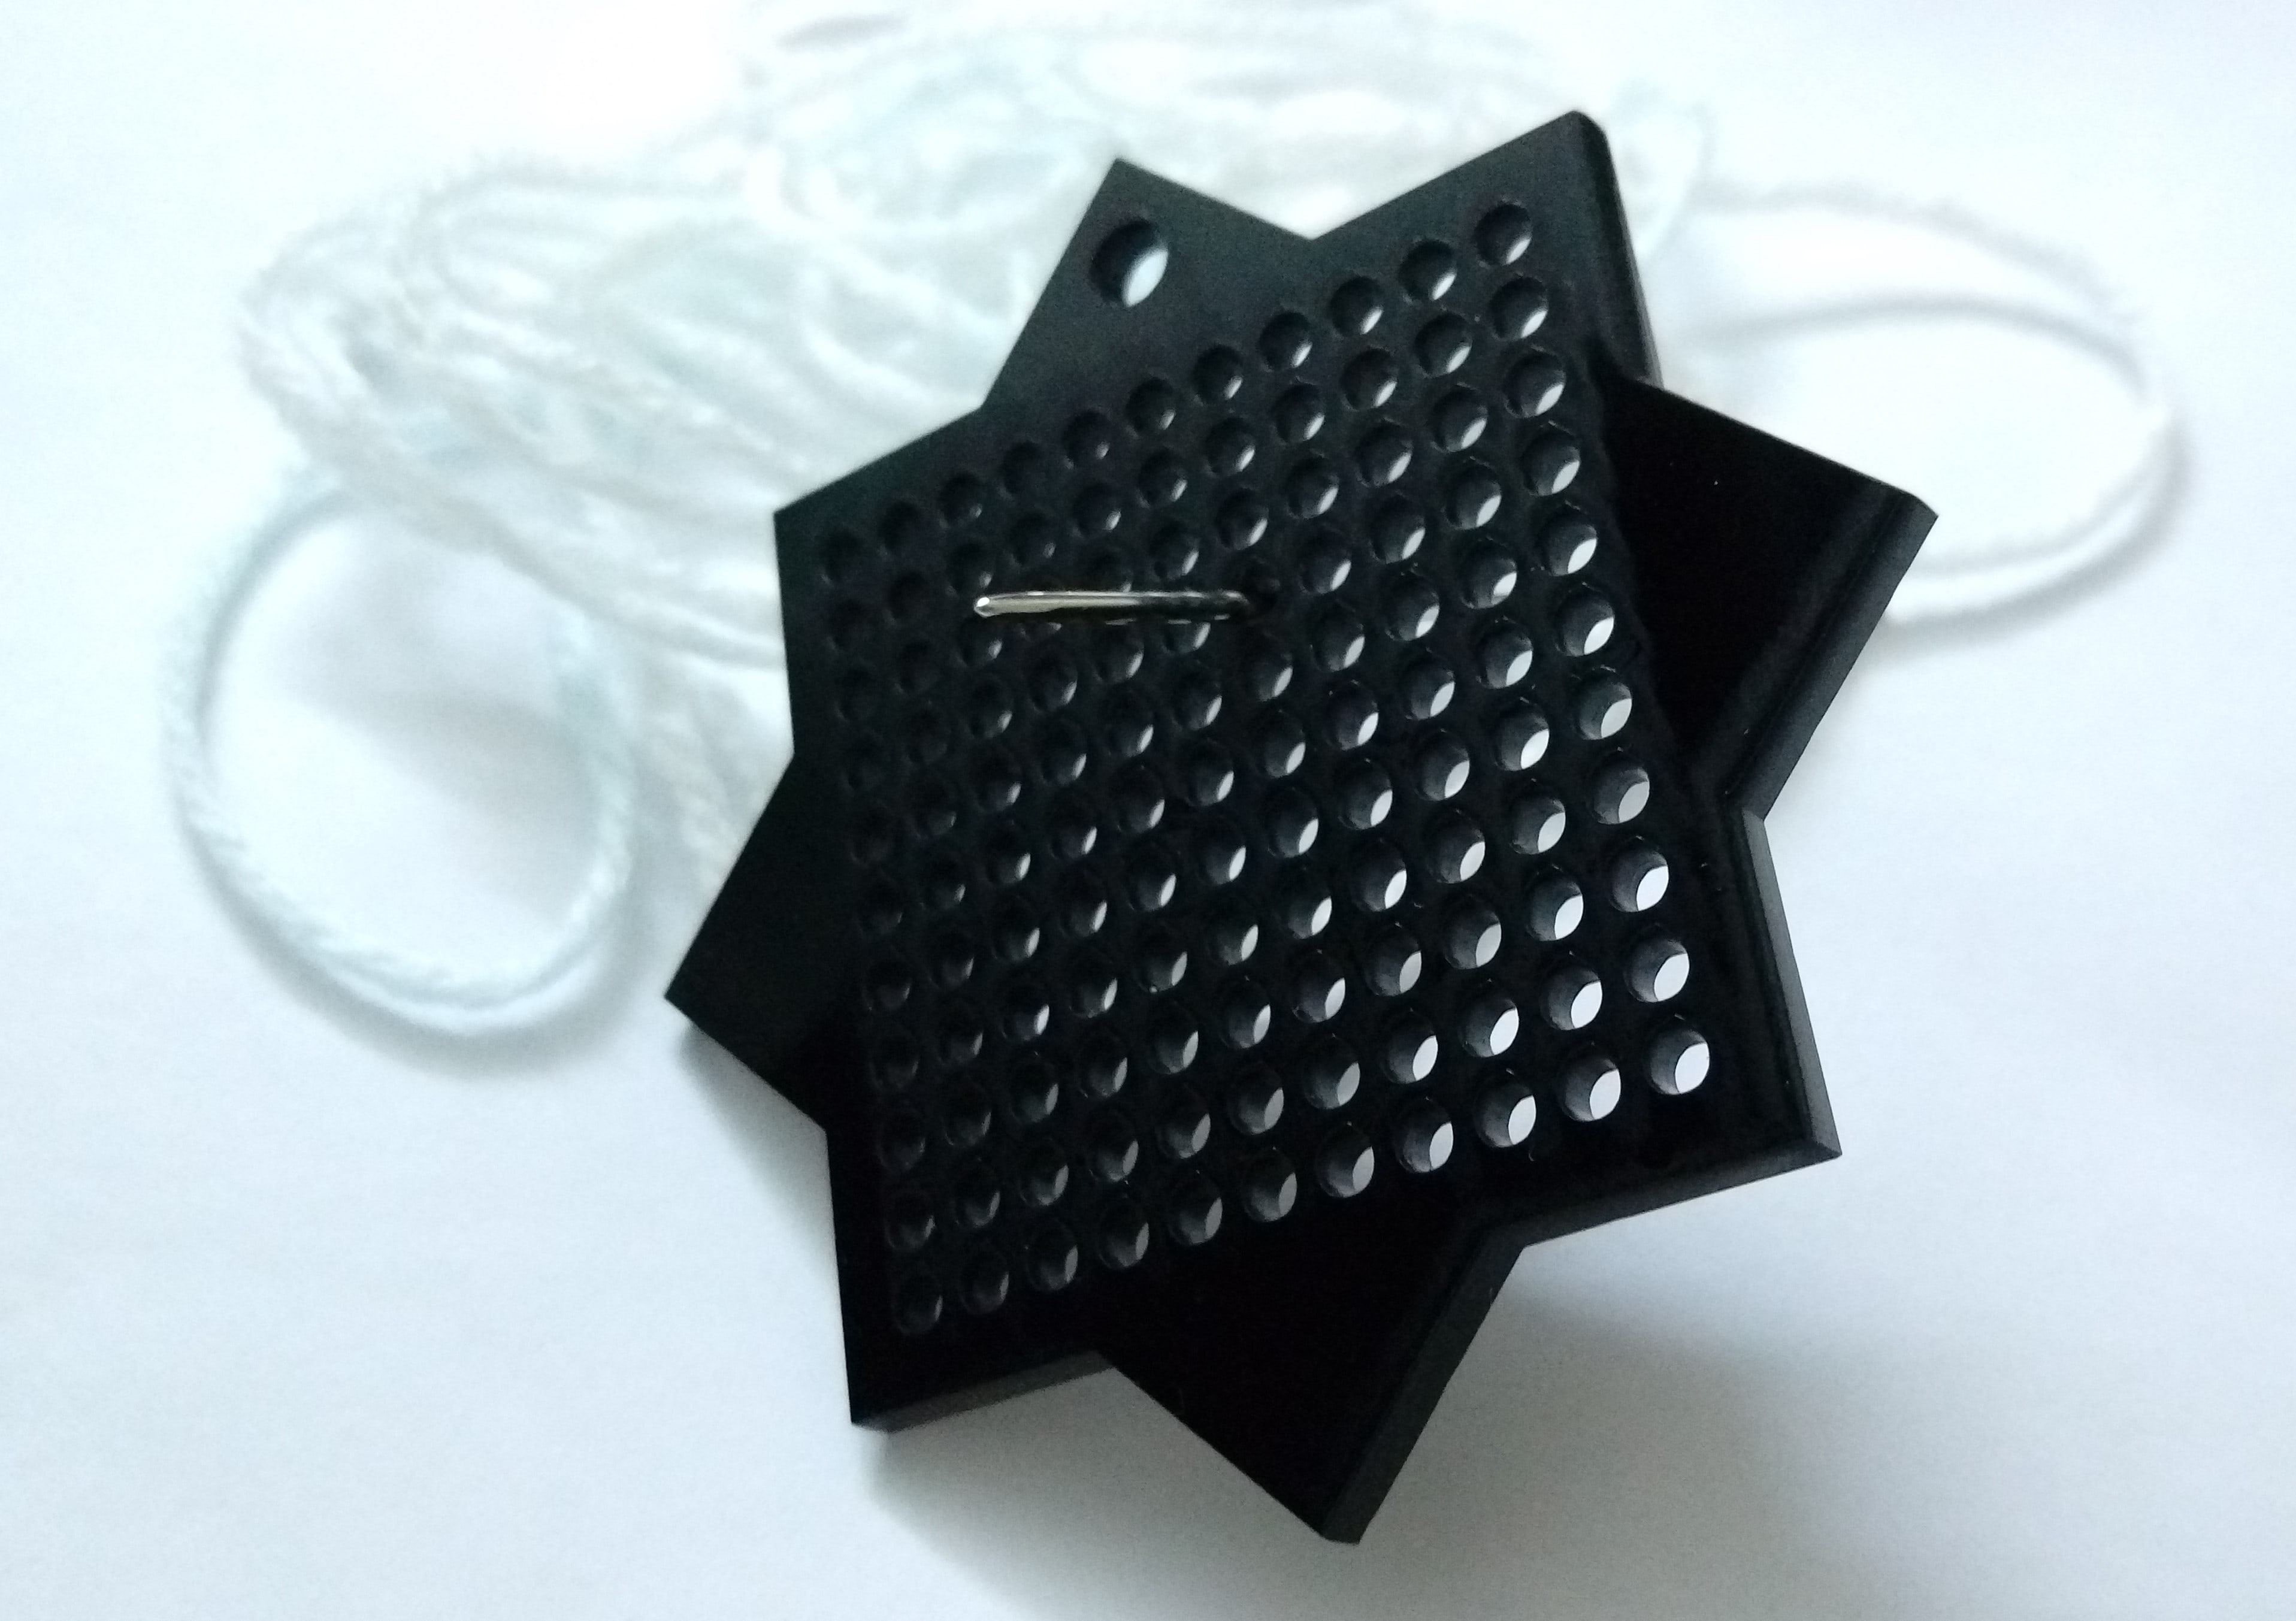
Finally, I embroidered these beautiful keychaines:
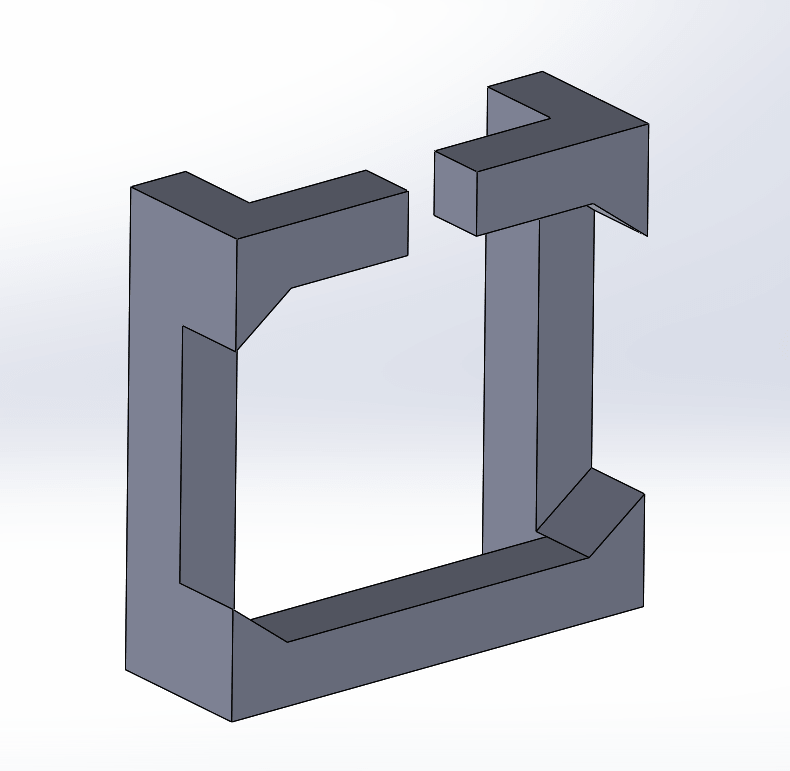
I start by researching about 3D printing clothes and their designs concepts. After that I started to design my own desgin on Solidworks. This is the core segment:
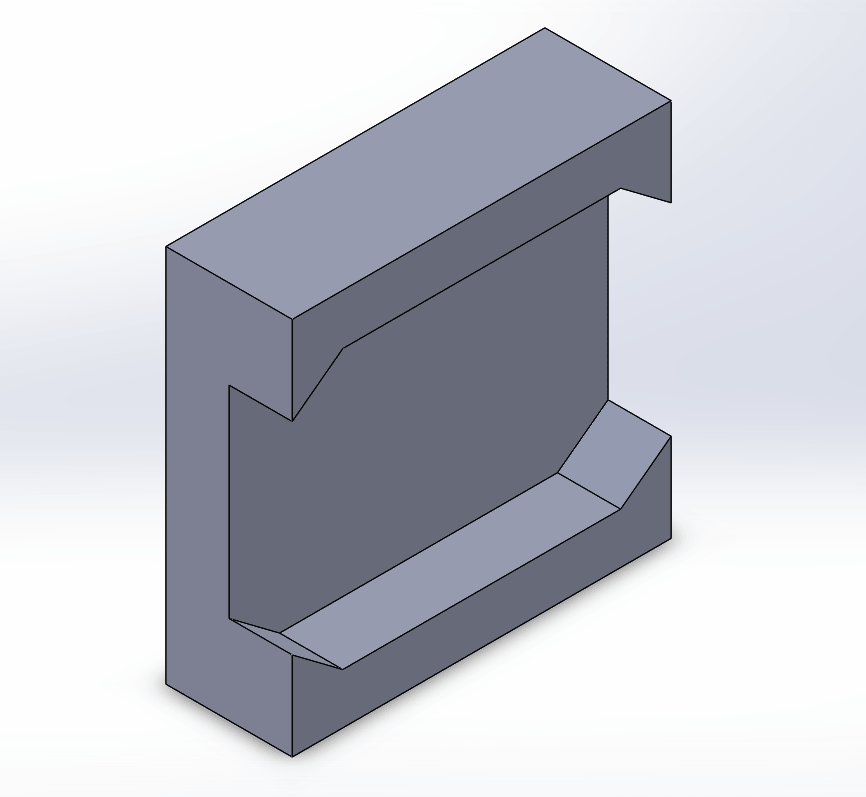
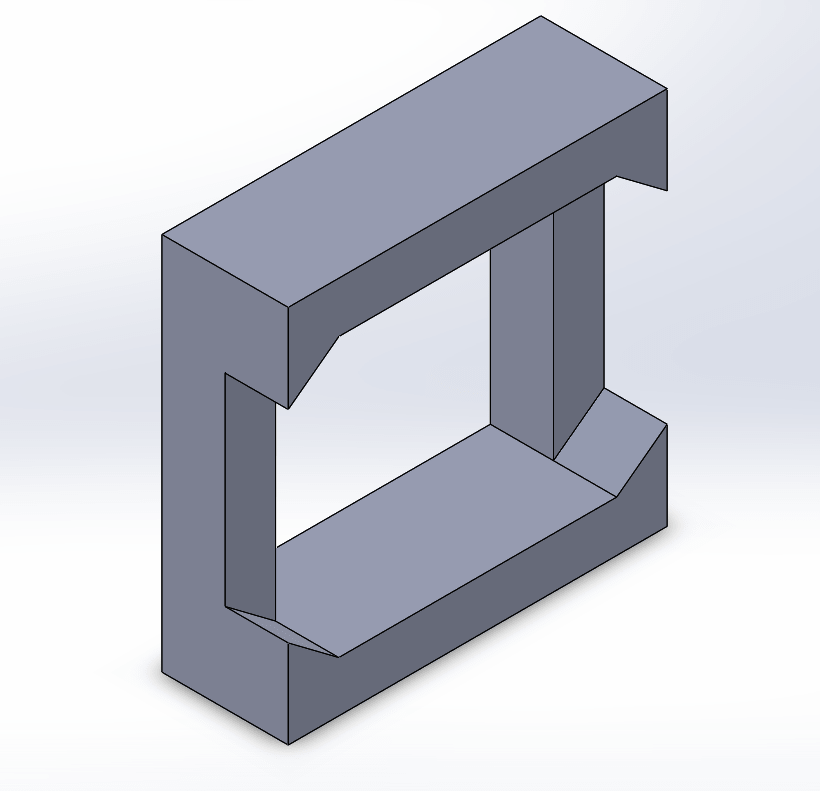
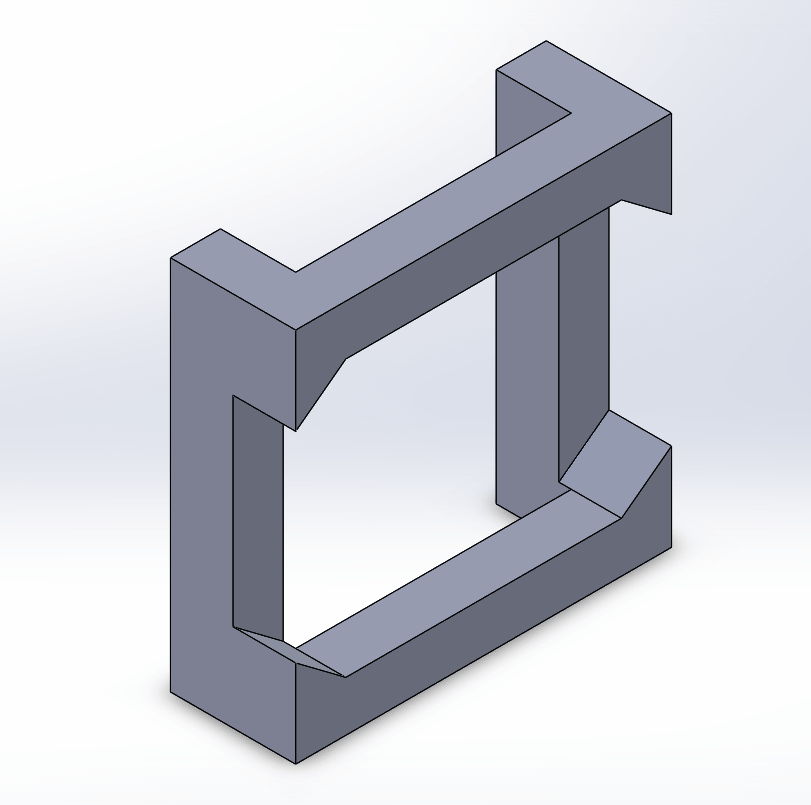
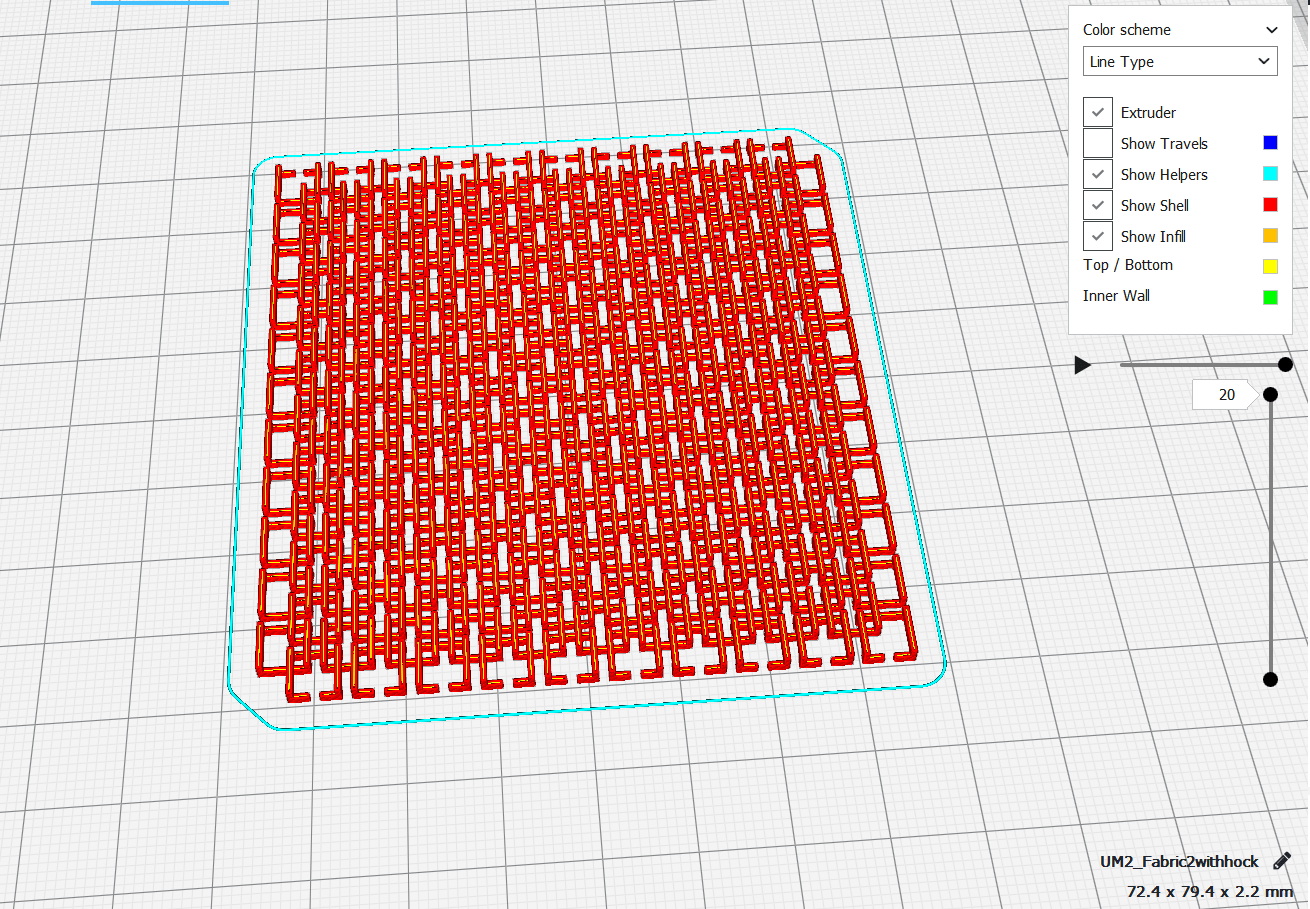
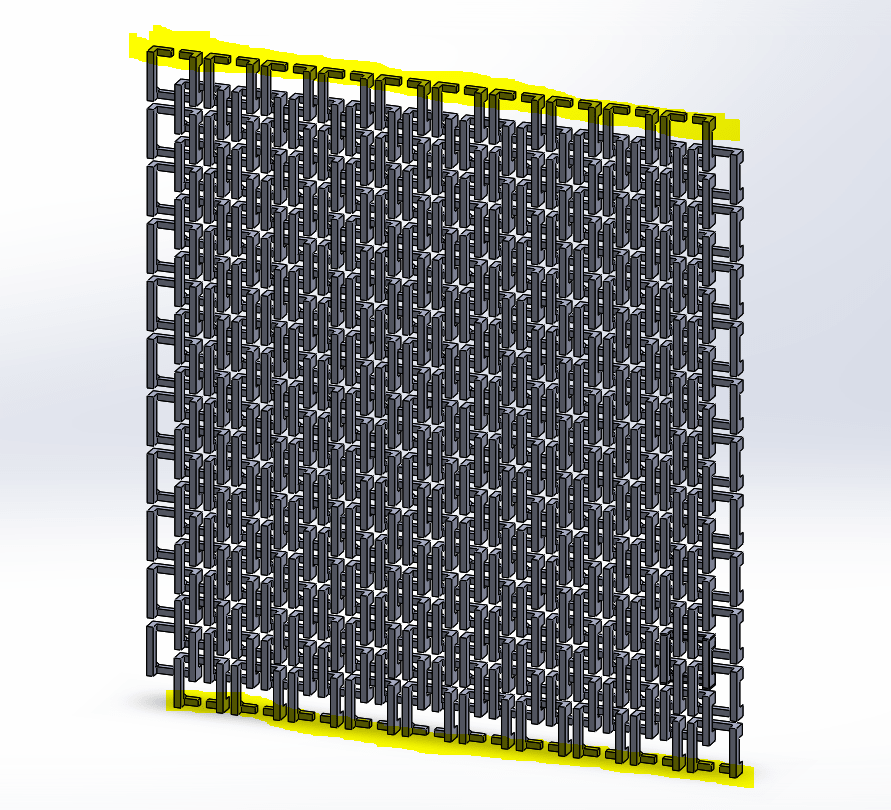
Then I assemble many pieces as this:

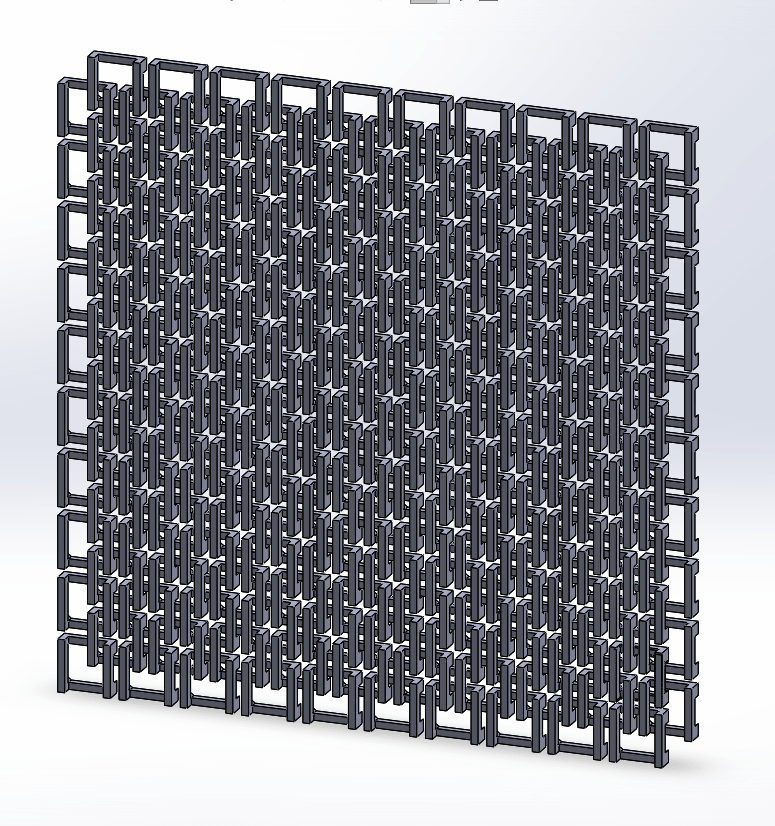
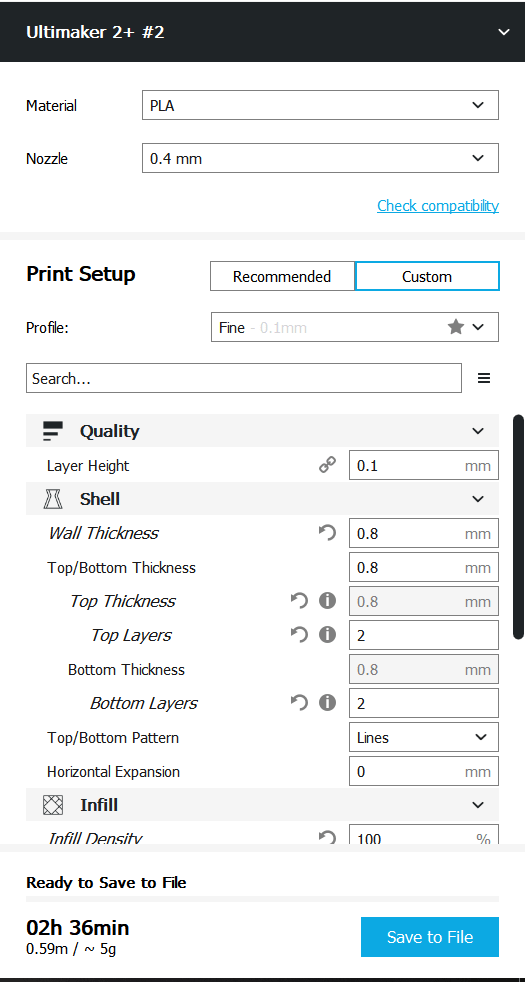
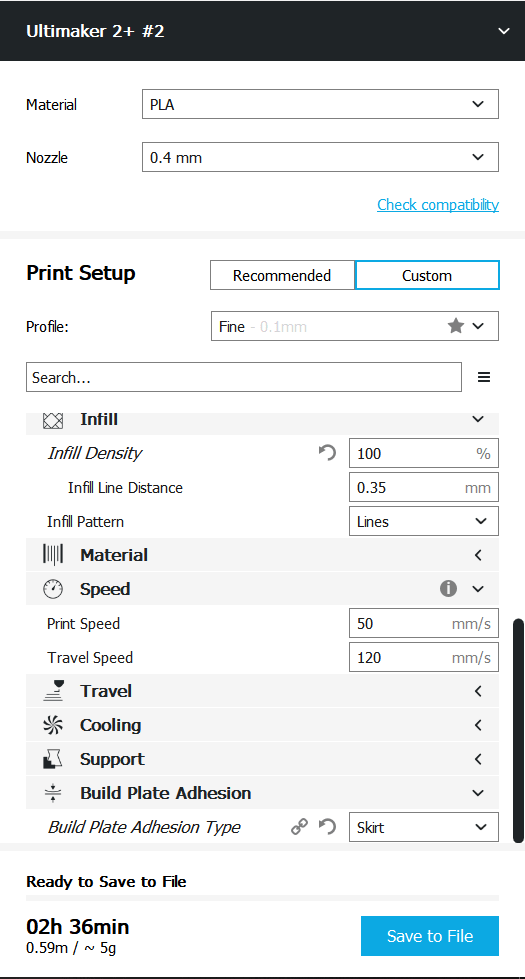
These are many tries to find the best settings and the correct space between segments in assembly.
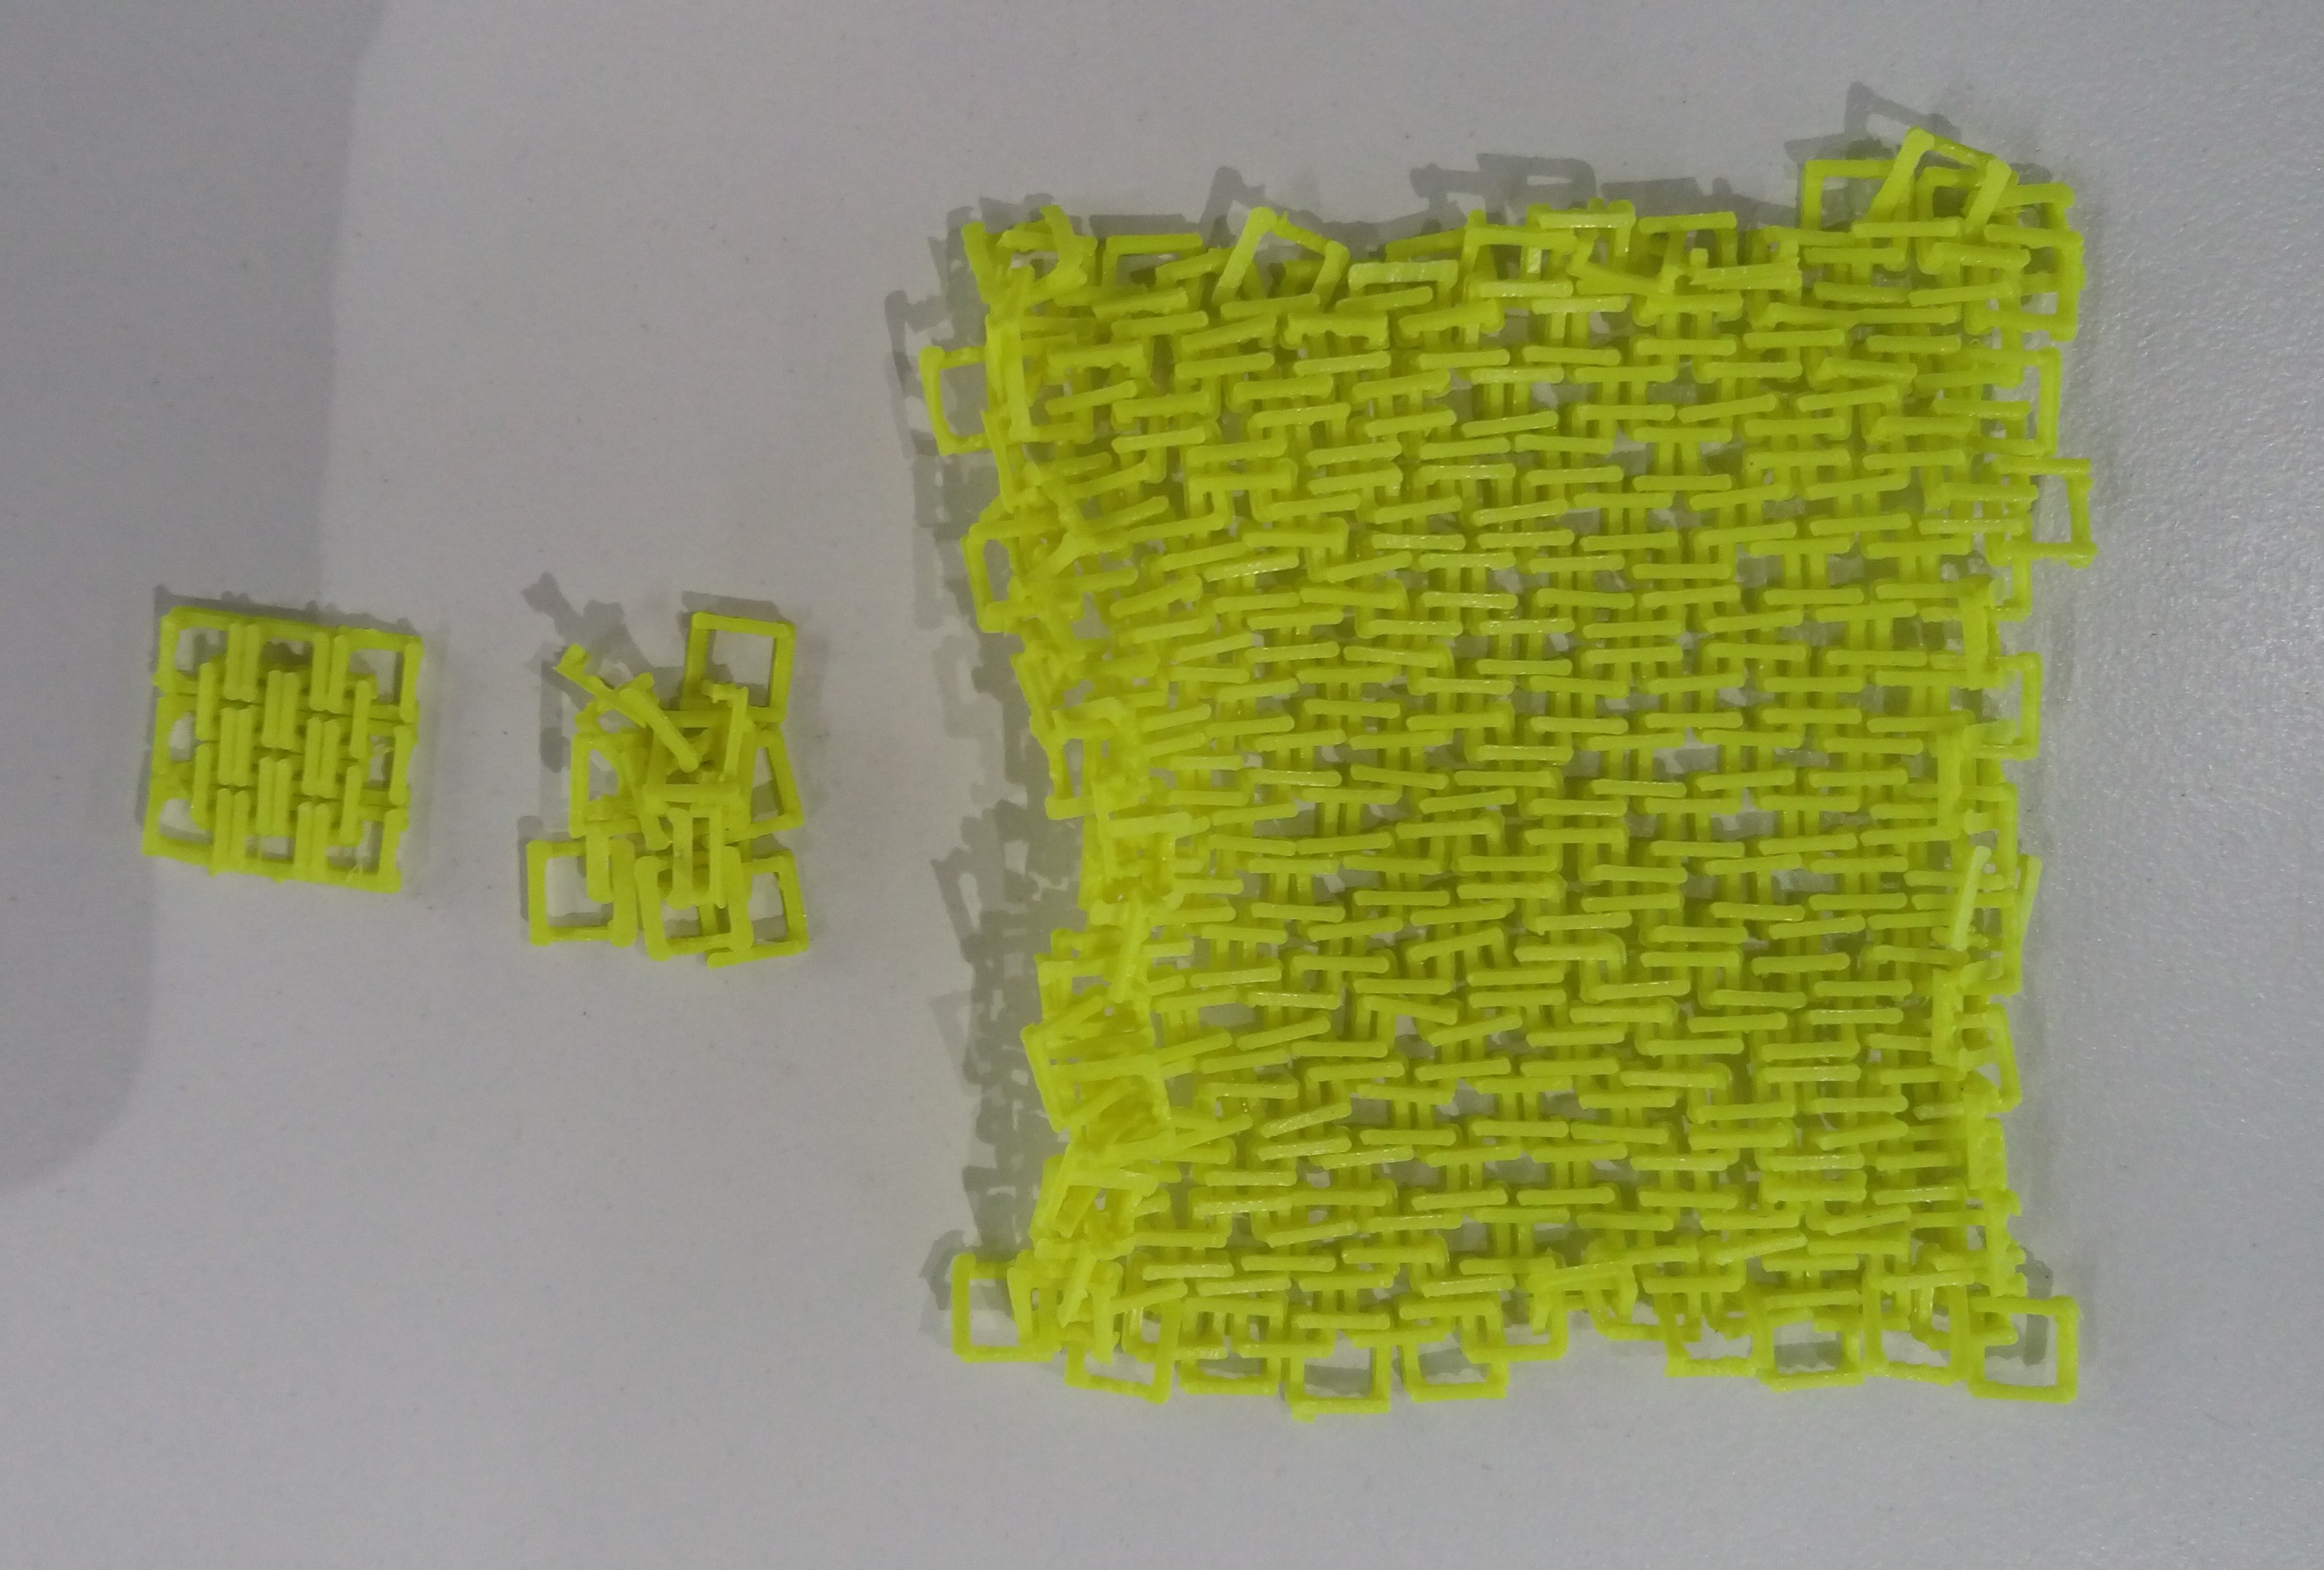
The final successful settings
To connect two pieces of fabric togother, I designed a segment with hole and put them at the edge of the piece as shown:
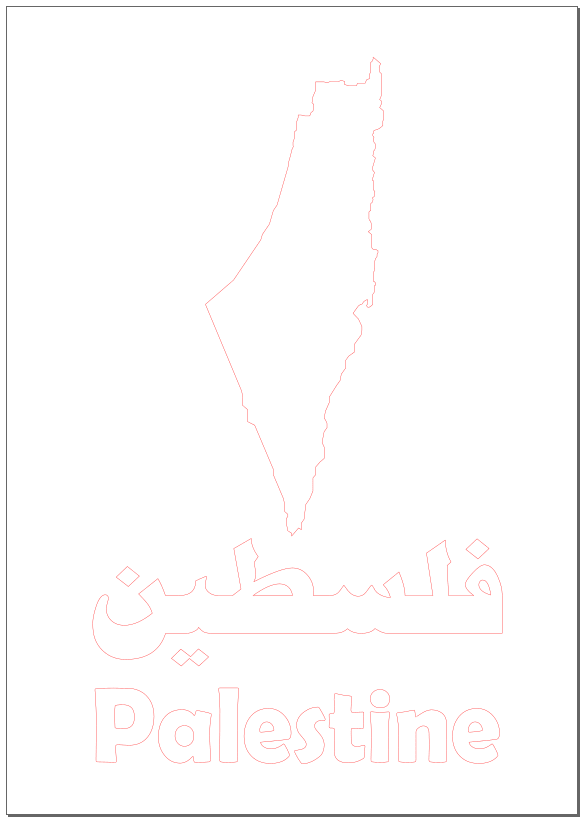
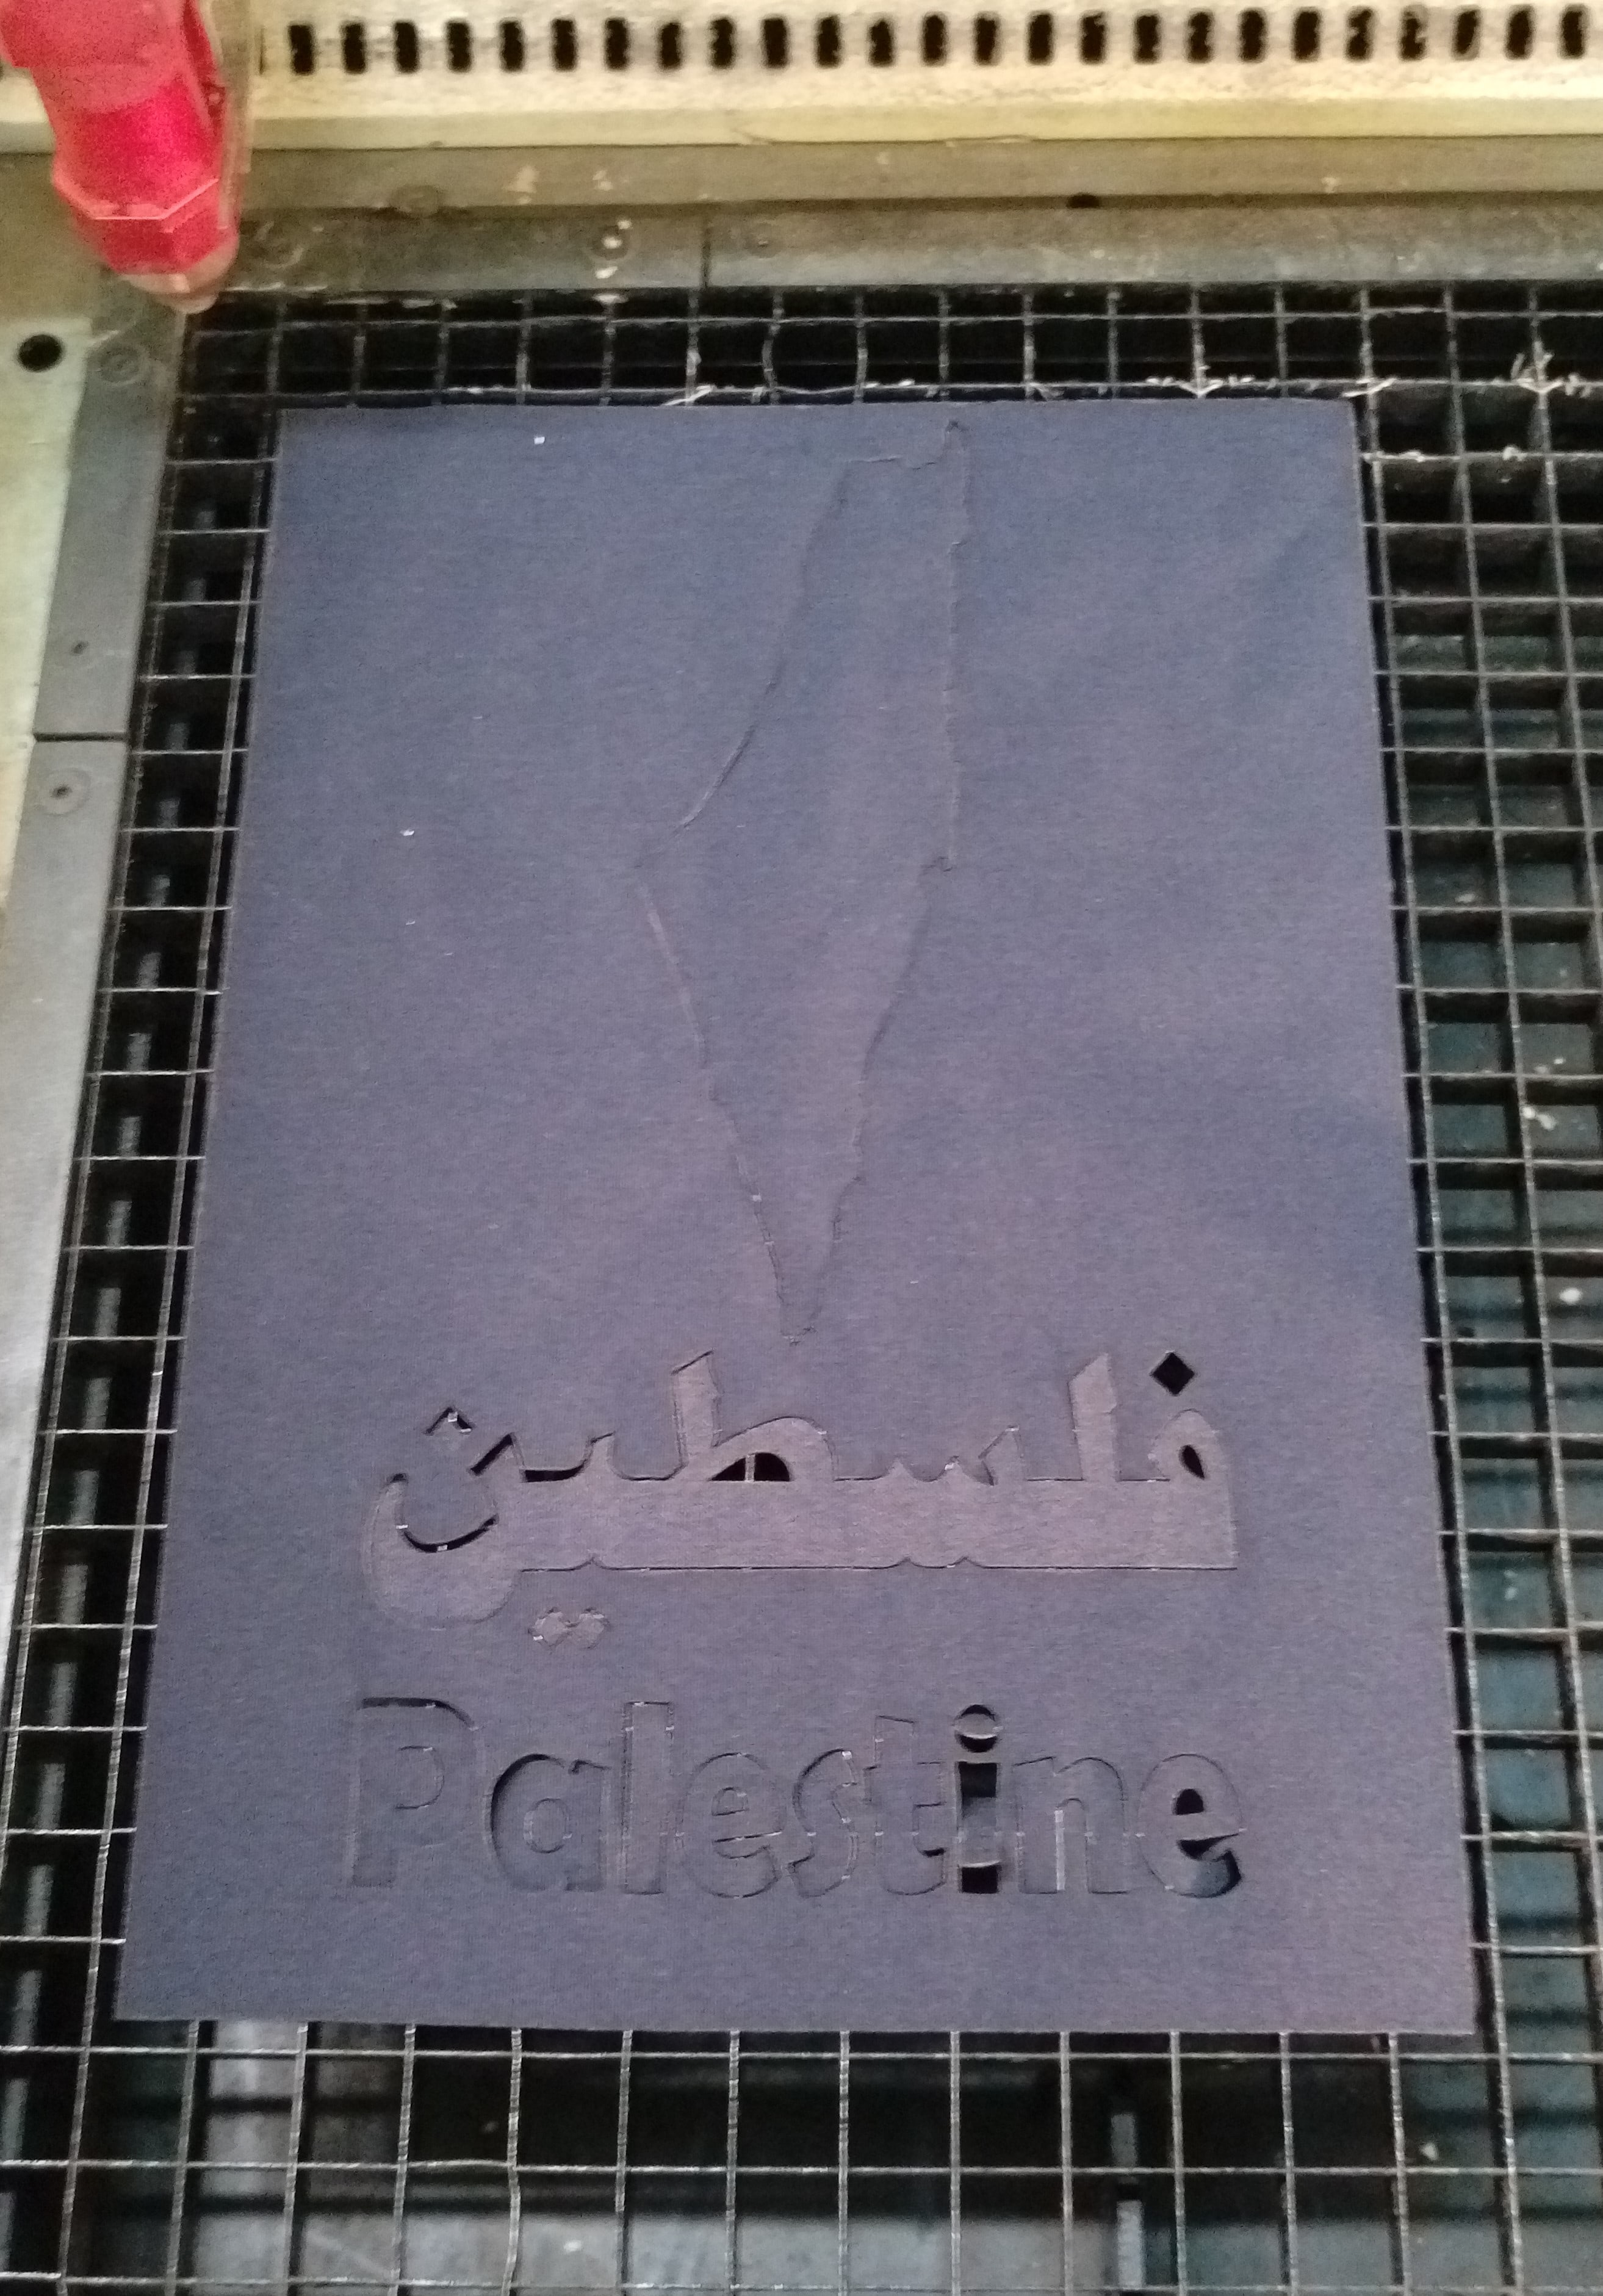
I previously designed Palestine map and published it in GrabCAD I saved the map as dxf and add open it with Inkscape and add some text
After fixing the size I pressed ctrl+p to transfer the file to laser cut software JobControl and used these settings

The result after machine complete the job:
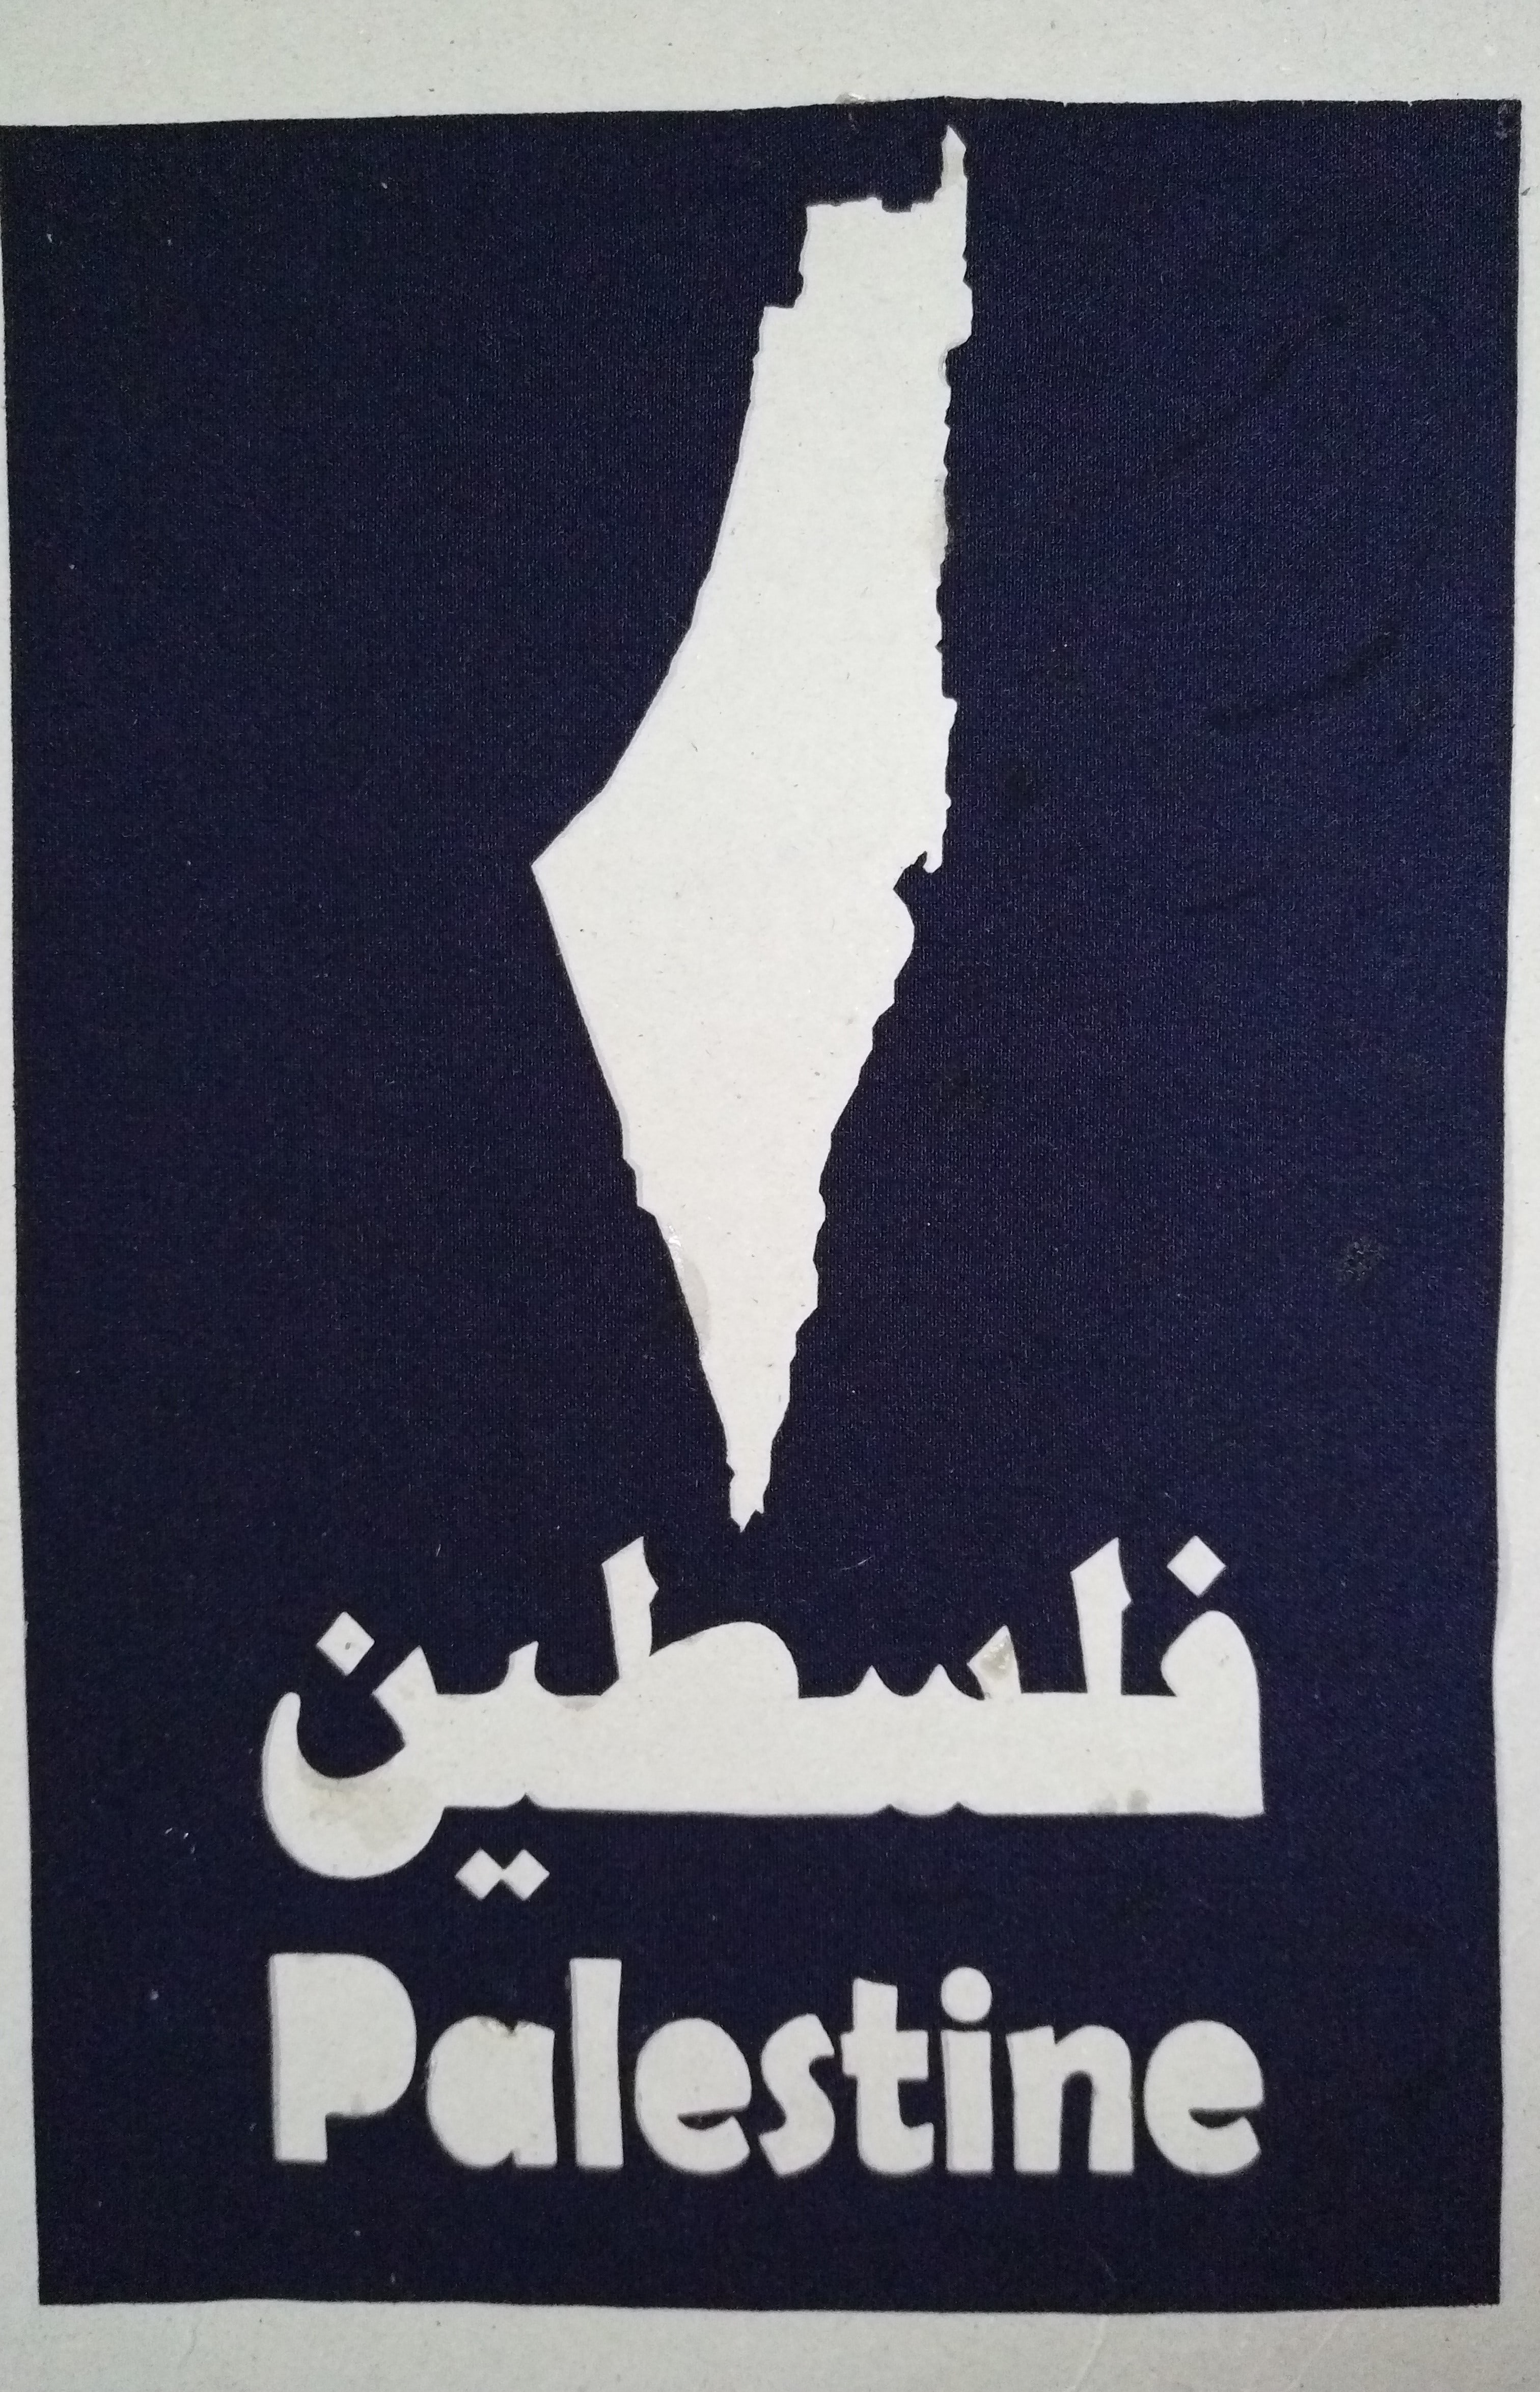
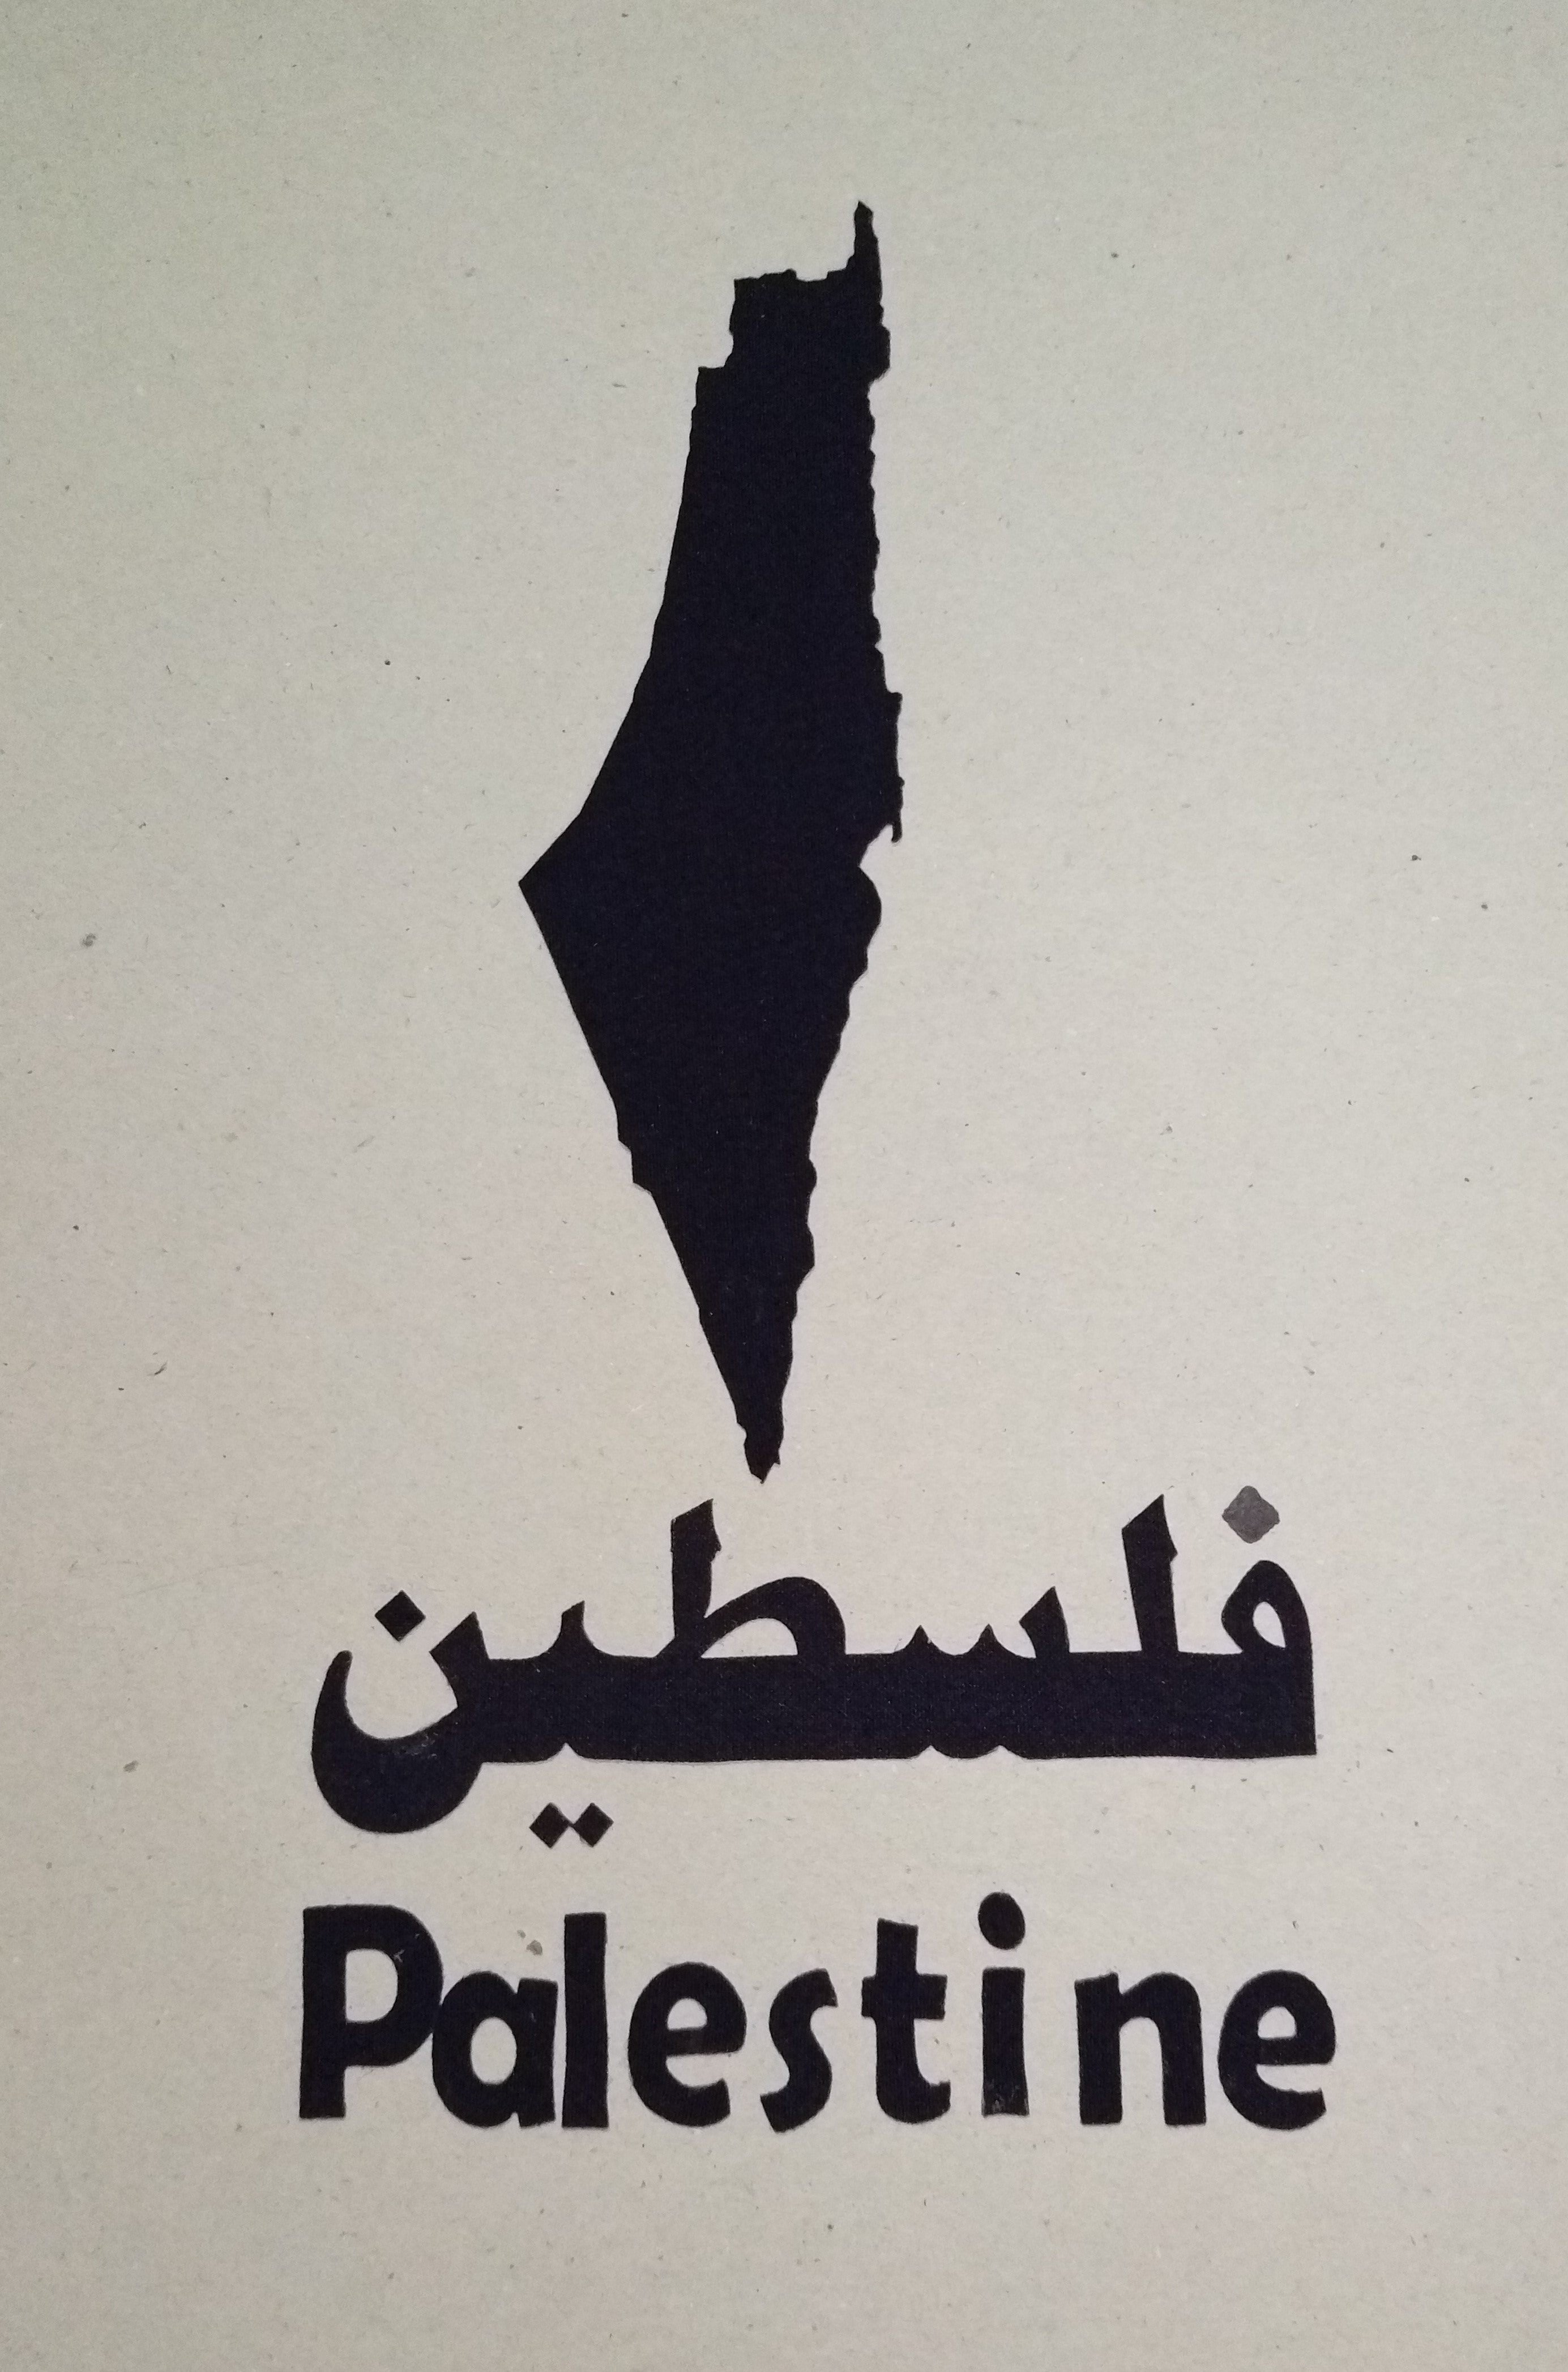
After separate the clipped parts I fixed them to make these two pictures:
Download designs files as DXF