Assignment 8: Computer-Controlled Machining
Make something big
Learning outcomes:
Demonstrate 2D design development for CNC production.
Describe workflows for CNC production.
Group assignment:
-
Complete your lab's safety training.
-
Test runout, alignment, speeds, feeds, and toolpaths for your machine.
-
Document your work to the group work page and reflect on your individual page what you learned.
Lab's safety training.
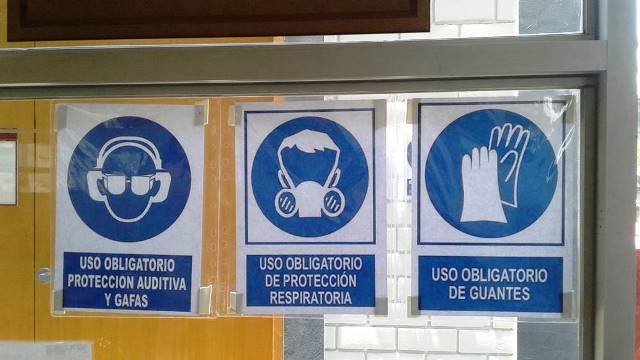
In order to use the CNC machine it was necessary to take personalized training. One of the most important topics of the training was knowing the security measures and the care when using this type of machines.
To operate this type of machinery it is necessary to follow the following safety rules. Ignoring safety rules can result in serious injury or equipment damage:
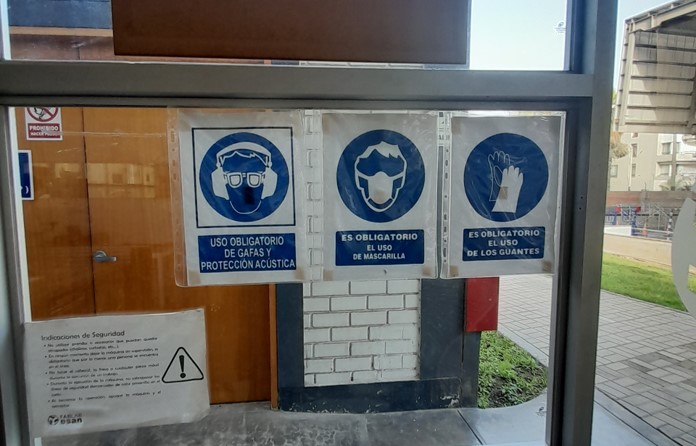
Wear safety gloves. We must protect our hands throughout the process of using the machine and when handling the cut pieces.
Use an acoustic protector. It is necessary to use a sound insulator because the machine works with a loud sound.
Wear eye protection. During the cutting process, small pieces of materials and dust can be ejected. These objects can cause serious eye damage.
Work line. It is necessary to stay behind the line of work of the machine. This is due to the fact that when operating the machine it has moving parts that can be dangerous.
-
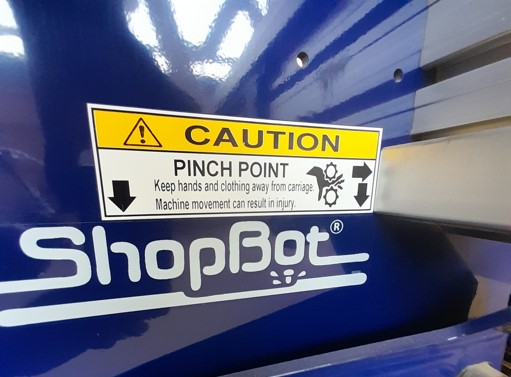
Keep your hands and clothing away from carriage. Machine movement can cause injury.
-
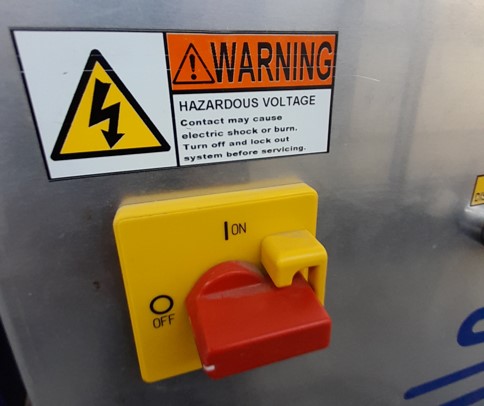
Be very careful with dangerous voltage. Direct contact with electrical parts of the machine can cause electrical shock or burns. Shut down and lock out the system before performing maintenance.
-
Use the emergency button: The machine has emergency buttons that can be used in case of dangerous incidents.
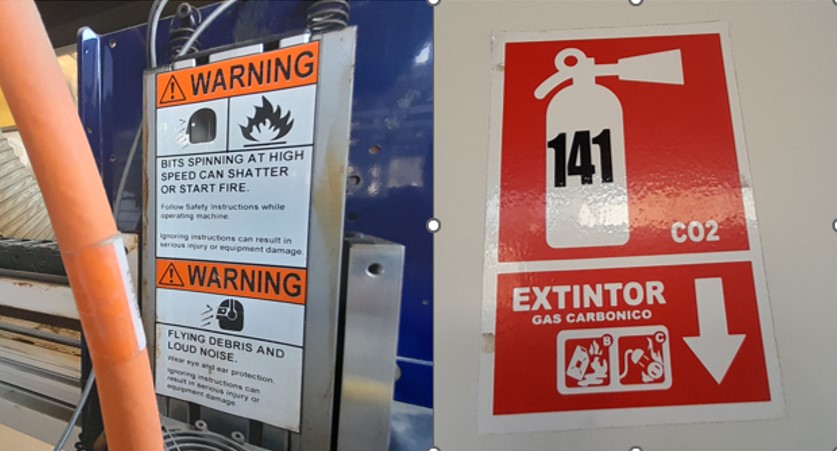
Be careful with fire. Bits rotating at high speed can break or cause a fire. In case of fire, use the carbon dioxide extinguisher.
Machine Test.
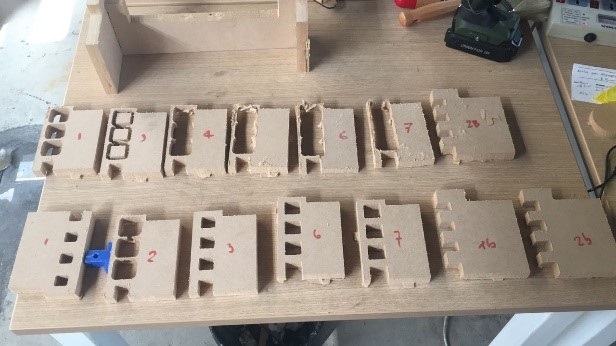
For the testing of the ShopBot machine we decided to design a wooden base. This wooden base would serve us for a future assignment. This wooden base is made up of 4 independent blocks. Each block must be joined by pressing against each other.
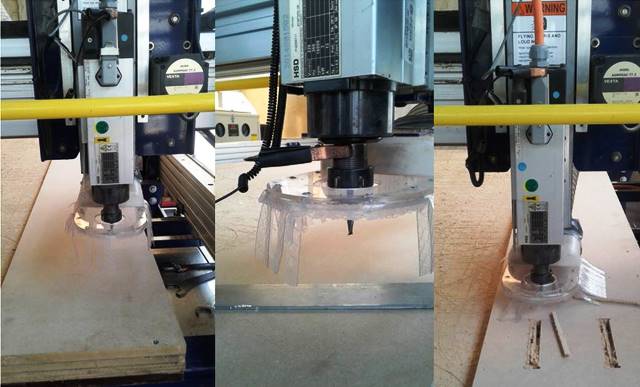
In order to find the exact measurements that allow having the right pressure, it was necessary to carry out several cutting tests with the Shopbot machine.
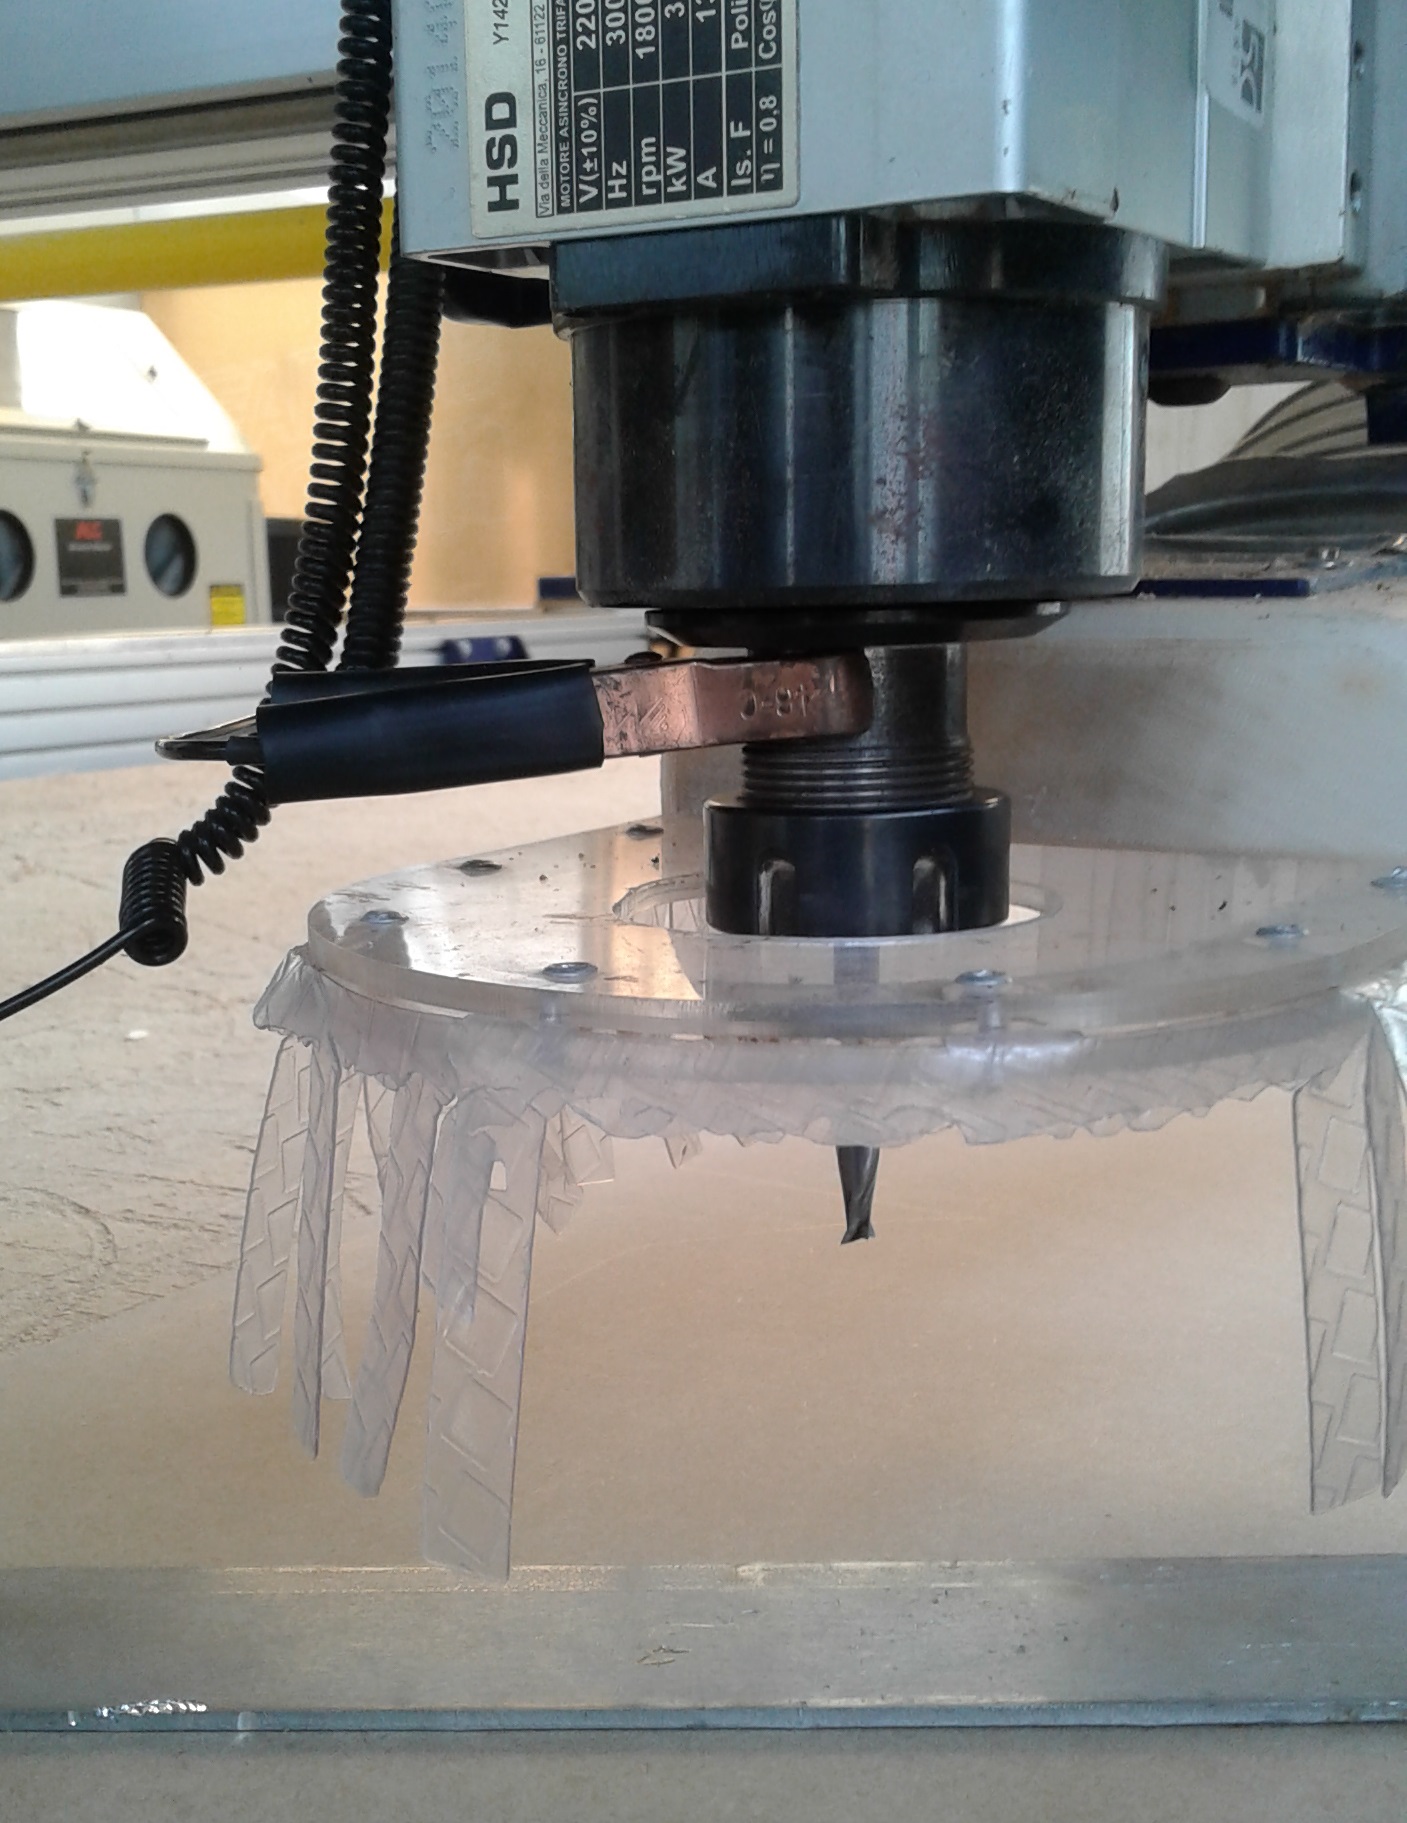
In order to make the cuts, we calibrate the milling cutter of the machine. To calibrate, we go to the Slices menu, choose C2 - Zero Z axis w/ ZZero Plate and use the metal plate for calibration.
The cuts were made on an 18 mm MDF plate. MDF are the initial letters of the name "medium density fiberboard". It is a type of engineered wood that is widely used in the manufacture of flat-pack furniture and cabinet doors.
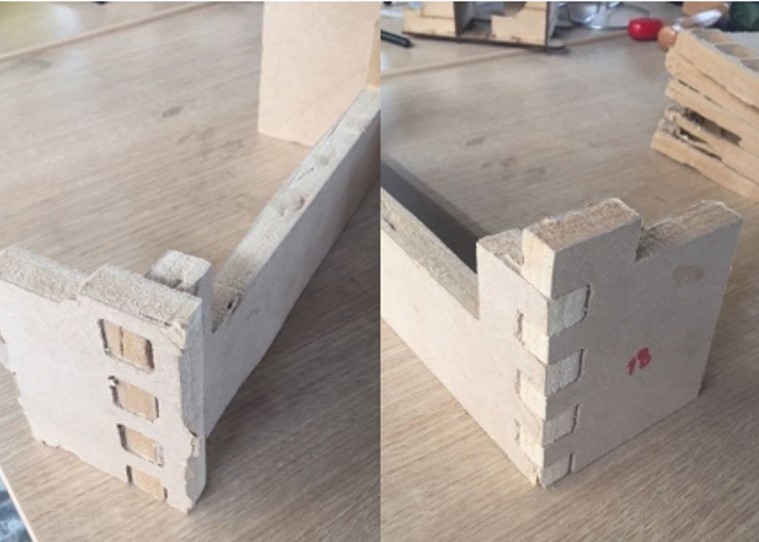
In order to find the exact measurements it was necessary to understand the KERF. The KERF is the width of cut that the blade of a cutting tool makes when cutting through a piece of material.
We did several cutting tests with different KERF sizes: 13mm, 13.5mm, 14mm, 14.5mm, 15mm, 15.5mm. 16mm and 16mm. The KERF with which we were able to assemble the pieces in the best way was the 15 mm.
Individual assignment:
-
Make (design+mill+assemble) something big.
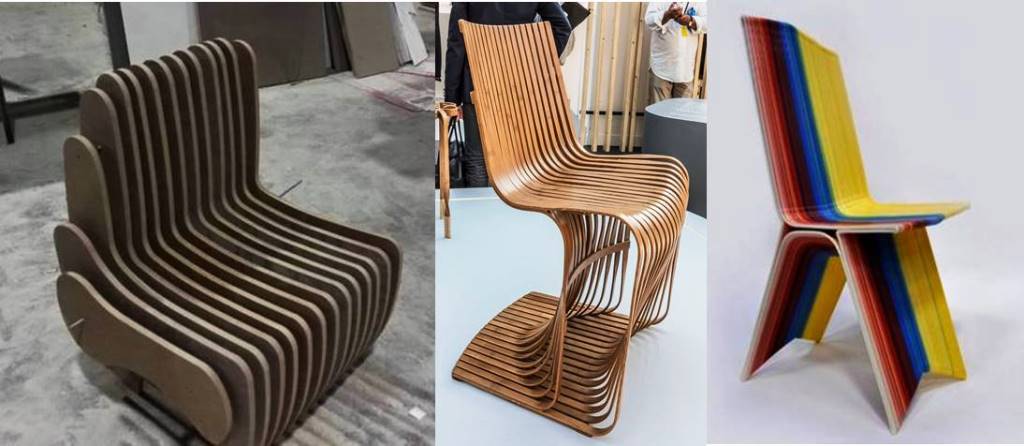
Step 1: For this assignment I tried to build a chair for a child from 4 to 6 years old. I looked for some sillar images on the internet. I was interested in three models of chairs: chair1, chair2, chair3.
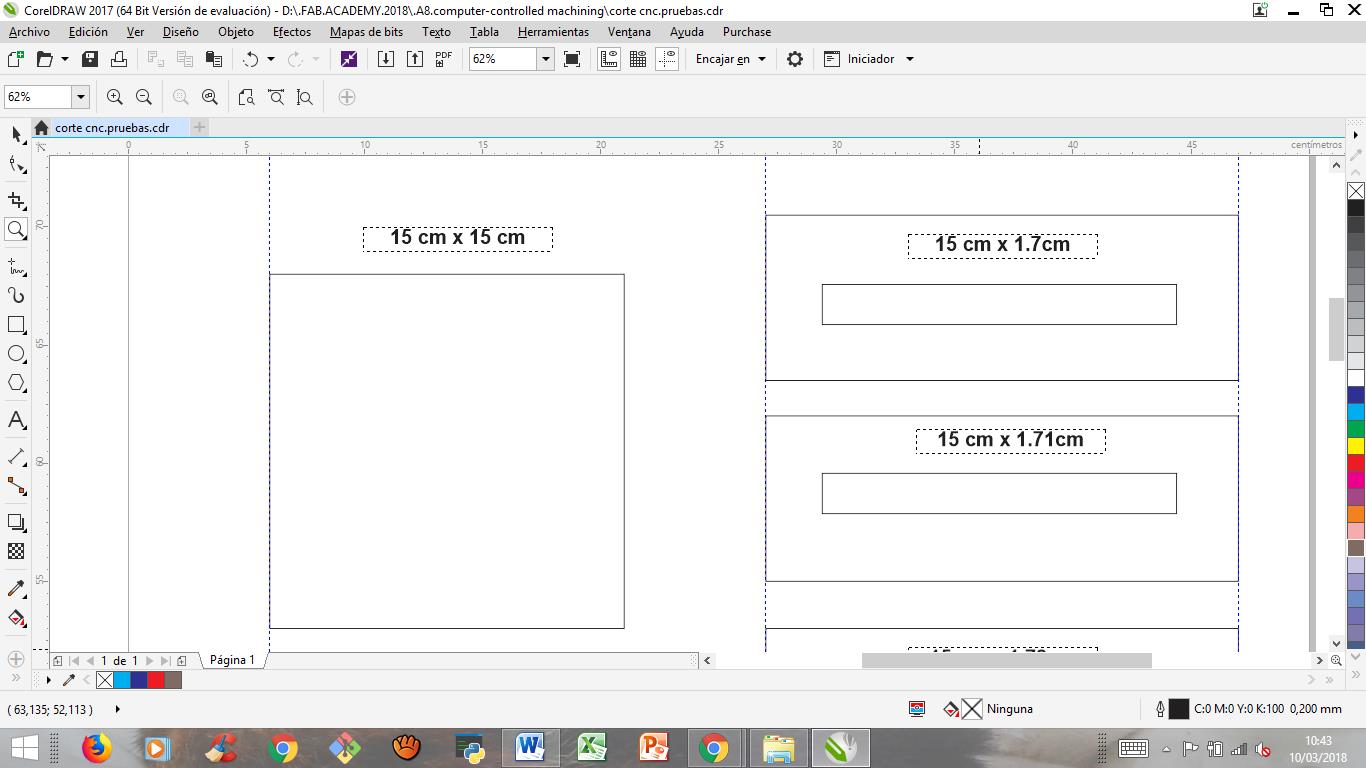
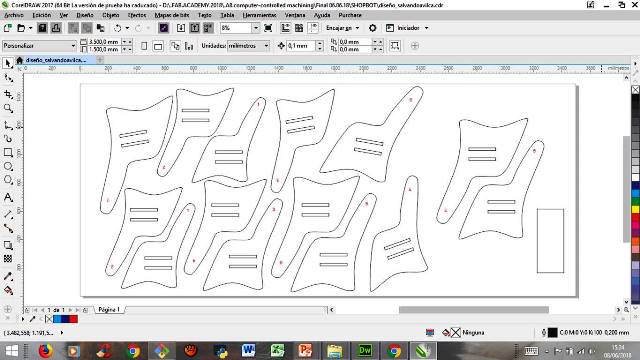
Step 2: For the design of the chair I used the Corel Draw program. I started the design by drawing the outline of an ergonomic chair.
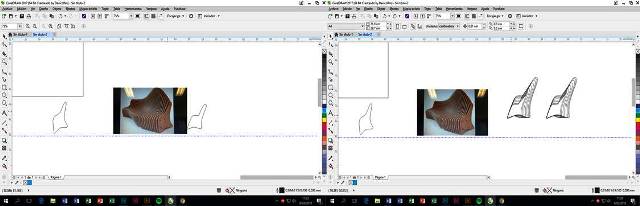
Step 3: Then I made copies of the outline. Each copy had a different size. The sizes varied by 10 millimeters between themselves.
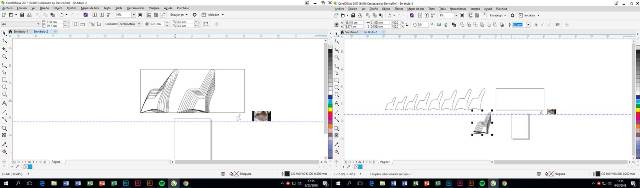
Step 4: Then place the copies one side of the other to order them before being cut by the ShopBot machine.
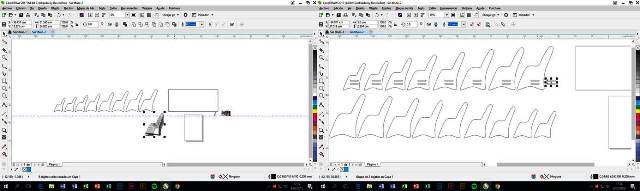
Step 5: Then I decided to build a scale model in order to test if the design was right. I modified the size of the design so that it can fit into the cardboard paper plate for laser cutting.
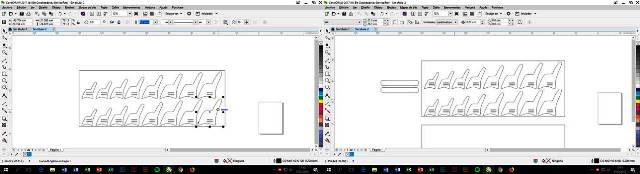
Step 6:The laser cut was made using the Trotec laser machine. The cardboard paper has the following size 86 x 60 cm.
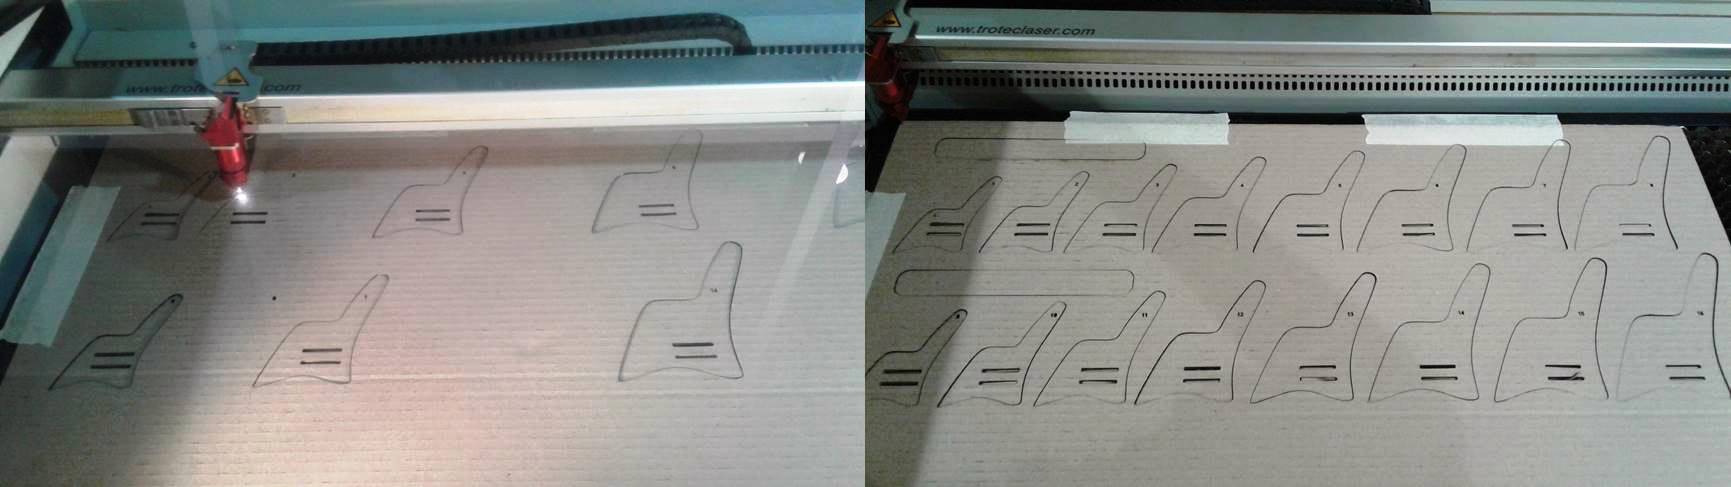
Step 7: Then I ordered the pieces for the final assembly. The pieces were ordered from smallest to largest size and according to their numbering. There were 16 pieces in total.
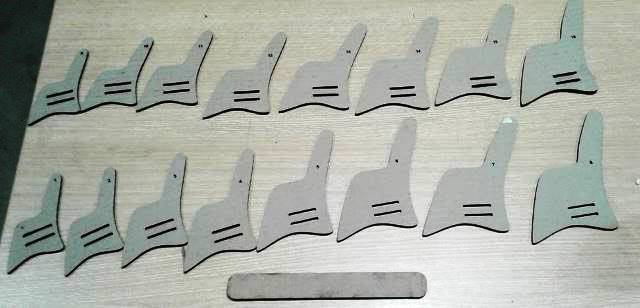
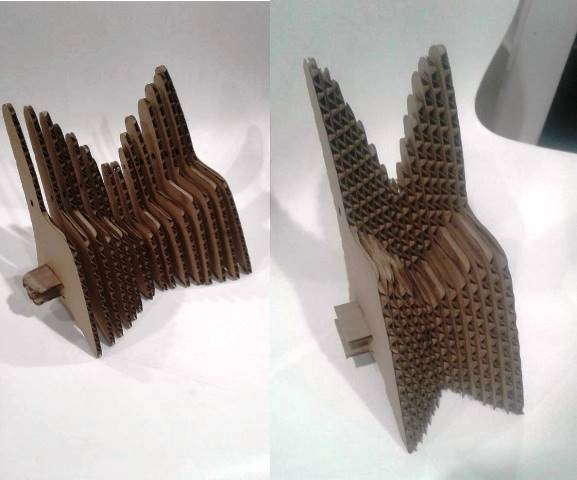
Step 8: The scale model was assembled in two ways: a model with the separated pieces and another model with the pieces completely joined. The second model seemed more suitable because it would be more comfortable for a child.
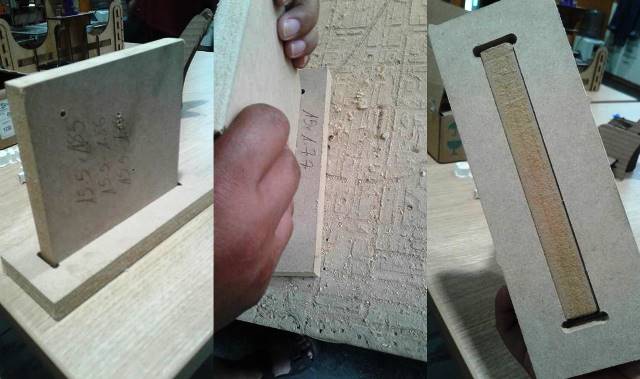
Step 9: Then, on the advice of my instructor, I did some fitting tests. For this I designed some fittings with various measures.
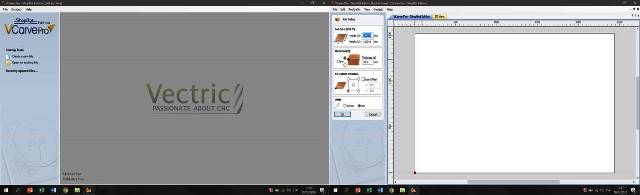
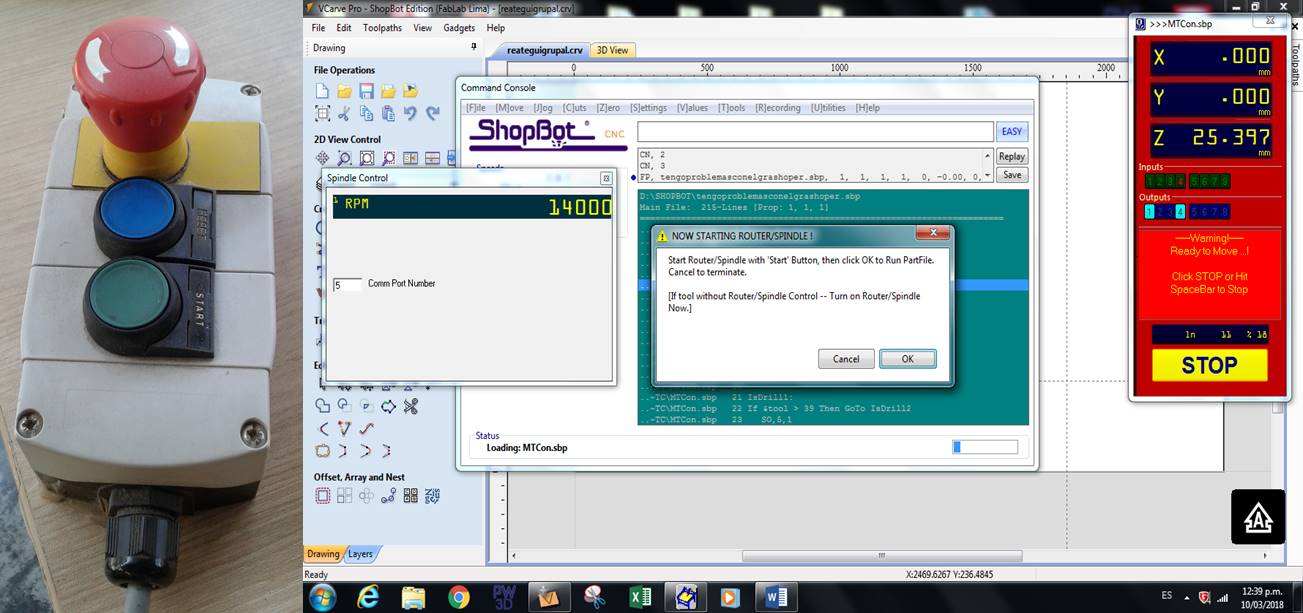
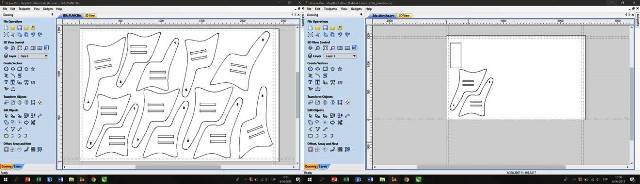
Step 10: I used the Vcarve program to cut the pieces on the Shopbot machine. VCarve program provides a powerful and intuitive software solution for cutting parts on a CNC Router. It is necessary to take into account the following considerations for the CNC cutting process with the Vcarve program on the Shopbot machine:
*Configuration of the file in the Vcarve program: To load the file, it is preferable to work the design file in other software. Files can be saved in the following formats: .pdf, .ai, or .dxf.
*Material configuration: In the upper left corner of the Vcarve there is the Material Setup title bar, where the length and width of the object to be cut is established, as well as the depth of the material. In addition, the origin point in x and origin position is selected.
*Drawings tool: It allows to edit vectors, scale the image, rotate it, move it, use layers, etc.
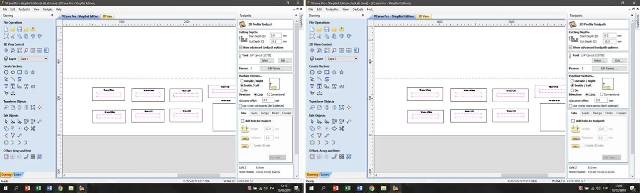
*Trajectory of operations: In the upper right corner, we have the Toolpaths menu. Inside is Toolpath List, in it we have the order of operations. If we do not have any yet, to create an operation, we select Create Profile Toolpath.
*Select the cutting parameters: Select the parameters according to the material. It is essential if you want to make assemblies, to see that the cuts for the union in the assembly have the same selection in machine vectors.
*Get the file for cutting: Select the image and click to calculate, this will allow us to have a 3D image of the piece and the cutting path.
*Start of cut: Open the Shopbot program, press k to use the keyboard and move the tool (previously the material must be screwed). Use the arrow keys to control the position in X and Y, for the position in Z use Pg Up and Pg Dn.
Step 11: To make the cut first I entered the measurements of the wooden board: 2440x1520x18 mm.
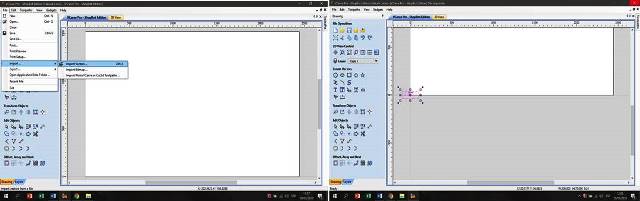
Step 12: Then I imported the designs to the Vcarve program from the "import vectors" option and placed them in the work area.
Step 13: Then with the option "Tbone fillet" I made holes in the interiors of each piece. This is necessary to facilitate the fitting of the pieces.
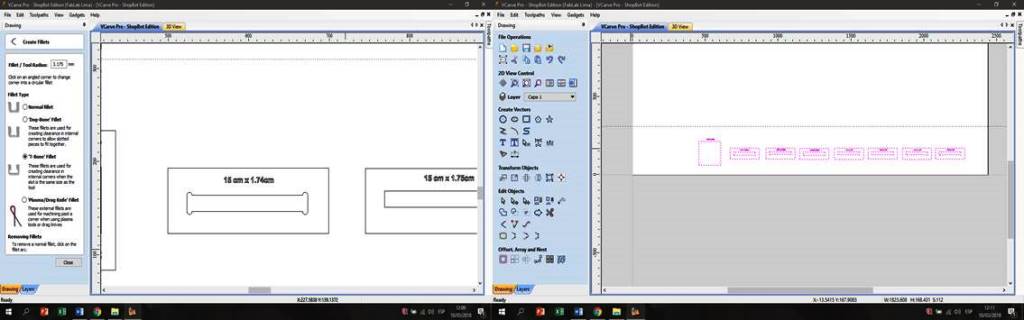
Step 14: Then I did the paths configuration. First I did the inside path configuration and then I did the outside path configuration
Step 15: Then I received instructions to prepare the CNC machine for cutting.
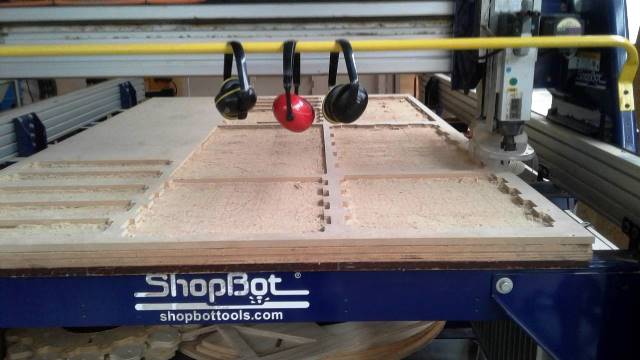
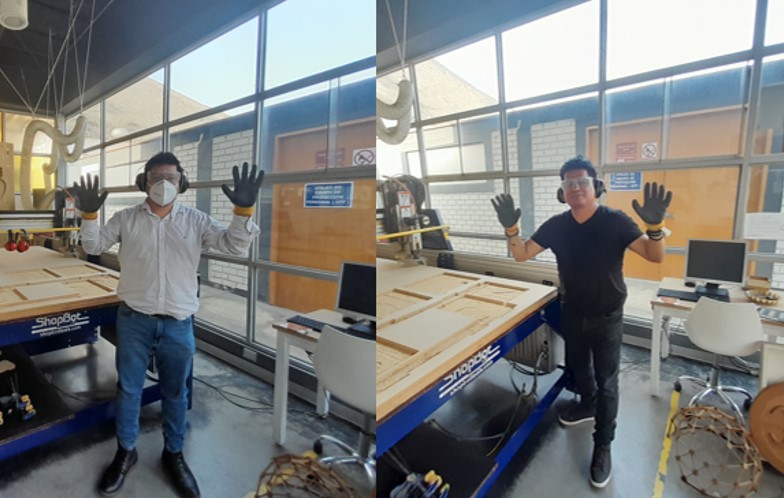
Step 16: To operate the ShopBot machine it was necessary to use some safety equipment such as gloves, hearing protector and respiratory protection.
Step 17: Before cutting, it was necessary to calibrate the milling cutter of the machine. To calibrate, we go to the menu Cuts we choose C2 - Zero Z axis w / ZZero Plate and we use the metal plate for the calibration.
Step 18: To send the cut to the machine it is necessary to use the "stop", "pause" and "reset" buttons.
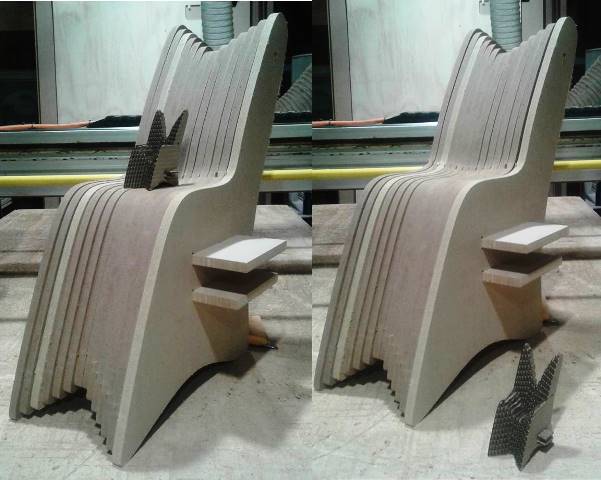
Step 19: It was necessary to perform several cutting tests until finding the right fit. The tests allowed me to determine the correct measures for cutting the pieces of the children's chair.
Step 20: Then I made the necessary modifications in the design.
Step 21: TThen import the modified files in the Vcarve program and make the cuts in the ShopBot machine. Two wooden plates of 2440x1520x18 mm were used to cut the pieces.
Step 22: Then I put in order the pieces cut according to their numbering.
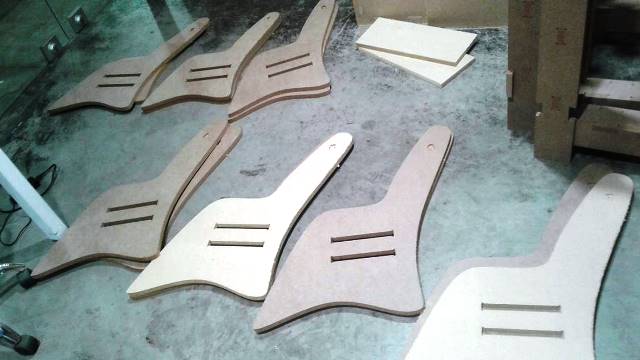
Sep 23: The order of the assembly was from the pair of pieces with the number 1 to the pair of pieces with the number 7. They were 14 pieces in total.
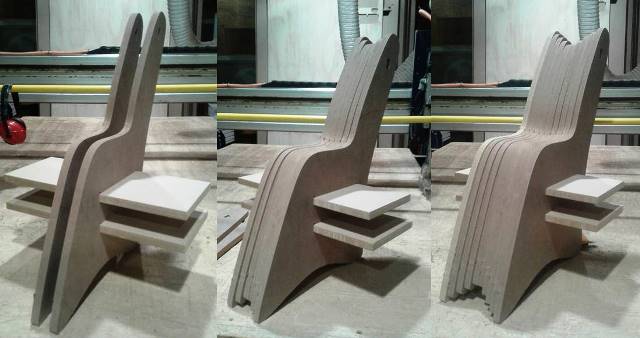
Sep 24: Finally I compared the final model with the scale model. I will paint and put some additional details to the chair and then donate it to a school near the local area.