Assignment 3: Computer-Aided Design
Model (raster, vector, 2D, 3D, render, animate, simulate, ...) a possible final project, and post it on your class page.
Learning outcomes:
-
Evaluate and select 2D and 3D software.
-
Demonstrate and describe processes used in modelling with 2D and 3D software.
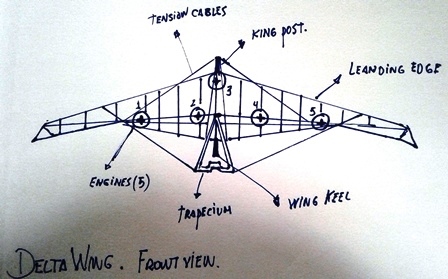
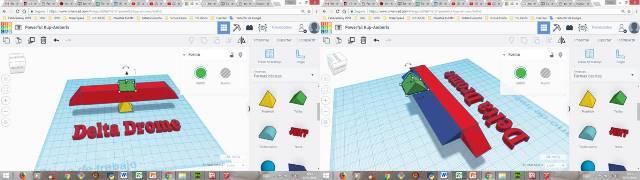
As a final project of the fab academy 2018 I have thought about a project called "Delta Drone". Delta drone is a hybrid air device. It is a mix between delta wing and a drone. The objective of the project is to have an aereo device that has the ability to take advantage of air currents and stability for independent flight.
Delta Drome would have flight autonomy of up to 2 hours. For this I would use two batteries and the possibility of taking advantage of the air currents by planning.
Delta Drone It would have incorporated a digital camera with a resolution of 4K (super HD). In addition Delta One could use flexible solar panels to store energy in mid-flight, this would allow it to remain in the air for much longer.
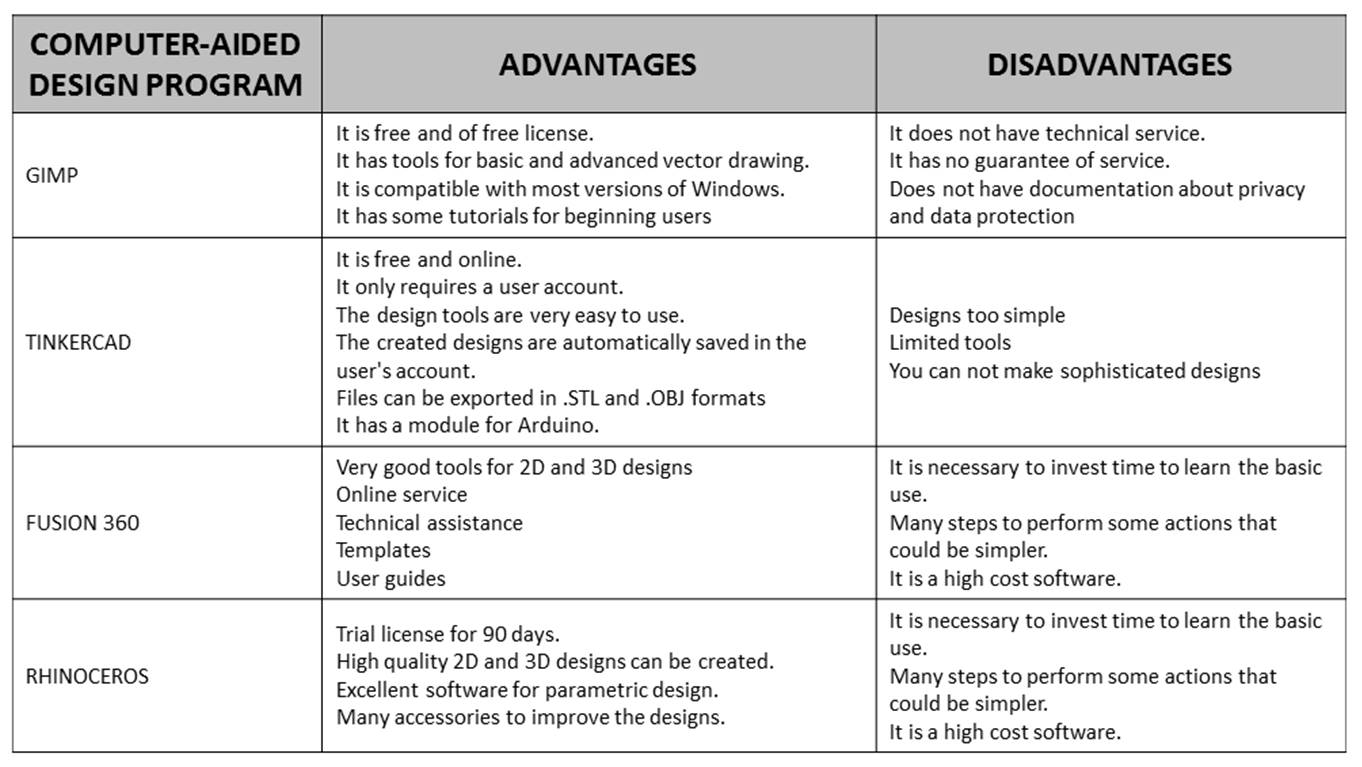
I evaluated four programs to design in two and three dimensions. All the programs have very interesting tools to elaborate simple and sophisticated designs. It is necessary to invest time and effort to find the ideal program. It is also necessary to know which ones have the advantages and limitations of 2D and 3D design programs.
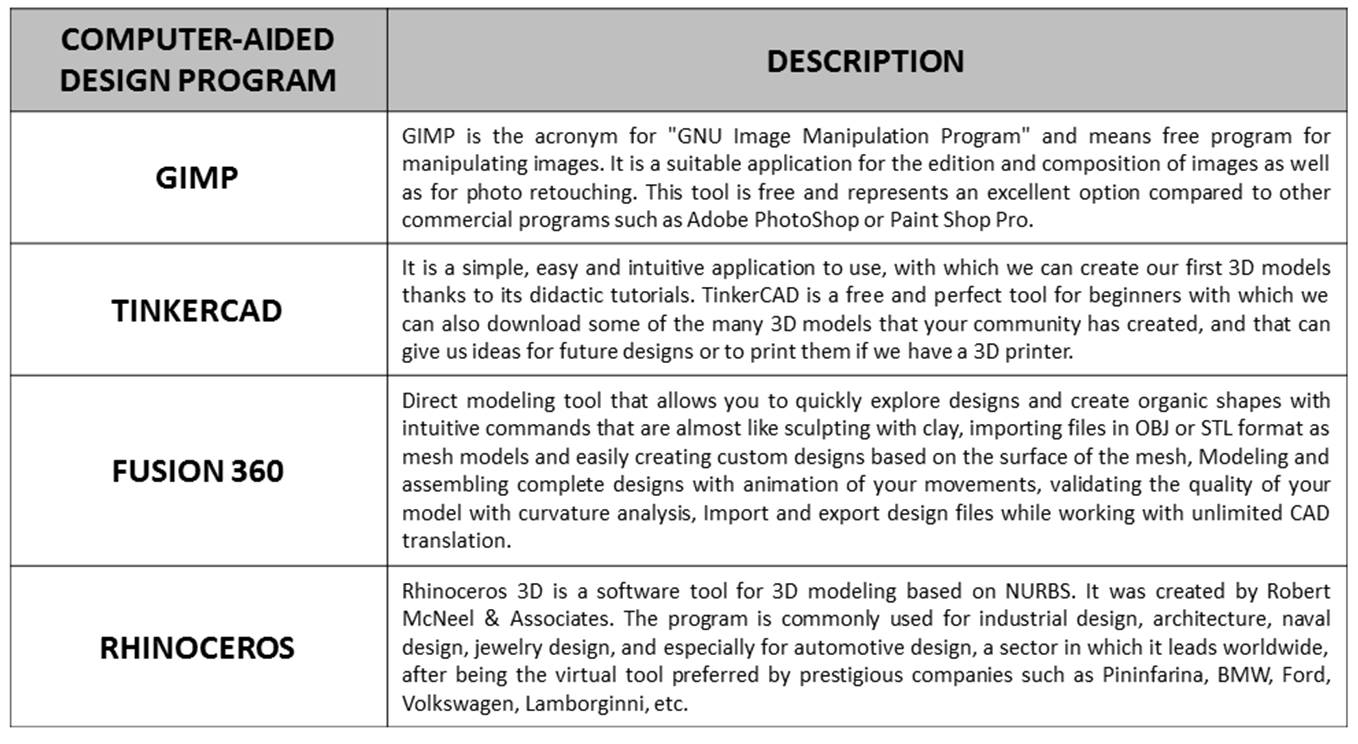
I developed a small table where I write some advantages and disadvantages of four programs for 2 and 3 dimensional design. I'm sure that the more I use them the better my appreciation will be.
Gimp
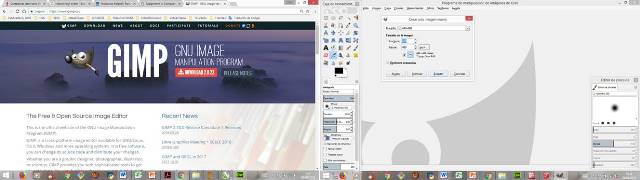
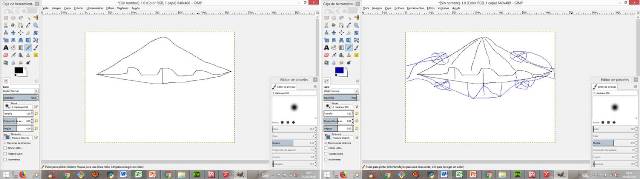
To draw a draft of the project I used the Gimp program. This program is easy to use and has a free license. It was very easy to download and install it on my computer. The interface of this program was very similar to the Adobe Photoshop program interface.
When we start GIMP, we can see several windows, and within each of them we use the right mouse button to access the different functionalities of each of them. The GIMP interface has two main windows - the Toolbox and the Image Window - in addition to other windows, such as the color palette, layer window,
etc.
Using GIMP we can create and edit bitmap images mainly. We can also work with vector images with the corresponding plug-in, but not
it is the most suitable program for dealing with complex vector images. We can also create small animations through the individual treatment of the images or frames. GIMP supports the creation of small AVI and GIF animations, and can also read MPEG videos.
GIMP offers a set of extensions and filters that allow generating and retouching
images with the minimum effort. Its usefulness, use and design are reminiscent of the "plug-ins" of Adobe's well-known "Photoshop" program. In the same way, GIMP allows writing "scripts" in a variety of languages to manipulate images. Among them is the popular language Perl and a language developed specifically for GIMP called "Script-Fu", with characteristics similar to LISP, in addition to writing extensions directly in C language.
Tinkercad
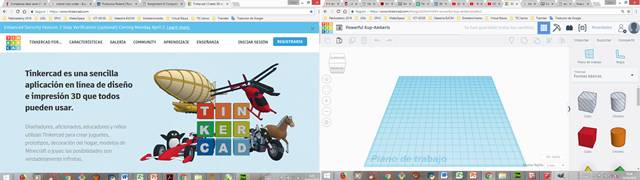
Delta Drome would have several ways to be used: to shoot landscapes, to cover public and private events, as a tool to teach children basic concepts of aeronautics and renewable energy, etc. To have a draft of the design in 3d I used the Tinkercad program. This program is a product of Autodesk.
The objective when using Tinkercad should be a first immersion in the world of 3D design in a simple and attractive way, since the work interface is simple and very attractive initially, although once the basic concepts are mastered it lacks tools to reach complex designs.
To use the Tinkercad program it is not necessary to have previous knowledge of 2D or 3D design. It is a program of easy handling. It has a tutorial that consists in going solving some small assignments to go learning little by little to use this fun program.
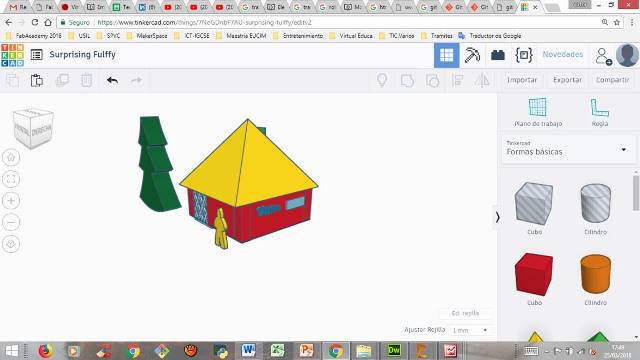
The appearance of the software when starting a new design is the one shown in the image. Without extending much explanation: in the upper left corner we have the "Tinkercad" button to return to our home screen as users, in the lower area of the same we have buttons to control the point of view of our design and zoom in on the same (although both options can be done with the mouse or trackpad buttons). In the right area we have a series of drop-down menus with direct design options (geometric shapes, letters, symbols ...). In the upper area we have the undo and redo icons and a series of shortcuts to work tools and design that will be explained later. In the center we find the work plane ("Workplane").
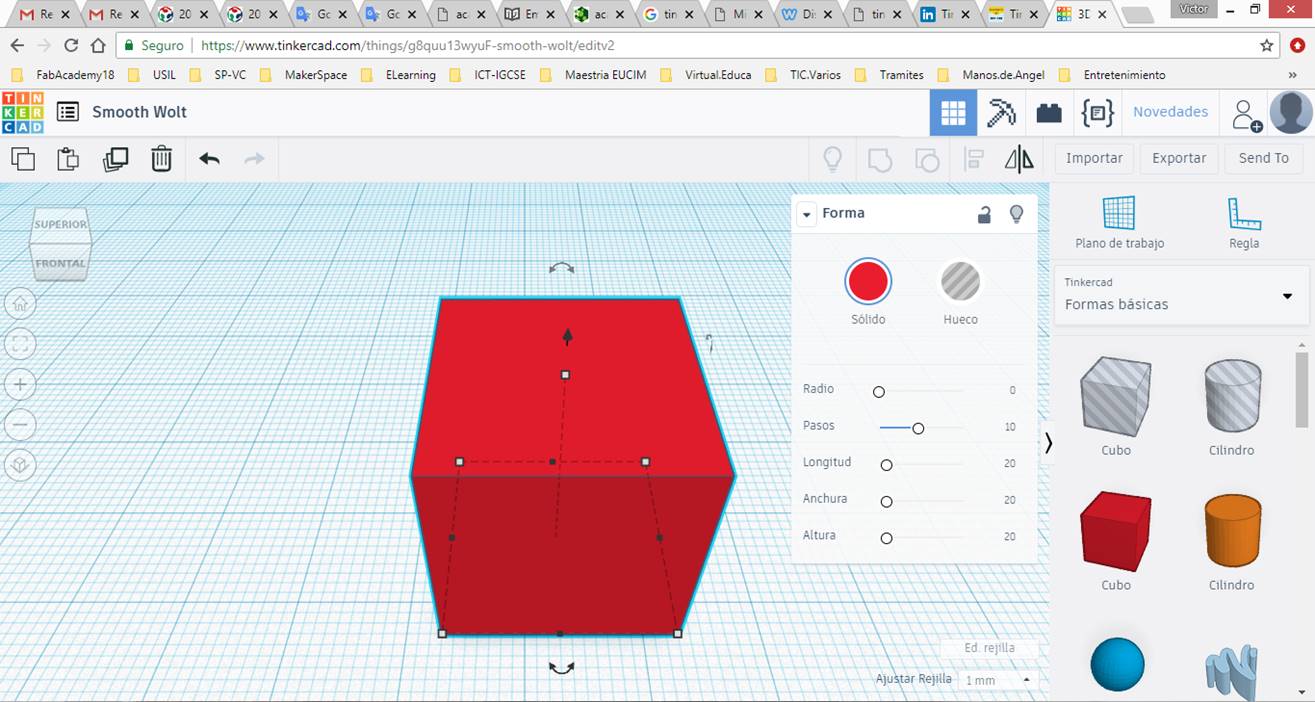
a. Display the "Geometric" right side menu and select the cube ("box").
b. Move the cursor of your mouse to the work plane.
c. A cube will appear that will move following the movement of the cursor and we can "deposit" it wherever we want (leave it fixed in any position of the work plane).
d. When depositing it, a series of selectable symbols will appear in the cube's outline. Its functions are basic. The white squares are used to increase or decrease some of its dimensions (length, width or height). The upper black arrow serves to raise the cube with respect to the working plane and the curved arrows allow us to rotate it with respect to the three main axes (x, y, z).
Rhinoceros
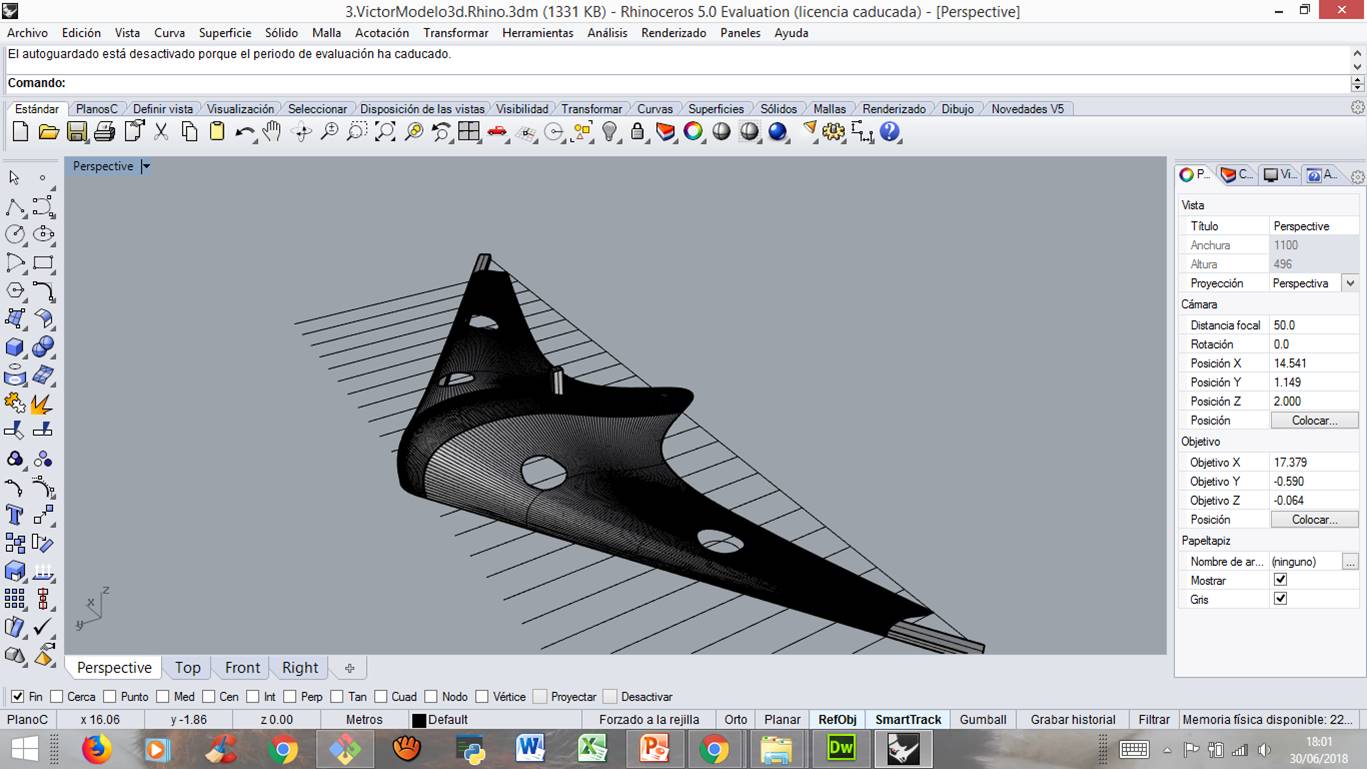
For the base design of Delta-Drone I used the Rhinoceros parametric design program in version 5.0 The base dimensions are long: 3 meters, width 1.5 meters. After drawing the base measurements, I proceeded to automate some of the design actions. For this I used the visual programming program Grasshopper. This program is a Rhinoceros plug-in.
Basic functions of Rhino
1-On the File menu, click Open.
2-In the Open dialog, select First model.3dm.
If you wish to have the file write to my email with the subject; First model.3dm
3-On the View menu, click Layout of the views and then 4 Views.
Three parallel views and one perspective view.
4-In the status bar, click Force to activate the forced grid.
The forced grid may already be activated in your system. Try not to disable it instead of activating it. If the forced grid is activated, the word "Forced" will appear in black in the status bar. If it is deactivated, the word "Forced" will be grayed out.
5-Click with the mouse in the Perspective view to activate it.
The title bar is highlighted when the view is active. The active view is the view where all commands and actions are executed.
6-Click with the right mouse button (BDR) on the title of the Perspective view and then click on Display in shaded mode.
7-In the Render menu, click Render. The rendering command opens a separate window. The model shows the colors previously assigned to the objects. You can also enter lights and a background color. You will learn to do it later. The view can not be manipulated in the rendering window but the image can be saved in a file.
8-Close the rendering window.
It is very important at the moment of sending something to be manufactured, from a digital file, having a well-defined system of units. If the model is drawn in Centimeters, the file has to be configured in Centimeters, if the model is in Millimeters, the file has to be configured in that unit.
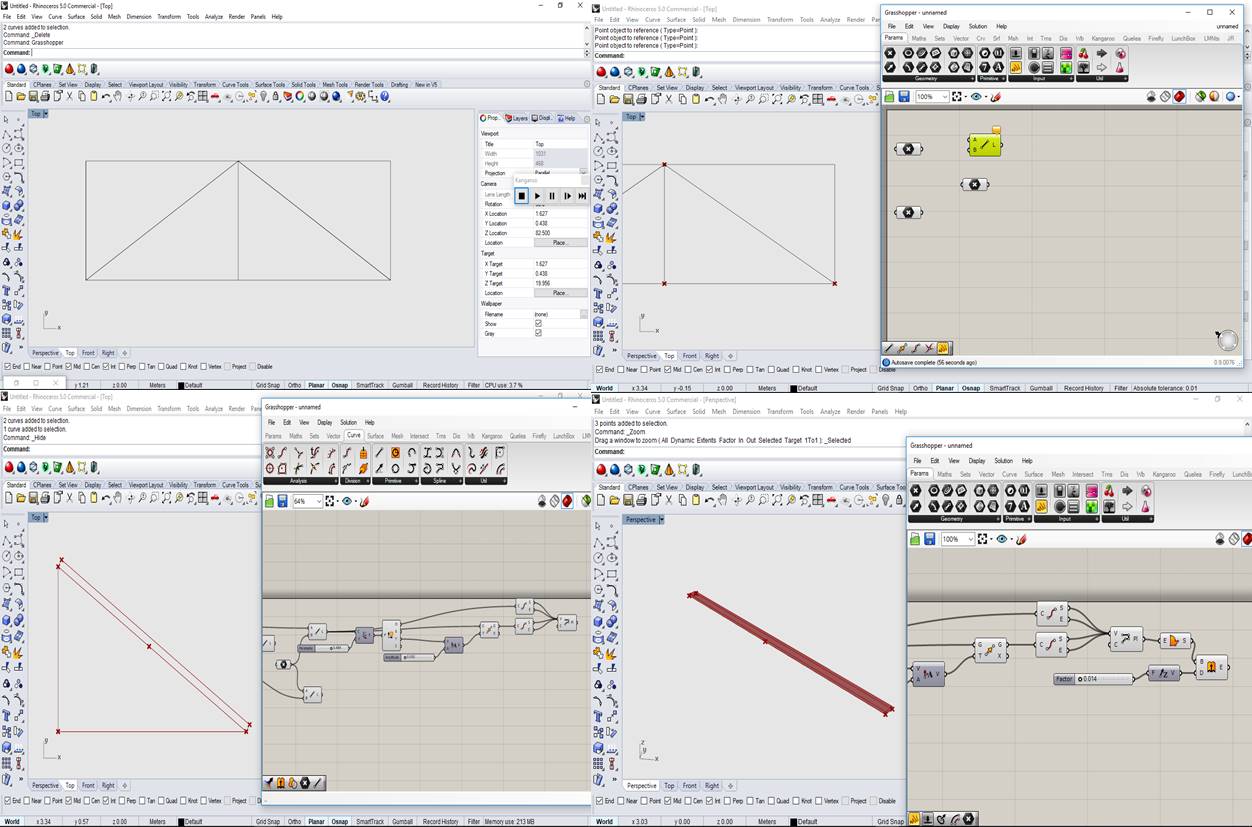
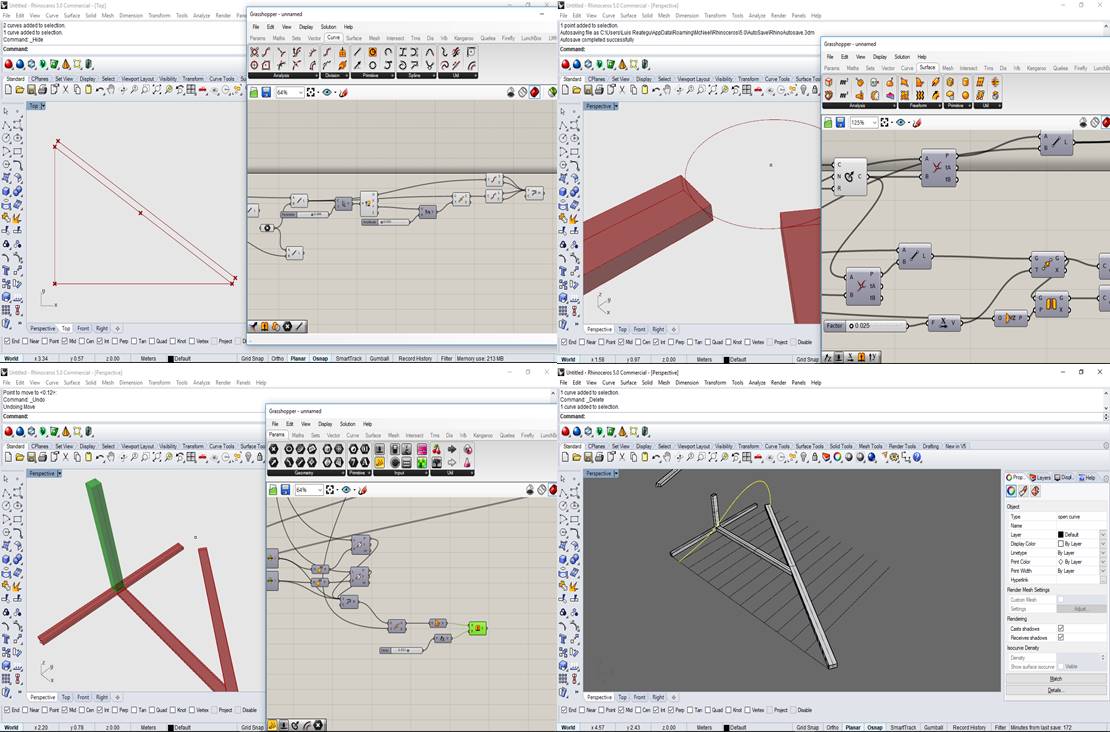
To give structure to the lines, some components were used that will allow modifying the design in the future. The components have inputs and outputs. The drawing entries in the Rhinoceros program are connected to the Grasshopper program components
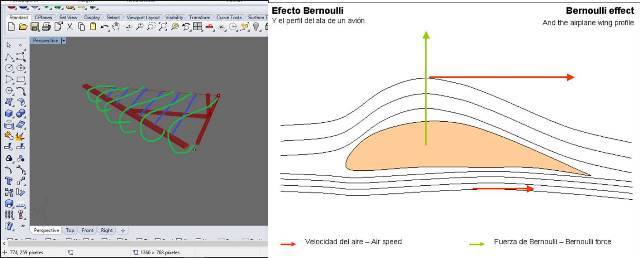
To guarantee Delta-Drome airborne suspension it will be necessary to carry out some tests taking into account the Bernoulli's principle.
The Bernoulli's principle is a seemingly counterintuitive statement about how the speed of a fluid relates to the pressure of the fluid. Link: https://www.khanacademy.org/science/physics/fluids/fluid-dynamics/a/what-is-bernoullis-equation
Image link: https://hernanleon1002.files.wordpress.com/2014/10/ala-de-avion1.gif
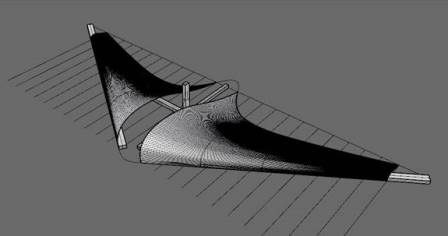
Once the base measurements of the design structure were determined, I created a mesh to cover the design.
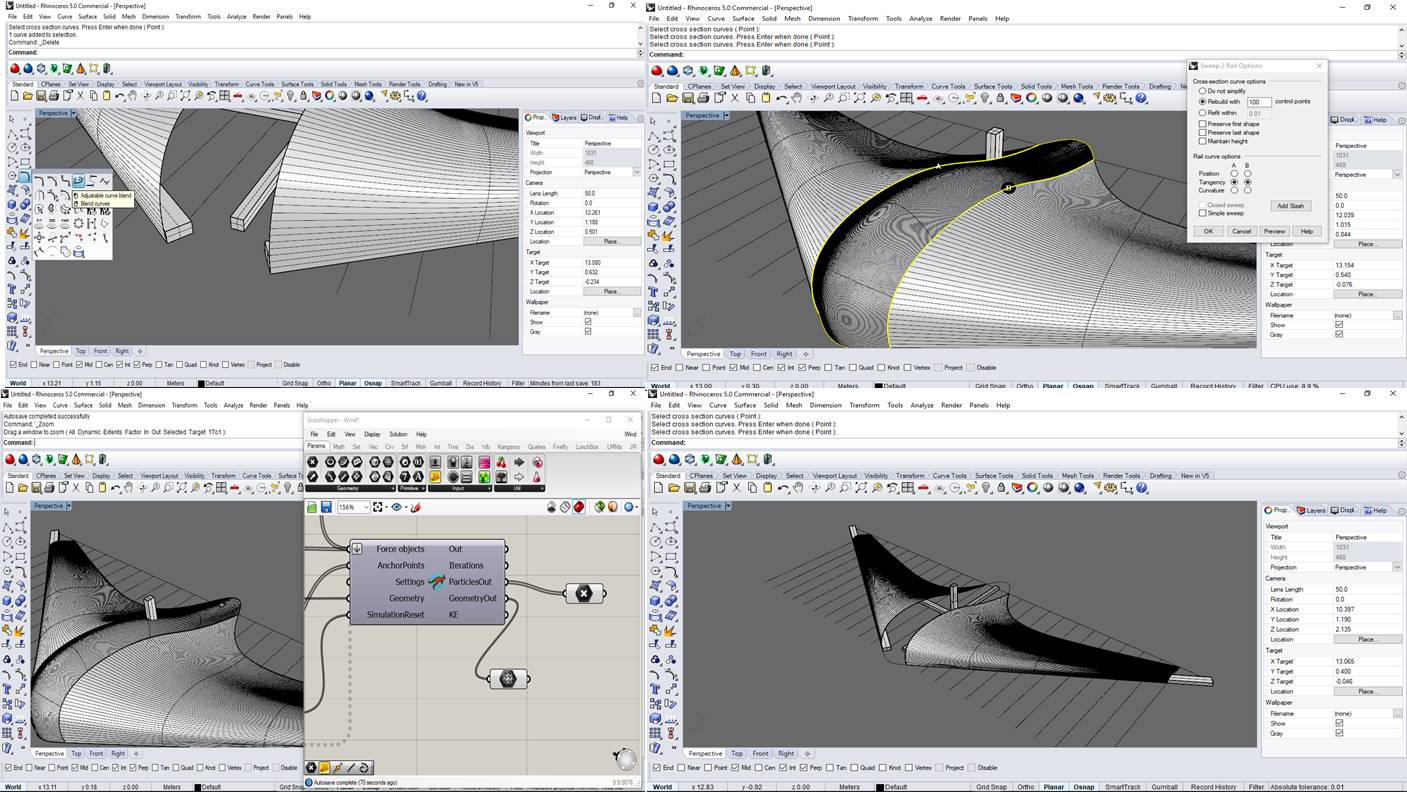
This is a draft of the design. I am going to improve the idea and the project according to the work schedule and the skills that I am acquiring in the Fab Academy 2018.