Week 5
3D Scanning and Printing
This week the theme was "3D printing and scanning". I learned about the operation of the 3D printer and also about the scanning devices.
The objectives of that week were:
- Design and 3D print an object (small, few cm) that could not be made subtractively.
- 3D scan an object (and optionally print it).
Design and 3D print an object
For this assignment I designed a small object that is difficult to manufacture or that can not be made using the subtractive method. This means that the object can not be manufactured with the three limitations of the axis.
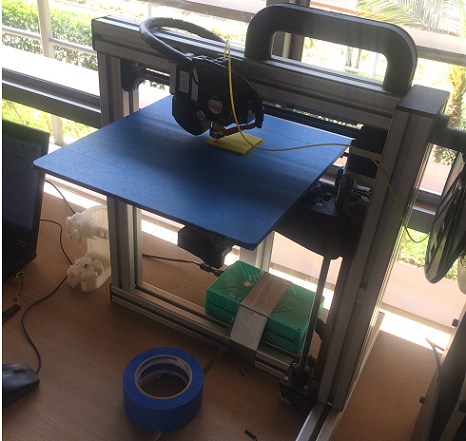
The printer with which I will work is the Felix 2.0 (Netherlands), works with PLA, ABS and Nylon with a resolution of up to 50 microns.
In this printer, the extruder moves on a horizontal axis, and the bed moves on the other two axes. The control is with Reperier customized for printer Felix
In this printer, the extruder moves on a horizontal axis, and the bed moves on the other two axes. The control is with Reperier customized for printer Felix
There are several types of filaments for 3D printing
- PLA: Polylactic acid,
- ABS: acrylonitrile butadiene styrene
- HIPS: high impact polystyrene
- PET: polyethylene terephthalate
- Laywoo-d3: composite wood or polyethylene similar to PLA
- TPE: Thermoplastic
- Nylon
The most used are PLA and ABS.
Although I will work on PLA, I found it interesting to show a comparative table between the two types of filaments
Although I will work on PLA, I found it interesting to show a comparative table between the two types of filaments
| Advantage | Disadvantages | Uses | |
|---|---|---|---|
| PLA |
|
|
Decorative elements, figures, models, prototypes. |
| ABS |
|
|
Mechanical elements, automotive parts, industrial parts, decorative elements. |
Caution
We must be careful with hot surfaces, to melt the filament, the extruder is heated above 200 ° C.
If printing with ABS the printing bed should be heated between 90 ° C and 110 ° C (the PLA does not need a warm bed.)
Do not insert objects or hand while printing, since the extruder could hit it
If printing with ABS the printing bed should be heated between 90 ° C and 110 ° C (the PLA does not need a warm bed.)
Do not insert objects or hand while printing, since the extruder could hit it
Designing the object
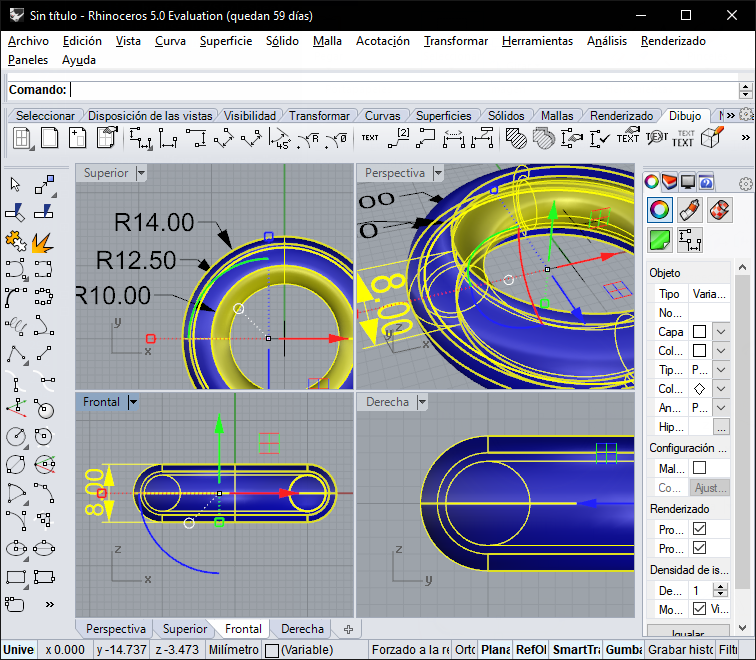
To make this impression I used Rhinoceros, I decided to make one toroid inside another.
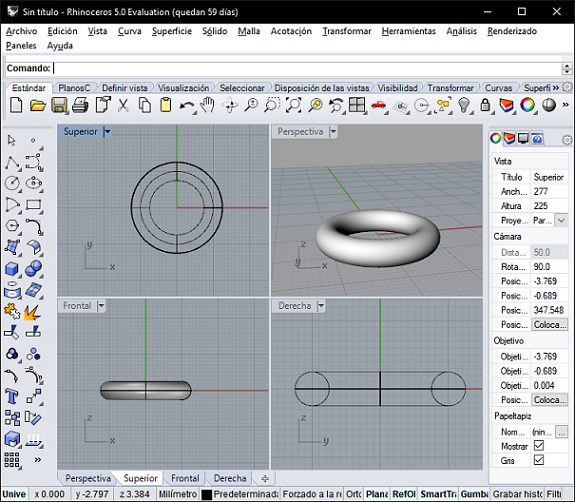
The idea is that the inner toroid has a rotating movement but can not be removed from the outer toroid.
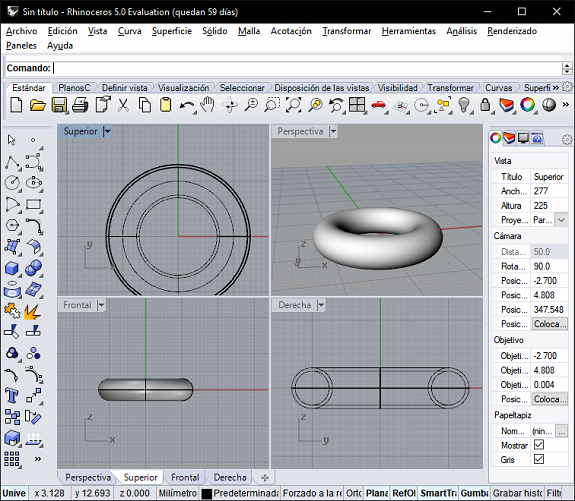
Here we can see the construction process of the external toroid
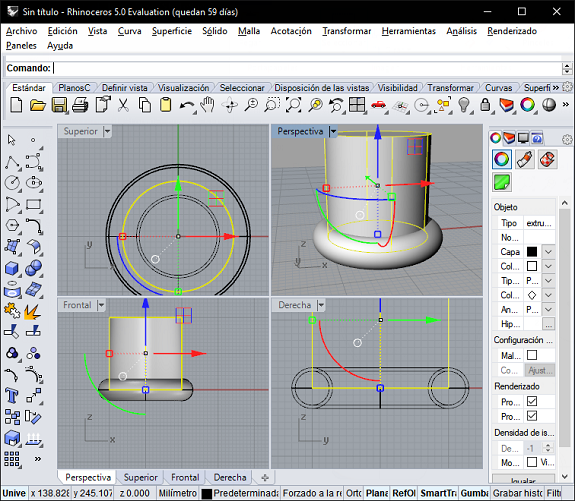
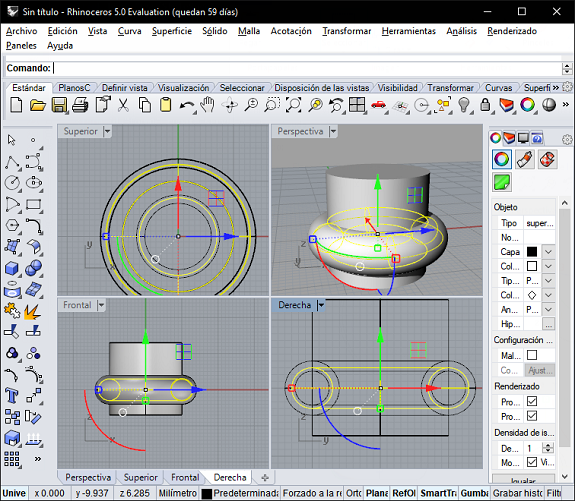
Here we can see some measurements, the big toroid has 28 mm of external diameter and 8mm thickness. The internal toroid is 24mm in diameter
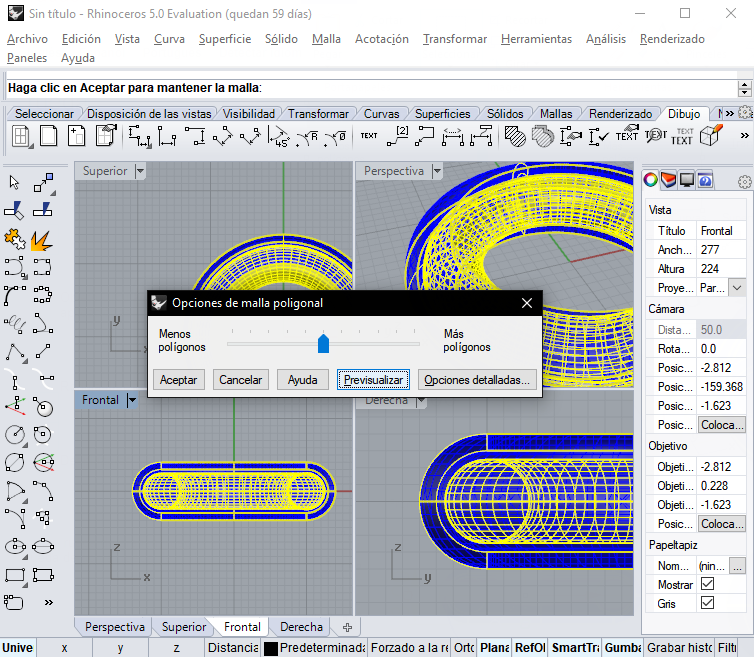
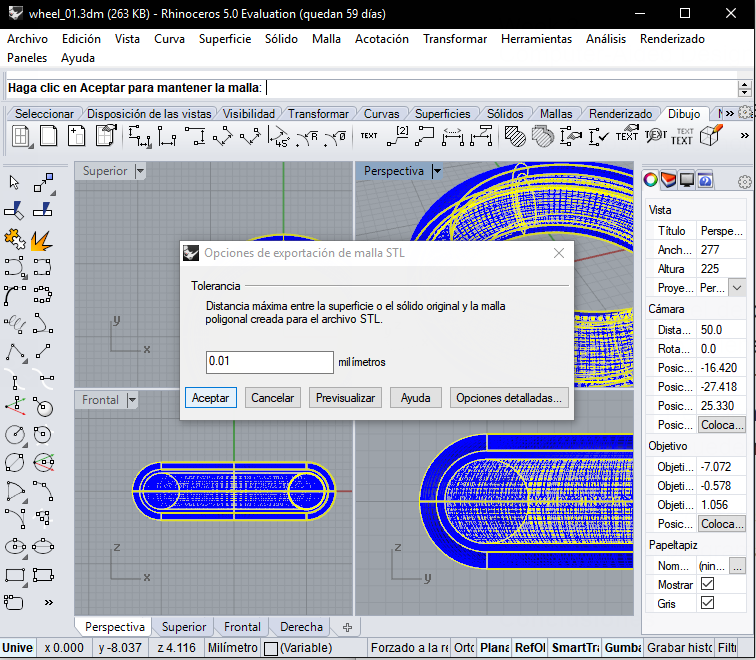
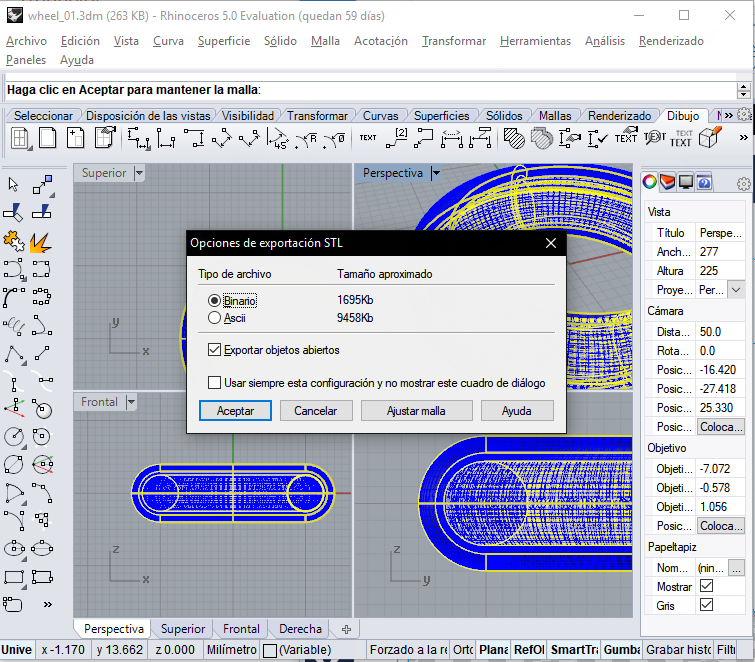
Once ready, we select everything and export it as an STL file
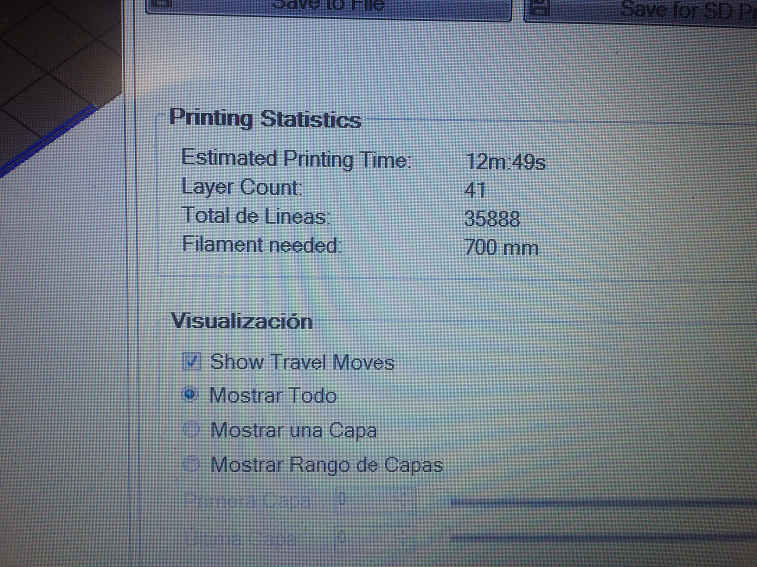
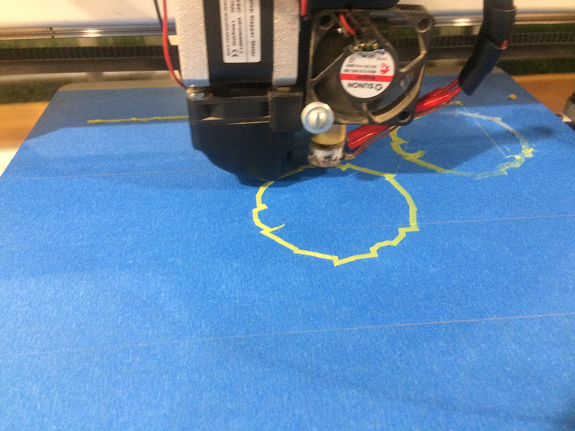
The STL file is loaded in the Repetier software, here we can see the printing process
The printing process will take 12 minutes and 700 mm of PLA
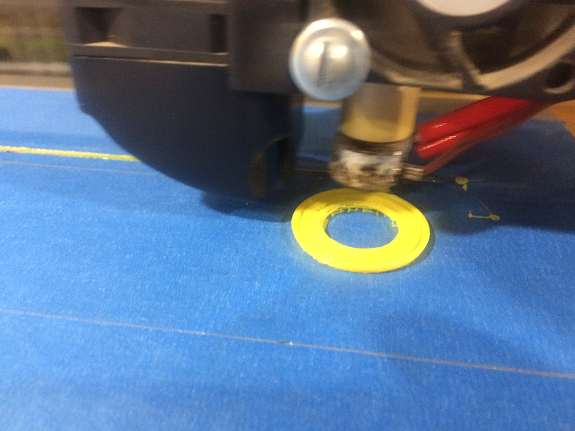

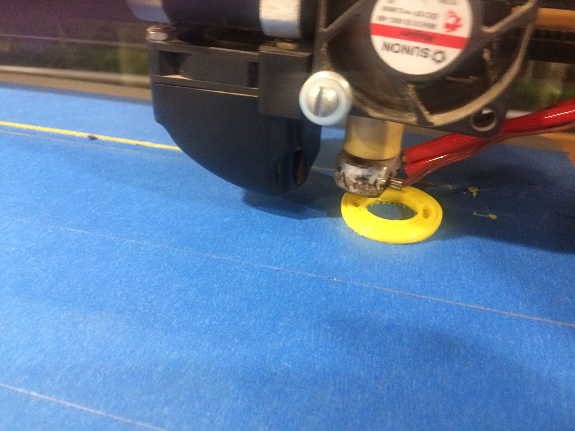
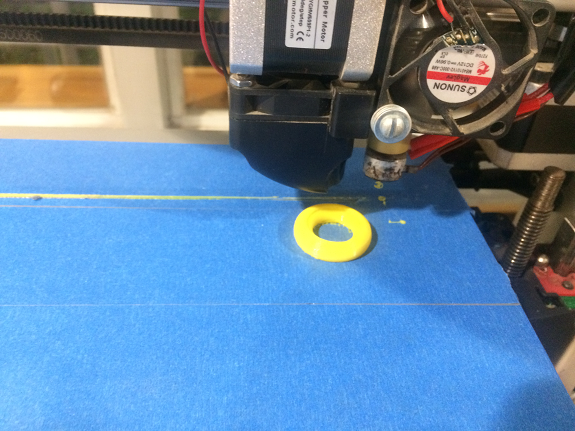
In this video, we can see part of the printing process
As you can see, I did not get what I expected, both toroids are fused, I did not properly define the supports between them and their surfaces are very close, which makes it difficult to separate them without breaking one of them
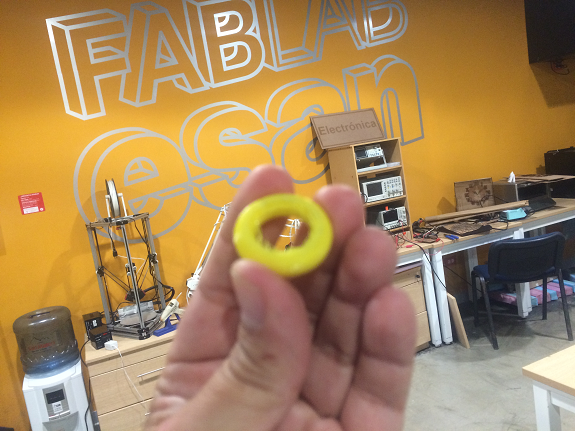
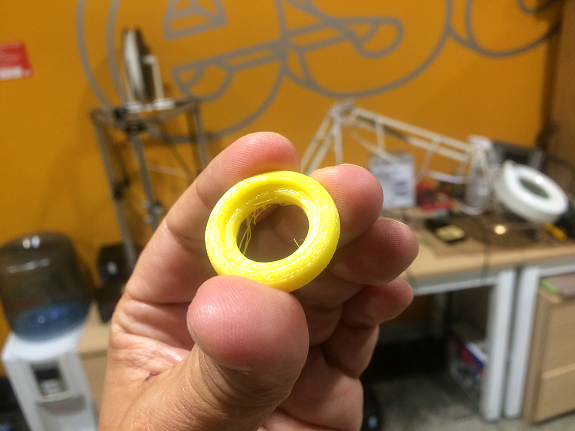
The supports between the surfaces of both toroids and the proximity between them were not a good idea. Perhaps, if the tolerance increase between them, then they could be detached; but I did not use Grasshopper and without it it will take me more time to redesign the toroids.
Later I will continue doing tests between toriodes, for now I will leave it and I will do another design.
Later I will continue doing tests between toriodes, for now I will leave it and I will do another design.
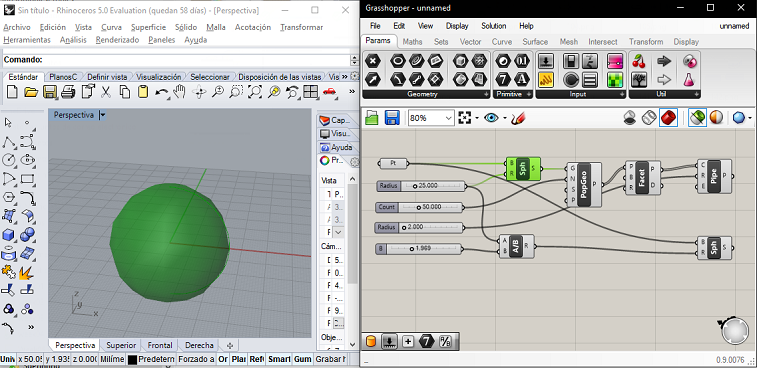
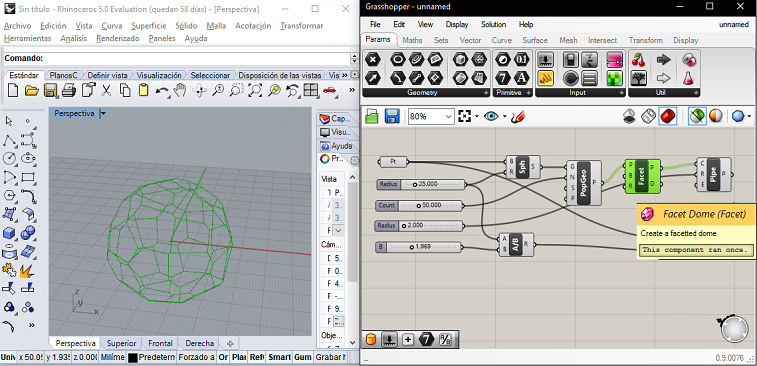
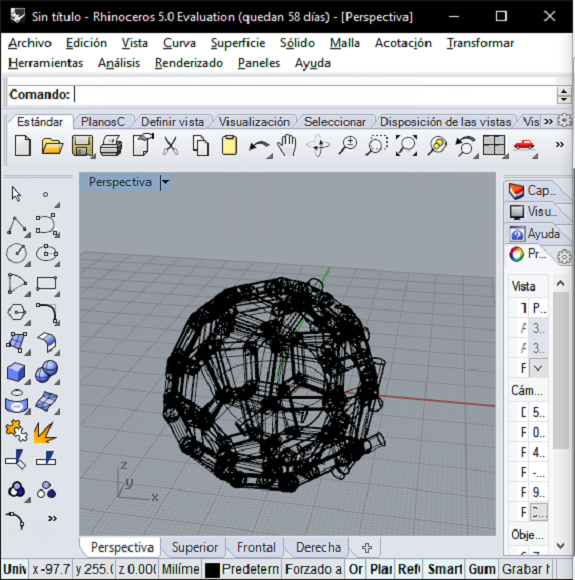
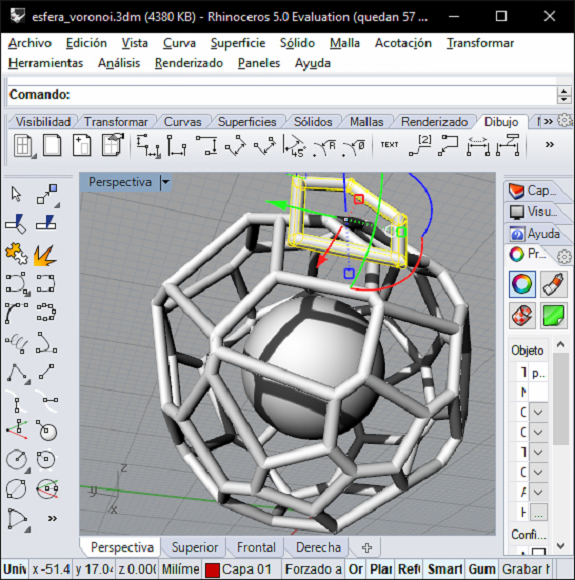
I've gone back to Rhinoceros, but this time I used Grasshopper. I made a solid sphere inside a spherical voronoi object. In this figure we can appreciate the external sphere.
With the PopGeo component and with a parameter with integers I filled the surface of the sphere with points.
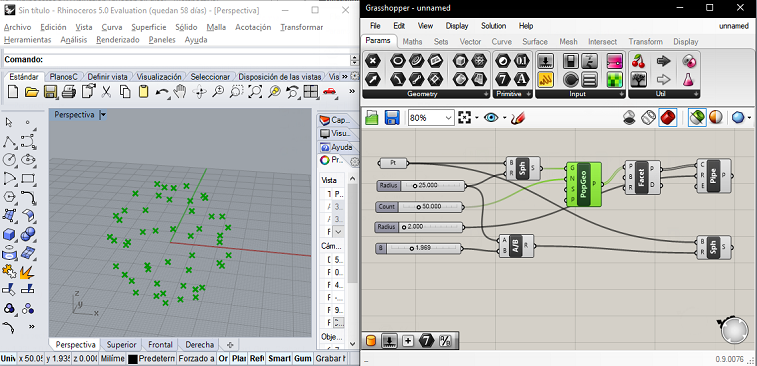
Then, I sent the resulting points as a parameter to the Facet Dome component, generating a voronoi structure.
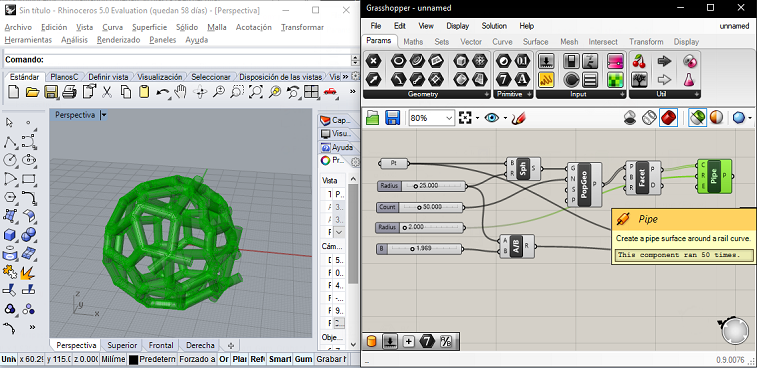
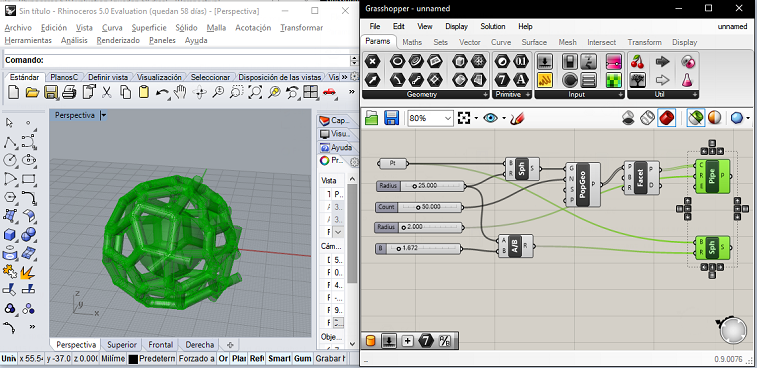
We are almost finising, but we cannot send a form without thickness to print. Due to this reason I used the Pipe component, which draws pipes on the lines of the structure Voronoi.
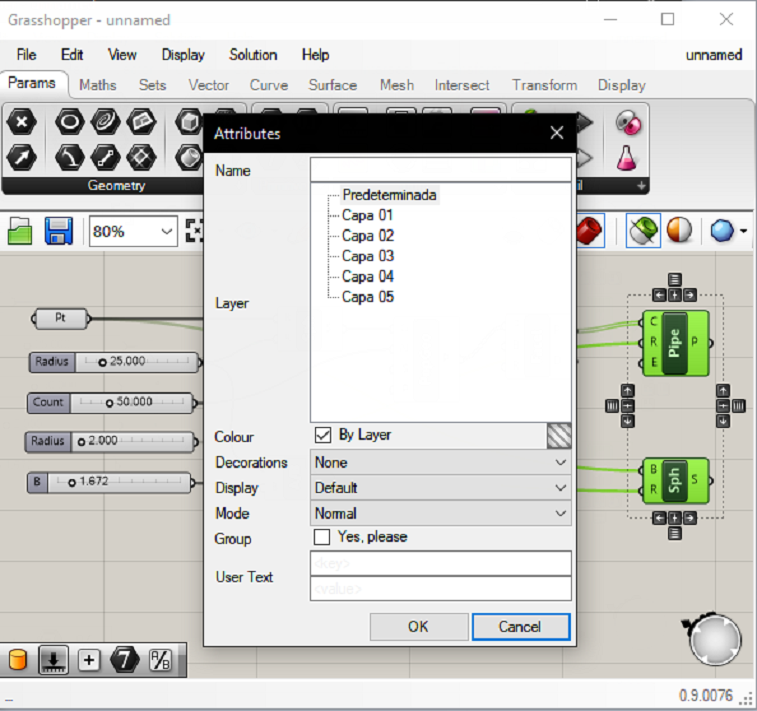
Now, we selected the figures that we wanted to export, then we click right and in the contextual menu we select "Bake".
Optionally you can assign the layer in Rhino
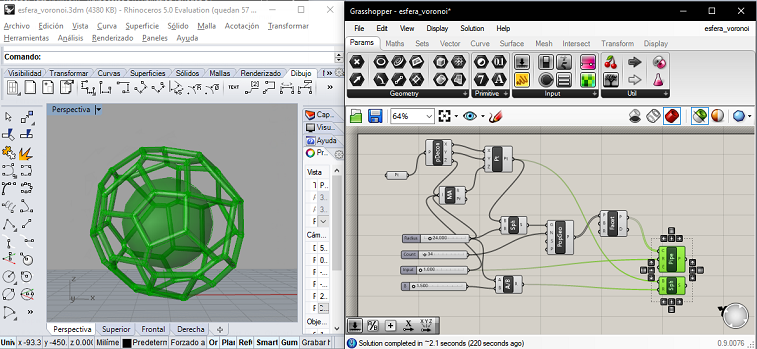
Here we can see the result. We already have the objects in Rhino, if we need to change some dimension, we only do it from the parameters of Grasshopper and we export again to Rhino.
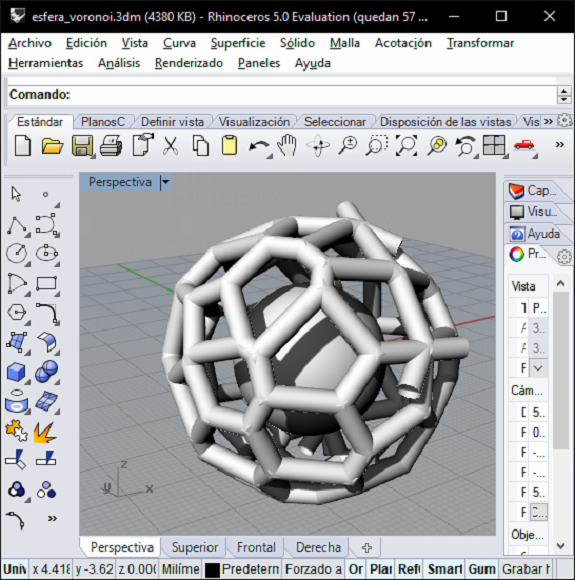
Here we can see the same figure in renderized mode.
Now we select everything and click on export selection of menu file, file type StereoLithography STL.
Difficulties
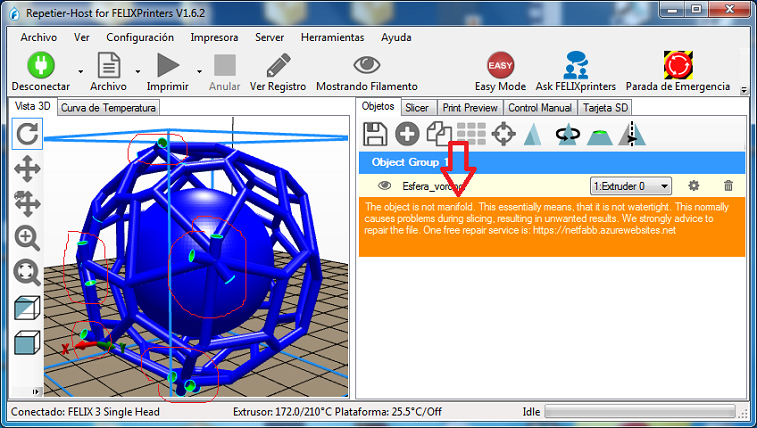
The STL file is brought to Repetier for FelixPrinters. When we open it, we get a warning message: "The obect is not manifold" ... Repetier makes segments of pipes that are not closed green.
The STL file is brought to Repetier for FelixPrinters. When we open it, we get a warning message: "The obect is not manifold" ... Repetier makes segments of pipes that are not closed green.
Fixing up
Again in grasshper we review and change the amount of points.
Again in grasshper we review and change the amount of points.
In spite of everything, there are still protruding pipe segments.
I selected one of the segments and when I moved it I discovered that it was duplicated, so I did the same with the others and eliminated them, making sure not to eliminate necessary pipes.
3d print
Returning to Repetier, there were no warnings.
Here you can see the object ready to print.
The supports
They are sacrificial structures that we must add to the But before that, the supports must be generated. Do not forget this, unless the object can sustain itself. For this part, we must choose the Slicer that we will use, I used CuraEngine, Type of adhesion "Brim", and Type of support "Touching Bed".
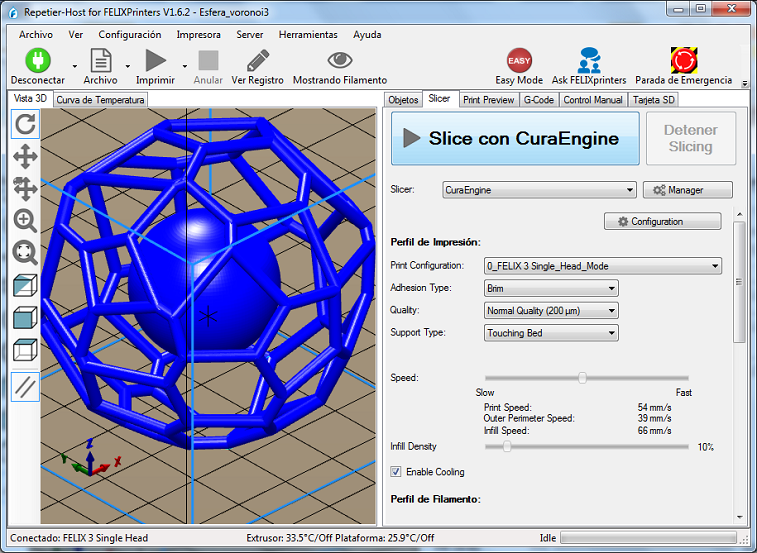
The result can be seen in the following figure.
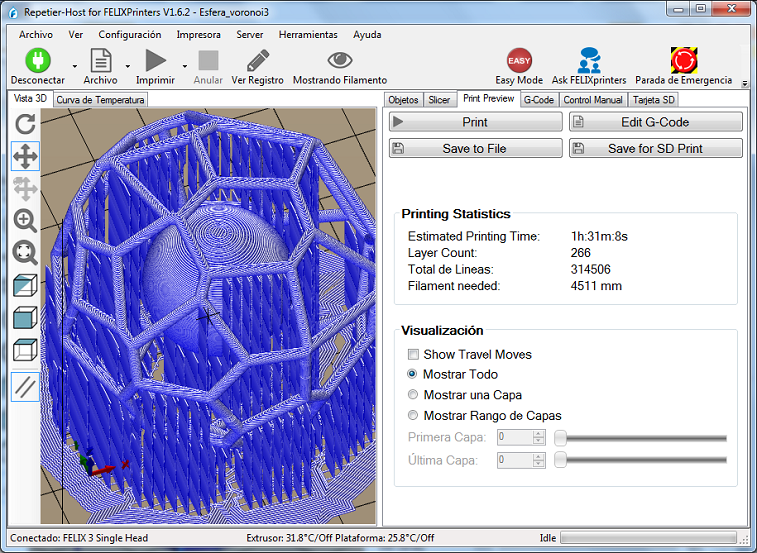
The printing took an hour and 31 minutes with 4511mm of PLA.
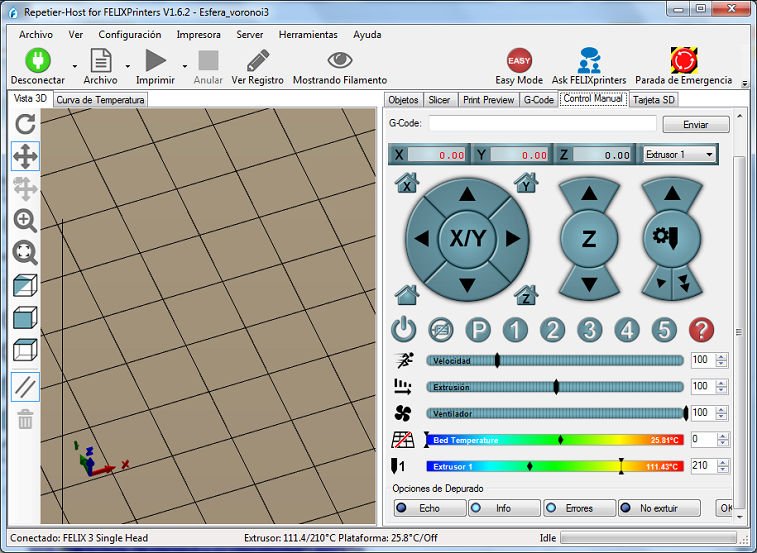
On this screen, we can see the "Print" button. Do not forget that we must go to the control-manual menu before.
The printing took an hour and 31 minutes with 4511mm of PLA.
On this screen, we can see the "Print" button. Do not forget that we must go to the control-manual menu before.
In "Control-manual" we can control all the variables of the printer, such as connection, movement of the extruder, displacement of the filament, height of the printing bed, etc.
Recommendations
Before printing, we must ensure the following:
Recommendations
Before printing, we must ensure the following:
- The printer is connected (first icon in the menu bar),
- The extruder fans must be working (click on black icon in the form of a propeller)
- Extruder must be hot at 210 ° C (click on black icon)
If everything is ready, we start printing
Some recommendations
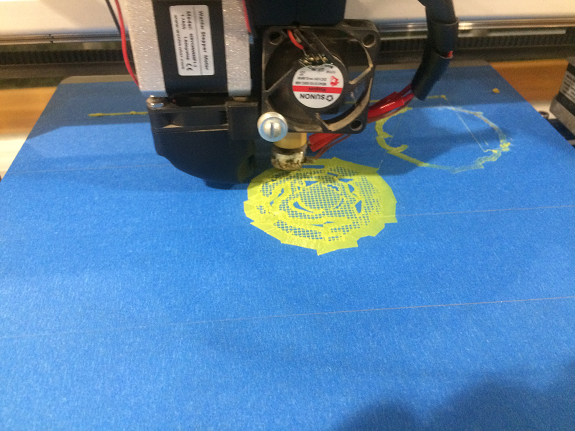
Before printing, rotate the object to try to generate as few supports as possible, this will influence the printing time and the quantity of material.
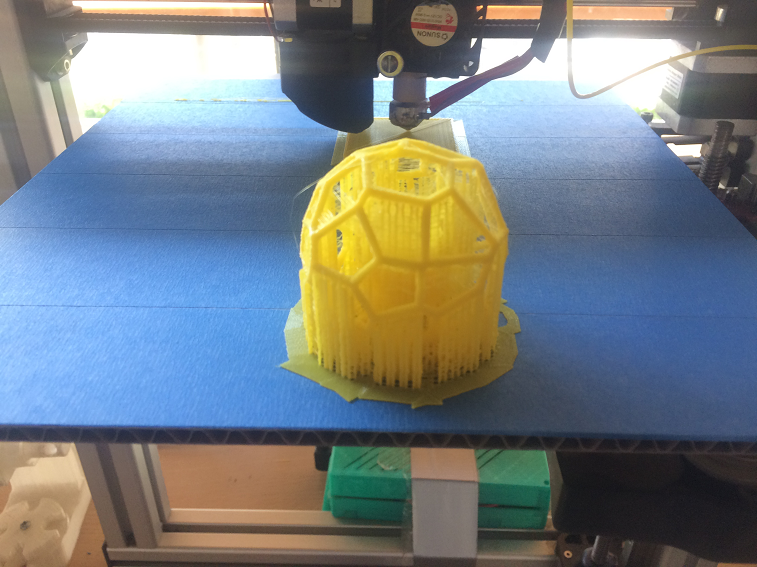
Here we can see that most of the printed matter is composed of supports.
Before printing, rotate the object to try to generate as few supports as possible, this will influence the printing time and the quantity of material.
Here we can see that most of the printed matter is composed of supports.
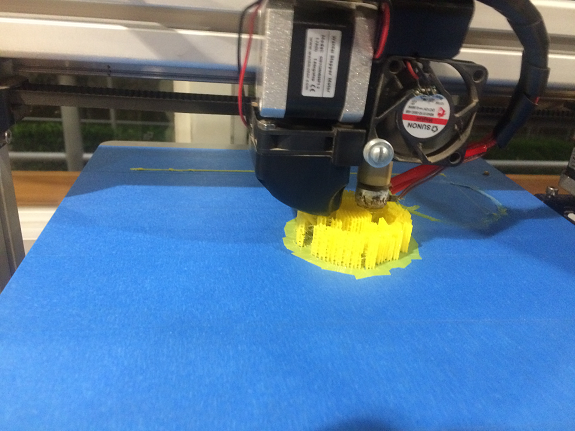
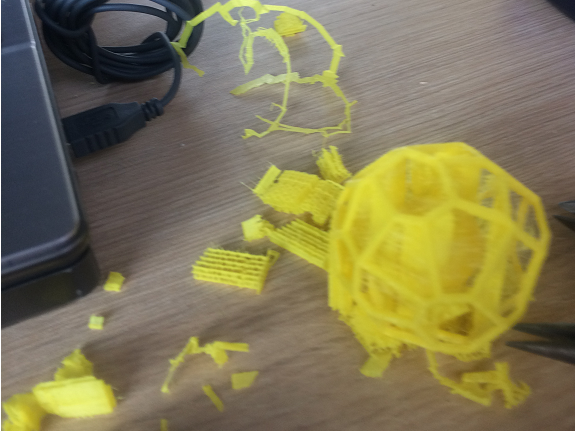
After 1 hour 31 minutes, we obtain the object.
We must carefully remove it with a spatula and then with the help of a cutter and pliers remove the supports.
We must carefully remove it with a spatula and then with the help of a cutter and pliers remove the supports.
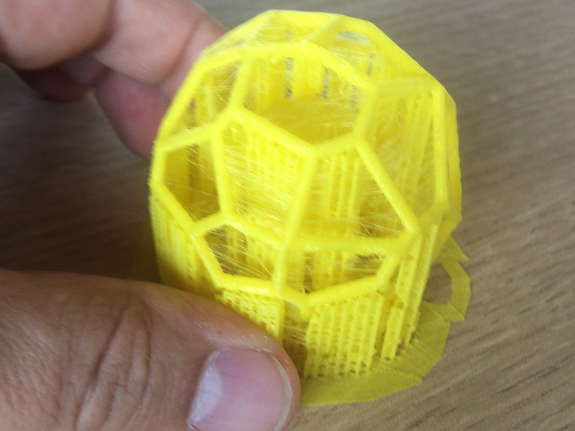
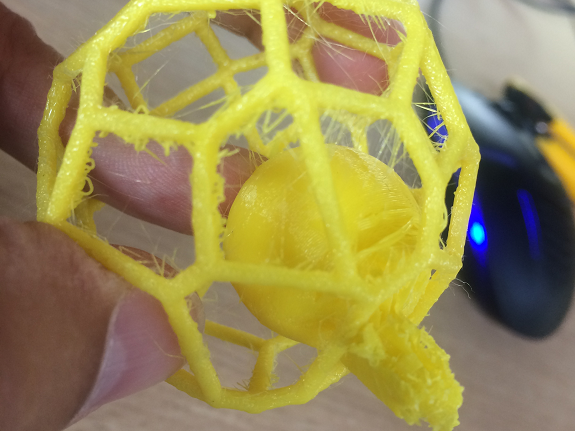
Here we can see fine filament fibers that are formed by the movement of the extruder from one printing point to another, this is called stringing.
The Stringing would have been prevented from activating the retraction.
The Stringing would have been prevented from activating the retraction.
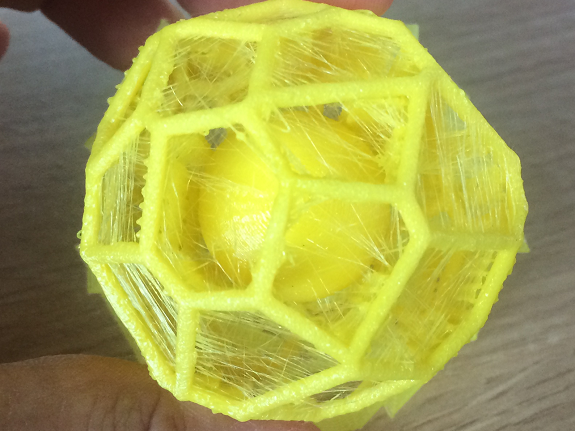
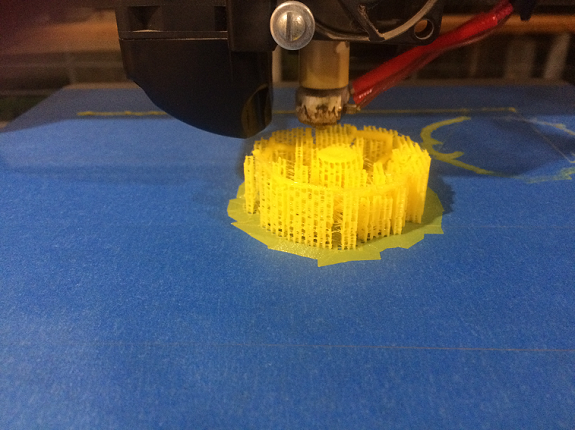
In these images we can see the process of removing the supports
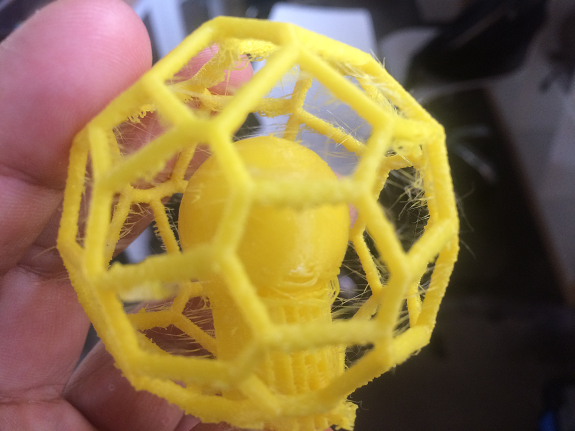
In this image we see how some filaments of the lower parts of the voronoi and the sphere are not integrated to their layer, instead they hang downwards, although they have supports.
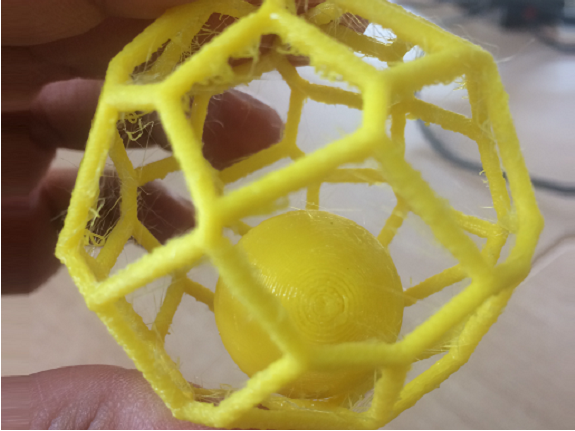
Analyzing the results, I think that if I had used supports in soluble material and retraction, the quality of the print would have improved remarkably. As soon as I get the material, I'll do the test.
According to the design, the printed figure can not be manufactured or would be very complicated by the subtractively method.
According to the design, the printed figure can not be manufactured or would be very complicated by the subtractively method.
Recomendations
- Search out the right temperature for the filament. Each manufacturer has different specifications.
- If working with ABS filament, the printing bed should be heated between 90°C to 110°C, depending on what the manufacturer recommends, after a few layers, lower the temperature of the bed to prevent the ABS bend for too much heat
- In humid climates, do not leave the filament roll in the printer if it is not in use. Keep the filaments in their box and in a place free of moisture.
- Level the bed well to prevent the extruder from separating or scratching the surface of the bed.
- Use the Retotraction parameter to avoid Stringing
To download the STL file click here
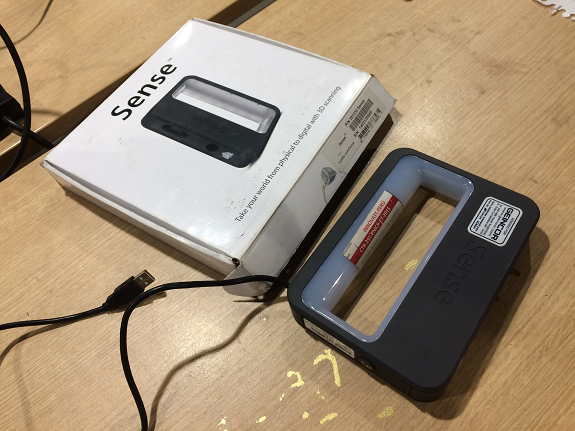
Scannig
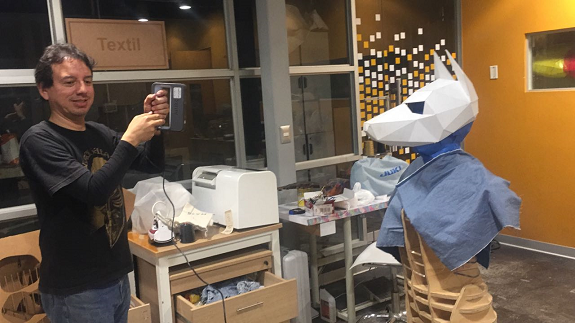
For the scan assignment, use a Sense hand scanner, connect via USB cable to the computer and scan the scanner using proprietary software.
Warning
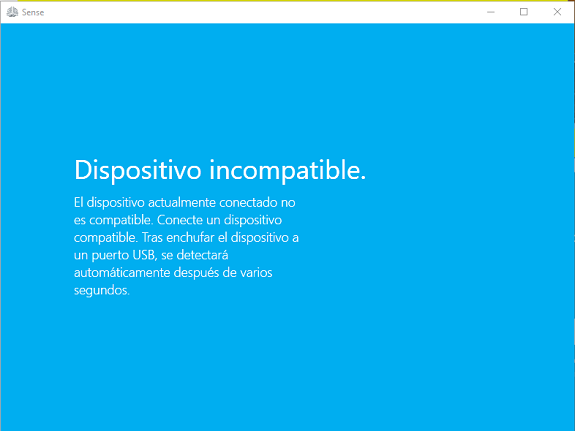
The scanner must be connected to the software before it is executed, otherwise an error message will be displayed.
You only need to make sure that the scanner is properly connected to the USB port.
The scanner must be connected to the software before it is executed, otherwise an error message will be displayed.
You only need to make sure that the scanner is properly connected to the USB port.
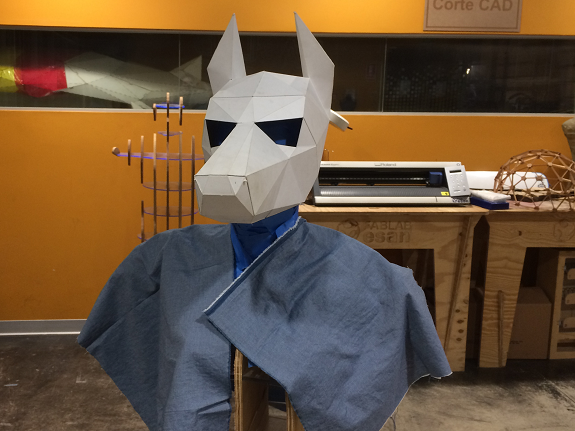
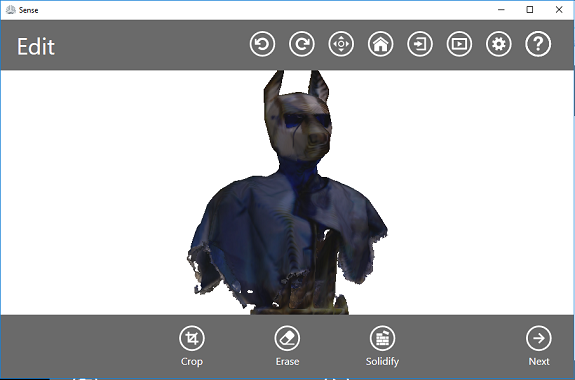
I scanned an Anubis mask from an assignment of previous years and to facilitate the scanning from all angles I placed it on a mannequin made by a student of the FabriAcademy.
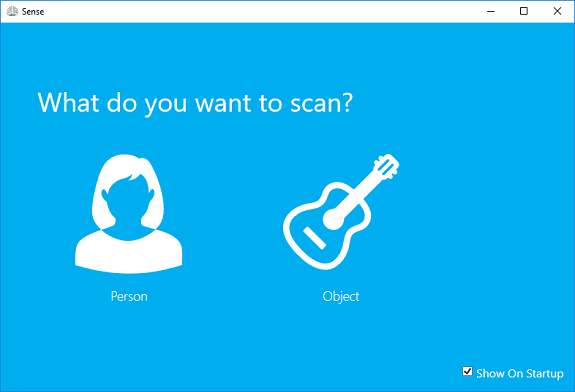
The use of the program is very simple. The first thing was to choose in the software what it was that I wanted to scan.
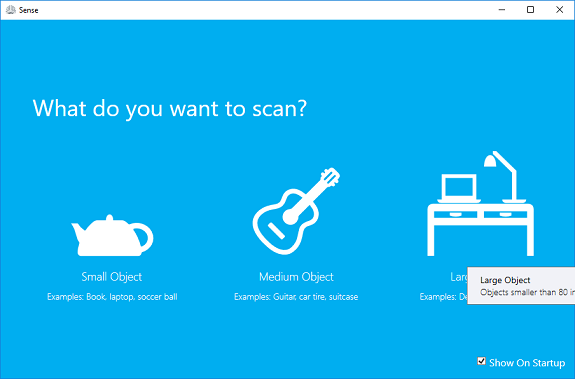
I selected an Object, then the medium size.
I selected an Object, then the medium size.
Then the video camera of the scanner began to transmit everything captured to the software. I framed the mask so that it looked complete in the center of the camera lens and I pressed the Play button in the software.
From that moment, I began to move slowly around the mask keeping it focused and at the same distance (for my case, about 90cm).
During the scan the reflections can be interpreted as objects, for that reason I covered the acrylic mannequin with some fabrics that I found. In these images it has an aspect of the living dead.
During the scan the reflections can be interpreted as objects, for that reason I covered the acrylic mannequin with some fabrics that I found. In these images it has an aspect of the living dead.
A bit of advice
The more turns and angles are captured, the more detailed the image becomes. I took about six laps slowly.
At times, lost the capture, but it was enough to go back to the previous position and wait a few seconds for the scanner to link again with the image that was formed.
At this distance from the object it is easy to lose the frame of the object that is scanned, so it is better to hold the scanner with both hands.
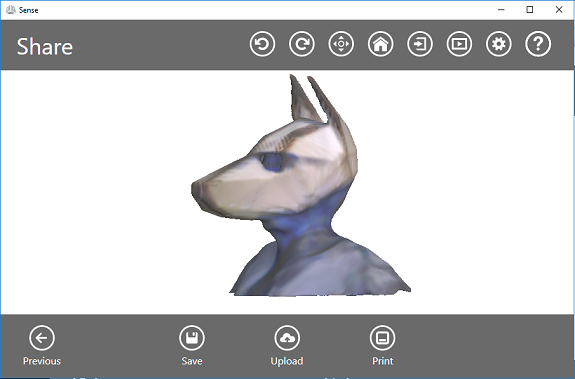
Finally, I finished with the scan. The information captured is composed of hundreds of photos and coordinates, with all this the software generates a maya based on triangles of the surface captured in 3d.
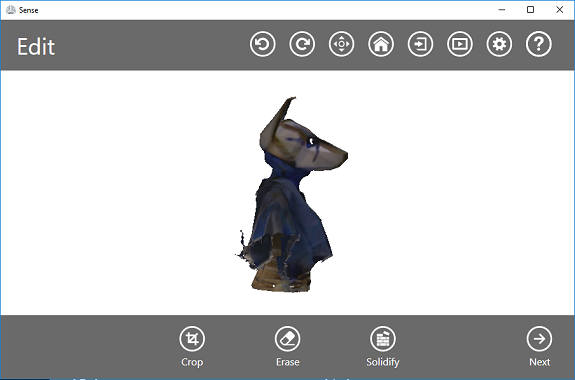
The software allows you to rotate the object to see details, just drag the left mouse button or turn the mouse wheel to zoom.
The "Trim" editing tool allows you to eliminate false captures. I eliminated some ramifications at the tips of the ears.
The "Trim" editing tool allows you to eliminate false captures. I eliminated some ramifications at the tips of the ears.
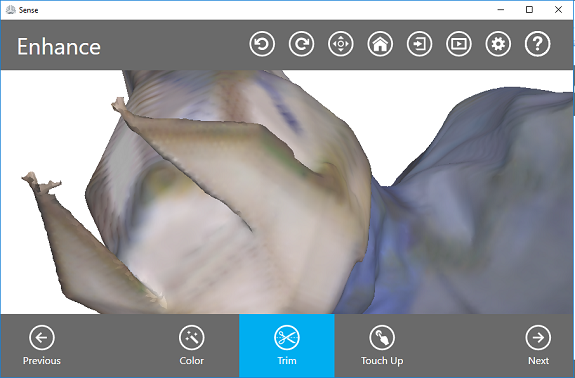
Then with the tool "Touch Up" I leveled the deep areas of the surface of the object, just by dragging the mouse painting the areas I wanted to modify.
The last step was to use the filling tool, this one converts the surface into an object ready for 3d printing.
The last step was to use the filling tool, this one converts the surface into an object ready for 3d printing.
File for download
Anubis scan (STL file)
Anubis scan (STL file)
Printing the scanned object. (Optional printing)
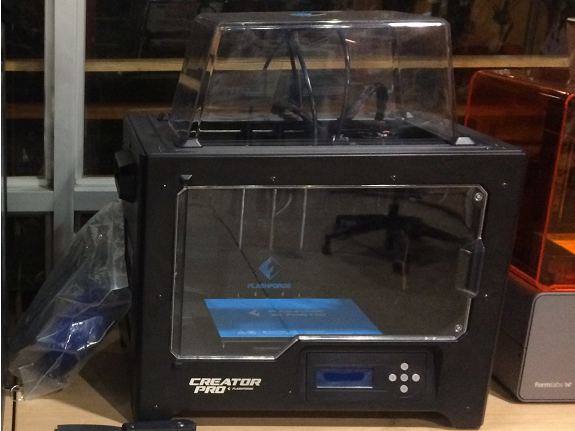
For 3d printing I used the FlashForge's Creator Pro printer, this printer has two extruders, can work with PLA and ABS, the caliber of the filaments should be 1.77mm.
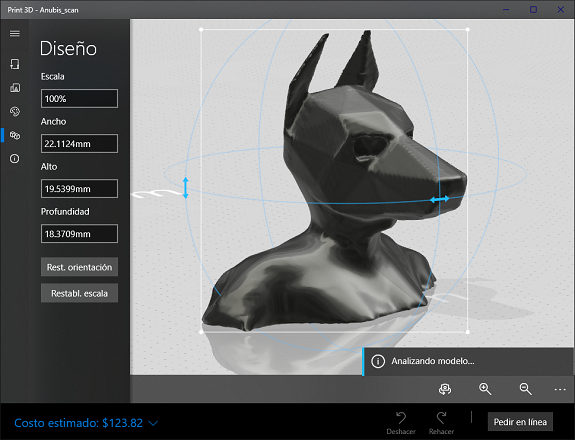
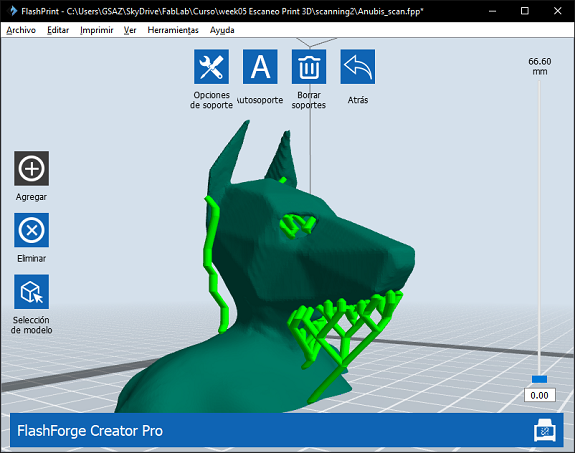
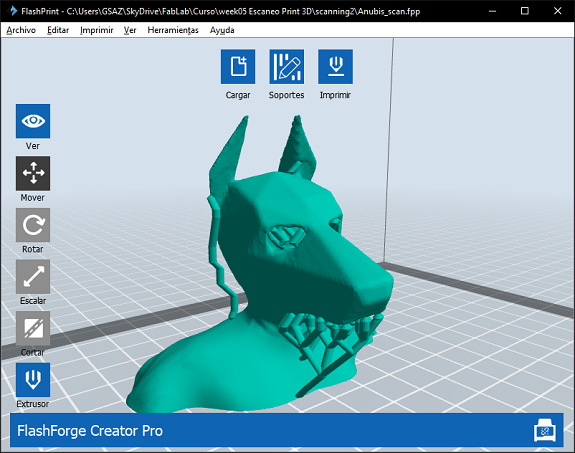
I opened the STL file in the FlashPrint software, selected the object and assigned it to the left side extruder.
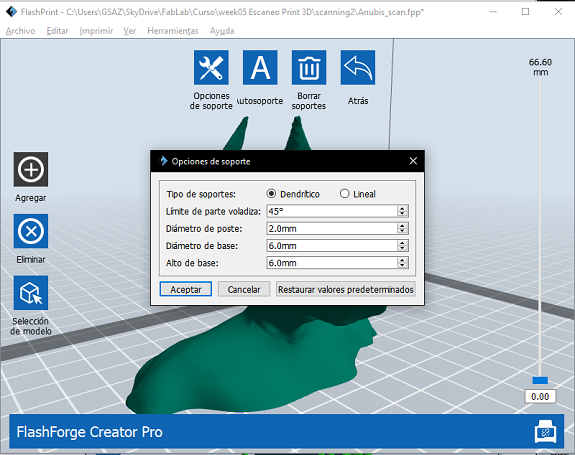
Then I centered the object and created automatic supports.
This printer brings the novelty of "Dendritic" supports, these supports have the shape of a tree and significantly reduce time and material. I chose to make them 2mm thick, so they are easier to remove, if I had made them 3mm it would have needed a pincer to remove them.
This printer brings the novelty of "Dendritic" supports, these supports have the shape of a tree and significantly reduce time and material. I chose to make them 2mm thick, so they are easier to remove, if I had made them 3mm it would have needed a pincer to remove them.
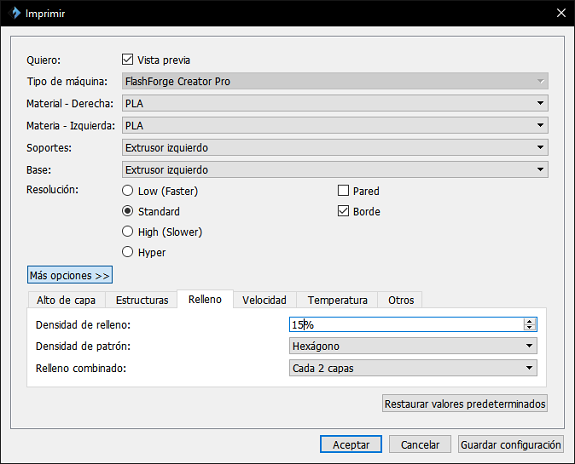
If the fill density is 20% 3D printing takes 2 hours 58 minutes.
As the design will not support weight, I decided that the fill is lighter,
I lowered it to 15% and the print time went down to 2 hours.

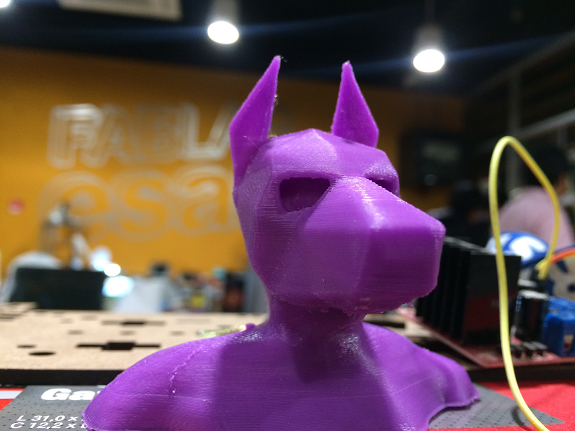
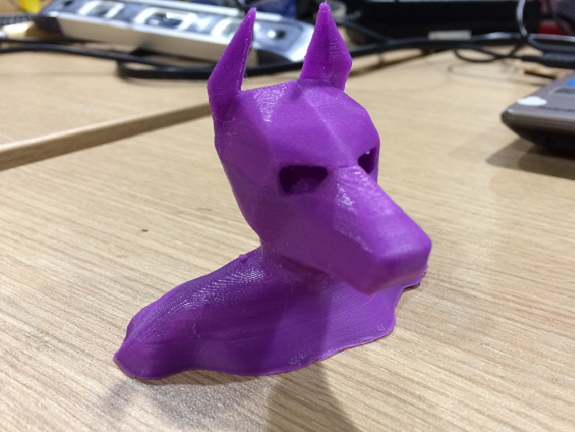
This is the 3d impression of the mask that I scan.
Made in Creator Pro printer.
Print time: 2 hours, 9 minutes.
Material used: 5.58 meters of filament PLA 1.75mm, in 373 layers.
Made in Creator Pro printer.
Print time: 2 hours, 9 minutes.
Material used: 5.58 meters of filament PLA 1.75mm, in 373 layers.
After 2 hours 9 minutes I got the 3d object 66.4mm high.