3D Printing and 3D scanning Target >>
group assignment:
- test the design rules for your 3D printer(s)
individual assignment:
- design and 3D print an object (small, few cm)
that could not be made subtractively
- 3D scan an object (and optionally print it)
Assignment 6
So first for the Group Assignment ..
I follow Neil Suggestion for the file and I start executing it on the Ultimaker ..
So the first thing to think about how to use cura .. I thought about making it as a fast print to see how it will looks like
here the interface running on ubuntu ..
you start inserting pictures by open them or drag them to the app ..
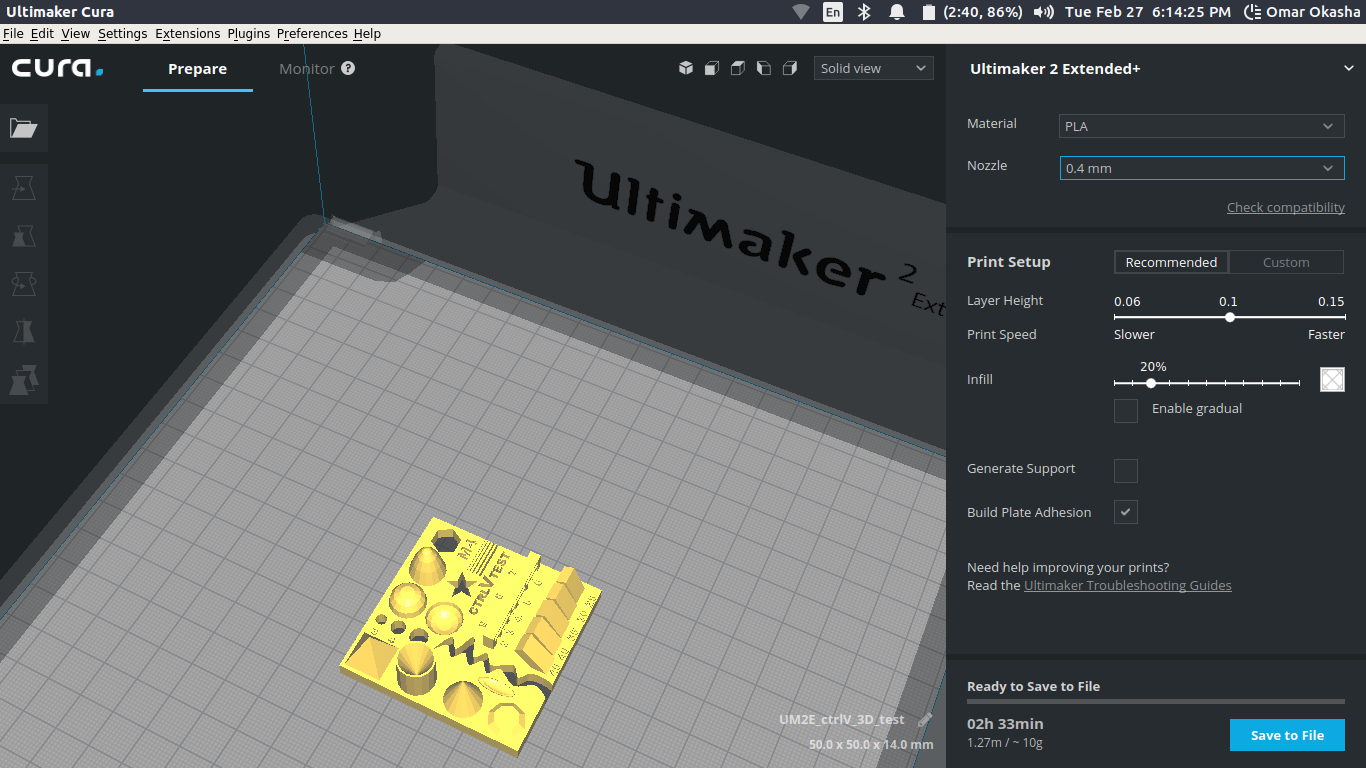
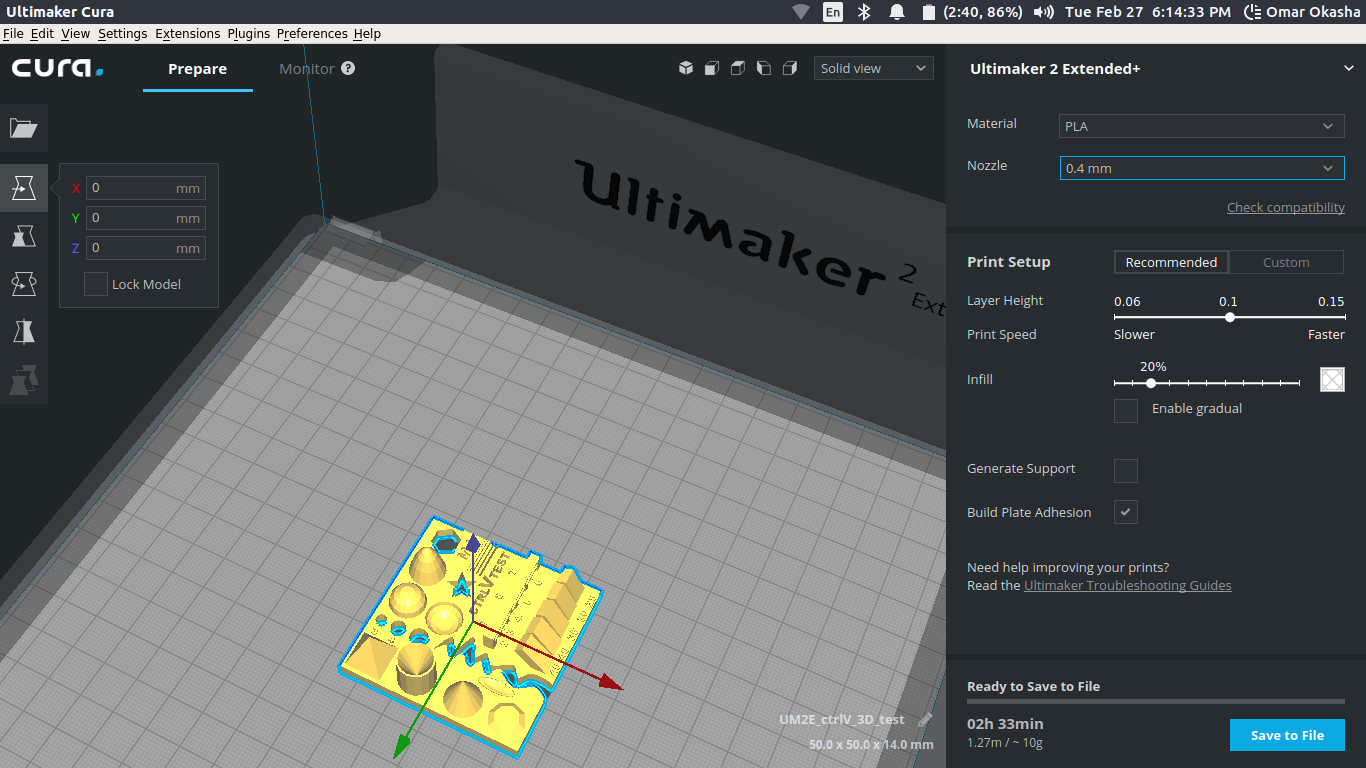
You can move the part
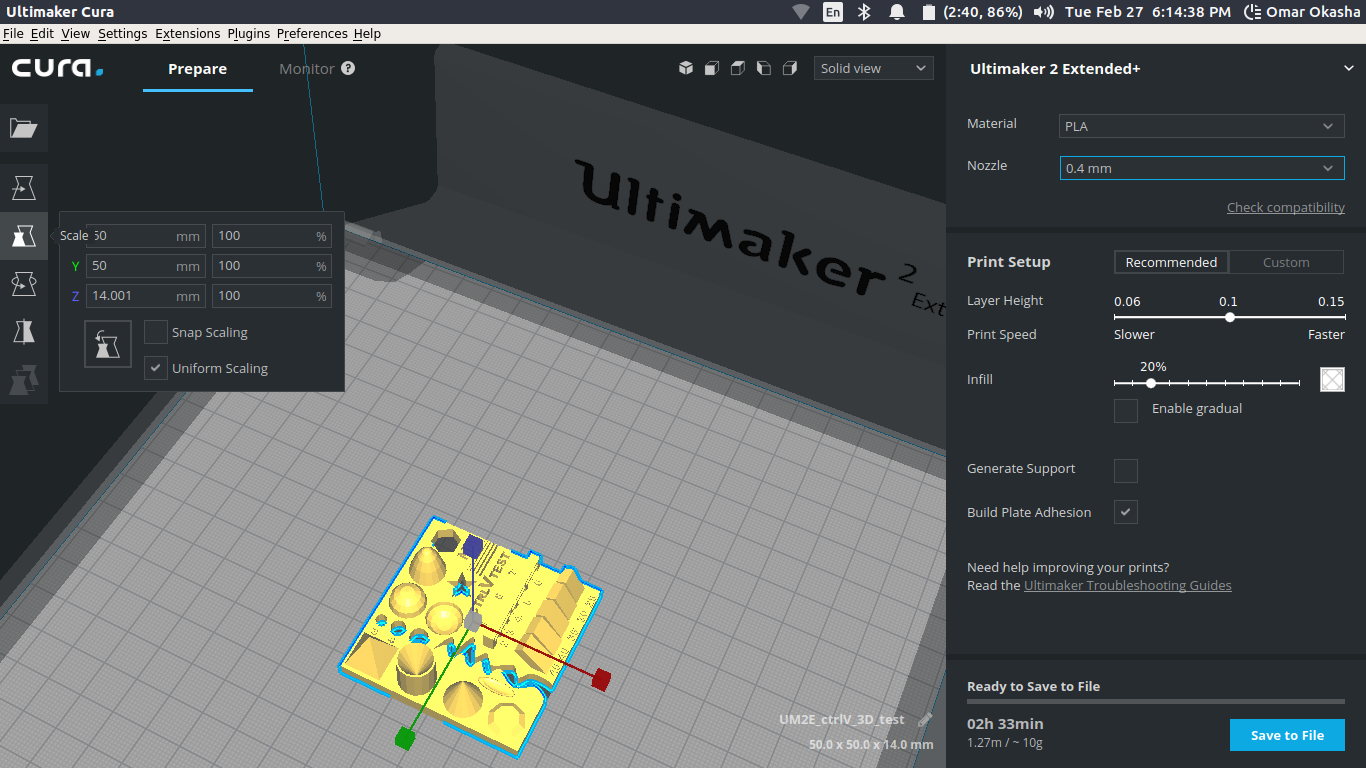
you can scale the part
you can rotate the part
you can mirror the part

By adjusting the infill and the layer height you can change Then I start print ..
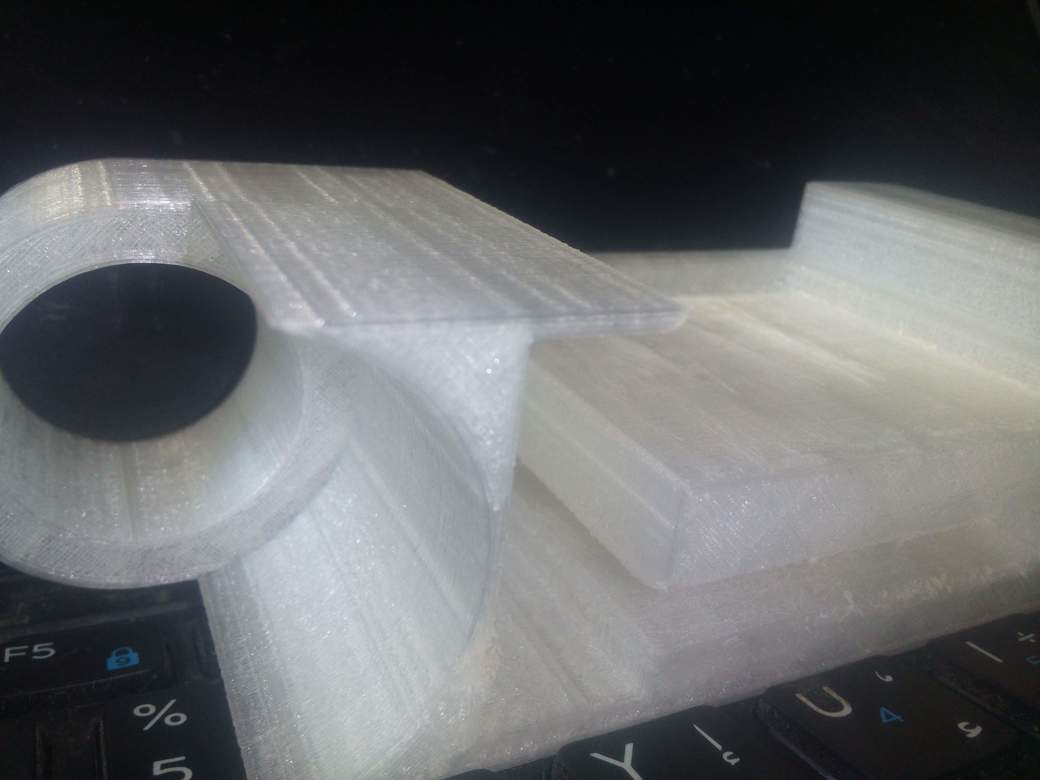
this is the part as a fast print on ultimaker not that bad It took 45 Mins
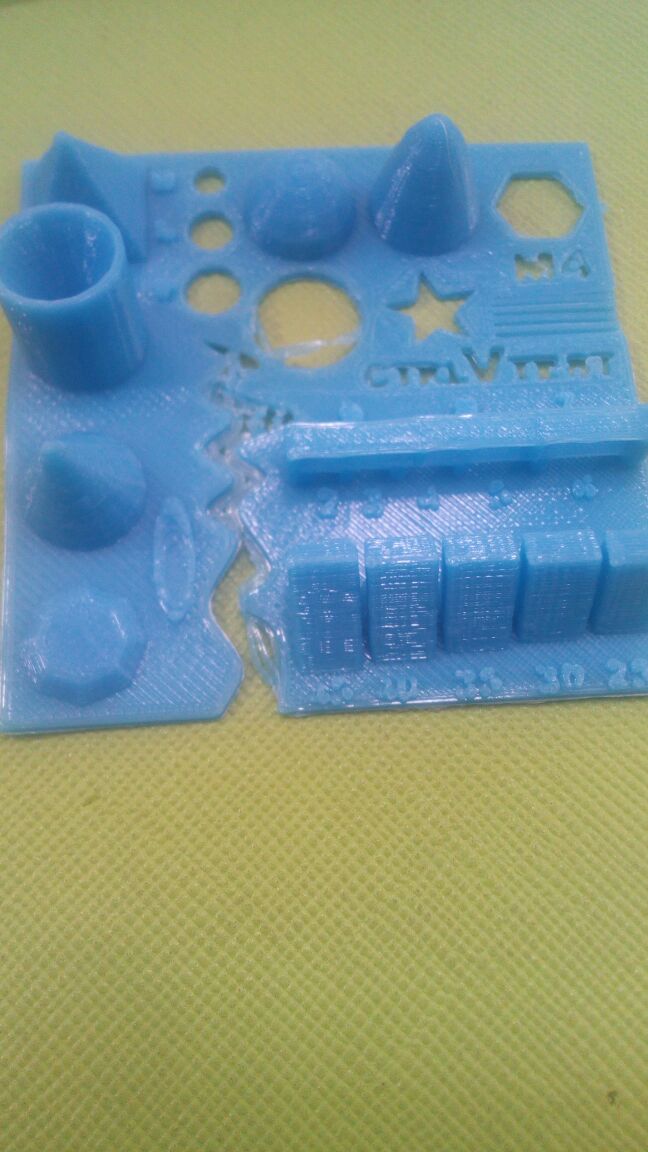
Results :
What I found for this machine as a fast print and the resoluation was good and after measuring holes that was almost equal but the fault was mine as I removed it to early from the Bed of the machine ..
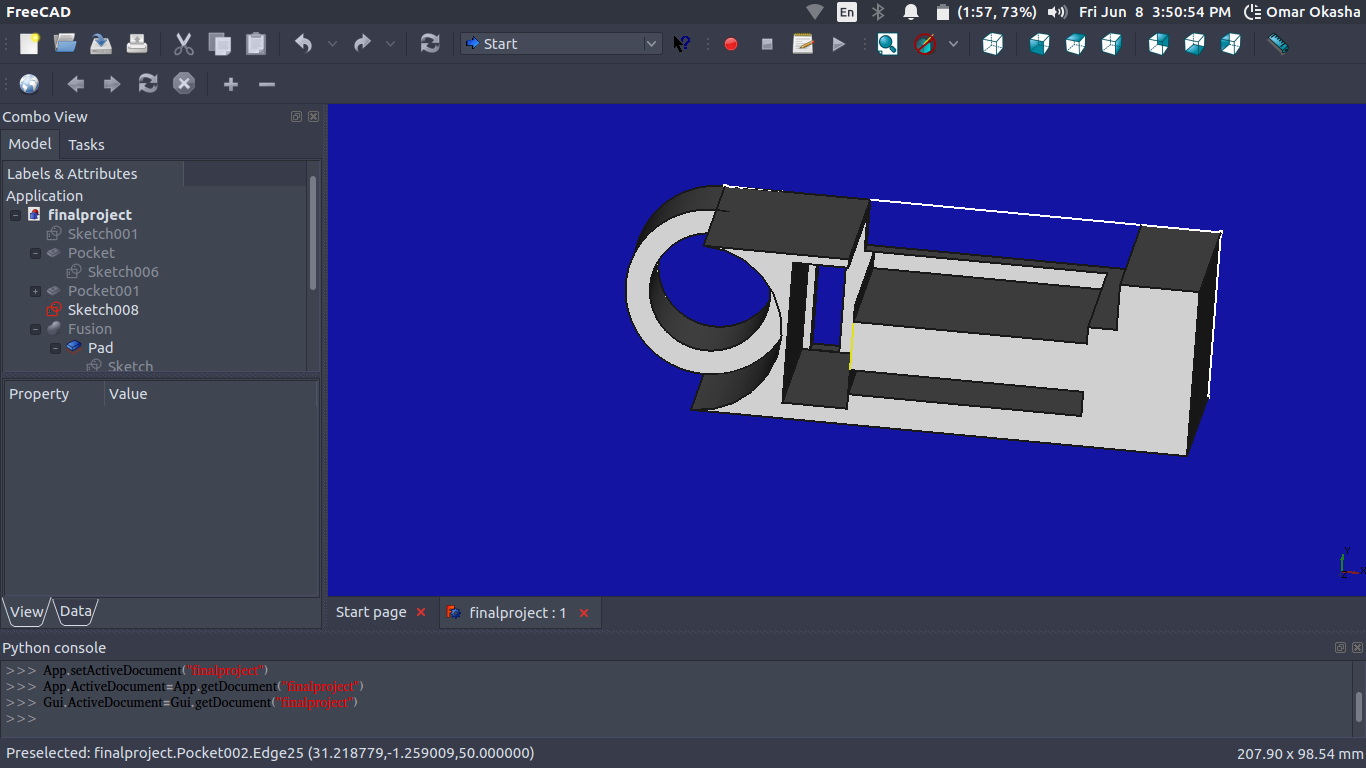
Then I start Design a part that have some curves that cant be done on the subtractive machines ..
I designed the Final Project Design ..
then this is was how I start working on it on Cura ..
and this is was the part after finishing ..
This is after I painted it :D :D But I was so close when I painted it as I was at home and tried to take care of the enviroment around me
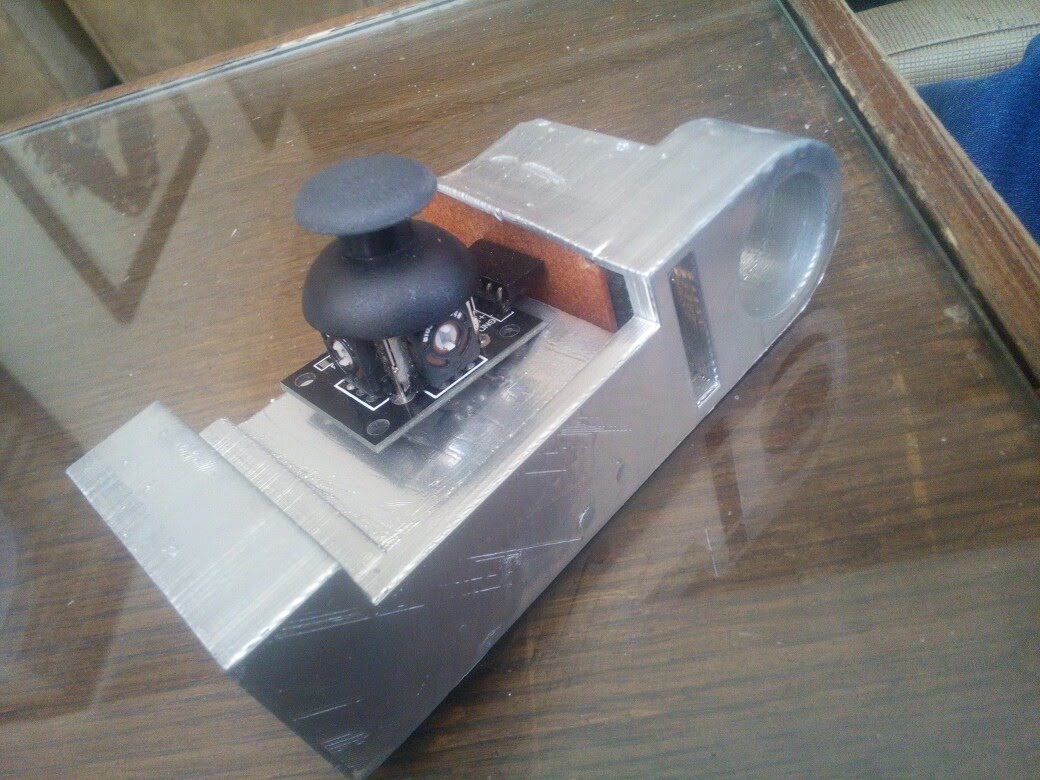
So Here We GO :D :D
For Illustrating the difference between the Addative Technology and Subtractive Technology ..
Addative Technology can make some designs that the Subtractive cant do ..
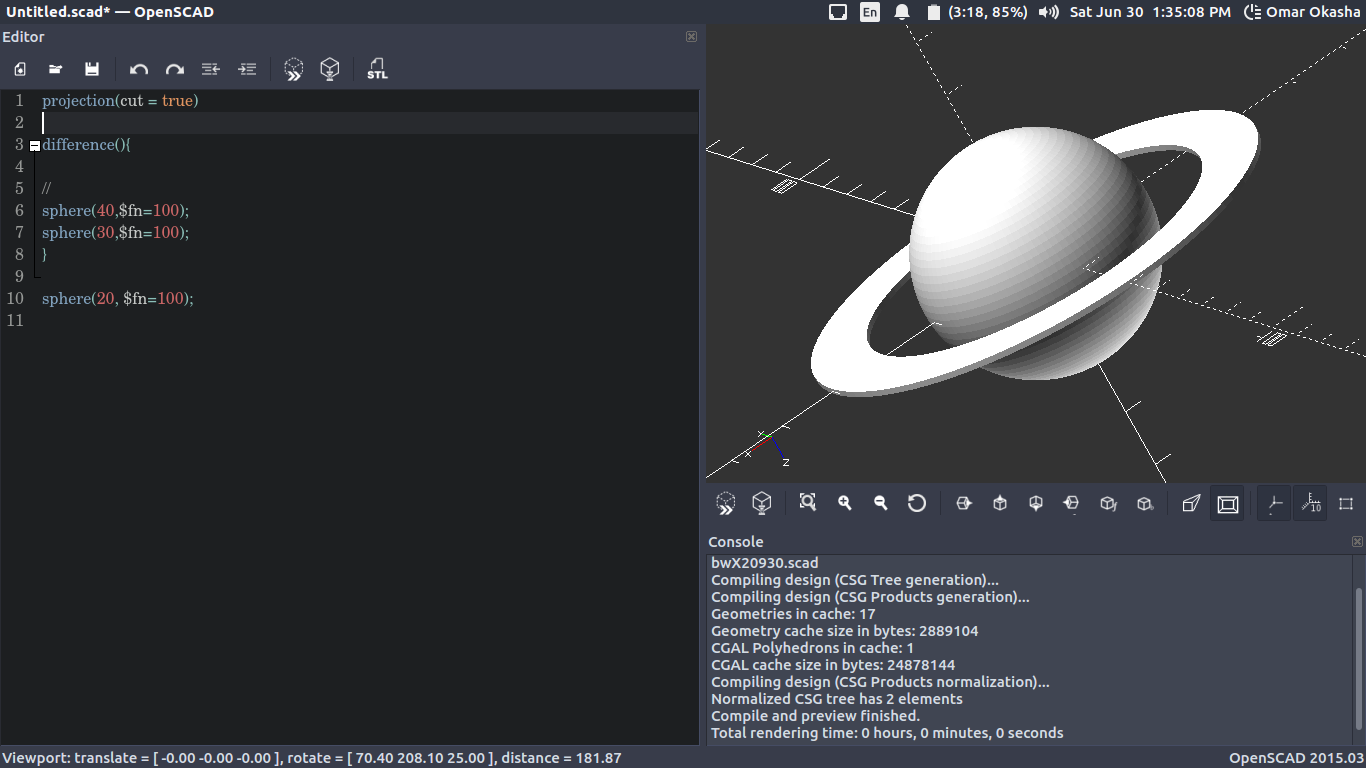
Lets take for example a 2 balls one inside the other one but the inner one cant get out because it is printed inside the bigger one
A Print like this cant be done on a milling machine .. because your machine wont reach inner places in this design ..
.. so Let's Design First ..
While Trying to Figure it out how I am going to do it ..
Final Design
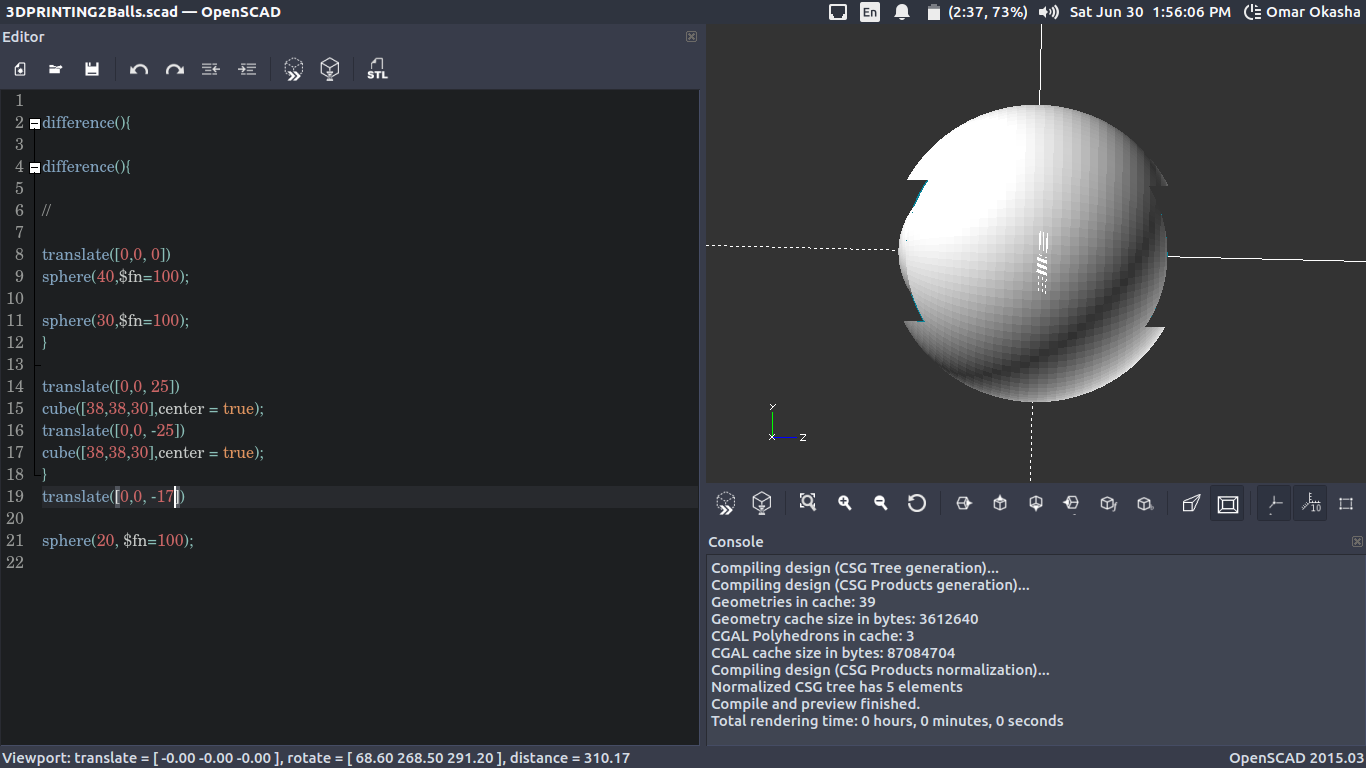
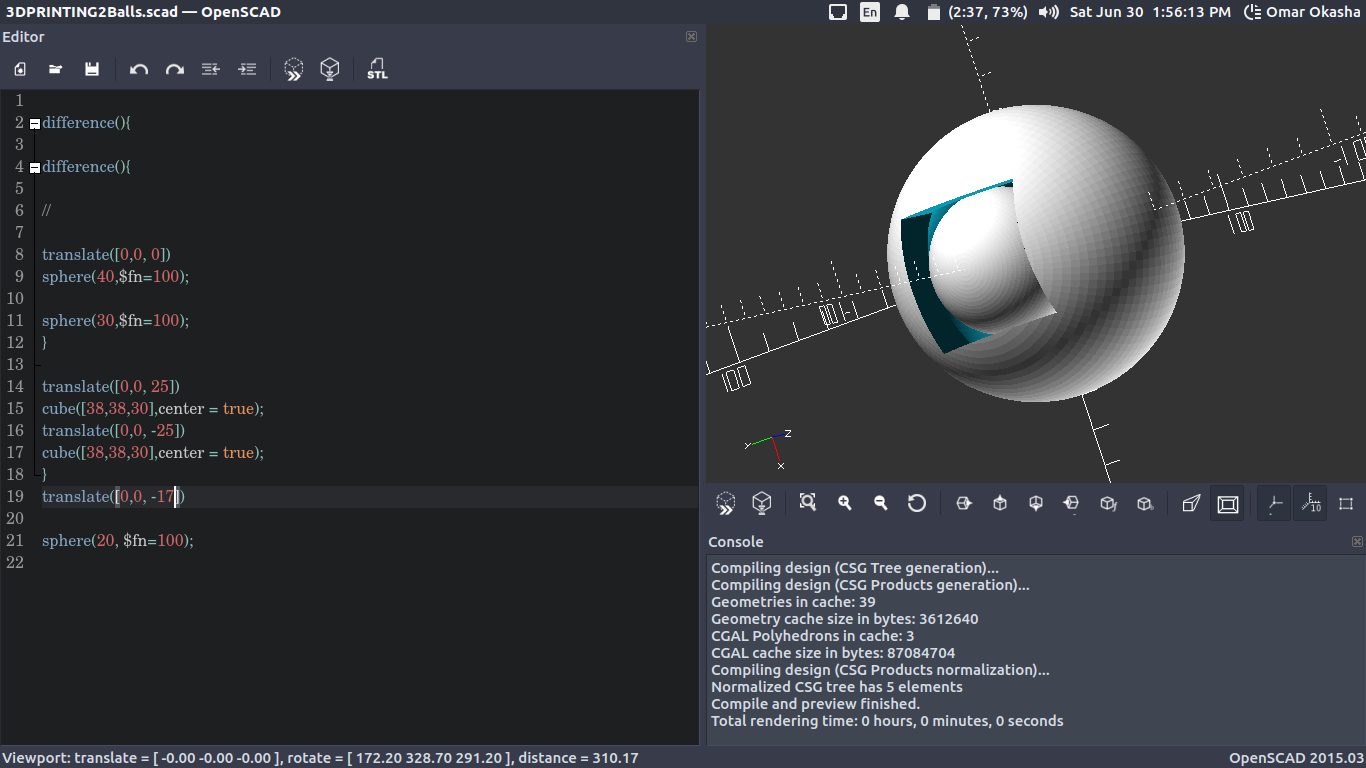
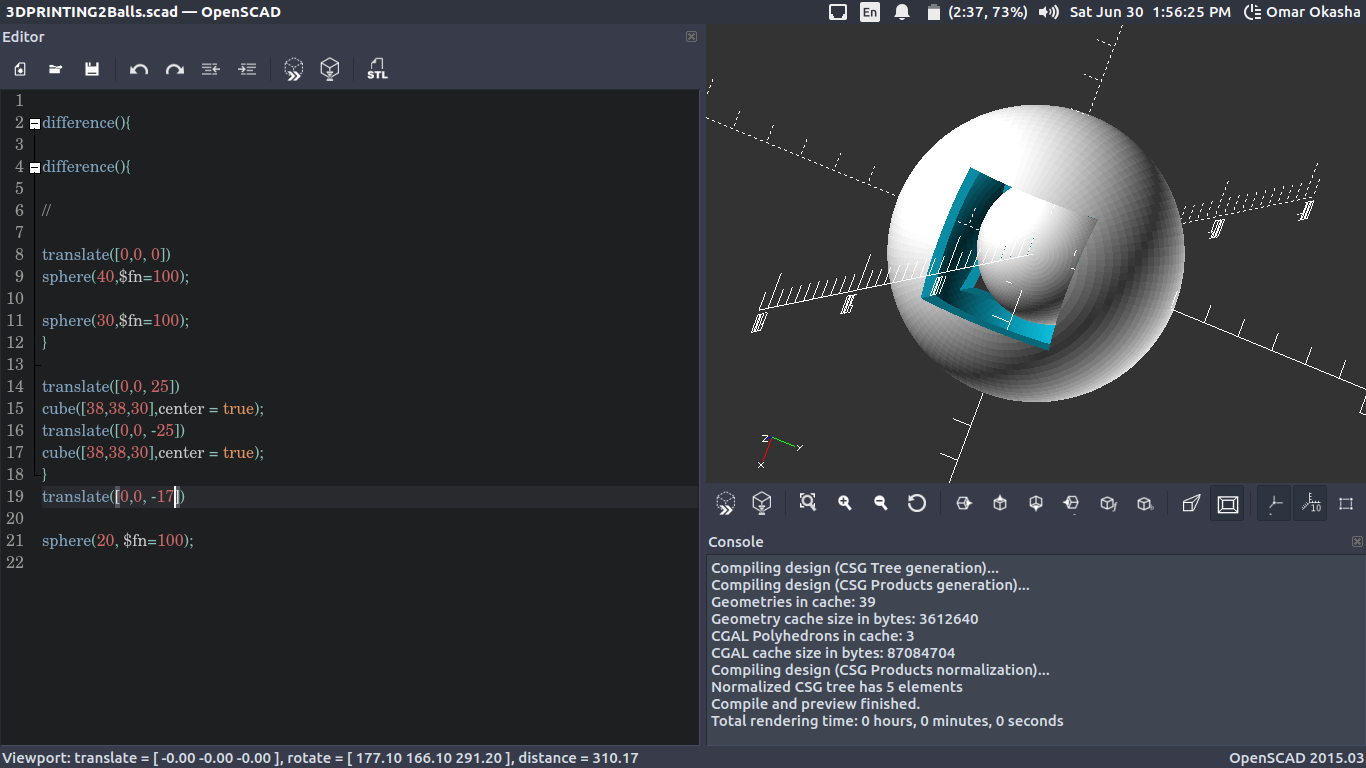
and this is the Code
difference(){

difference(){

//

translate([0,0, 0])
sphere(40,$fn=100);

sphere(30,$fn=100);
}

translate([0,0, 25])
cube([38,38,30],center = true);
translate([0,0, -25])
cube([38,38,30],center = true);
}
translate([0,0, -17])

sphere(20, $fn=100);
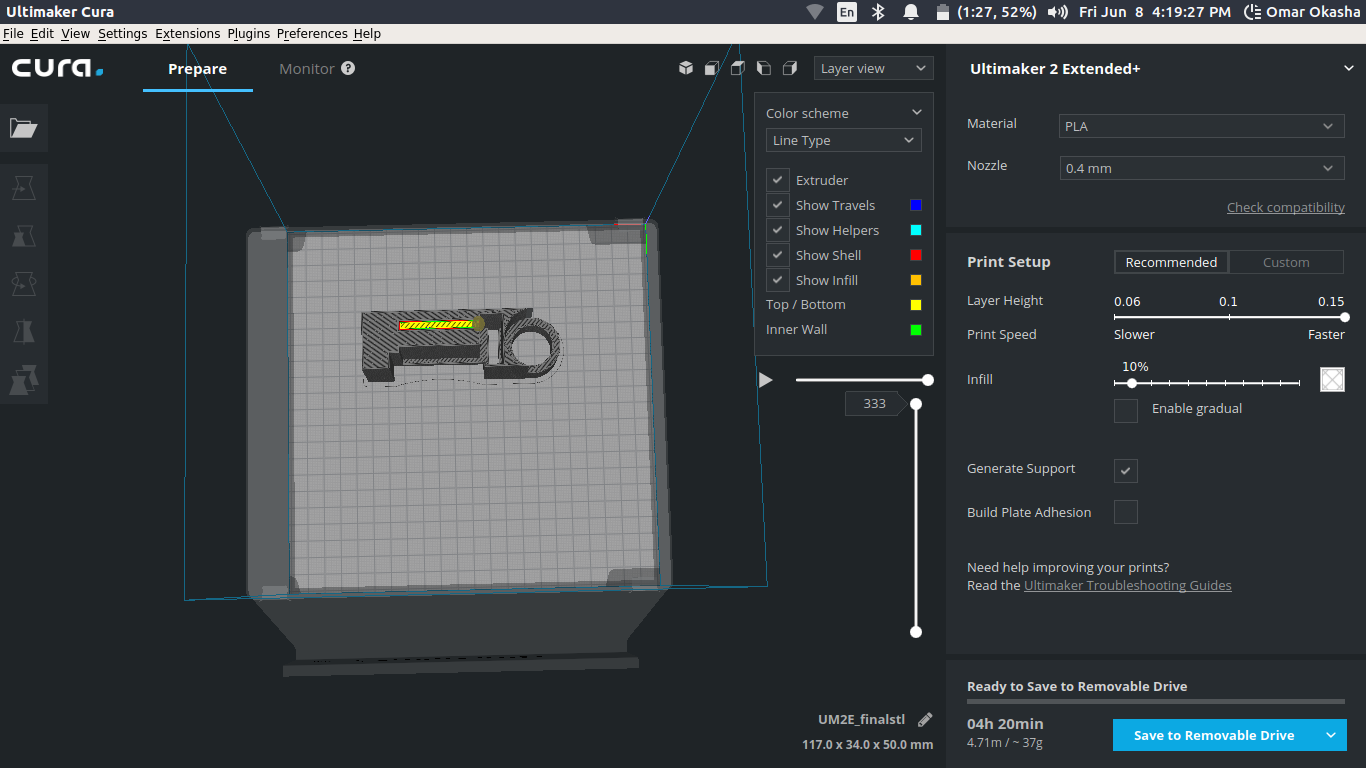
Then After Exporting STL File and Get it on Cure
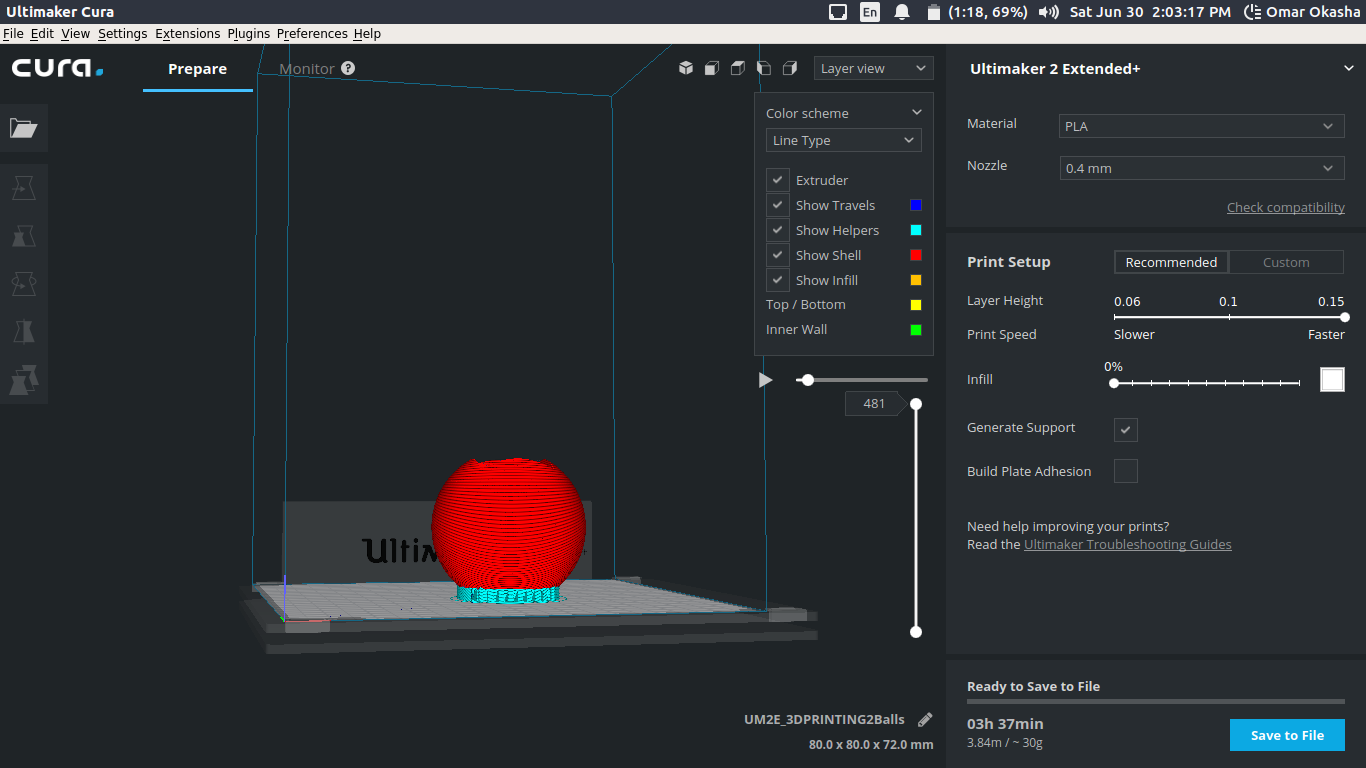
Before Talking about the Design .. Let's talk a little Bit about how to take Cura For Intermidate level ..
As you can see at the last picture ..
there is a layer view ..
you are going to see there are color coded for some items
1) Show Travels : Show you how the nozzle will move
2) Show helpers : Show where will be the support
3) Show Shell : Show the outer Surface
4) Show Infill : Show the Infill Between Inner Wall and Shell
5) Top Bottom : Show the Bottom and top layer
6) Inner Wall : The inside Surface
And There are 2 Scrolls ..
1) WIth play button to play how the machine interact with layers " Step by Step "
2) The Vertical Scroll Is very important .. Because it shows you how the machine will build this Model ..
For Custom Settings :
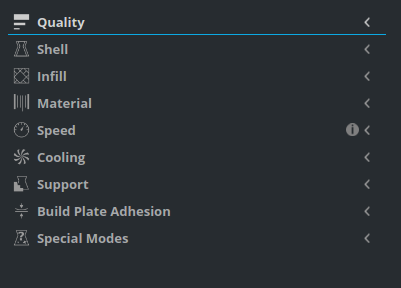
you can see there are a lot of parameters there ..
There are a lot of Parameters for Each item of those you can add them and start changing them as you need to modify your print ..
you can add them by the Gear beside each one ..
Let's Go Quickly with it ..
1) Quality : Here You Select your Layer Height to Can control how much material You need to work with and To make your design more Presice
2) Shell : Here we Define the Wall Thickness and top Bottom Thickness as you control here how much solid is the last surface ..
3) Infill : This is how to control the infill denisty and How the Infill Looks like as there are a lot of shapes for the Infill
4) Material : Here control Retraction to Reduce it .
5) Speed : Here control the Printing Speed and Better not to play with it ..
6) Cooling : Here you select if you need cooling while printing or not ..
7) Support : Type of Support and If you need it Everywhere or not .. You can add here the type of support " Support Pattern "
8) Build plate : To make the Print Stick to the Bed
9) Special Modes : Print Sequence if there are 2 or 3 Parts Print Individual or at same time ..
Here we go a Video I made for this Design .. to test the different Infill and Layer Height Impact in time and The Shape of the Model ..
Then This is the Output .. after printing .. :D :D ..
Small Model ..
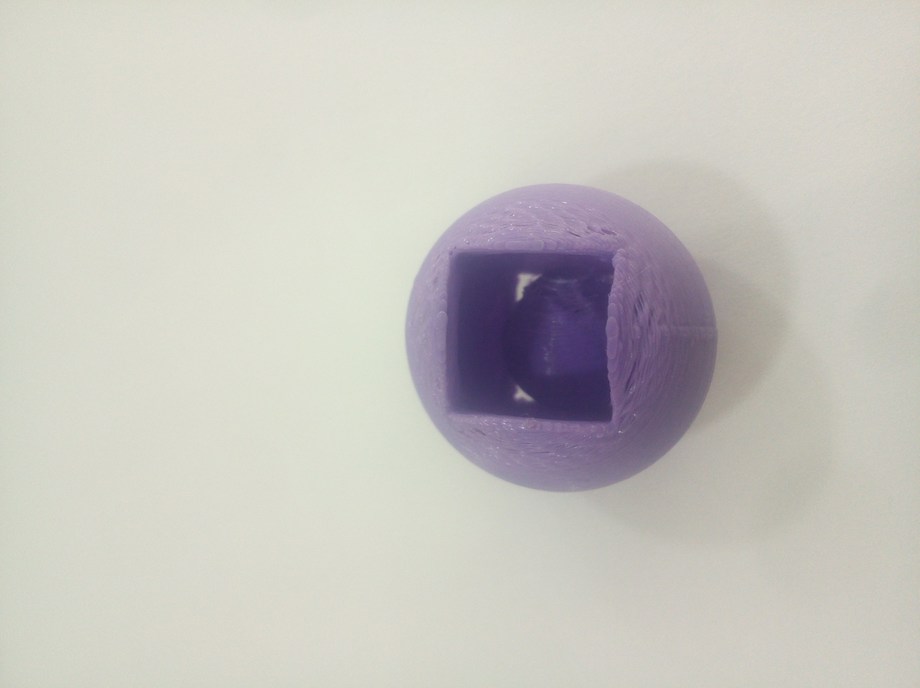
Big Model ..

This is my video playing with it :)
Then I start working on the 3D scanning and I faced a lot of problems ..
My phone first didnt run any app that working for 3D scanning ..
So I tried to make our Next Engine in the lab to work because there were a wire corrupted but I didnt have a phone terminal to make it work ..
So I tried to look for talking photos from phone and sent it to software that can do it ..
I tried Autodesk recap but I faced something called Autodesk Recap Photo TM that I didnt understand what to do to comeover it ..
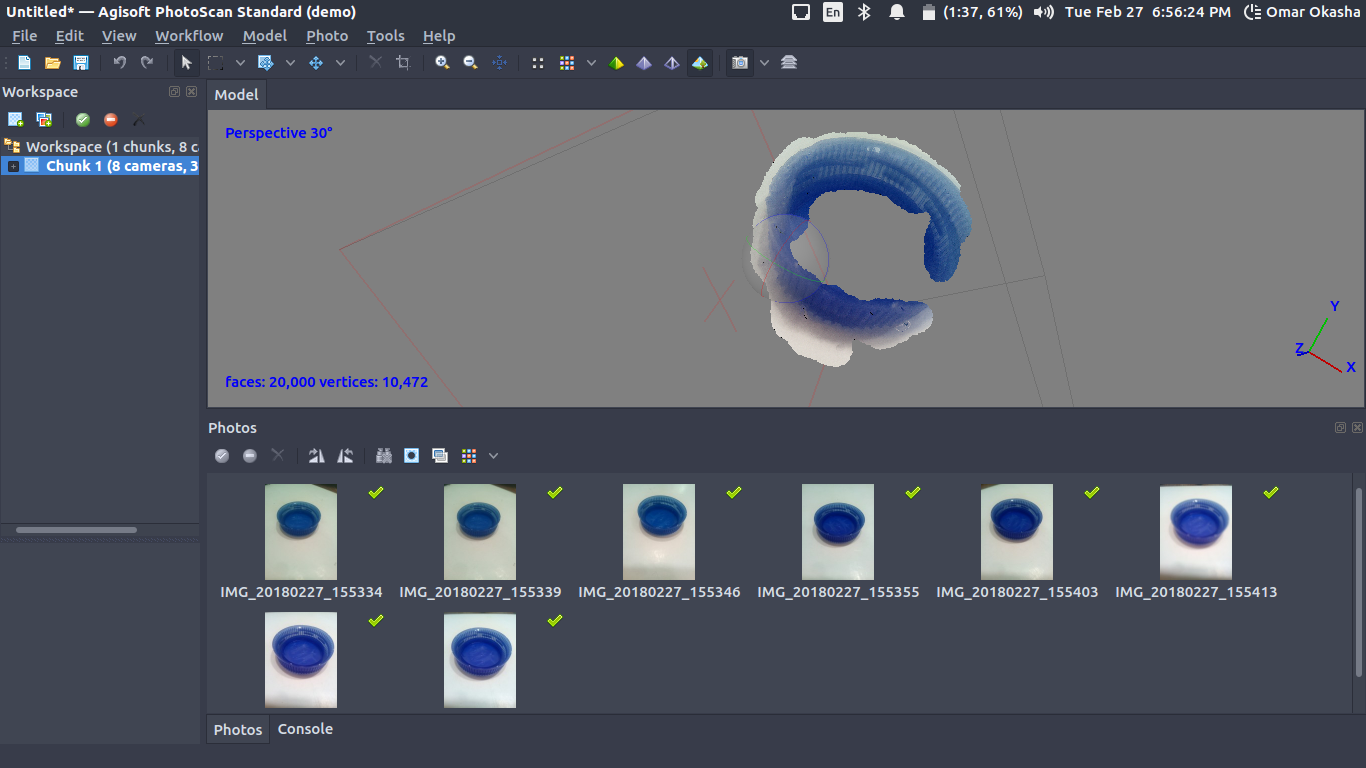
So I started using Photoscan ..
So I shift directly to Photoscan ..
So I tried to make it ..
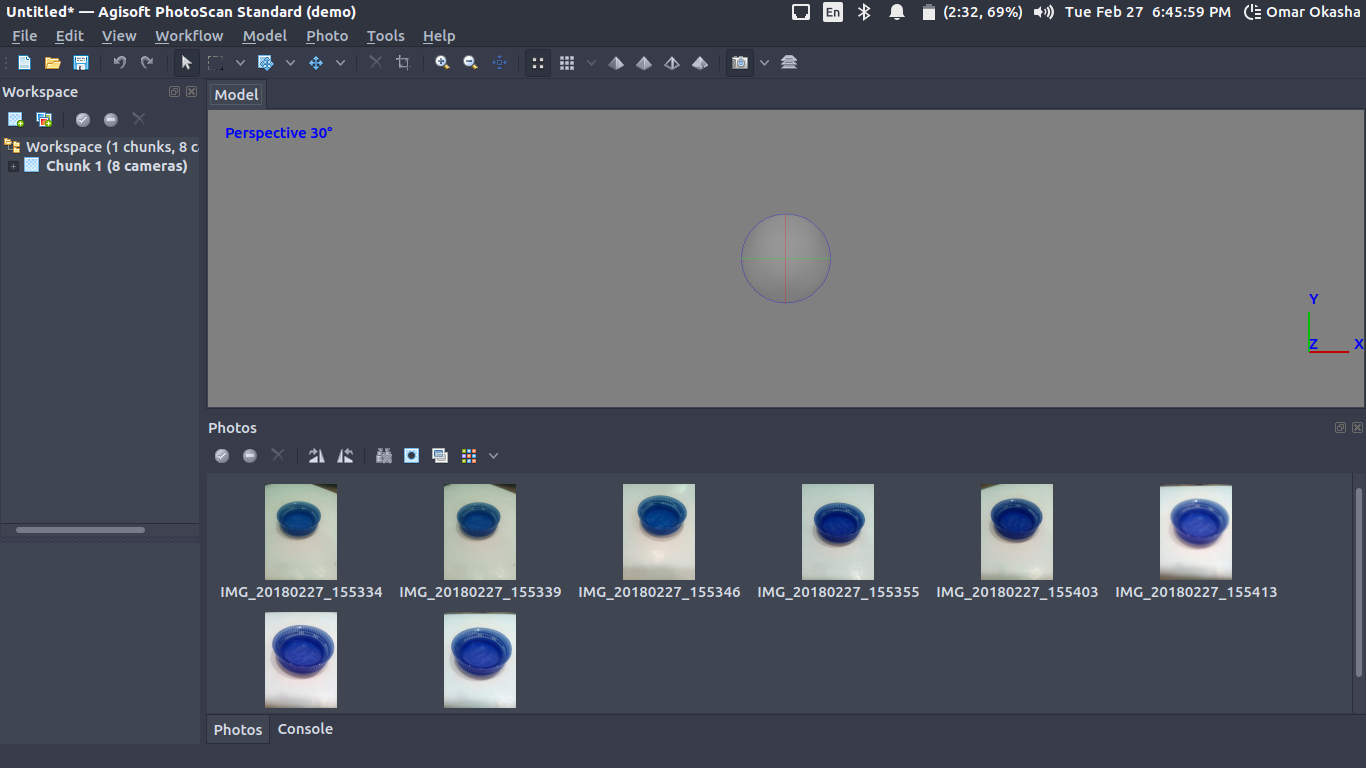
I just made it but it is not working that well but atleast it worked to ensure next try refine that
I tried Qlone on phone .. and Works great ..
This what i made .. you are just moving the camera around the object until it you cover all blue rectangles .. then you finished ..
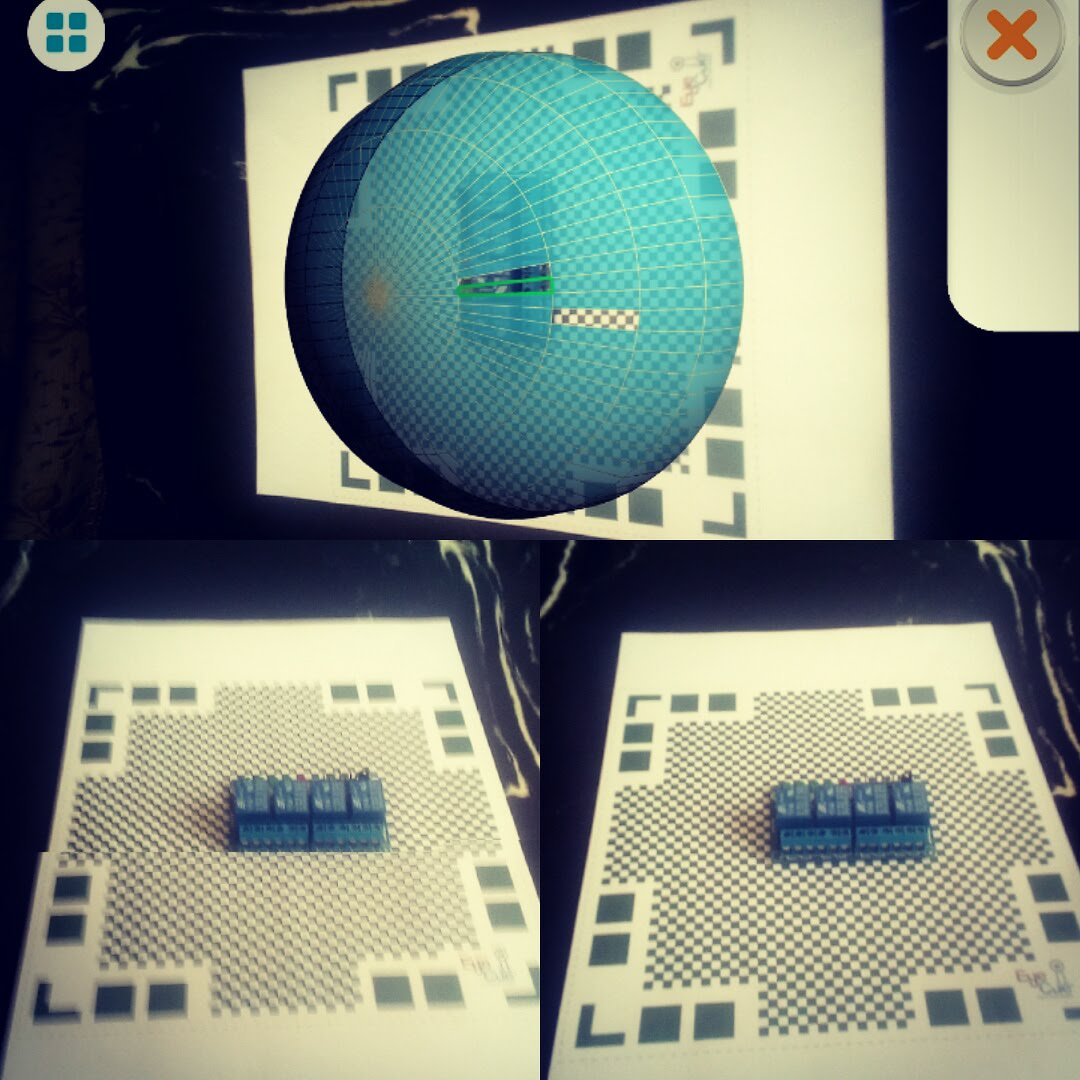
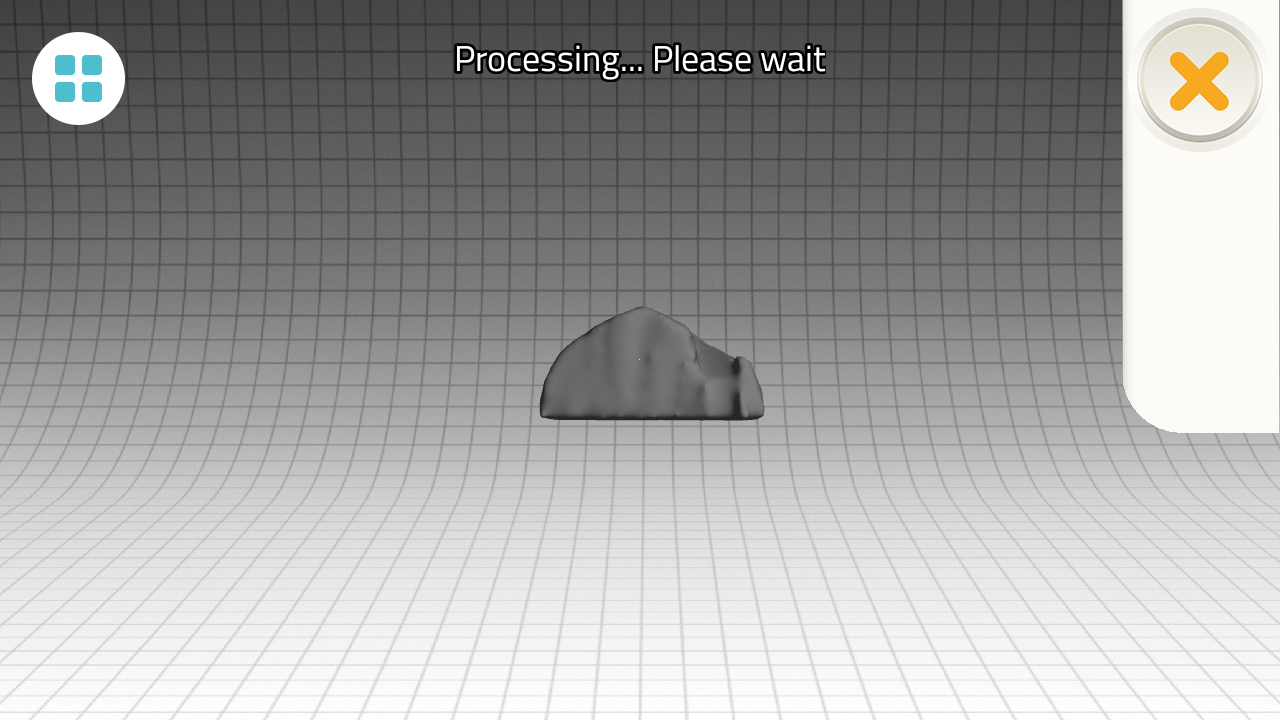
The resolution is not the best thing because my phone camera is not the best thing ..
As a Feedback about this app .. It is really easy to use ..
But it has 2 problems :
1) you have no access to edit the scanning
2) it is not free you have to pay to download the stl file ..
Q) So why My part Can't be fabricated one time through Milling Machines ?
because there are Holes In 3 Dimensions .. That is Why It is better to be done in prototype phase in 3D printer But in Next Phase .. IT will be 3 parts that will be moulded and casted after this but as Prototyping Phase we Need to "test" the Idea . and WHat is meaning by testing .. I ALready Design my Print depending on Measurement but As A User Experience I will change my design in Future ..
Q) For advantages and limitations of the additive manufacturing and 3d scanning ..
After going through such like this experience I Believe 3D printing Technology Is a great tool for 3D printing and quick tool For prototyping but it is really a high cost for such Industrial phase .. Also 3D printing Technology Can Do Design more quickly with less process than the CNC Milling .. Like the Design I made Before ..
About 3D scanning I Have in the lab i am working with a Next Engine which is have a great output before it was courpted .. But My Experience I was Suffering as I have a very bad Camera .
Q) What are the Types of 3D Printing Technologies and Applications of them ?
You can Read This Article for more details ..
And I quote from it ..
Parameters based on it there are different types of technologies ..
Printer cost
Print quality
Print speed
Printer capability
Practicality
User expectations
Types of 3D printing
Stereolithography (SLA)
Digital Light Processing (DLP)
Fused deposition Modeling (FDM)
Selective Laser Sintering (SLS)
Selective Laser Melting (SLM)
Electronic Beam Melting (EBM)
Laminated Object Manufacturing (LOM)
Binder Jetting (BJ)
Material Jetting (MJ)
SLA is a fast prototyping process. Those who use this technology are serious about accuracy and precision. It can produce objects from 3D CAD data (computer-generated) files in just a few hours. This is a 3D printing process that’s popular for its fine details and exactness. Machines that use this technology produce unique models, patterns, prototypes, and various production parts. They do this by converting liquid photopolymers (a special type of plastic) into solid 3D objects, one layer at a time. The plastic is first heated to turn it into a semi-liquid form, and then it hardens on contact. The printer constructs each of these layers using an ultra violet laser, directed by X and Y scanning mirrors.
Just before each print cycle, a recoater blade moves across the surface to ensure each thin layer of resin spreads evenly across the object. The print cycle continues in this way, building 3D objects from the bottom up.
Once completed, someone takes the 3D object from the printer and detaches it carefully from the platform. The 3D part will usually have a chemical bath to remove any excess resin. It’s also common practice to post-cure the object in an ultra violet oven. What this does is render the finished item stronger and more stable. Depending on the part, it may then go through a hand sanding process and have some professional painting done. SLA printing has become a favored economical choice for a wide variety of industries. Some of these include automotive, medical, aerospace, entertainment, and also to create various consumer products.
DLP is the oldest of the 3D printing technologies, created by a man called Larry Hornbeck back in 1987. It’s similar to SLA (see above), given that it also works with photopolymers. The liquid plastic resin used by the printer goes into a translucent resin container. There is, however, one major difference between the two, which is the source of light. While SLA uses ultra violet light, DLP uses a more traditional light source, usually arc lamps. This process results in pretty impressive printing speeds. When there’s plenty of light, the resin is quick to harden (we’re talking seconds). Compared to SLA 3D printing, DLP achieves quicker print times for most parts. The reason it’s faster is because it exposes entire layers at once. With SLA printing, a laser has to draw out each of these layers, and this takes time.
Another plus point for DLP printing technology is that it is robust and produces high resolution models every time. It’s also economical with the ability to use cheaper materials for even complex and detailed objects. This is something that not only reduces waste, but also keeps printing costs low.
FDM is a 3D printing process developed by Scott Crump, and then implemented by Stratasys Ltd., in the 1980s. It uses production grade thermal plastic materials to print its 3D objects. It’s popular for producing functional prototypes, concept models, and manufacturing aids. It’s a technology that can create accurate details and boasts an exceptional strength to weight ratio.
An American businessman, inventor, and teacher named Dr. Carl Deckard developed and patented SLS technology in the mid-1980s. It’s a 3D printing technique that uses high power CO2 lasers to fuse particles together. The laser sinters powdered metal materials (though it can utilize other materials too, like white nylon powder, ceramics and even glass). Here’s how it works:
The build platform, or bed, lowers incrementally with each successive laser scan. It’s a process that repeats one layer at a time until it reaches the object’s height. There is un-sintered support from other powders during the build process that surround and protect the model. This means the 3D objects don’t need other support structures during the build. Someone will remove the un-sintered powders manually after printing. SLS produces durable, high precision parts, and it can use a wide range of materials. It’s a perfect technology for fully-functional, end-use parts and prototypes. SLS is quite similar to SLA technology with regards to speed and quality. The main difference is with the materials, as SLS uses powdered substances, whereas SLA uses liquid resins. It’s this wide variety of available materials that makes SLA technology so popular for printing customized objects.
The main Difference between SLS and SLM .. SLS for Non Metalic Printing , SLM is for Metalic Printing ..
A Swedish company called Arcam AB founded EBM® in 1997. This is a 3D printing technology similar to SLM (see above), in that it uses a powder bed fusion technique. The difference between the two is the power source. The SLM approach above uses high-powered laser in a chamber of noble, or inert gas. EBM, on the other hand, uses a powerful electron beam in a vacuum. Aside from the power source, the remaining processes between the two are quite similar. EBM’s main use is to 3D print metal parts. Its main characteristics are its ability to achieve complex geometries with freedom of design. EBM also produces parts that are incredibly strong and dense in their makeup.
LOM is a rapid prototyping system that works by fusing or laminating layers of plastic or paper using both heat and pressure. A computer-controlled blade or laser cuts the object to the desired shape. Once each printed layer is complete, the platform moves down by about 1/16th of an inch, ready for the next layer. The printer then pulls a new sheet of material across the substrate where it’s adhered by a heated roller. This basic process continues over and over until the 3D part is complete.
The Massachusetts Institute of Technology (MIT) first invented BJ 3D printing.BJ is a 3D printing process that uses two types of materials to build objects: a powder-based material (usually gypsum) and a bonding agent. As the name suggests, the “bonding” agent acts as a strong adhesive to attach (bond) the powder layers together. The printer nozzles extrude the binder in liquid form similar to a regular 2D inkjet printer. After completing each layer, the build plate lowers slightly to allow for the next one. This process repeats until the object reaches its required height.
The four popular materials used in BJ printing include:
Ceramics
Metals
Sand
Plastics
these printers allow you to print parts in full color. To do this, you simply add color pigments to the binder, which typically include black, white, cyan, yellow, and magenta.
You will also hear Material Jetting referred to as wax casting. Unlike other 3D printing technologies, there isn’t a single inventor for MJ. In fact, up until recent times it’s been more of a technique than an actual printing process. It’s something jewelers have used for centuries. Wax casting has been a traditional process where the user produces high-quality, customizable jewelry. The reason it gets a mention here is because of the introduction of 3D printing. Thanks to the arrival of this technology, wax casting is now an automated process. Today, MJ 3D printers produce high-resolution parts, mainly for the dental and Jewelry industries
Those almost all new technology of 3D printing ..
Now for applications of 3D printing ..
It is really nowadays 3D printing is spreading at Biology , Militiry , Automotive , Aerospace , Education , arctiectures and ETC..
Q) What are the types of 3D scanning Technologies ?
You can check this Link .. And I quote ..
3D scanners are powerful tools for professionals in several industries, such as automotive, aeronautics, dental, jewelry, video games, special effects and animation movies.
The 3D scanning technologies rely on different physical principles and can be classified in categories:
Laser triangulation 3D scanning technology, as illustrated on the image, projects a laser beam on a surface and measures the deformation of the laser ray.
Structured light 3D scanning technology measures the deformation of a light pattern on a surface to 3D scan the shape of the surface.
Photogrammetry, also called 3D scan from photographies, reconstructs in 3D a subject from 2D captures with computer vision and computational geometry algorithms.
Contact based 3D scanning technology relies on the sampling of several points on a surface, measured by the deformation of a probe.
Laser pulse (also called time of flight) 3D scanning technology is based on the time of flight of a laser beam. The laser beam is projected on a surface and collected on a sensor. The time of travel of the laser between its emission and reception gives the surface’s geometrical information.
Q) What are the parameters Important to know about 3D printing and Scanning Technology ?
1) Difference Between Addative and Subtractive Technology
2) What can Addative Tecnology make That subtractive cant do
3) What type of Files Do the the Addative Technology work with ?
4) What are the Simple and Custom Parameters ?
5) How to test your Machine Parameters ?
6) What are the types of 3D printing Technology ?
7) Mention some Applications of 3D printing
8) Print Something that you cant make with with subtractive technology
9) What is 3D scanning
10) Make a Pilot on 3D scanning
11) What type of technologies in #3D scanning
Files