Exercise 2. Computer-aided Design
Assignment: Computer-aided Design
- Model (draw, render, animate, simulate, ...) a possible final project, and post it on your class page with original 2D and 3D files.
Learning Outcomes
- Evaluate and select 2D and 3D software
- Demonstrate and describe processes used in modeling with 2D and 3D software
Evidence
Process
I'd like to create some sort of tool to inspire children and their families to create stories during a bedtime routine that incorporates shadow play and shadow puppetry. The device would include a light source, laser-cut shadow elements and hand-held puppet pieces. First I started with some notes and sketches found here. I decided I would create a few 3D renderings of different versions of my idea.
TinkerCad
I first set out to try FreeCad. I watched a couple tutorials but found the interface confusing.
I hoped to design a 6-paneled of lantern interlocking and interchangeable pieces.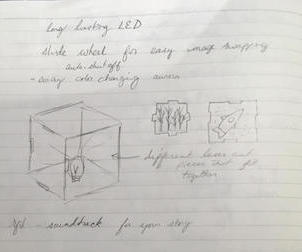
I downloaded FreeCad and watched a couple tutorials but found the interface confusing and the program kept crashing on me.
After becoming frustrated, I decided to use TinkerCad- the one tool already familiar to me before trying something new.

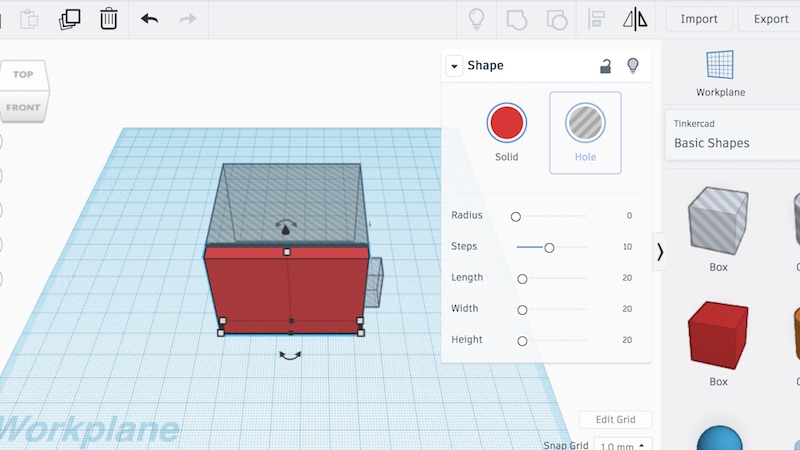
First I created a "hole" box of the approximate shape and size I wanted.I was able to specify the length, width, and height.
Then I started building panels around it.
I created one panel using the box solid from the shape generator and placing it on the first face of my "hole" box.
I cut slots for tabs by creating a box hole on one side of the panel.
I duplicated this hole and moved it over to the other side of the panel creating a wide "I" shape.
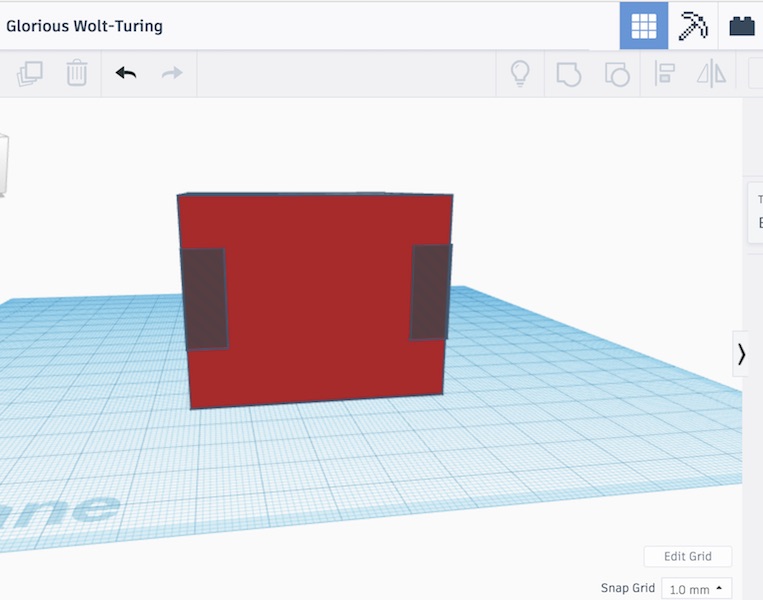
I duplicate this shape and moved it to the opposite side of box-shaped hole for a second panel.
Next I created the other two sides of the box with tabs that fit perfectly into the slots I'd created earlier.
To create the cut-outs for the panels I used various shape generators, making sure that all shapes added to the panels were "holes".
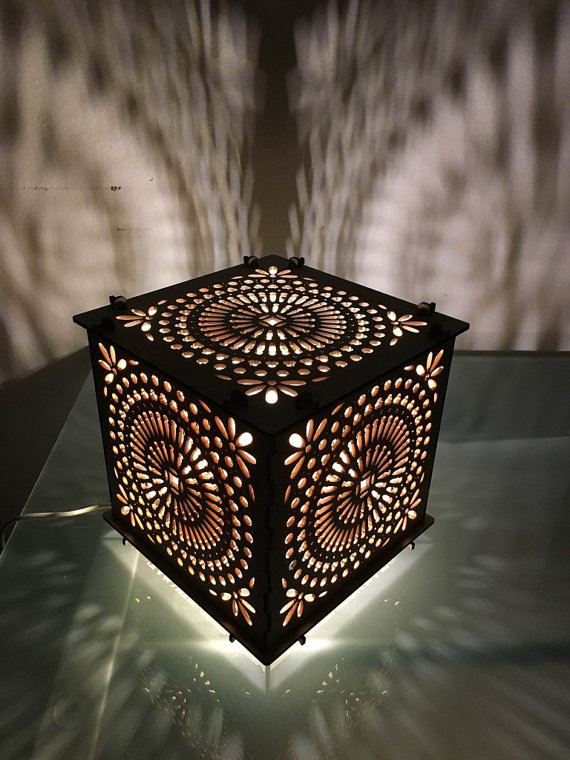
On one side I created a simple wave pattern, on others a mountain, a hill and cave, and a tree from another user's design on TinkerCad.
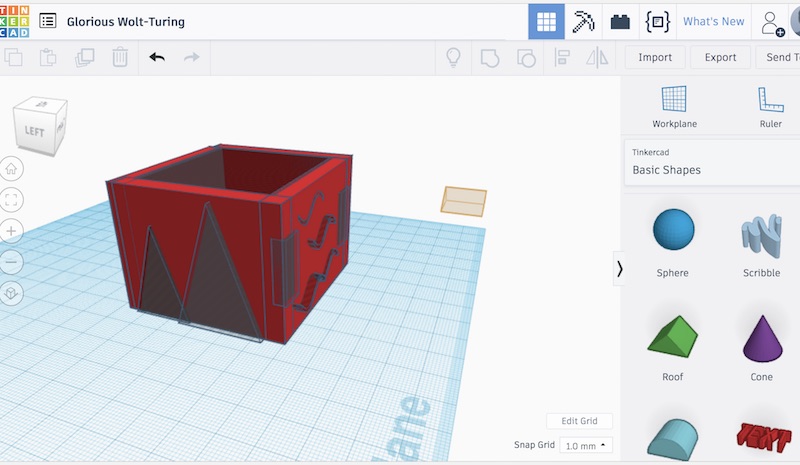
I finished with the top piece of the lantern. After I'd created the panel, I added star-shaped holes.
Finally, I removed the inner cube that I'd used as my foundation to build the panels on.
While I was able to create this model with relative ease,
I came to see that this tool doesn't allow for enough control and specificity to meet the needs of a more complex project.
For good measure, I downloaded Fusion360, another free CAD tool. Like with FreeCad, I saw that I would need to invest some time to learn how to use it but I didn't encounter the program crashing on me which seemed to be a good start.
Inkscape
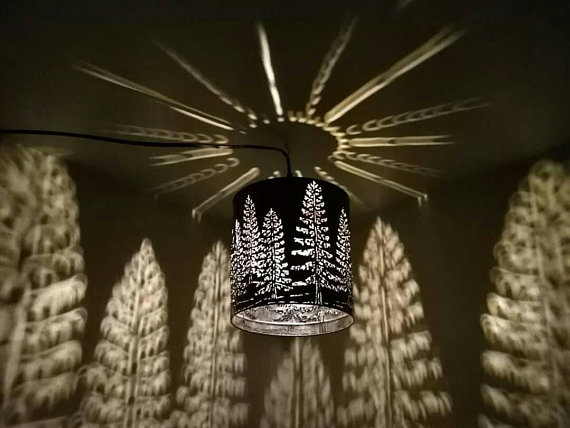
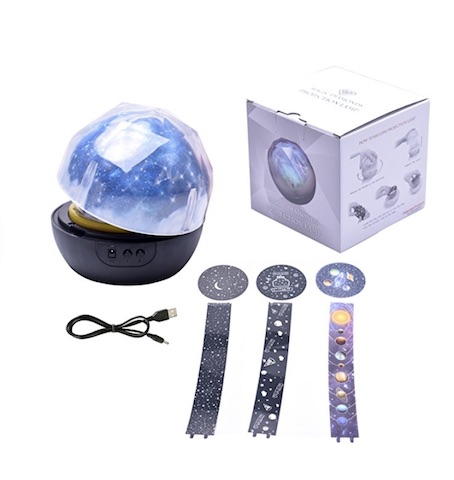
Another idea was to create a domed lantern with different strip inserts to project images.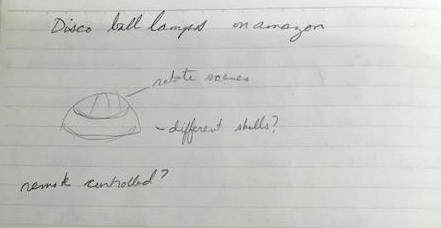
I liked the idea of the strips being placed inside of a dome on a base surrounding the light source with at least one strip rotating, to suggest movement across a landscape, while the dome itself or another strip remained stationary.
In this way you could also be certain to project on the walls and ceiling of a space.
I decided to use Inkscape to create my design in 2D.
Without any previous experience using this tool, I used the Inkscape tutorials available right in the "Help" menu as a starting point. I appreciated the interactive nature of these tutorials.
I began from my sketch and a similar design from a commercial product as inspiration.
First I designed the lantern shape by drawing a half circle, an ellipse and a rectangle between them.

I removed the outlines to create one complete dome shape. I also added a line to indicate that the dome is made of a top piece and a cylindrical bottom piece.
I drew the line by snapping line nodes to opposite edges of my top ellipse and dragging the middle of the line to curve it.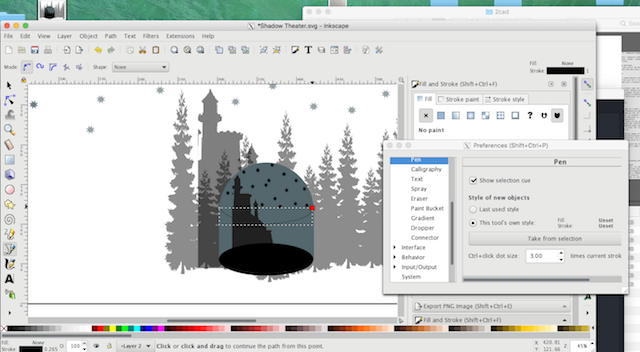
Next I imported an image of a forest and castle.
I scaled and cropped them both to fit inside the "dome" I created. I filled each with a different color to suggest that they exist on different planes within the dome. I switched my bottom ellipse color from gray to black to suggest that the forest wraps all the way around the cylinder.
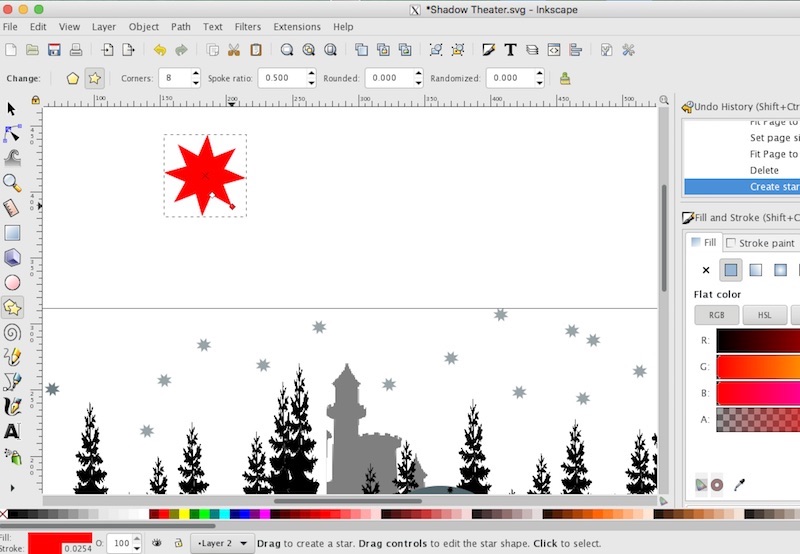
In the toolbox I used the "polygon or star" tool to generate an 8-pointed star. I duplicated the star across the top of the dome to create a night sky.
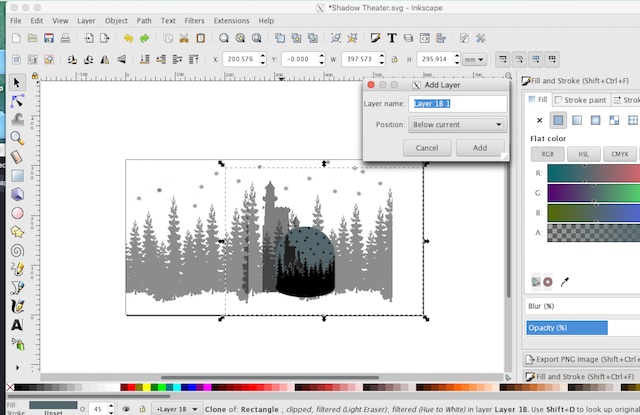
Finally, I duplicated the forest, castle, and stars to create the projected shadows from the lantern. I scaled these up and placed them on a layer behind my lantern layer.
Finished 2D sketch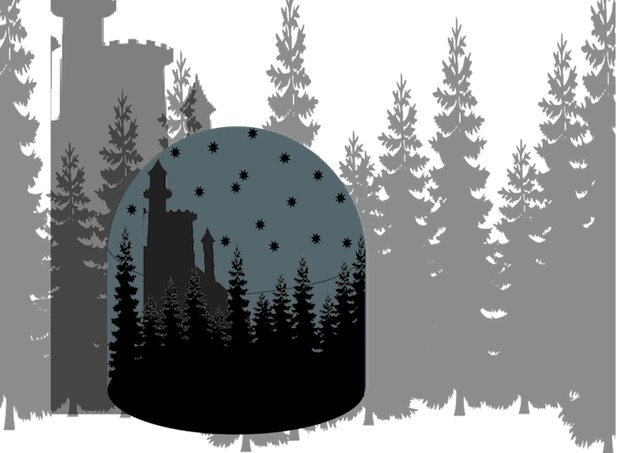
Fusion360- Update
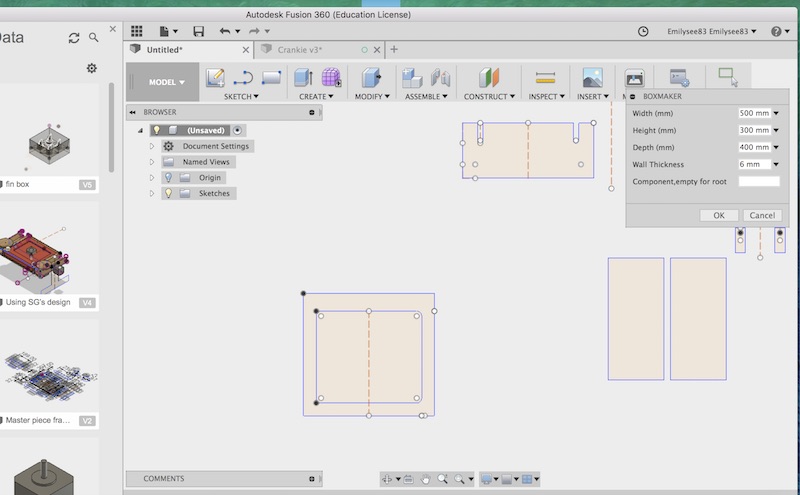
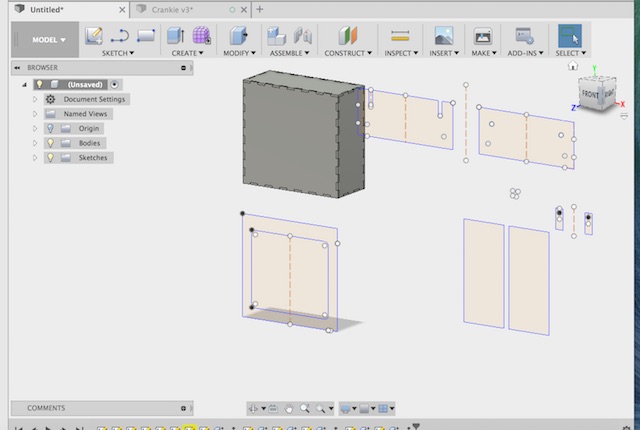
For my final project, I decided to make the crankie.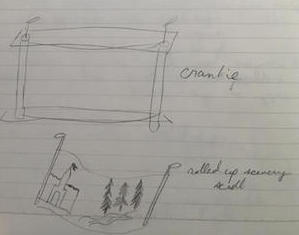
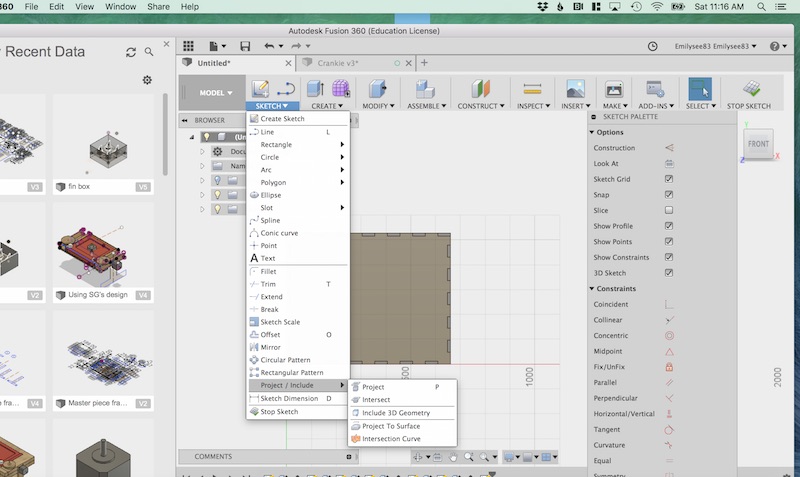
I first created this design in 2D using Fusion360 and then planned to extrude the surfaces as I've done in other assignments, Exercise 9, for example.
However, I found a plug-in that would easily create a tabbed box that I could use for my press-fit design.
Using the BoxMaker plug-in, I created a box with my set parameters of material thickness and height, width, and depth dimensions.
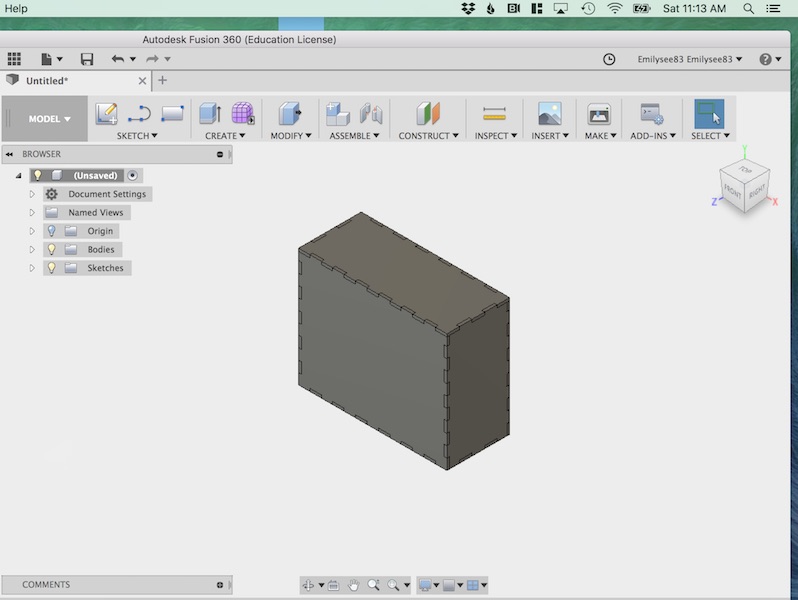
Then, I projected my previously created box sketches onto the respective surfaces- top, bottom, and front.
Finally, I used the press-pull tool create the pockets for the scroll dowels on the bottom piece and the holes for the dowels and front "screen".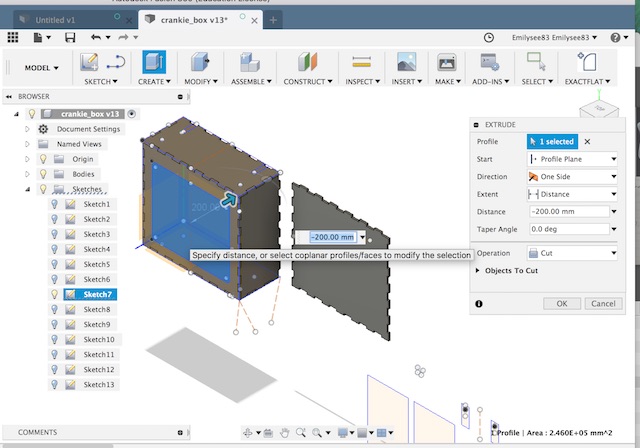
Please also see the Final Project Process page for documentation on additional 2D design using Gimp and Inkscape.
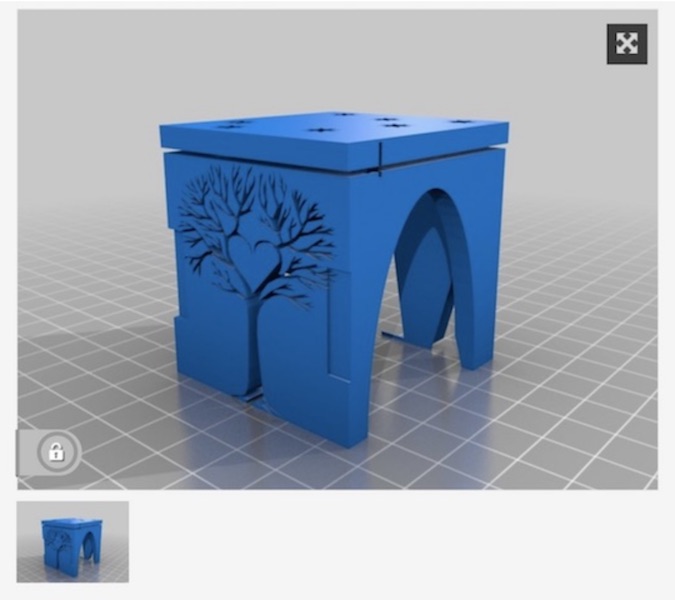
Finished 3D design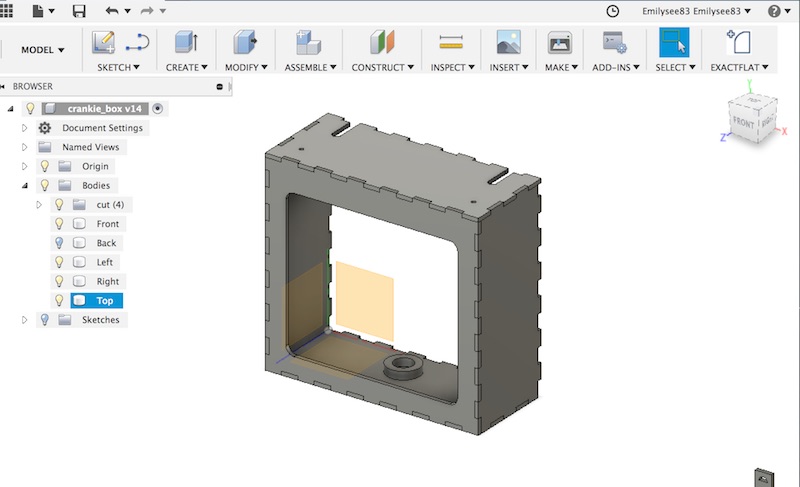
Files
TinkerCad- Paneled lantern
Inkscape- Rotating lantern with inserts
Fusion360- Crankie box