Exercise 15. Wildcard Week
Assignment: Wildcard Week
- Design and produce something with a digital fabrication process not covered in another assignment
- Document the requirements that your assignment meets, and including everything necessary to reproduce it
Learning Outcomes
- Demonstrate workflows used in the chosen process
- Select and apply suitable materials and processes to create your project
Evidence
Process
Leading up to Wildcard Week I'd done significant research on building a wooden fishbone-frame stand-up paddleboard (SUP) to cover composites. While I still have high hopes of creating a customized SUP starting from a Clearwood Paddleboards design, given time constraints and significant documentation catch-up, it'll have to be put on hold for now.
We have two embroidery machines in the lab I've been itching to use so instead I focused on learning how to use them. Sterling, an intern at the FabLab here at Dassault, was kind enough to briefly introduce me to the Brother machine. Additionally, Rachael, another intern, familiarized me with the Pfaff, some of the documentation she'd created for the PE-Design Plus software, and helped me troubleshoot with both.
I was particularly interested in creating free-standing lace so I started with some tutorials: [Urban Threads] (https://www.urbanthreads.com/tutorials.aspx?t=stitching+freestanding+lace), Making custom designs, Free standing lace.
We only have 50 weight Polyester thread which worked well enough but cotton or rayon are preferred for FSL. For water soluble backing material used both Ultra Solvy, plastic-type backing and Fabri-Solvy, fabric-type backing.
PE-Design Plus
This software makes it easy to convert an image or photo to something you can embroider so I experimented with some images to see how they might render.
I'd tried to convert an existing image into one that had stitches that created an open mesh for free-standing lace (FSL) but ultimately wasn't able to achieve this with the software. A work-around would be to create the hatching in the image itself or to use an image with many connected lines, as I ultimately did with the cloud.
Instead I downloaded a file from the web; note that thousands of embroidery files are built into the Pfaff software that can be used on either the Brother or the Pfaff.
The stitch colors are for reference only. The darker stitch sets on the left of the image are base stitches with a lot of hatching. The lighter sets are satin border stitches.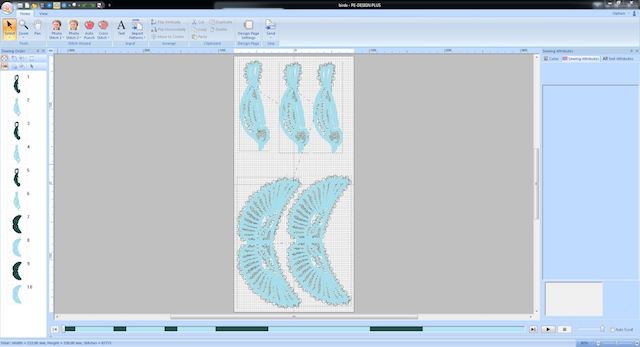
I kept most of the default file settings and exported the file to .pes for the Brother. Then I used my USB stick to transfer the file to the machine.
Brother SE 1800
The machine display is simple but you can access a wealth of information from here including designs, settings, and step-by-step visual instructions to thread the machine, wind the bobbin, etc. We had a quick reference guide in the lab and I found the manuals to be useful in troubleshooting.
Once I had my spool and bobbin loaded I opened the file. It shows the two sets of stitches (base, outline) from my design.
I pushed the embroider button on the machine (now green)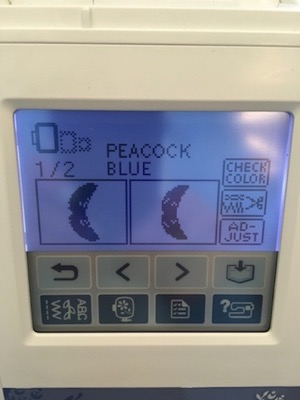
I discovered that even though the process of machine-embroidering can be straight-forward, a lot can go wrong. I had to tinker with settings of tension and speed, bobbins, and spools.
Printing one object meant stopping to cut knotted up threads a number of times.
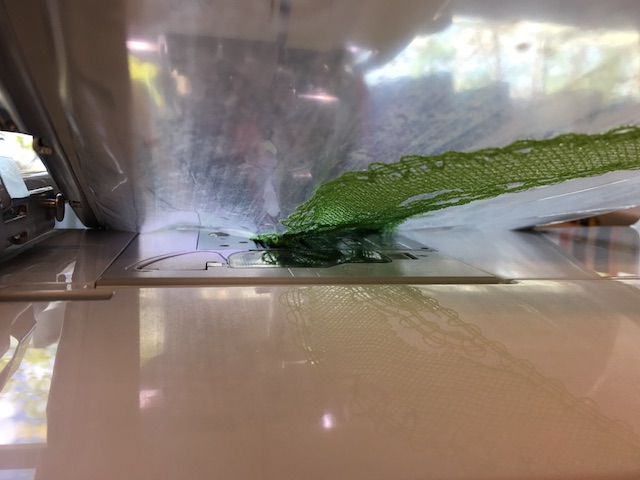
It also meant stopping to replace bobbins often since with FSL you must have the same color as your top threads.
Finally, I got smart and wound them in bulk in advance of machining.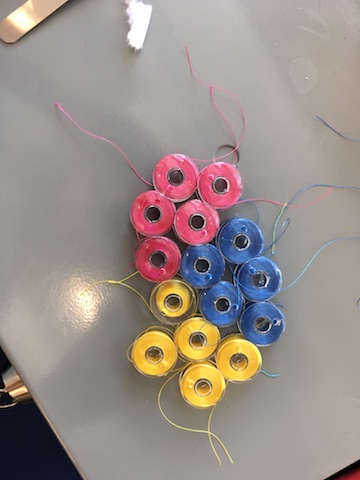
Pfaff Creative 3.0
The Pfaff machine has significantly more software built into it. I'd figured out some basics on my own and learned more through the manual and Rachael.
I've still barely scratched the surface though. I primarily used it to set up the machine, move my object, set tension, and choose sample designs.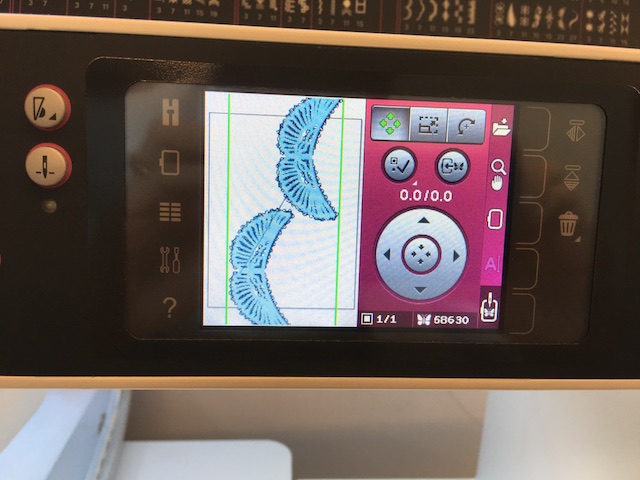
We had some difficult getting this machine going- after a minute or so of stitching the thread repeatedly broke.
Eventually Pilar realizing that the spool wasn't threading properly, manipulated a mechanism in the threading flow and we were able to embroider an entire sample successfully.
My first run on this machine was another bird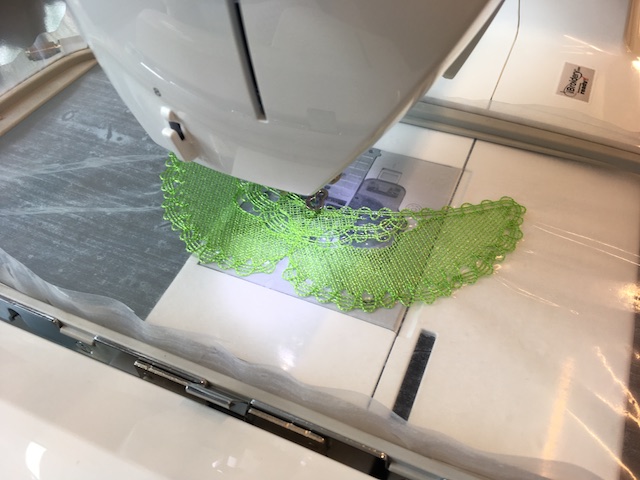
And then I switched over to clouds.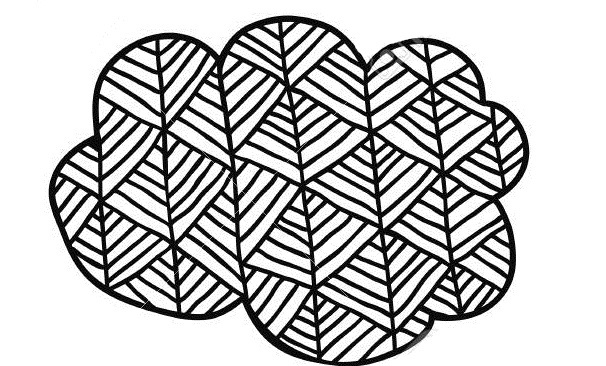
I changed stitch density and direction until I ended up with an image that rendered as I thought might work for FSL.
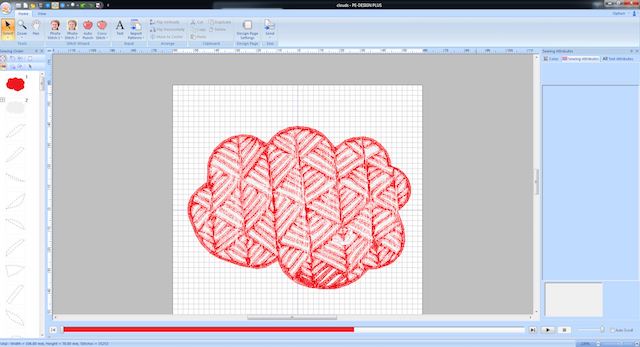
Notice that every single "hole" appears as a stitch set on the left. Ultimately I used only the first (red) stitch for my cloud so that the "holes" would be empty.
The fabric-type backing kept jamming the threads because the needle became stickier as it punched through the material, so I switched to a stretch type needle (advisable for FSL, I discovered). This didn't solve the matter so I switched out the backing for the plastic-type.
Original cloud design
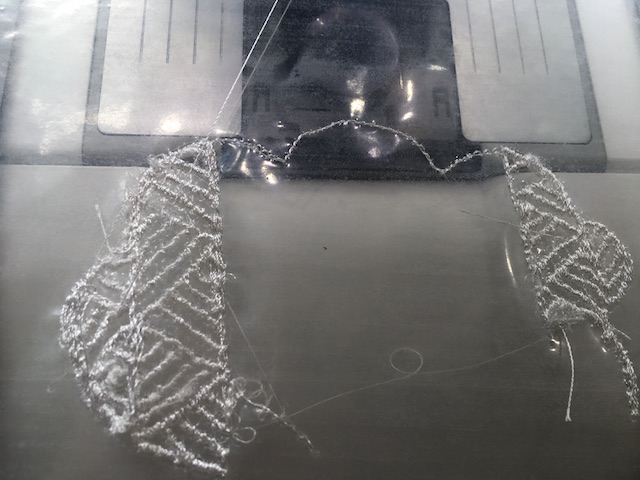
In some places the thread is shiny and others is matte- I'd used a cotton thread bobbin and nylon thread spool. For FSL both bobbin and spool should match in material. I'd found that the satin stitches in this design tore the water-soluble backing on automatic mode so switched to manually operating the machine with the foot pedal. This worked better but was a verrry slow operation given the fine detail, so ultimately I abandoned it. Next steps will be to try with two layers of material of water-soluble backing material as is recommended by some textile artists.
Finishing
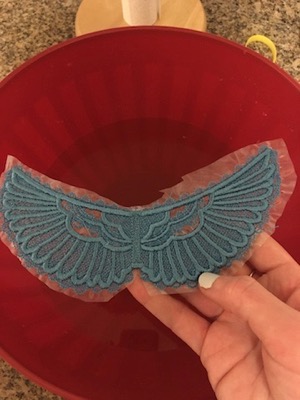
Once a piece was stitched, I removed it from the hoop, cut around it, and soaked in warm water for the recommended 5 minutes.
This worked well with the plastic-type backing but even after repeated soaking, rubbing, and being left overnight in water, bird bodies stitched on the fabric-type soluble backing still had material left between the mesh.
Birds in production using both embroidery machines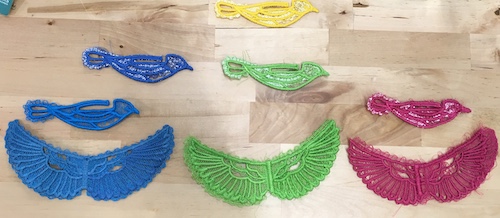
Notice the white backing on the bird bodies. Also the magenta wings are off because I'd adjusted the embroidery hoop mid-job.
Finished free-standing lace bird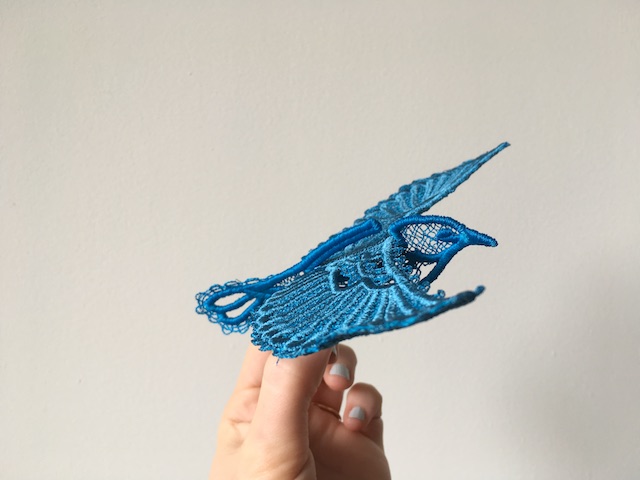
Files
FSL bird design available from Embroidery Library
My FSL cloud design