Exercise 13. Networking & Communications
Assignment: Networking & Communications
- Design and build a wired and/or wireless network connecting at least two processors
Learning Outcomes
- Interpret and implement networking protocols
Evidence
Process
The following resources helped in understanding an I2C serial bus and writing code:
- How To Mechatronics How I2C Communication Works
- Instructables Master Slave LED Controller
- Arduino Wire Library
- And Instructables I2C Between Two Arduinos with the code I modified
Testing with Arduinos
By this point my computer was no longer programming any of my boards so I used two Arduinos to start while I sought help in getting my computer in working order (and eventually used a different computer) to program my boards.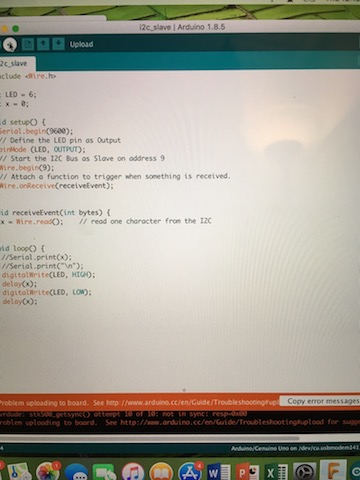
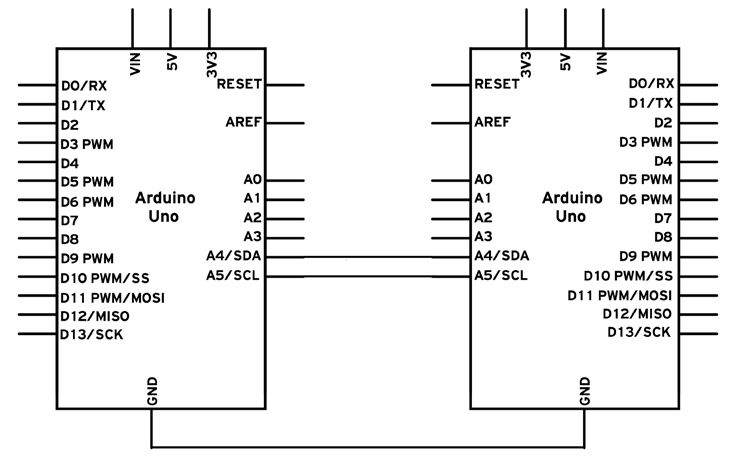
The following diagrams from the I2C Instructables helped in wiring.
I downloaded the wire libary necessary for I2C communication and sent the master/slave codes that I'd found to my two Arduinos.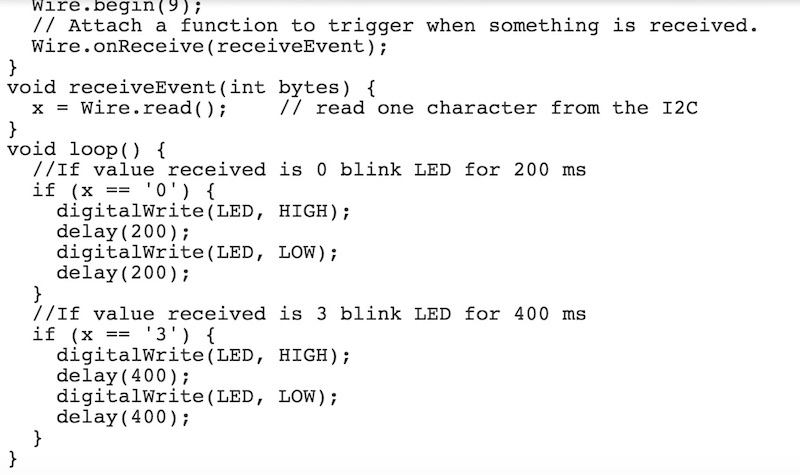
Next I modified the codes and sent this.
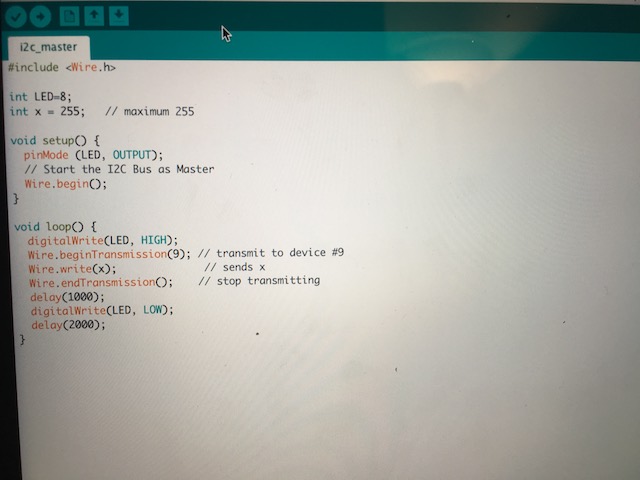
I2C Boss
#include <Wire.h>int LED=13;int x = 255; // maximum 255void setup() {pinMode (LED, OUTPUT);// Start the I2C Bus as MasterWire.begin();}void loop() {digitalWrite(LED, HIGH);Wire.beginTransmission(9); // transmit to device #9Wire.write(x); // sends xWire.endTransmission(); // stop transmittingdelay(10);digitalWrite(LED, LOW);delay(20);}
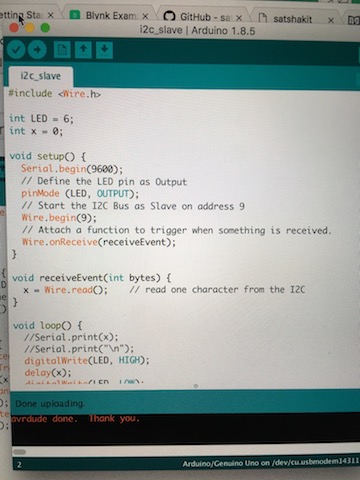
I2C Worker
#include <Wire.h>int LED = 6;int x = 0;void setup() {Serial.begin(9600);// Define the LED pin as OutputpinMode (LED, OUTPUT);// Start the I2C Bus as Slave on address 9Wire.begin(9);// Attach a function to trigger when something is received.Wire.onReceive(receiveEvent);}void receiveEvent(int bytes) {x = Wire.read(); // read one character from the I2C}void loop() {//Serial.print(x);//Serial.print("\n");digitalWrite(LED, HIGH);delay(x);digitalWrite(LED, LOW);delay(x);}
Once I was able to program my boards with another computer I tested with my modified Satshakit, first as the board receiving messages and
blinking the LED, and then as the board sending the message.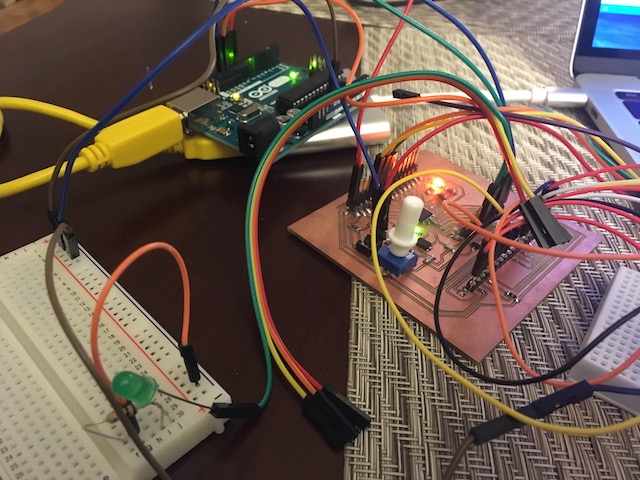
Preparing a second Arduino-like board
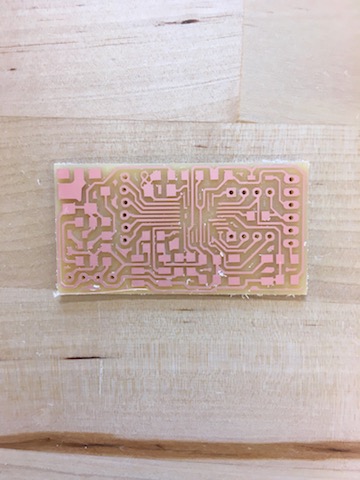
Since for my final project I need a 2nd Arduino-like board, I decided to make Luciano's Barduino. It has a much smaller footprint than my modified Satshakit and I was able to mill it successfully on the first go.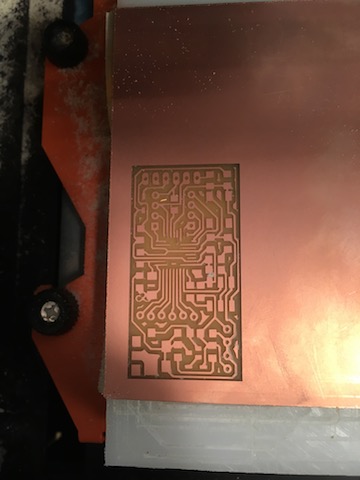
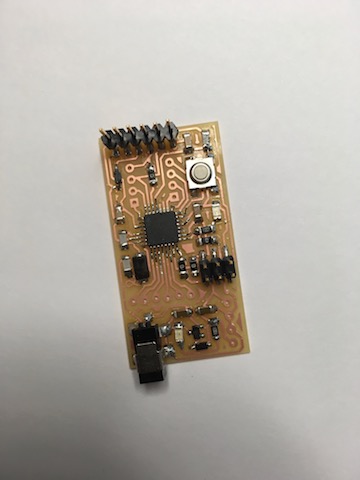
I burned the bootloader and successfully ran Blink on my board.
Programming
Although it is possible to create a serial bus between two Arduinos without pins A4 and A5, these pins are necessary to create an I2C serial bus. I discovered as I was looking at the schematic and board diagram for the Barduino that it doesn't have traces to these pins.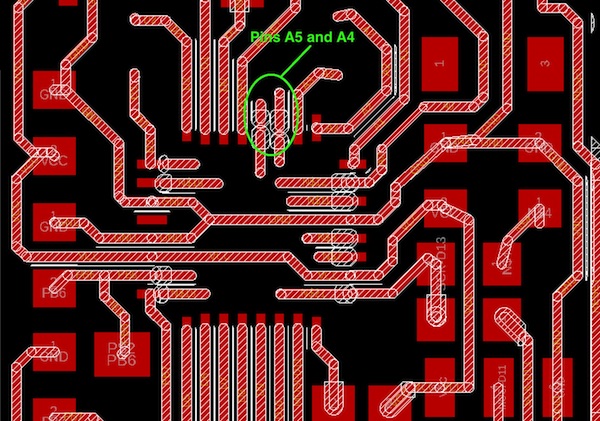
First I set up my satshakit and Pilar's to communicate with each other.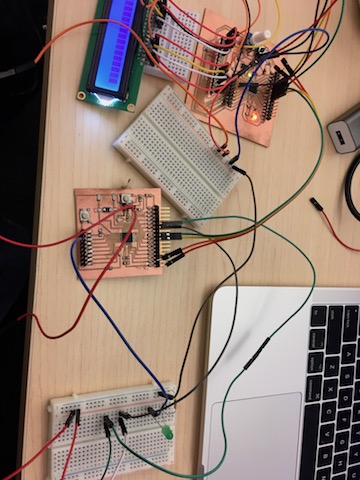
Then I decided that rather than redesign, mill, and stuff another board, I would connect wires to the A4 and A5 pins on my Barduino's microcontroller. This was very tedious work but worth the effort.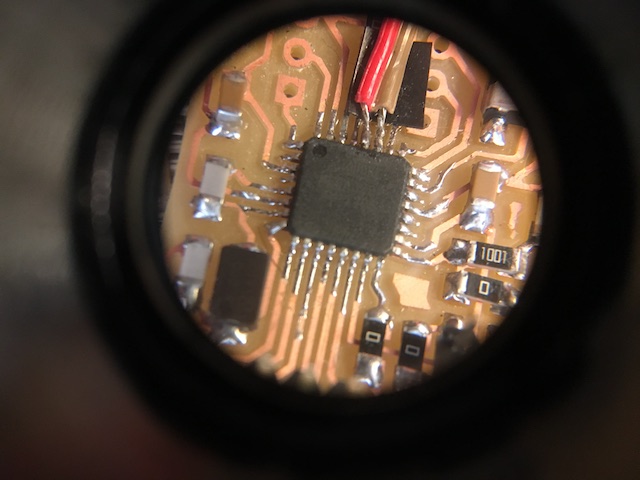
The original code that I found tells the receiving board if value received is 0 (x == '0') to blink one set of code with a shorter delay and if the value received is 3 (x == '3') to blink another set of code with longer delay. I changed my code so that there is a 1 to 1 relationship with the value of x. The highest number I can send with this code is 255 (1 byte of data) but I can change 'int x' value to manipulate blinking delay.
I2C Boss
#include <Wire.h>int LED=13;int x = 255; // maximum 255void setup() {pinMode (LED, OUTPUT);// Start the I2C Bus as MasterWire.begin();}void loop() {digitalWrite(LED, HIGH);Wire.beginTransmission(9); // transmit to device #9Wire.write(x); // sends xWire.endTransmission(); // stop transmittingdelay(10);digitalWrite(LED, LOW);delay(20);}
The receiving board has the address of "9" in both the Boss and Worker codes. If I were to connect these two boards with others, the Boss code would send the message out to all the boards but only my Barduino would act upon.