I wanted to have a go at creating a soft robot this week. I have designed two different ones based on previous designs
Soft Robotic Toolkit - bending actuatorsInstructables soft robot gripper
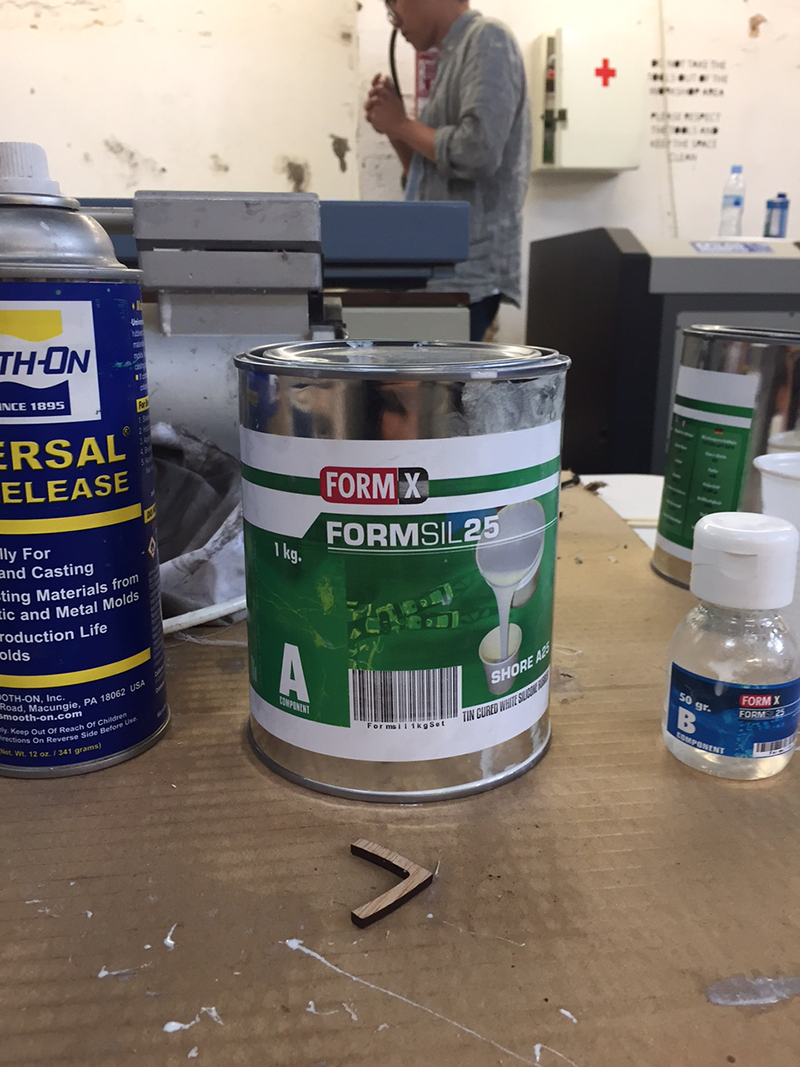
For the casting material I used Eco-Flex 0030. The data sheet can be found here and the safety information here. This has a reasonable cure time (I found I was able to remove the mold in 2 hours) and had the best properties for a soft robot. Apparently it can stretch to 900% its intial length before it breaks!
Technique 1
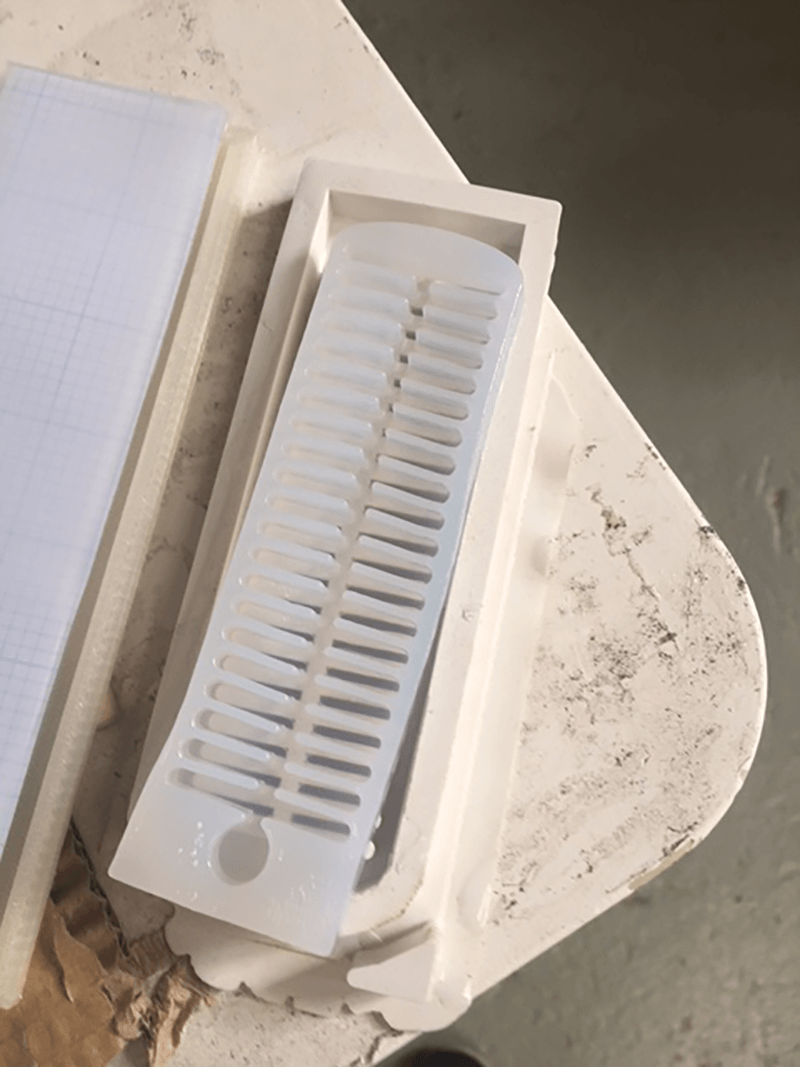
The first one I designed and 3D printed. I applied a repeated scale down of the chambers, similar to how the golden ratio is seen in nature. I was hoping this would give me some interesting results. The concept of this one is air chambers connected by a narrow channel with air pumped at one end. The base of the robot has paper impregnated in the silicon which avoids stretching in this direction and so dictating the movement of the robot.
When casting with a material it is important to get the formulation right (read the instructions) and also to remove bubbles to avoid any weak spots or blemishes on the final piece. To avoid bubbles, one trick is to pour a very thin stream from high up, allowing any bubbles that may be in the mix to pop. Another technique is to use a vaccuum chamber, this causes the air bubbles to expand and rise to the surface. I used a combination of both for all my molding.
After lots of mold release, I sealed the two parts of the mold using lots of vaseline. After several fills I realised this wasnt enough and the reason the mold wasn't filling was because it was leaking out the bottom :/ Fortunately I had covered the surface so the mess was easy to clean. What came out was never going to be impressive, but I was amazed by the level of detail I was able to achieve.
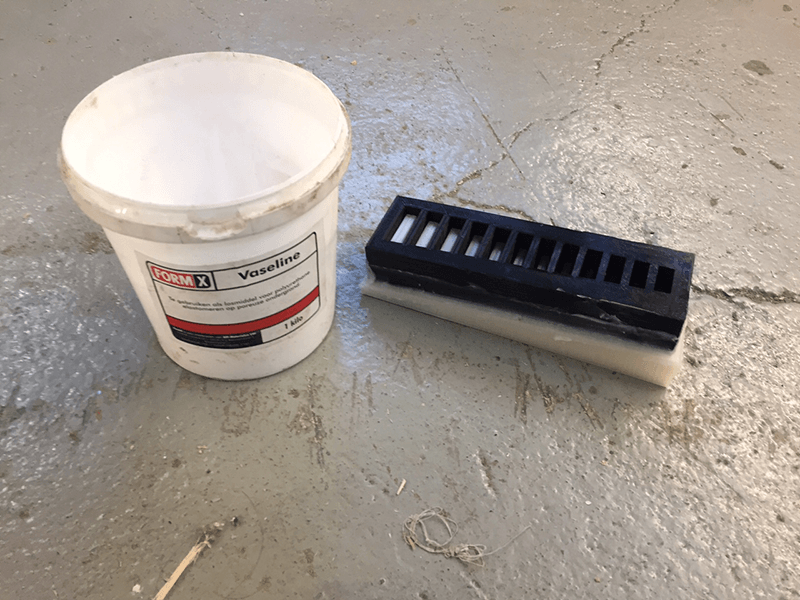
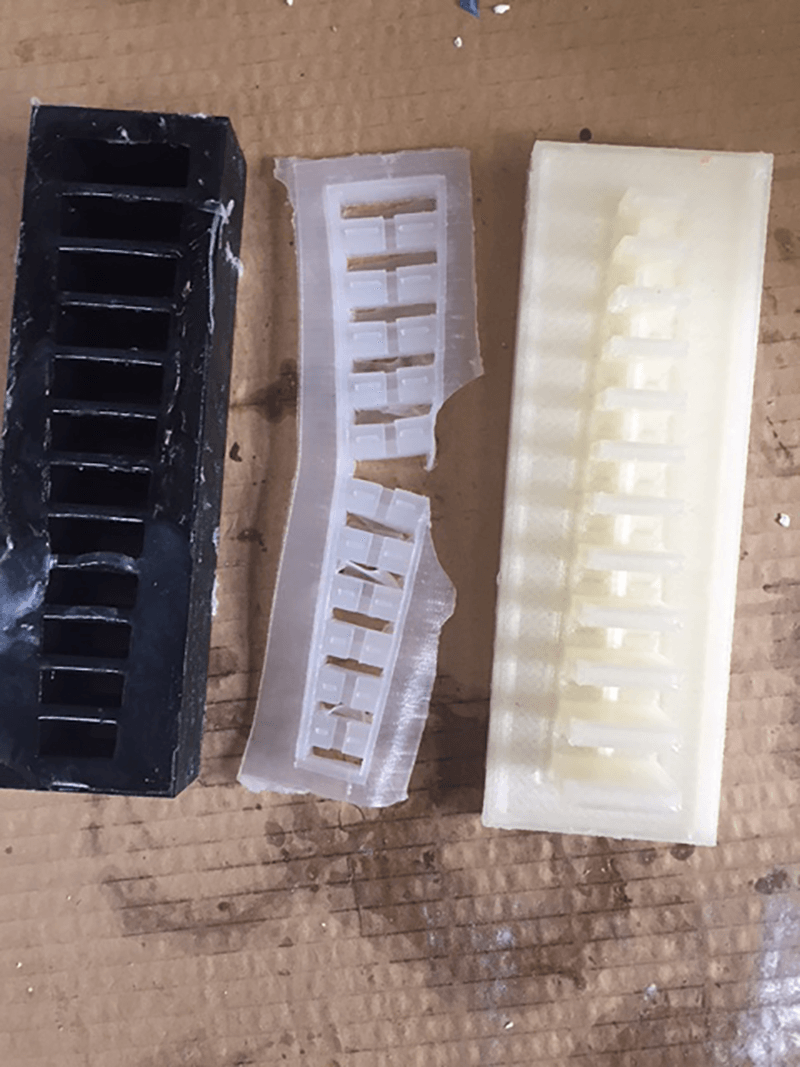
For my next attempt I sealed the mold using some plaster. This worked perfectly and the mold was filled and allowed to set. It was difficult to remove the cast piece as the texture of the 3D print gave a lot of surface area for the silicon to stick to. I eventually got it out however.

For the other half of the cast I quickly laser cut a piece of paper to size (just cause) and embeded it in some silicon and let set
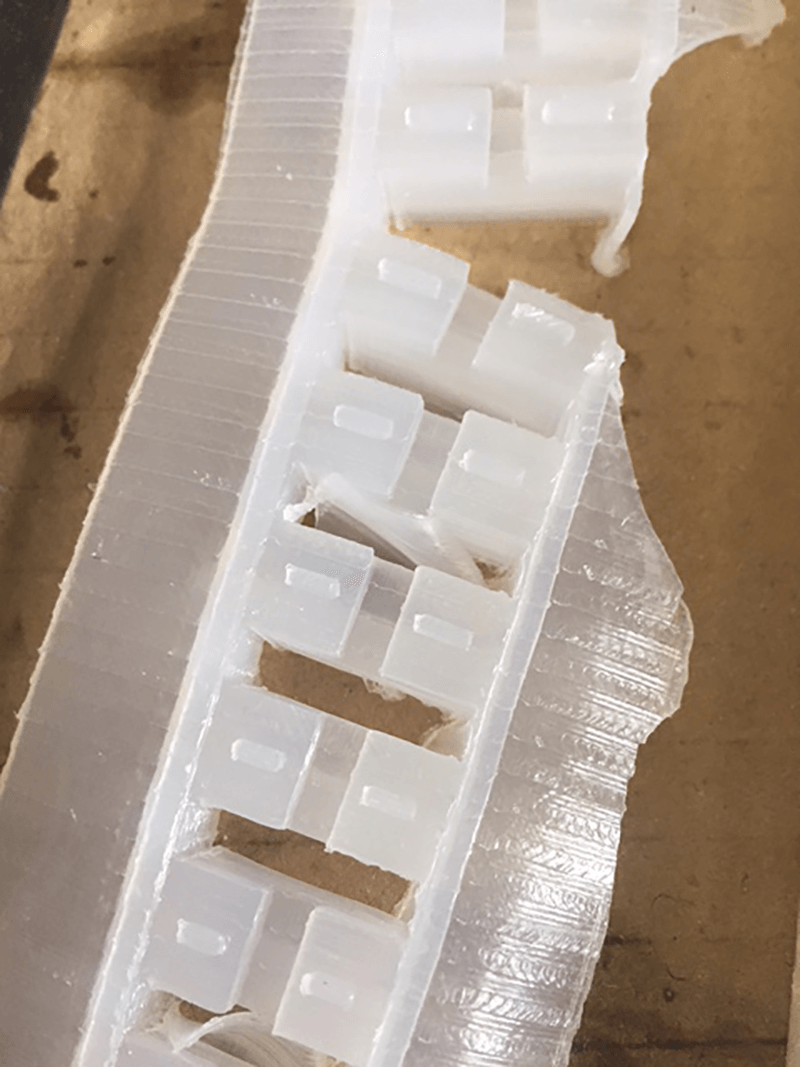
When both halves had set I lay a thin layer of silicon on the base layer and a placed the other half on top. I pasted extra silicon around the edge to ensure a good seal. When it was time to test I had clearly fallen upon the main problem that can occur with this piece. Because the air channel layer is so thin, it is at risk of getting blocked. Unfortunately this was the case and only the first chamer inflated.
Technique 2
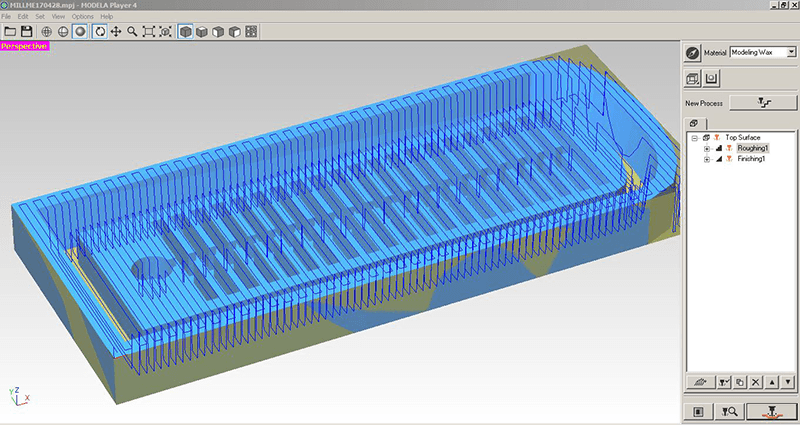
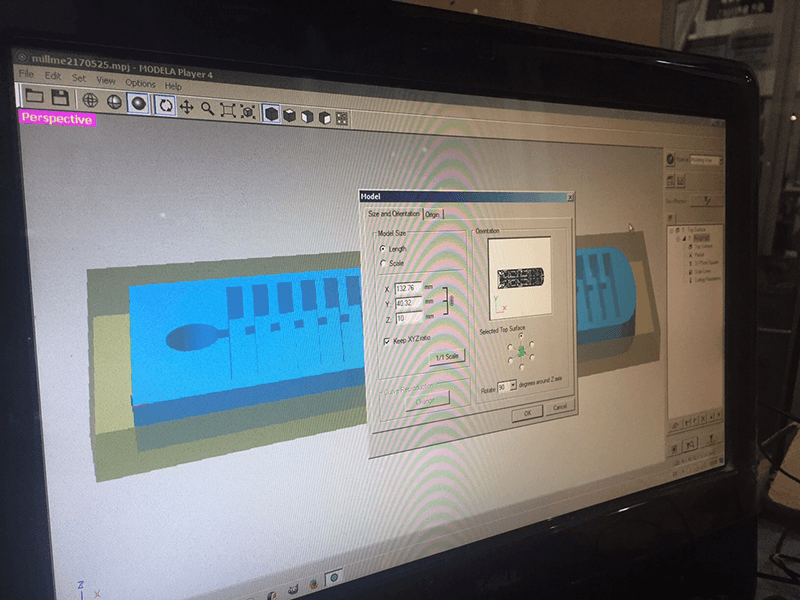
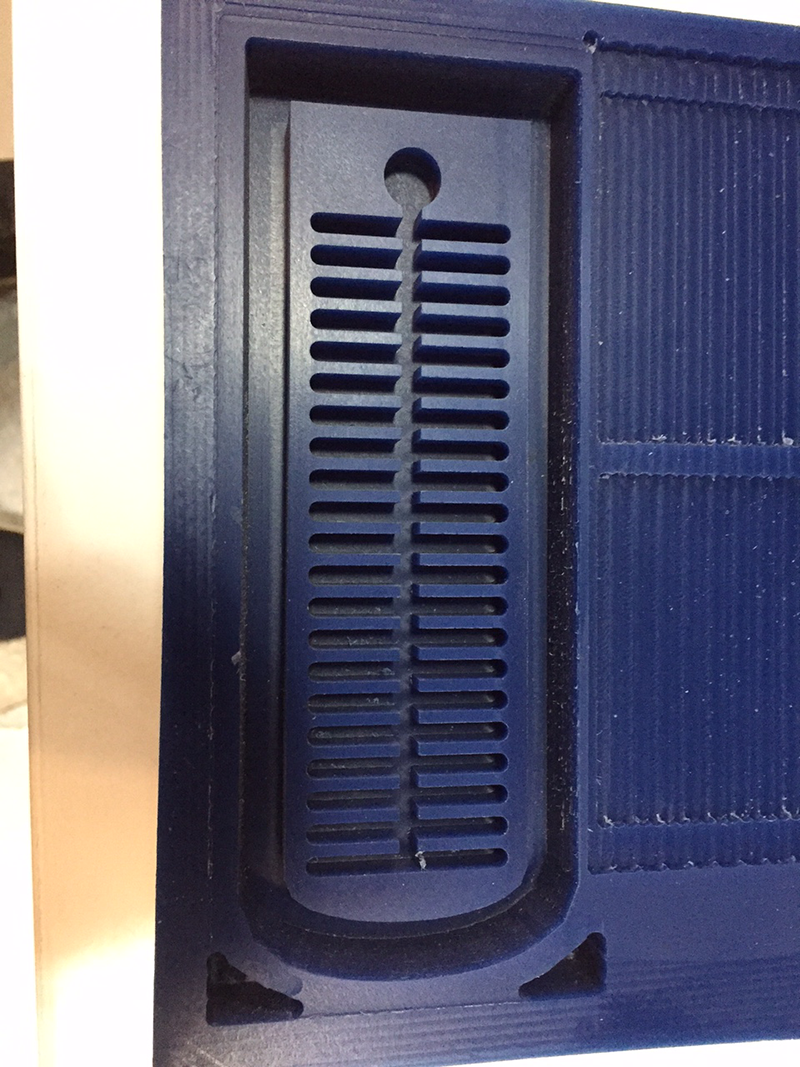
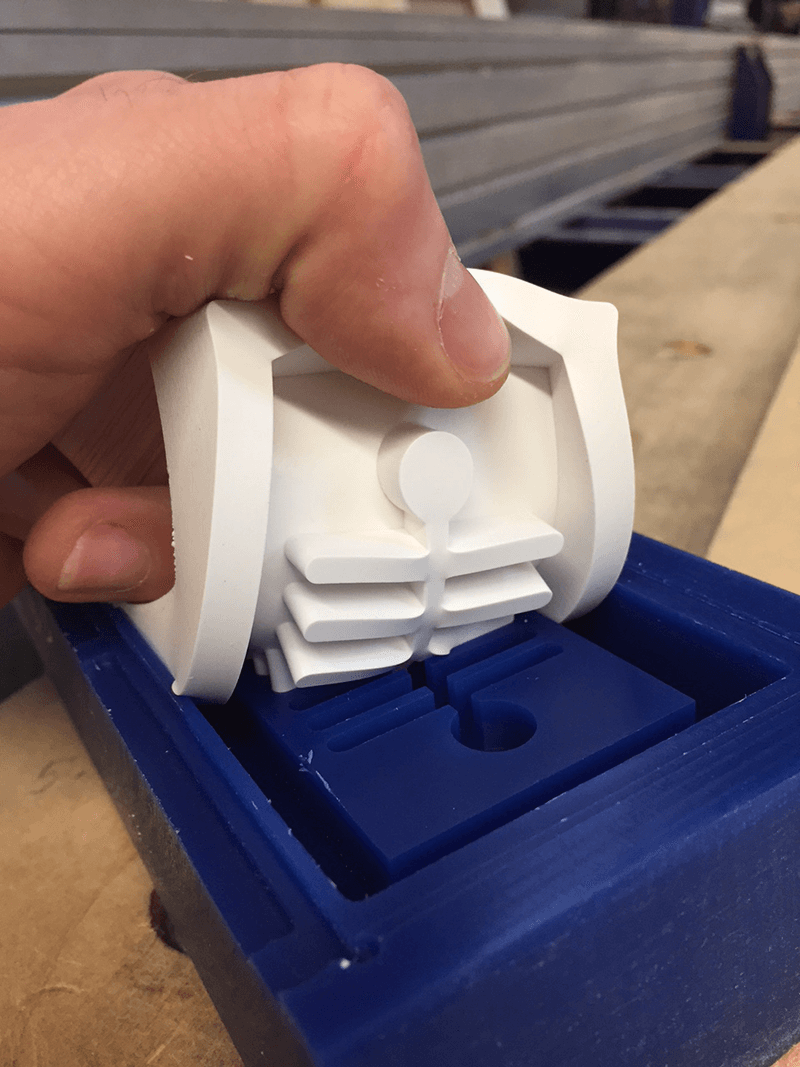
For my second attempt I milled my mold after designing a file in rhino. This time however, I milled the final piece of what I wanted out of wax and then casted a reusable silicon mold. This was based on the Instructables link above. This design is build up in the same way with 2 halves, one from the cast and the other side a flat piece of material stuck to the top. This design had no paper in to clearly dictate which side the robot will contract/expand, so I assume the thicker side will have more resistance to stretching.
I used the Roland mill, but used a larger drill bit (3mm) at first to remove unnecessary material first (roughing) and then down to a 0.79mm drill bit (finishing) to achieve the detail. I was introduced to a new program called MODELA to create the gcode for the file. This had preset feeds and speeds for the wax material being cut.
As my 3D model did not have any sloped edges I deicded to pick 'scan lines' in the x direction (as opposed to contour which would trace the edge). Due to the orientation of the model, this would give the least amount of travel time, or more importantly the fastest cut time.
.png)
.png)
.png)
.png)
.png)
.png)
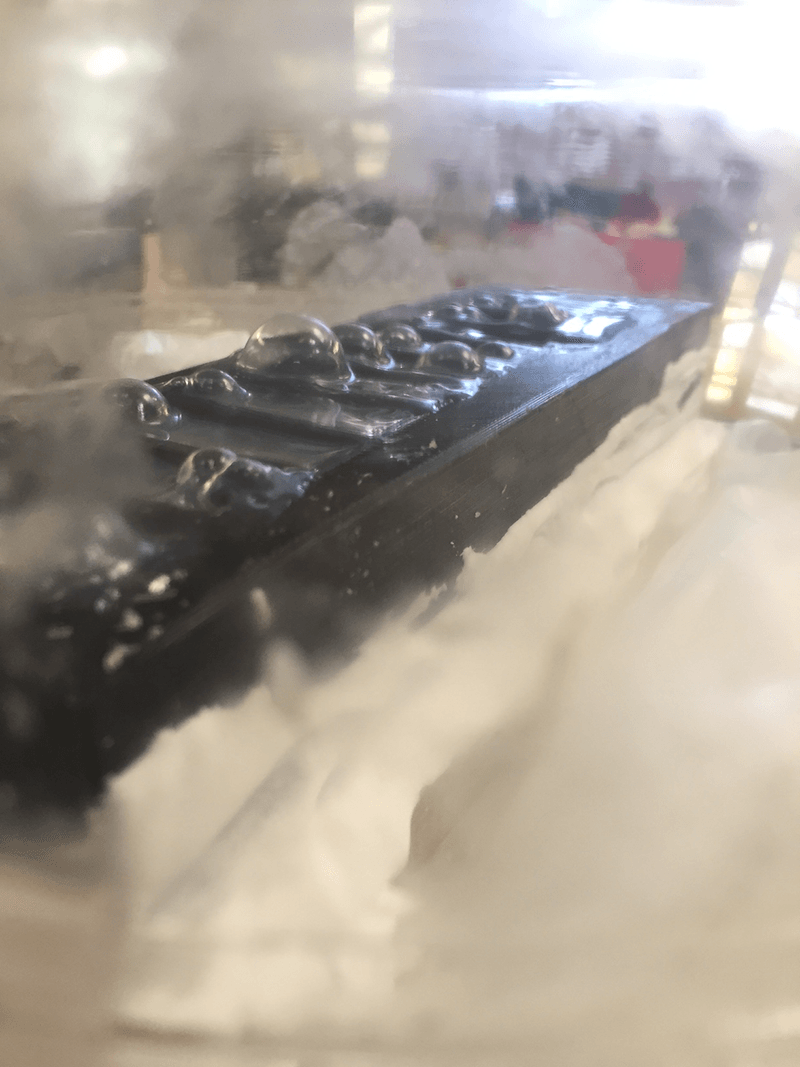
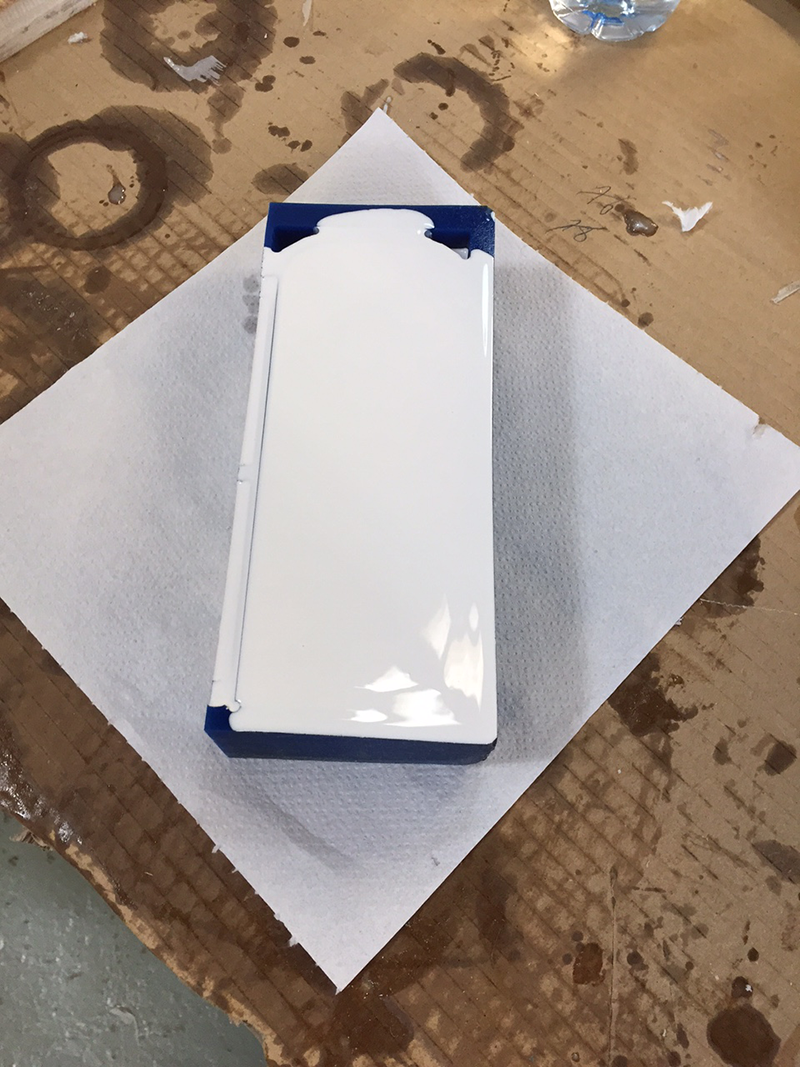
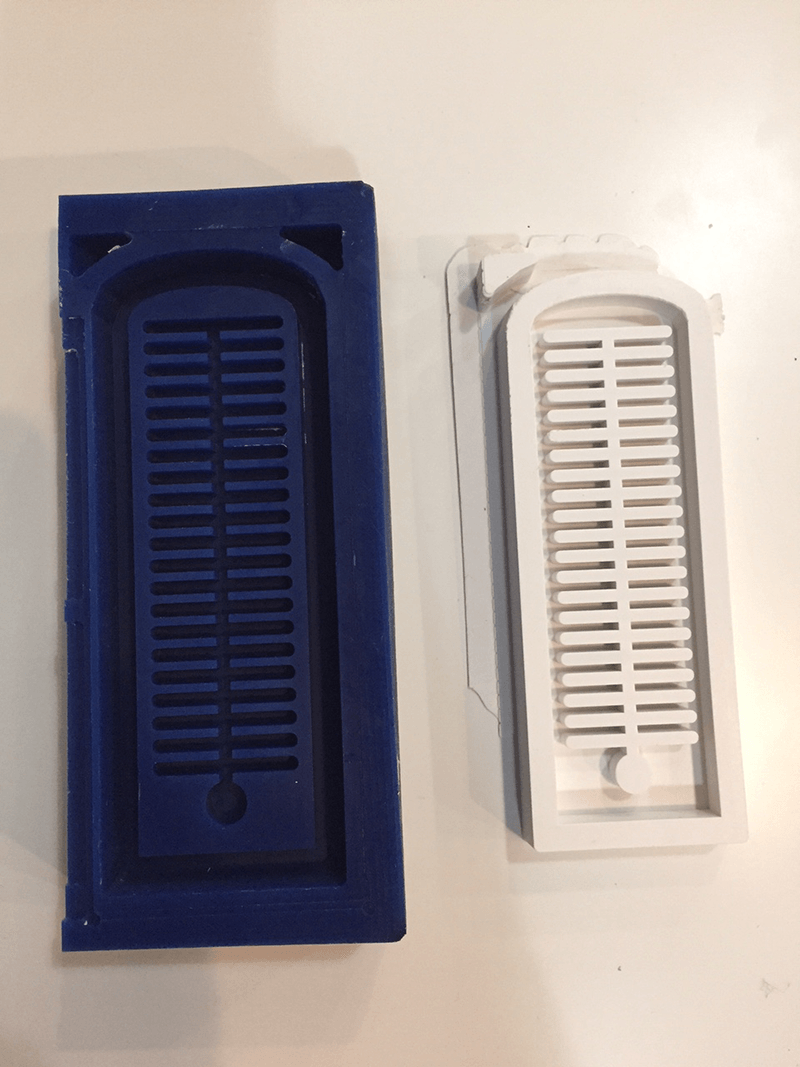
I used white silicon to create the mold for my robot, mixing according to the instructions with the activator and placing in the vaccum chamber to remove the bubbles. I left it at least half an hour in the vaccuum chamber until no new bubbles appeared. As the final piece would be effectivley a moving part I didnt want any blemishes in the mold. It was worth it and the piece came out very well.
Next was to use the Eco-flex. Using the same technique as the white silicon, I mixed the two halves according to the instructions and placed in the vaccuum chamber.
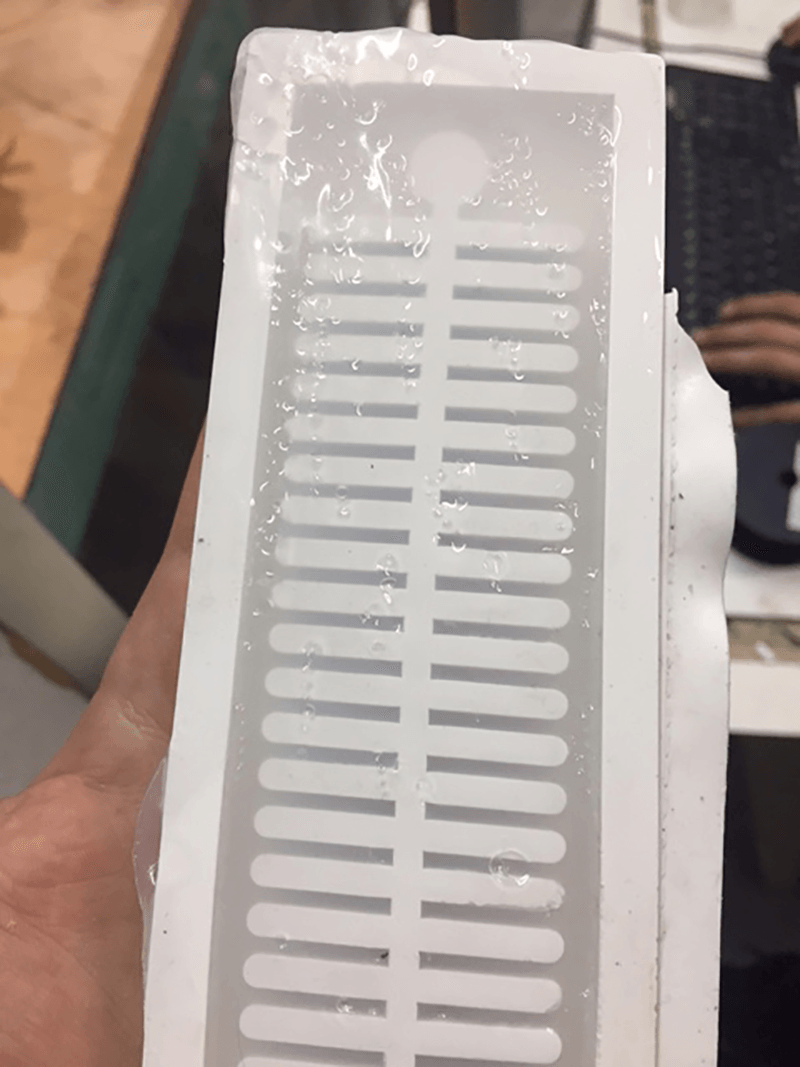
Unfortunately the Eco-flex didn't seem to set correctly on the surface and I ended up with a very sticky piece covered in unset material. I initially put this down to not mixing correctly, but after several attempts I knew something was not right. I checked the Eco-flex data sheet and it said that setting may be inhibited by 'tin-cure' silicon
I did some tests using samples of the silicon I used for the mold with the aim of creating a physical barrier between the silicon and the Ecoflex. I left one bare, one covered in clear spray paint and one covered in hair spray (that we had been using for 3D printing) and left them out to dry. After this I mixed a small amount of Eco-flex and placed each of the 3 samples on.
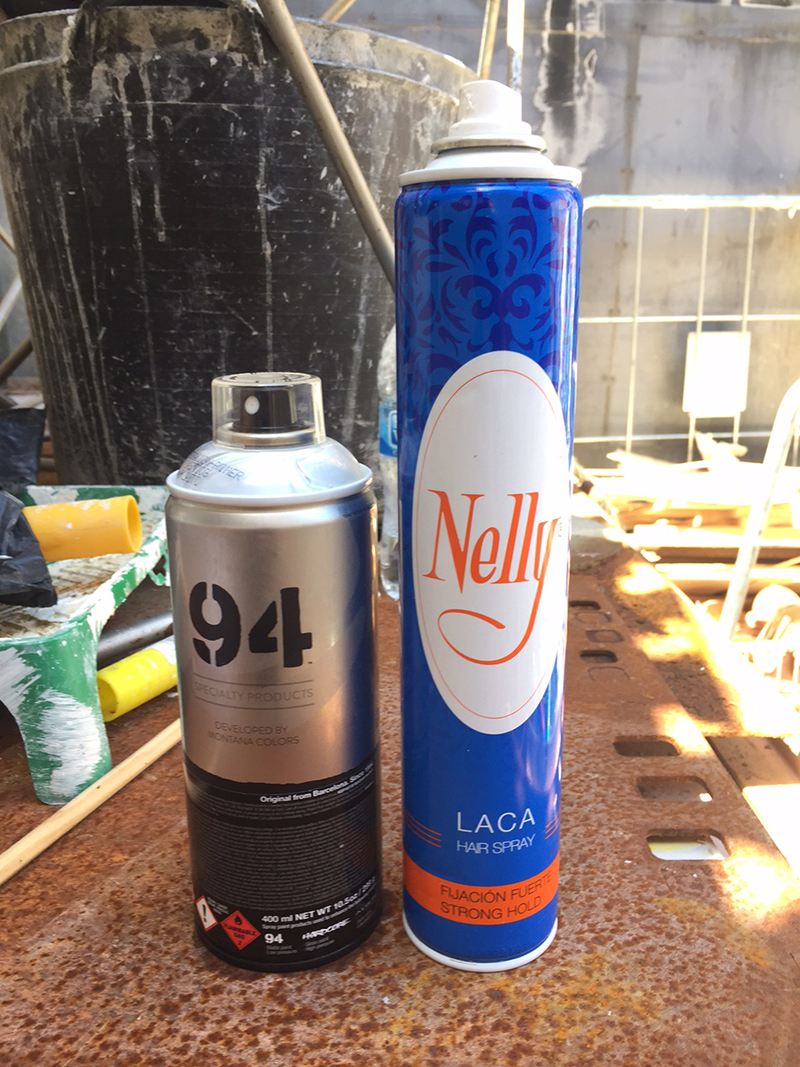
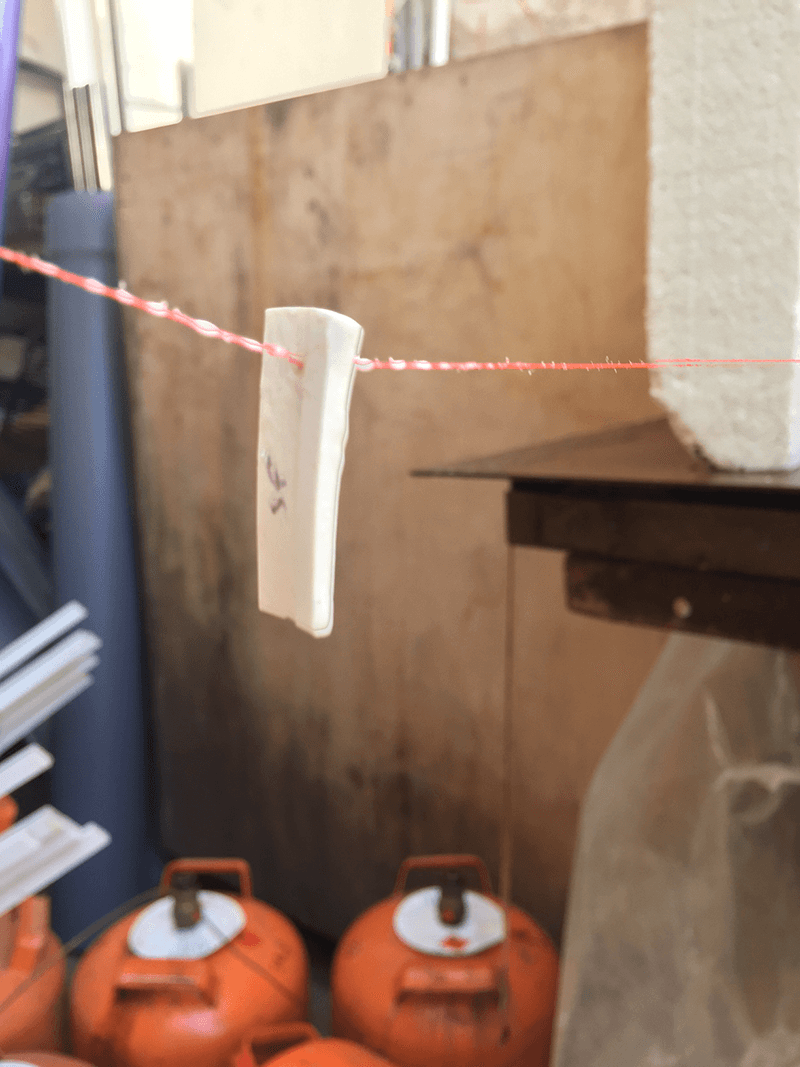
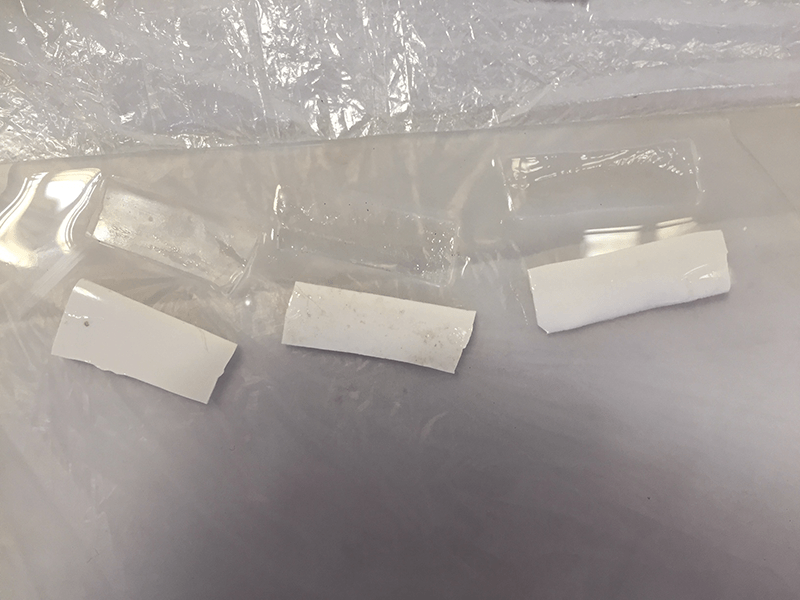
Once set, I checked the samples and the silicon was indeed the case. The hairsray seemed to perform best so I used this on the main piece. The casting was a success and I managed to succesfully fix the base. The first inflation was great fun :D
In future I would never use the silicon and eco-flex in combination.
And one more...
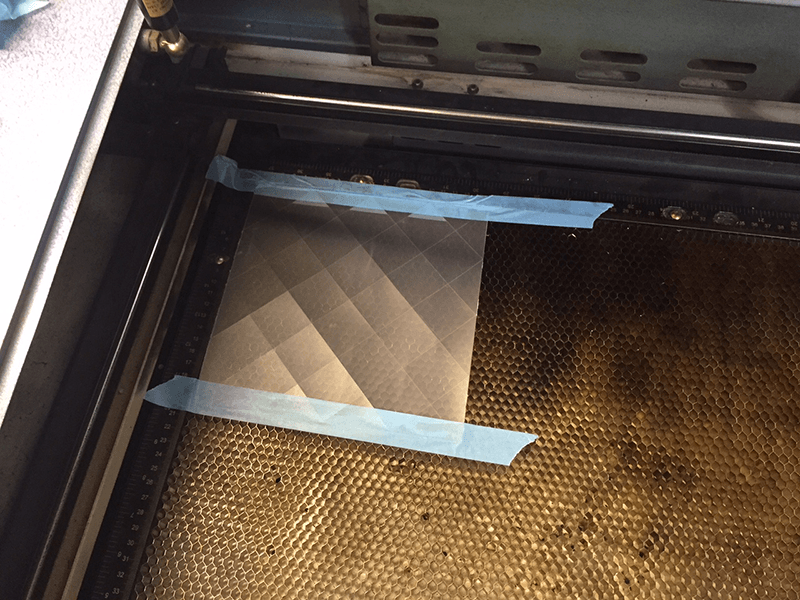
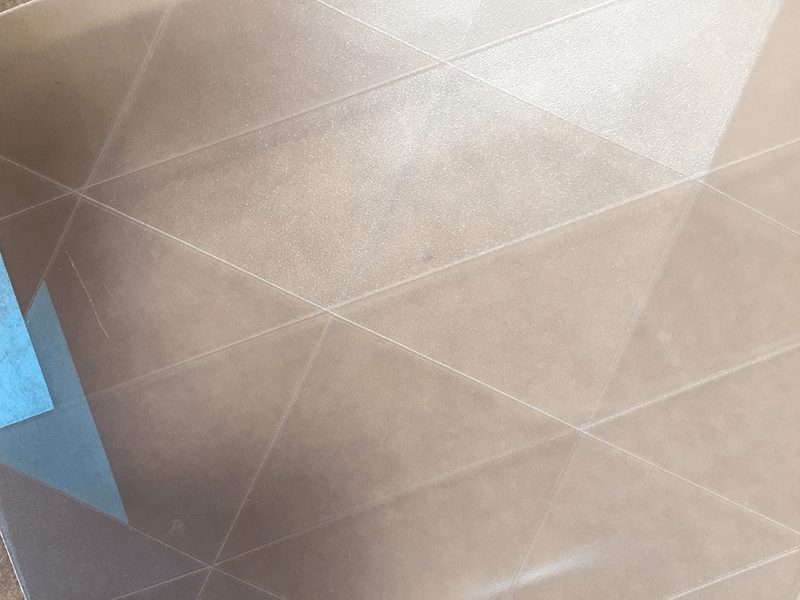
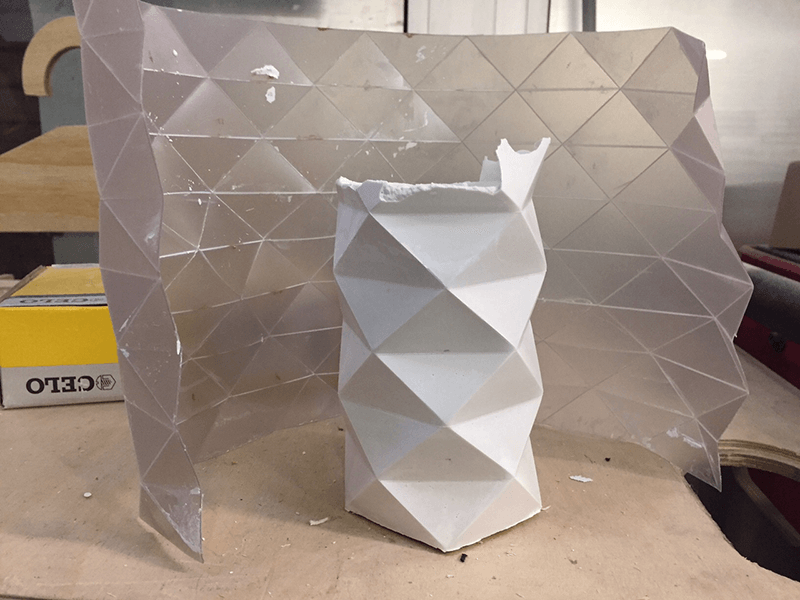
We saw some nice stuff done using polycarbonate, laser cut, folded and used as a mold. I found a fascinating book called Folding Techniques for Designers. I found a design in this I liked and that could be wrapped up into a closed shape.I got on the laser cutter and did some tests to figure out the settings I needed to cut and engrave the polycarbonate. For cutting I used Speed 10 and power 35.For the engraving I used speed 50 and power 50. I am pretty sure the machine was quie dirty at this time, so I am not sure how replicable these values will be.

.png)
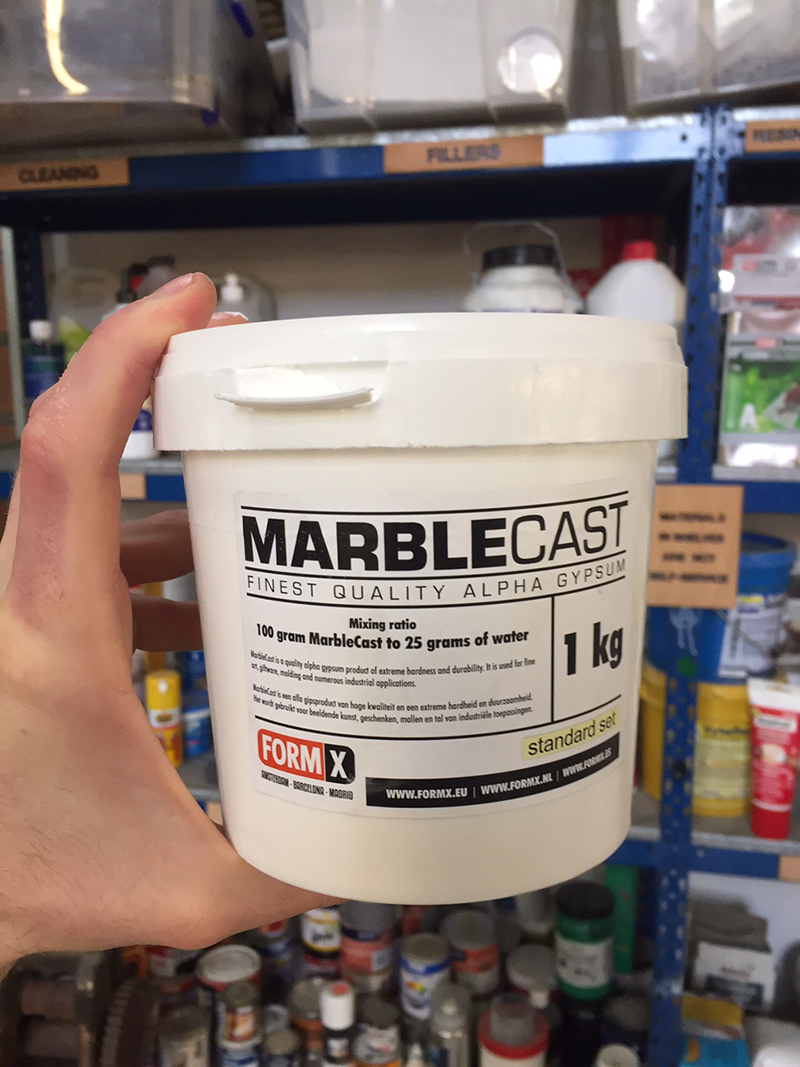
I liked the shape I got, but I wanted it a little bigger to make a planter with it, so I cut a piece with a larger pattern and folded it up. I sealed one end with lots of masking tape and used MarbleCast as the material. I could not find much safety information on this material at all which I found unusual. The mixing ratio was approximately 4:1 with water with about 10minute working time and 30 minute hardening time.

.png)
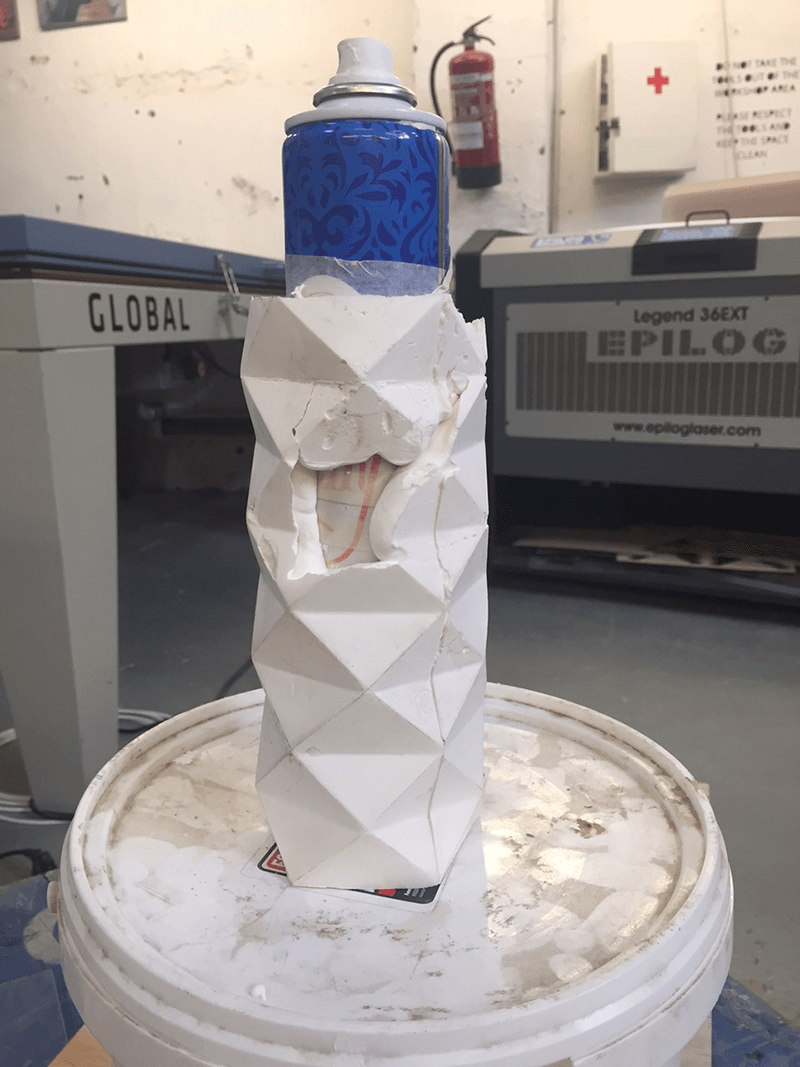

For a first attempt it was not too bad. Unfortunately the hairspray can I used for the interior cavity had a small ridge which made it very difficult to remove (despite being greased up to the gills). Also the join line where the two ends meet was not a great aesthetic. I tried a second attempt to get a nicer piece with less air bubbles in.
.png)
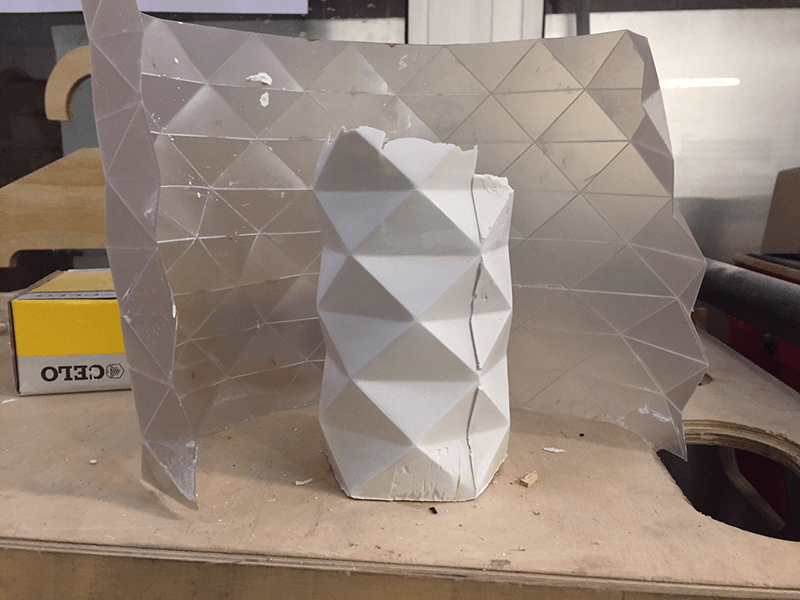
Although a nicer finish this time, I still had the edge. If I was to repeat this using the polycarbonate technique, I would sand and finish off this plaster peice until the ridge had gone and then created a silicon mold which could then be used over and over again.