Discovering Molding and Casting
Molding and Casting is usually used in the Plastics industry and automotive industry, where the same object is mass produced. In the plastic manufacturing industry, injection molding is usually used to produce the plastic products. The procedure is also used when we want to produce shapes using other material such as wax, foam, rubber, silicone and resin. Molding and Casting is also used to produce sand casted metalic parts such as aluminum, steel, lead and much more.
In this section, we will learn on how to prepare a Mold and use it to Cast a certain object.
Assignment
We had a Group Assignment and an Individual Assignment this week.- Group Assignment The group assginment was to review the safety data sheets for each of your molding and casting materials, then make and compare test casts with each of them.
- Individual Assignment The individual assignment was mainly to design a 3D mold around the stock and tooling that you'll be using, machine it, and use it to cast parts.
- Roland MDX-40 is the Desktop CNC machine used to mill copper boards.
- Fusion 360 was used for 3d modelling in this assignment.
- AutoCad was the main software used for 2D design. I used it to design in 2D and set the dimensions i want to use in the 3d model.
You can check the Group Assignment on the following link: Group Assignment
Machines Used
The main machines used in this week's assignment are the CNC Routers. The list of machines we used are the following:Software Used
The following software were used for the Design part in this week's assignment:1- Group Assignment - Testing Molding and Casting Material
However, we had a limited variety molding and casting material in the lab. So what we did is that we used different material to make the mold and then we poured resin testing the different colors we can achieve.
Test 1 - Testing Various Molding Material
In order to perform this week's assignment, we tried two differnt Molding Material and we compared the technical specification and the results.
The following material were available in the lab and were used during this week's assignment:
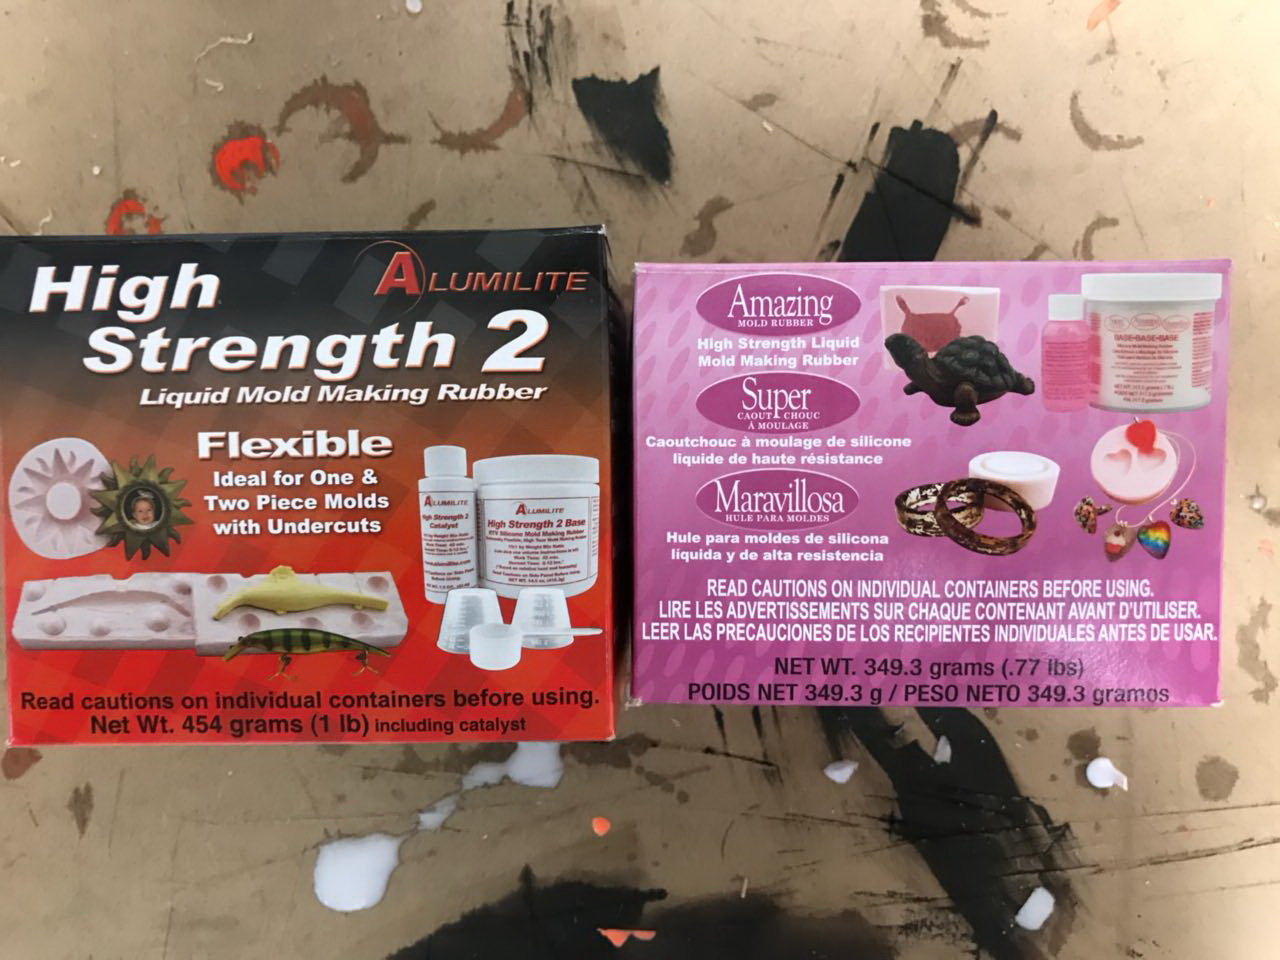
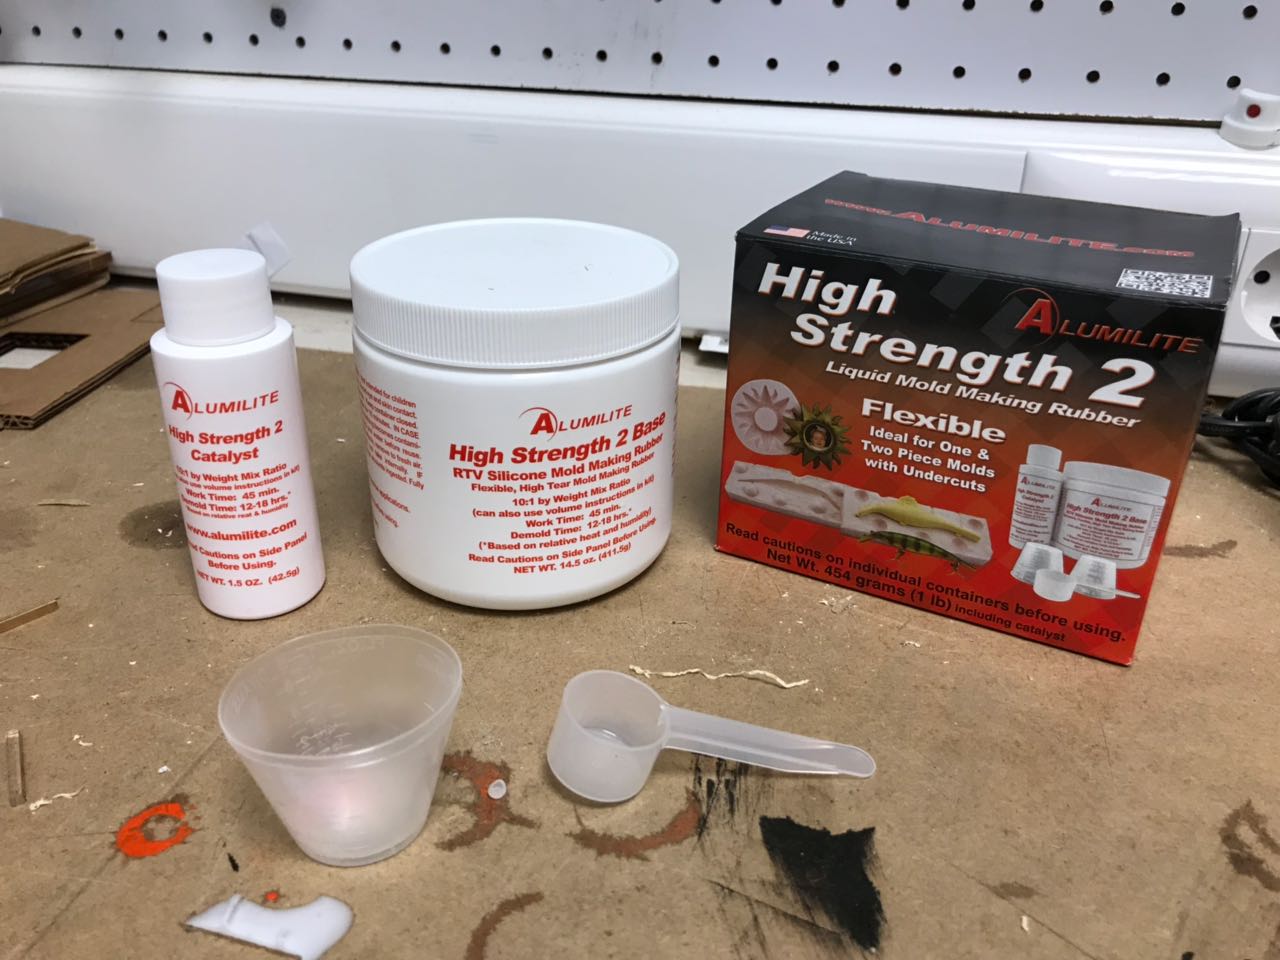
- Molding Material 1 - Alumilite - Amazing Mold Rubber
- Molding Material 2 - Alumilite - High Strength 2
Always use safety products when working with silicone and resin. Always wear gloves, apron, coveralls, boots, chemical goggles.
Mixed High Strength rubber will absorb into porous materials and may stain! Avoid clothing, carpet, upholstery, and any other porous materials which will stain and will not come out. Mold making and casting is best done in a designated area such as a basement, garage, or hobby room with adequate air movement or ventilation. Cover any surfaces including floors with plastic sheeting, or plywood to prevent damage from spilled resin. To clean up unmixed or still liquid material, use rubbing alcohol on a rag or paper towel to quickly clean and remove. In some instances, such as spills on non-porous surfaces, it's easier to clean up silicone after it's allowed to cure. Then simply peel away and discard.
The following are the safety warning for both material:
- Keep out of reach of children
- Avoid eye and skin contact.
- In case of skin contact, wash with soap and water
- Use with ventilation. In case of ill effects, remove to fresh air
- Keep container closed
- Do not take internally.
- Do not use for food.
A detailed discription of the technical data sheet for both materials is described below.
You can download the data sheet for the material from the following links
Material 1
The following is a summary of the data sheet of the Amazing Mold Rubber.
- Color: Pink
- Mix Ratio: 10:1 by WEIGHT
- Open Time: 20-30 mins
- Demold Time: 2-4 hours
- Mixed Viscosity (cps.): 15,000
- Specific Gravity: 1.15
- Shore A Hardness 25
- Linear Shrink (%) .3
- Tensile Strength (psi) 550
- Elongation 500%
- Temperature Range (F) -67 to 395
- Vacuum Required No
Material 2
The following is a summary of the data sheet of the High Strength 2.
- Color: Pink
- Mix Ratio: 10:1 by WEIGHT
- Open Time: 45 mins
- Demold Time: 12-18 hours
- Mixed Viscosity (cps.): 18,000
- Specific Gravity: 1.15
- Shore A Hardness 25
- Linear Shrink (%) .3
- Tensile Strength (psi) 550
- Elongation 500%
- Temperature Range (F) -67 to 395
- Vacuum Required No
Dicovering Casting Material
The following material was available in the lab and were used during this week's assignment:
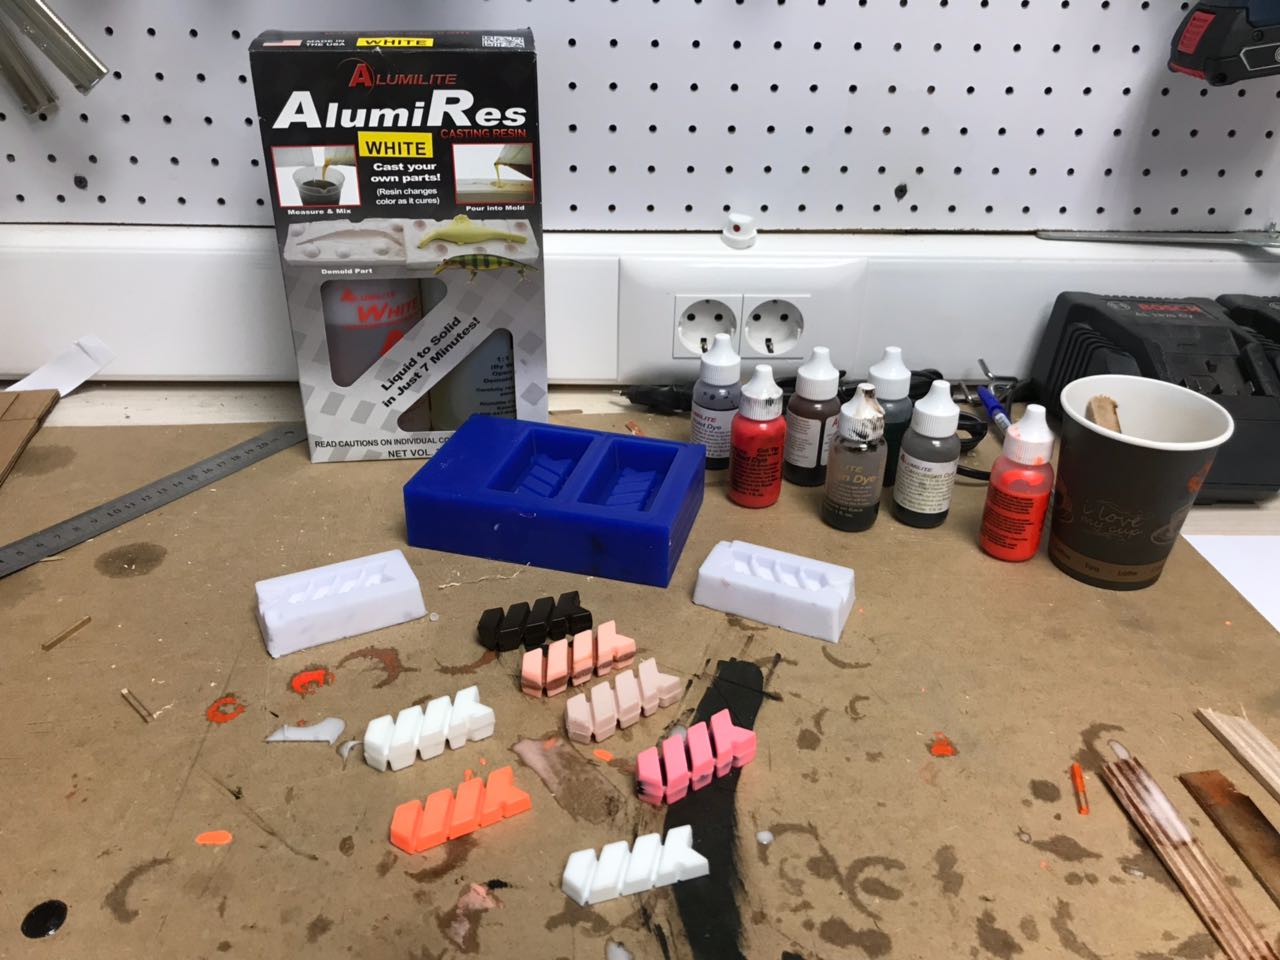
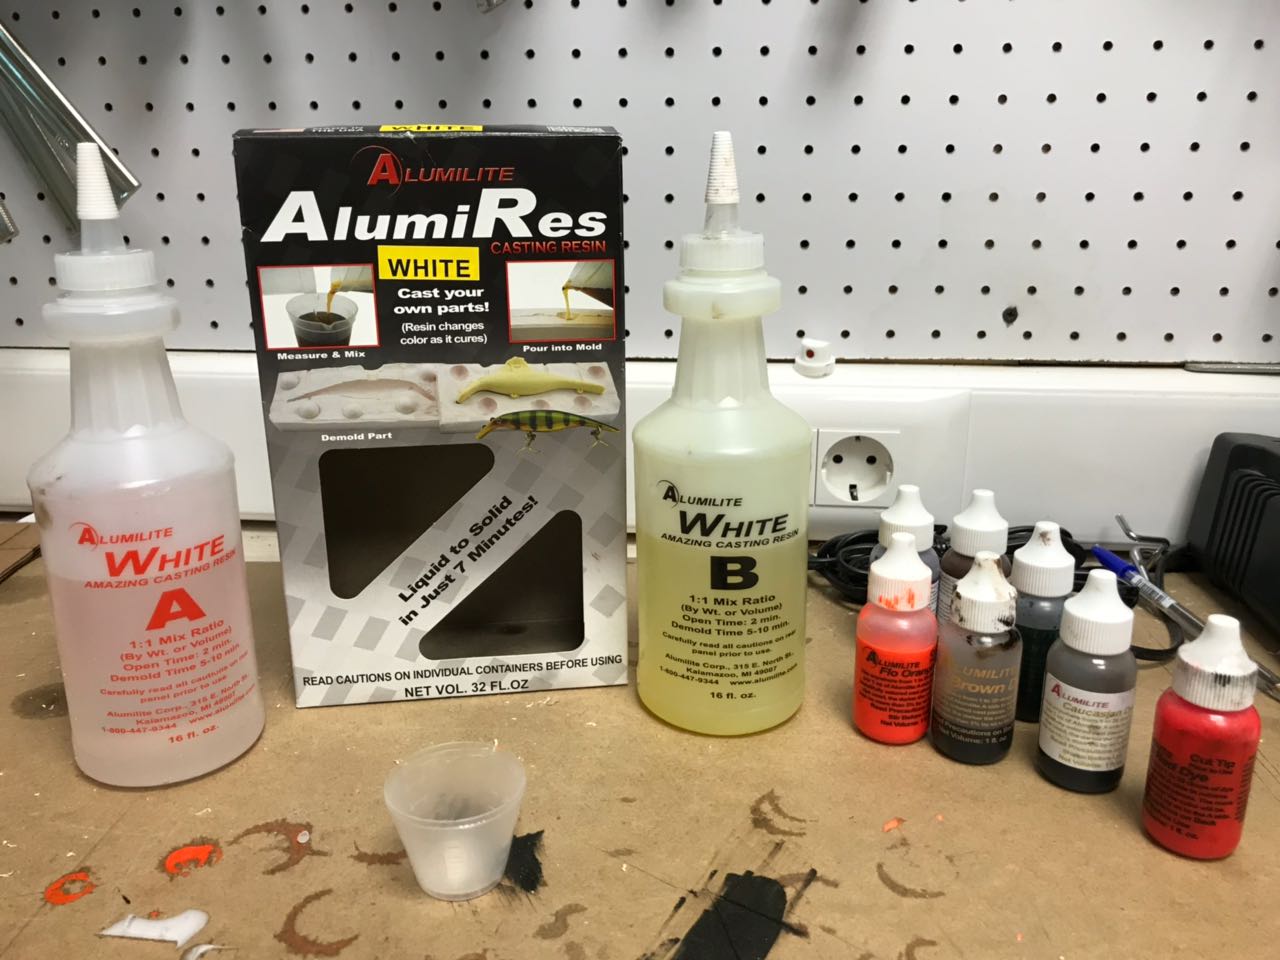
- Resin Material - Alumilite Casting Resin - White
- Alumilite Coloring Dyes, Various Colors
- Color: White
- Mix Ratio: 1:1 by Volume
- Pot Life: (100g mass @ 75 degrees F) 2.5 - 3 minutes
- Demold Time: (100g mass @ 75 degrees F) 5-15 minutes
- Mixed Viscosity (cps.): 90
- Specific Gravity: 1.05
- Shore Hardness (ASTM D-2240):72 D
- Shrinkage (in./in.): .006
- Tensile Strength (ASTM D-638) (psi) 4,500
- Elongation 10%
- Temperature Resistance 185 F
Testing Casting Material
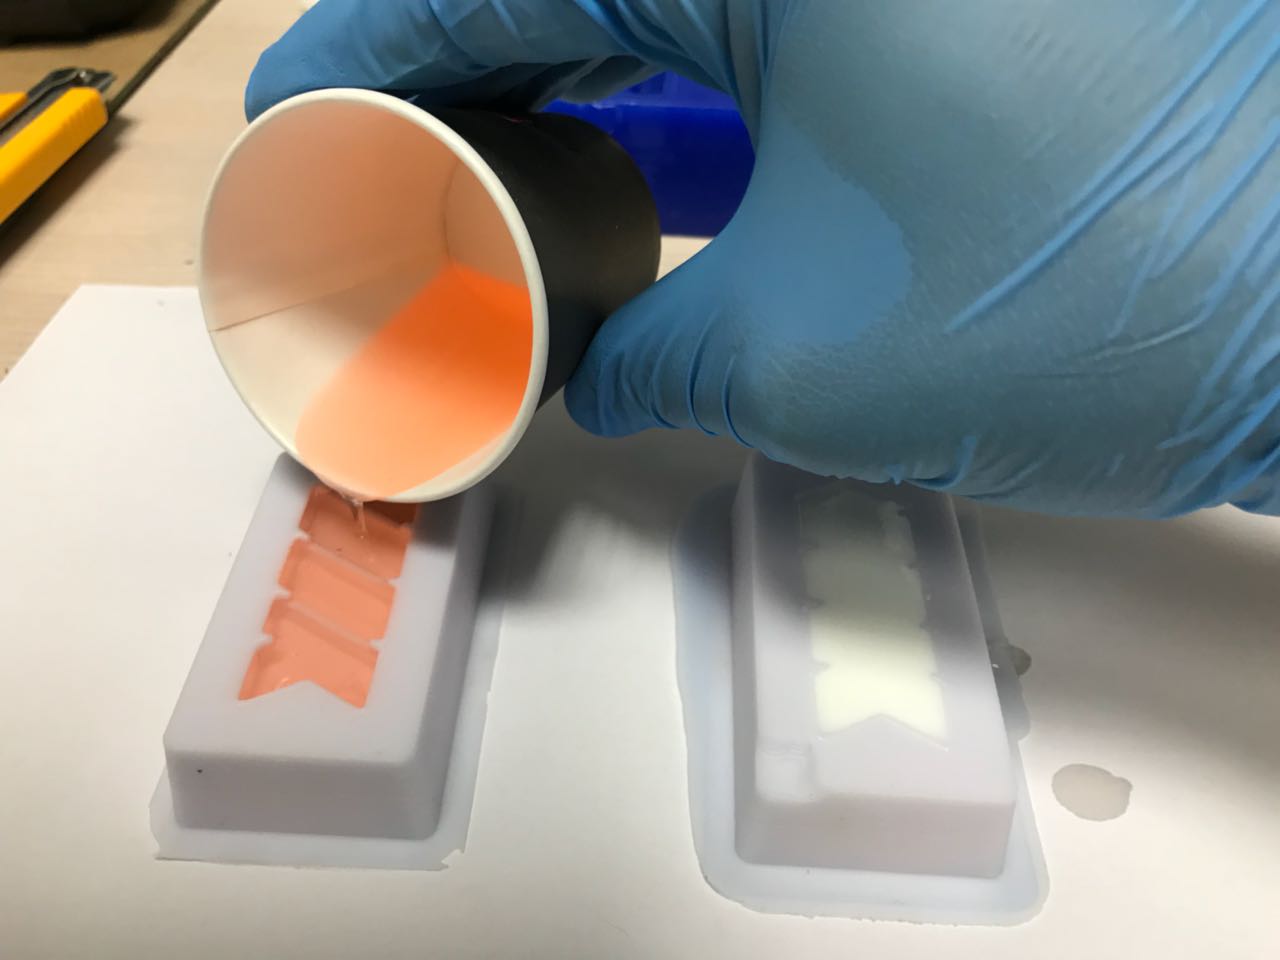
We had only one type of resin material that we used in this week's assignment. However, we had a variety of coloring dyes. So what we did is test pouring resin using various colors.
Some parts were poured all in one color. Other parts were poured in phases, thus having a combination of different colors in the same end product.
2- Individual Assignment - Mold and Cast Something
In the individual assignment, we had to Mold and Cast anything. To achieve that, i had to design a certain shape that could be casted.However, i couldn't think of something related to my final project that could be casted. So idecide to make my own personal customized key chain based on a personal logo of my own.
So the first step was to design a personal logo and then convert it into the 3D shape i want to be produced at the end.
Next i had to prepare the digital model of the positive shape that will be used to build the mold i want using scilicone material. After building the digital model, i prepared the g-code that will be used to machine the positive mold in Machinable wax.
After that, i poured the scilicone material in the wax mold and when it cured, i ised it to build my final shape using Resin. A detailed step-by-step procedure is described below.
You can download the original file from the following link WK Logo
Step 1 - Designing my Personal Logo on AutoCad
So i started by building my logo using AutoCad as it is my preffered design software.The progress of the desgin is shown in the image. It took me a while to decide on the final design i want to cast, but i reached to my design in the end.
You can download the original Autocad design from the following Ling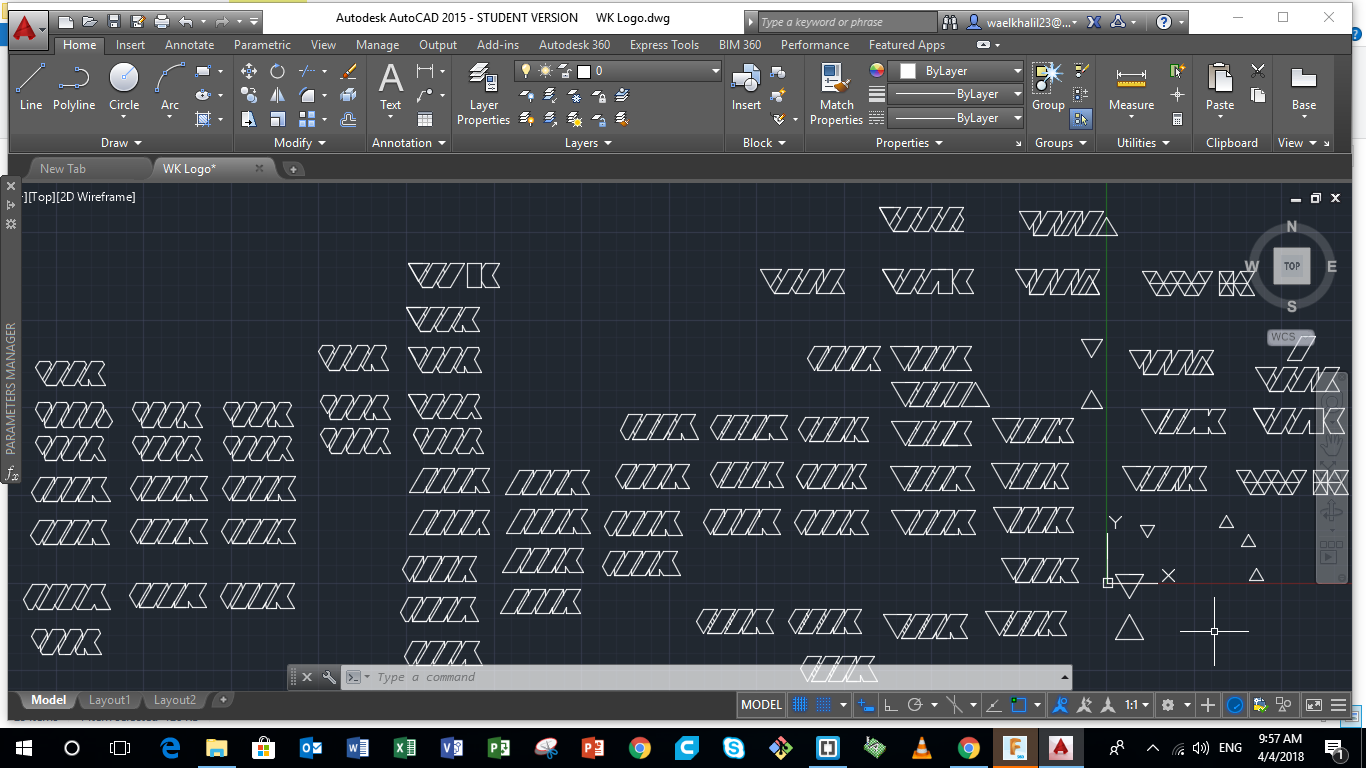
Step 2 - Building the 3d Model on Fusion 360
After finalizing the AutoCad drwaing, i saved it in DXF format and then exported it to Fusion 360. Next i extruded the 2d drawing into the 3d shape i want. After that, i designed the positive mold that will be used to make the scilicone mold.
Many point were taken into consideration including the following:
- Clearance A clearance of 1 cm was used on all sided to have a solid mold and at the same time save material.
- Maximum Height The height of the mold was limited by the thickness of the wax block and its width that that will be milled to produce my mold. The thickness was equal 3.5 cms and the width equal 9.2cms. So my positve mold size was 71mm x 36mm x 17.7mm
- Pivot points were also designed because my mold was made of two parts. THus those points were used to achieve a perfect fitting between both parts when pouring into the mold, thus achieving a seamless final product.
- Chamfers Tiny chamfer was made at the edge of the mold to prevent the scilicone mold from being stuck when removing it.
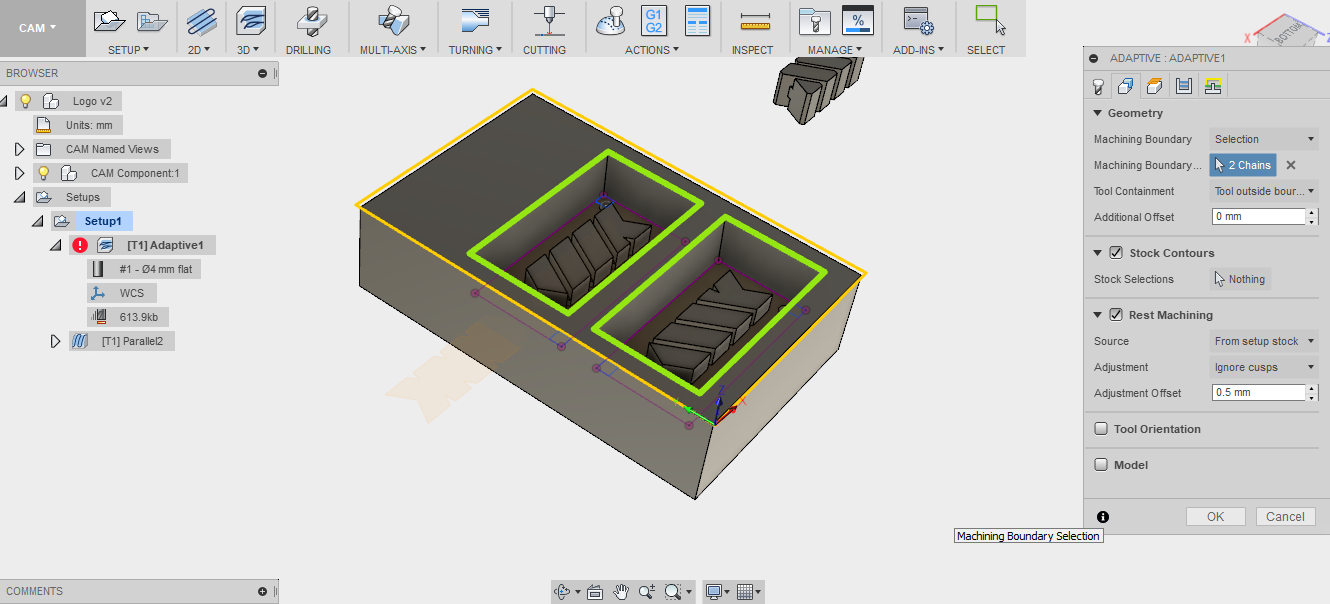
Step 3 - Preparing G-code using Fusion 360
So after preparing the 3d model for the positive mold i will be using to make the scilicone mold, the next step was to produce the g-code that will control the Roland MDX 40 to machine the shape into machinable wax.
Two different sets of g-codes were produced, as the process of machining was done in two phases, The roughing phase and the smoothing phase.
To do that, i followed the following steps on the CAM workspace in Fusion 360:
- Adding the Tool info and details of the tools i will be using to machine the wax. by pressing "Manage">"Tool Library">"New mill tool" and after that filling all the details Two different tools were used for the Roughing and the Smoothing processes:
- Roughing Tool Specification:Flat End - Diameter:1.5mm - Shoulder Length 25 mm
- Smoothing Tool Specification:Ball Nose - Diameter:1.5mm - Shoulder Length 15 mm
- Prodcuing the g-code for the roughing phase and the smoothing phase .
- Roughing The roughing phase is the first phase of machining where we remove most of the material and go as close as possible to the final shape, thus achieving faster machining time. The Roughing G-code was produced by pressing "3d">"adaptive clearing" and then i change some parameters.
- Tools
- Spindle Speed:12000 rpm. I chose 12000rpm because a faster rmp could cause the wax to melt and accumilate on the bit, whereas slow rmp would cause a bad surface finish.
- Surface Speed: 150m/min
- Cutting Feedrate: 1000mm/min
- Geometry
- I choose the Machining Boundary and the tool containment .
- Passes
- I change the Fine Step down to be equal to 0.5mm.
- Smoothing The Smoothing phase is usually the last step after doing the roughing phase, and the goal is to reach the final shape with the best surface finish. This phase is usually slower because it uses a smaller milling bit diameter. The Smoothing G-code was produced by pressing "3d">"parallel clearing" and then i change some parameters
- Tools
- Spindle Speed:12000 rpm. I chose 12000rpm because a faster rmp could cause the wax to melt and accumilate on the bit, whereas slow rmp would cause a bad surface finish.
- Surface Speed: 150m/min
- Cutting Feedrate: 1000mm/min
- Geometry
- I choose the Machining Boundary and the tool containment .
- Passes
- I change the Stepover to be equal to 0.2mm.
A simulation of the milling jobs could be done to make sure that there is no problems in the milling processes and get an estimation of the milling times. You can download the original g-codes from the following Link 1 Link 2
Step 4 - Preparing the CNC Machine and Zeroing
Next we need to set the zero position for the machine on the machinable wax block we are using.
Note that the zero was set on the Fusion 360 design by choosing the boundaries of the body that we want to machine and setting the Zaxis at the edge from the Setup option. The same zero position was set on the wax block i am machining.
To do so, we need to follow those steps.
- Manually move the router to the desired X and Y position, and then zero the X and Y from the control panel
- Zero the Z-Axis manually by using a small piece of paper and moving it down until you feel some friction while moving the paper.
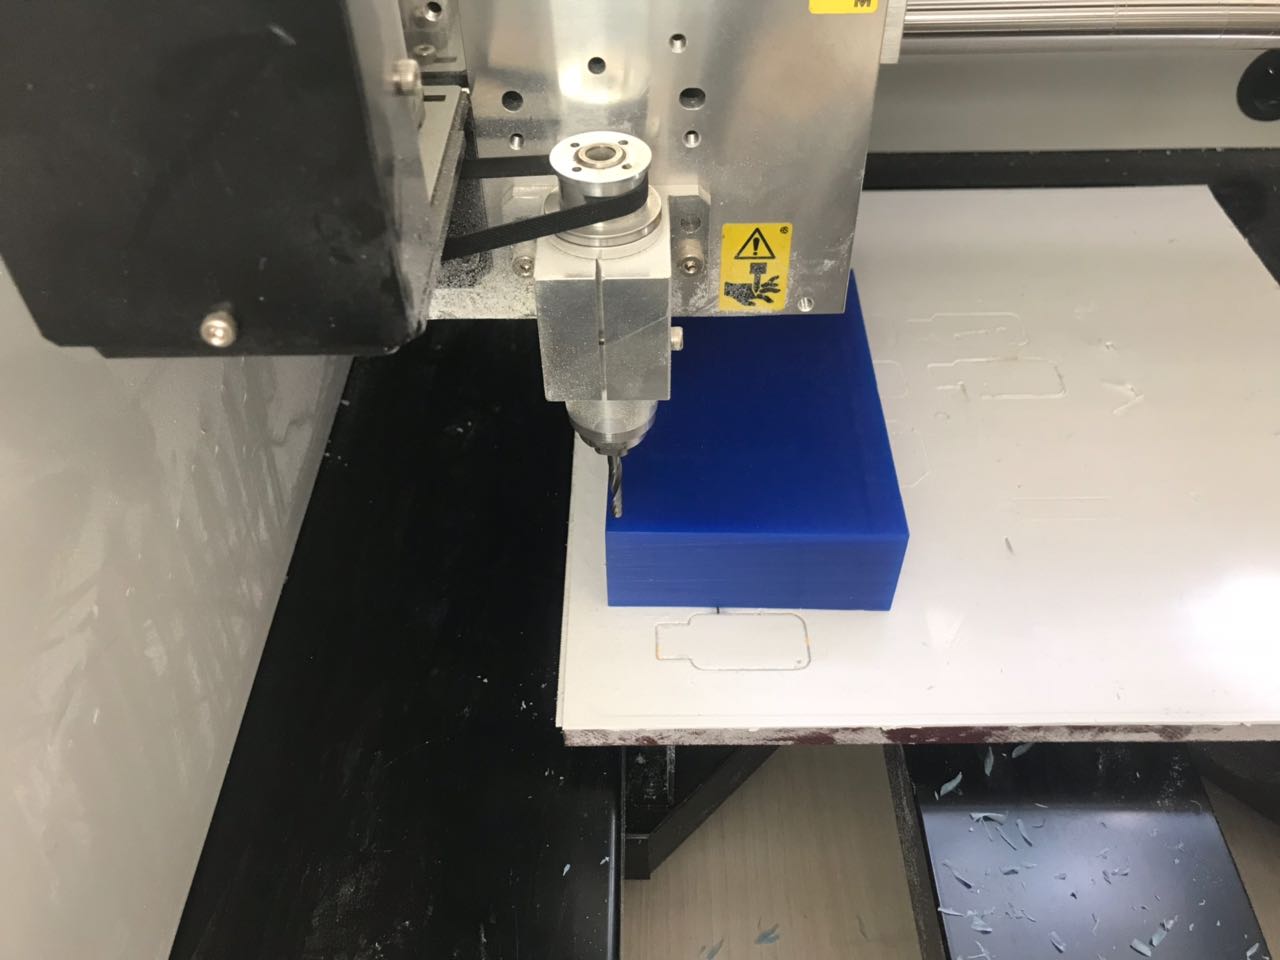
Step 5 - Performing the Milling Job
Next we perform the milling job. Just import the G-code to the Drop-out softawre and launch the job.
The video illustrates the milling job.
According to the simulation on the CAM processor on Fusion 360, the Roughing machining time is 5:36 mins and the Smoothing machining time is 23:43 mins.
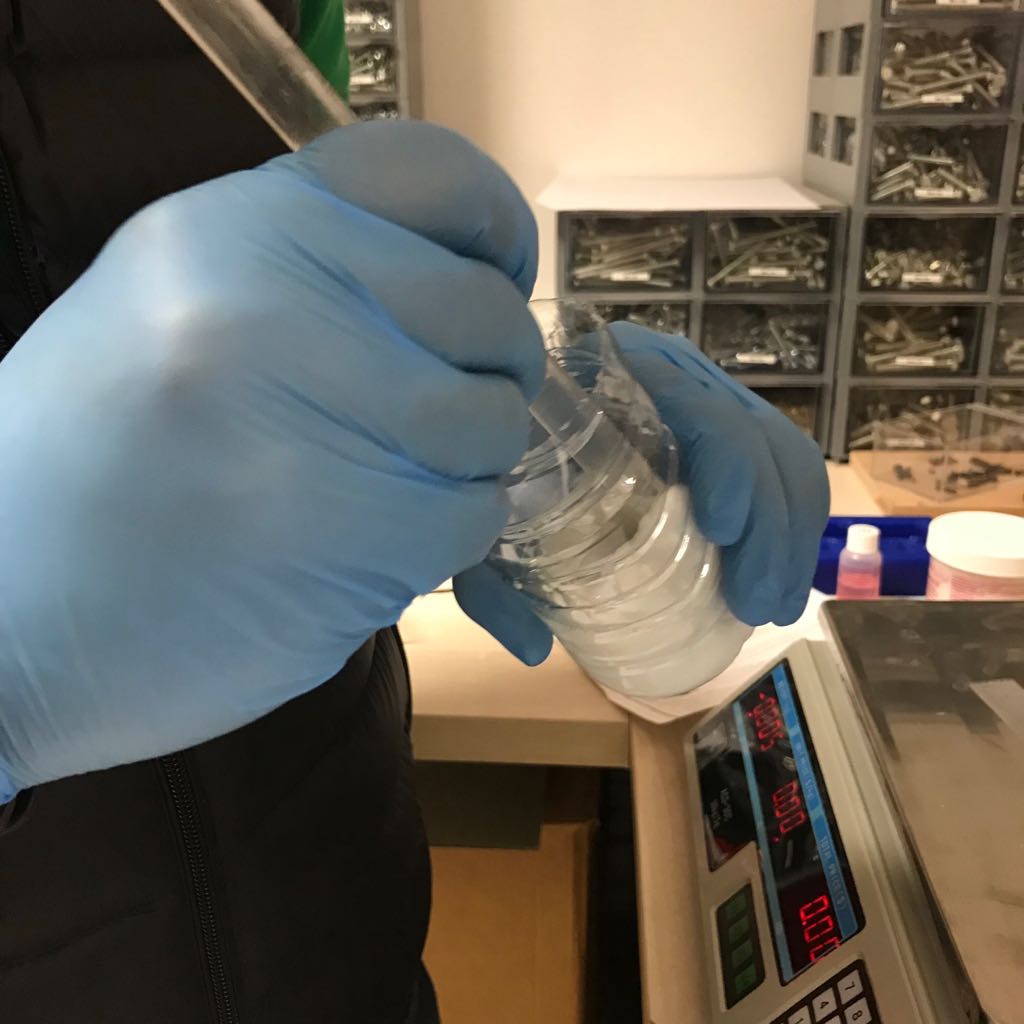
Step 6 - Preparing the Scilicone Mixture
The next step is to prepare the Silicone material I want to pour. But before that thoroughly clean and remove all dirt/contaminates from the mold.
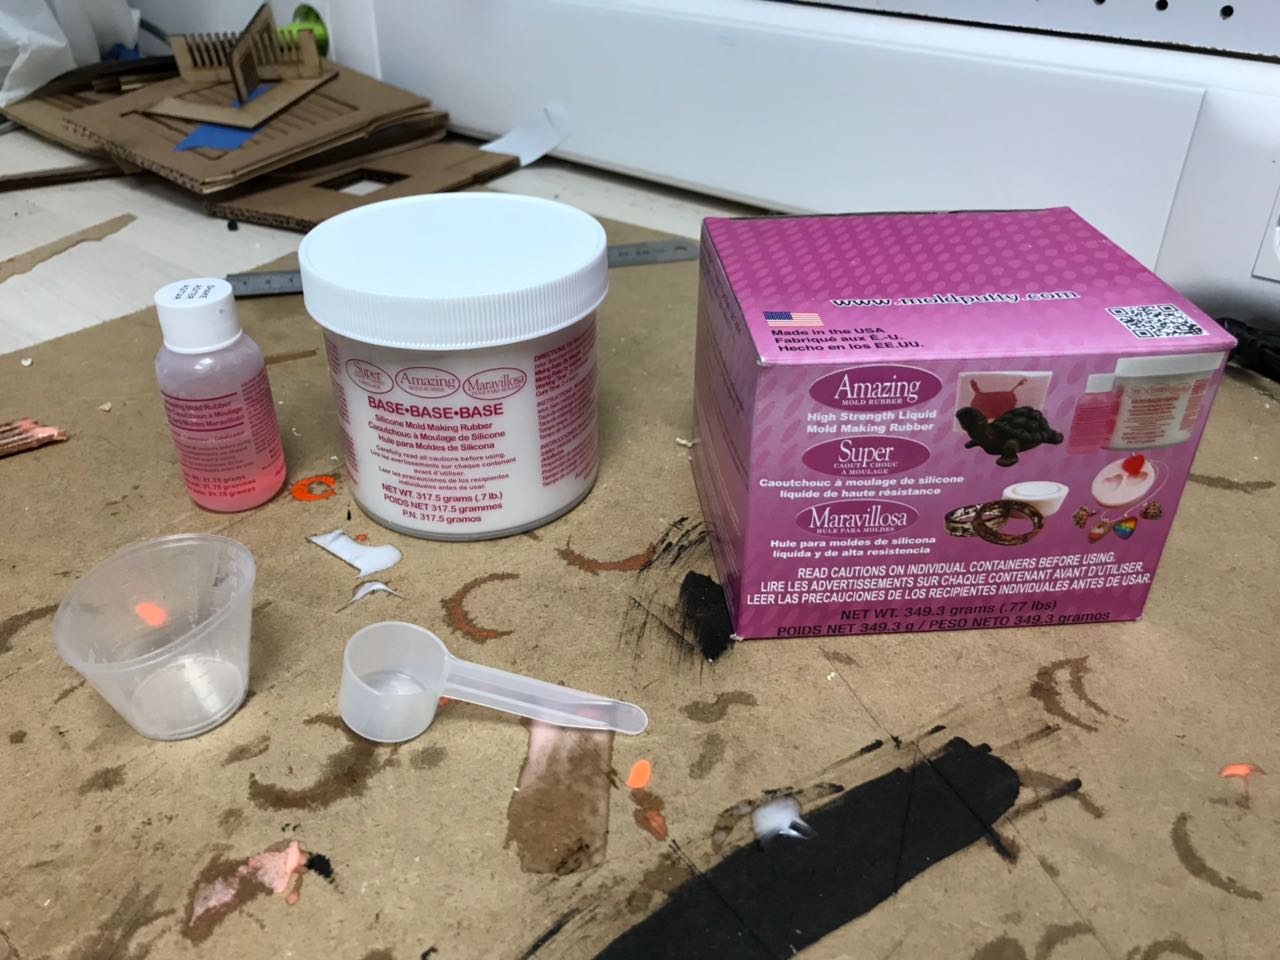
A gram scale with an accuracy to the nearest 1 gram is used to measure the material we want to mix. The mix ratio of the Amazing Mold Rubber is 10:1 by WEIGHT.
The material was mixed thoroughly making sure to scrap the sides and buttom of the container until a uniformconcitency is achieved with no swirls in the rubber. Mixing and pouring in this case had to be done withing 20 mins of working time.
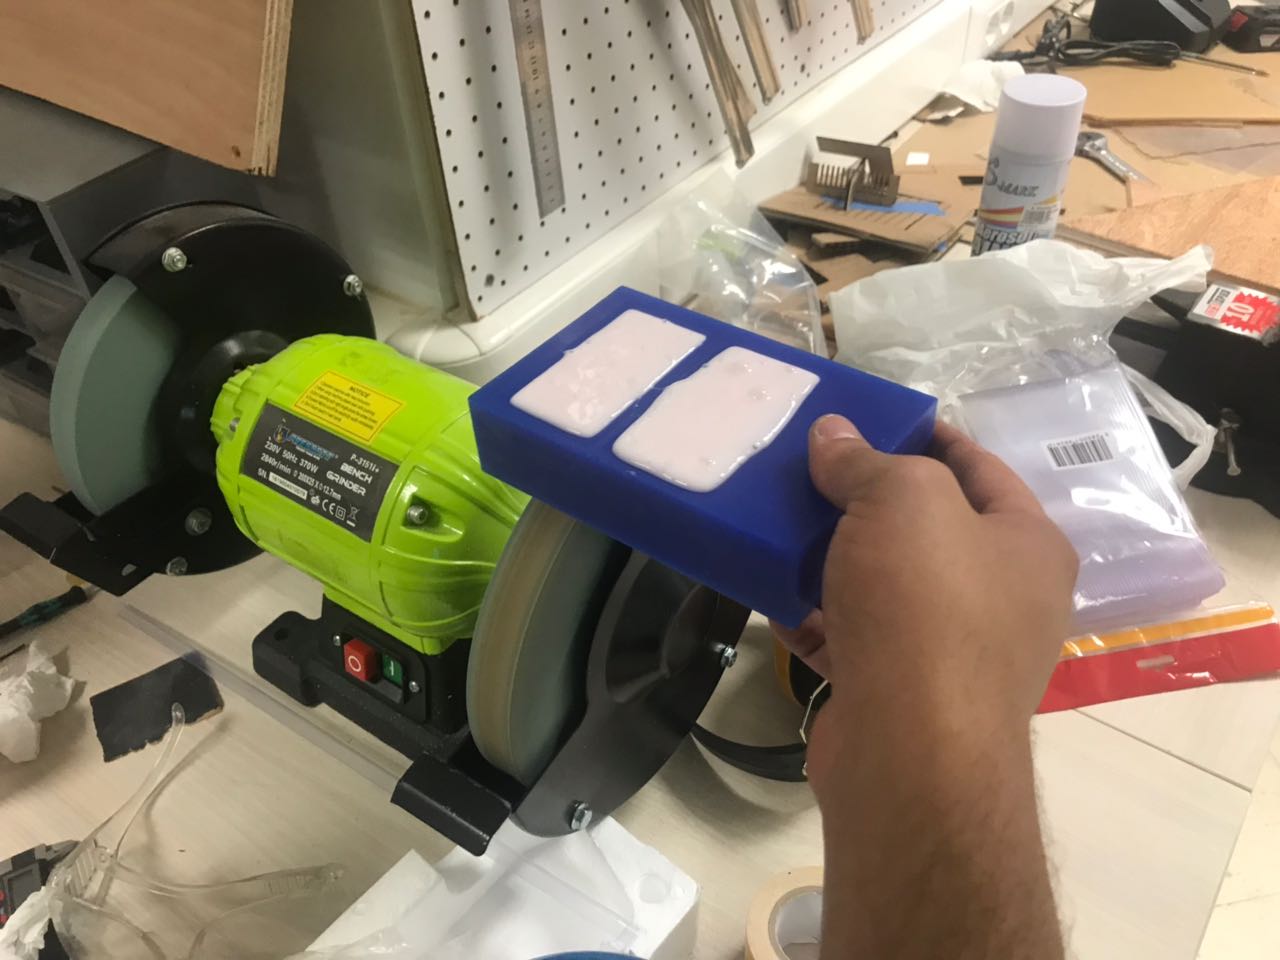
In order to remove air bubbles, the mold is virated by the help of the bench grinder to remove all the bubbles inside the material. You will notice that air bubbles will appear at the surface. You can pop them by blowing on them.
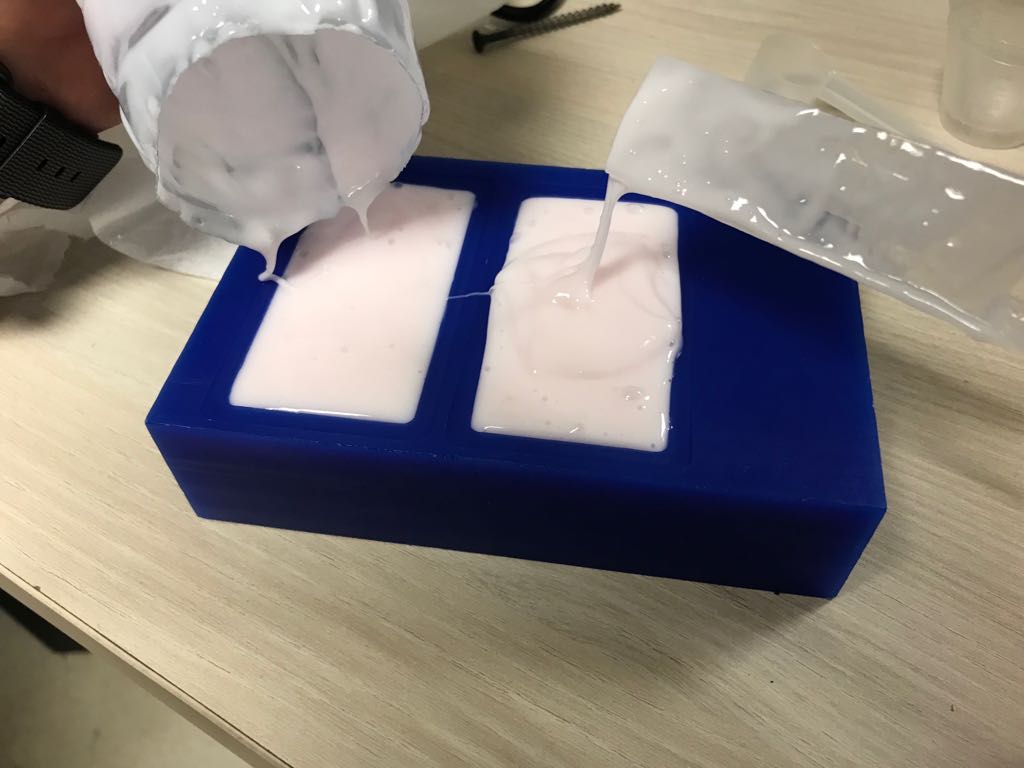
Step 7 - Pouring the Scilicone in the Positive Mold
Once the material is thoroughly mixed, pour the mixed rubber slowly in one corner of the mold and allow the rubber to flow slowly and naturally around your master. This process allows the rubber to roll over your master avoiding air entrapment. Avoid pouring the rubber directly over or onto your master.
It is advised to vibrate the mold to remove all trapped bubbles inside the silicone before it cures. There are many techniques that could be used to vibrate the mixture. I choose to lay my mold on the bench grinder for a while, as it produces a lot of vibration. At the end, it did what it was expected to do, all bubble went up to the surface causing a very nice silicone mold surface finish.
Step 8 - Removing the Mold after Curing
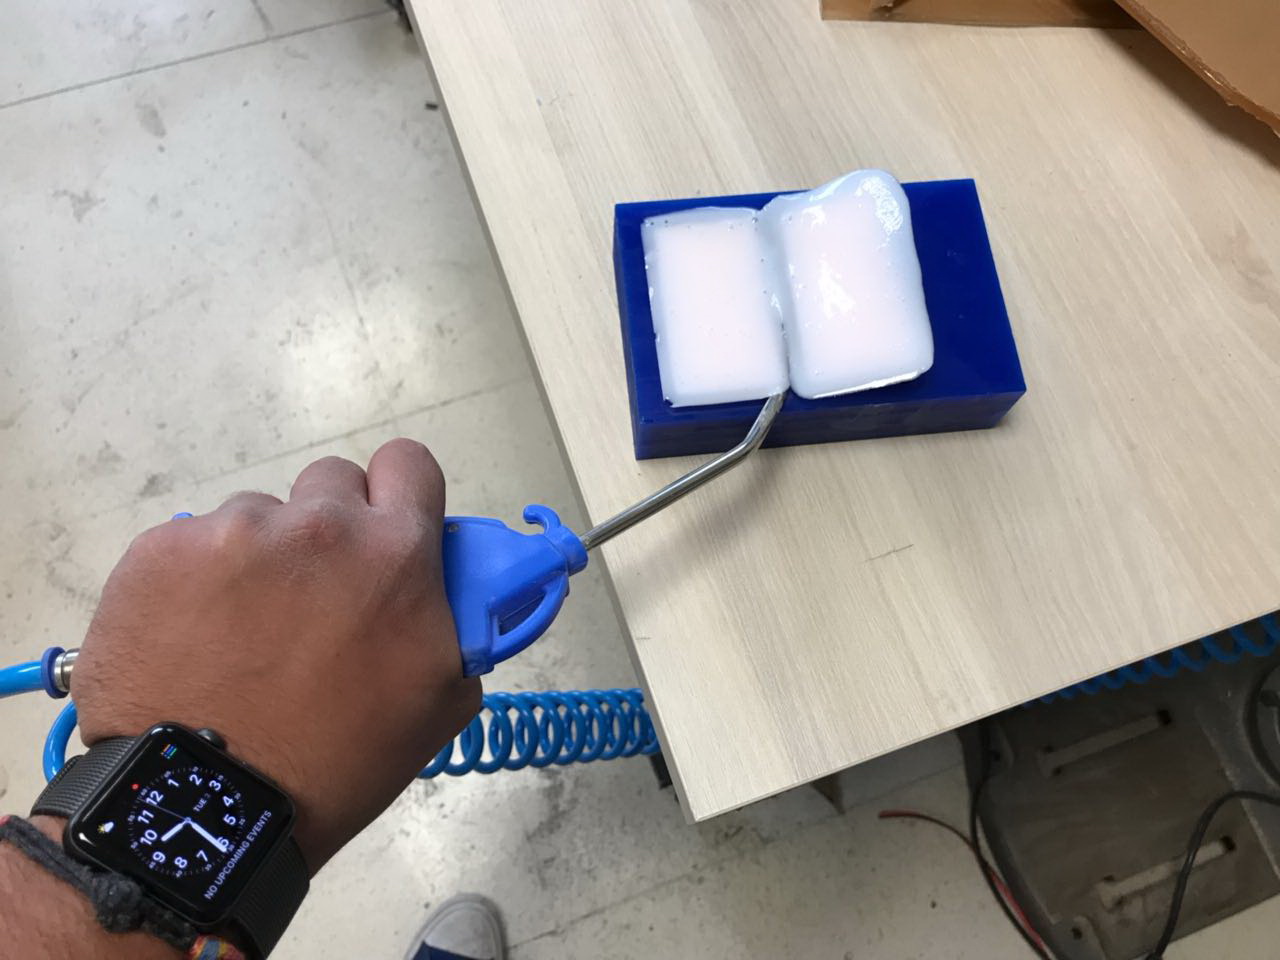
Once the silicone rubber is cured, gently separate the silicone from the original item and remove. In my case i used compressed air which easily pushed out the silicone rubber out of the mold.
Step 9 - Pouring Resin Into the 1-Sided Mold
After the silicone mold is ready, the next step is to prepare and pour the resin into the mold. But before mixing and pouring the resin into your mold to achieve a cast resin piece there are a few things to do to prepare the mold, that will greatly enhance the physical properties and curing of your cast resin piece.
The first thing you can do is to preheat your mold. Warm the mold in a microwave for 1 minute/lb of rubber on high. This will only warm your mold and will not affect the microwave or your mold adversely. It will however help the thin sections of your casting to cure more evenly with larger sections and reduce the demold time. It will also help the resin set up uniformly to give you a consistent fully cured cast piece.
Next we have to mix the A and B side of the material. Before mixing make sure you know the proper mix ratio of the material you are using. Alumilite White is 1:1 by weight and/or by volume. Thus the following procedure is followed to make the casting material and pour it into the mold:
- Measure out equal parts of side A and B. Make sure to shake the bottles prior to puring
- Combine both material in a mixing cup. Use paper or plastic cups and do not shake to prevent air bubbles
- Mix the resin using a mixing stick
- Pour the mixed resin into the open mold. Slowly pour casting resin down the side of the mold allowing the resin to flow naturally into the detail of the silicone rubber mold.
- You can also gently squeeze the mold to force any trapped air within.
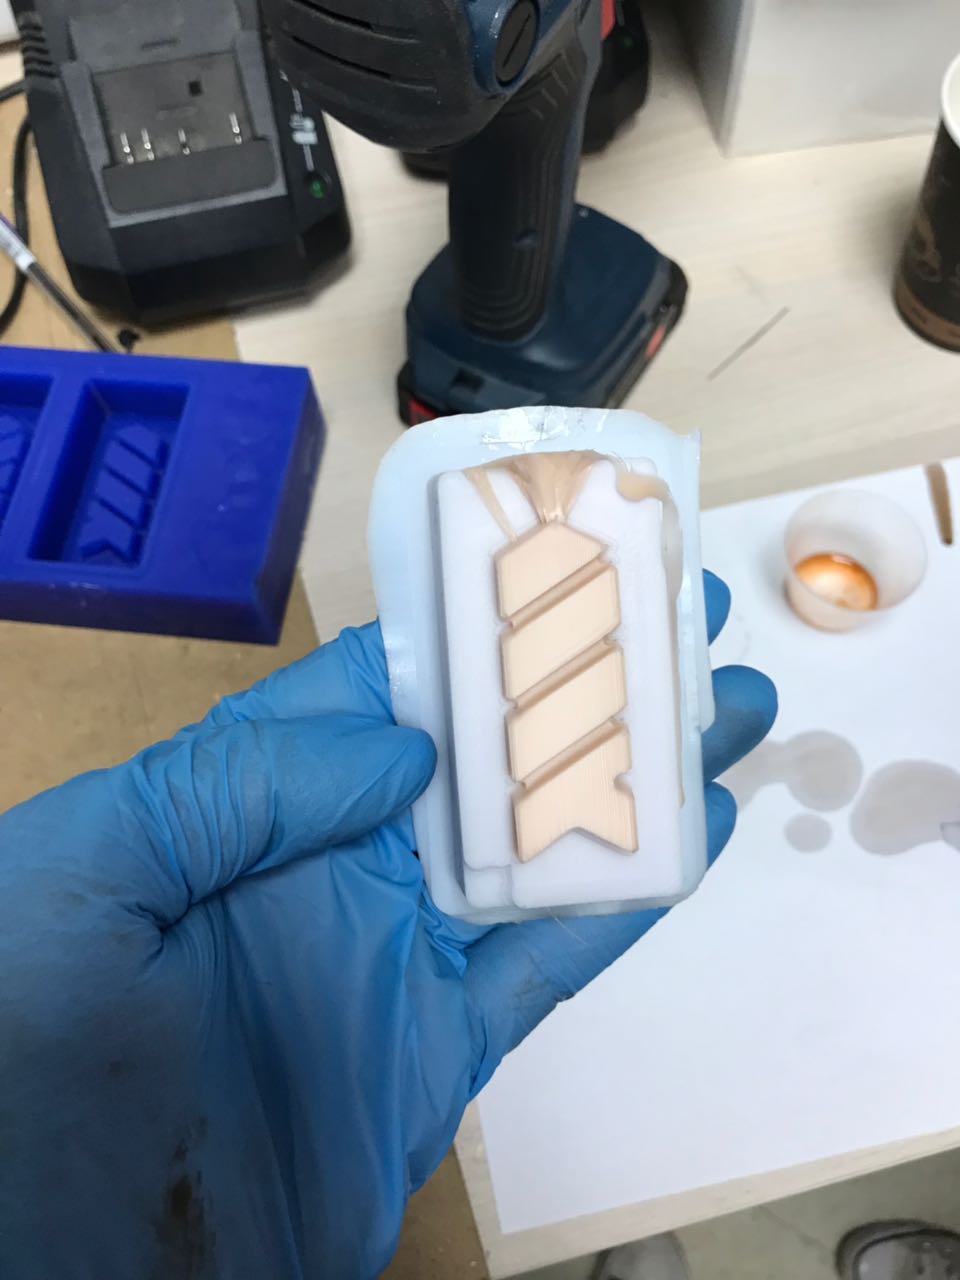
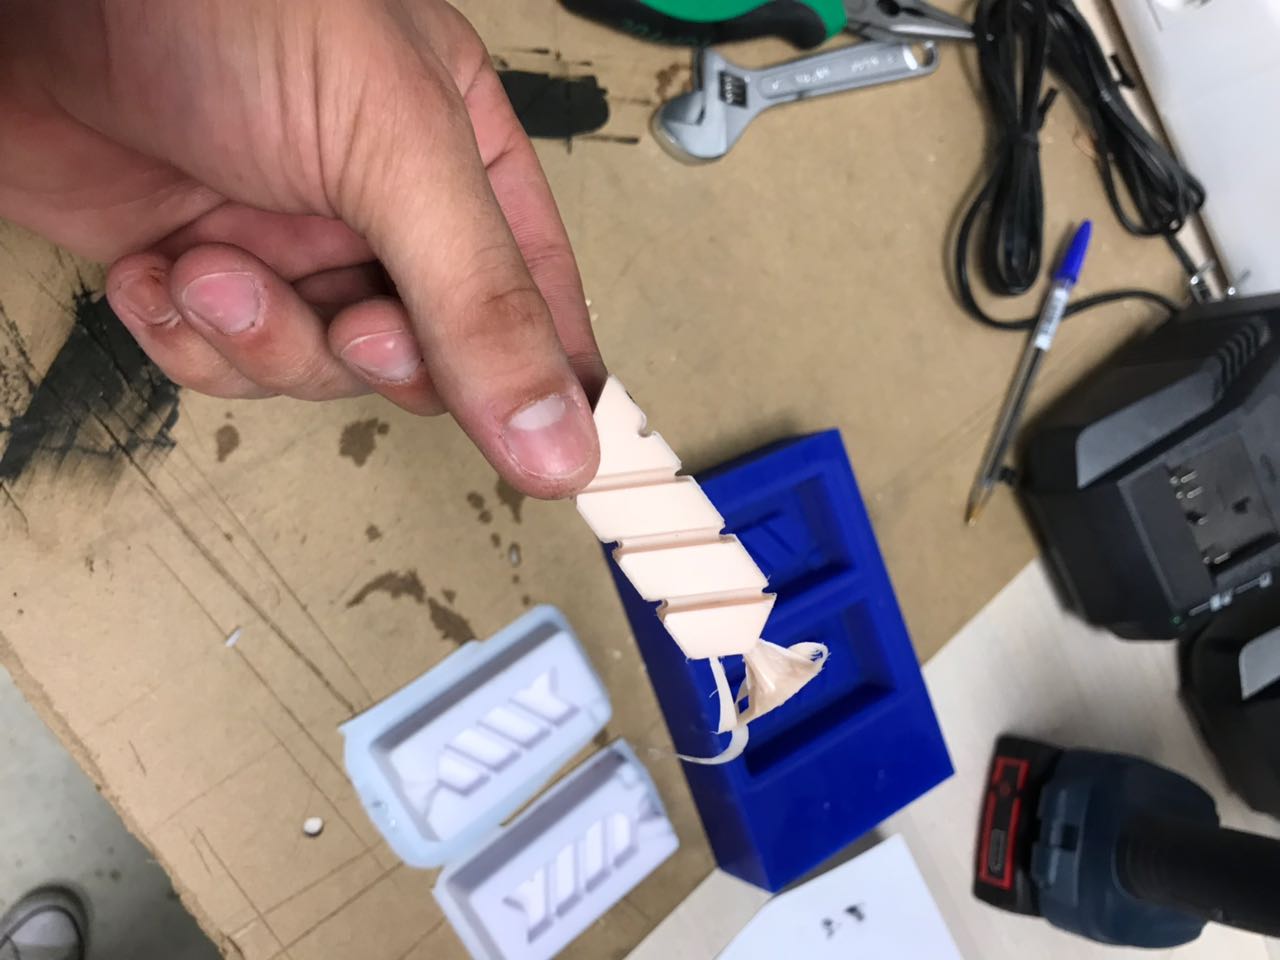
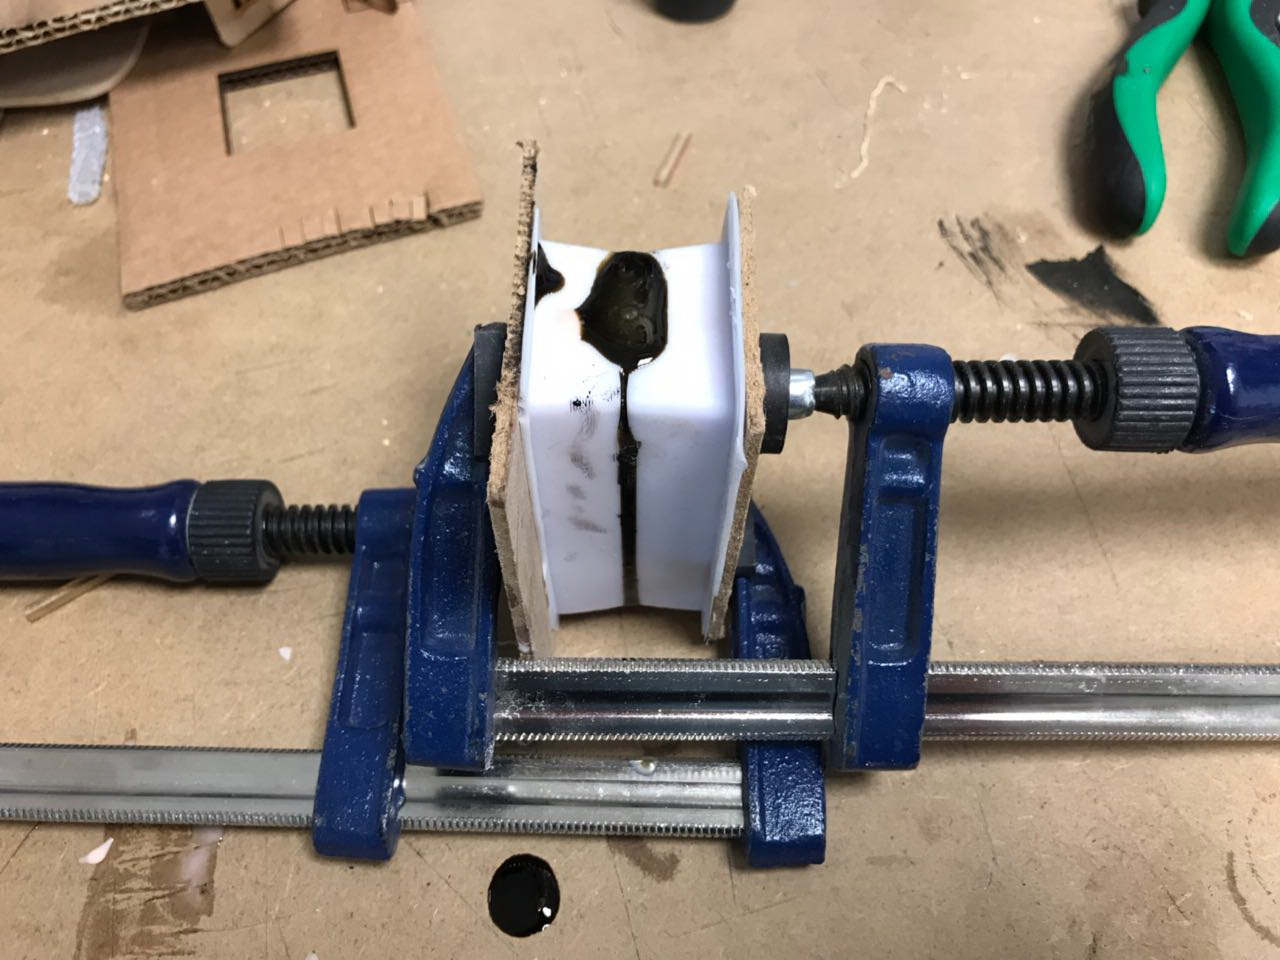
Step 10 - Pouring Resin Into the 2-sided Mold
The same procedure was used to pour inside two-sided molds.
The first thing you can do is to preheat your mold. Warm the mold in a microwave for 1 minute/lb of rubber on high. This will only warm your mold and will not affect the microwave or your mold adversely. It will however help the thin sections of your casting to cure more evenly with larger sections and reduce the demold time. It will also help the resin set up uniformly to give you a consistent fully cured cast piece.
Next we have to mix the A and B side of the material, before pouring it into the mold.
However pouring with a two sided mold is a bit different than a one sided mold. The two sides of the mold should be fit together to get the final shape.
One mistake i made was i didn't take into consideration a funnel like oppening to be used for pouring the resin inside. So i had to do some manual edits on the mold.
Using a cutter, i cut a funnel-like oppening on the top, and an air vent that will allow air to leave the mold when pouring the resin inside.
Next I fixed the mold to pour into it. To do that i used a vise and two flat mdf peices to keep an equal force applied on the mold. After that i poured the mixed resin into the mold.
Step 11 - Removing the Casted Object after Curing and Finishing
After the resin is cured,the next step is to demold the part. You can notice the material curing by changing its color.
To demold, gently flex the rubber mold away from the casting and pull the cast resin piece out.
Note that many parts were made using the same mold as shown in the group assignment, by trying different mixtures of colors.