week 08

Embedded Programming

0.Assignment

Individual assignment:

read a microcontroller data sheet
program your board to do something,with as many different programming languages and programming environments as possible

Group assignment:

Compare the performance and development workflows for other architectures
Have you:

  • Documented what you learned from reading a microcontroller datasheet.
  • What questions do you have? What would you like to learn more about?
  • Programmed your board
  • Described the programming process/es you used
  • Included your code

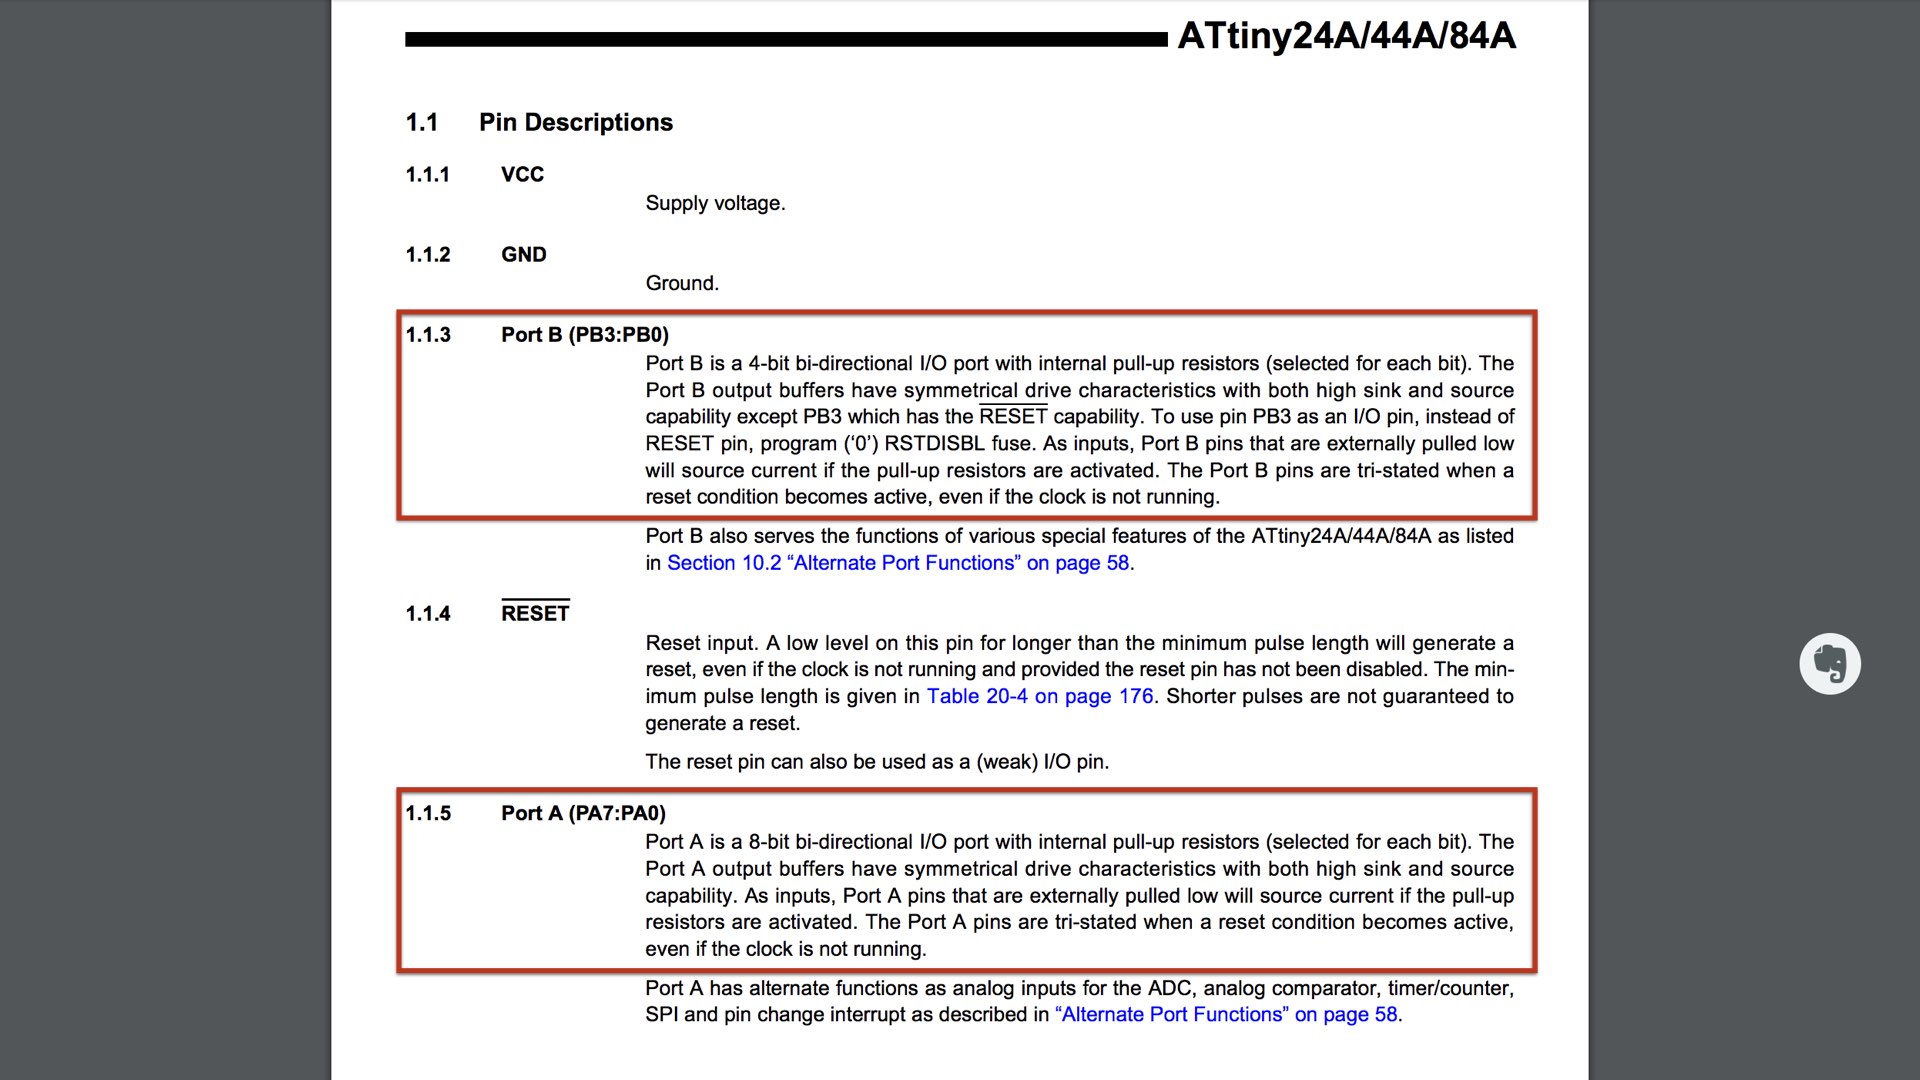
  • 1.Read data sheet of ATtiny24/44/84

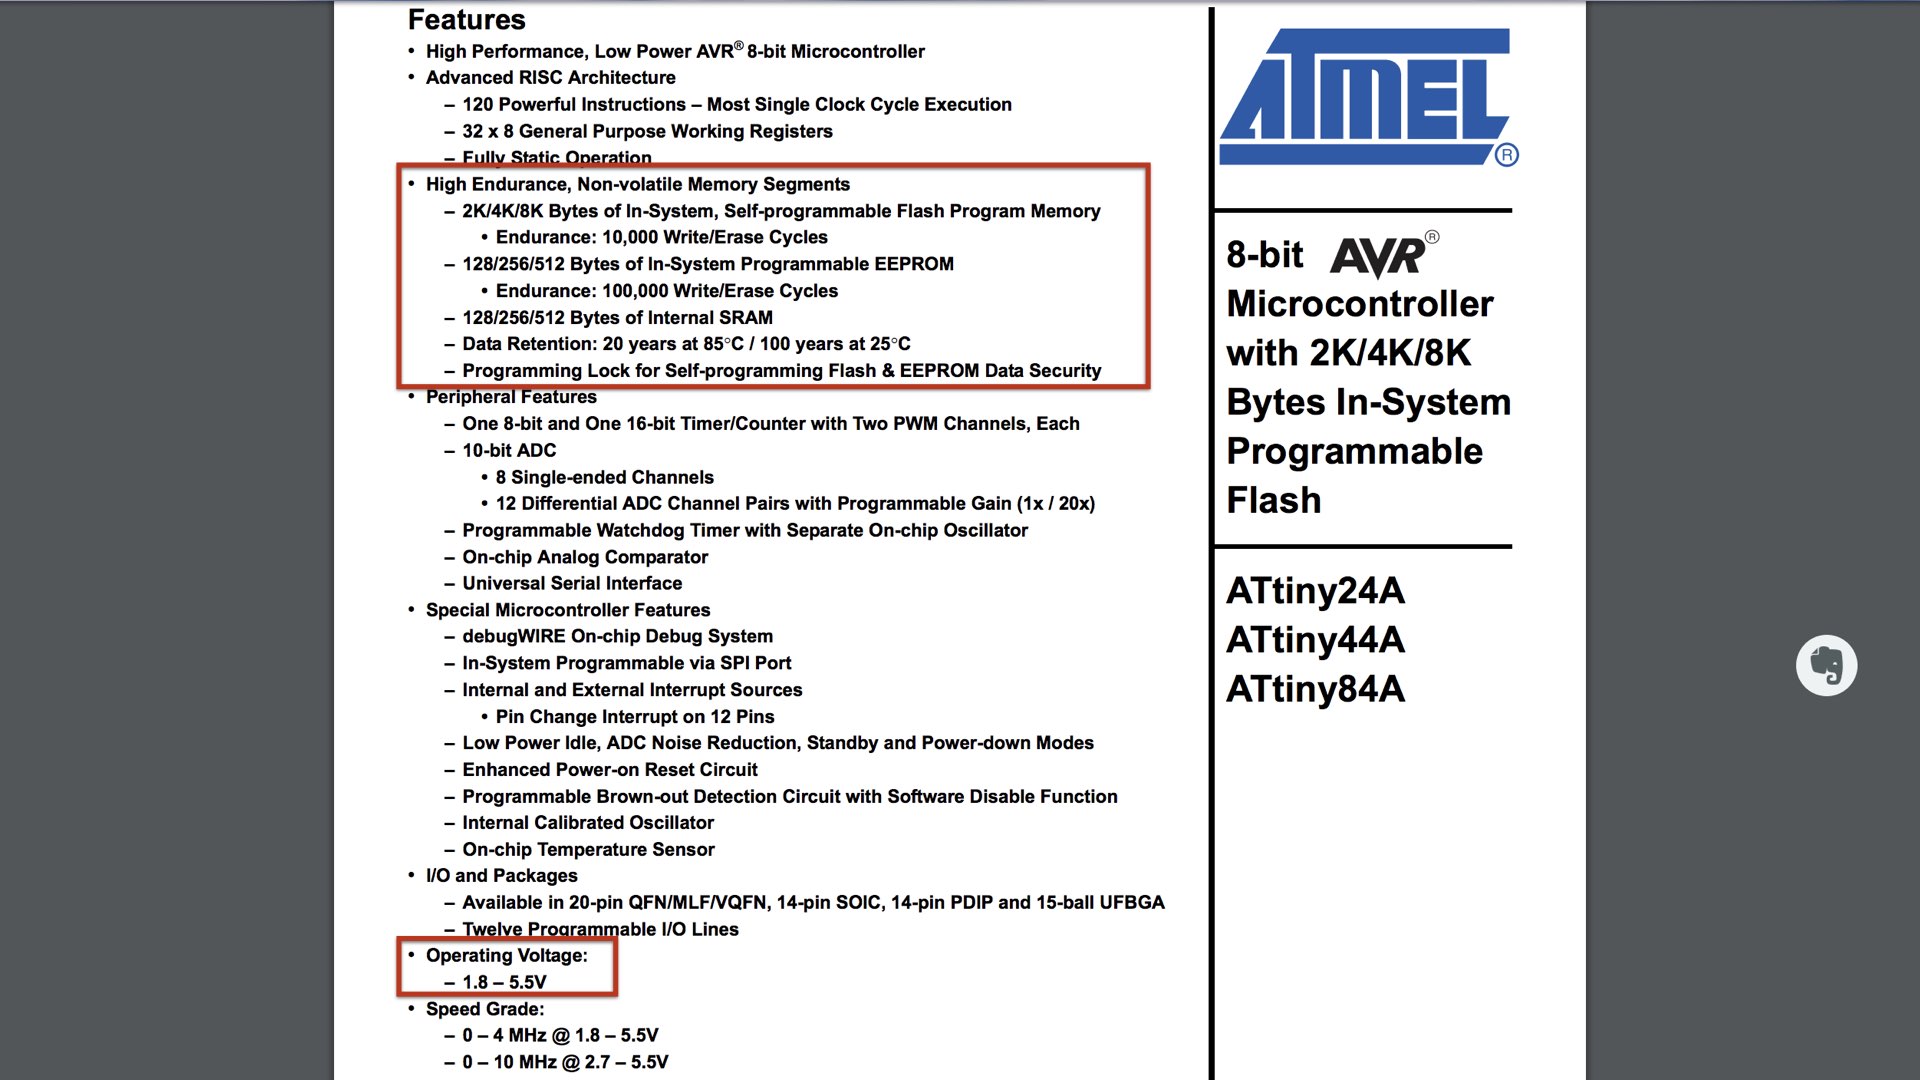
    Here is the ATtiny24/44/84 main features:

  • High Performance, Low Power AVR® 8-Bit Microcontroller
  • RISC Architecture
  • 2/4/8K Bytes of In-System Programmable Program Memory Flash
  • 128/256/512 Bytes of In-System Programmable EEPROM
  • One 8-Bit and One 16-Bit Timer/Counter with Two PWM Channels
  • 10-bit ADC
  • In-System Programmable via SPI Port
  • Internal Calibrated Oscillator
  • Available in 20-Pin QFN/MLF & 14-Pin SOIC and PDIP
  • Speed Grade: 0 – 20 MHz @ 4.5 – 5.5V
    I choose ATtiny84 microtroller, with 8K flash program memory , 512Bytes of In-system Programmable EEPROM and 512 Bytes Internal SRAM.
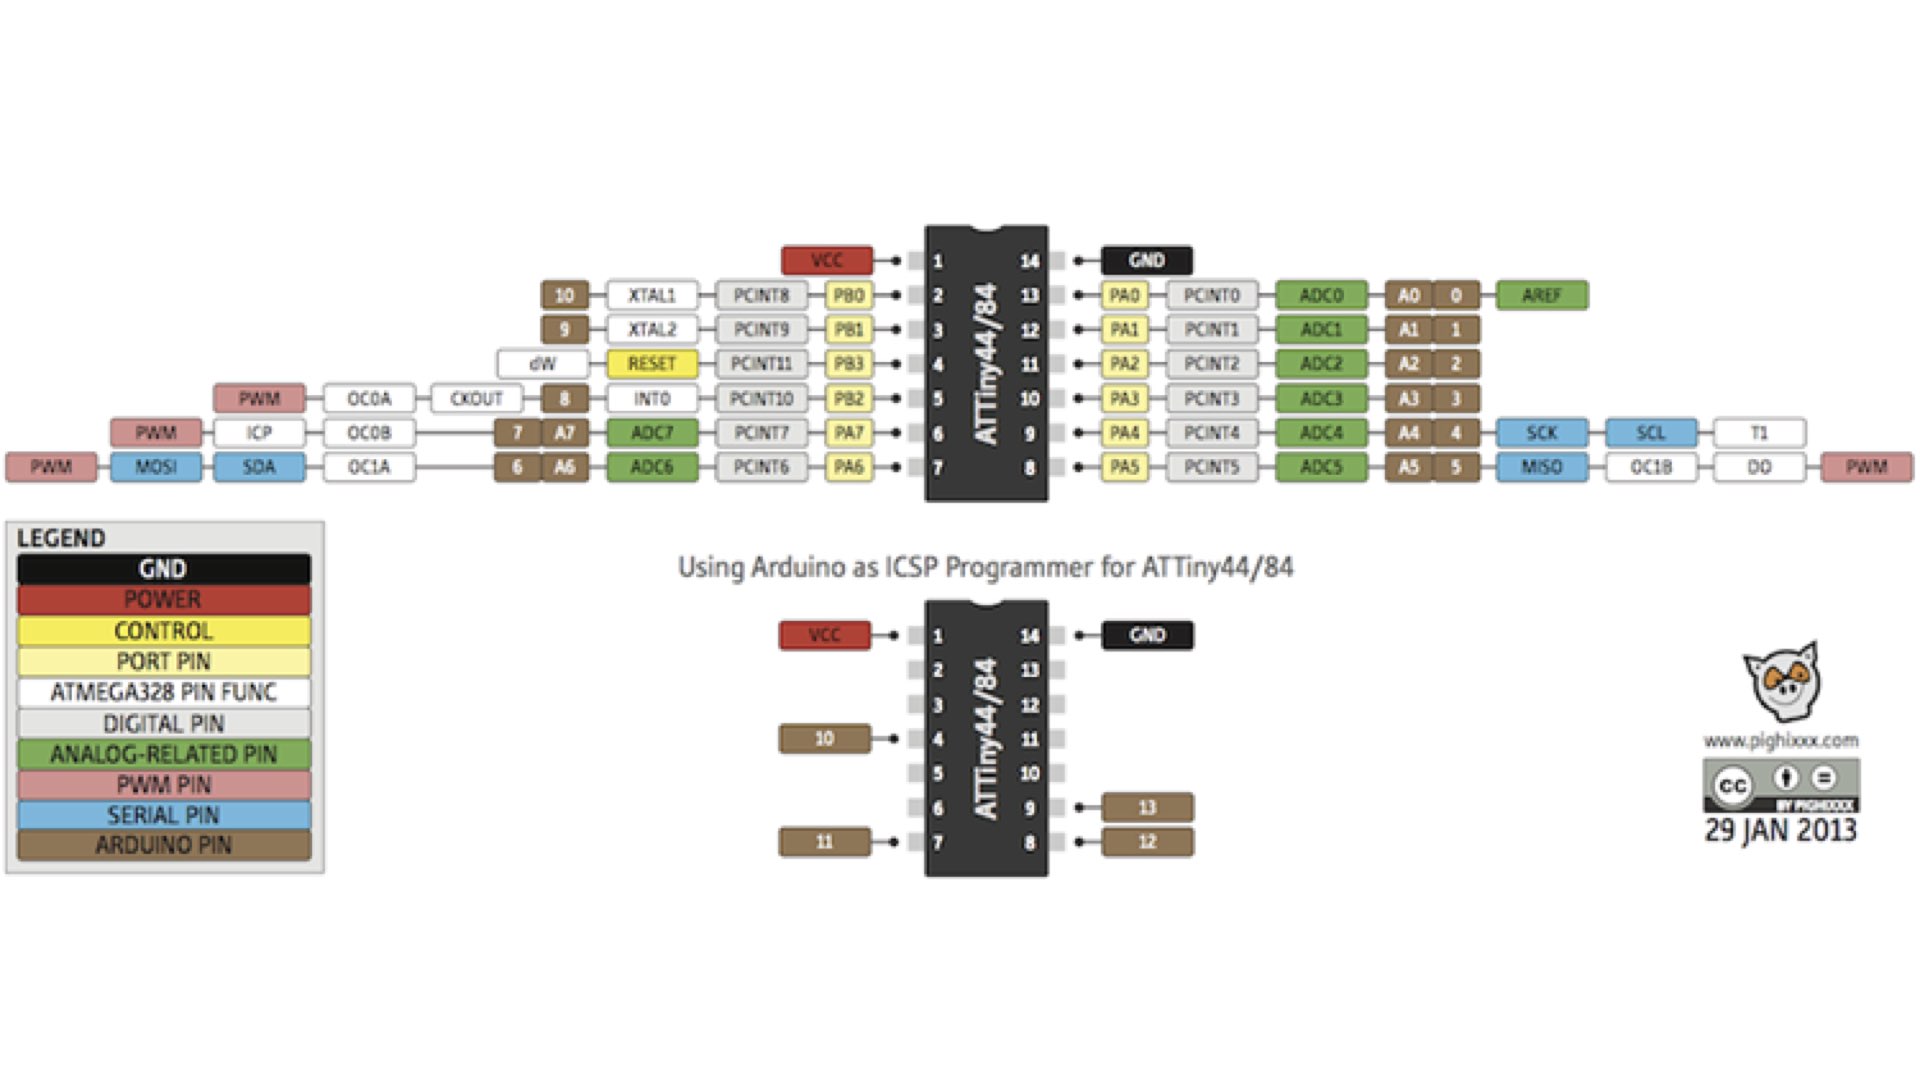
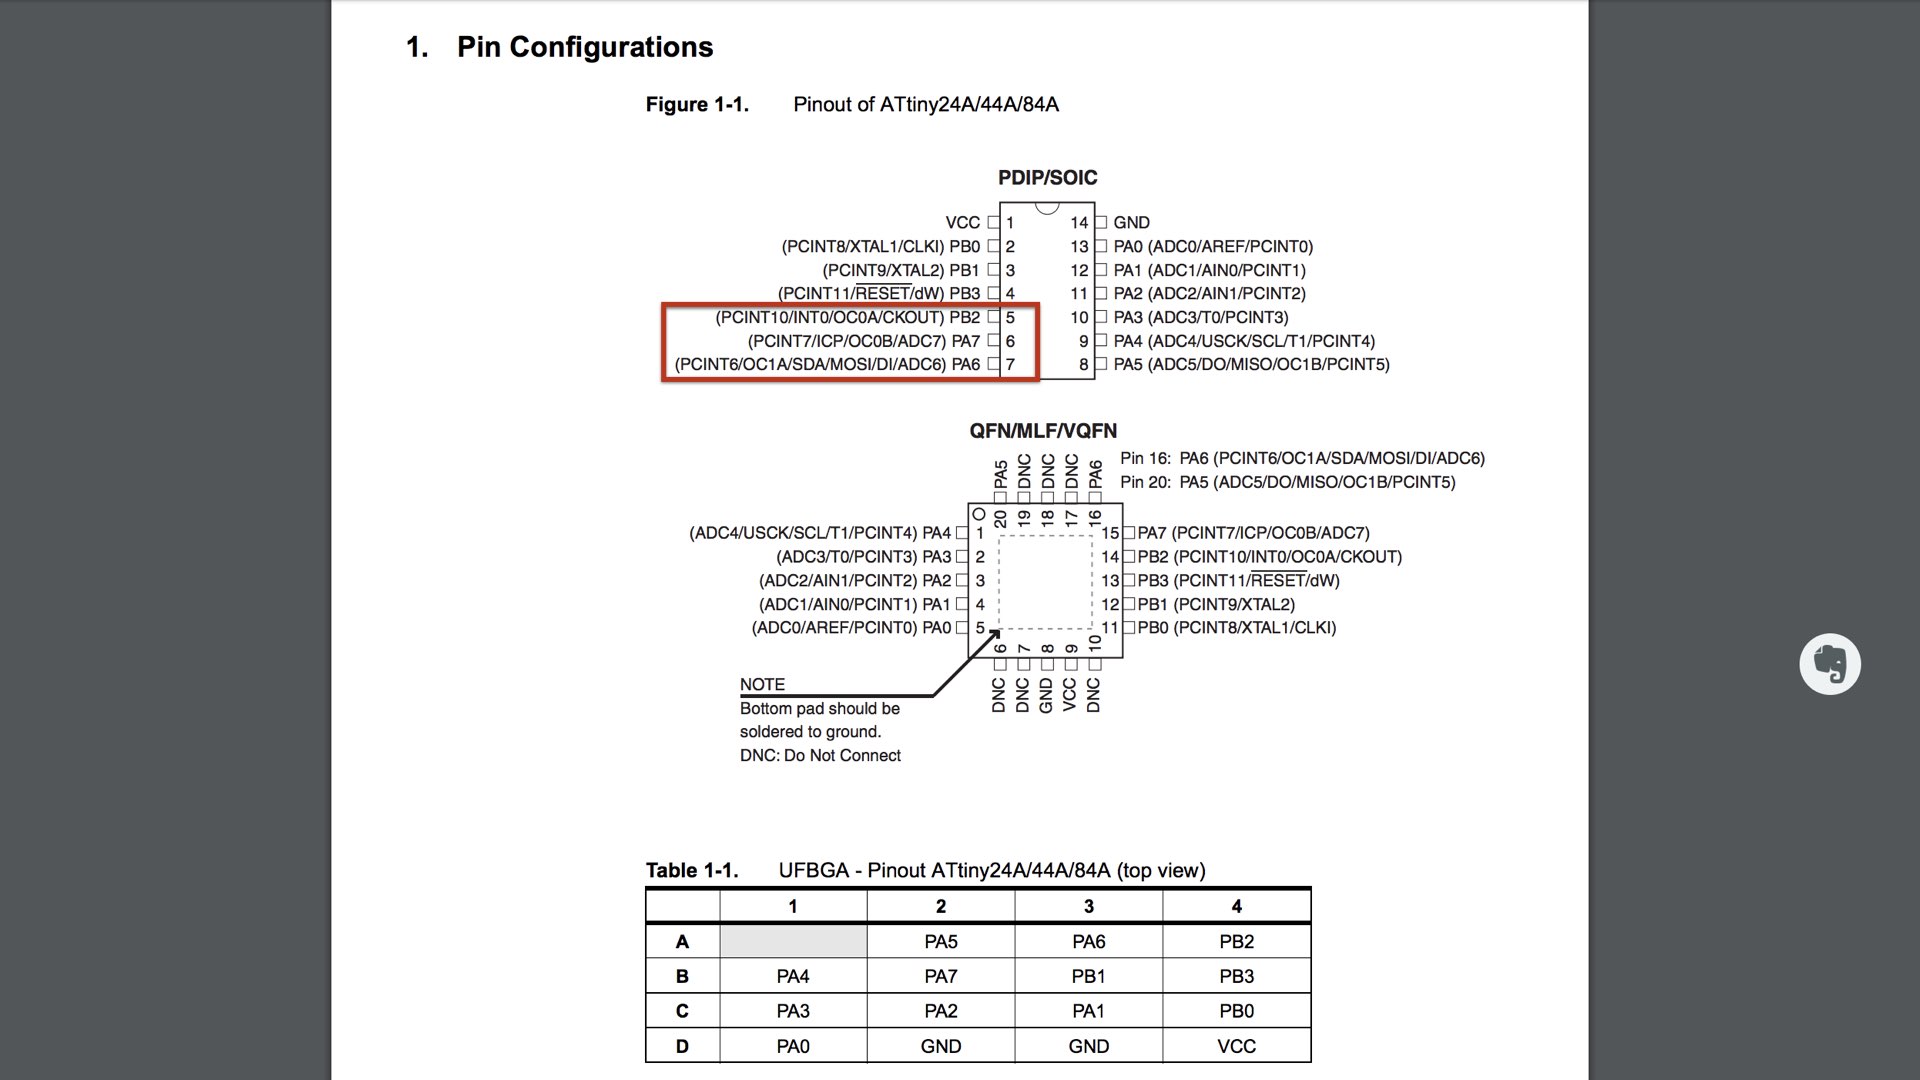
    Acording to following tabel , PB3 is pin3, PA7 is pin7 in Arduino.

  • 2.Programming my board

    Using UsbISP & Arduinoo IDE

    The blog I refer to this week is daisuke-doyo , he give me a lot of help.
    I check the board I made in week 06 & conect it with my computer then open Arduino IDE.
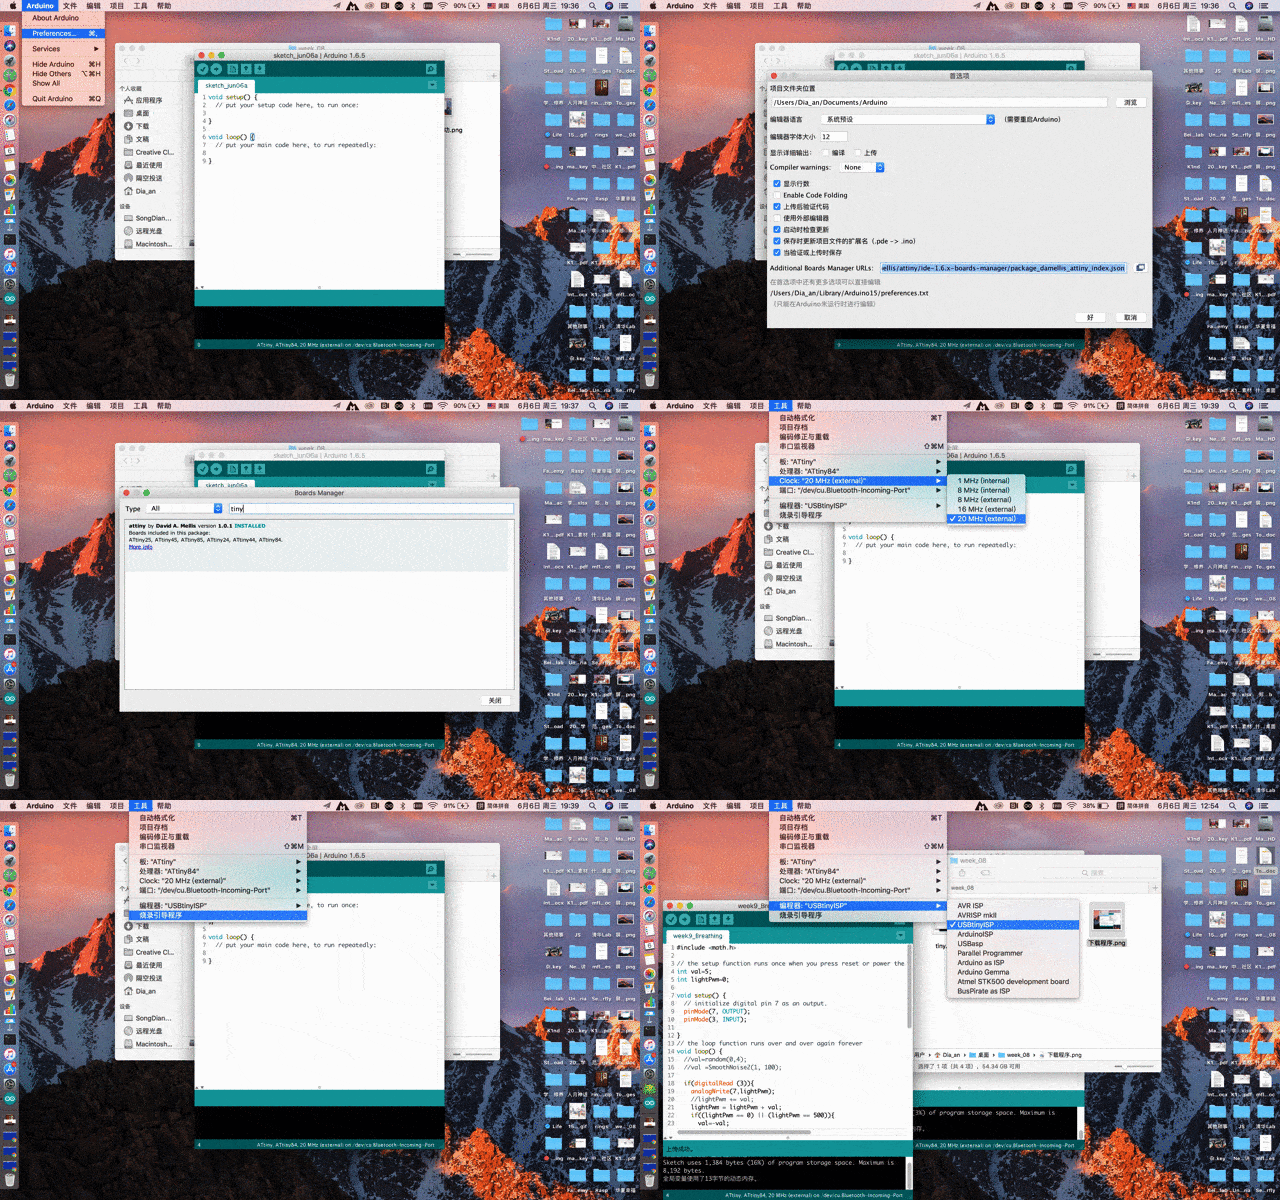
    Step1: Using UsbISP & Arduinoo IDE

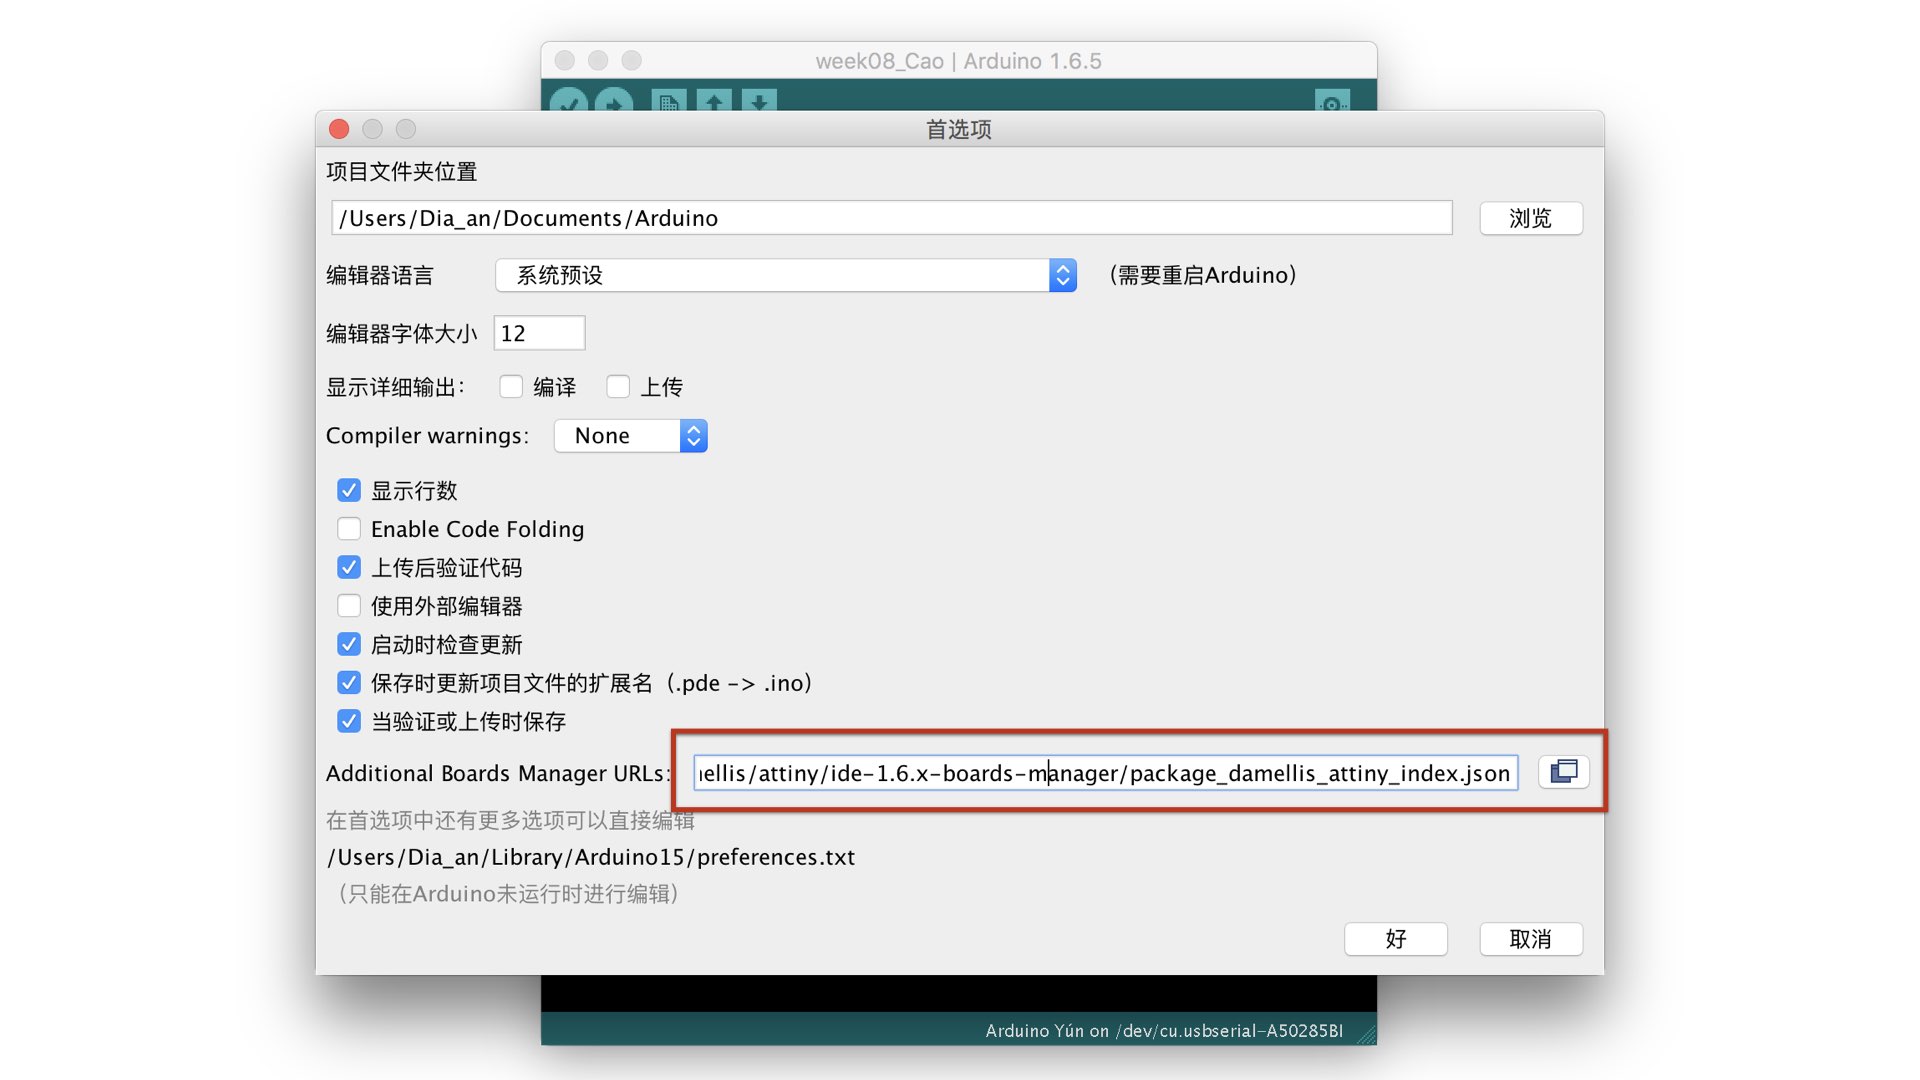
  • Top Menu "File -> Performane"
  • Paste the following url into the field, use a comma to separated it from any urls you have already added .json urls
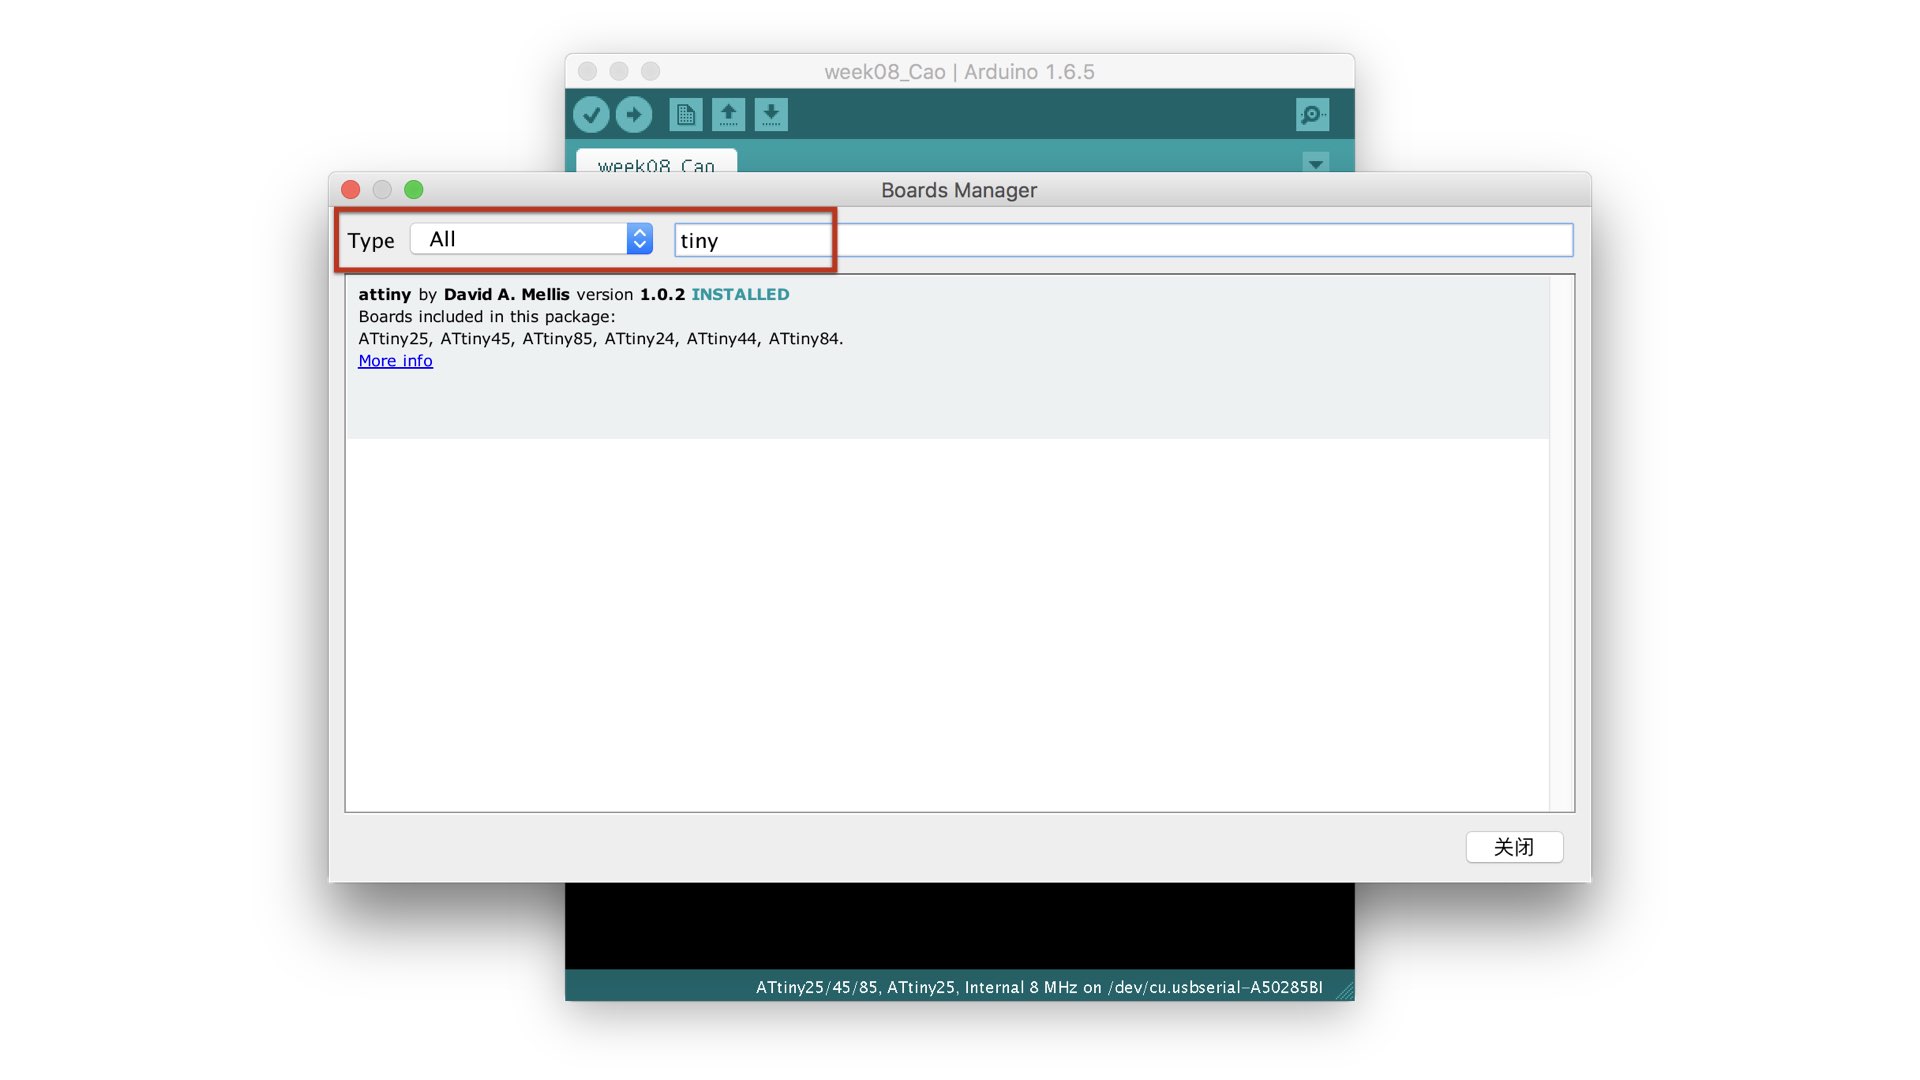
  • "Tools -> Board ->Boards Manager", tpye "tiny" in the filter text. Click it and then click the Install button.
  • Set the Processor to ATtiny84. "Tools -> Processor -> Attiny84"
  • Set the Clock to External 20MHZ. "Tools -> Clock -> External 20MHz"

  • Step2: upload the Bootloader

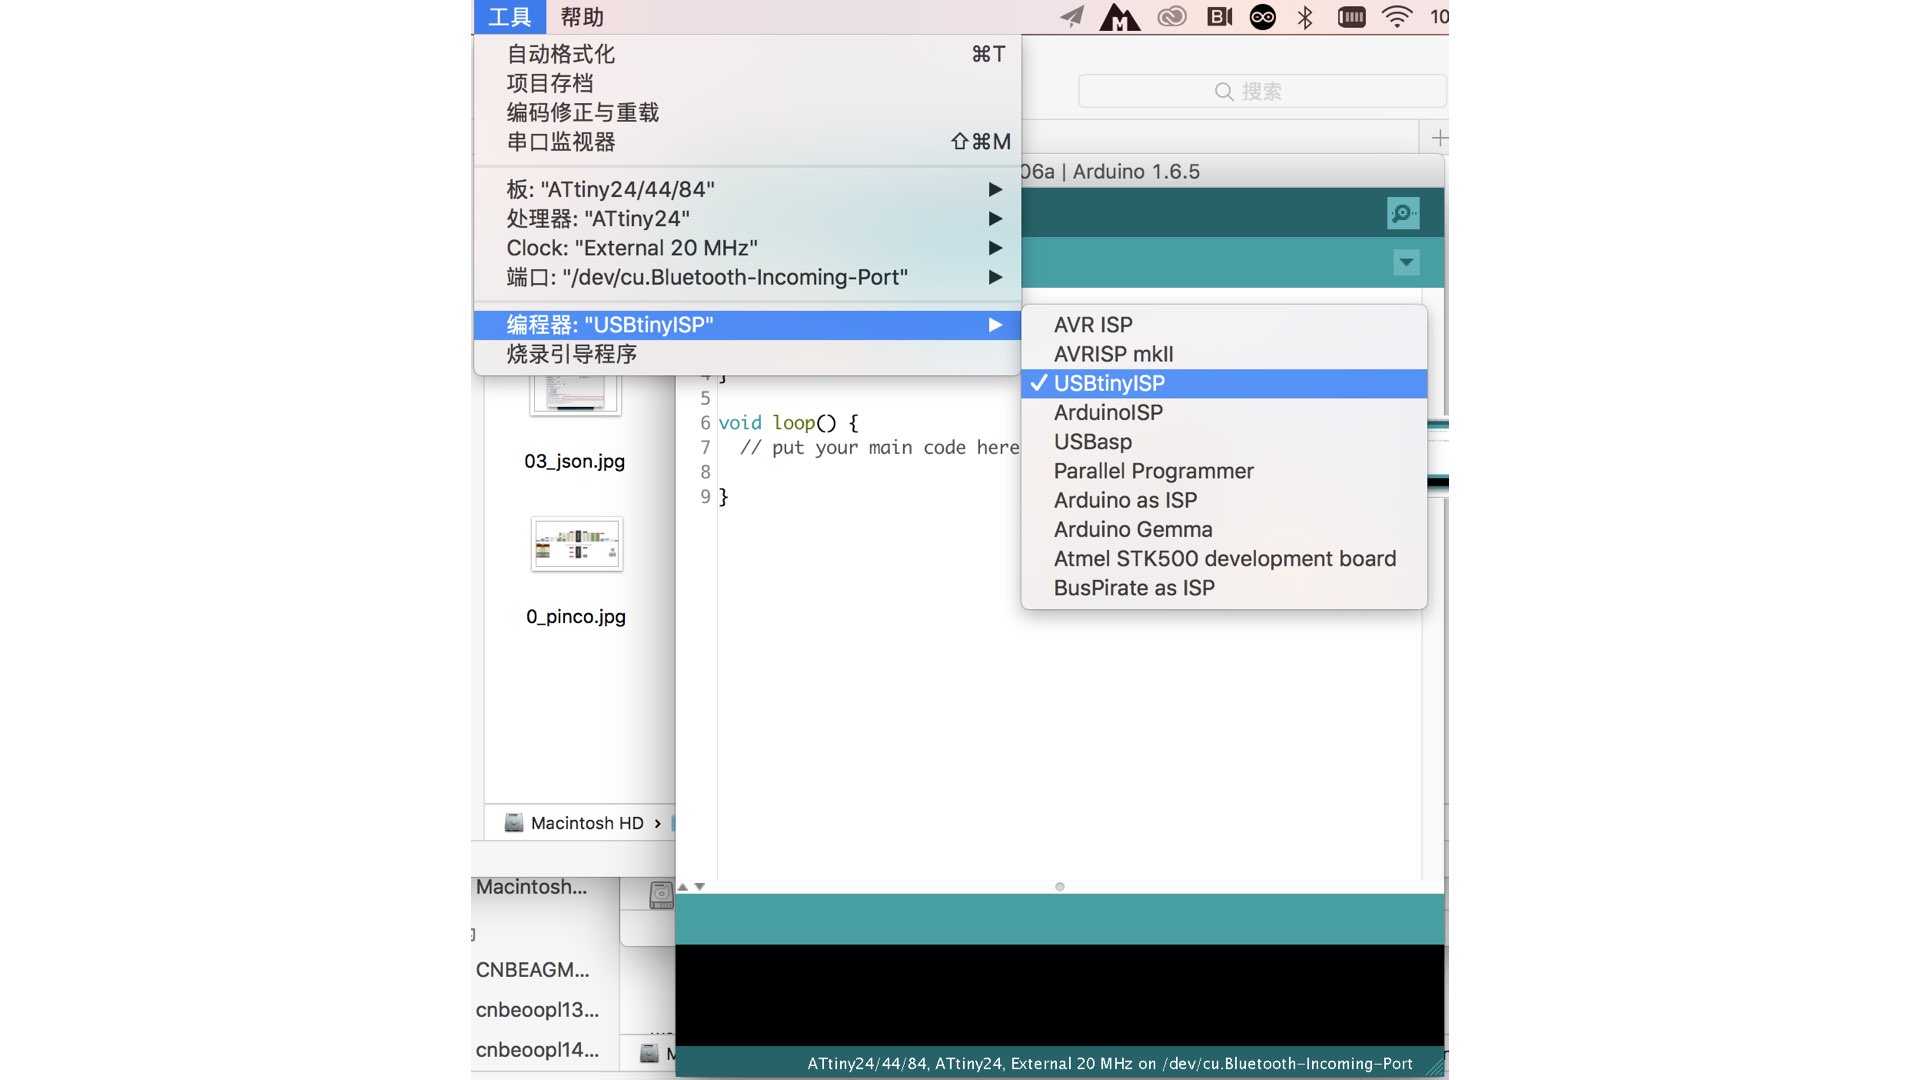
  • I choose USBTiny, "Tools -> Programmer -> USBTiny"
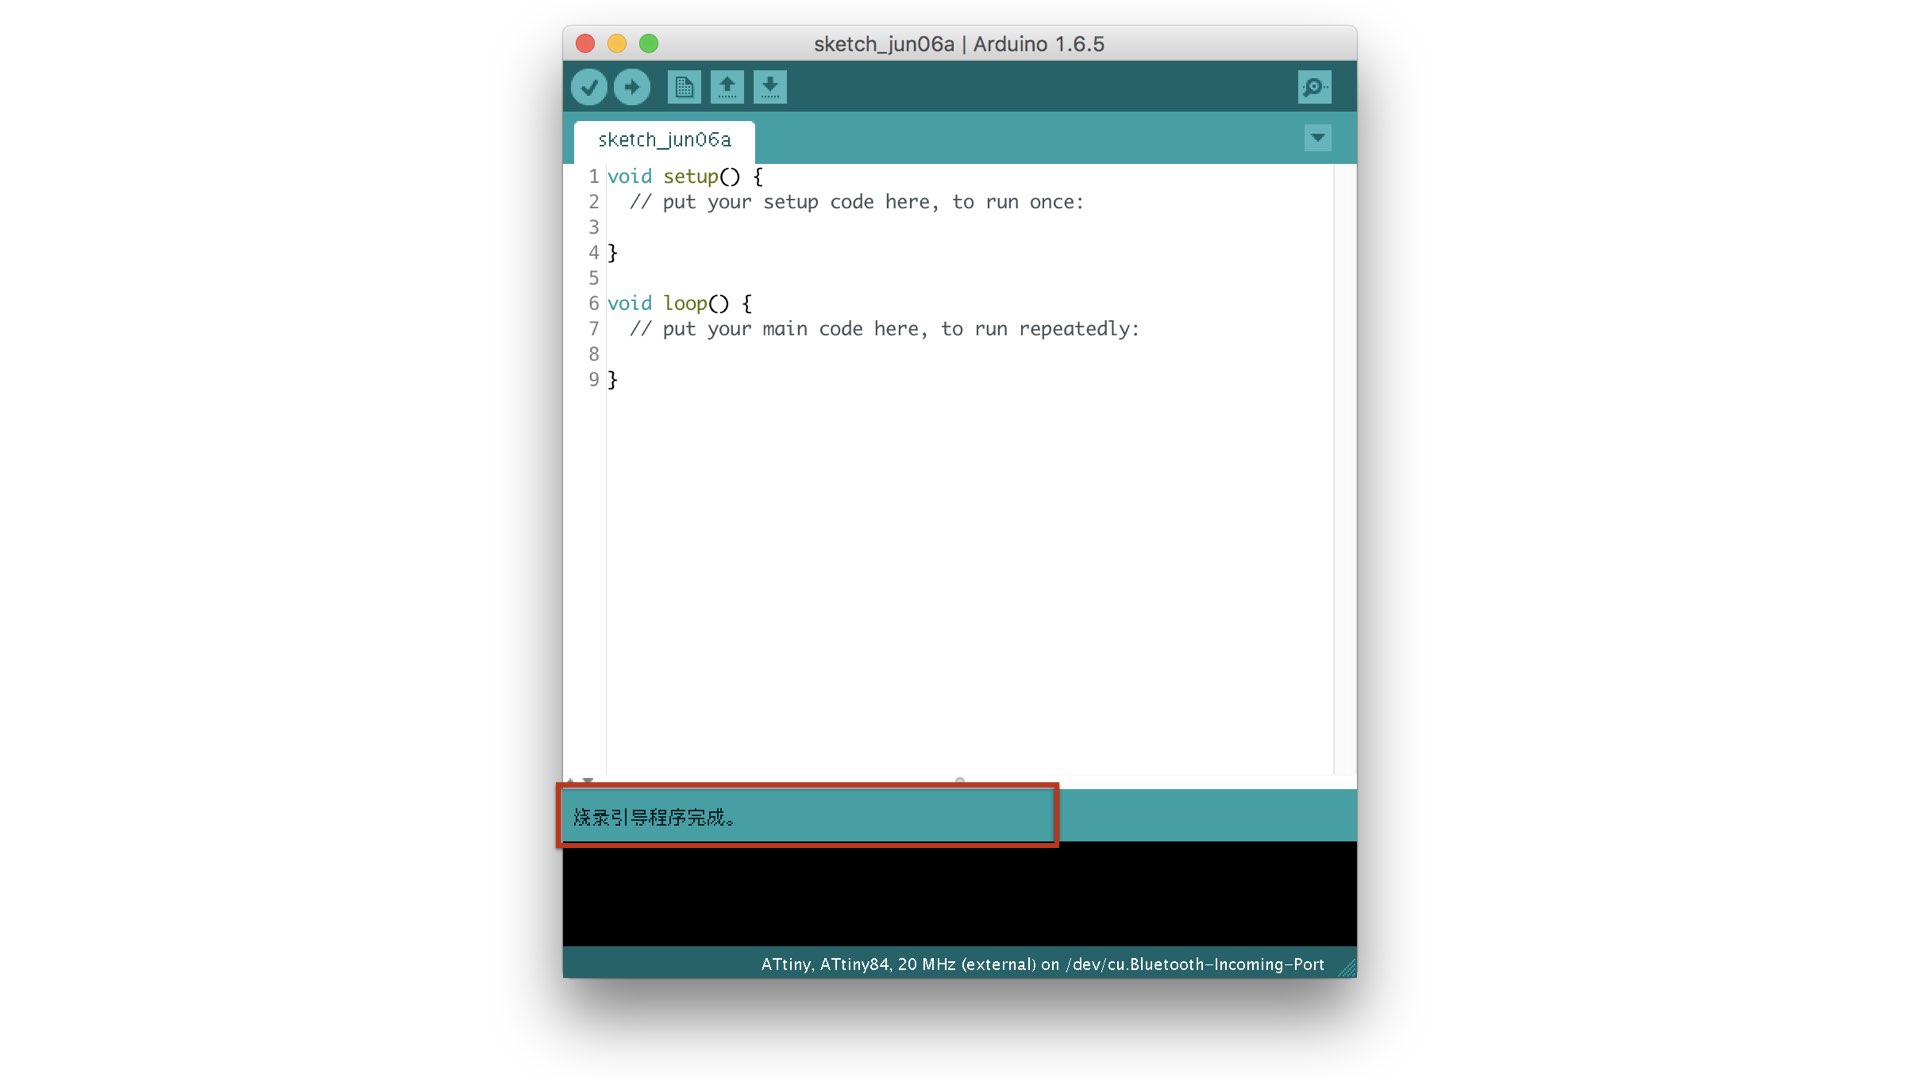
  • Upload bootloader to ATtiny84. "Tools -> Burn Bootloader".
  • "Done burning bootloader" display in the message bar.

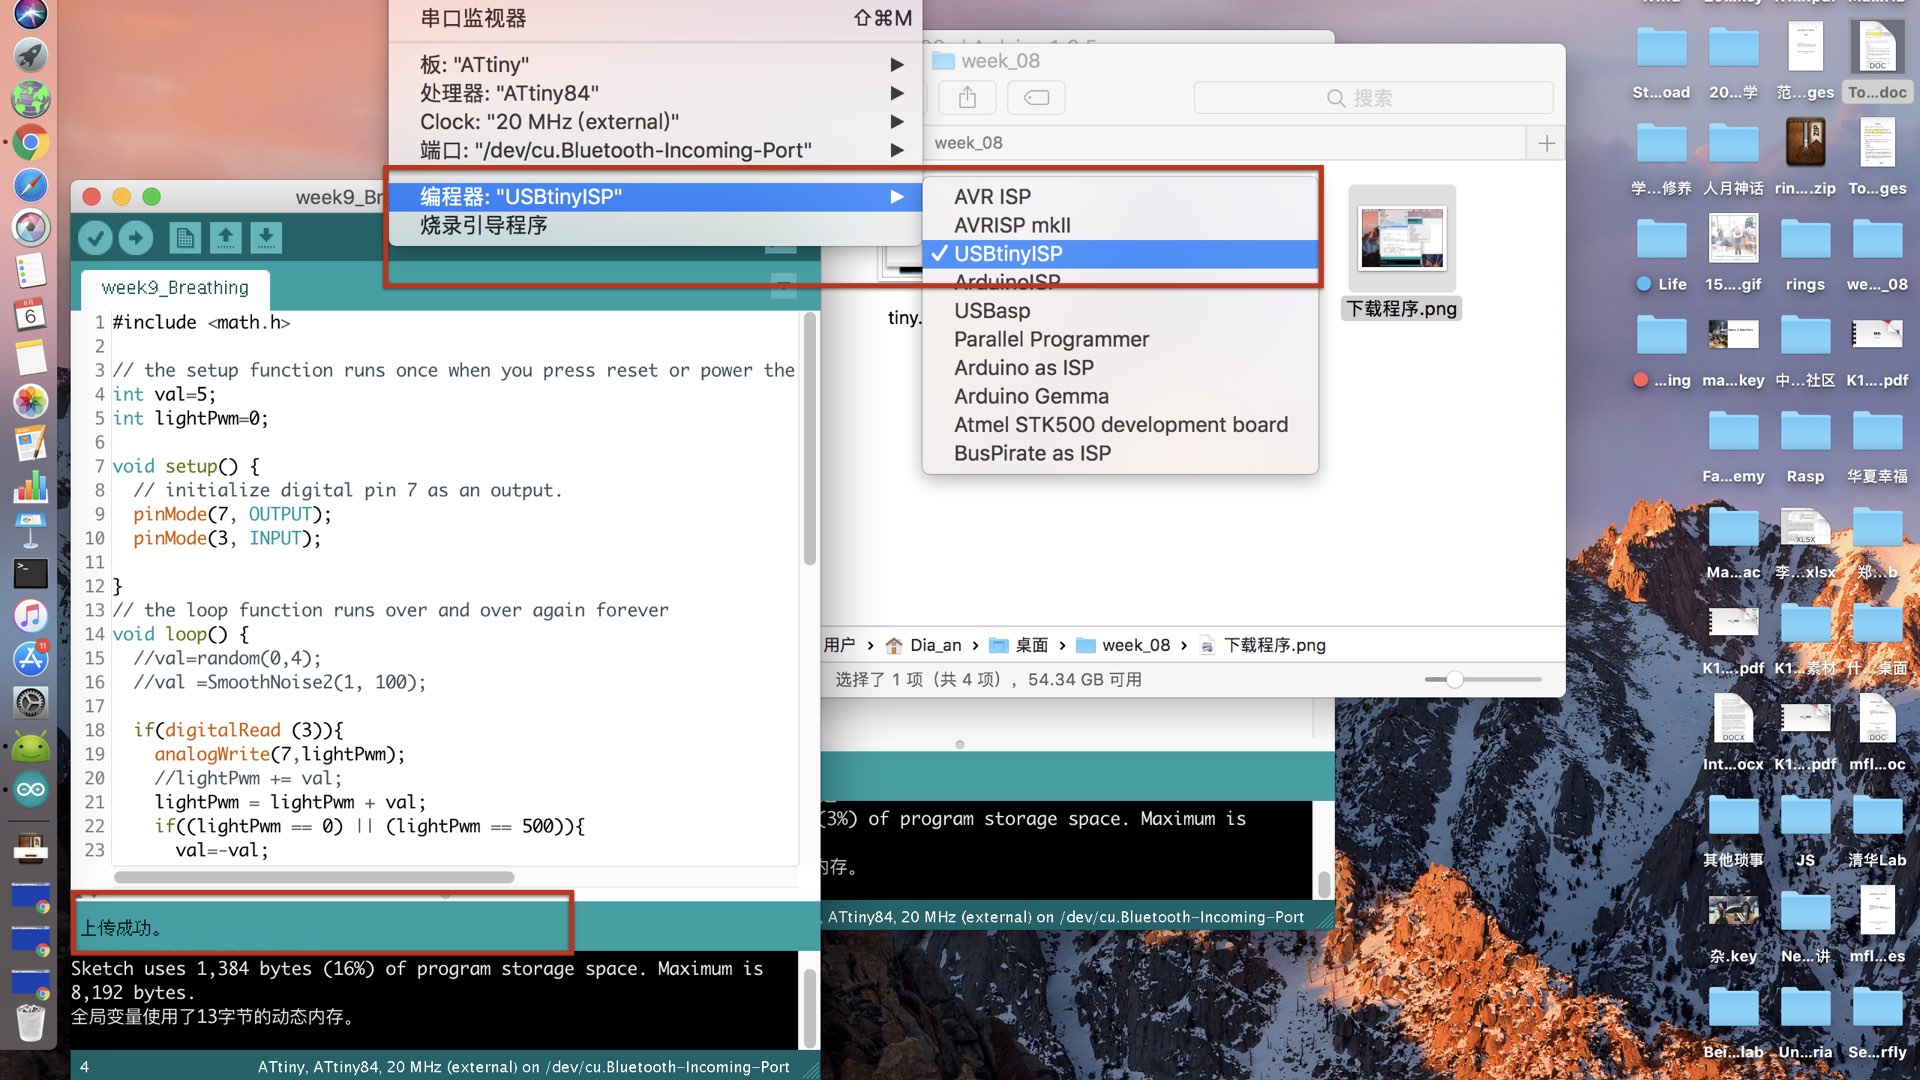
  • Step3: Upload Arduino program with USBTiny

    Renmber the Pin number of ATtiny84 used in Arduino, the key was connected button to Pin3 and the LED connect to Pin7.
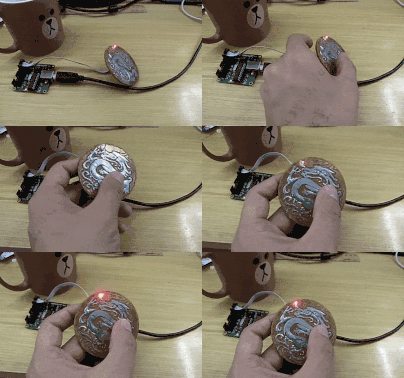
    The programming logic is: Normal state,the LED is bright like a breath light, when pressed the button,the LED will flashing.
    Here is the program.
    Tada~

    File list

    Arduino
  • program.ino