The process!
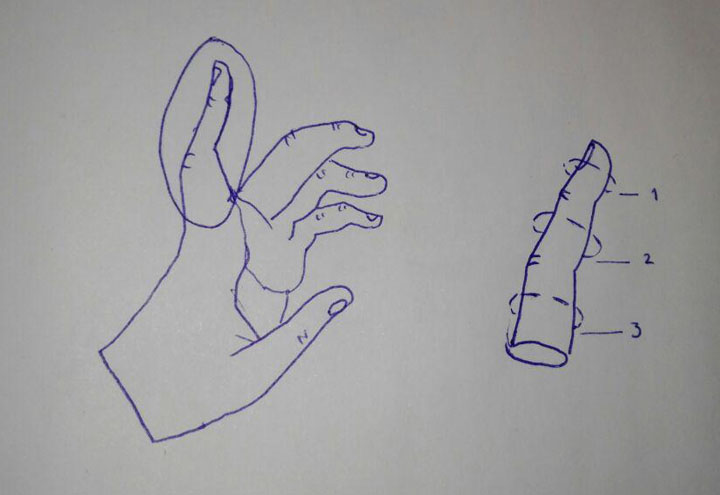
A set of three little rings, meant to be put on the three segments of my finger and assist in making a barre chord.
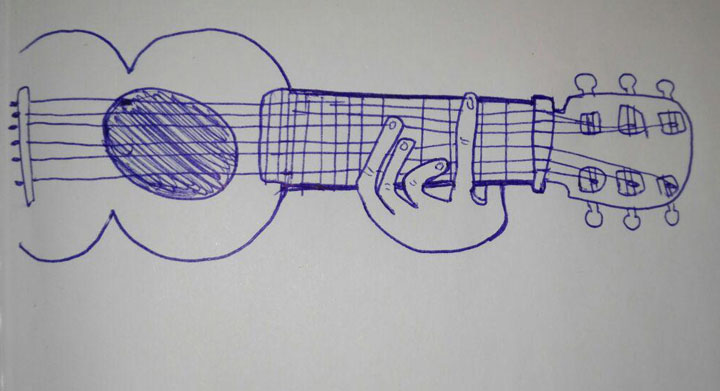
These barre chords are giving me trouble in that it's really uncomfortable to apply the necessary pressure, along the entire width of the guitar neck, to press all the strings fully and to produce a beautiful sound. It also requires a bit of a twisting of the hand sideways, in a way which is not very agreeable with my wrists.
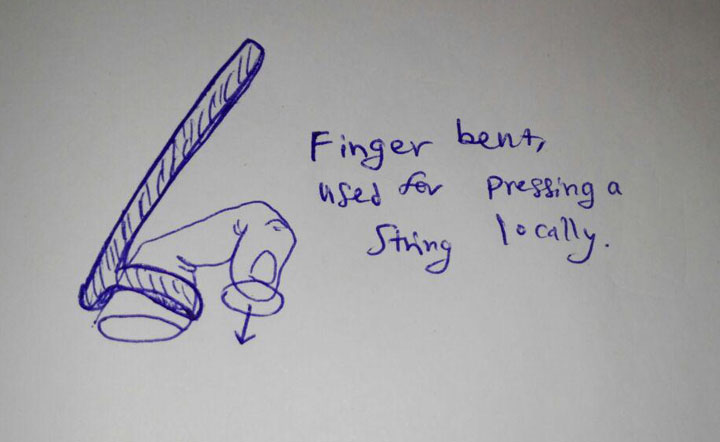
So I decided to make myself a tool which is going to help me with doing that, consisting of three rings, one for each segment of the finger, that together form a tool that is both flexible for when I need to fold the finger, and forming a solid straight and efficient string pressing tool when my finger is fully stretched.
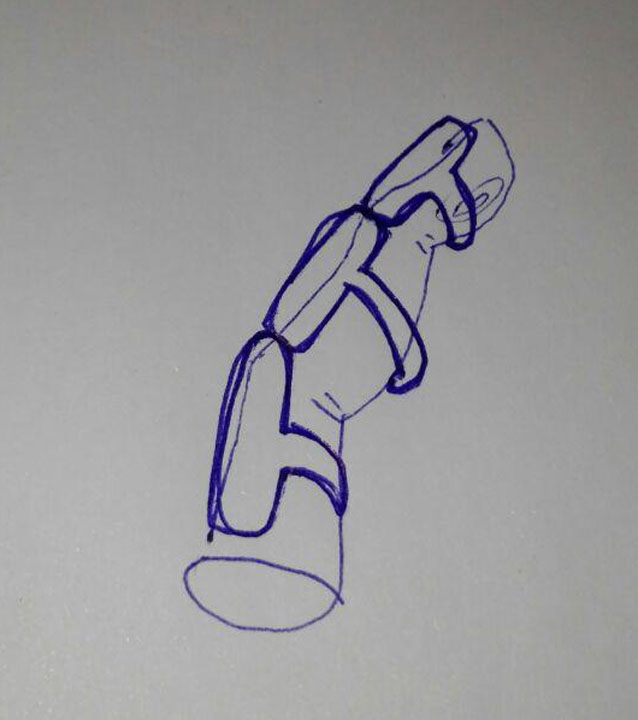
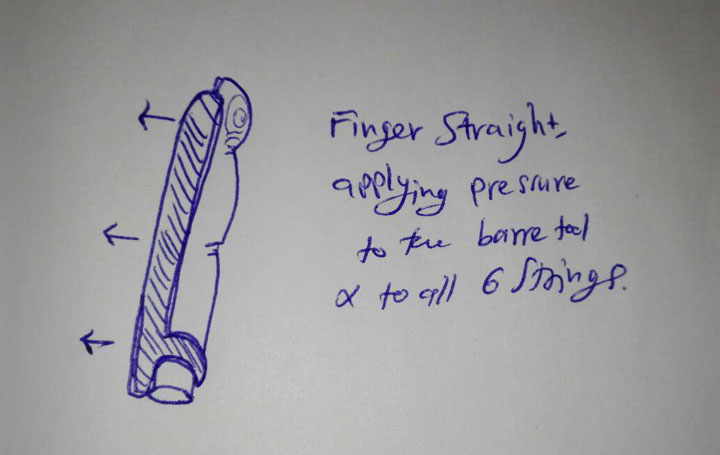
So it's going to be something in this spirit, comprised of three rings. But now that I'm actually thinking about it - I can make it out of just one ring, and a single continuous line, that I can choose to press down with my full finger or not. Something like this:
That way I can bend my finder as I need it, or straighten it and apply pressure along the tool if I need a Barre.
Of course, to actually make something like this I need to measure my finger. I also need to account for my finger joints, which are significantly wider than my finger itself, and my experience with rings already taught me that this is a problem.
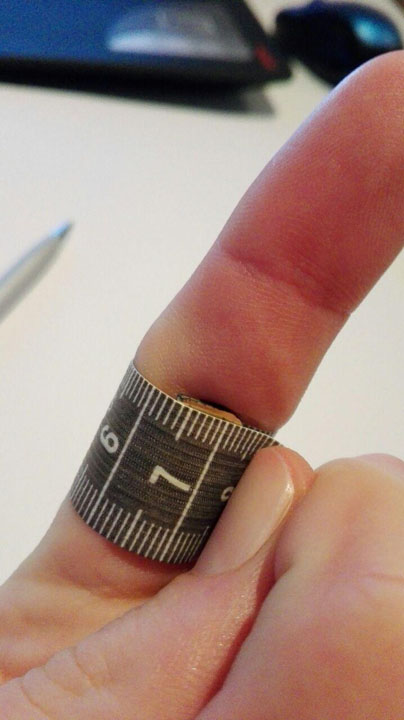
So the circumference of my finger joint at the thickest part seems to be 7.7cm, or 77mm, which is going to be the measurement unit I will use. This is also a bit tight, as I actually kept the thing relatively tight around my finger.
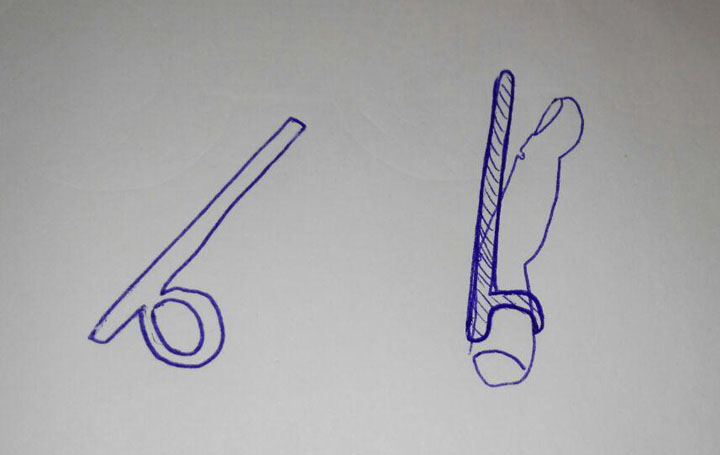
I'm thinking of maybe having a ring that can tighten as needed around my finger, as opposed to just a round solid ring, though I am not sure how I would achieve that with a 3D printed object. Or do I?
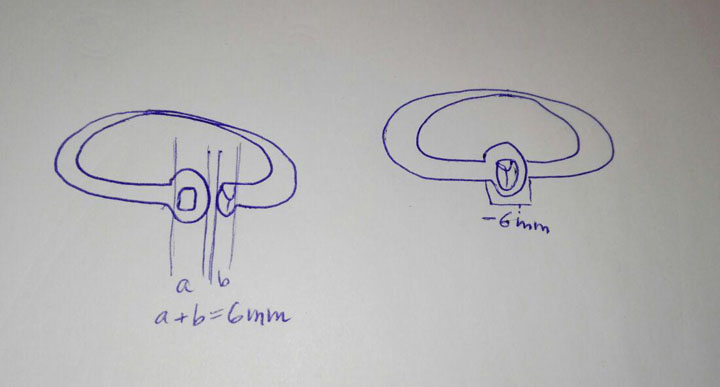
Here's a sketch:
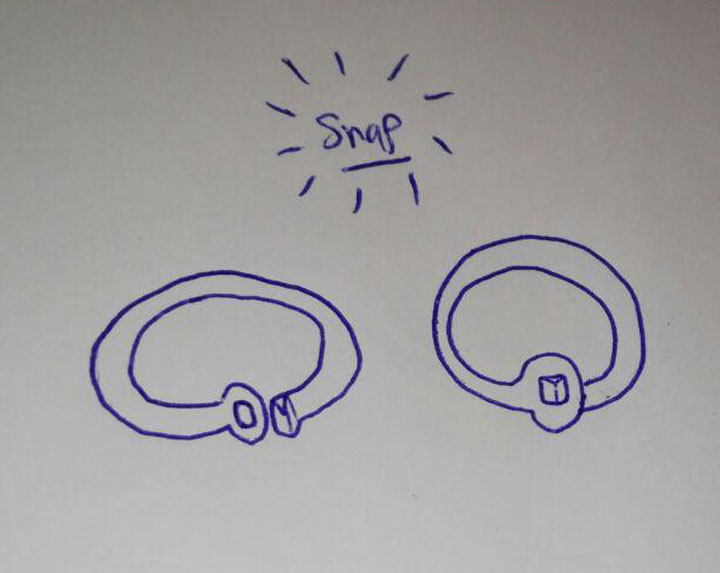
My only concern is that it will pinch my finger skin when I snap it shut, but I am willing to take that chance - for science! So then, for a tighter fit, suppose the ring till be a 80mm in circumference while open, and 74 when closed. To avoid too much math, I will just make the snappy part approximately 6mm in length, both of the snap components 6mm in total.
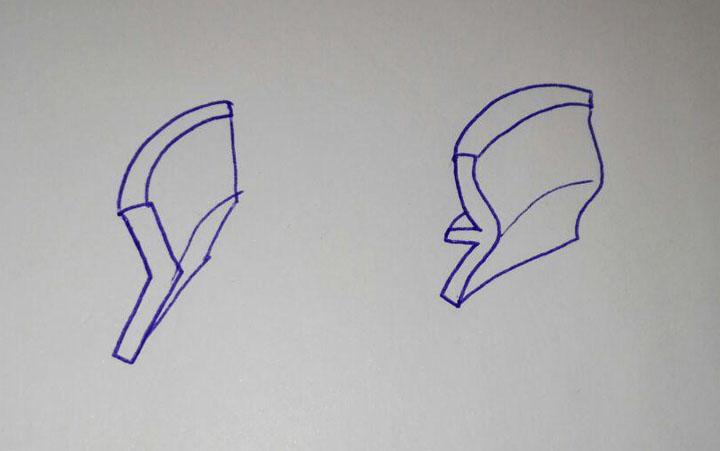
I want the ring, thus, to be flexible enough to do the snap. Which means it needs a relatively thin body, but it also needs to be structurally strong, so it also needs to be curved, and needs to have some structural integrity assistance running to it's length. A cutaway of the ring should look like this:
Last thing left to do is a couple of minor calculations.
If the circumference of the open ring is 80mm, then it's Radius would be the "reverse" of the "Radius to Circumference" circle formula, C=2pi*R(adius).
Meaning R(adius) = C / 2pi.
So: Radius = 80mm / 2pi, which is approximately 12.73mm.
Now I'm heading into Fusion 360 to model the ring. Knowing the radius is 12.73mm, I'll sketch out a line with that length, and will then do two things with that line:
On one edge of the line I will make a cylinder to create a custom axis through, and on the other edge of it I will sketch my ring profile to then rotate it around that measured axis.
.jpg)
Then close the sketch and rotate it to it's profile, to make the ring profile. I figure, I want the ring's height to be 1cm, so 10mm.
.jpg)
Extrude the cylinder and put through the axis (Construct > Axis through cylinder):
.jpg)
Then delete the cylinder (because I only need the axis). Now select the ring profile faces and rotate them around the axis (Create > Revolve).
.jpg)
.jpg)
This is now the ring structure, it has an inner circumference of 80mm, a thickness of 2mm (bit thicker when accounting for the curve, just the lining itself is 2mm), and looks like it would be about strong and flexible enough to hold up when being snapped close, at least from my memory of the material used in the 3D printing in class.
Now I'm gonna make a sketch exactly at the center, profile view, and cut off a piece in order to make the actual snapping mechanism. I will cut off more than 6mm, because the actual mechanism itself is wider than 6mm, 6mm is just the difference between the open and closed state.
.jpg)
.jpg)
Made a rectangle with these measurements, and gonna extrude it to cut a piece of the ring off:
.jpg)
.jpg)
.jpg)
I'm also going to trim off the supporting structure along the length of the ring's curve at the end there, next to the cut, to give it a tiny bit more flexibility:
.jpg)
.jpg)
The gap is 10mm wide. Now it's time to put the snapper in:
.jpg)
.jpg)
Snappy part is 3mm long. Hole needs to be 3mm long too thus. But actually that's too long, because I need to offset another bit there, and the shape is absolutely ugly, so let's figure out something a little better. I'll decide right away on the following: The "in" snap bit, the "hole", will have a 1.5mm edge on the outside, to ensure it doesn't just break off completely whenever I snap it in. So that's 6mm - 1.5mm = 4.5mm to play with. I'm going to want both the "hole" and the "protrusion" to be the same width, so 2.25mm each. As for the thickness of the structure, I'm thinking 1.5mm as well, with the "protrusion" itself coming out at 1.5mm as well. With this in mind, it means I'm going to need to make it easily snapping in, so I'll have to change the shape up in general. It's super hard to put in words, but the next sketches will really clear things up.
.jpg)
.jpg)
.jpg)
.jpg)
.jpg)
.jpg)
.jpg)
.jpg)
.jpg)
Now to place them on the ring sides:
.jpg)
.jpg)
Making a few final adjustments, cutting some bits off, adding some new bits, etc - just to make it look nicer and have a nicer connection, and also to avoid painful skin pinching:
.jpg)
.jpg)
.jpg)
With the final ring model being:
.jpg)
.jpg)
.jpg)
Now I'm going to add the actual tool which goes onto the ring, that's supposed to press all 6 strings of my guitar. I don't actually need to measure the instrument itself, I will instead just make it as long as my finger is, with a little bit of extra length added. So that would be 10cm total, 100mm. I'm gonna make it 15mm wide, 100mm long, and it's going to have a slightly curved shape on the inside to fit my finger pressing it, and on the outside to have a nice protrusion. At first however I'll just make a solid block on the inside (and a curve on the outside), and only after that I will carve a curve into the inside as well.
So extruding and placing the model:
.jpg)
.jpg)
.jpg)
Putting them together into one body, and a few additional shape adjustments:
.jpg)
.jpg)
.jpg)
.jpg)
.jpg)
.jpg)
.jpg)
.jpg)
And a quick render in plastic to get the idea:
.jpg)
.jpg)
.jpg)
Now it's time to send this model to Cura!
First I'll send the model to MeshMixer. File > 3D Print > Select the ring and send to MeshMixer.
Here it is in all it's glory:
.jpg)
Now saving it as a .3mf file and opening in Cura:
.jpg)
Rotating it a bit here and there to see what would work best structurally for me:
.jpg)
.jpg)
.jpg)
.jpg)
Looks like the best position is upright. I'm going to have to fiddle with the snappy hole to remove the support, and I hope it won't actually break the ring itself, but this does look about right. I wanna make it a bit faster so the layer height is going to be 0.16mm, 15% infill density instead of 20% (I want it to be a little flexible, and again - faster made!), and actually - I'm making the Support only touch the build plate, rather than everything:
.jpg)
Because I don't want to risk breaking it when removing the support from more delicate parts, and because I'm counting on the snap hole being small enough to not generate too much spaghetti. I can deal with some spaghetti.
Also slowing down print speed to 40mm/s, because last time I recall seeing it higher - the results were very terrible.
I also changed my mind again and decided to go with 20% infill after all, since I am going to be using it extensively and it will likely break sooner or later anyway, with the preference being later. And one final change - layer size 0.2mm instead of 0.16mm.
Final model view:
.jpg)
Looking good.
Set to be ready within 1 hour and 9 minutes, but we'll see.
Next step for me is to buy an SD card reader, since my computer doesn't have a slot.
PRINTING AT THE LAB
Print settings:
Printed on: Ultimaker 2
Settings:
0.2mm layer height
40mm/s speed in Cura, but 90% speed on the machine
20% infill
Wall thickness 1mm
Material settings: material set to PCA
Calibration: Followed Ultimaker's calibration procedure
Note: On the final print, distance between the nozzle and plate was too small, so first layer of film was very thin and almost entirely transparent.
I used the Ultimaker 2 to print my model. After doing the calibration, I sent my file to print, and adjusted the speed to 90% of the original just to be sure. When doing the actual printing, I found that my ring is actually getting far too big. In fact it's about twice the size it should be. The height is right, and the string pressing component (the large pillar) is also right, but the ring itself is badly done. This means that during my calculation I missed something at some point.
.jpg)
.jpg)
.jpg)
Unfortunately right now I no longer can address this, apart from halving the size of the entire model, which I did. Halving the size, this should fix the ring diameter (I expect that the problem was because of the 2pi*r part, more specifically in the '2'), but will unfortunately shorten the string presser too much to be fully useful. Regardless, it's printing now, so that's what it is.
At 50%, I found it's too small. This means that my issue was not at the calculation stage (where, after checking the numbers, the only possible room for error could have been that '2'), but rather at some point during the modeling phase in Fusion 360. I think that the only way I could fix this is by setting the size to about 75% of the original.
This is because the width of the ring is 24mm at 75%, and my radius was 12.73mm, so 24mm is a very close approximation of 2 * 12.73mm.
Basically, at 75% the diameter of the ring will be very close to what I need, which is, practically speaking, enough for me.
One's too big, one's too small, the third - will hopefully be - just right!
I paused the printer to stick my finger through the ring part, it is unfortunately still too big. This makes it not usable for me.
60% of the original - final scaling change.
This is based on measuring the thickness of my finger, 1.7 or 1.8 cm approximately, and scaling the ring to be 1.9cm with change, accounting for the fact that the ring itself will occupy about that 2mm~ thickness difference, and hopefully the inner diameter will be just right.
Fourth attempt magic!
This size of the model tells me that it will take about 30 minutes to complete, which is great, because I just spend over an hour with these multiple many attempts.
Always make sure the scale is right, is the lesson here.
Even if the scaling is not correct on this one - I am absolutely not printing it again >_<. No, I'll just give it to a small handed friend who plays the guitar, and call it a day.
.jpg)
Observing the print, it looks like it's coming out okay. With 10 minutes left on the clock, it's actually been pretty fast, and looking pretty good.
.jpg)
After it finished, it turned out that 75% would have been perfect, and that I should not have stopped it to do it at 60.
OH WELL. It's a bummer, but it's a bummer that I can live with.
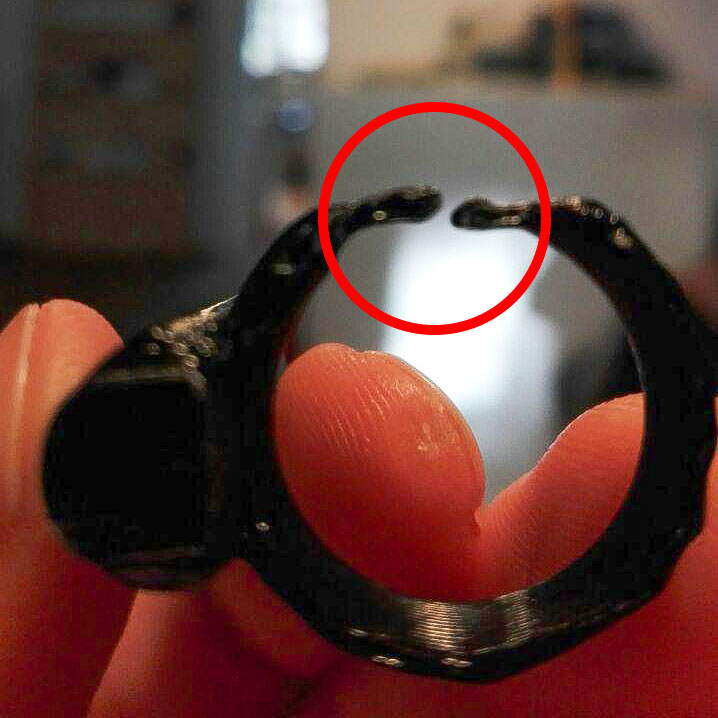
The objects itself came out right - it's flexible and bendable enough to snap in place as necessary. The snappy part didn't come out well - it's apparently too small to stick, and it also didn't print out in the exact right shape as I expected, which means I did not account for the actual size of the plastic stream from the nozzle.
Here is the final result:
.jpg)
.jpg)
.jpg)
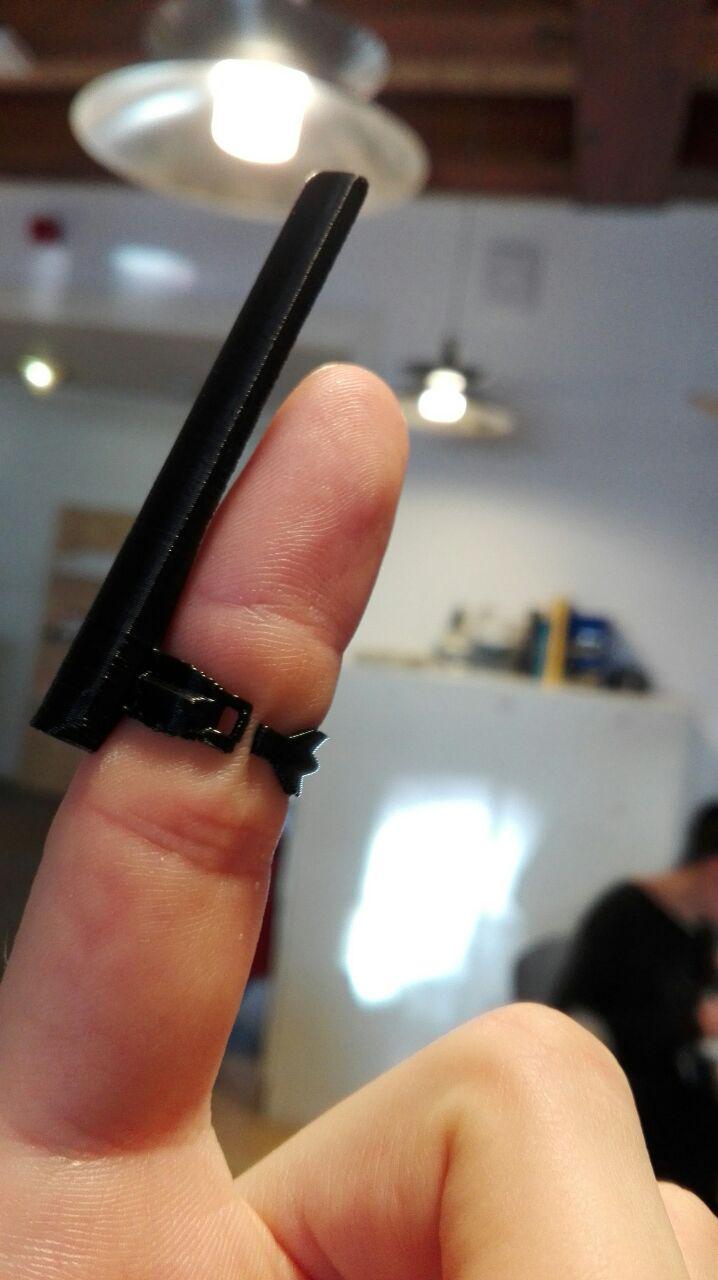
It's not fitting me, it's too short and too small. But the object is printed, it's form is about as good as it can get, and I am quite happy with it. As one final note, I found it quite interesting just how fine the 3D printer detailing actually is. I set the printed object next to my finger, and even though I used relatively thicker layer height when printing, I was surprised to see just how fine it is - much thinner than even the lines on my fingerprints.

Files - both the Cura file for the 3d printing and the Fusion 360 model file in a single RAR archive:
3D Print FilesBack home 3D Scan