Week 16: Wildcard (composites)
Download the code
Assignment requirements
The first checklist
Design and produce something with a digital fabrication process (incorporating computer-aided design and manufacturing) not covered in another assignment, documenting the requirements that your assignment meets, and including everything necessary to reproduce it. Possibilities include (but are not limited to) composites, textiles,biotechnology, robotics, and cooking.
The second checklist: Learning outcomes
- Demonstrate workflows used in the chosen process
- Select and apply suitable materials and processes to create your project.
The third checklist: Has your group
- Shown how you made your project
- Described problems and how you fixed them
- Included your design files and ‘hero shot’ photos of the project
Doing it
I could not think of how composites would be relevant for my final project. Somehow, I started thinking of canoes. Specifically, ribbed canvas canoes. After having looked at previous years' projects, the process of constructing an internal structure, covered in the composite, looked a lot like canoes. I'm Canadian, so why not?
I watched this tutorial for building boat hulls in Fusion:
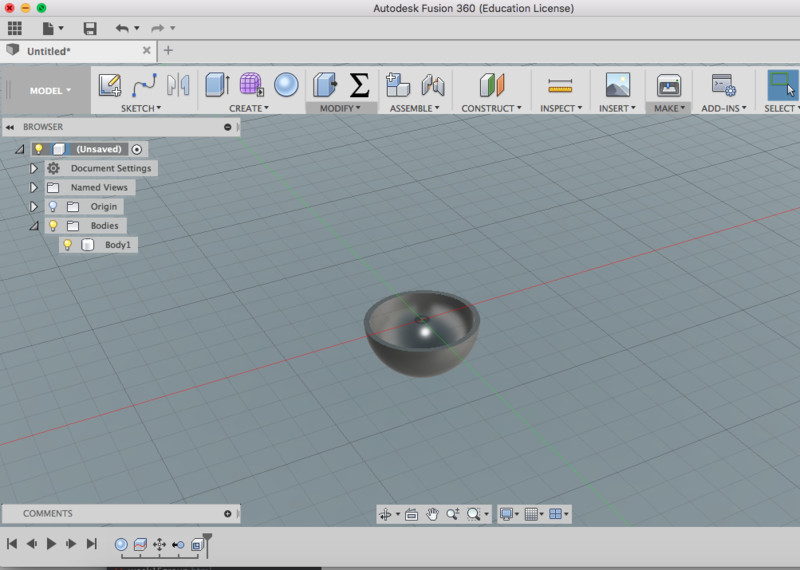
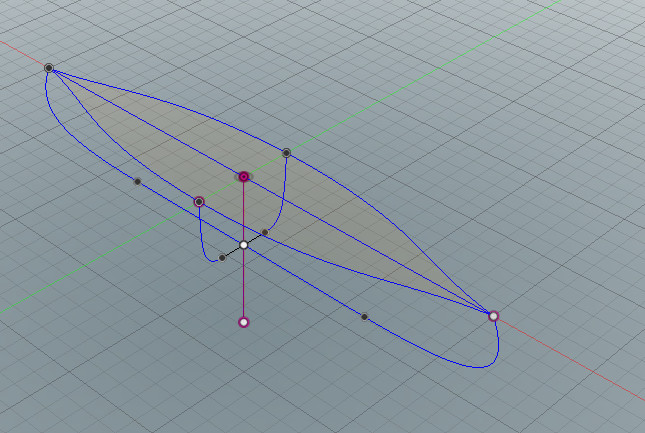
Because it's my first time trying to use Slicer, I created a hollow half sphere in Fusion 360 and exported it to Slicer to see what it would do with this shape similar to a boat hull. It looked like it worked fine.
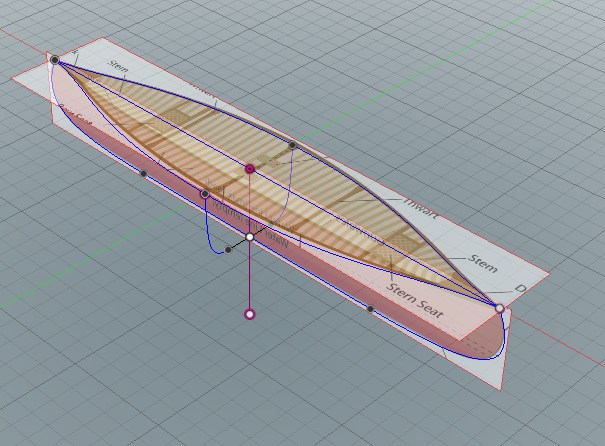
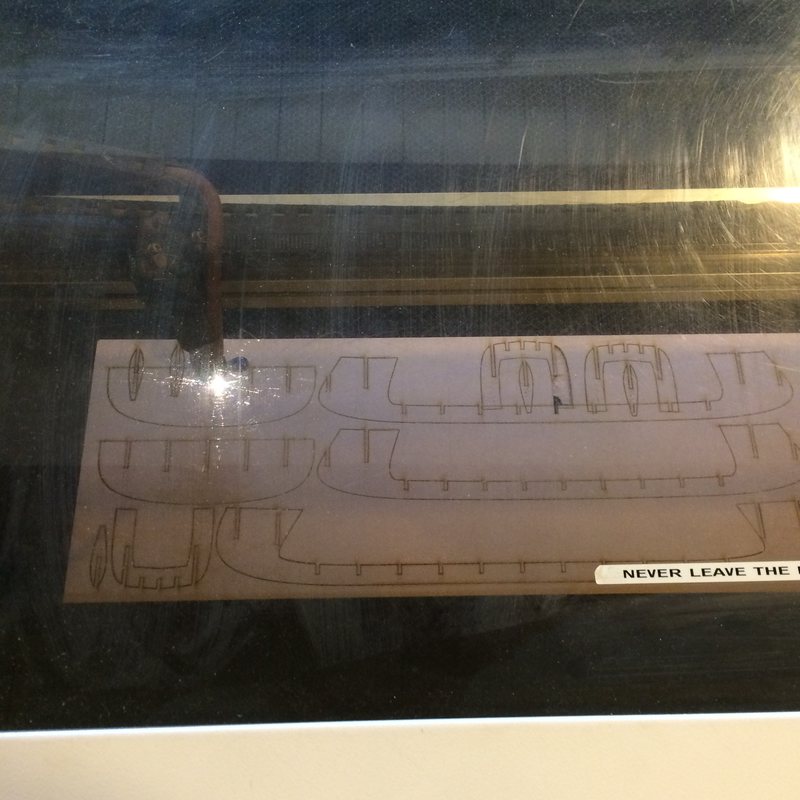
Then I looked only for images of canoe profiles. Specifically I wanted the top profile, the side profile, and a cross section at the middle of the canoe. I assumed that I could loft it between these shapes. I sed the top and side profiles from here and the cross-section at the middle from here.
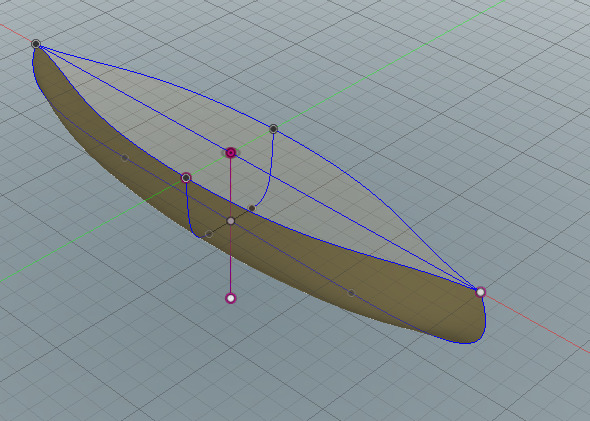
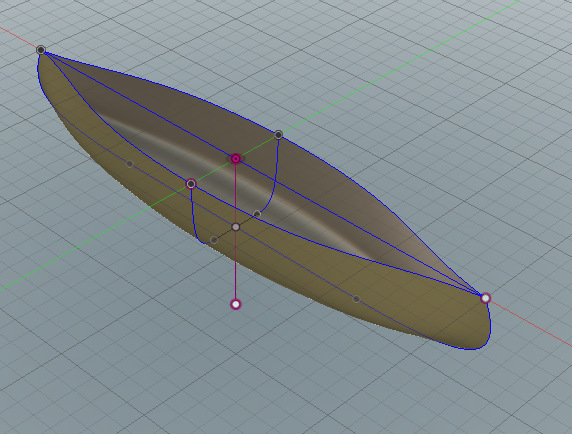
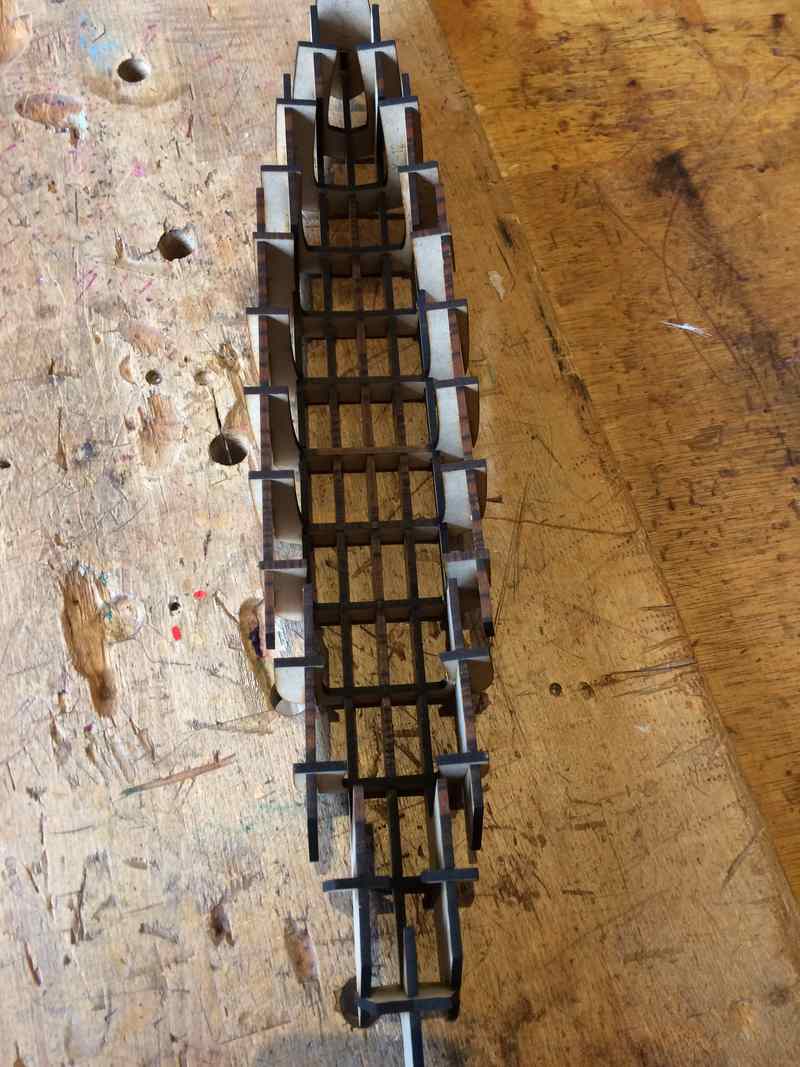
get images for canoe profiles. cross section:In fusion I used the images to create sketches. In the patch environment I loft between the sketches and then used the thicken command to … thicken it.


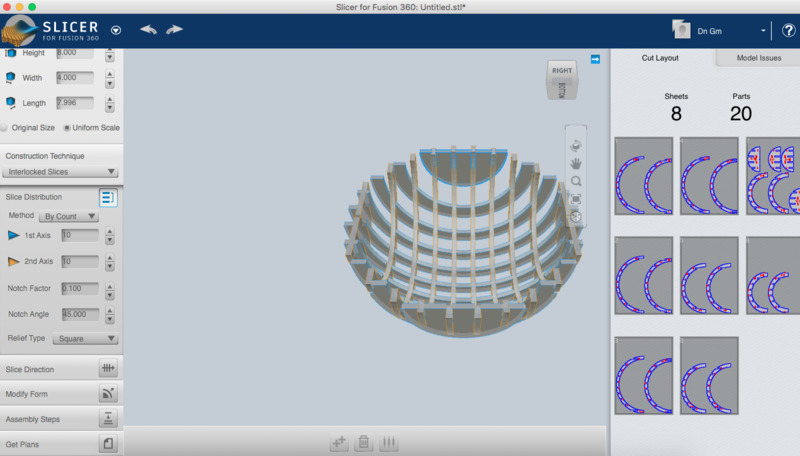
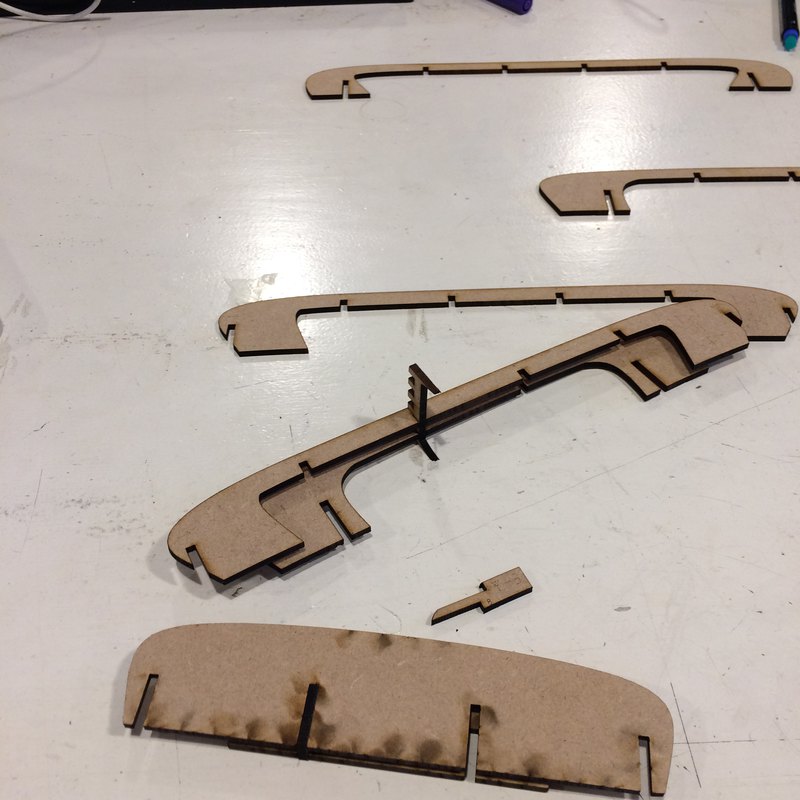
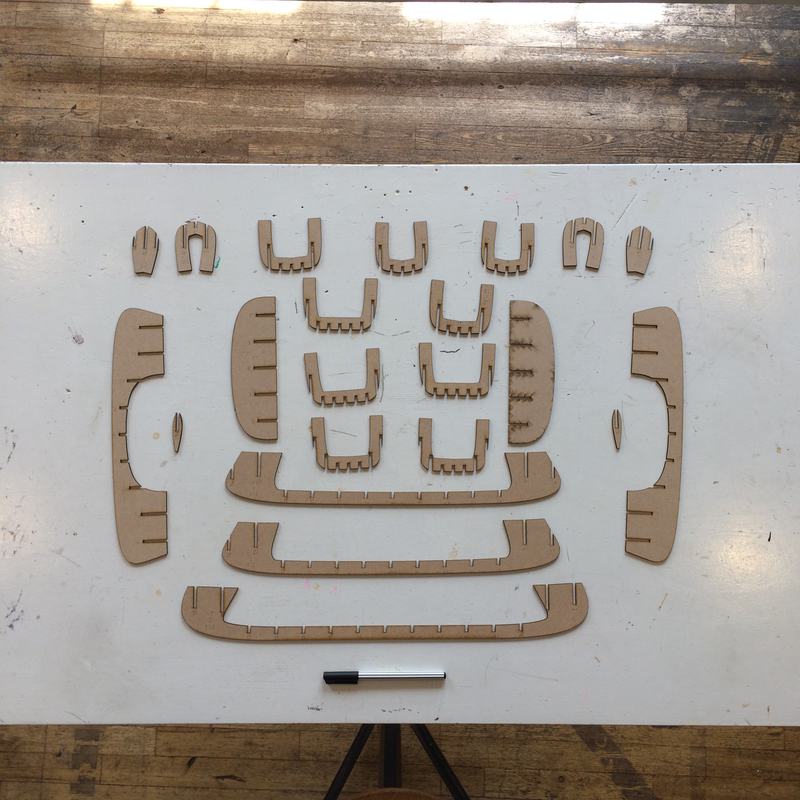
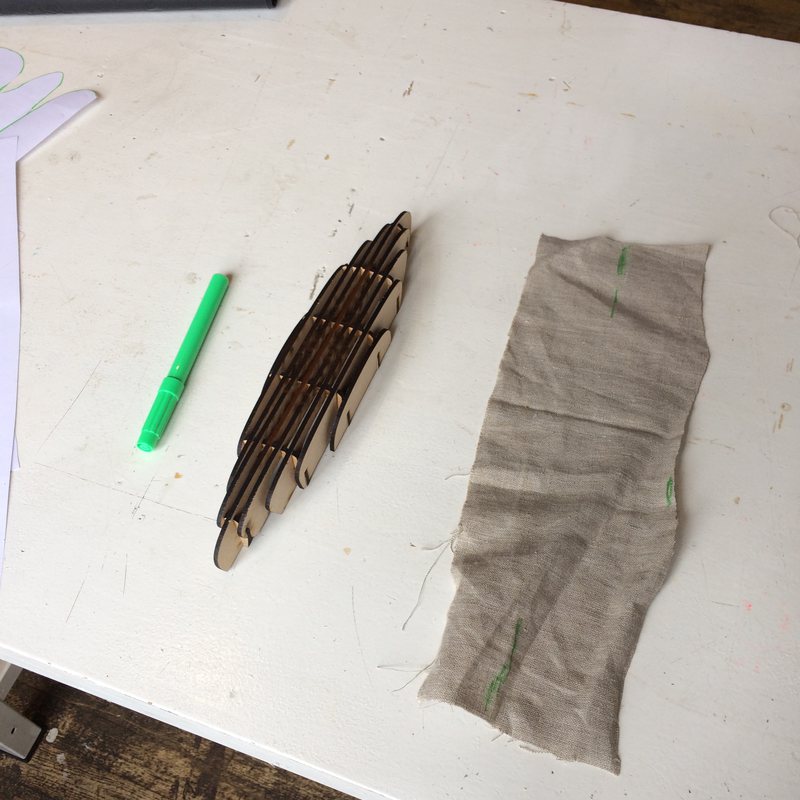
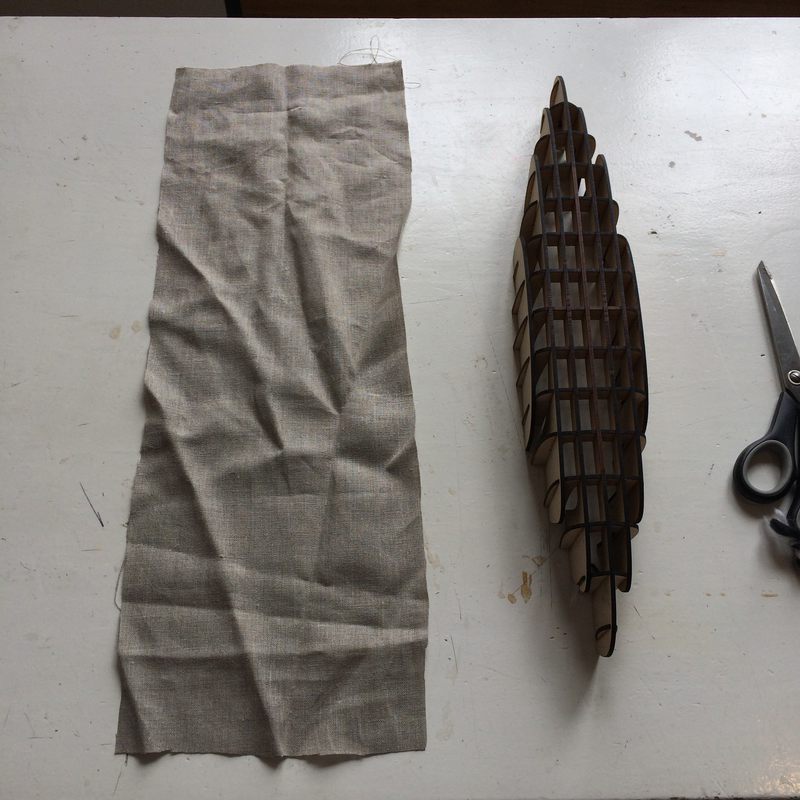
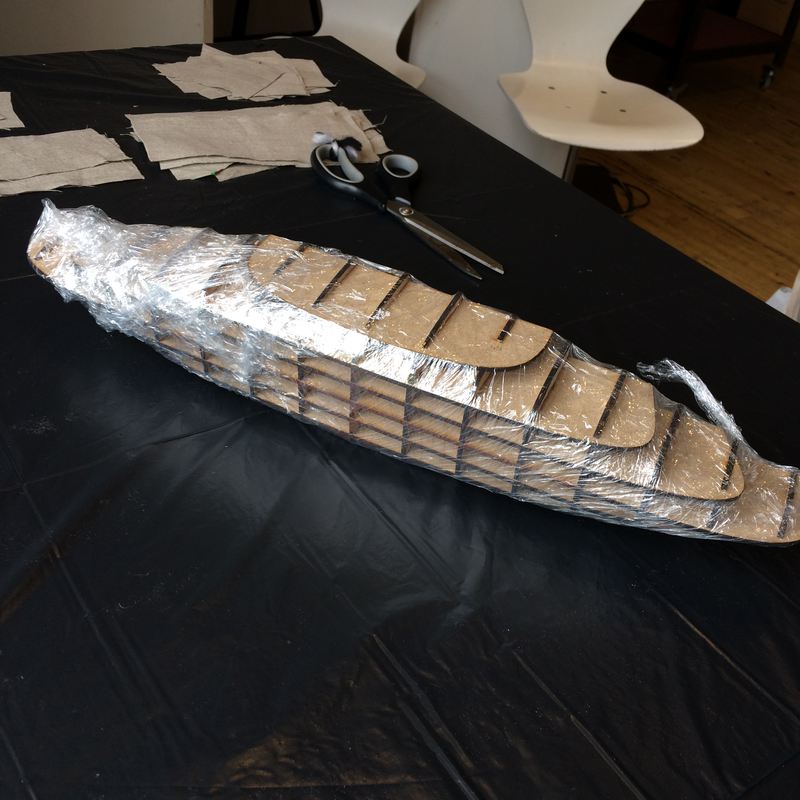
This was then exported to Slicer. I created a custom material for our MDF, with a thickness of 3mm, the dimensions for the sheet, and the kerf of 0.18mm, as we found in our first laser-cutting group assignment. I played around with the number of vertical and horizontal slices to try and find a configuration that gave no errors.

Then I spent for ever trying to get the kerf right. It turns out that I was getting my units confused between cm and mm and was adjusting a kerf of .018mm, which is negligible. Once I figured that out, my test pieces fit together perfectly.
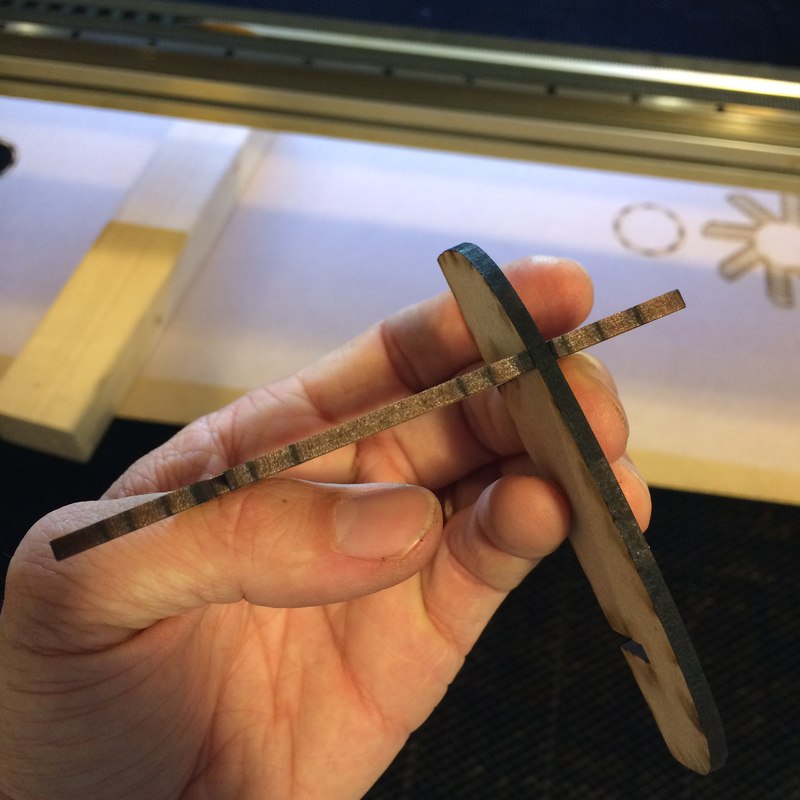
Jelka asked me about going from Slicer to Lasercut5.3. I had a few hiccups that needed rectifying. First, the export units in Slicer should be "mm". Second, sometimes the vectors don't import into Lasercut5.3. I could not find a reliable solution, but I had the feeling that when in the open-file dialogue box it helped to single-click the file, give the software time to "think", and then click the import (I know this sounds crazy). The other solutiosn were to restart the software or restart the whole computer. When the vectors were imported, in the menu you need to select "Unite lines". And final, to engrave the text on the pieces to assemble, you cannot use the Engrave toolpath because it is expected closed shapes. You must set it to a CUT toolpath, but the strength and speed to engraving settings. Speed 400 and power 15 gave great faint lines.
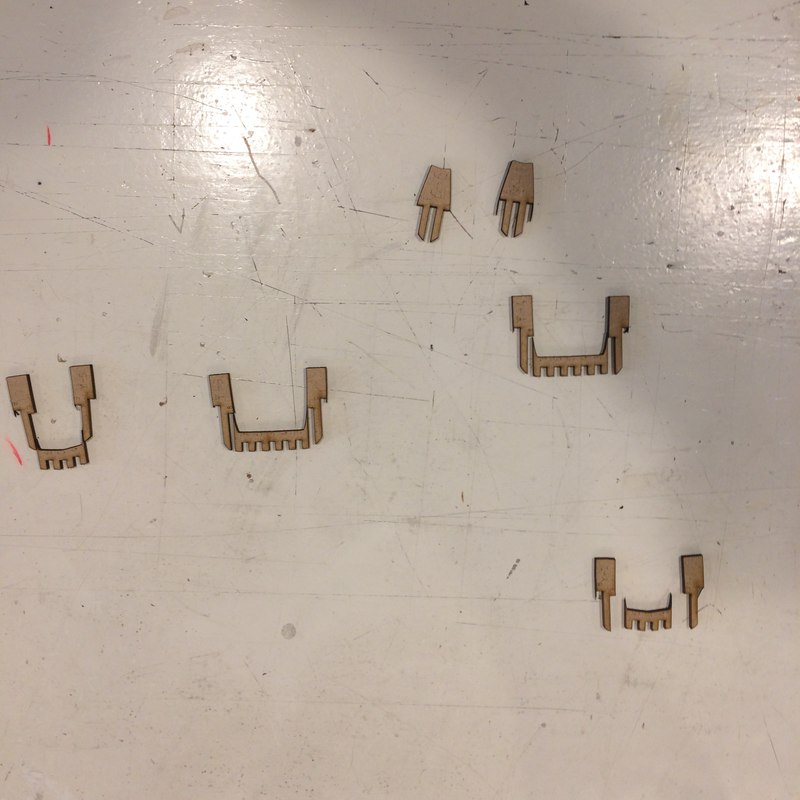
My first fully-cut model had problems. Some slices had areas that were too narrow, and broke apart. Emma also said "Are you sure this is one square foot?" … Since the parts had broken I though, well, might as well enlarge it. Do you think that didn't create more problems? You are wrong. In Fusion I tried modifying the main sketch, only for the loft to compain and not reloft. I never solved this problem. So in Slicer I resized the object to 50cm long.

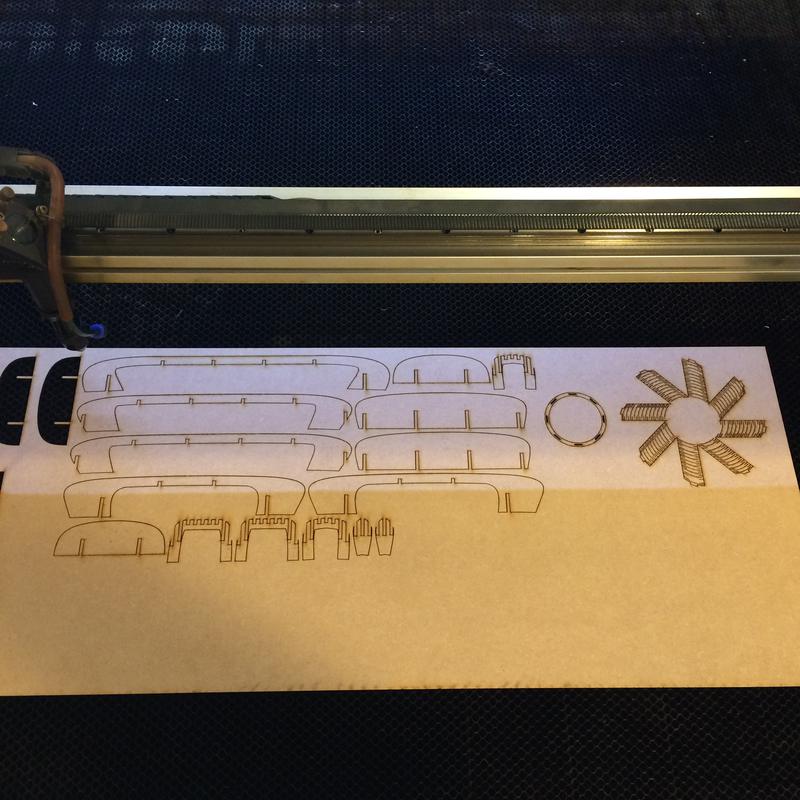
Then I started cutting late in the evening, using the same settings as I had been for the previous few hours, and it did not cut all the way through the material. Great. Try again tomorrow morning.
Jelka suggest a tutorial for turning objects faces into flat surfaces:
This appears to be for a paid service, and may be more involved than I need for the boat.
I also wanted to look at how traditional canvas canoes are skinned, and found these videos of a summer camp that had made their own canvas canoe.
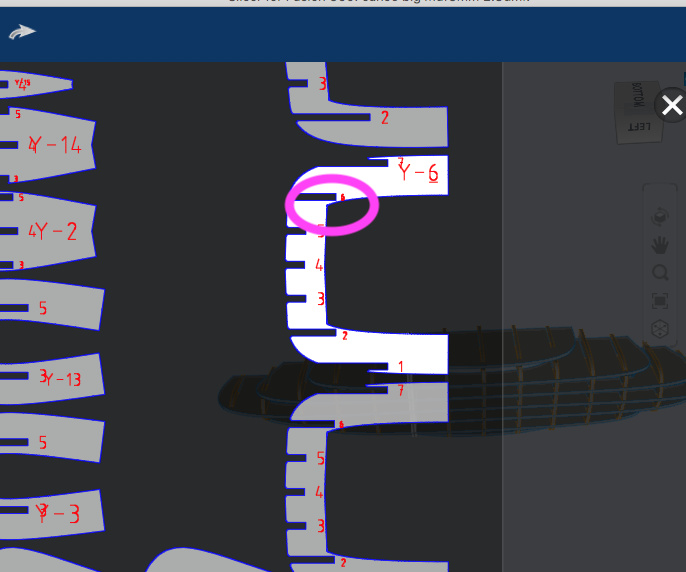
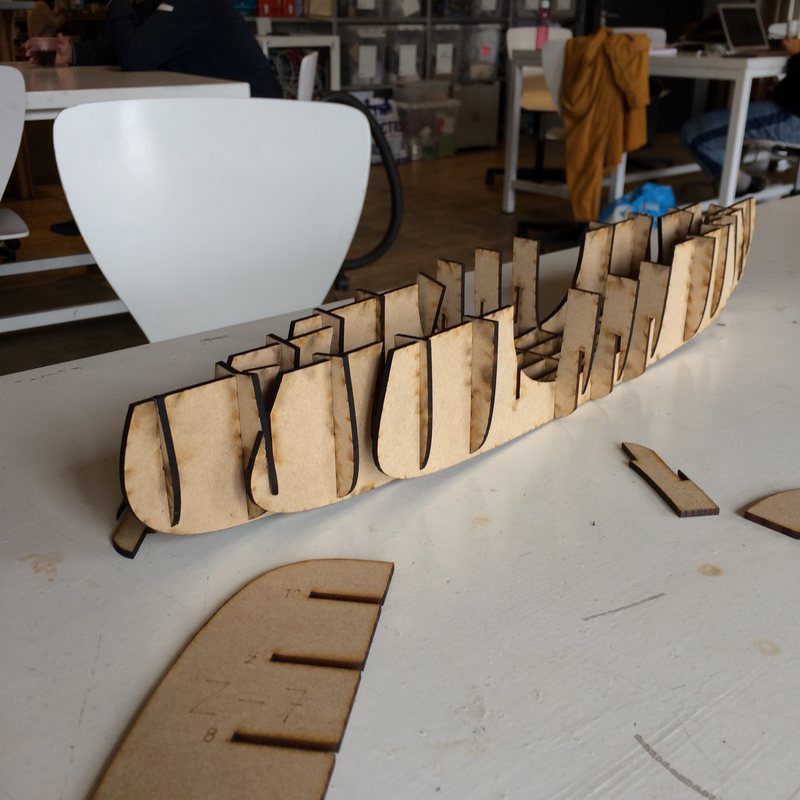
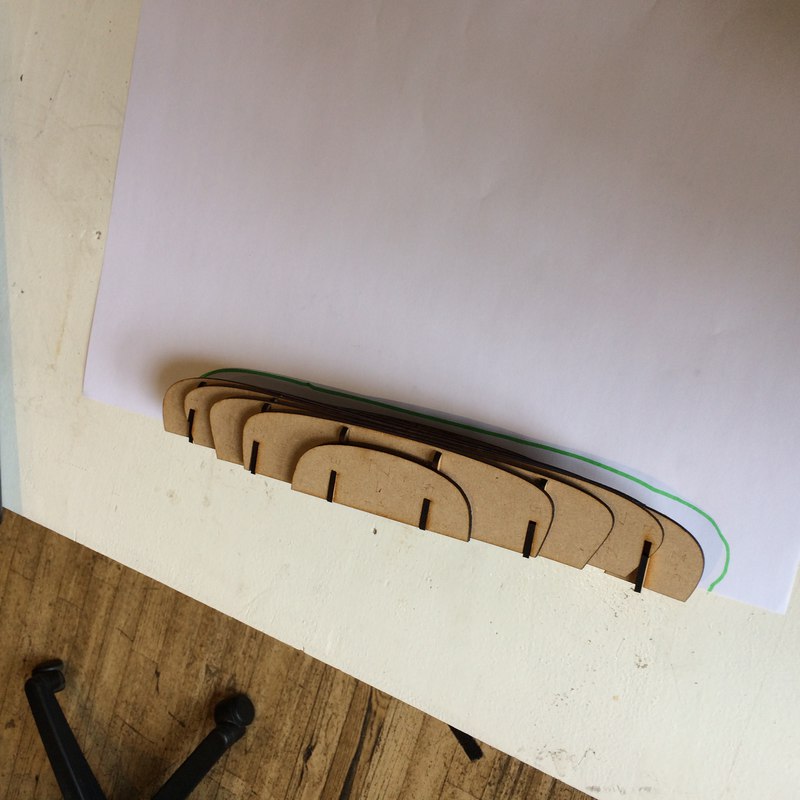
Some pieces in slicer had areas that I thought would be too thin and would break when they were laser cut. I tried to move the pieces around to make a better fit, but moving one always affects the cuts on other pieces. I deleted the problem slices in the model, and saw that the model would work OK without them, so I chose to cut the pieces anyway, and if they broke it would not be a big deal. You can see the thin part isolated in the turquoise oval in the first image:
I stayed late on Thursday, agonising over that kerf problem, and then I went ot finally cut out the parts for the canoe, and the laser did not cut through the material. You can't see it, but that's what's happening here:
I went home, dejected. Someone at the lab suggested that the lenses and mirrors needed to be cleaned. The next day, Henk cleaned the machine, and tested to small squares that cut fine. So I prepared to cut again, decided to do some small tests, and it would not cut through again. Something was up. I took a look at every single number in the toolpath configuration and… There is was. My laser problems were from a low corner power. I must have restarted the programme on Thursday night, and it defaulted to a corner power of 10, which was being used to cut all the curves. After testing some settings, everything works well again: Speed 40, power 100, corner power 25.
Here I am assembling the model:


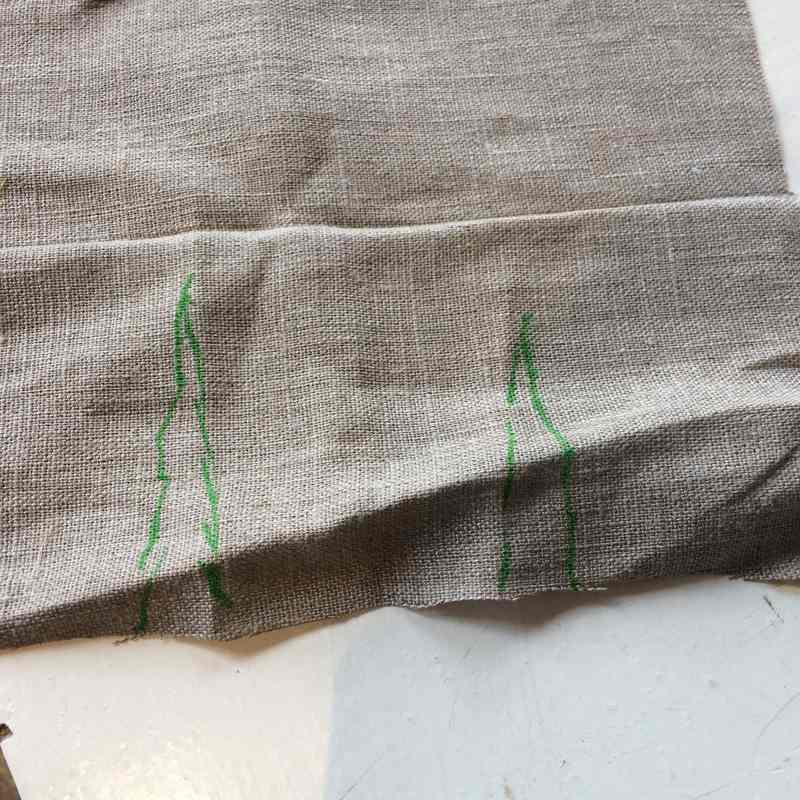
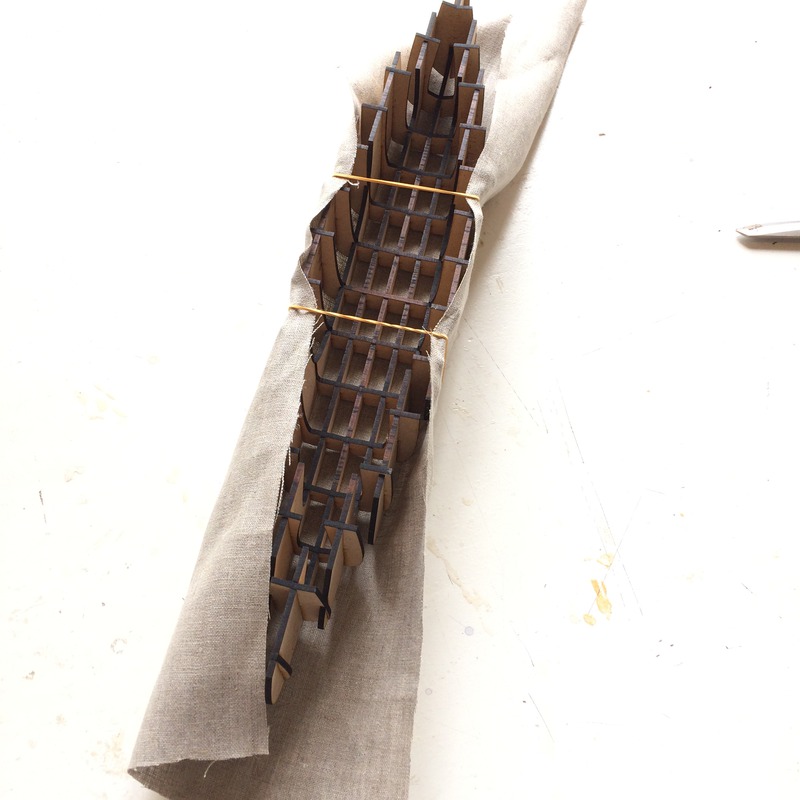
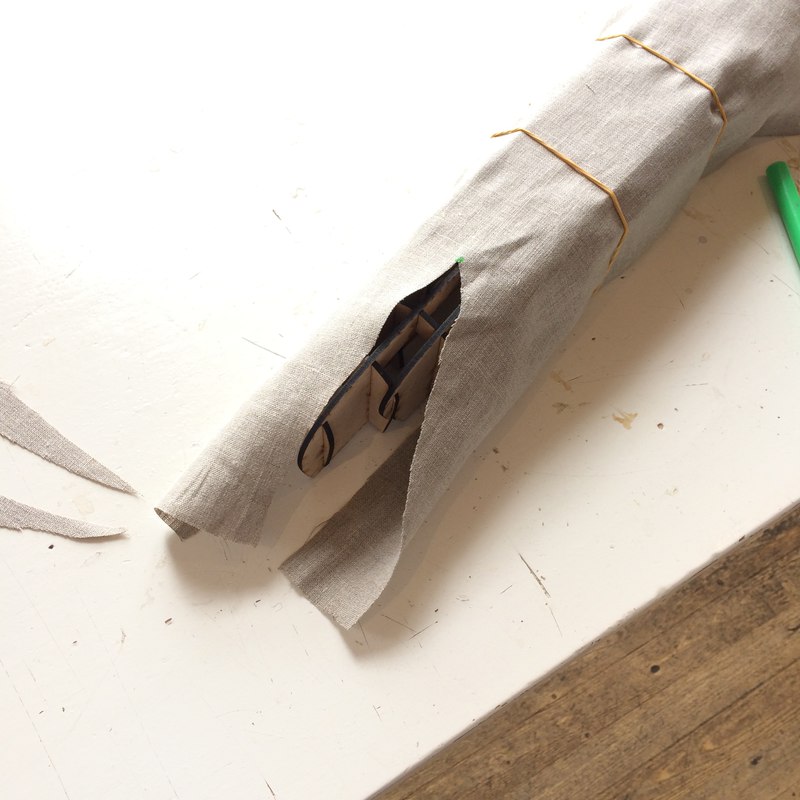
I tried to figure out what shape the fabric should be in. Real canvas canoes appear to stretch the canvas around the frame, but you can see here that this builder creates a dart around the bow and stern:
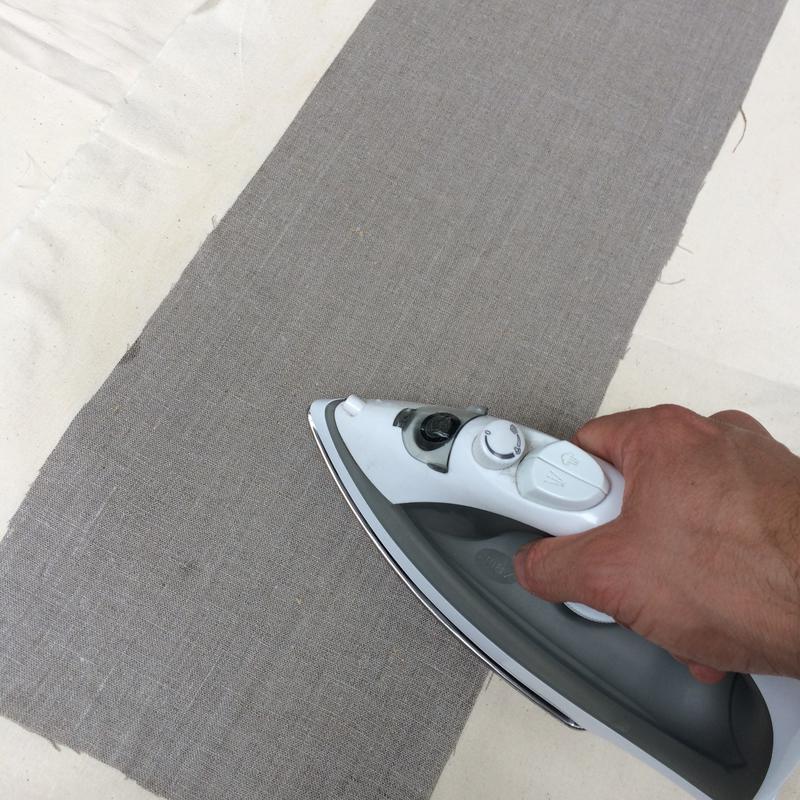
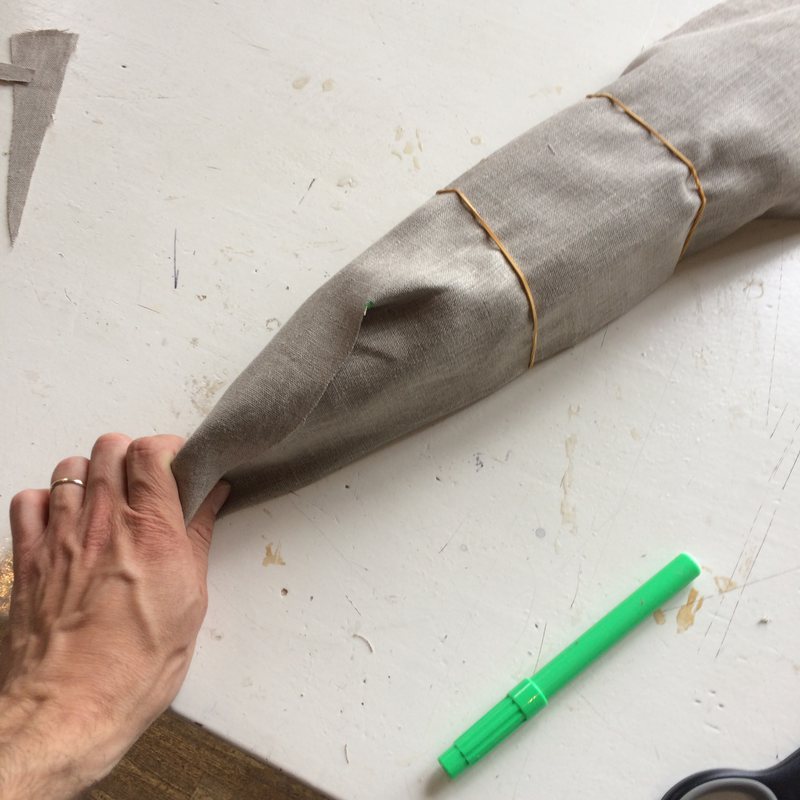
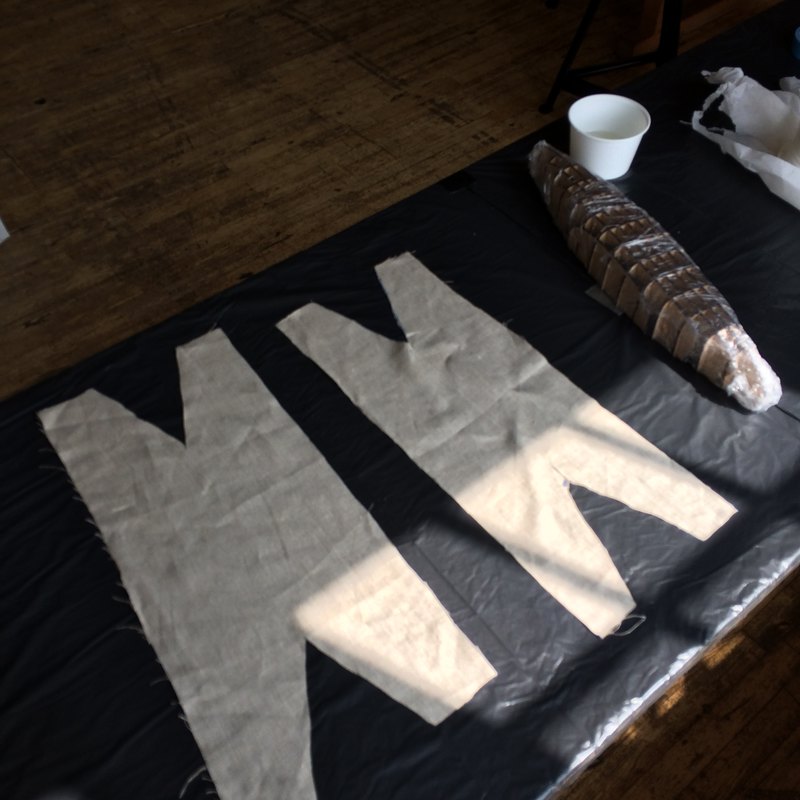
First I tested with the smaller model that I had cut previously. I rolled it on paper and traced around it. I cut fabric like that, with two darts on each end. I sewed one of the darts to test. It was too bulky to be gooped and cured. Emma suggested stretching it over and doing one dart along the bow and stern (like I saw the real canvas canoe done). I tried that. I ironed the fabric to make it easier to work with. But such a long dart was bunching. I decided then to do it paper maché style, with many smaller strips.
Paper and double darts:


Single darts:

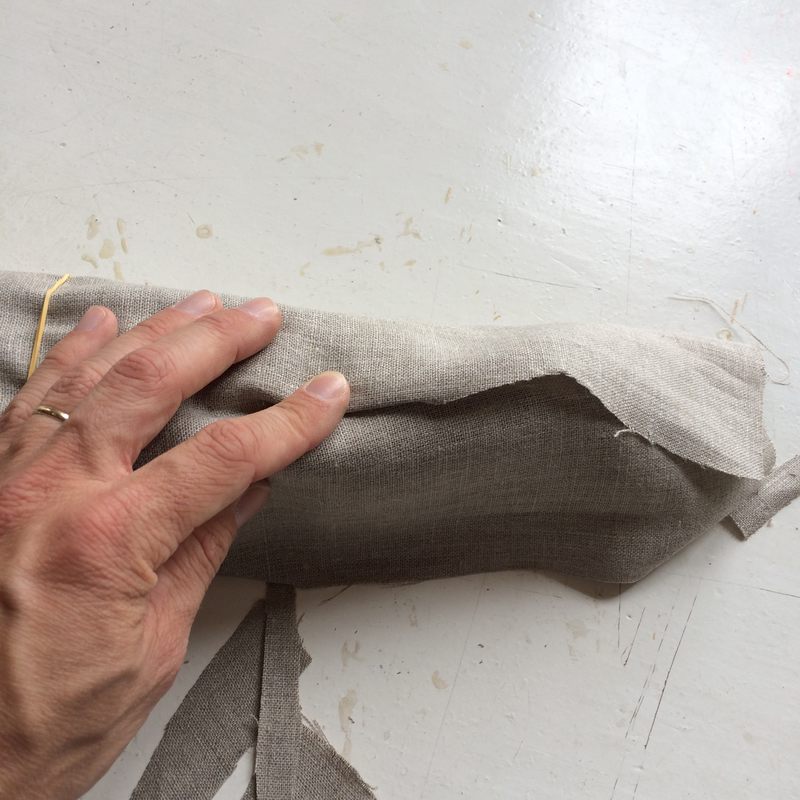
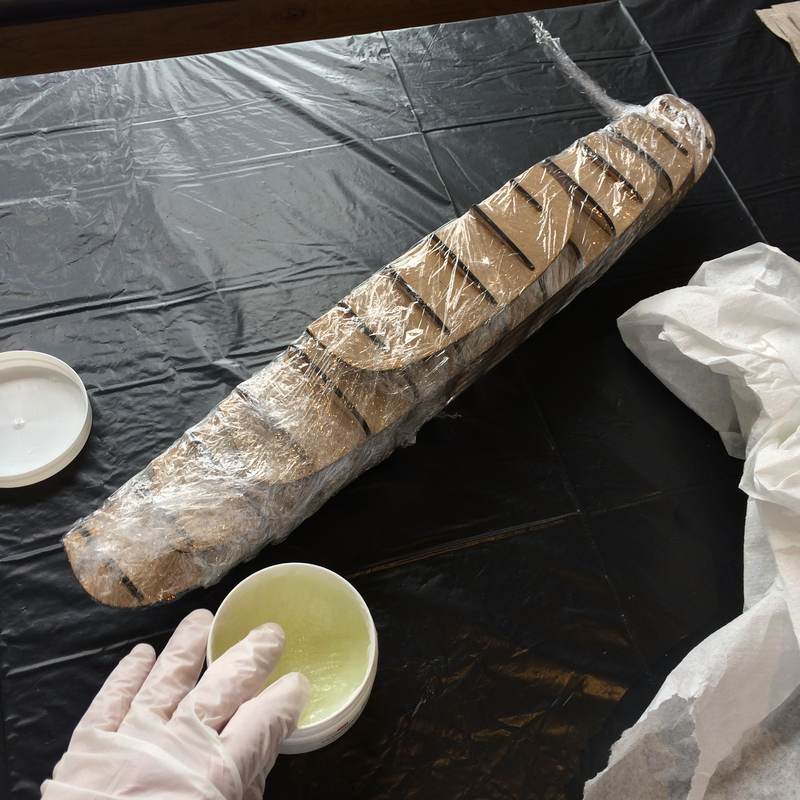
The process of making the composite is quite similar to moulding and casting. I used the softest canvas that we had (so, not burlap), and cut it into small strips. I covered my mould in plastic wrap, and then smothered that in vaseline.
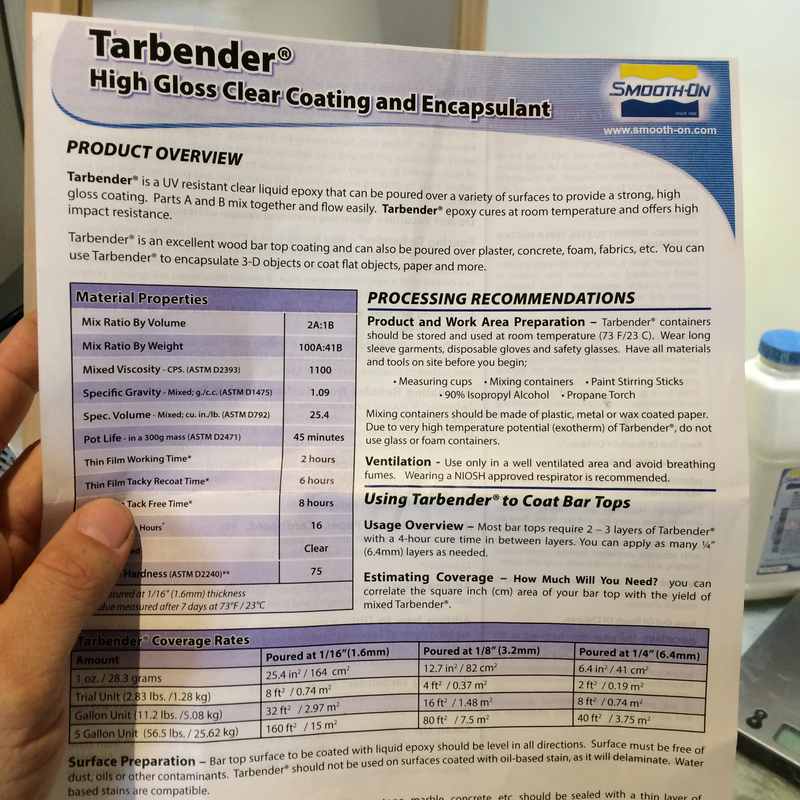
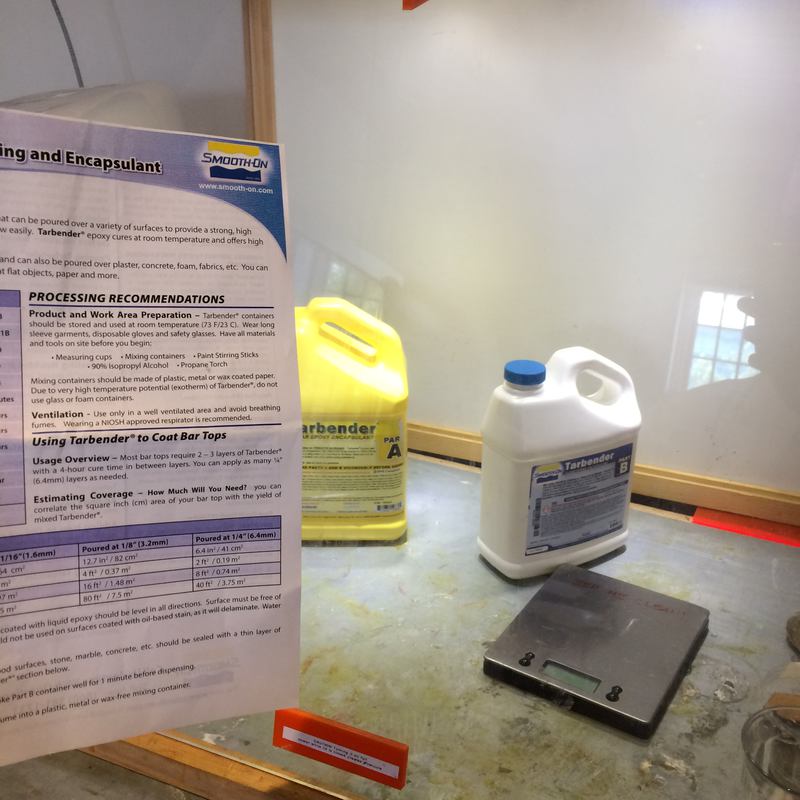
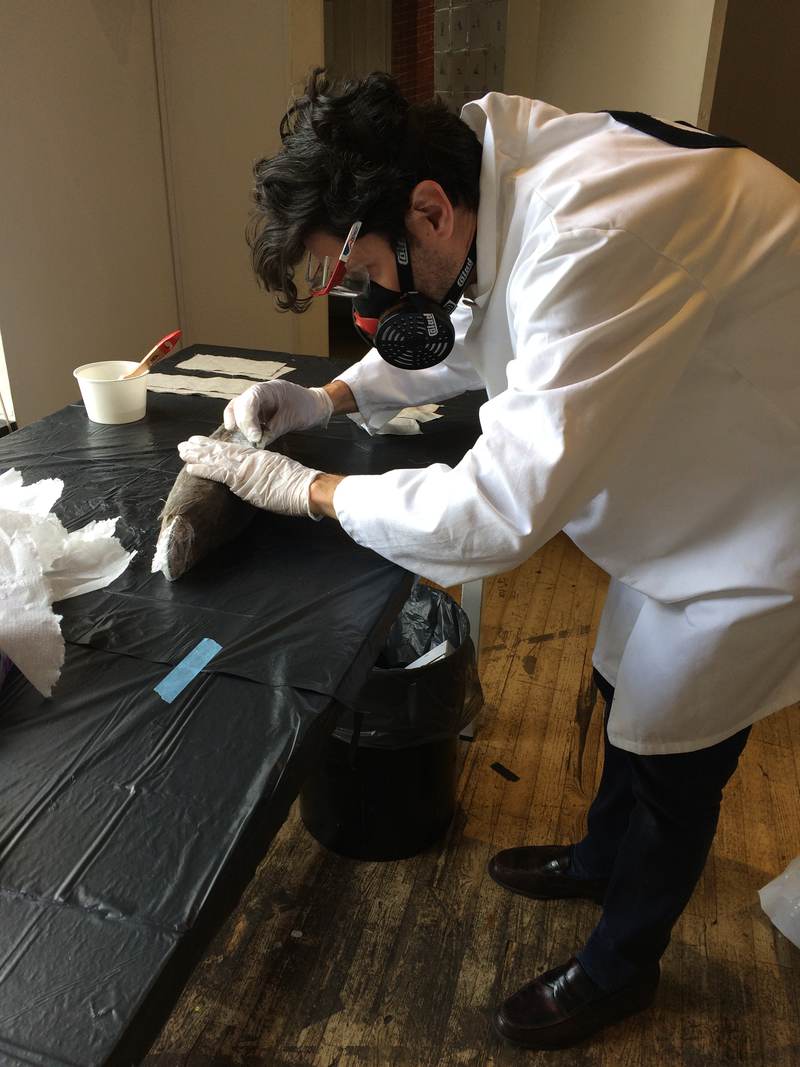
The epoxy that I used was Tarbender, which in the global review Neil said is not suited to this application. Although, everyone in Amsterdam had good success with it. Tarbender cures in 16 hours, and has a pot life of 45 minutes, which seemed like a good amount of time to work with it. I read the safety sheet, covered the table in garbage bags, suited up with safety equipment, shook up the two components (as advised on the labels) and mixed the two components in the fume hood, and then remixed them in a second pot, as the safety sheet advised. I then painted the epoxy onto each strip, and layed them around the mould. I did two layers of fabric. Then I wrapped it in vaseline-smothered parchment paper, and enclosed it in a vacuum bag. I haven't been able to visit the lab since, so I'm not sure how it turned out.

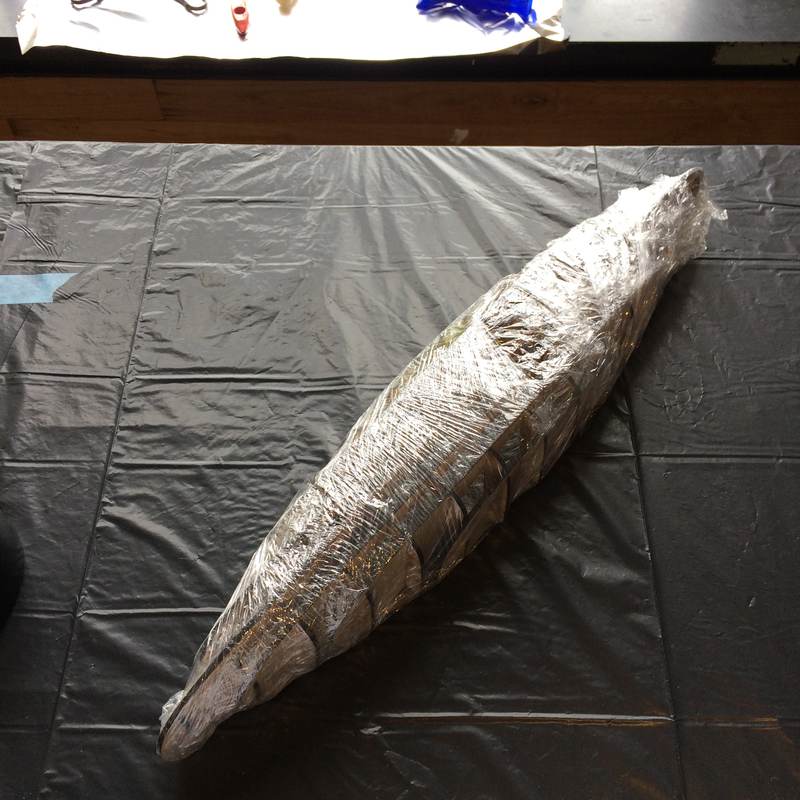


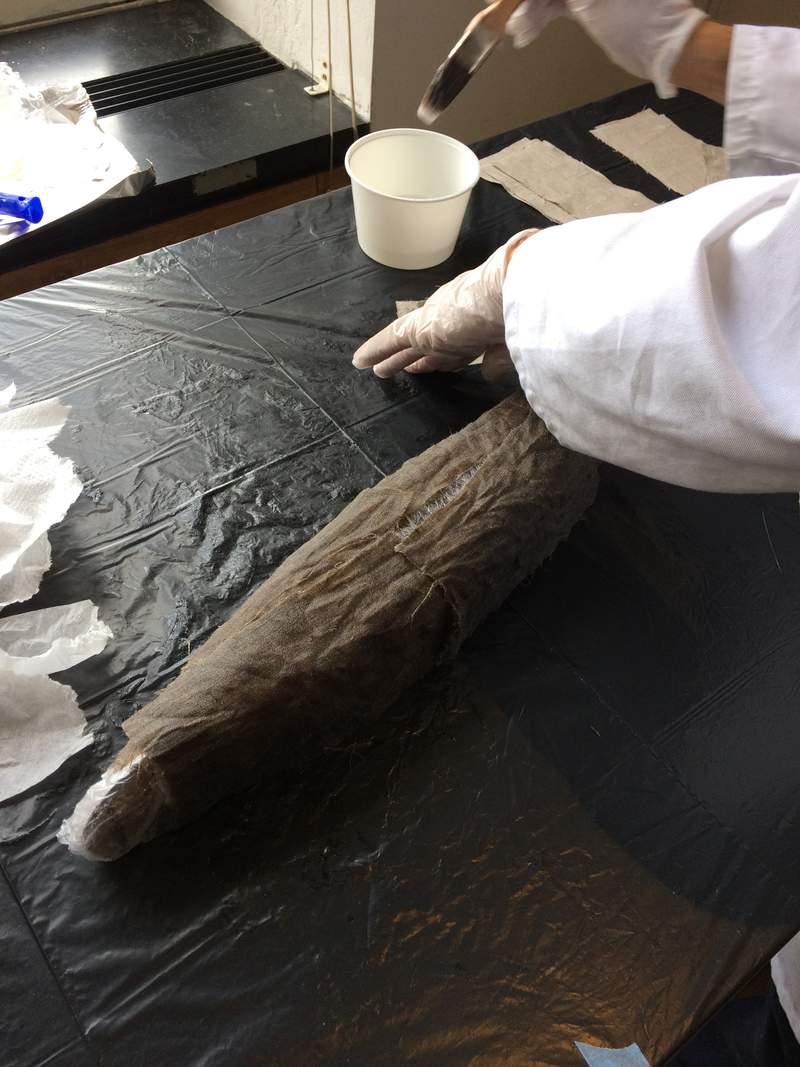

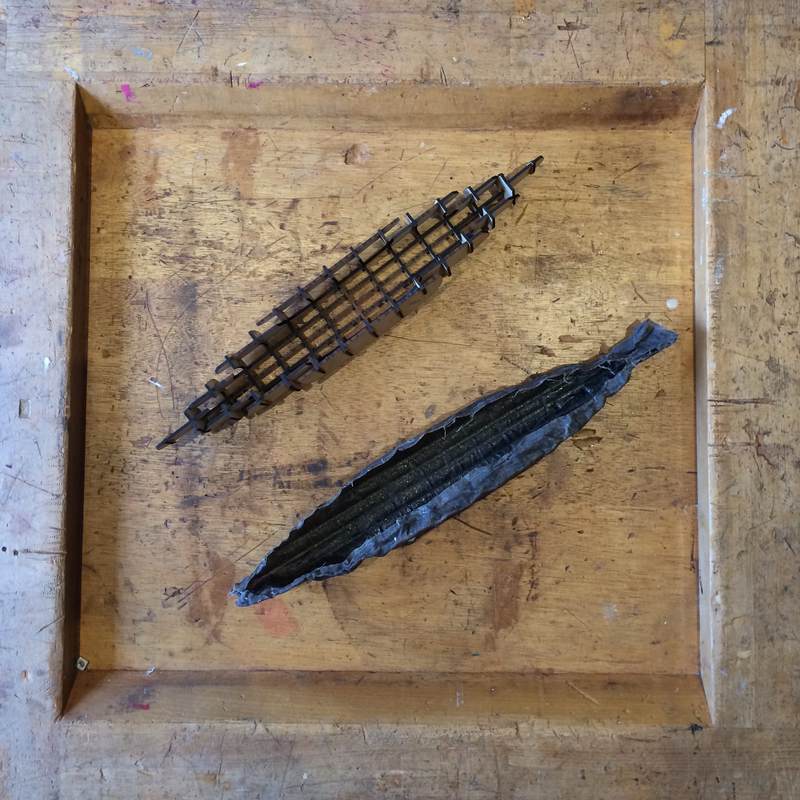
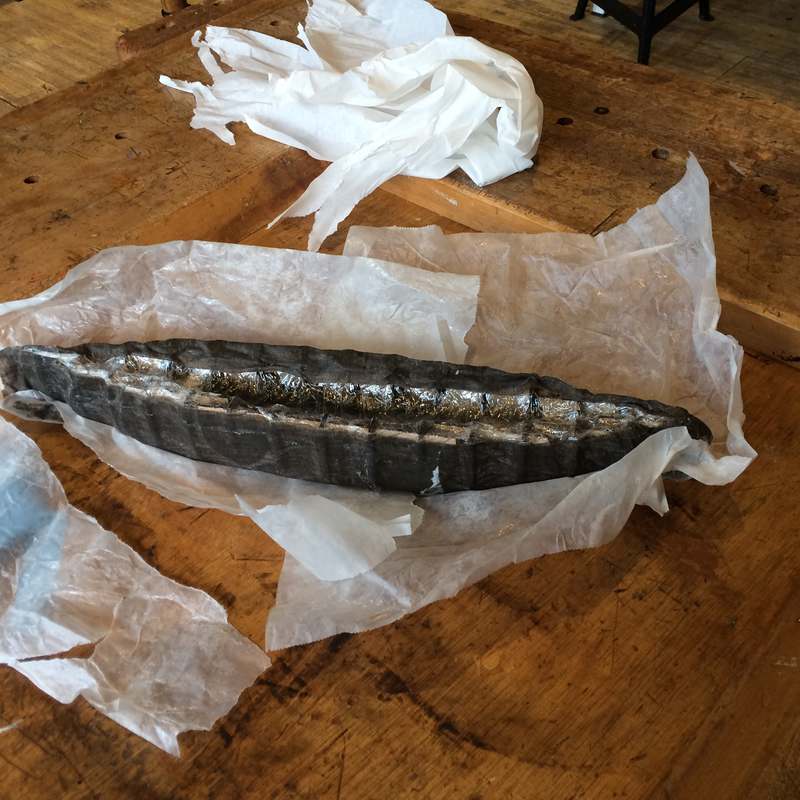
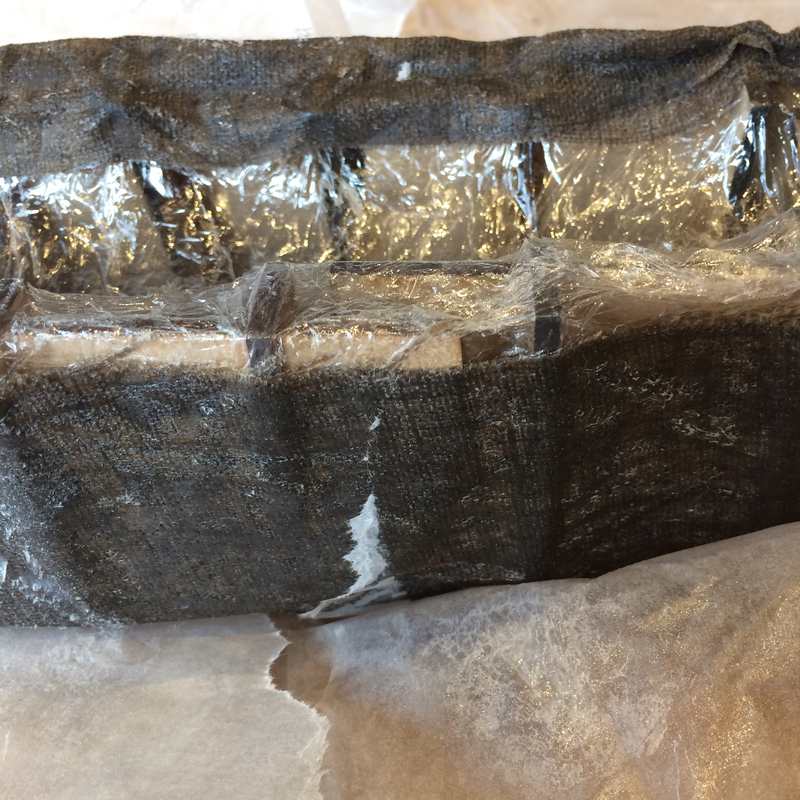
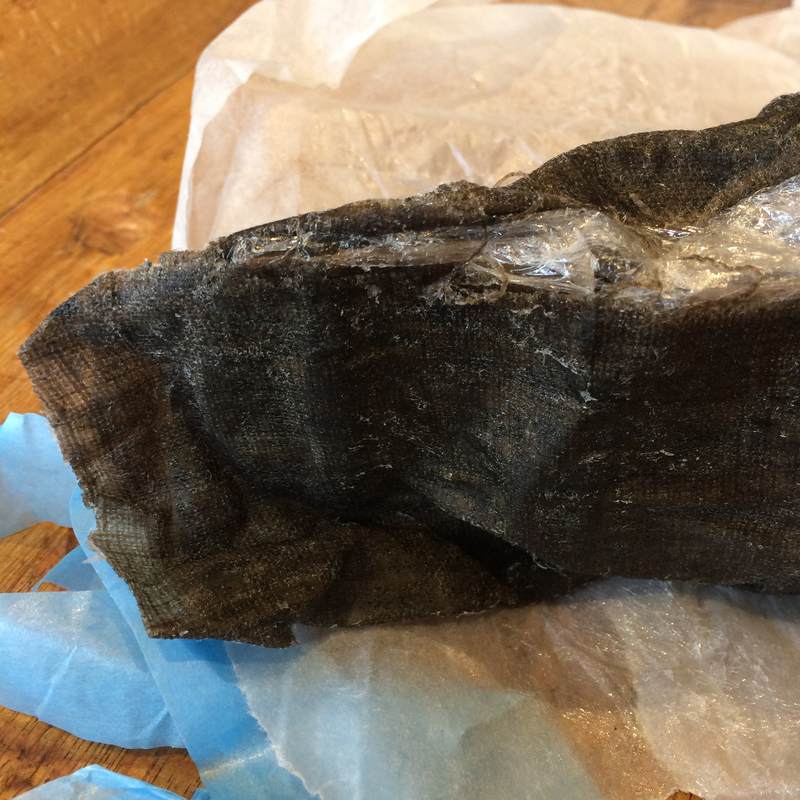
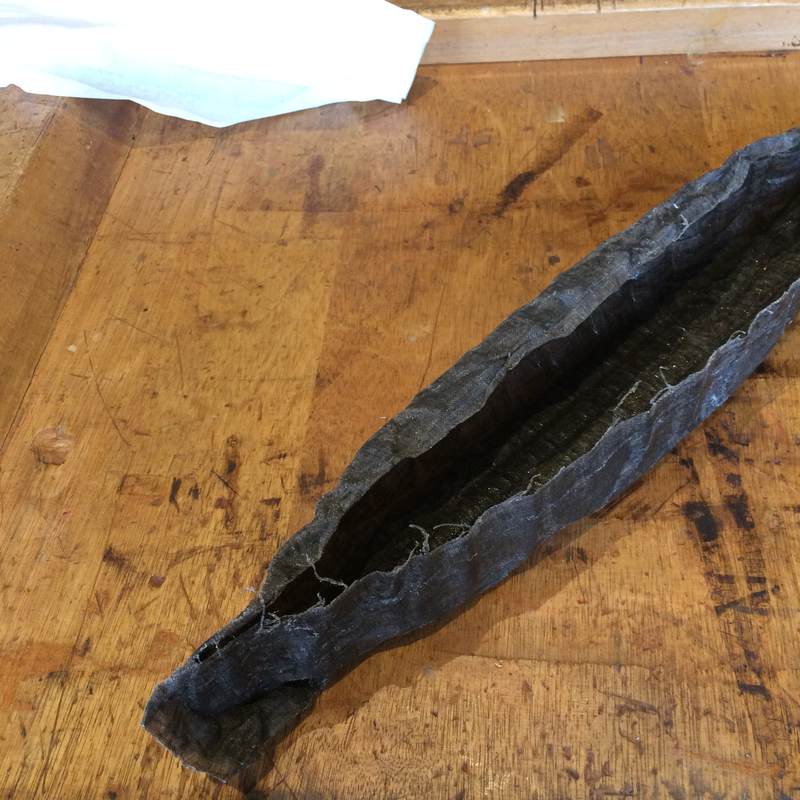
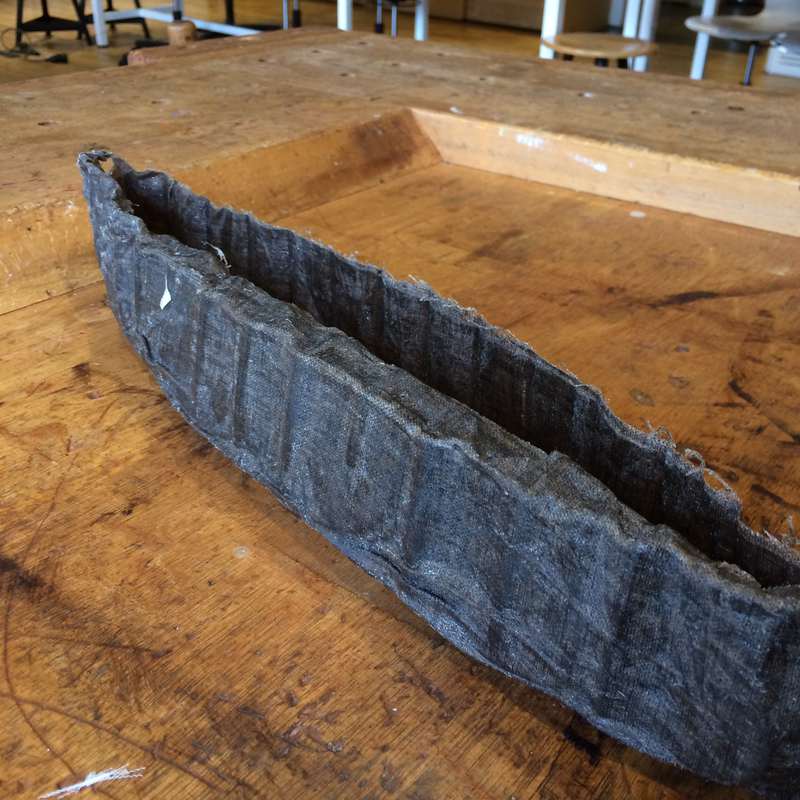
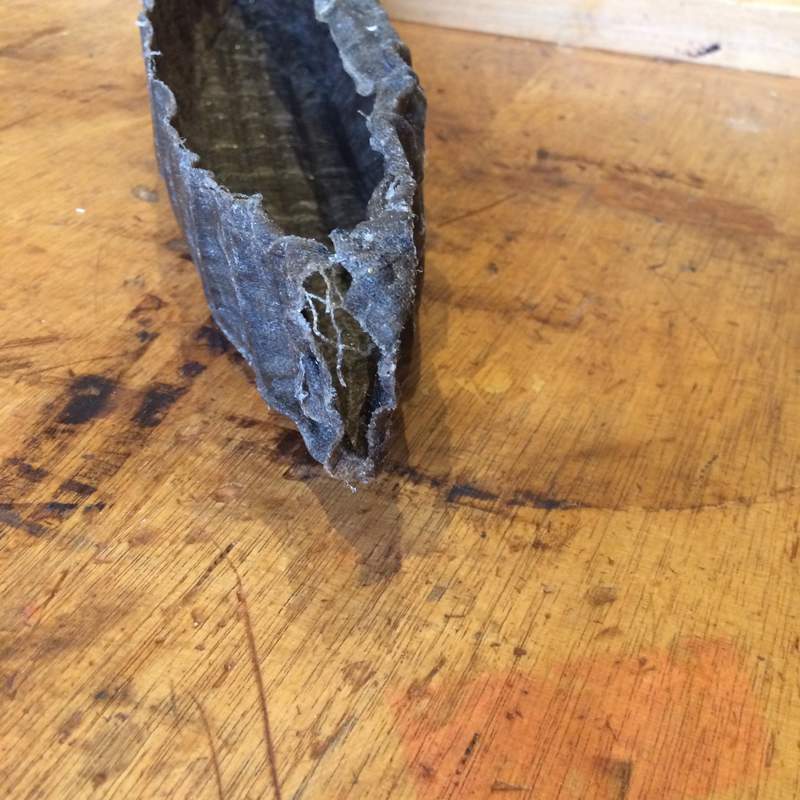
So… I unwrapped my canoe. I took some pictures. I didn't like it, and it was all greasy from the vaseline, so I threw it in the garbage. Later that week I was with my kids, and needed to free up some space on my phone for some adorable pictures… and I deleted the canoe pictures without realising that I hand't offloaded them. So, guess what? I did the composite again. Yay! I followed the same procedure as before, but this time, I cut the fabric differently. I tried it closer to how the canvas is put on real canvas canoes, with a dart for the bow and stern, and I did two layers. Here are the pieces of fabric, and the canoe in the vacuum bag.

When I unwrapped the canoe, there were some obvious problems. The first is that I hadn't used enough vaseline and some of the parchment paper was stuck to the model, though it cam eoff fairly easily. The second was the outline of the mould ridges in the fabric. This was obviously not the right kind of mould for this shape, and I should have done a two-part mould that was 3D milled out of foam. Also, the bow and stern of the boat were not great. One was folded over, the other had a gap in it. This was a difficult shape to wrap elegantly, and perhaps it would have benefited with more careful attention to darts, and even to sewing into shape before applying the epoxy. The process also crushed the model slightly, though it mostly kept its shape.

The takeaways
To do this better next time: use a two-part 3D milled mould, pay more attention to the shape of the fabric.