WEEK 10: MOLDING AND CASTING
Day 1
I’m incredibly excited about this week. I’ve been waiting for this since week 1. Now that I’m familiar with the milling machine, I know what to expect. More or less.
So this week we’re basically designing the positive of a mold to mill in wax, to then cast a negative silicone mold from it, and then to cast a positive of the object we wanted in the first place from the silicone mold we cast from wax mold. It sounds confusing but it’s fairly straight forward. There are simpler ways to make molds, mainly because generally speaking you start from the positive and make a mold out of it, but Neil wanted to force us to use the milling process for this particular assignment.
I think it’s a good way to get a cleaner result, seeing as if you were to make a silicone mold from a 3D printed positive, chances are the silicone would pick up on the imperfections of the plastic in each layer of the impression. That is, unless you have a very high resolution 3D printer. Milling wax leaves a cleaner surface than most low cost 3D printers.
This is really useful for small runs of production because you can cast out several silicone molds and start “mass” production, or as mass as you can get at this scale.
Day 2
So, after trying to make an interesting design in Rhino all weekend, and failing, I decided to use this design from Thingiverse:
https://www.thingiverse.com/thing:1897060/#files
… as a basis for my mold.
Turns out that what I wanted to do, and this will come as no surprise by now, is much too complicated and is also beyond my current abilities with the design programs.
What I had in mind was to make a two piece Ice Tray that in the form of little Thwomp shaped parallelepiped. Thwomp is an enemy character from Nintendo’s Mario Bros. However, it became quickly apparent that it was too advanced a shape for me to design from scratch in Rhino, or any other program I have available.
Instead, I decided to make a one part, one side mold, but pushing the limits of the amount of detail and precision that could be achieved.
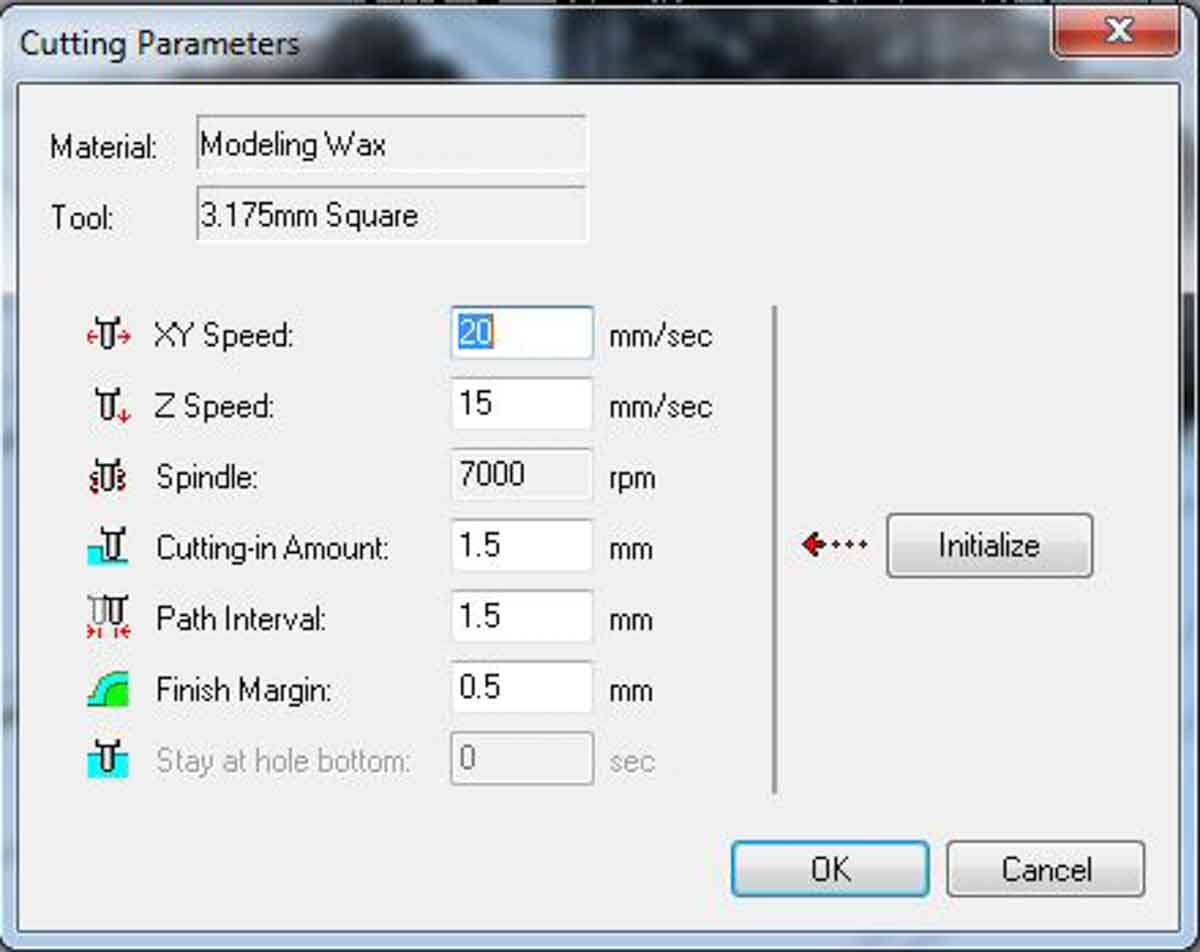
Taking that into account means that the maximum depth I can achieve is the size of the tool I’m going to use, which in this case isn’t much. The smallest tool I’ll be using is the 1/64, which only has 4mm of depth.
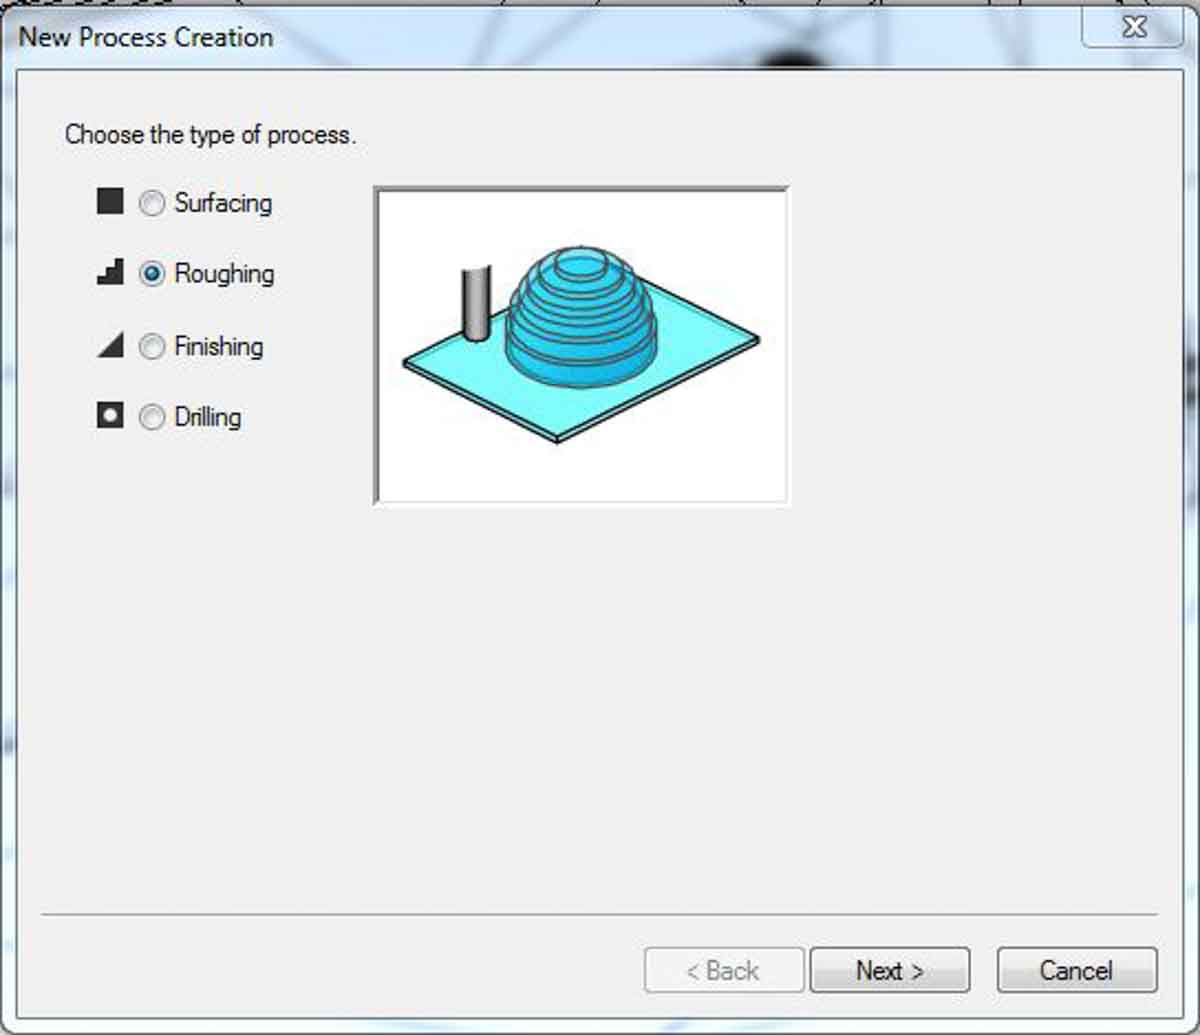
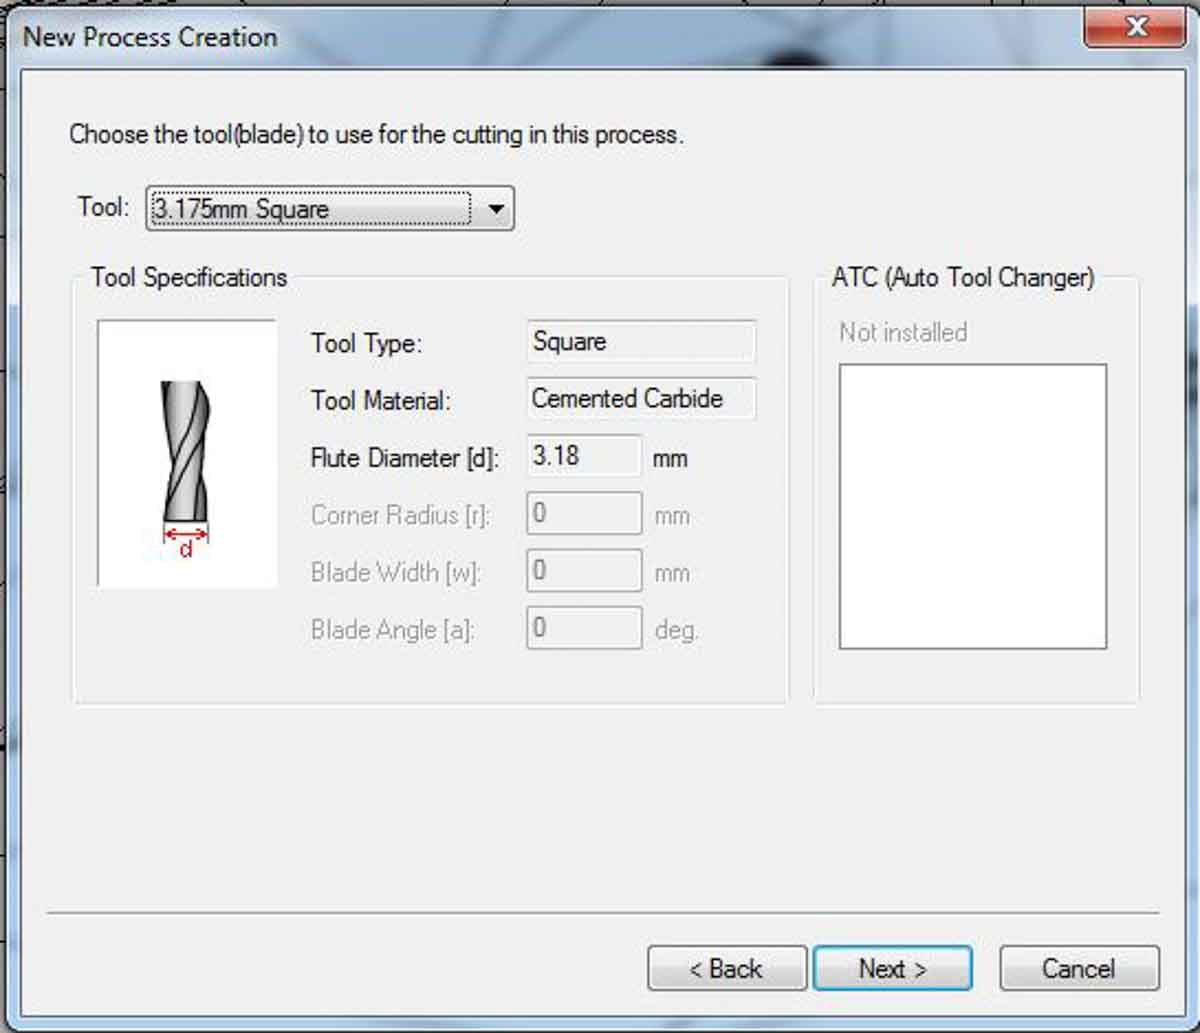
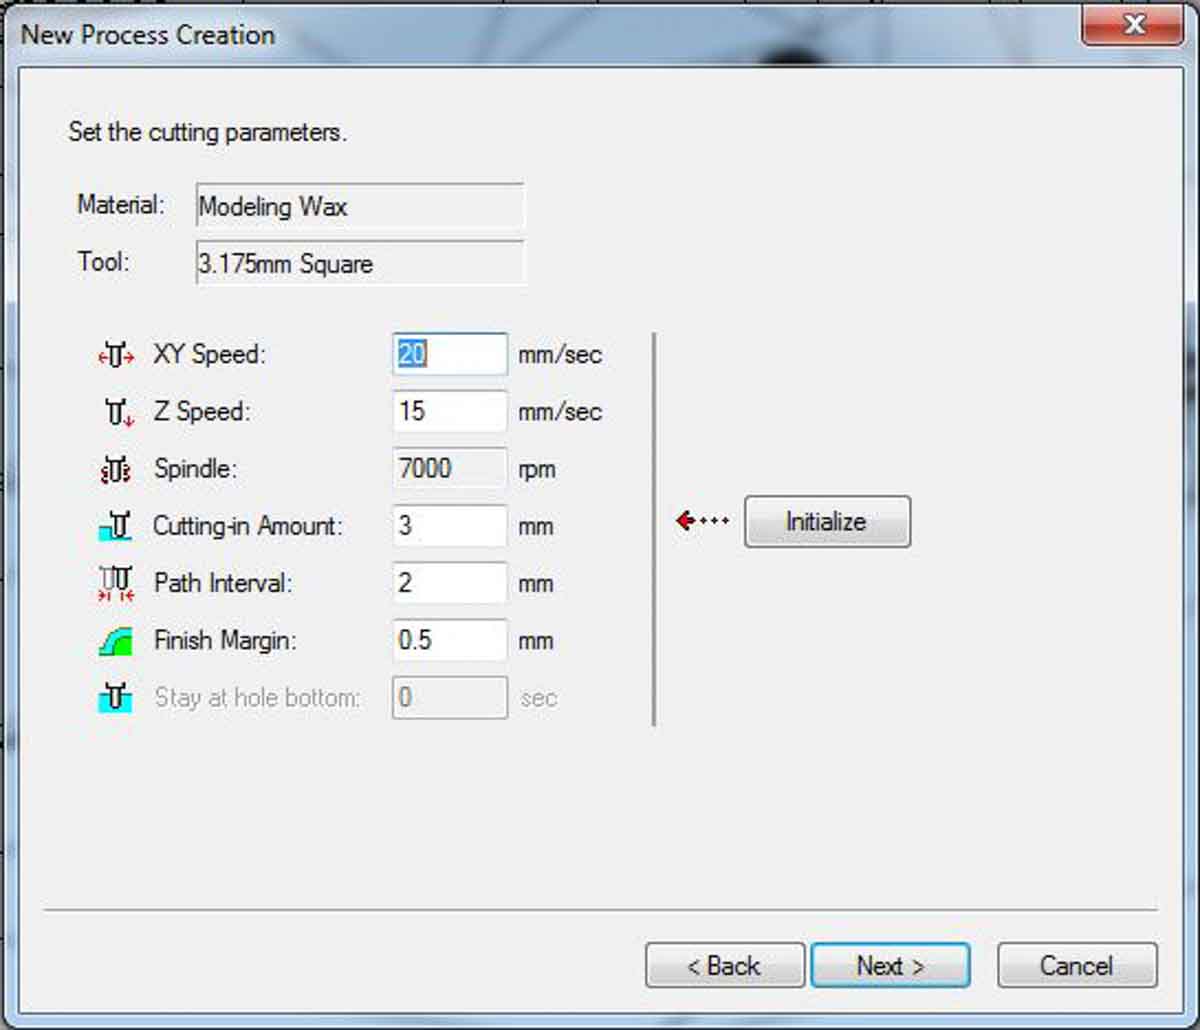
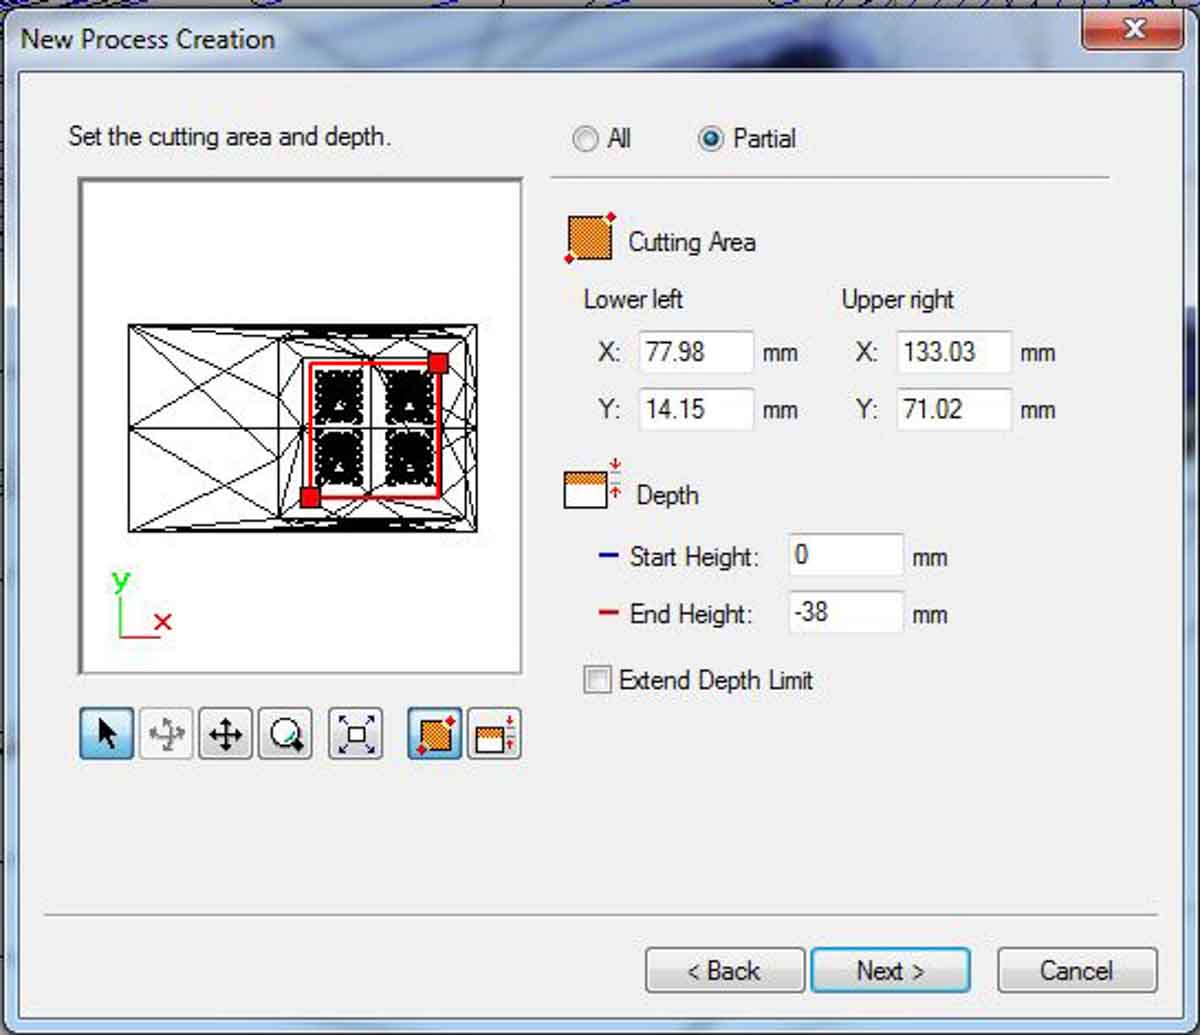
However, to not break the tools, the wax has to go through a first milling process of roughing out the shape. To prepare the file we had the option of using the Fab Modules that we used for the electronics milling assignments or the MODELA Player 4. I chose to use the latter. The file was saved in stl. and converted to prn. By the MODELA Player 4.
The settings I used for the roughing are the following:
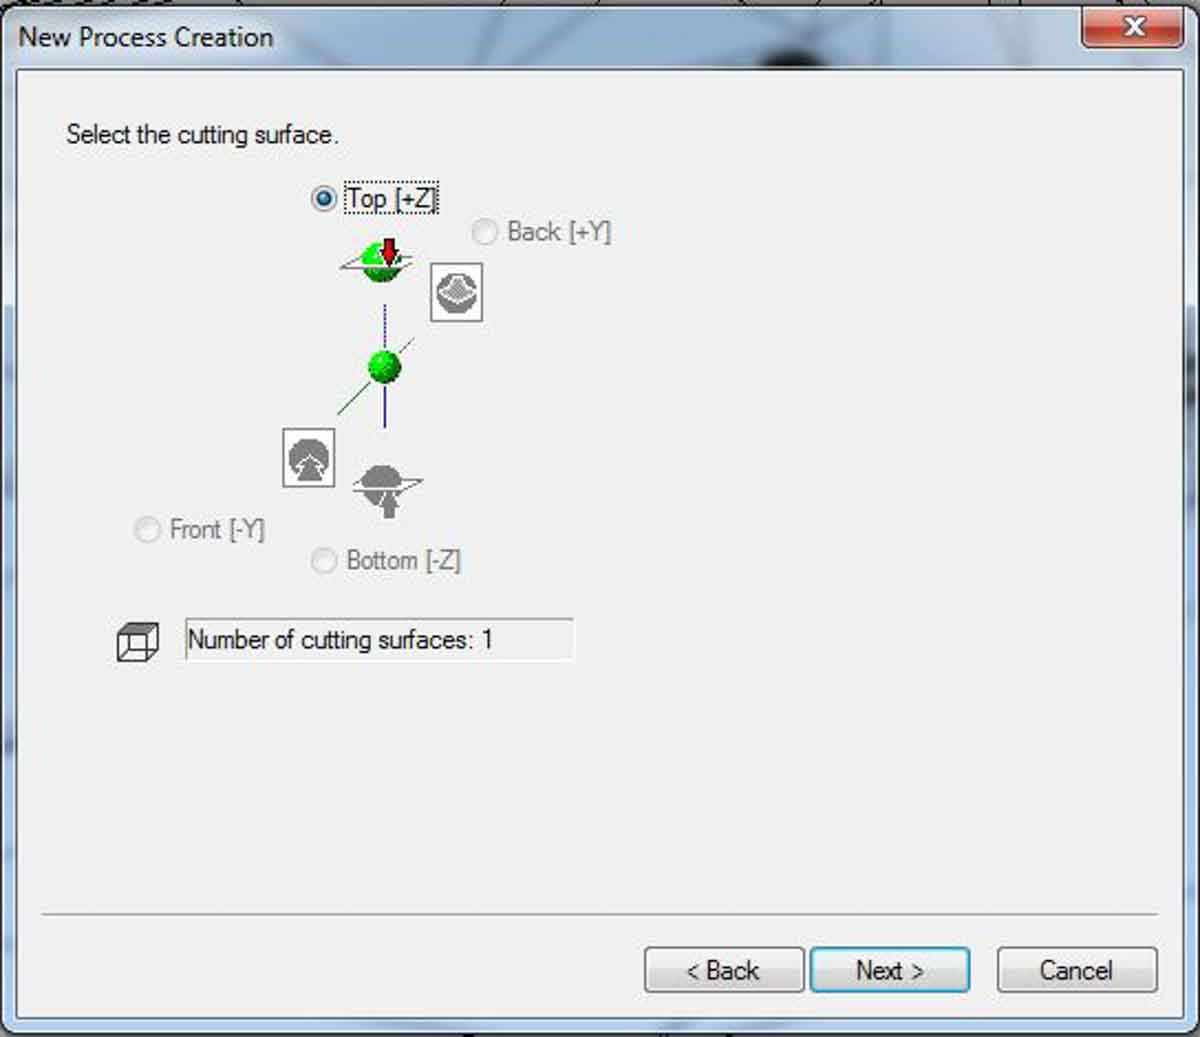
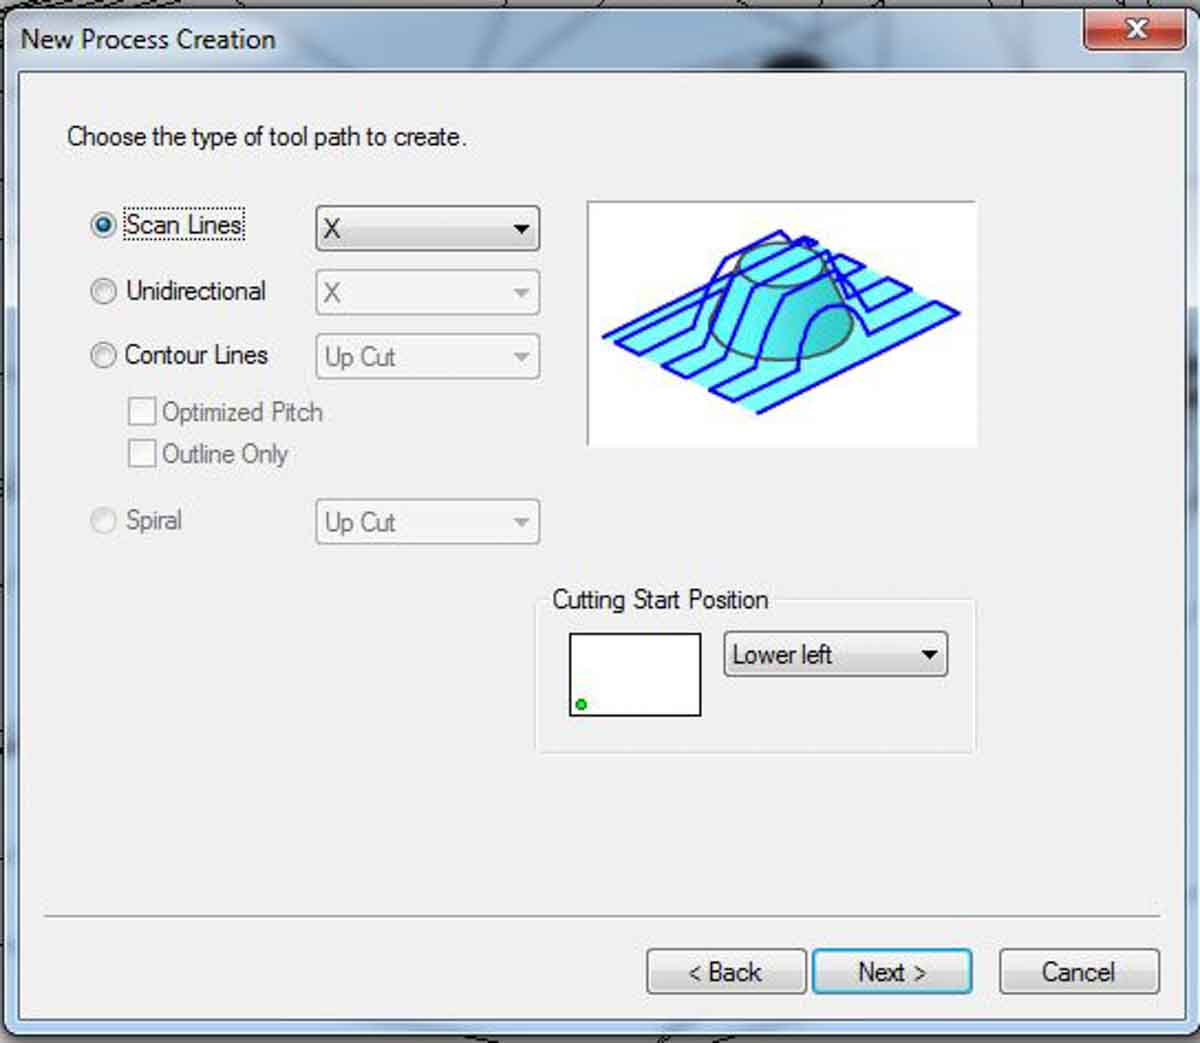
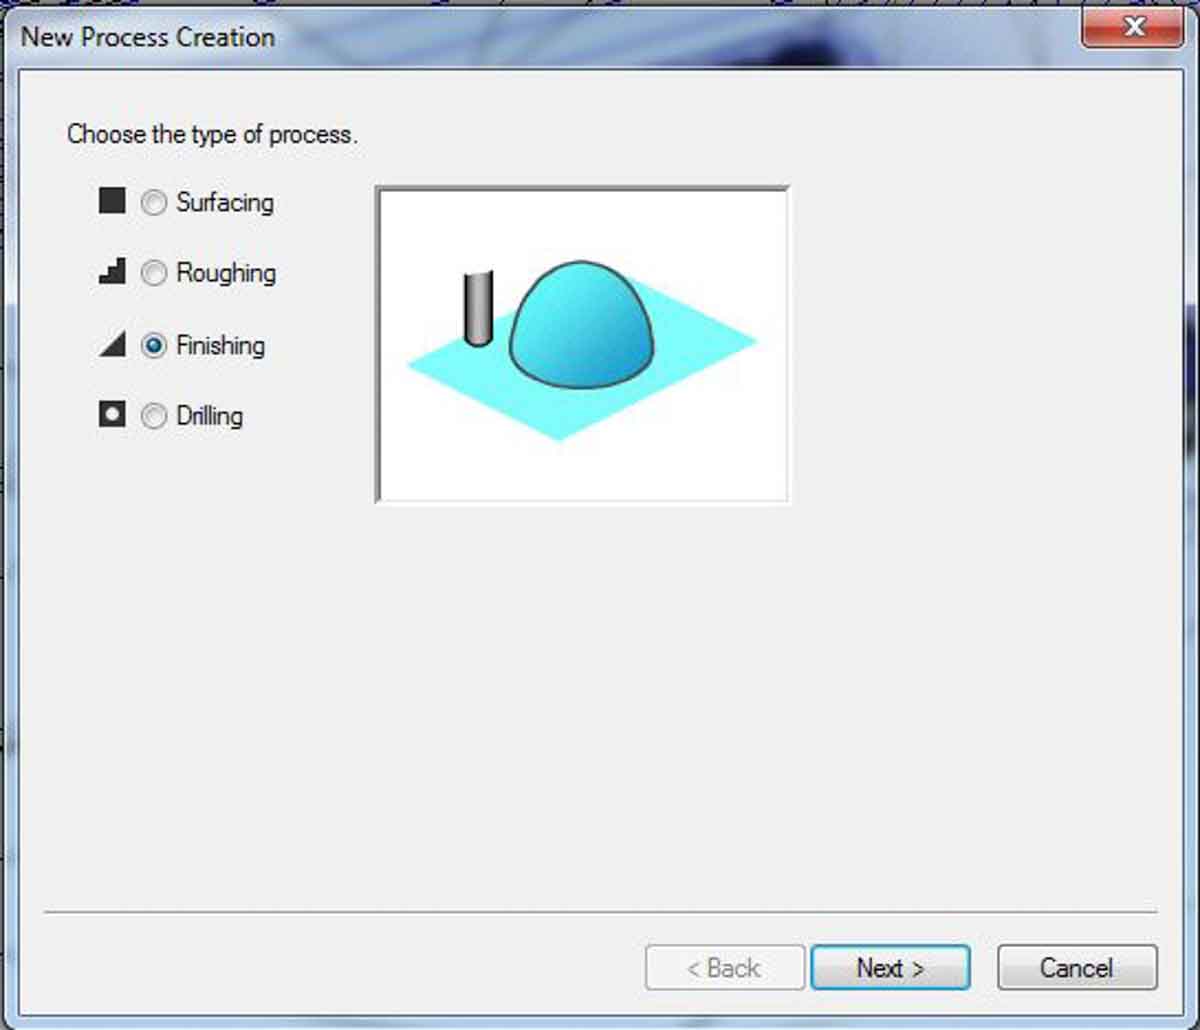
I forgot to take a screenshot of the setting of the x-y 0 point, which as it says in the image above, I set to the lower left. The default setting is the center, but whatever is chosen as the Start point has to be the same for every process (Surfacing, Roughing, Finishing, Drilling).
The smaller the cutting are, the shorter the milling time. This has to be taken into account for both time and the tools used.
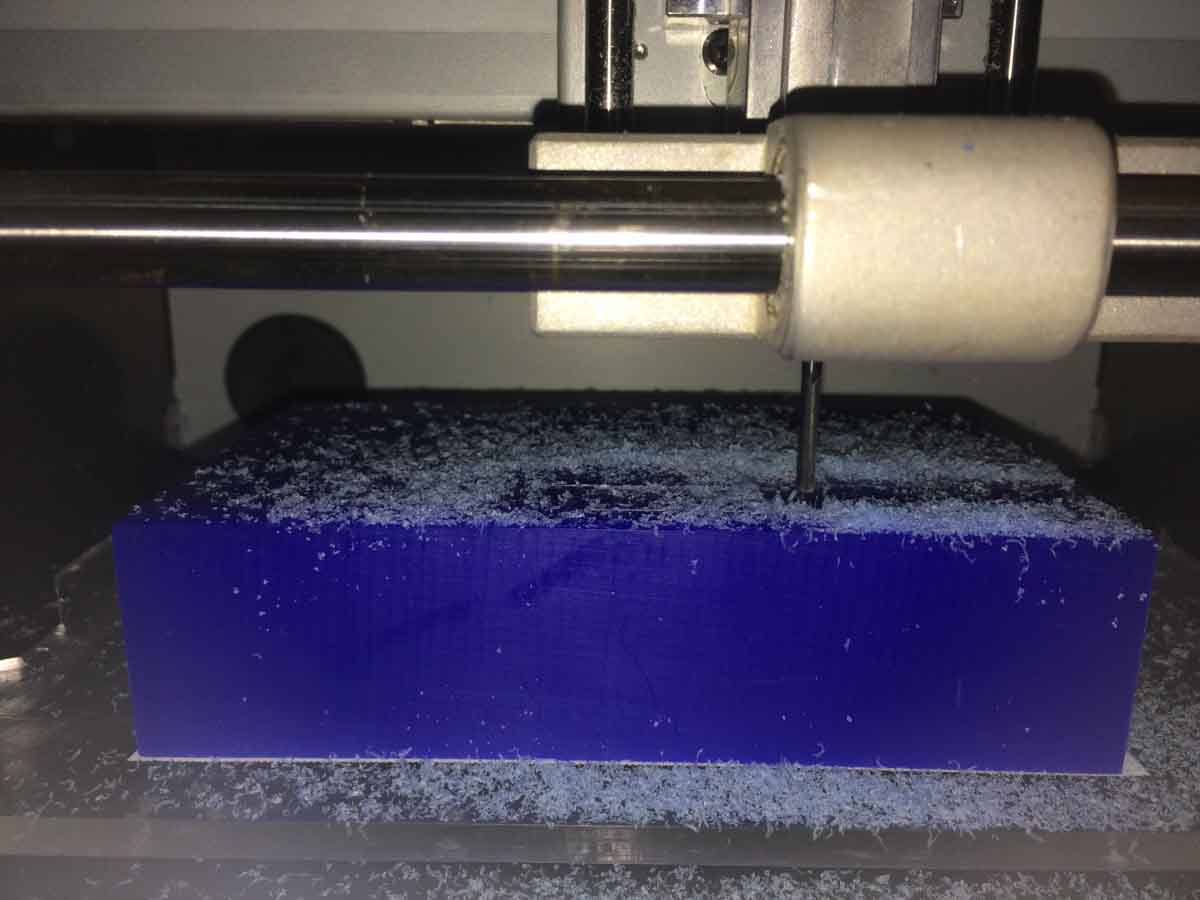
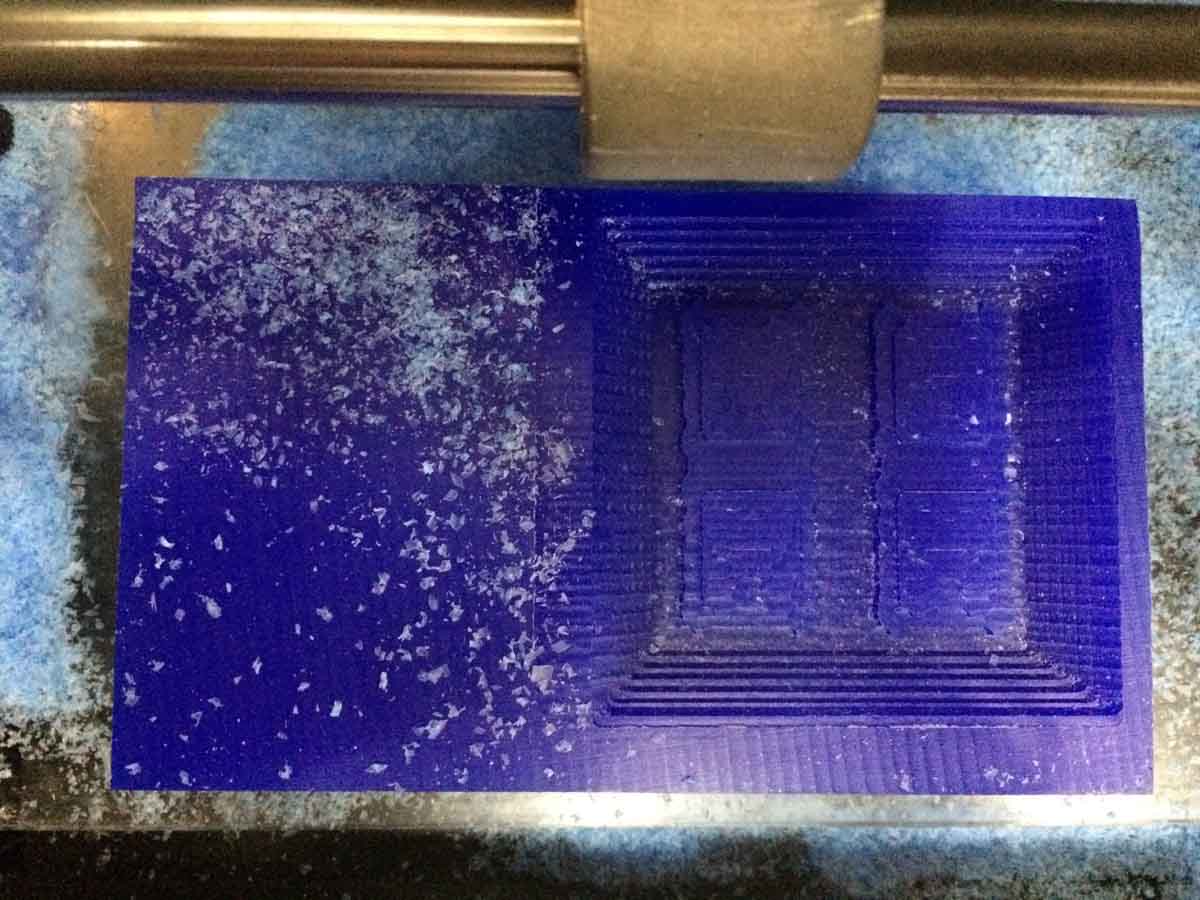
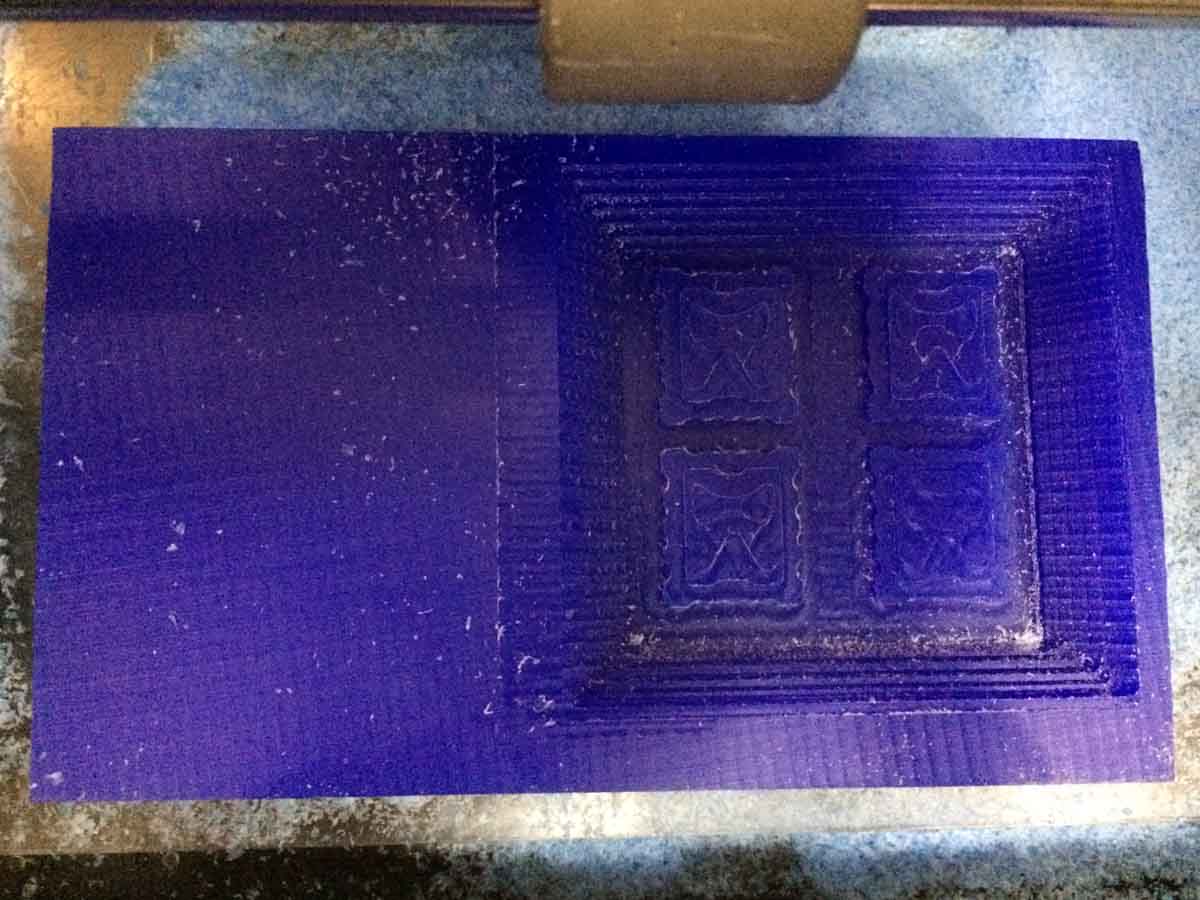
This was the result of the Roughing process, and as the image above shows you can’t really tell what the shapes are.
Despite the fact that I know the diameter of the tool used to the Roughing (3.175mm) is too big to get any of the details needed for my design, I’m going to use it for a round of finishing to show the results of the process. The expected result is that while more detailed than the image above, it won’t read as it should because the tool is simply not small enough to mill the details that are in the design.
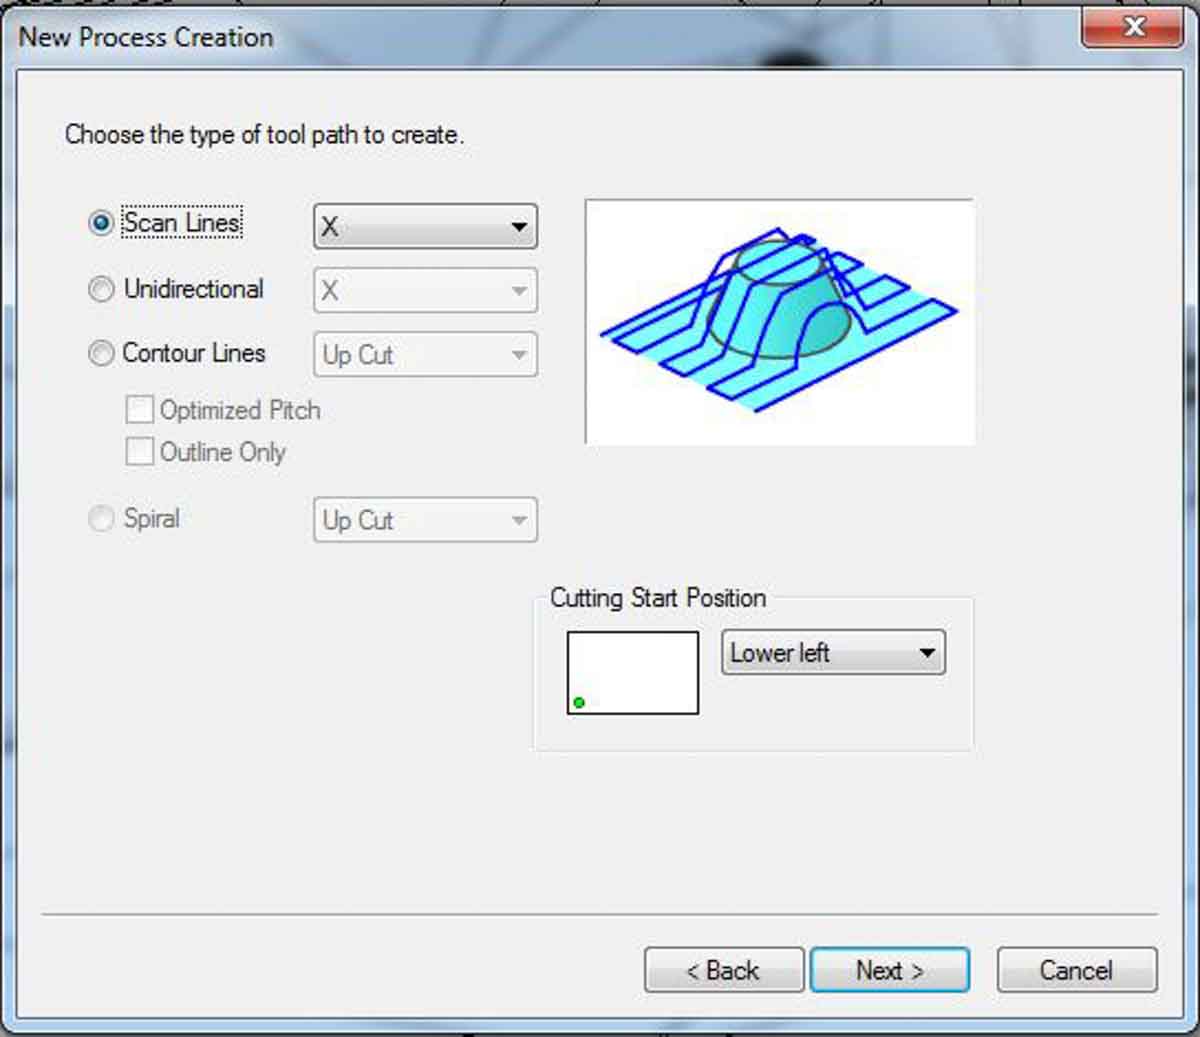
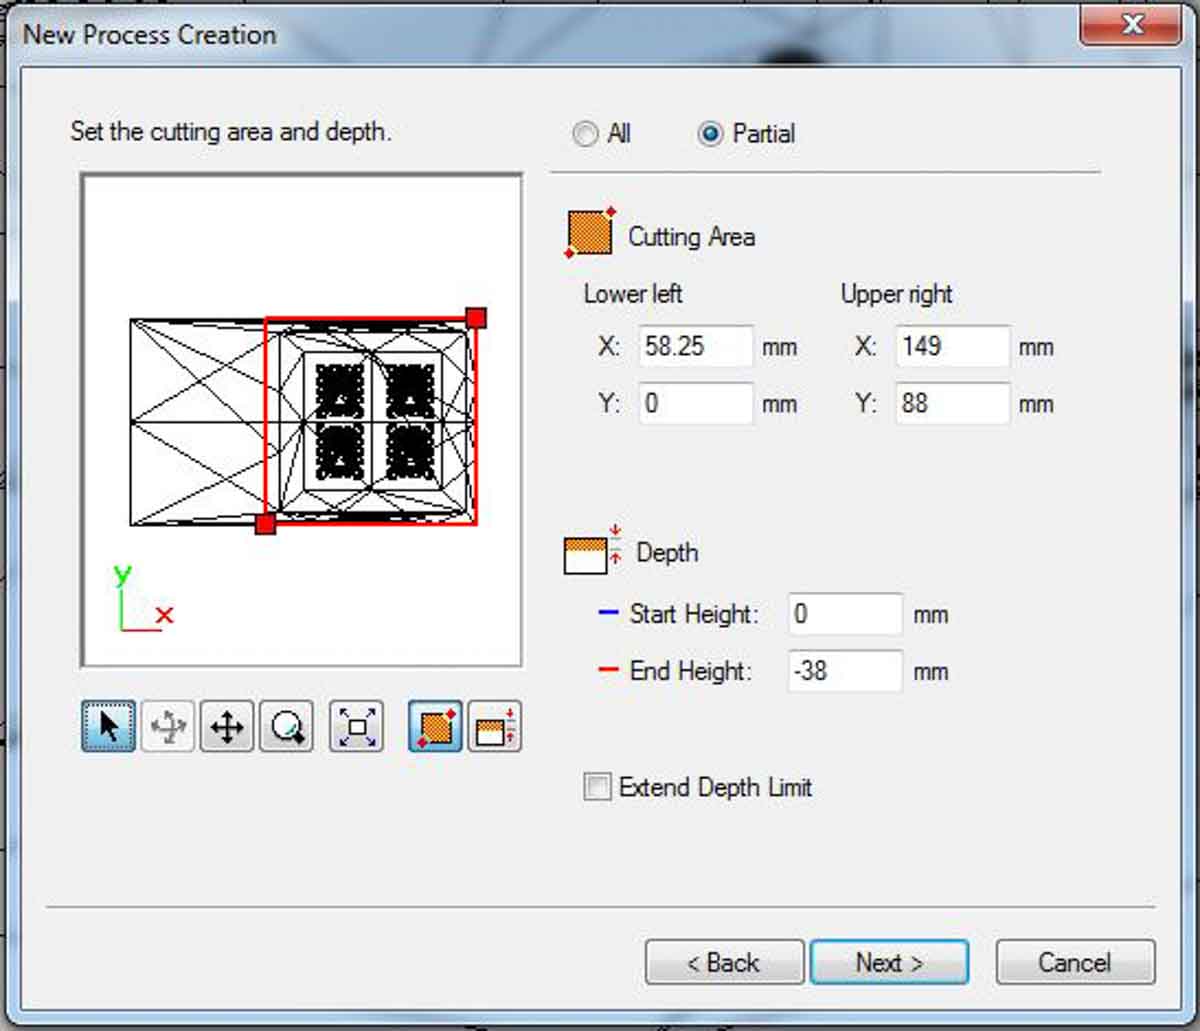
As mentioned above, since the angles on the side are already roughly milled, there’s no need for further detail in them for this particular design. If this were a two part mold where one part would need to fit perfectly within the other, then the depth angles would need to be milled with a finishing process. Since this is a one part mold then the finishing of that part of the mold won’t affect the cast. As such I’m removing it from the cutting area to save time.
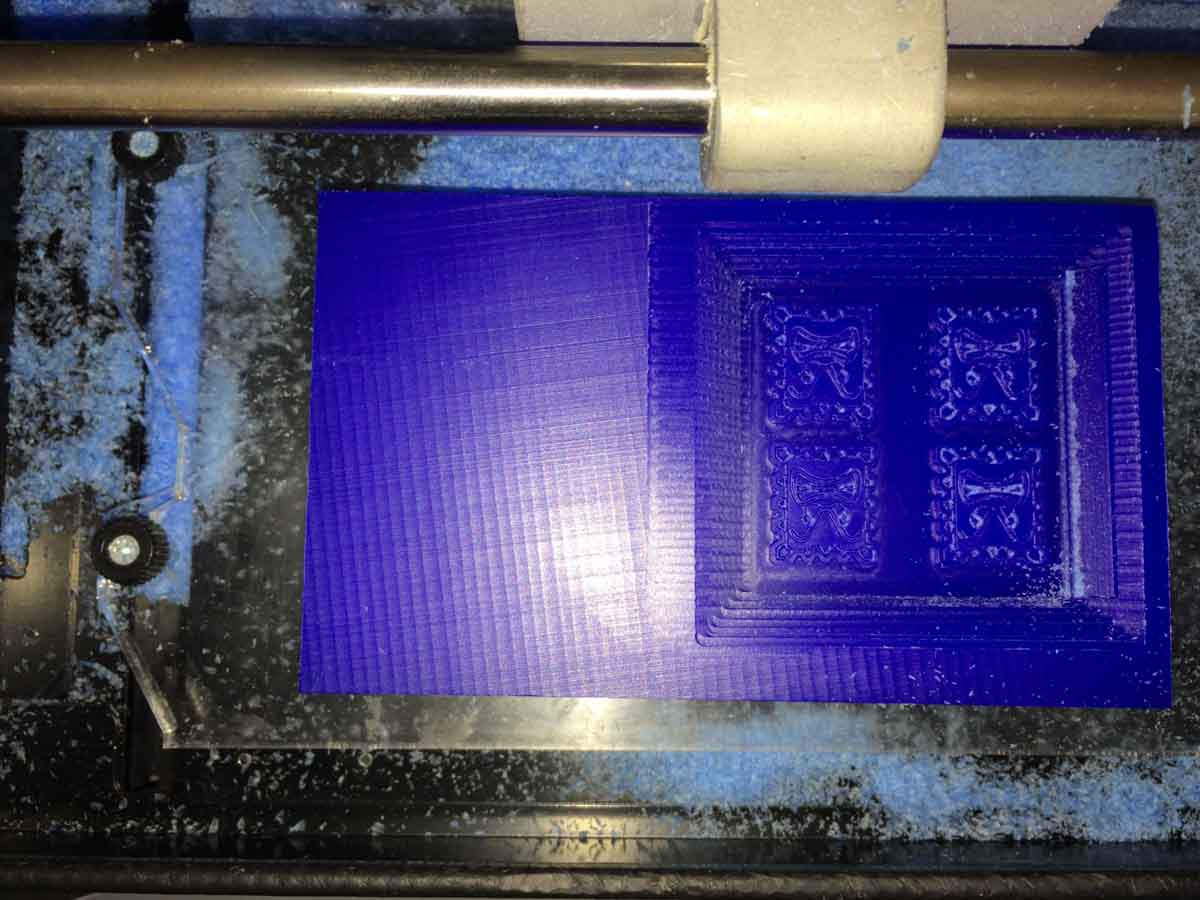
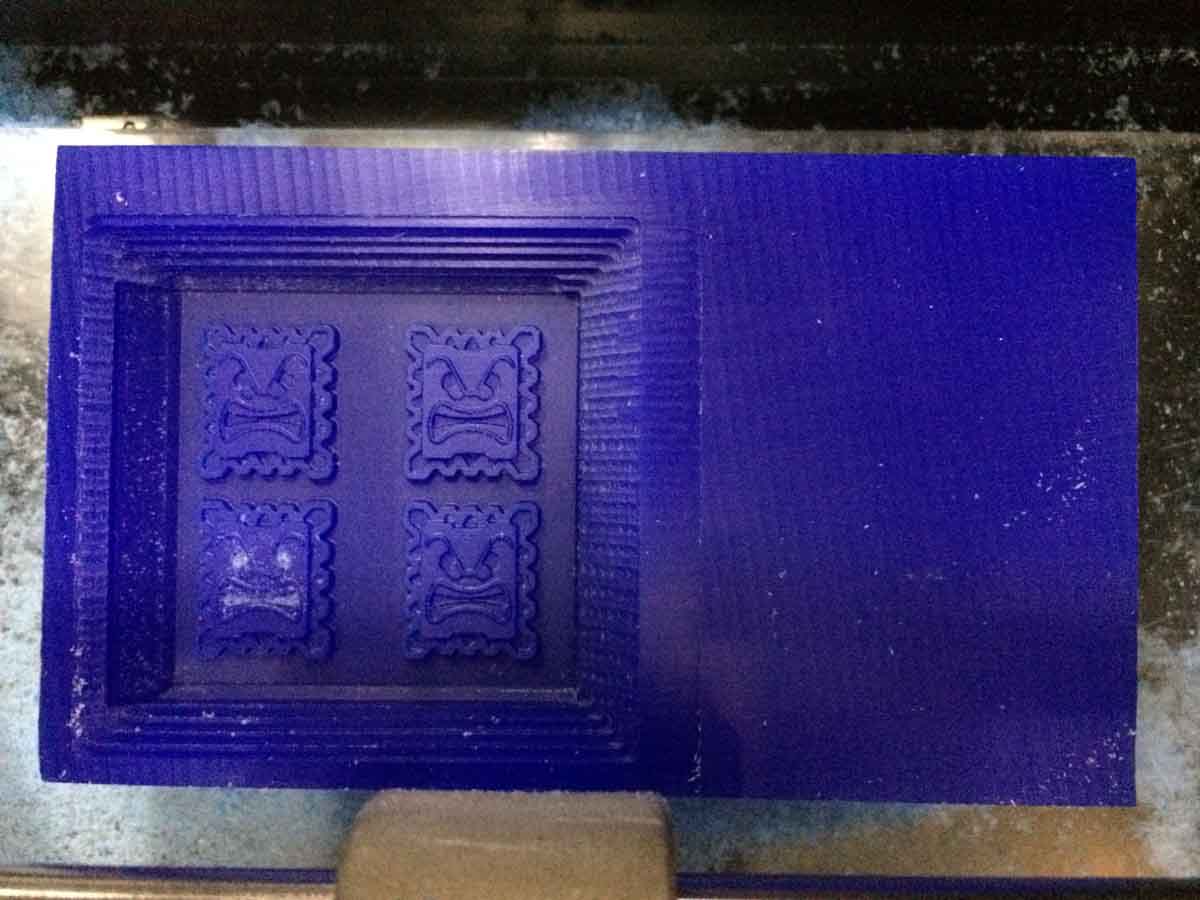
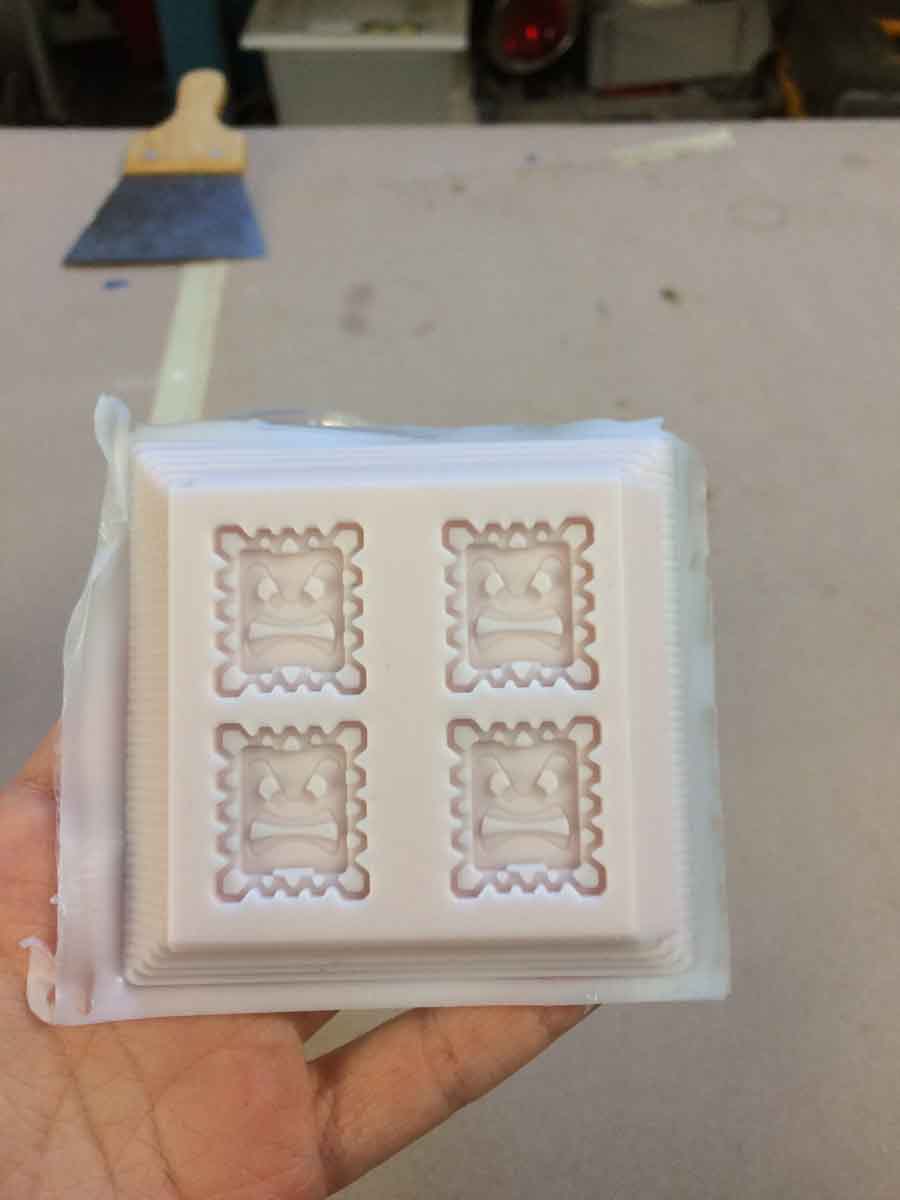
As seen in the image above, the design isn’t really there so I had to go a step further and use the 1/34 tool that we used for the electronics milling with a Finishing process.
Day 7

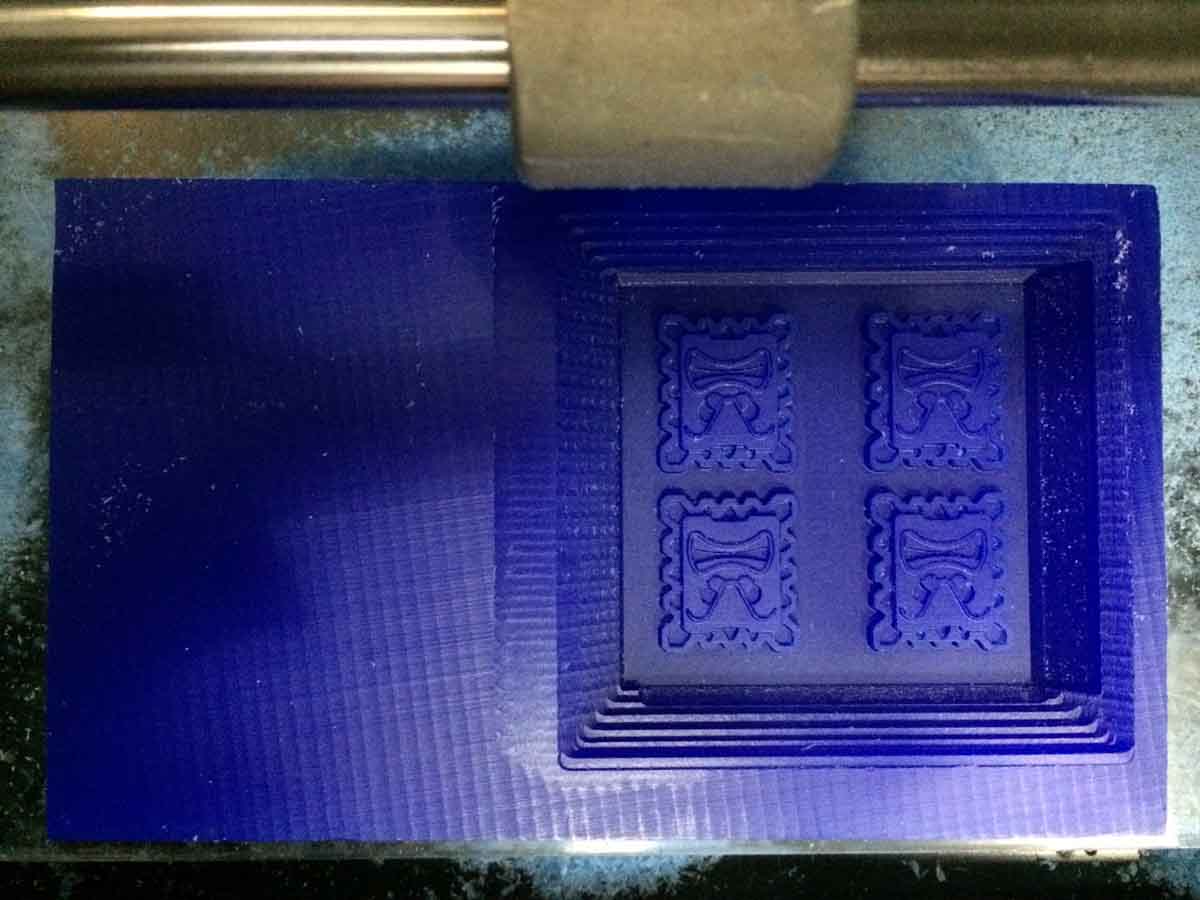
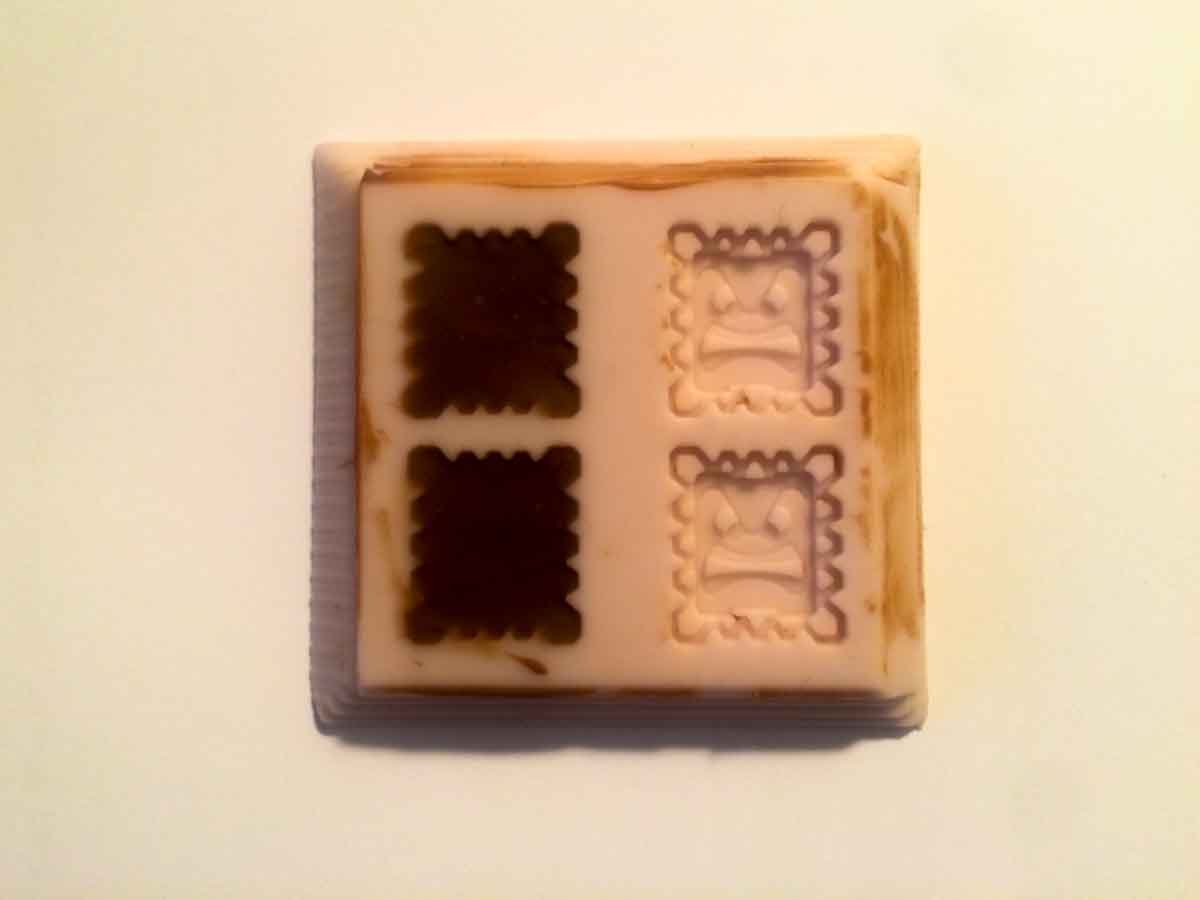
After the last finishing round the design finally became visible. I wanted to go a step further and see what the result would be if I used the 1/64 tool, which is the smallest one we have available at the lab for the Rolland machine. While the preview in the MODELA already told me that not all the details I wanted could be milled even with this tool, I wanted to see what the difference might be between the two tools.
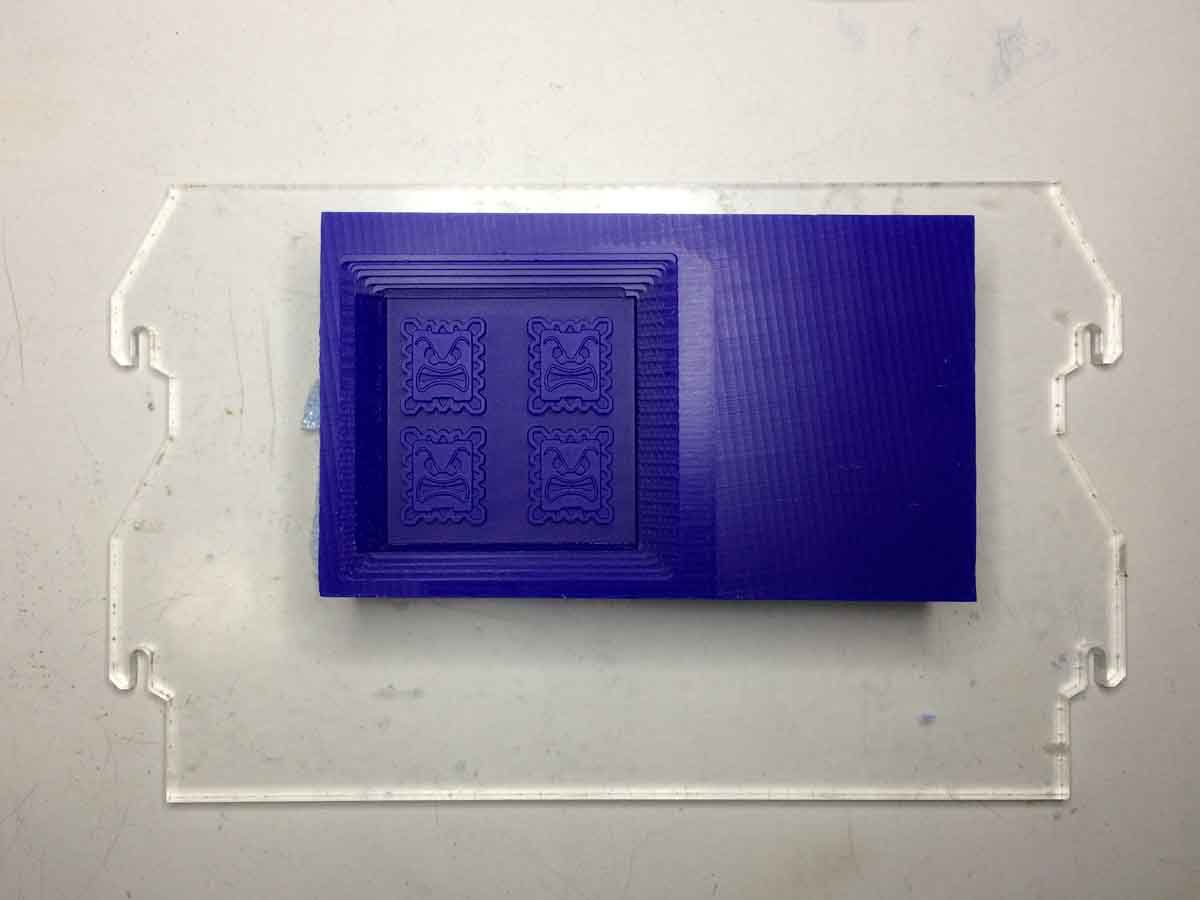
As expected, and seen above, the amount of wax that was actually milled (as seen in the lower left Thwomp design) was minimal. The white in the space inside the eyes and mouth is the wax that was removed and it looks almost like powder, as opposed to any real removal of material. It was an interesting attempt, though.
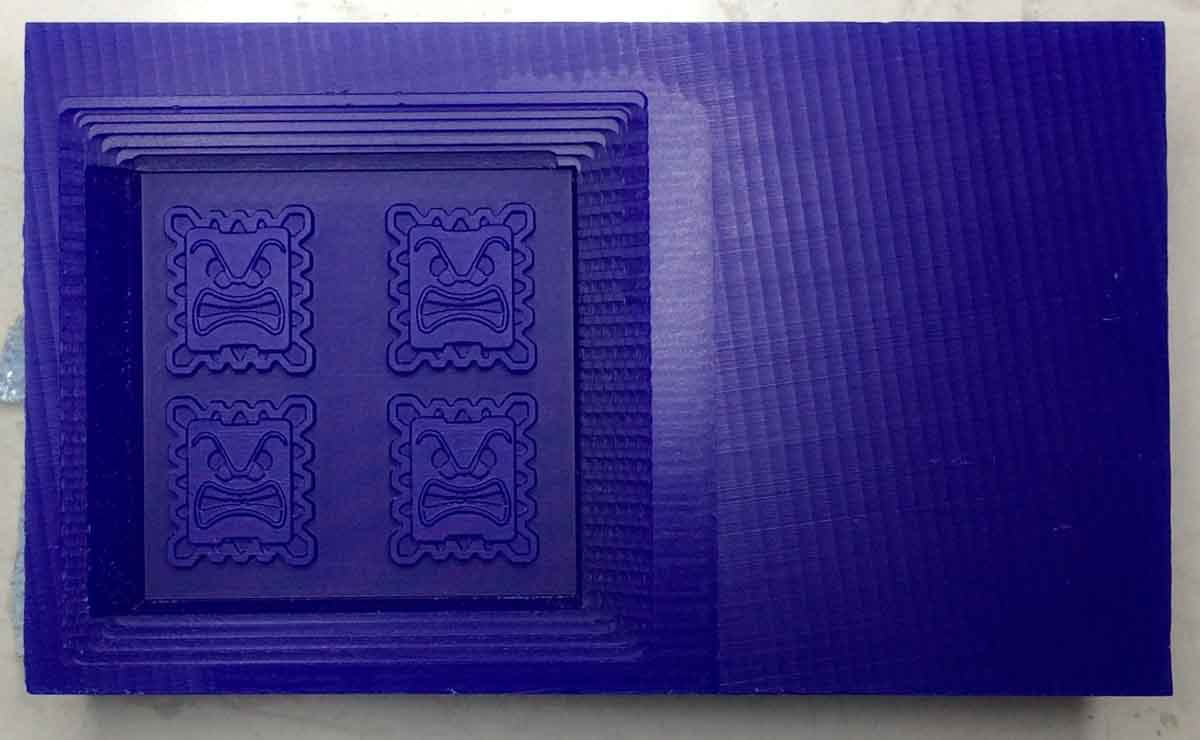
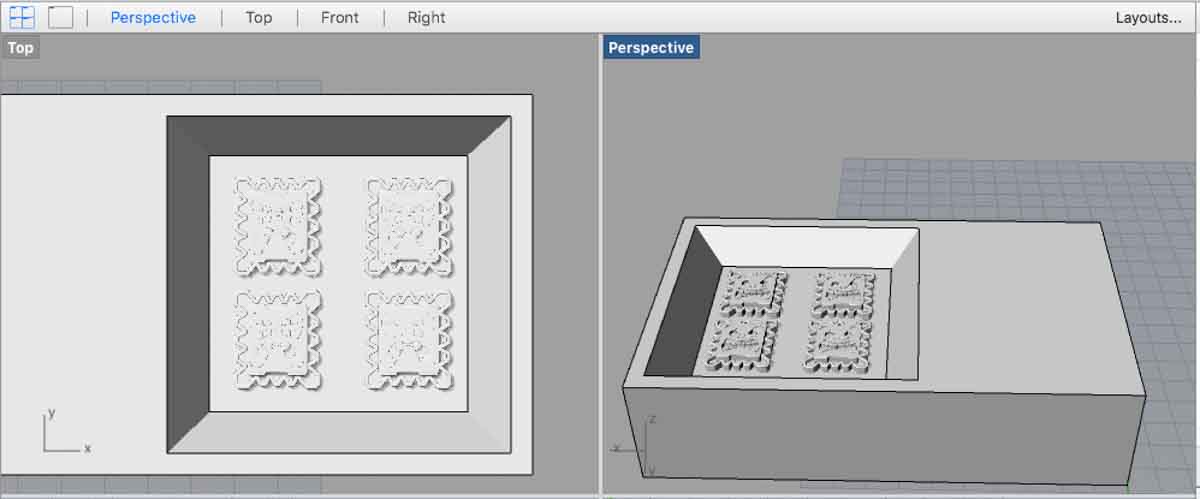
The end result ended up being very detailed and satisfactory.
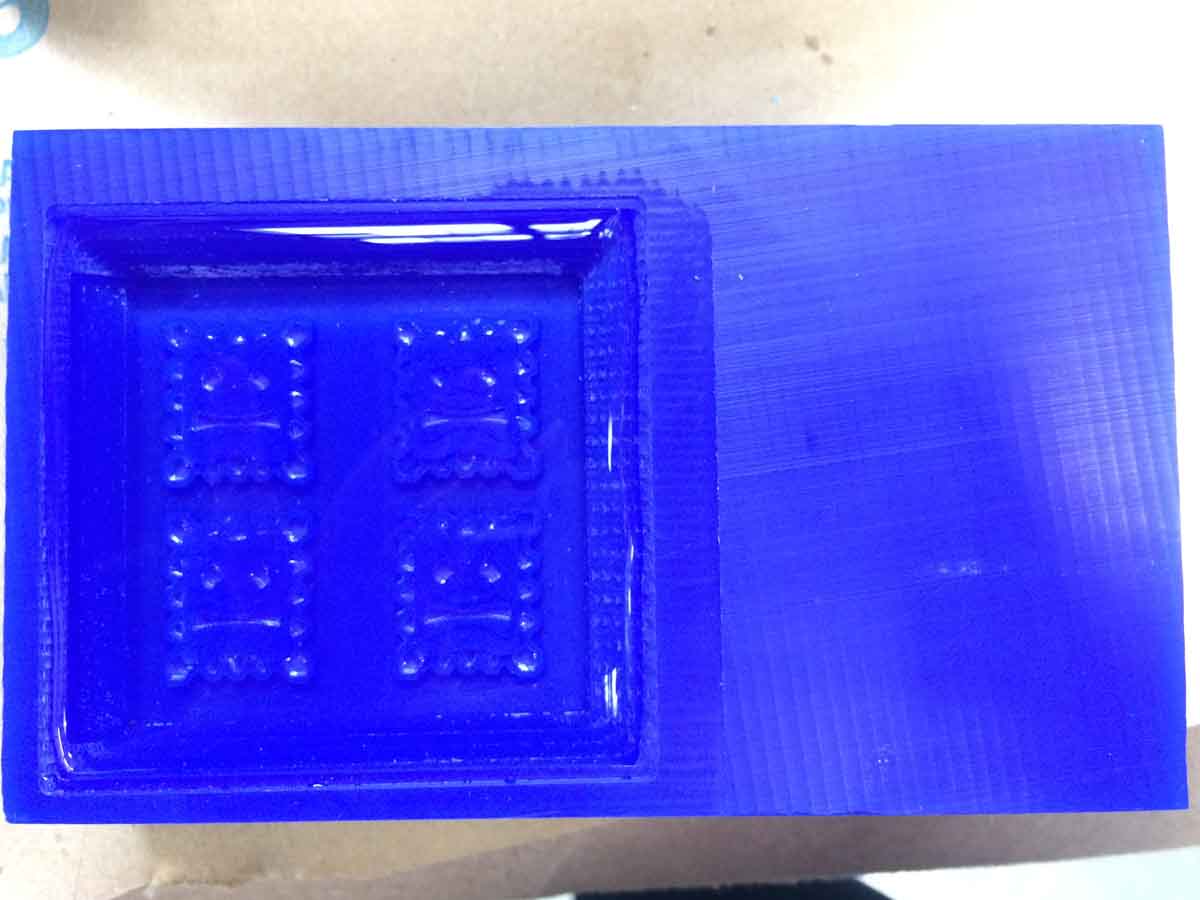
For the molding process we filled the wax mold with water to the top, to get an idea, volume wise, of how much material we would need to fill it.
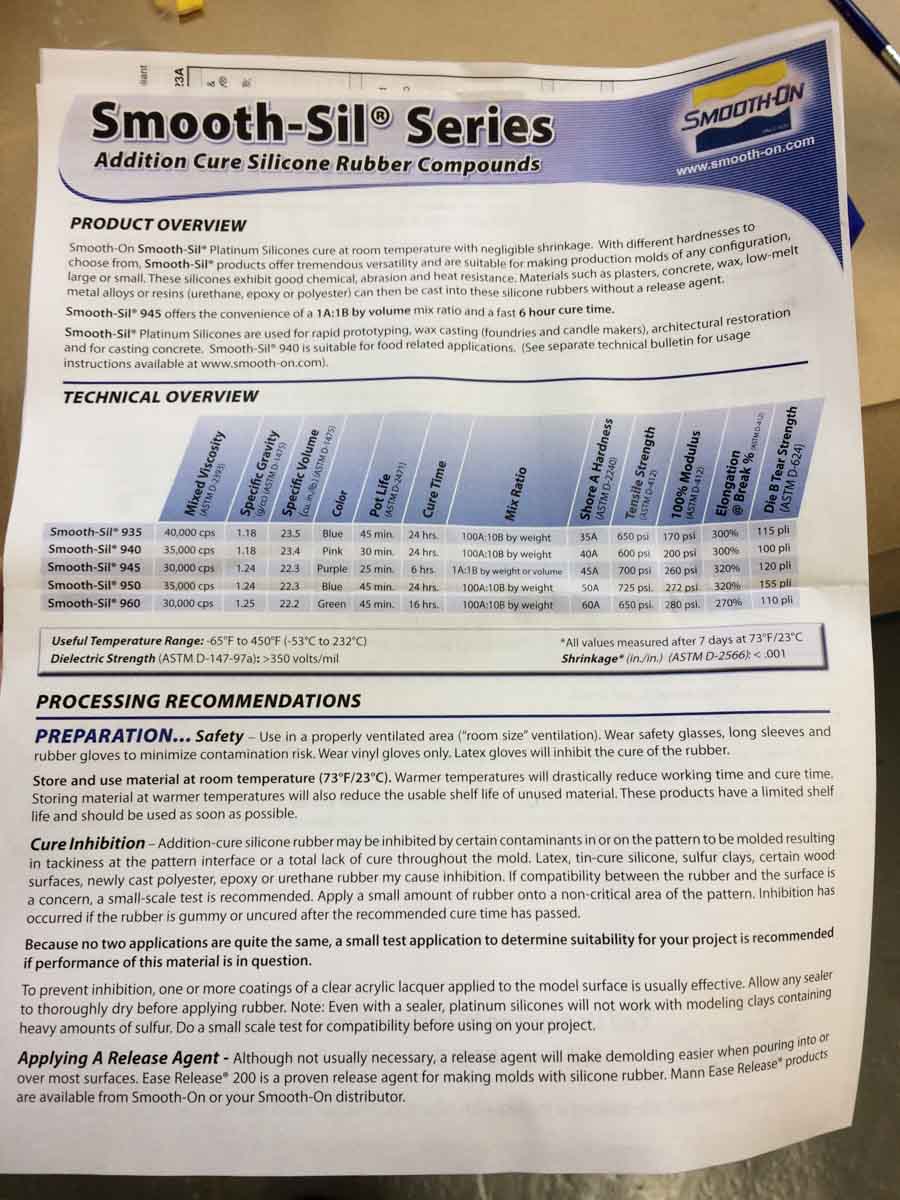
The link for the full product information sheet is the following:
https://www.smooth-on.com/products/smooth-sil-940/
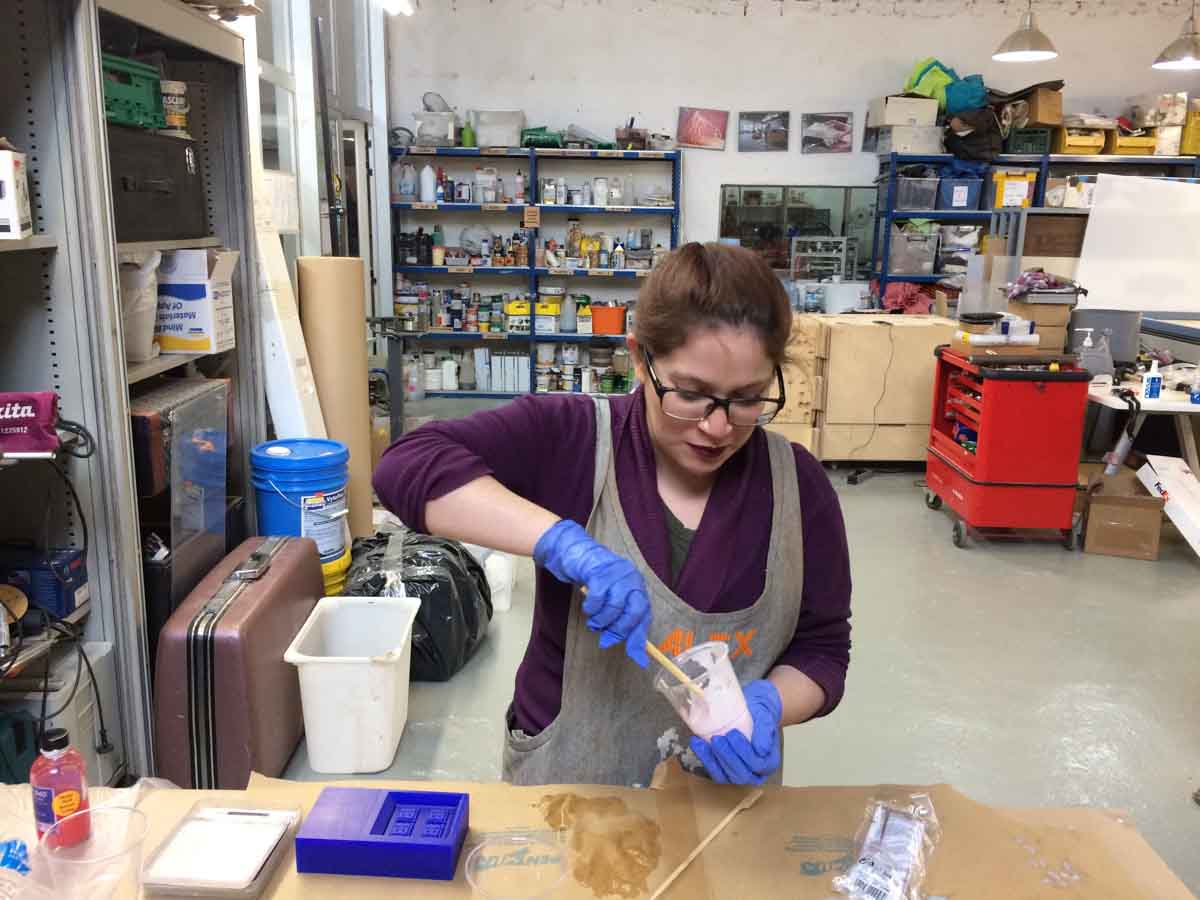
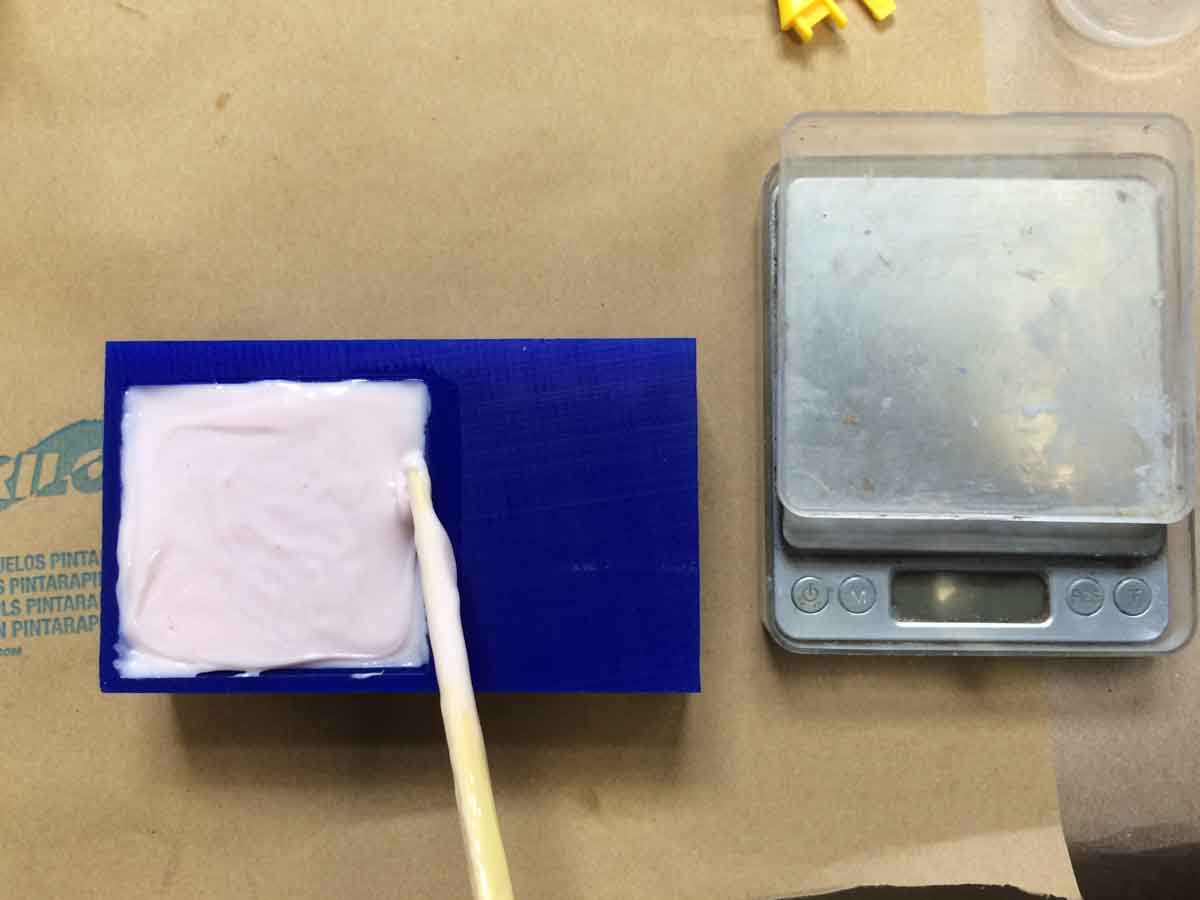
I mixed 6grs of a red, more liquid substance with 60grs of a thicker, white silicone that combined made the pink silicone rubber described. I mixed it for probably longer than recommended, trying to leave the stirring stick inside the cup as to avoid air bubbles, because the silicone was a lot thicker than I expected and it was very resistant to mixing.
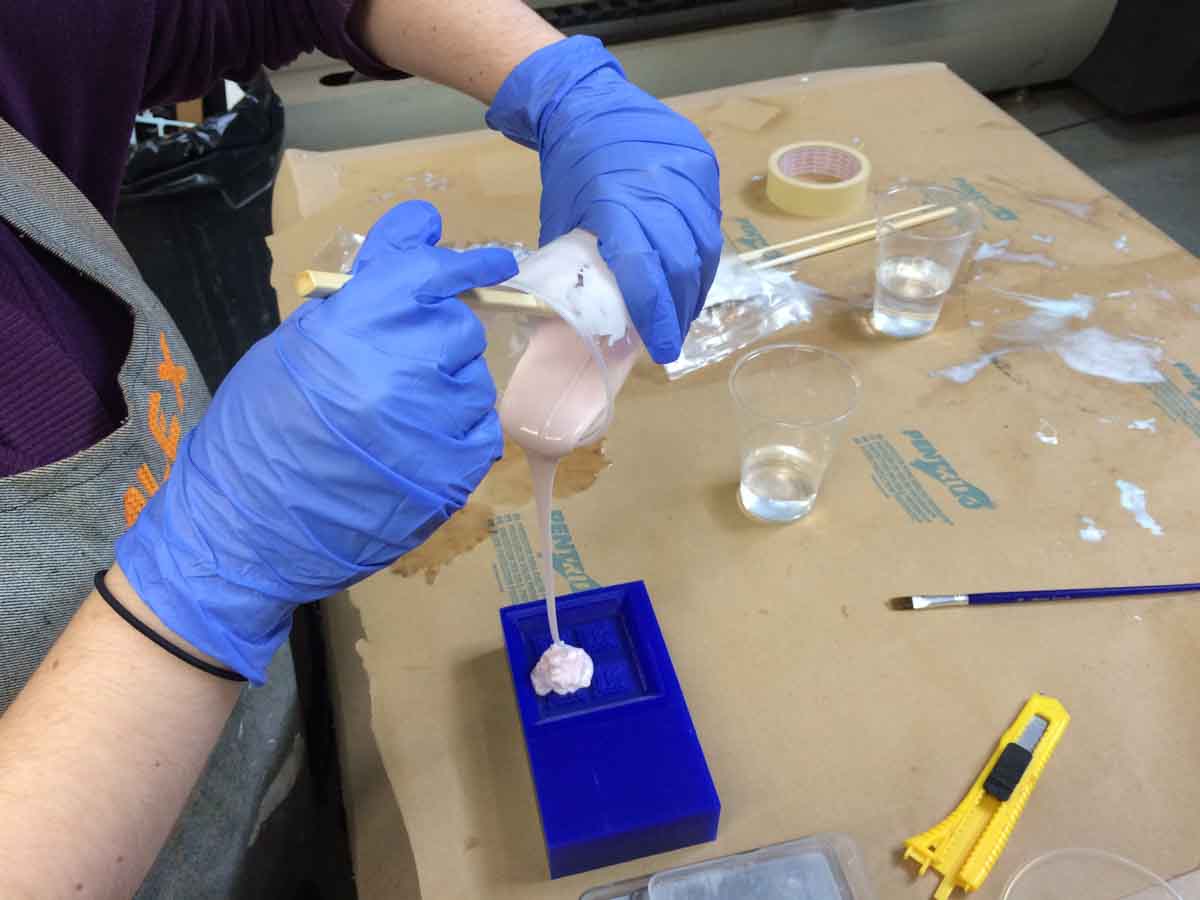
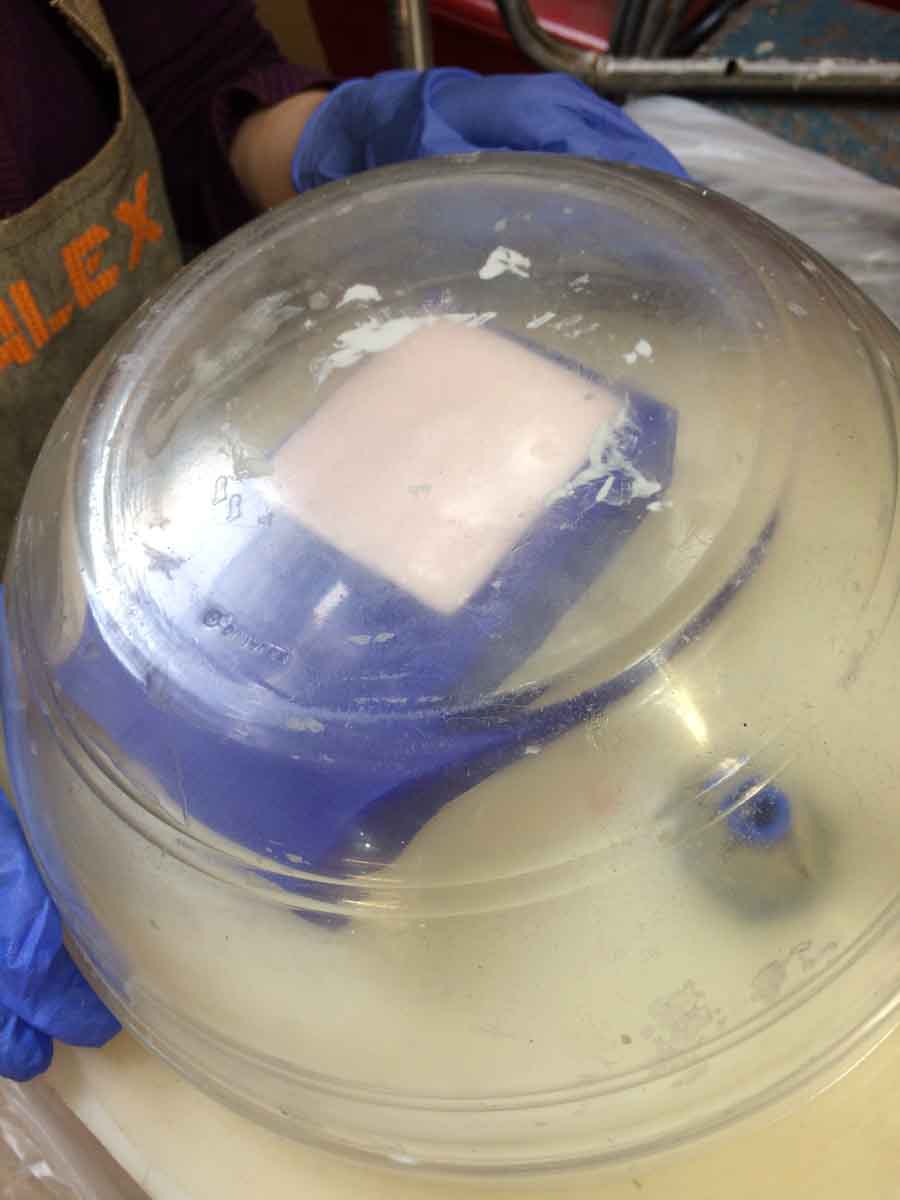
Since our labs vacuum machine is busted, one of the instructors fashioned a DIY version that we could use for this project to get the air bubbles out of the mixture.
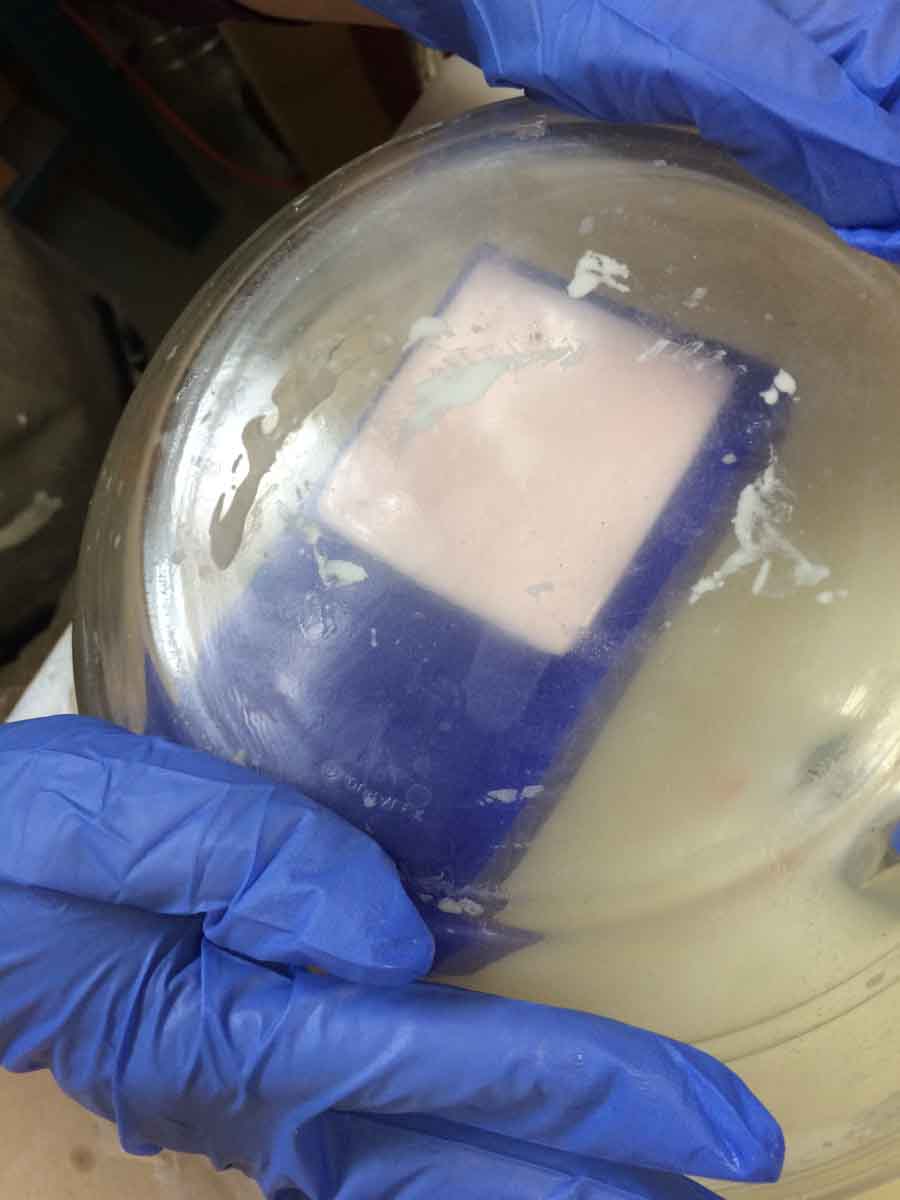
The curing time of my silicone starts after 30 minutes but I vacuumed my silicone for about 45 minutes, wanting to make sure that all the bubbles close to the wax would come out. Since the design was so detailed, any little buble would ruin the silicone mold that was being cast.
Day 8
26 hours later (two hours later than needed for good measure), the silicone looked beautifully smooth and all I had to do was take it out.
The consistency of the silicone was a lot firmer than I expected but it came out without a problem.
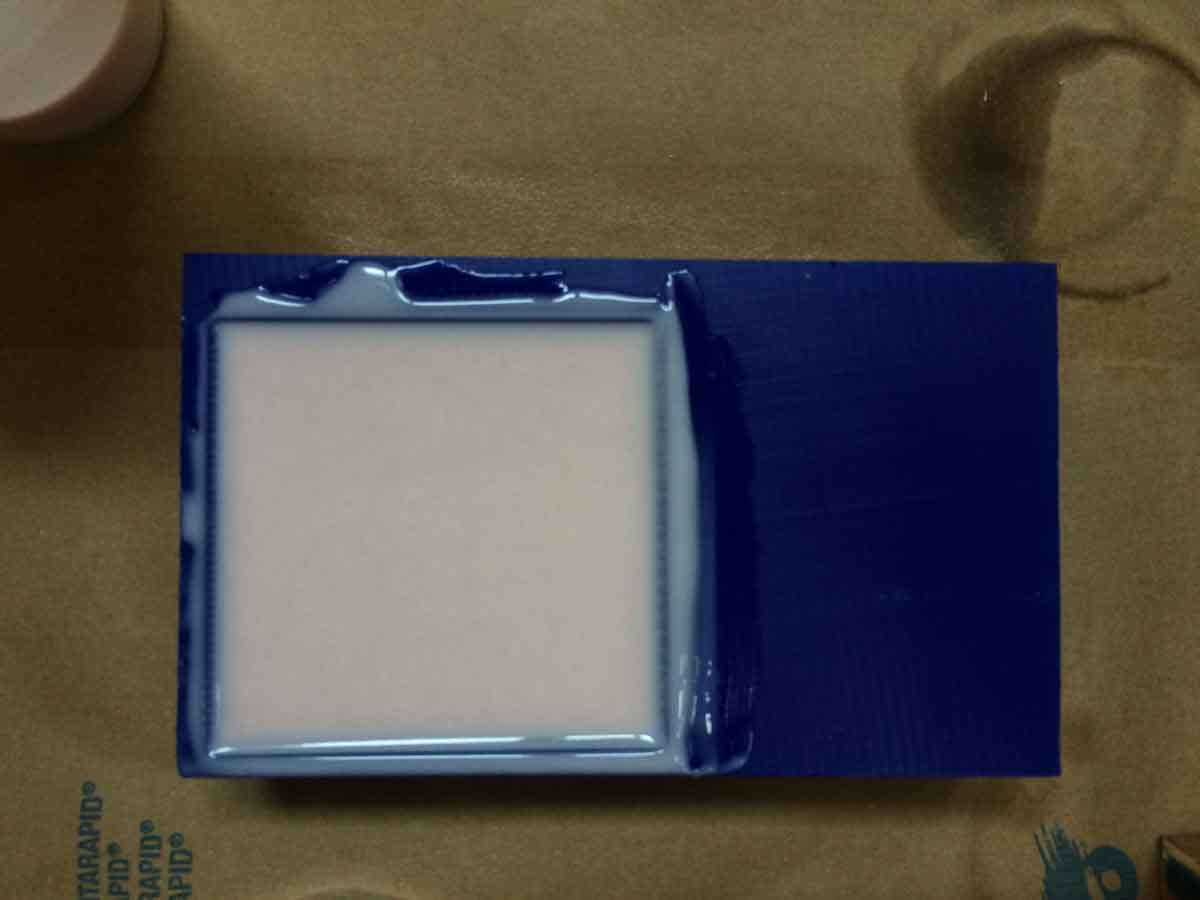
All of the forms came out perfectly except for a single tiny bubble that remained. The amount of detail achieved was astounding and I loved how it came out.
Before casting anything in chocolate or caramel, I baked the silicone mold for two hours at 80C and and another hour at 100C, as stated as optional in the page with the rest of the information of the Smooth-Sil 940, in a regular home oven.
Day 9
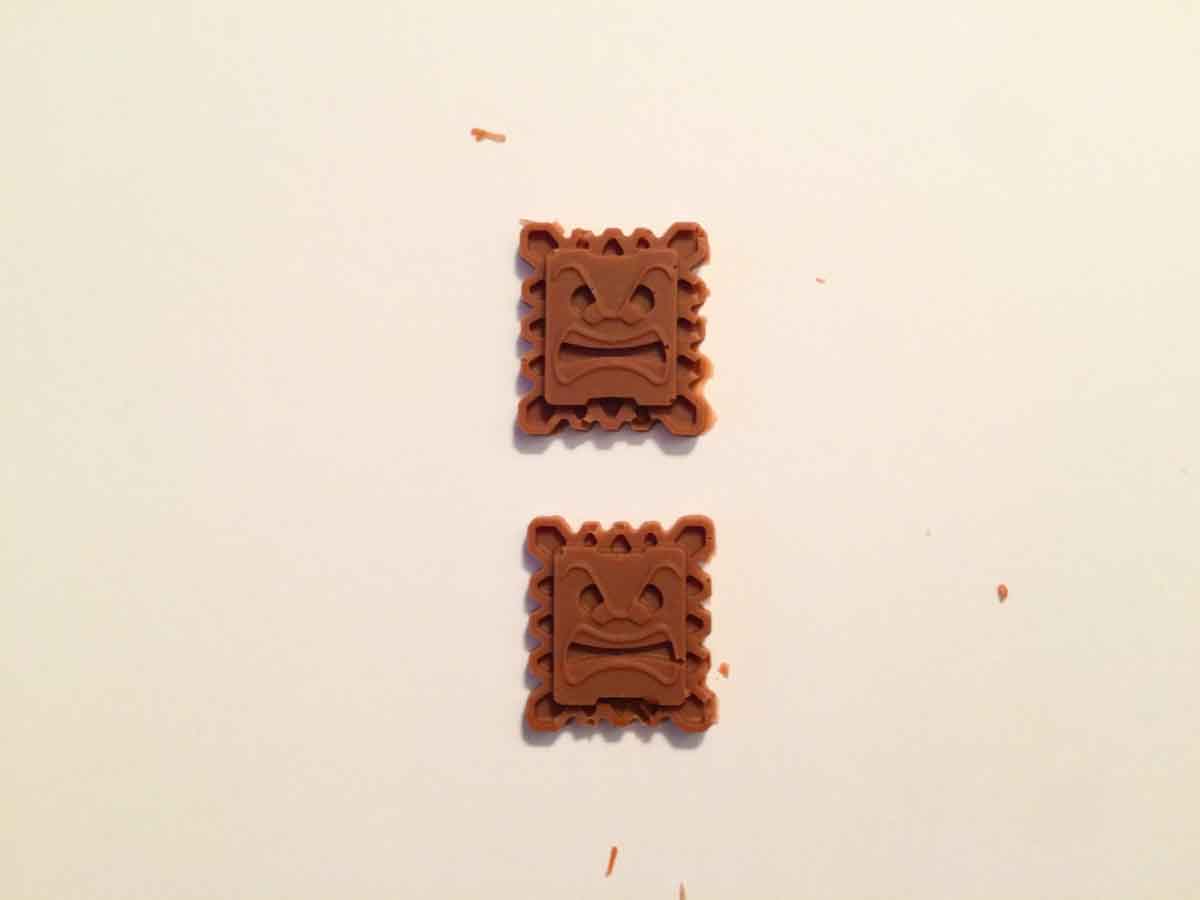
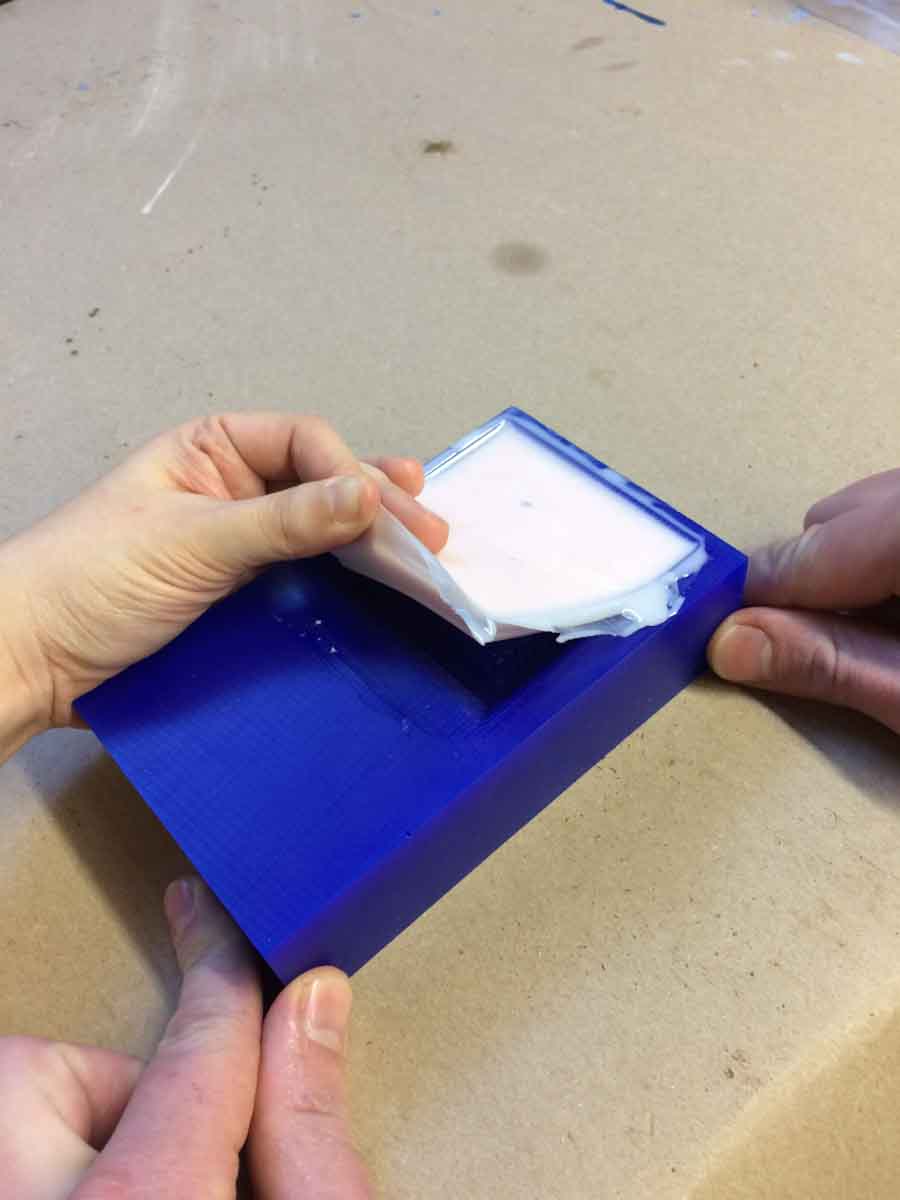
The end result left much to be desired, at least with the chocolate I had in hand. The results might differ with caramel, but since the depth of the design is only about 3.8mm, the chocolate had a hard time adhering to the silicone in such a shallow surface. The material is so good at not adhering to the food that it was too successful in that regard and there were many bubbles, no matter how many times I tried.
The files can be downloaded here and here.