week 16 - wildcard week
assignment:
-design and produce something with a digital fabrication process (incorporating computer-aided design and manufacturing) not covered in another assignment, documenting the requirements that your assignment meets, and including everything necessary to reproduce it. Possibilities include (but are not limited to) composites, textiles, biotechnology, robotics, and cooking.

laser welding
Laser welding is a technique I wanted to develop in Fab Academy as a final project, but I finally decided to leave it for the wildcard week. The idea is using the laser cutter as a "sewing machine" for plastic materials. The layers, instead of being joined with thread, they are sealed together by melting them with the laser heat. The purpose of this technique is achieving inflatable volumes.
Inflatables/soft robotics can also be made in a more manual process with two layers of vinyl and a baking paper layer in between, sealed with a Heat Transfer Press. The purpose of Laser Welding is compiling all the steps into a single lasering process, making it a simpler and faster way of getting similar results.
I first came up with this method back when I was in architecture school making this model down here for an inflatable house I designed. Here I sealed the plastic manually using an iron, but this made me think there had to be a better and faster way to seal the plastic. This is how the idea of using the heat of the laser came to my head. Since then I always wanted to spend some time experimenting with this method.

I searched if this had already been done in Fab Academy, but I believe this digital fabrication process is apparently new because no one has documented this technique before. Developing new stuff is always a personal challenge I like taking! The most similar thing I found on the internet was this guy from MIT who also used the laser engraver for the same purpose as me. However, he doesn't really explain the method in detail.
There are multiple possibilities and areas where I think this process could be implemented, such as design, architecture, art or even cooking. These are some inflatable examples that might be possible to get with this process. The obtained results could be filled with any shapeless material (air, gas, smoke, water):


or be used only as a mould to obtain a solid volume (ice, concrete, chocolate):


process
I went to Servei Estacio, a huge shop in Barcelona were you can find almost anything. There they had several plastic rolls. PVC roll looked nice and I'm sure it could work nice. However this material should not be lasered because it releases toxic gases when it is burned. That's why I went for Polyethylene (PE), which can be lasered. There were many sizes and thicknesses (even different colors). I believed the thinner the material the easier it would be for the laser to heat both layers without cutting them. That's why I tried with the thinnest Polyethylene they had in the shop: gauge 200 (0.05mm) and gauge 300 (0.075mm).
I put a wood base on the laser cutter in order to have a flat bottom. I prepared two PE layers and placed them on the base, one layer on top of the other. Then I proceeded to make different linear tests by changing the power and speed. The two PE layers sometimes melted and sometimes didn't, depending on the settings. To test the strenght of the sealing I pulled both plastics layers. Some tests were stronger than others, but no matter all the settings I tried, none of them were strong enough to bear the stretching.


Not finding the right settings was a bit frustating. Technicaly, what I wanted to accomplish sounded logical and possible: just melting two plastic layers together using heat. But maybe the problem was not the laser settings, but something else I was doing wrong...It was a matter of understanding what made it work and what didn't, so I decided to find out what could be done to improve that.
First I thought it had to do with the width of the sealing lines. They were very thin, so maybe the sealing was too thin to hold both layers together when pulling... I thought of three options to increase the thickness of the sealing:
a) making more than one passing by offsetting the sealing line.
I made several tests with different offset distances. Doubling or tripling the line seemed to improve the strenght when the offsets lines were very close together, merging into a single thicker sealing.
b) making a non-linear boundary (zigzag...)
The zigzag didn't really work out, when pulling the two layers of plastics they started to unstick in the sharpened angles of the zigzag.

c) defocusing the laser on purpose.
This seemed to be the best option. Defocusing the laser meant a wider area where the heat was applied. At the beggining I defocused it manually with a ruler. Later on I realised you can defocus it in the laser settings, which was way more useful and fast.


I finally decided to keep on trying with both the offset and the defocusing, and move on to try the first inflatable tests. First attempts were a bit dissapointing. The two PE layers did not seal well all along the sealing lines, which made the inflatable piece have small holes through which the air leaked when inflating it.

I realised it had to do with the two PE layers not being in complete contact to each other. I tried by taping the two layers to the board in order to make them stay in contact, but the result was pretty much the same. After several tries I thought of using some kind of adhesive. We didn't have any in the lab at that moment so the closest thing was the Nelly hairspray we use for the RepRap 3d printer surface (we use it to make the 3d printed piece stick to the base). This made the two PE layers stay almost 100% in contact. And since it's not a strong adhesive, it unsticks easily when inflating the object. By this tecnhique, I achieved the first succesfull test.

I also tried to use a thermo-adhesive spray. This is used for adhering clothes: you spray the clothes and the heat of the iron activates de glue. This sounded perfect for this process: the heat of the laser would not only melt the plastic but also activate the sprayed area along its path. Worst solution ever: the spray was not sticky but dusty, which made not stick the plastic layers together at all. Also, the heat of the laser cutter did not activate the adhesive (when you iron the sprayed clothes, you need to iron ir for at least 30 seconds). So after a couple tests I didn't even try this again.

However, the method with the hairspray was not 100% reliable either: there were always some air bubbles trapped in-between the two layers, no matter how hard I tried to take all of them out. An air bubble means the two layers are not in contact, which can make the sealing fail on that point.
Then I decided to google deeper about sealing plastics together with a laser. I found there are experienced companies (1, 2, 3, 4, 5) with speacialized laser machinery for transmission welding, even though I believe this method is basically for rigid plastics. There are two important things I got from their way of doing that could be helpful for welding my PE layers:
-The top plastic (transparent) must transmit the laser radiation and the bottom plastic (opaque) must absorb it. This explains how color affect the welding process and this explains which thermoplastics can be welded.

-To ensure perfect contact of the layers, pressure needs to be applied.
These videos explain everything about laser welding:
After seeing how they do it, I realized by the way I did it most of the laser power went through the two transparent PE layers. I decided to try with two different polyethylene layers: one transparent and one opaque. This seemed to improve the sealing quite a lot, but still did not seal when there was air in between the layers. This means there was always a chance of getting gaps in the sealing, so the tests would not be airtight.


After playing with the laser settings, I managed to make a succesful small inflatable test.


it can also hold water!
But as soon as I tried with more complex shapes, sealings problems started to appear again. Most of the problems came from the two PE layers not being in uniform contact throughout the entire surface. This makes the PE layers react weirdly to the laser and rather not be sealed at all or being cut through.


The proper contact between the layers is what experienced companies solve by applying pressure on the two parts so they join. But pressure can't be applied in the Trotec...Maybe the air assist nozzle in the laser engraver could apply this pressure?...
That night, at home, I took out the garbage. When I replaced the bags for the garbage bin, I noticed how garbage bags were made: a roll of two plastic layers, with absolutely no air in-between. Two polyethylene (PE) layers in complete contact to each other throughout the entire surface. I had to try lasering that.


Even the first tests with this material had very positive results. The sealing was great thanks to the complete contact of the two layers. I tried different garbage bags and turns out biodegradable garbage bags seal better than any other material I had tried.


Soon after I started to make more complex tests and see how far I could go with this technique.


fly little man!
I wanted to see if I could get helium balloons out of this technique. I inflated the little man with helium, but unfortunately it did not rise. I think the size is too small and the plastic is too heavy for the amount of helium inside. I believe increasing the size of the design will make it rise, since the volume of air inside would scale up quicker than the amount of surface outside.
However helium has very thin particles which leak through everywhere. In this photo I had two men, one inflated with helium and one with regular air. The one with helium (left) deinflated in about 1 or 2 hours, while the man filled with air (right) lasted completely inflated for at least more than a week.

I also wanted to try getting ice shapes by filling the inflatable with water and freezing it (this plastic is NOT foodsafe). Here the result:


Inflatable text can also be made!
sealing
cutting

It's interesting how much it bends when inflating. Notice how the lower part of the L bends, forcing also the A. When inflating, a slight curve in the design will curve even more if no other part stops this movement. This might be something useful somehow...

When the sealing is good, you can keep blowing air above the limit until the PE plastic starts deforming. This plastic is not elastic, so any deformation will not go back to the original shape. The deformation makes the plastic thinner and thinner, so if it keeps being inflated it will end up bursting.
In this case I inflated it until the little man's belly started growing. When inflating it, I did not decide which part of the man I wanted to start deforming. Inflatables are a bit unpredictable...but I guess the deformation will occur in the bigger volume of the shape, in this case the belly.

This made me think: maybe I can somehow control this deformation? Can I use the laser in a way to weaken the plastic or make it thinner? If so, will the deformation occur where the plastic is weakened? The answer is uncertain...Seems like it might be possible, however the material is probably not the best for this method.
This is the closest thing I could get before the test burst. For the blue lines I set the laser power very low, lower than the sealing power, so it weakens the upper layer without sealing it to the lower layer. I think this could work out better with a thicker material.


With this other test I discovered something very interesting. When the shape is inflated, the narrowings that subdivide the volume will make the shape unstable in the straight position. They will tend to bend to one side or the other, making the narrowings act as articulations. This allows each part of the inflatable shape to keep its position as desired.


Then I decided to move on to more complex shapes and explore this articulation method. I decided to do a scorpion so I could test if the tail can be articulated by dividing it in different segments separated by narrowings.


The result was very satisfying. Once inflated, the tail acted as expected and it could be articulated into any position keeping the shape.

Since I had only tried to seal exterior boundaries, I also wanted to try interior sealings, so the inflatable volume can be subdivided into smaller volumes, but all of them sharing the same air. In order to try this, I decided to do a Star Wars spaceship: the N-1 Starfighter.


Notice how at the end of each interior sealing a wider rounding is needed. When inflating the object, the tension held in these points is higher than in the rest of the sealings. Without this wide rounding, the PE plastic will most likely tear and create a hole, which will ruin the inflatable. A more elastic or thicker plastic would probably hold this tension easier.


So these are most of the tests I did for the wildcard week. I will stop for now, but I will keep on testing after Fab Academy. Things I want to try: using the air assist of the laser to apply pressure on the plastic layers; a bigger scale (balloons, zeppelins, boats, architecture...); a more elastic material; softrobotics; concrete molding; cnc welding...
I believe this technique has so many possibilities in the digital fabrication area and I really want to see how far it can go.
step by step
I will explain now how to make an inflatable step by step:
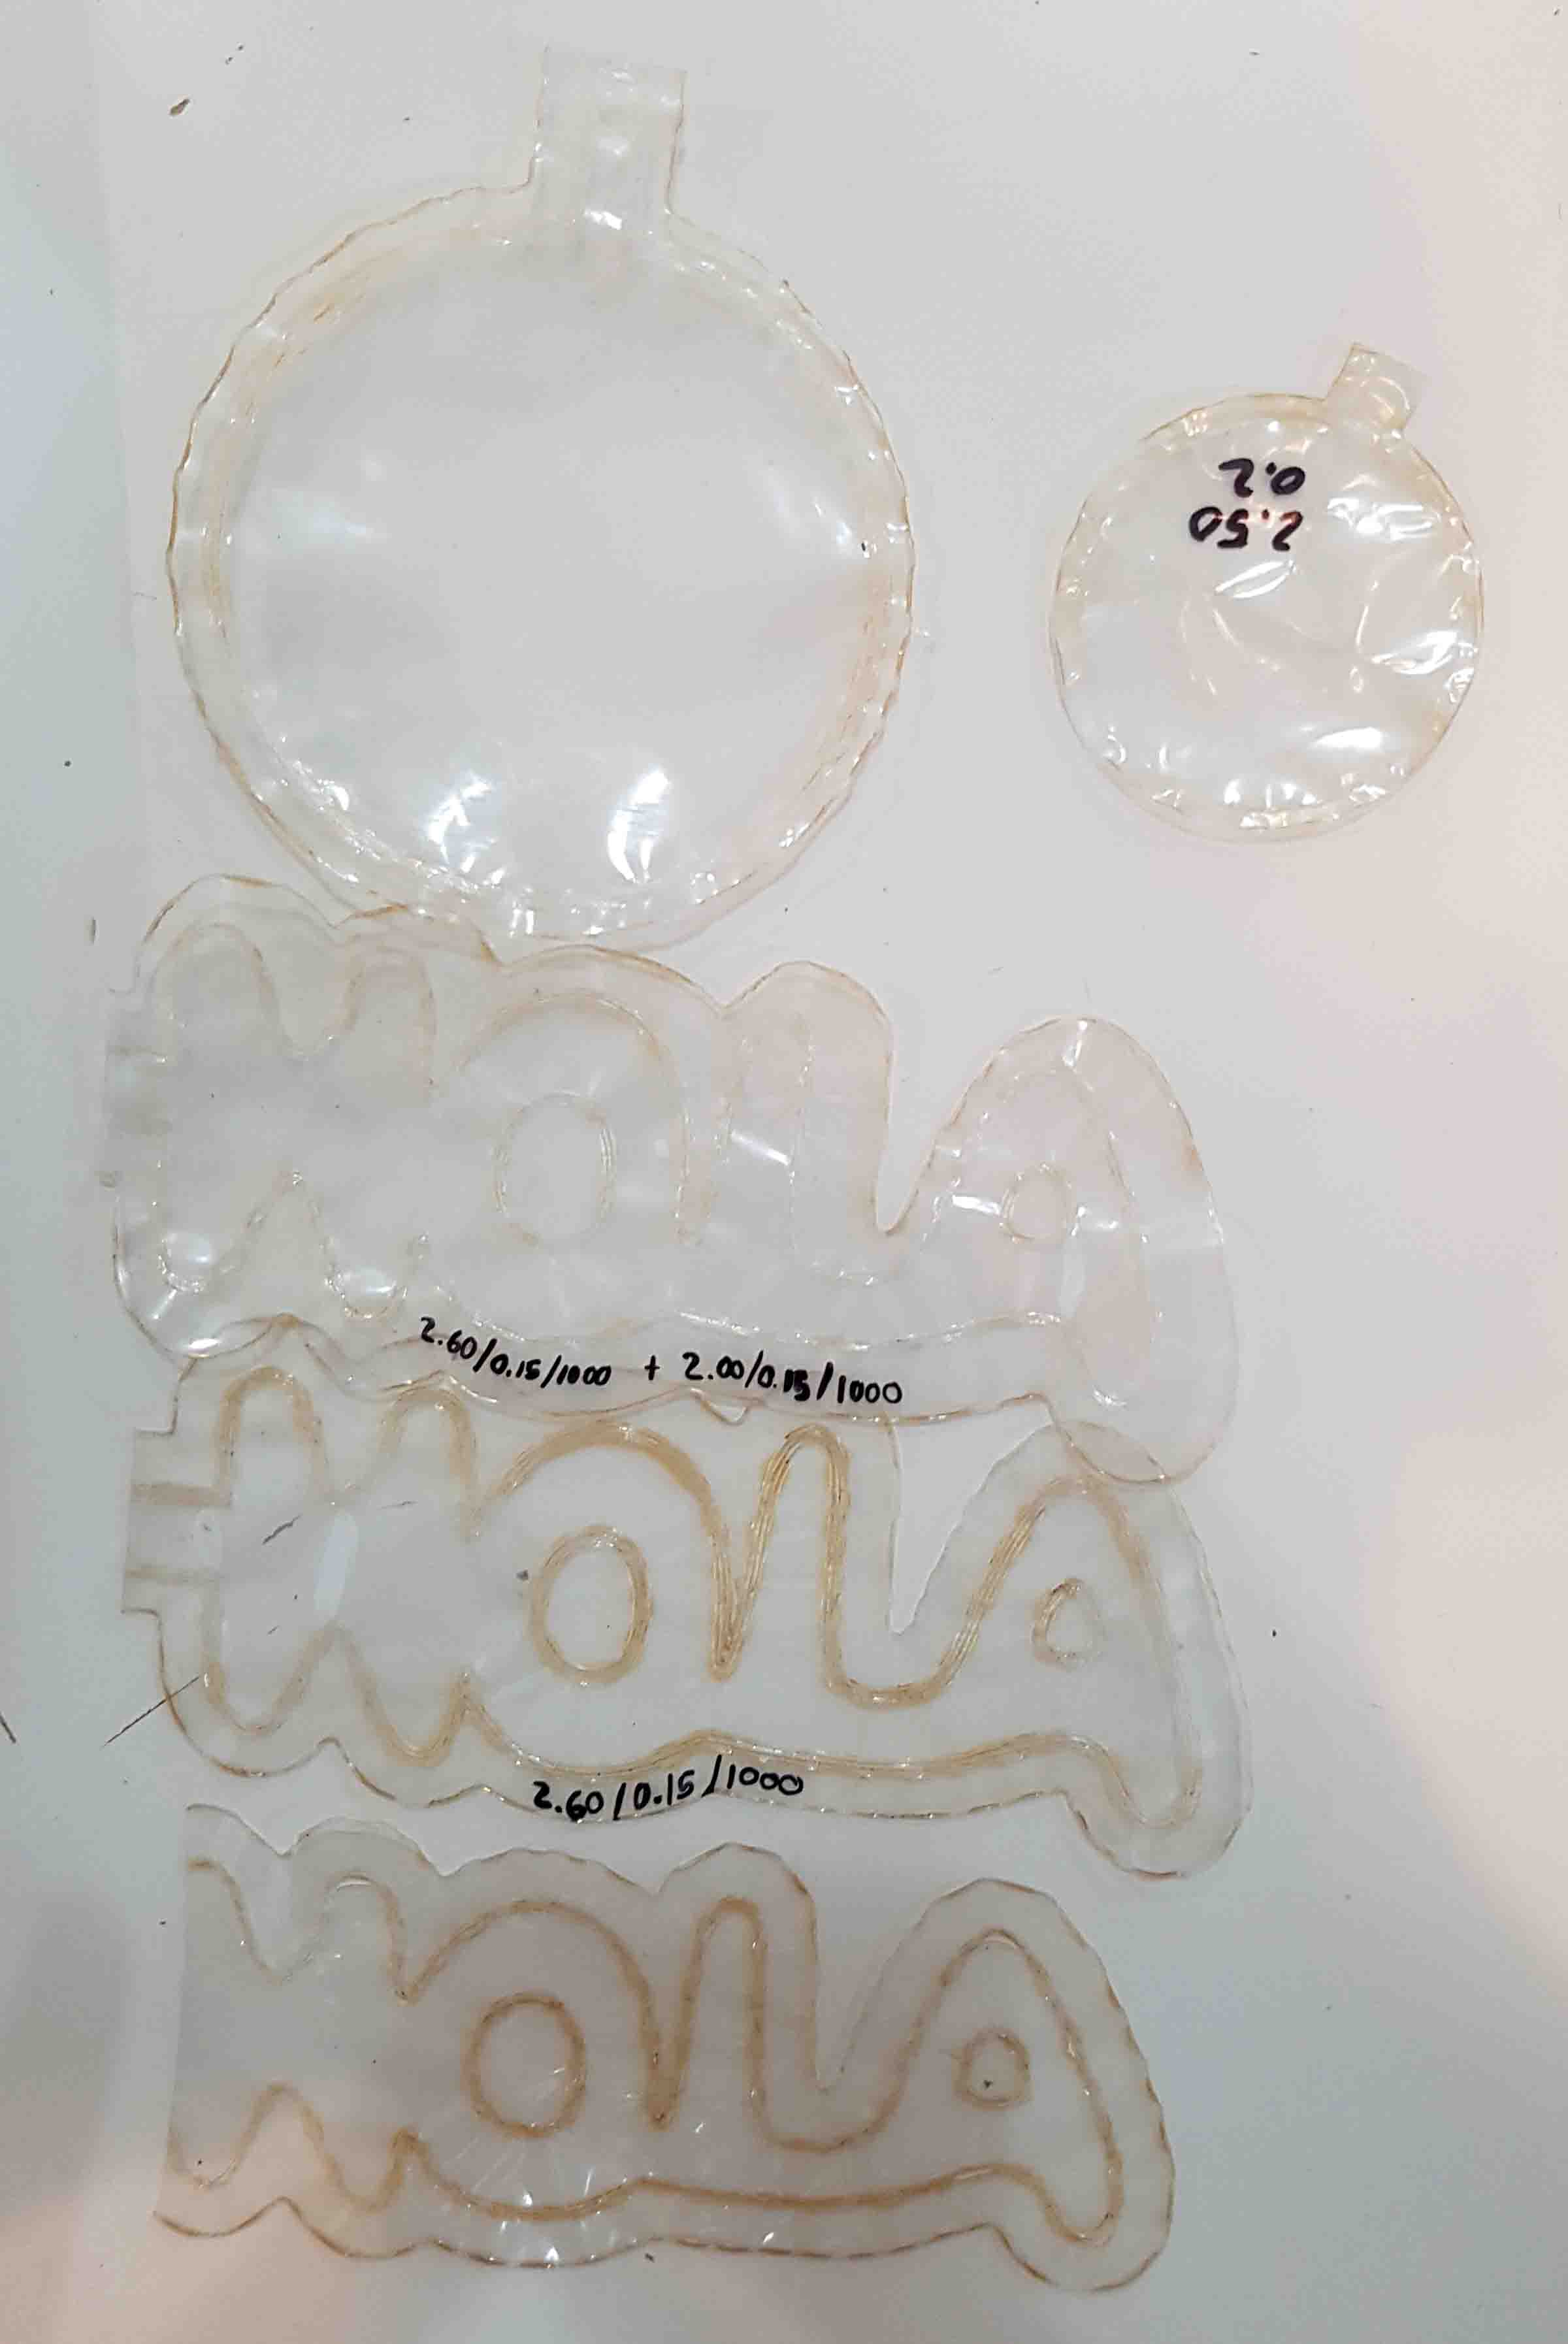
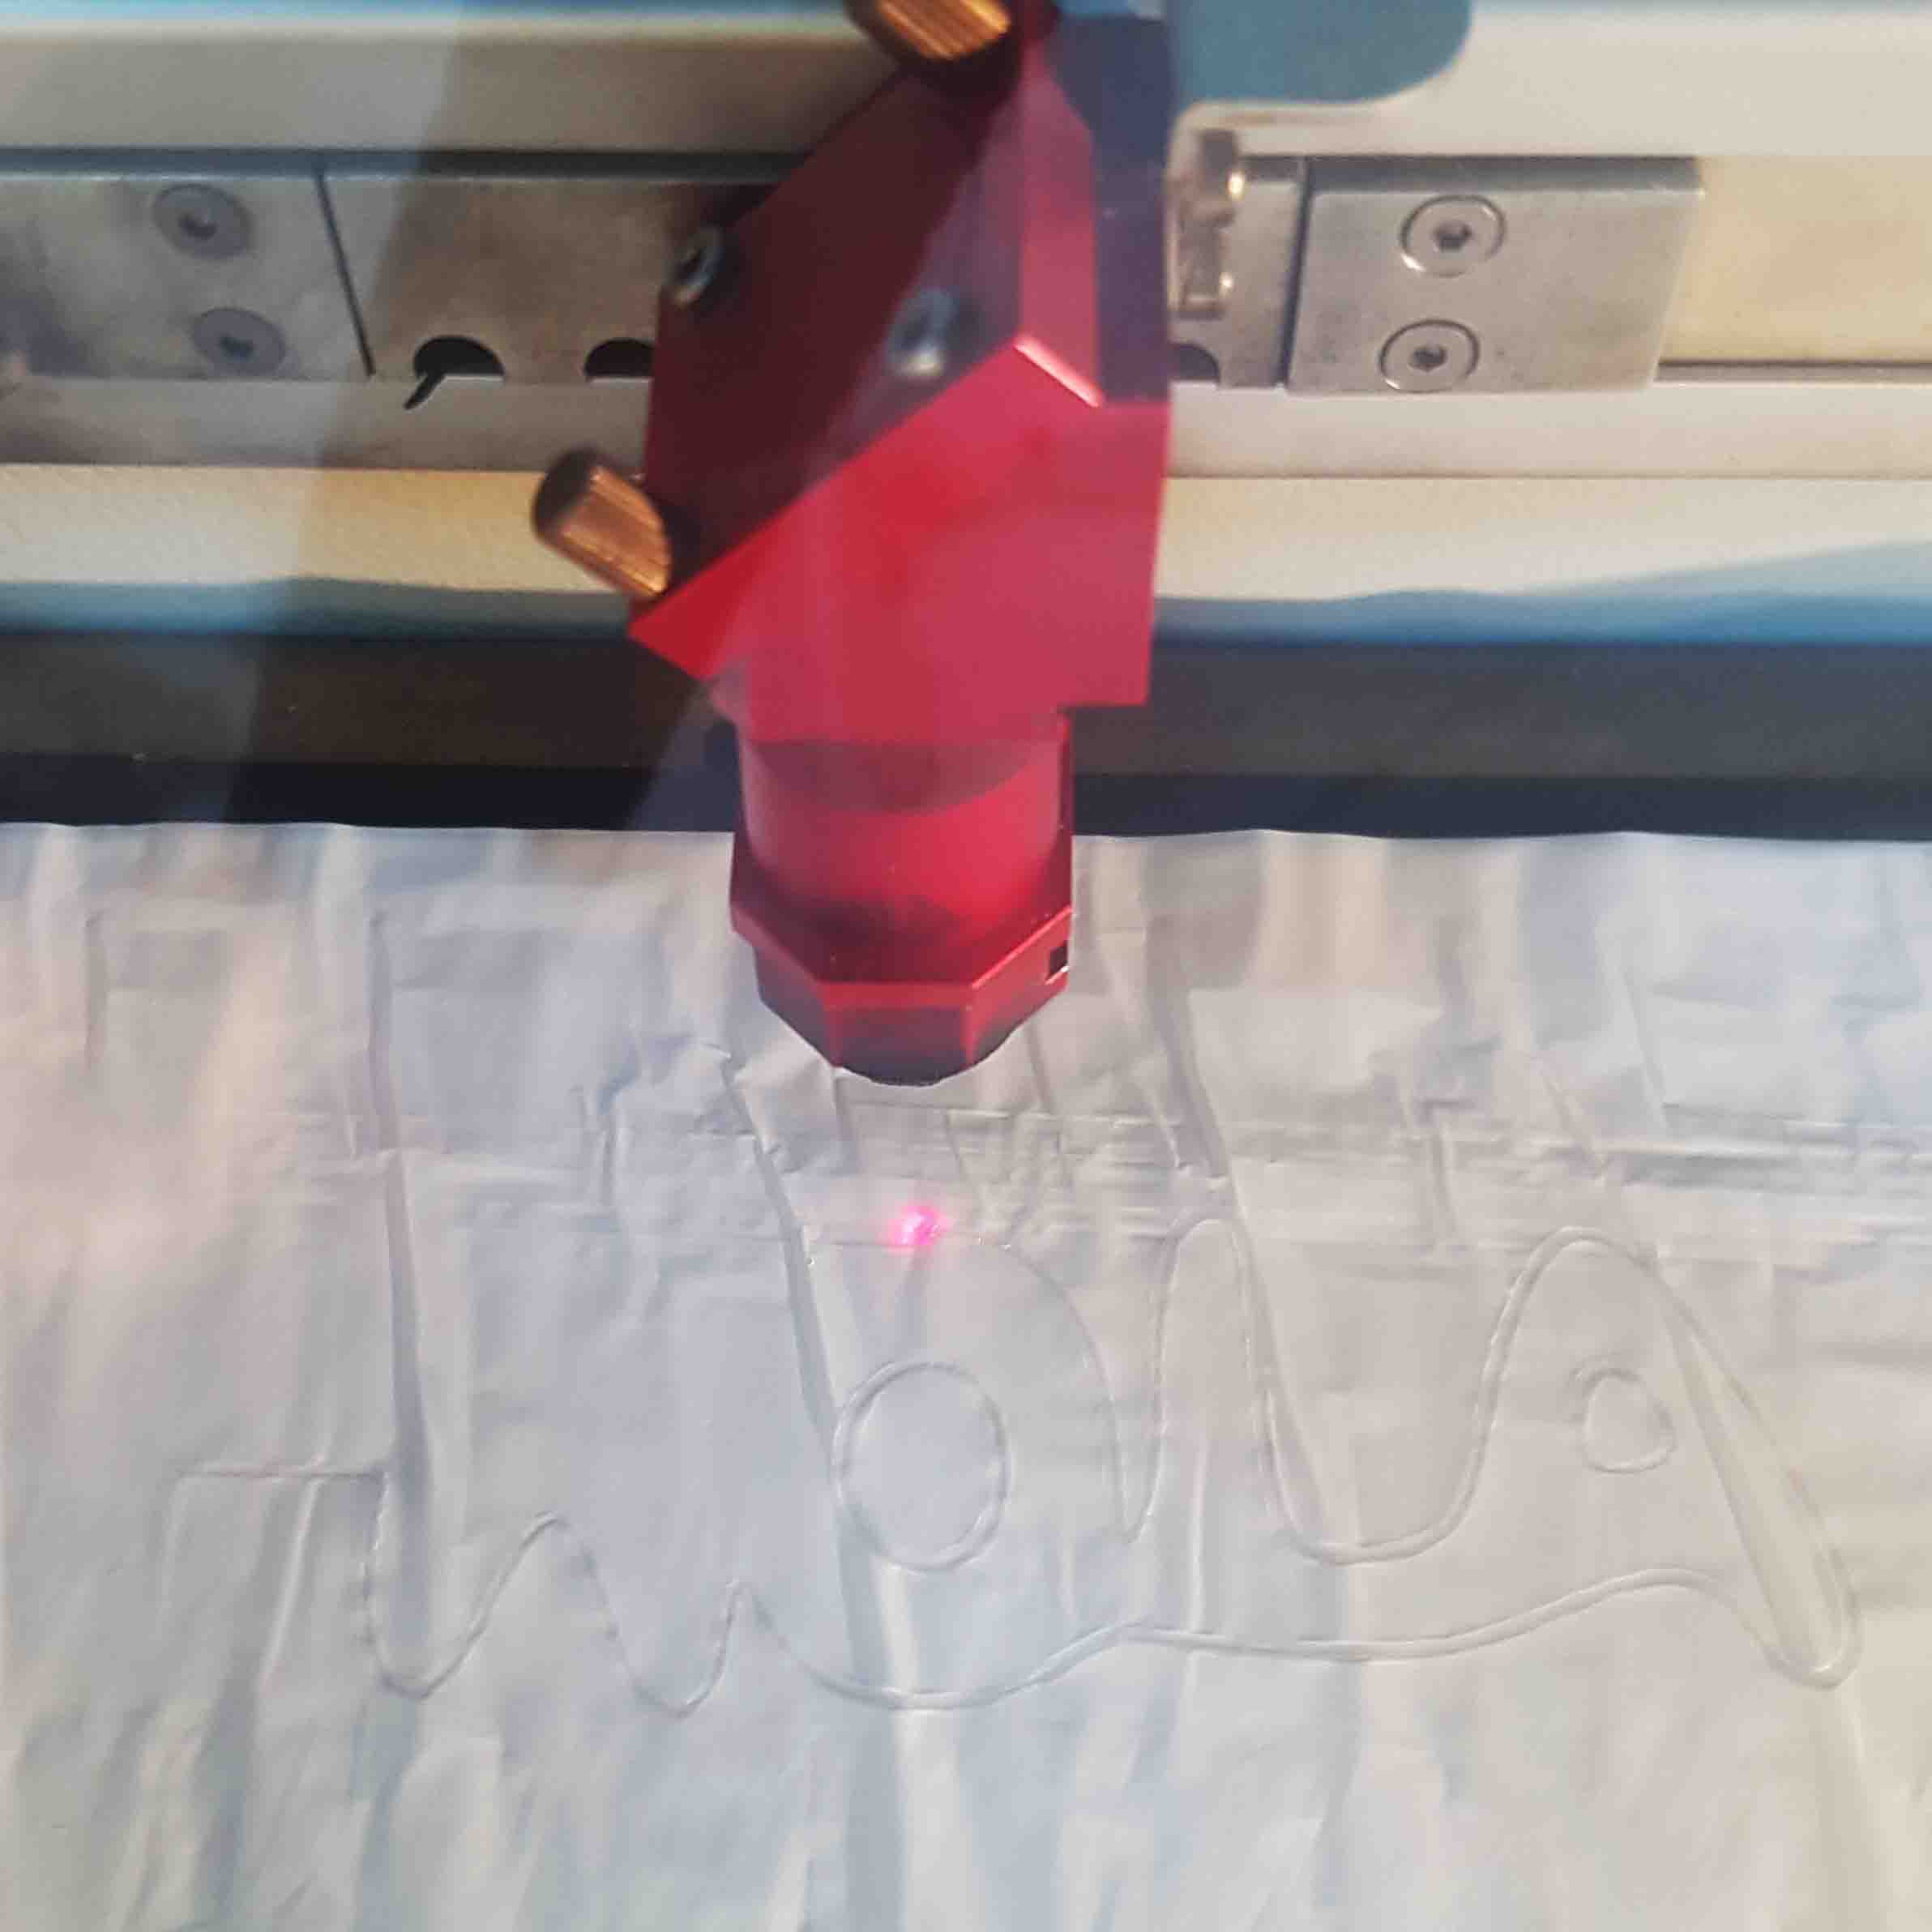
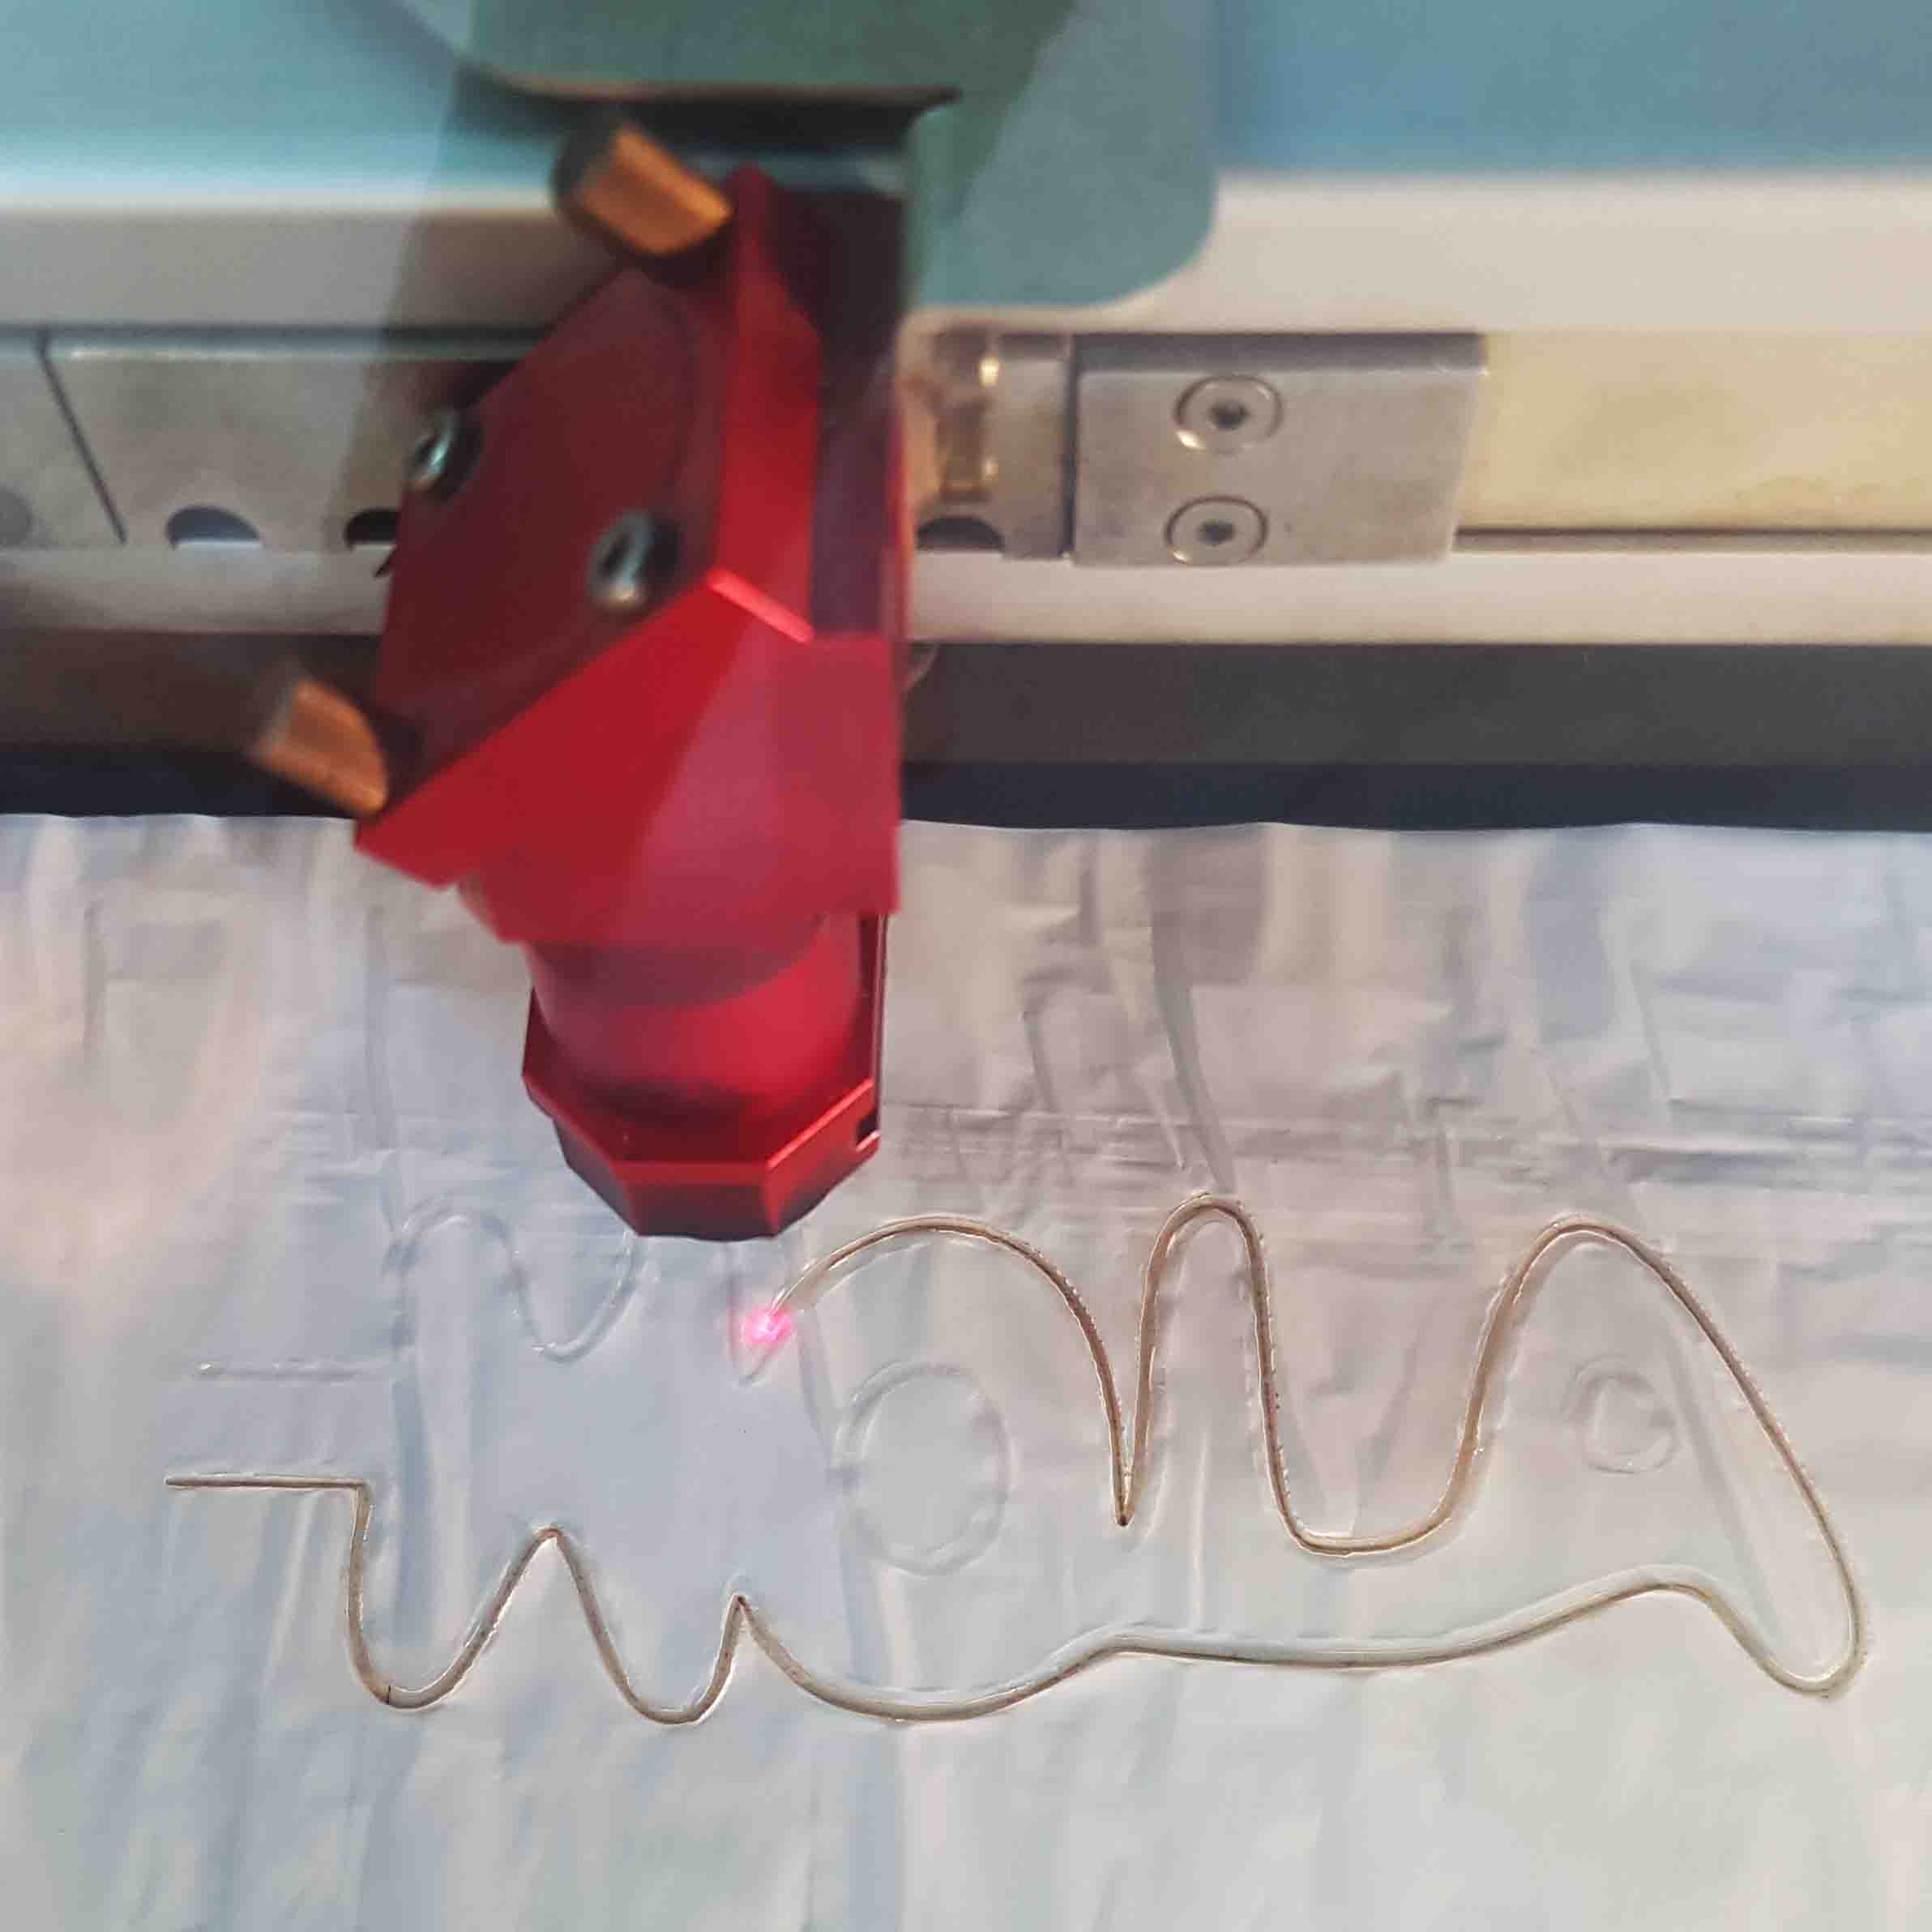
In Rhino, draw whatever you want to inflate. You will need 2 layers, one for sealing (black) and one for cutting (red). Remember the sealing goes before the cutting! I usually triplicate the sealing path to ensure the sealing is good. I offset each line 0.4mm. If the inflatable is very small, even just one path for sealing might be enough.
Also try not to have sharped angles because the laser speed/power will change slightly on those points and it will probably do weird things when sealing. Try to make the angles as round as possible in order to make the laser movement smoother.


Remember to draw an air entrance. I make this entrance a bit long, so I can use it later for making a knot. Once the whole shape is cut, you will need to manually cut off a thin slice of this air entrance so as to be able to introduce the air pump or straw.

Prepare the laser machine:

place a flat base on the laser table

take one garbage bag from the roll

place the bag on the wood as flat as possible

put some weights on the edges of the bag
One aspect to keep in mind is the air ventilation inside the laser. Because the plastic bag is very light, it is very easy to be moved by the air. The weights help keeping the bag flat and also hold it in place from the laser machine ventilation. The long piece I put on the lower edge is very important because the air blows from the lower to the upper part. If there is no weight along this edge, air will flow underneath the bag and lift it up from the base. I also tend to close half of the air ventilation valve so the air blowing inside is not that strong. If this is not done, when the laser is cutting the design, the air can lift up some parts, which can ruin the whole thing. The triple sealing also helps sticking the shape on the wood.
You will try to place your design avoiding the wrinkles of the bag as much as possible. The more wrinkles the bag has, the higher the chances of getting a bad sealing. Actually, out of all the bags in the roll, the first ones are better because they have less wrinkles. The inner bags of the roll are too wrinkled and will cause many problems in the sealings, specially when doing big inflatables (It would be nice to obtain a BIG roll of this material, so there would be more and bigger bags. This would also allow a bigger flat area and a bigger inflatable design...)


I usually limit the design size to this area to avoid the wrinkles
In Rhino, print your design to the Trotec software. Once there, place the drawing in the flat area of the bag and prepare it for sending it to the laser machine. For this material I used these settings:
Sealing: Power 2.70 - Speed 1.10 - 1000Hz - Zoffset 16Cutting: Power 5.00 - Speed 1.00 - 1000Hz - Zoffset 10
When the job is done, remove carefully your design, cut off the air entrance, blow and make a knot!


:)

download files
