Assignment:
A. Test the design rues for your 3D printer
B. Design and 3D print an object.
C. 3D scan an object (and optionally print it).
B. Design and 3D print an object.
C. 3D scan an object (and optionally print it).
Introduction to 3D scanning and printing
3D printing is synonimous of additive manufacturing which determines very clearly the processes it implies: adding layers of material to create/print an object of any form or shape. While additive manufacturing is a process that exists for a long time the tems 3D printing is more recent and mostly associated with indivual product designer, hobbyist, the maker and DIY movement. 3D printing allow rapid prototyping of a design at a marginal cost. While there are many techniques and each of them have their advantages and disadvantage in general it is suited to create research iteration, prototypes, molds, etc. It is a relatively cheap process that allows to get an almost immediate result, test physical, technical and aesthetical aspect of a design. Even though there are exceptions 3D printers are usually of relatively small size adn best suited for small objects that could not be produced sbstractively and/or with more conventional machining process. Printing large objects are often impossible due to the machine size but also because it would be too energy and time consuming. Another disadvantage of 3D printing is the strenght of the object produced. Because the pritn happens through layers it is very likely the piece might not resist force that are aligned with the pritned layers. In some cases it is possible to overcome this but it is nevertheless not recommended for long lasting parts that will receive lots of stress.
We use CAD application to create 3D printable models. 3D CAD files can be generated via a plain digital camera and photogrammetry software, a 3D modeling applications (see week2 assignment) or a 3D scanner which is a process of collecting digital data on the shape and appearance of a real object, creating a digital model based on it. The .stl format is the standard for 3D printing. Most CAD applications produce errors in output STL files and a repair step is often needed to consider the file printable. Once completed, the STL file needs to be processed by a piece of software called a "slicer," which converts the model into a series of thin layers and produces a G-code file containing instructions set to a specific type of 3D printer. This G-code file contains all the instructions for the 3D printer to execute the job.
A_Test the design rules for your 3d printer
I did this group assignment invividually as I was assigned with 2 continuing students who do not attend class on a regular basis.
I downloaded this All in one 3D printer test from Thingiverse.
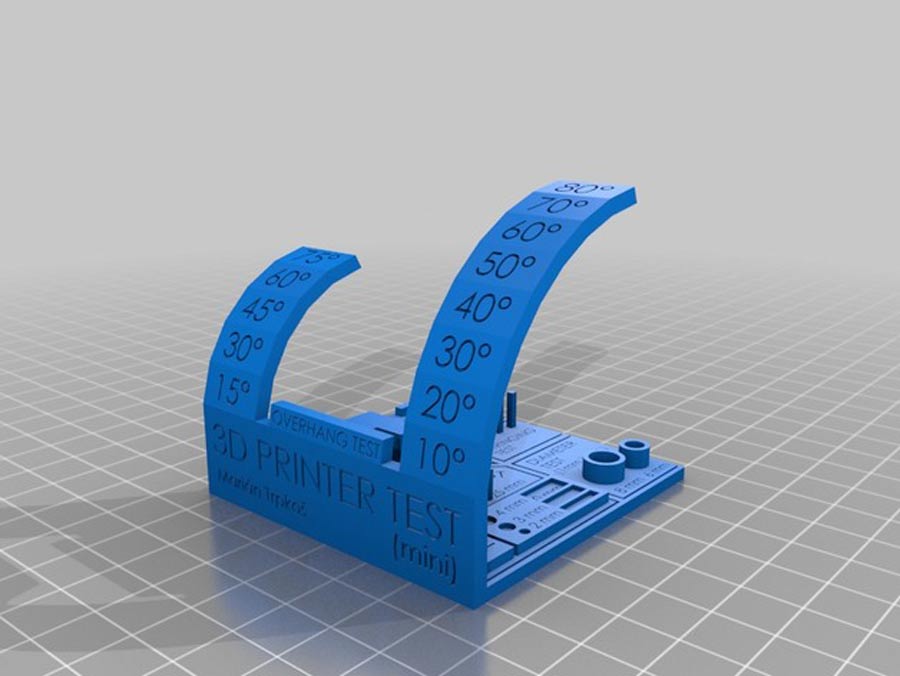
The test comes as a .stl file and contains a complete set of design elements (hole, diameter, scale, stringing, support, bridging and overhanging) to test the precision and quality of a 3D printer as well as the material possibilities and to test the parameters of a specific printer.
For this exercise I am working with a Ultimaker 3 which is (at the time of this documentation) the upgrade verson of the Ultimaker 2 printer. Most feature have been upgraded to target the professional market. It integrates dual simultaneous printing and a slighly smaller print area (215 x 215 x 200 mm:) than its previous version (Ultimaker 2) and can print to temperature as high as 280º celcius. I reviewd the Ultimaker user's manual prior to start the actual printing process.
I am using CURA to setup the print, make the Gcode and control the printer. The CURA manuals pages contains different documents to get user introduced to work with the Cura application and prepare printing files with Ultimaker 3D printer. While the manulas covers mostly printing with Ultimaker, Cura can also be set and used to print with other 3D printers such as Reprap, Prusa or many others (driver and setting files are available).
Printing setup
Cura contains a large lists of setting that are divided in different sections:
- Machine—Settings related to the specific printer
- Quality—Settings that define the (visual) quality of the print. The layer height - one of the most often changed settings - is the thickness of one printed layer (in mm). With a thinner layer height you will usually increase the quality of the print, leading to a smoother surface and more detail visible in the Z-direction (height) of the model.
- Shell—Settings related to the outside of the print. Wall Thickness adjusts the thickness of outside walls (on the X/Y axis) of the model. This value divided by the wall line width defines the number of walls and is generally a multiple of the line width. For example: when using a wall line width 0.35 mm, it will be logical to set the wall thickness to 1.05 mm (3 * 0.35), which means that 3 walls will be printed. In general a wall thickness of 2 or 3 times the line width is sufficient. A higher value will create a sturdier model and decreases the chance of leaks, while a lower value can significantly decrease the print time and filament costs.
- Infill—Settings related to the inside of the print. Infill density defines the amount of plastic used on the inside of the print. A higher infill density means that there’s more plastic on the inside of your print, leading to a stronger object. An infill density between 10% and 20% will be enough for most objects though. (Instead of filling in the infill density as a percentage, it’s also possible to set the line distance. This determines the distance between each infill line, which has the same effect as changing the fill density.)
- Material—Settings related to Material. Retraction is one property that can be set. At the places in a print where the printer has to do a travel move between two printed parts and you don’t want it to leave plastic in between the use of retraction is important. This means that the filament is pulled back by the feeder, so that it doesn’t leak from the nozzle during the travel moves. By using retraction, “stringing” (thin threads of plastic in between the printed parts) is prevented, resulting in a much cleaner final model. You have to be careful with flexible materials or models that require a lot of retractions though, as that might lead to grinding of the filament.
- Speeds at which the print head moves while printing. The print speed defines at which speed (in mm/s) the print head moves while printing. Based on this setting, Cura will also calculate how fast the filament must be extruded. A higher print speed will lead to a shorter print time. But keep in mind that increasing the print speed means that you might have to increase the temperature as well, to ensure the plastic is properly melted. Although you can choose one overall print speed for the complete print, it’s also possible to use different print speeds for specific parts of the print:
Infill speed: The speed at which the infill material is printed. Since (visual) quality of the infill is not important, you could use a higher speed for the infill. But keep in mind that this might affect the strength of your print.
Wall speed: The speed at which the walls are printed. You can also set the speed for the outer and inner wall separately. Printing the outer wall a bit slower usually results in a better surface finish.
Top/bottom speed: The speed at which the top and bottom layers are printed. A lower speed increases the reliability of closure of the top layers, especially on large area prints.
Support speed: The speed at which support structures are printed. The quality of the support is usually not that important, so a higher value can often be used here.
- Travel—How the print head behaves while traveling.
- Cooling—Settings that define how the plastic is cooled. You can enable or disable the print head fans during printing. The print head fans will make sure that the material is properly cooled before the next layer is placed on top of it. Especially on layers with a short layer time and layers with bridges/overhangs, cooling will increase the print quality.
- Support—Options for support structures. Some models have overhanging parts, which means that parts of the model float mid-air when you would print the model. In this case you must use a support structure under the model to prevent the plastic from falling down. This can be achieved by enabling support.
- Platform adhesion—Options for how your model relates to the build plate. Options include Brim, Raft, and Skirt.
- Special modes—Features that influence printing. These modes include print sequence, surface made, and spiralize outer contour.
- Experimental—Experimental new features.
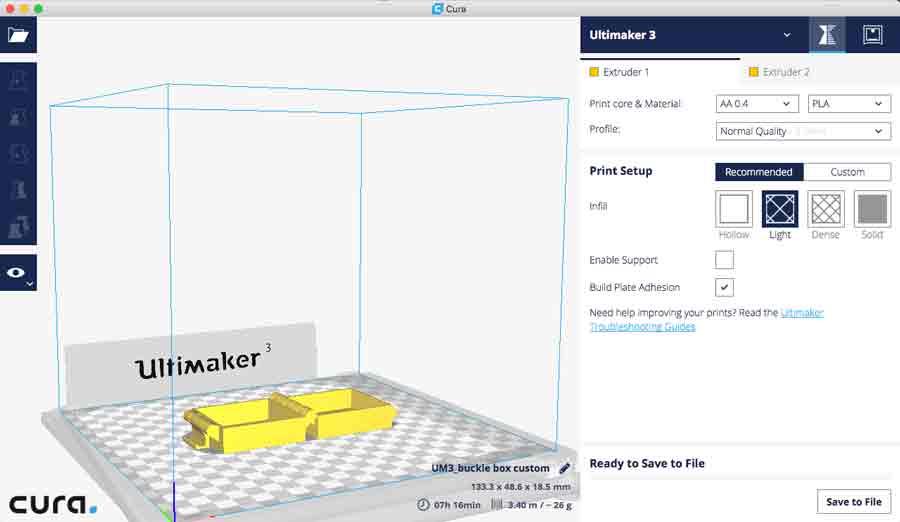
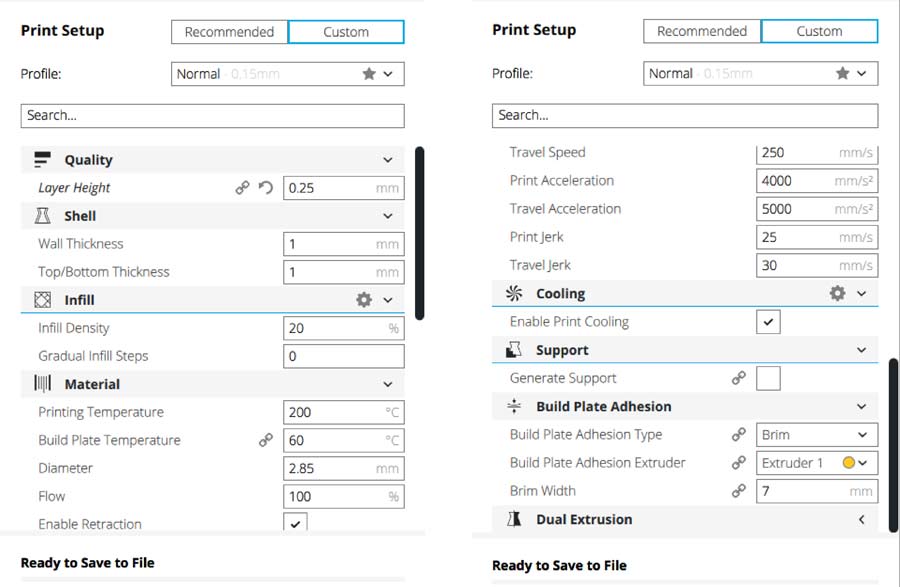
I loaded the stl file on Cura and choose Ultimaker3 which is the printer I will be using. After doing some research I sat the following settings: (here are only the main parameters (see following picts for full list of parameter settings)
- Infill: 10% - Cubic
- Layer height: 0.15mm
- Initial layer height: 0.3mm -
- Line width: 0.4mm
- Wall line count: 3mm
- Printing temperature: 205ºC
- Filament: 1.75mm
- Flow 100%
- Travel Speed: 120mm/s
- Print speed: 60mm/s
- Retraction distance: 6mm
- Retraction speed: 25 mm/s
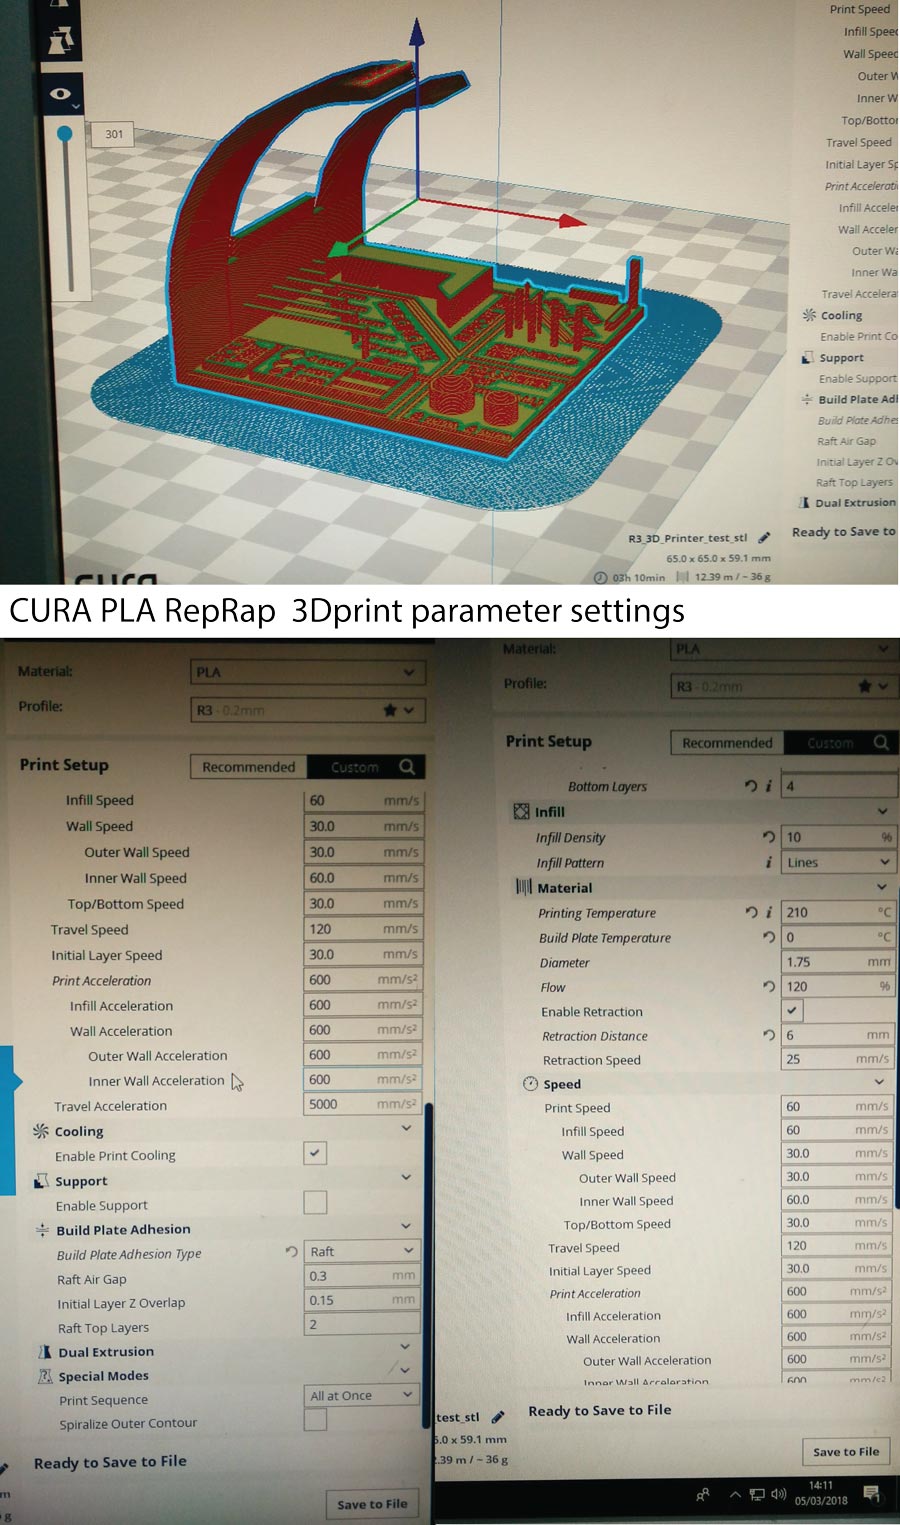
The print time was set for 3h:09 min using 36g of materials. I enabled retraction to avoid filament spill between parts that are seperated in the design but very close to eachother in the actual print. I added a Raft for the model to adhere tot he base plate, and disabled support so from the test we can deduct how much angle overhang can the printer with these setiing tolerate.
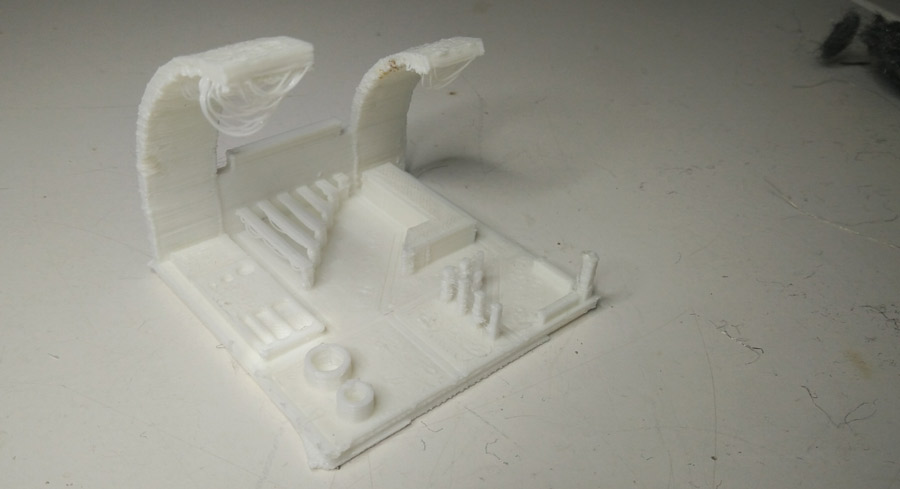
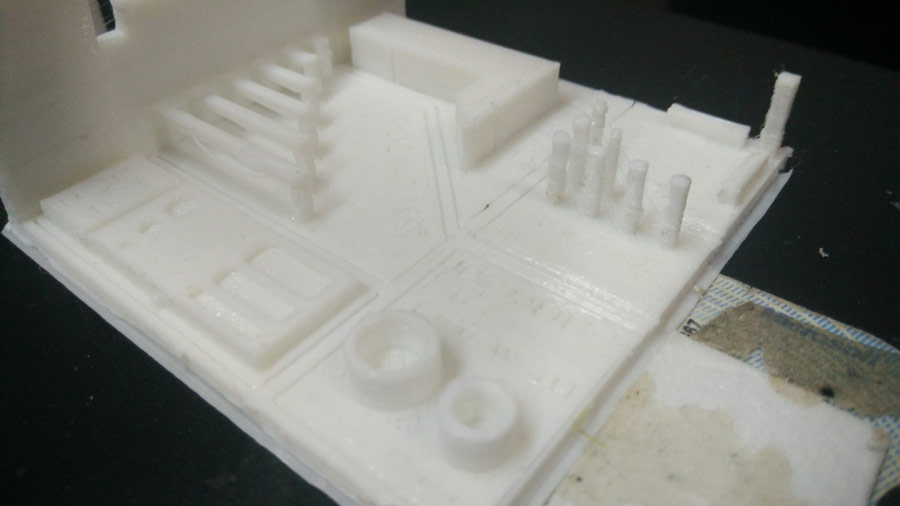
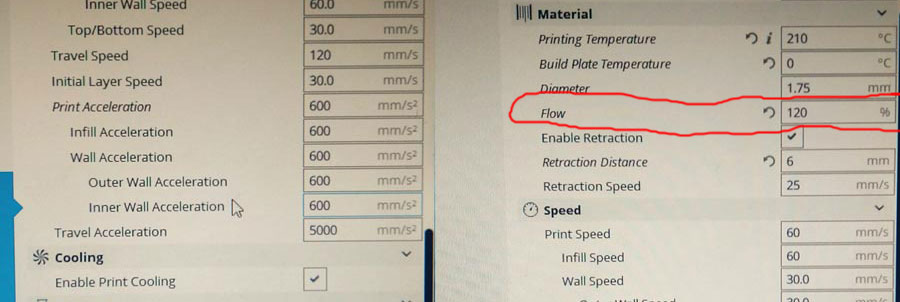
The quality of the print is very bad. I asked the 3D printer instructor to analyse the print and help me understand what went wrong. The inflill sub-presets were almost all on which should not be - they are for extremely speficic use-case and only the Infill density and Infill pattern should be checked. One other reason and probably the main cause of the porr quality print is the "material flow being set at 120%. That causes cluttering of the material on the nozzle as the printer is trying to force more material (120%) into the nozzle than it should.
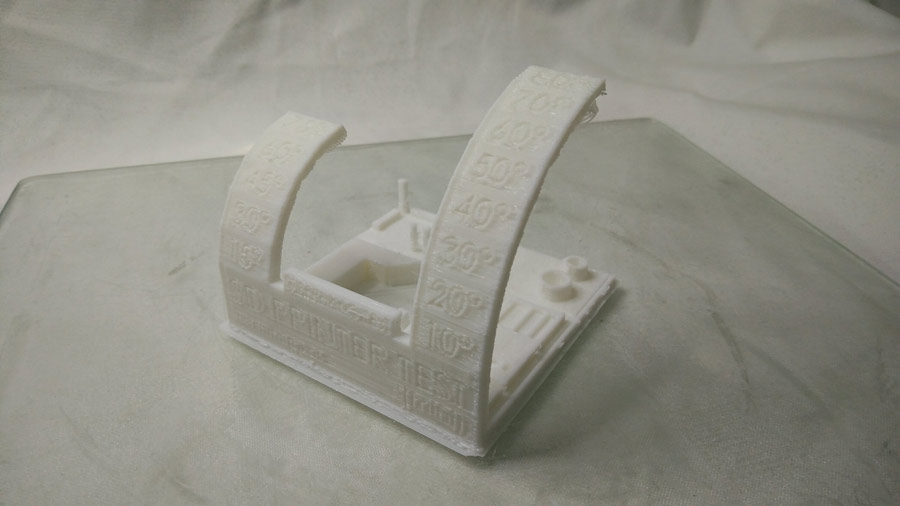
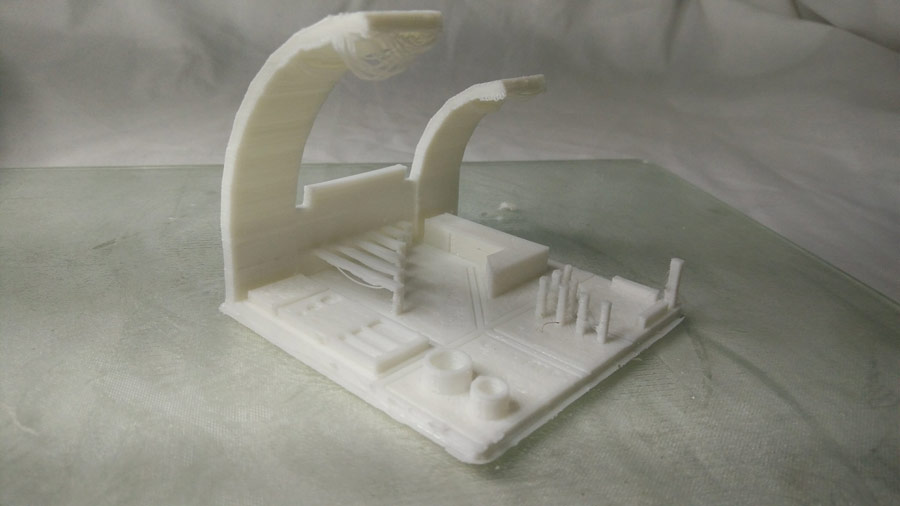
I also decided to uncheck the raft and replace it by a simple brim as it was not necessary to have such a big base. The new print with those settings came out much better. It shows much better the margin, potential and limitations of both the material and the printer it-self. For example we can obviously see how at 80% overhang the filament start dripping.
B_Design and 3d print an object.
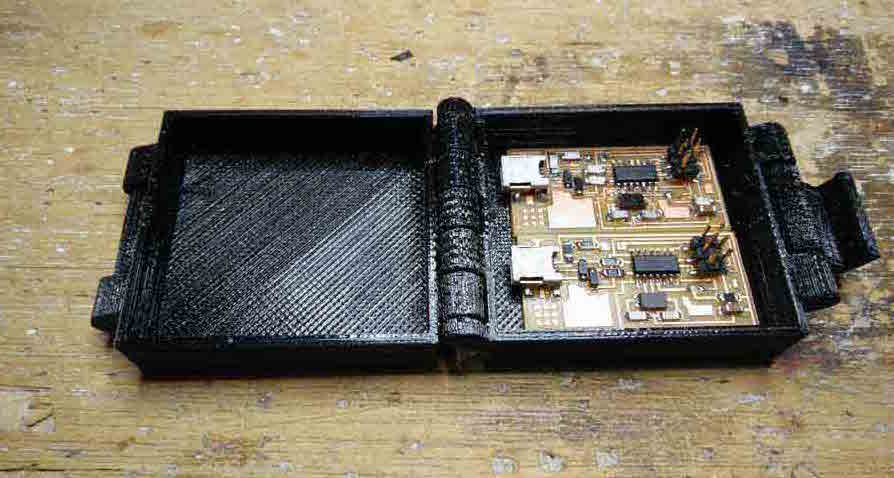
As a first exercise I downloaded a small kuckle box model from Thingiverse. I choose this model because the design has features that are perfectly suited for a 3D printing exercise since it would not be possible to make it substractively - parts of it (hinges and knuckle) can only be made in one piece additively. With any other fabrication techniques these parts would need to be produced seperately and later assembled. With 3D printing they can be produced all at once and come out of the printer already assembled. I also find challenging to find the right settings to print the whole object (including hinges and knuckle) at once and with such precise tolerance.
I started by editing the model (adapting the width and lenght) using Rhino. I imported the .stl file in Rhnino and proceeded with the changes. I used split and different boolean commands.
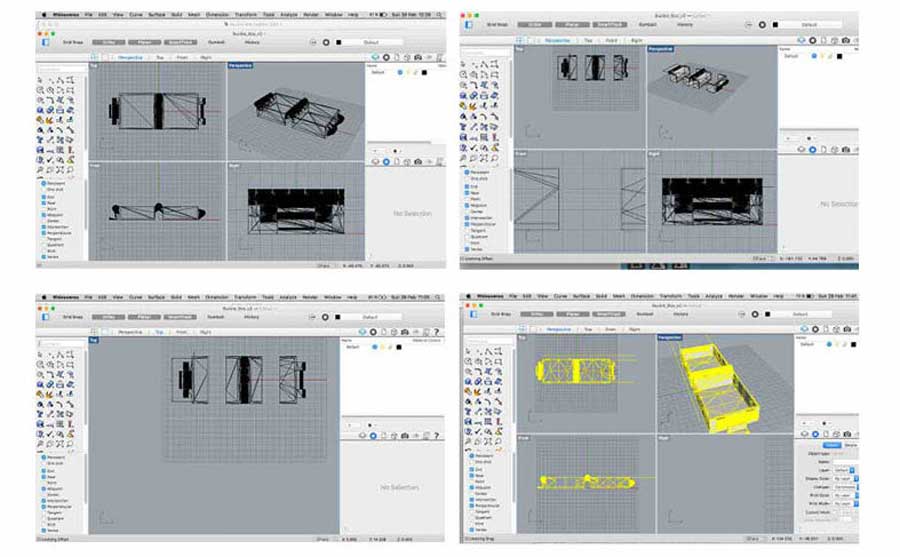
Than I exported the model to .stl and used Cura to generate the G-code for a Ultimaker2. Ultimaker2 which an upgrade of the original DIY Ultimaker printer. This version is a self assembling version with upgrade in most technical features (larger printing area: 22.3 cm × 22.3 cm × 20.5 cm, Operating nozzle temperature 180°C - 260°C, Operating heated bed temperature 50°C – 100°, layer resolution up to 20 microns). See ....
It was my first time using Cura and I used a low density print preset. I threaded black filament in the machine and printed it. Once the G-code is generated with Cura the print can be launched from the printer's menu.
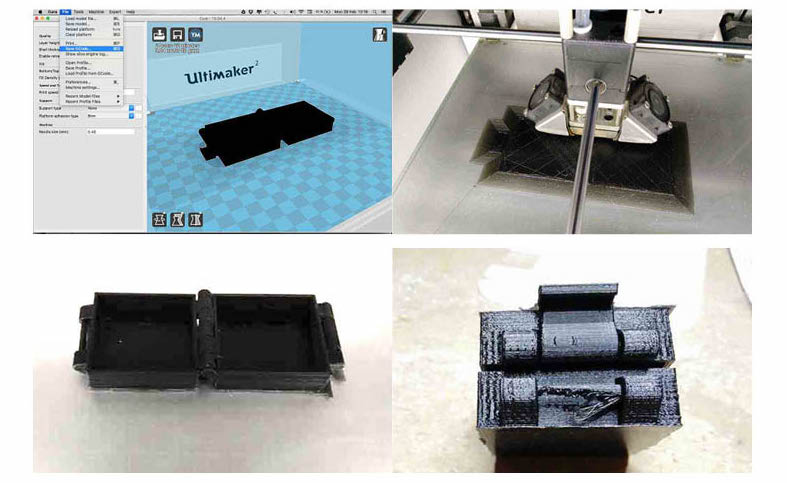
The print came out well for a low quality print - only on the thin parts of the "knuckle" the material dripped a little bit. But the hinges worked well. A lower (colder) temperature and higher retraction setting would have help solved the issue on those parts where the material could not have support, avoiding dripping.
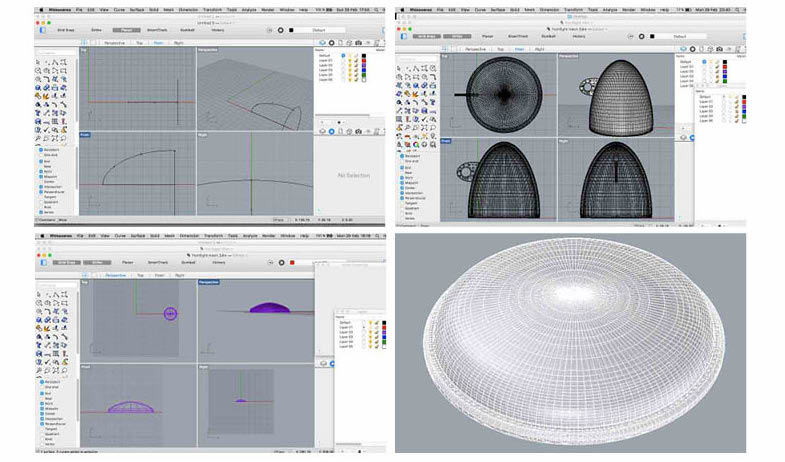
After I designed a front beam casing and the cap of a bike head-light (related to a possible projet I had thaught I could do) in Rhino also. For this model I worked with revolve commands. Then I sliced the stl file and generated the Gcode in Cura, and printed it on the Ultimaker2- again using presets. I use this exercise to experiment with wall thickness and to make a rapid prototype of part of a possible project.
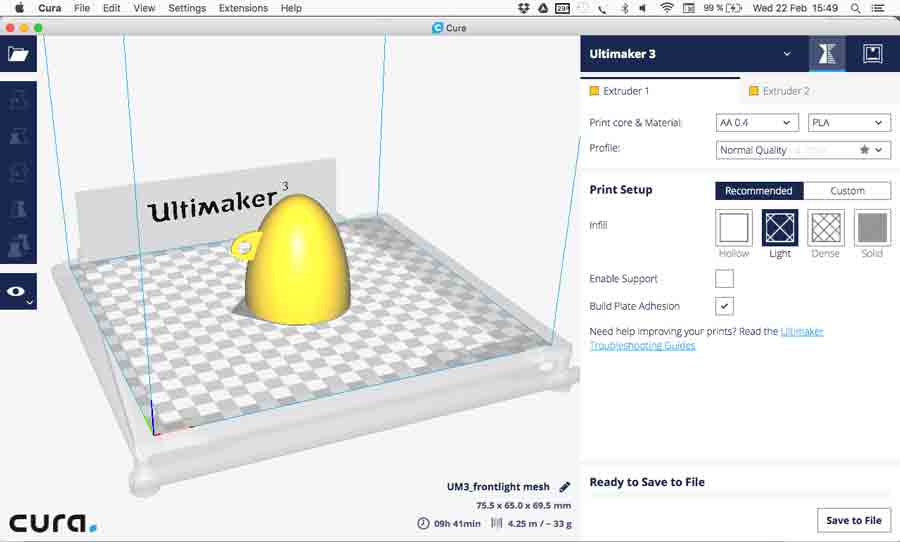

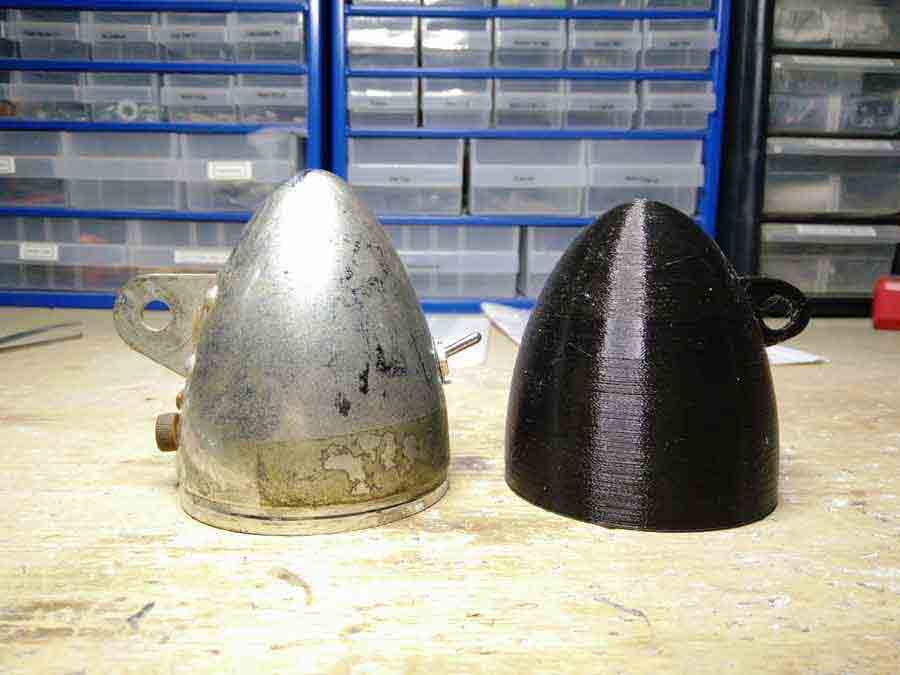
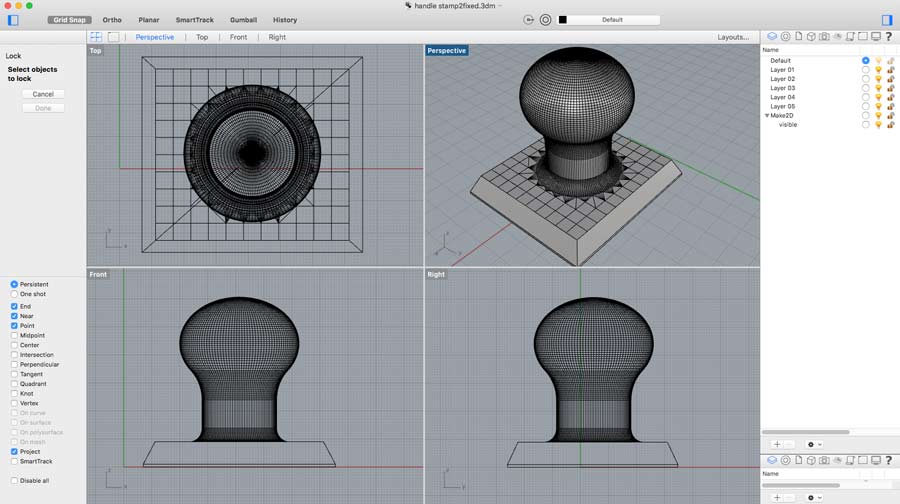
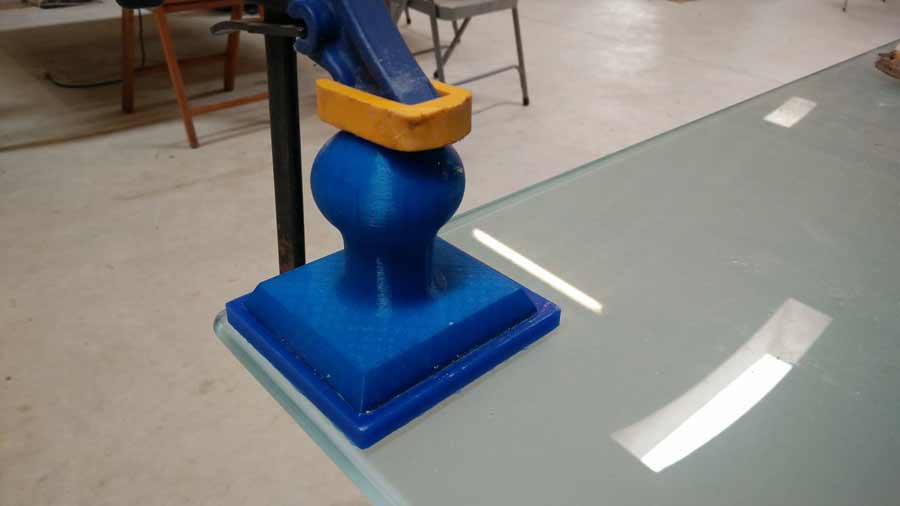
The next prooject I did is a rubber stamp handle. I designed, meshed and generated the stl file in Rhino and prepared the print and made the G-code in Cura for Ultimaker3. This time I played with custom settings trying to get a better quality finish as it is an object I would like to use on a daily basis.
The difference in printing time between normal and fine mode in the custom setting is only 20 min. extras so I decided to try out the fine options. I respected most of the suggested presets. Though I don't need any support, and just a thin brim at the bottom to hold the model to the base plate.
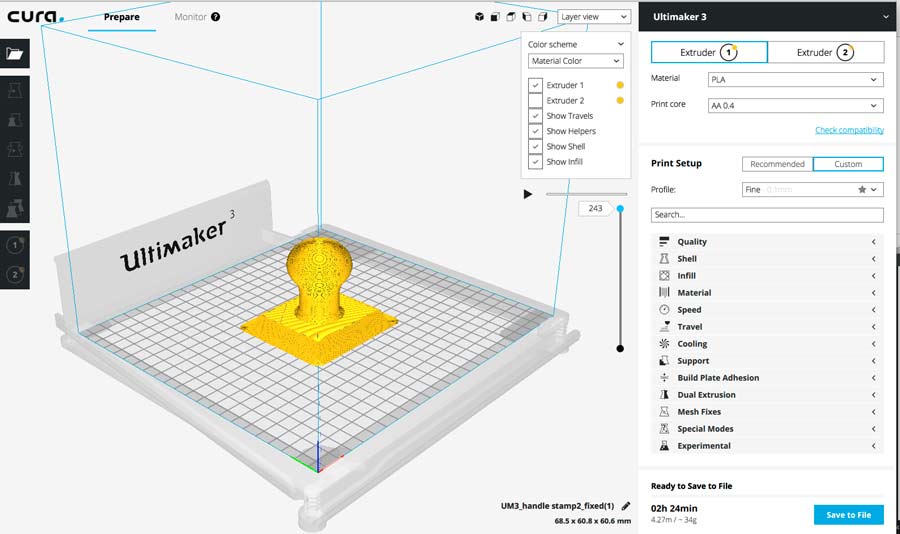
I chose a white filament but it got tangled on the roll during the job and could not complete. I had to start again but there was not enough white filament in the lab for a 2nd print so I changed and threaded a blue filamnet in the Ultimaker and resent the job. This time it completed and came out very well.
Wanting to test the strenght and resistance/vs/layer orientation of a print I designed a lamp holder - the typical plastic piece used to clamp a flexo lamp to a table or to a wall. I need to replace one that had just broken.
I created the model in Rhino, exported the stl file and made the g-code in Cura for a Reprap4. Reprap is an open source 3D printer replicable 3D printer. It is designed so a RepRap 3D printer can print a Reprap 3D printer - meaning as much of its parts as possible are 3D printable and hardware is composed of elements that can be sourced easily almost anywhere and at a minimum cost. Reprap pronters are highly customizable and can be redesigned by the user and for specific applications. See Reprap wiki page for more details on RepRap printer.
I set the print for dense infill ( for a stronger print).
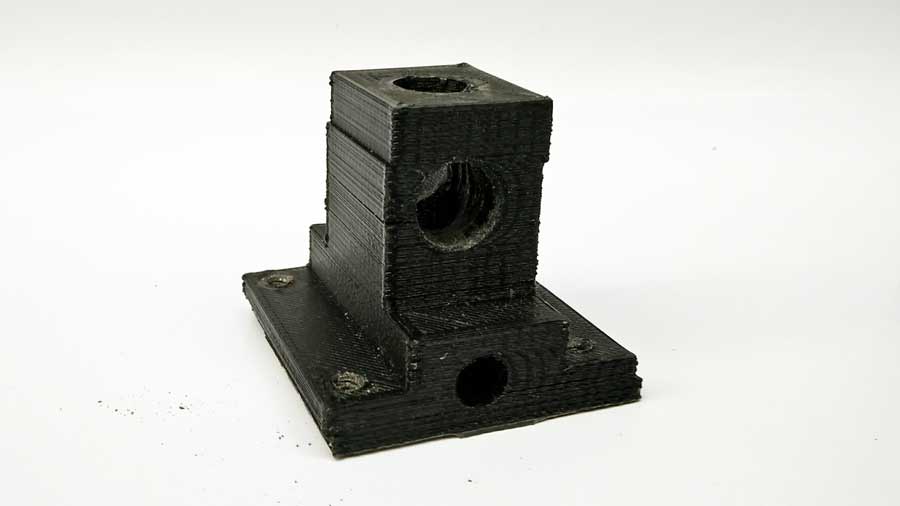
The first print did not come out well because the printer plate had a wabbly movement on the X axis. As shown in the next image some layers at the bottom and the top are offsetted by the printer.
Having to reprint I went back to the model and added a fillet and a few details
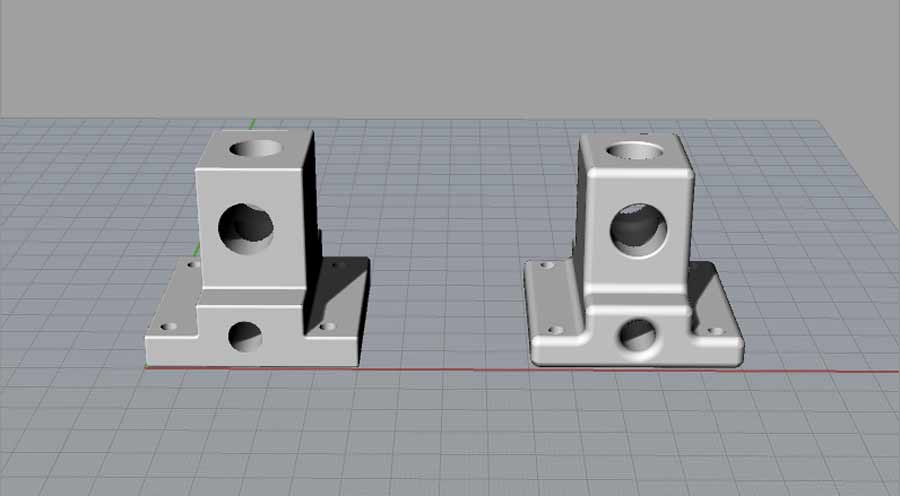
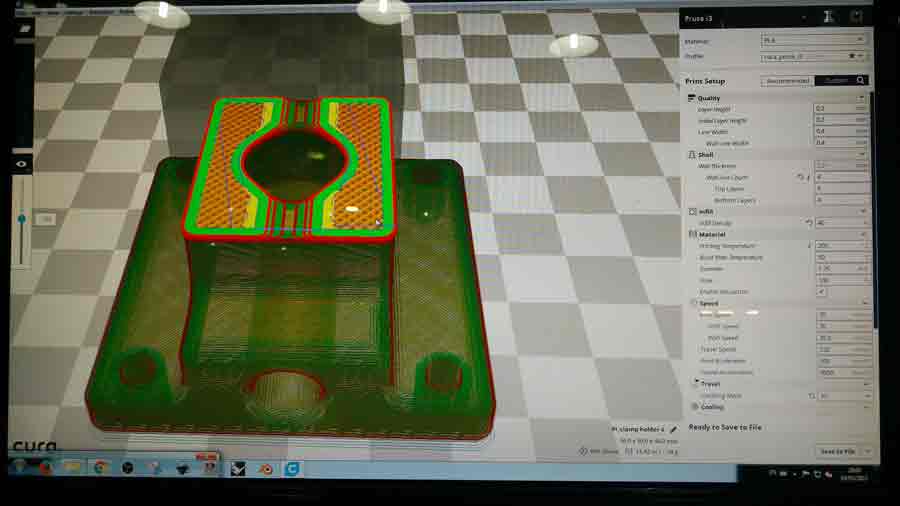
The print came out as it was designed and i mounted it to the wall but it did not last more 10 minutes.
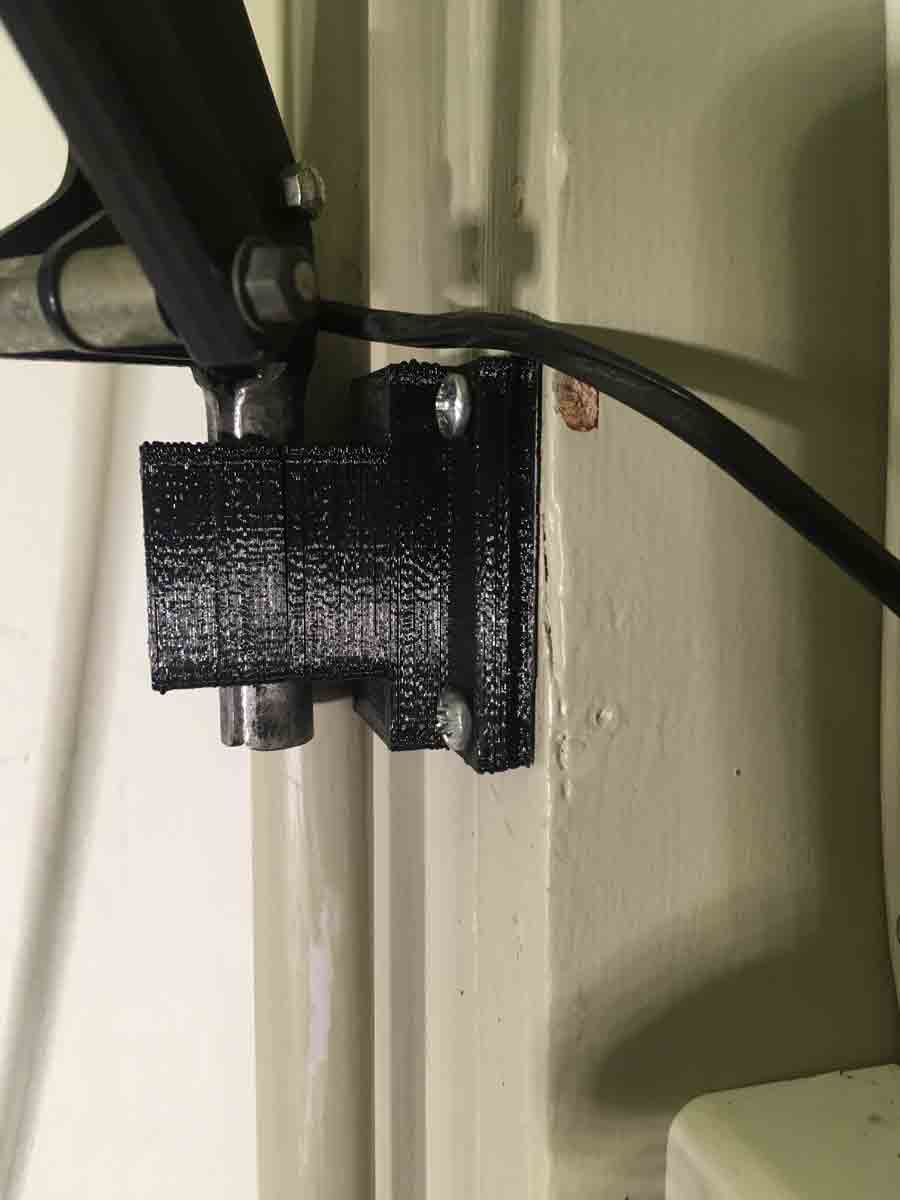
It splitted with the weight created by the hanging of the lamp. I repeated the print this time with even more infill and rotating the part so the layer would pruint on the vertical axis. This way the layer orientation would be perpendicular to the tension of the lamp weight.

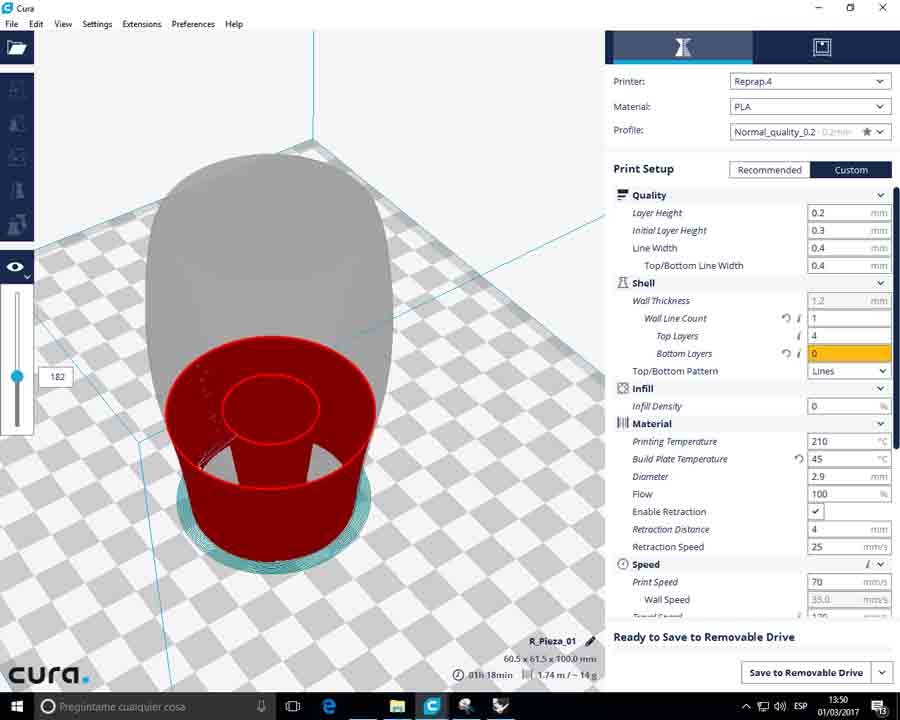
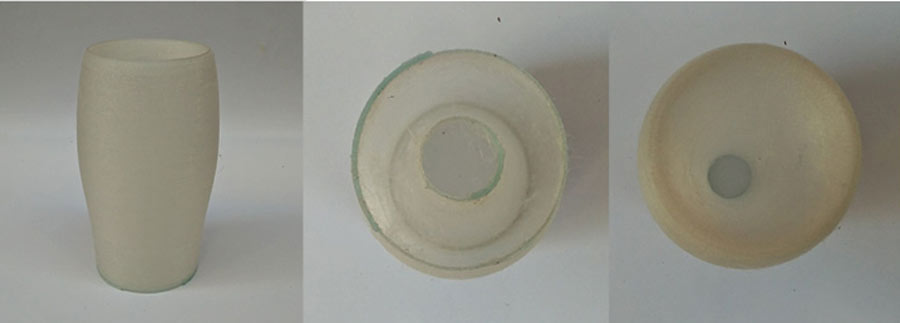
I also designed a hollow shape using the Grasshopper file I had done in earlier exercises. The idea is to experiement with very thin double wall and no support. I also printed with the Reprap4 using a minimal layer height (.2mm). The print came out well though in the interior part there was a lot of hairy leftovers from the prints, and because of the hollow shape it was difficult to get to clean it up. Having set a stronger retraction speed I could have avoided it.
3d scanning
I scanned my-self (chest up) with the skanect 3D scanner software which is available for free for trial perdiod, and the Kinect XboxOne hardware. The scanning process is fairly simple.
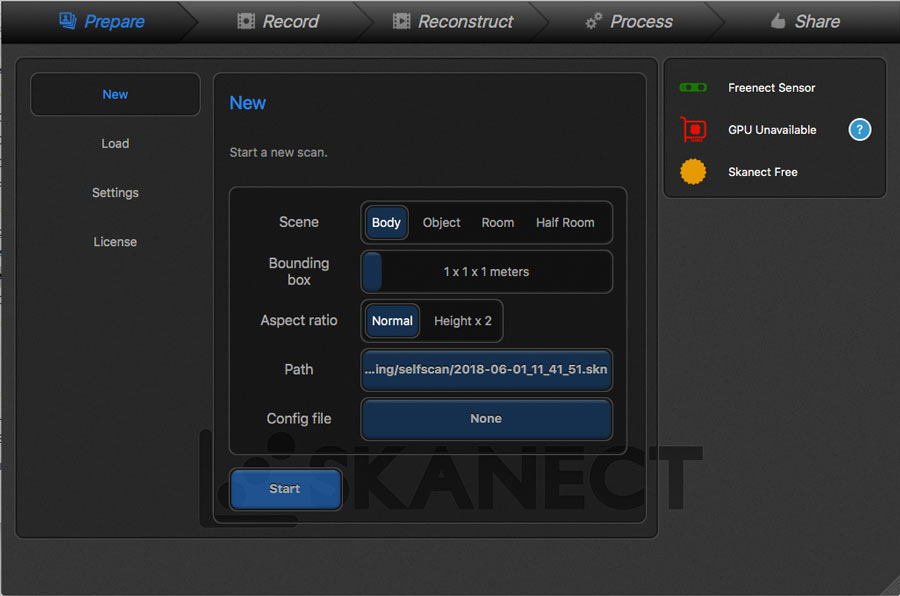
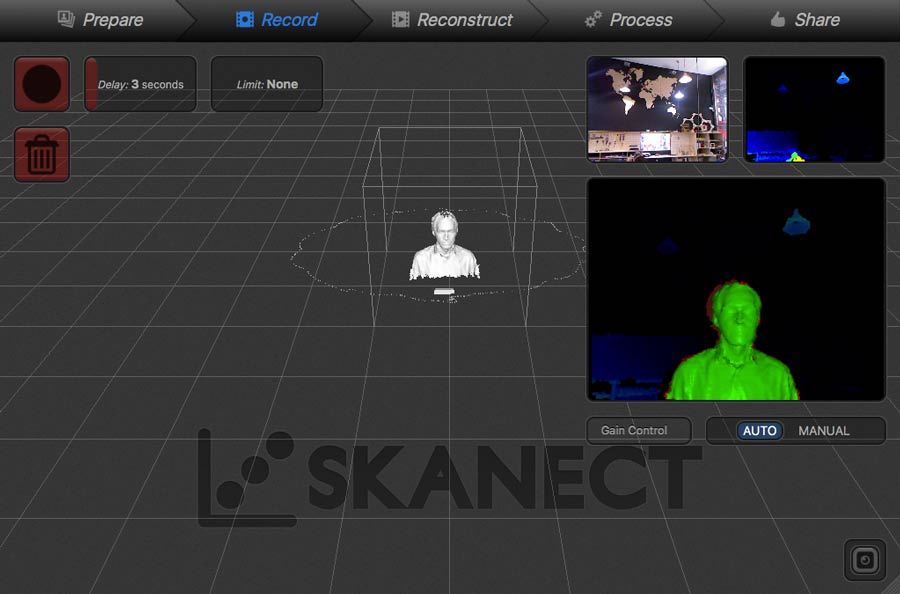
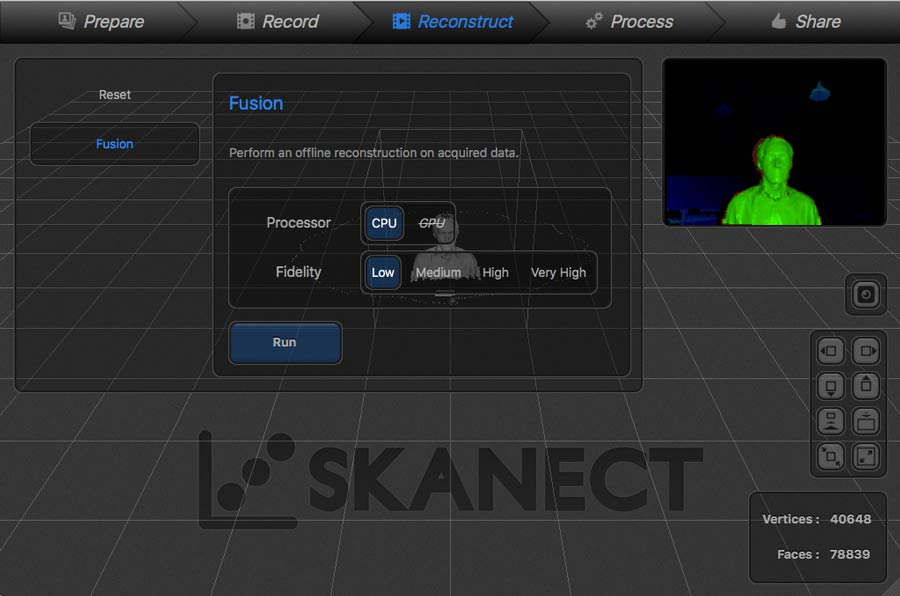
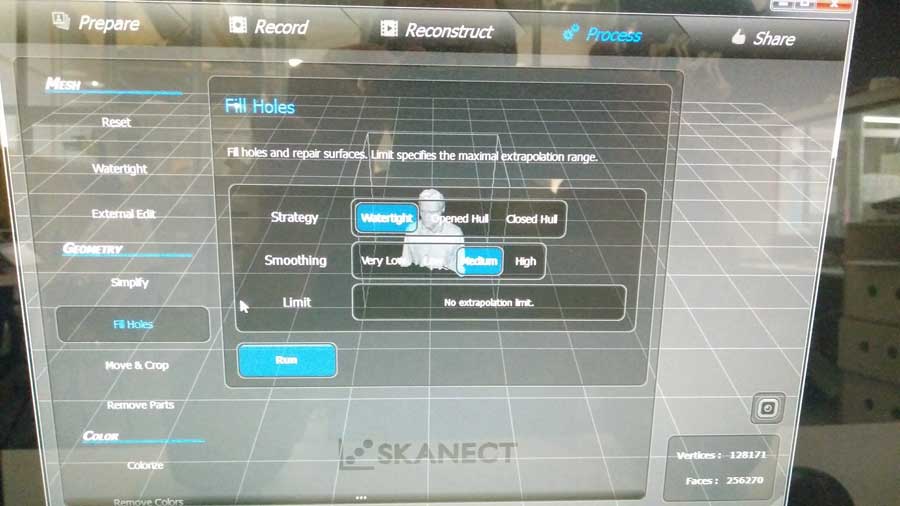
-Download and install the software, define scan parameters and proceed wih the scnning. Scanning consistof 4 main steps: prepare, record, reconstruct, process and share.
-Prepare: choose the type of object, the size of the bounding box (physical area the scanner will record), aspect ratio, the path (where the fle will be saved) and the possibility to chosse a preconfigured file setting.
-Record: This step consist essentially in placing the object in front of the Skanect and rotate it 360º (which I did) or rotate the Skanect 360º around the object.
Reconstruct: Skanect will "fuse" each frames into a 3D render of the object. It gives the option to choose the quality/resolution of the scanned result - highest quality made my computer crash so I chose the lowest.
-Process: choose the type of mesh and with action to apply on the scanned geometry. I chose watertight and fill holes.
Share: decide to save the model on the web, in sketchfab or export the model and in which format. I select a path in my local repository and .stl file.
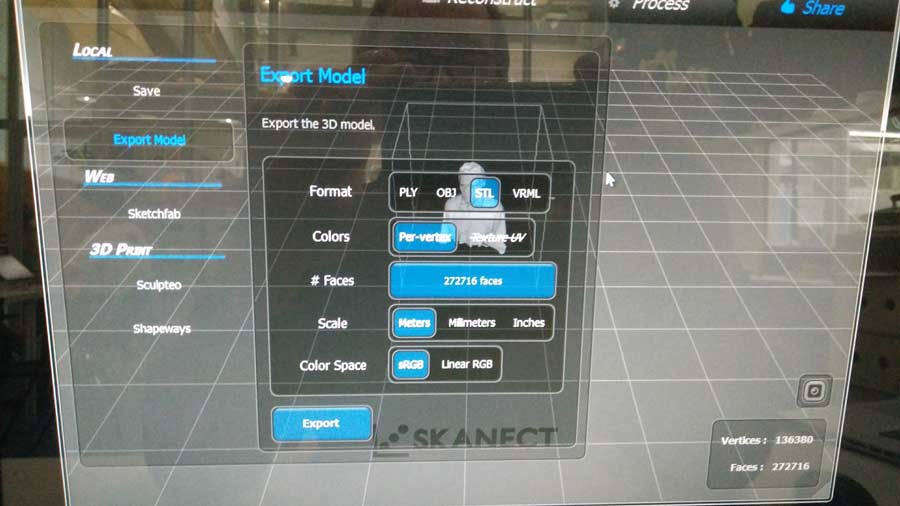
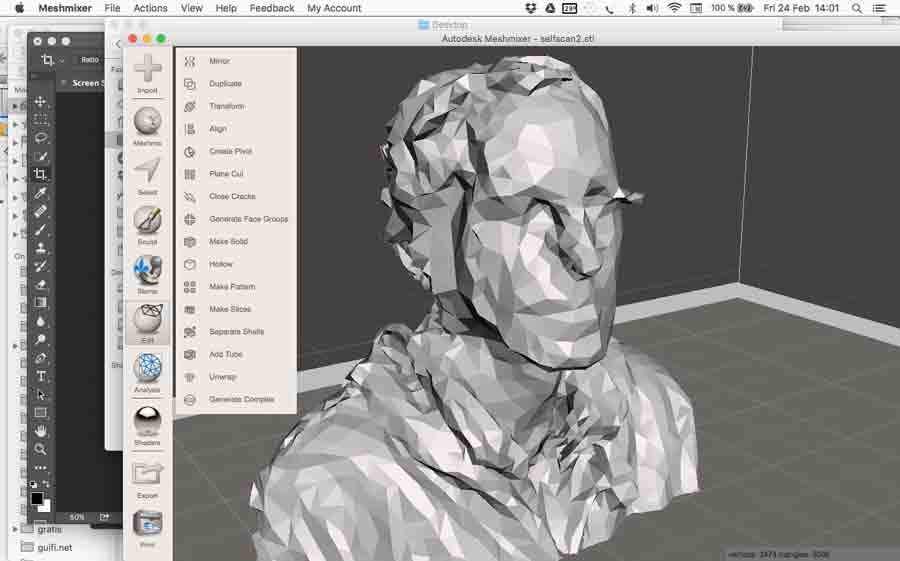
I opened the stl in Meshmixer to fix a blop on one area (right side of the forehead) of the model. I did not spend much time fixing it, just enough to understand the basic of meshmixer and see its potential.
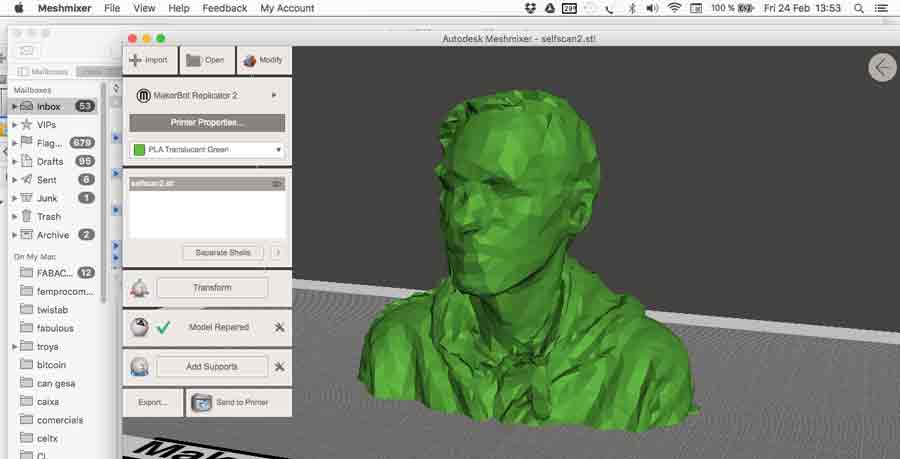
Then I imported the stl file in Cura and did my setting for a low-res quality with reprap prusa I3 presets. I refered to the Prusa manual page for instruction on how to use this particular printer. I did not pretend to get much further with it but simply to get familiar with the workflow of a new printer.

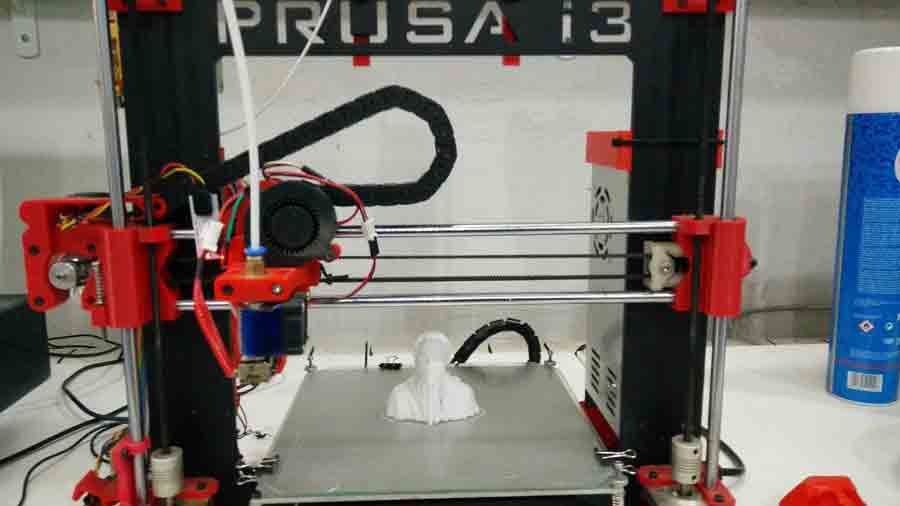
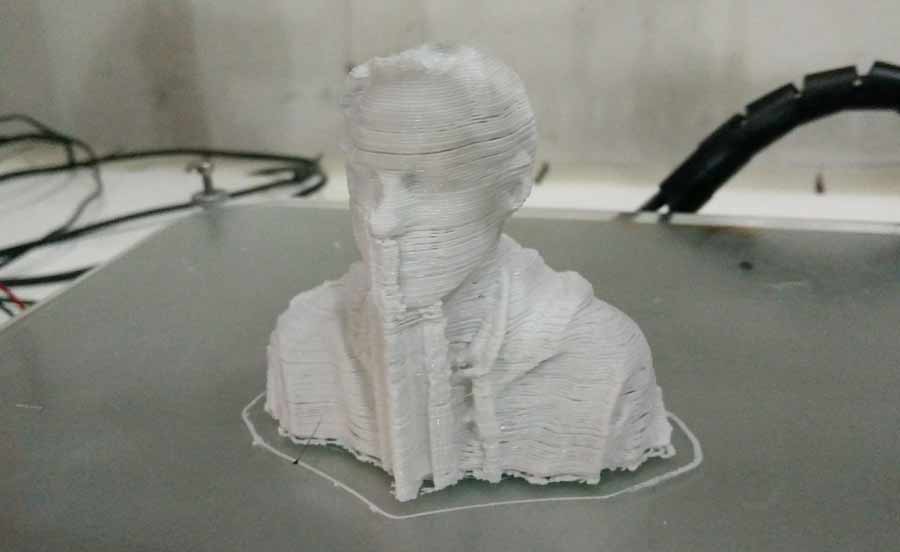
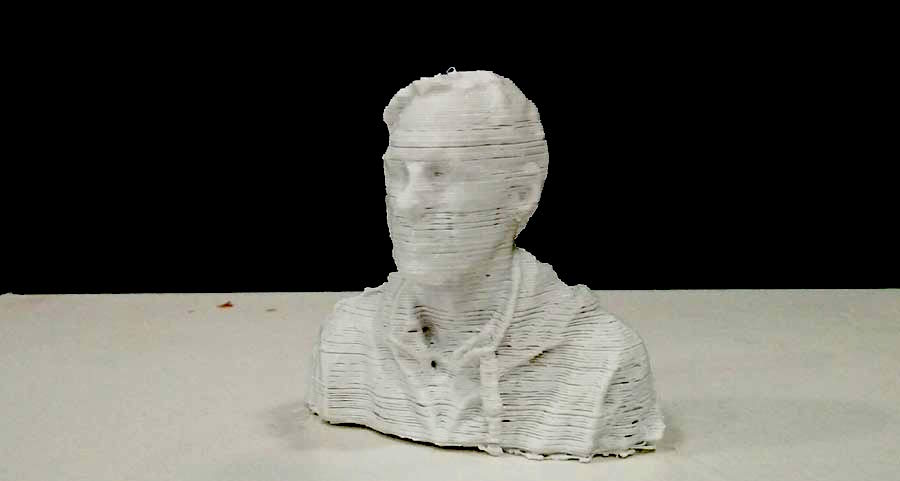
Even though I had set up the print at a low quality I thaught the print would come out better than that. The extruder has a leak so apparently it was not extruding as much filament as it should have and therefore left a slight gap between the layers.
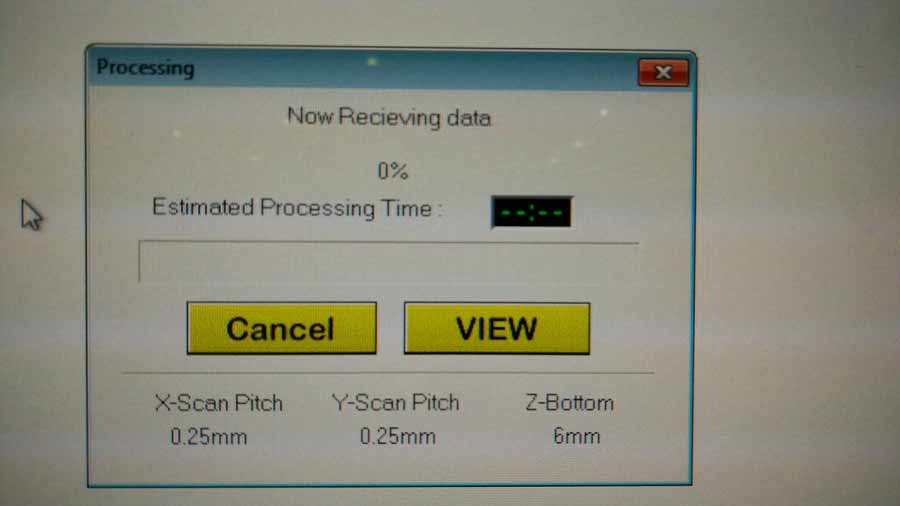
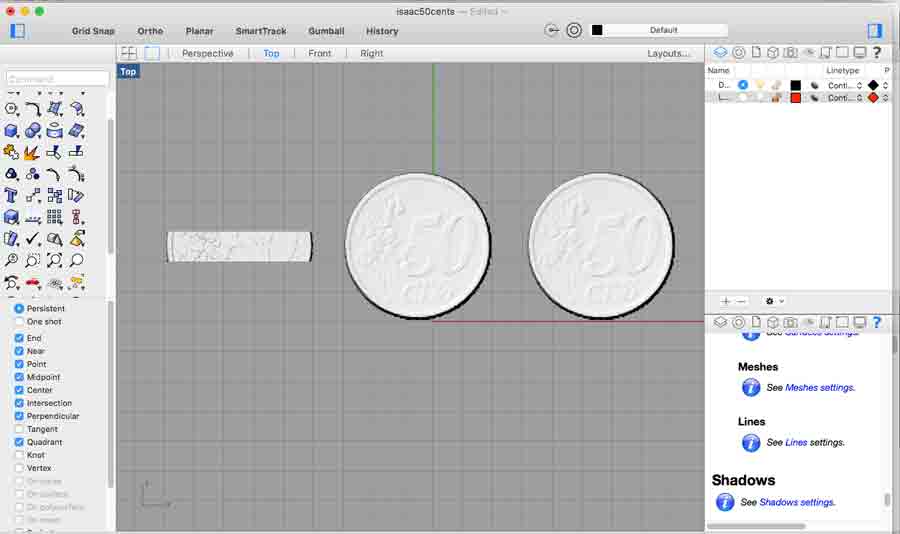
The last exercise I did was to scan a coin using the Modela and Dr Pizca application. I did tests with 2 different resolutions:
One at 0.5 x 0.5mm
One at .25 x .25mm. This process is time consuming which led to about 3 and 5 hours for each scan sessions. From the file it is difficult to tell how much more resolution there is but the 3D printer probably don't have enough resolution to output such quality print.
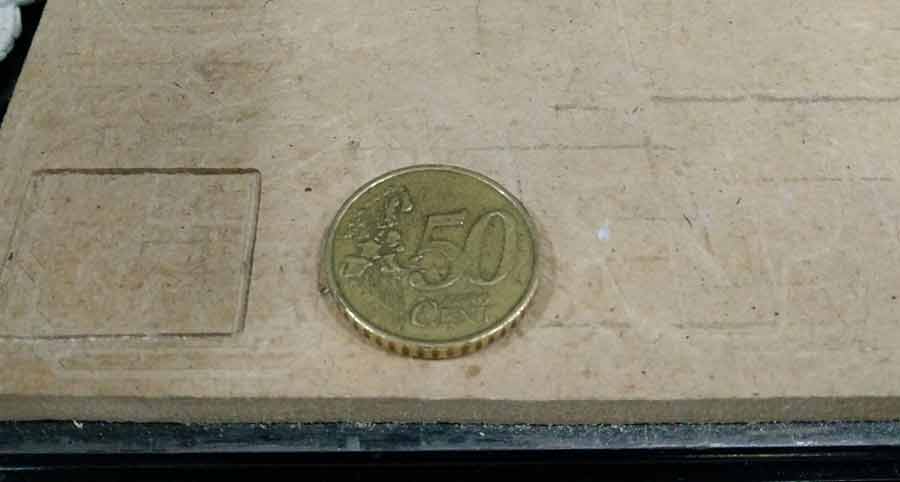
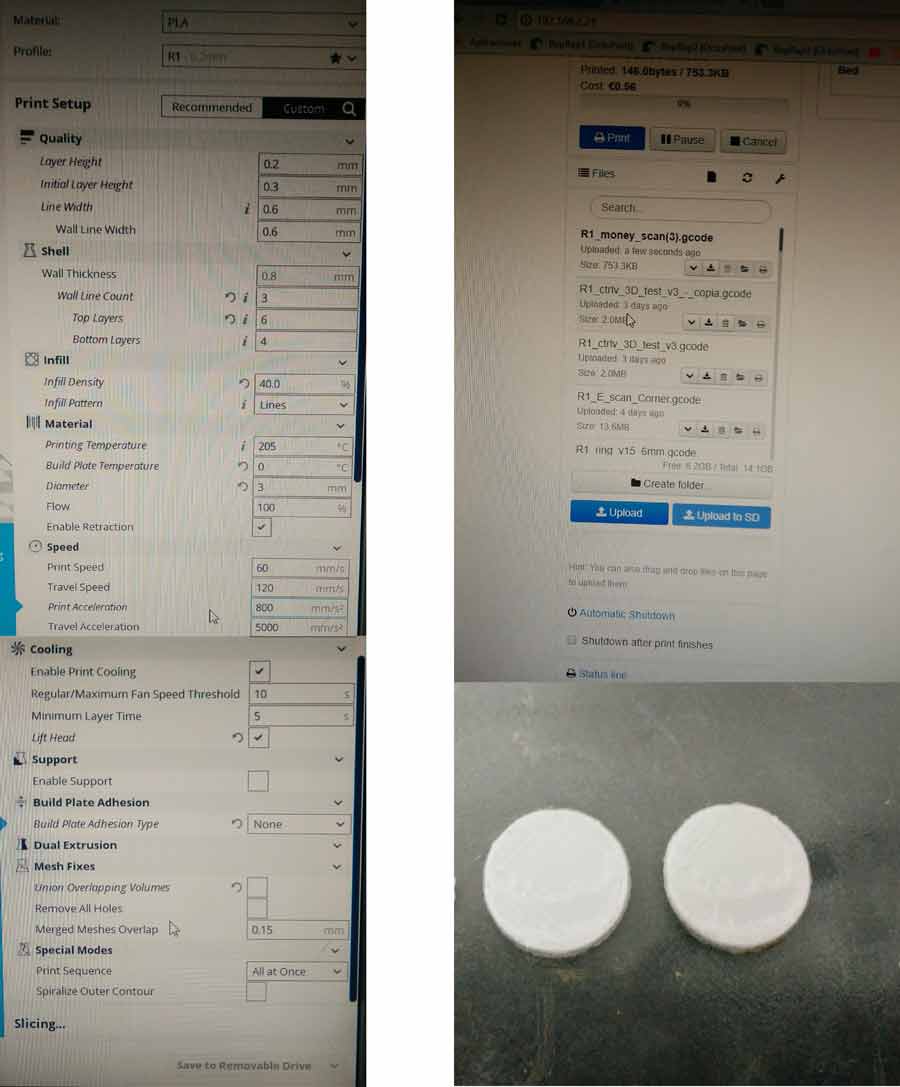
I tried to print the scanned coin with a reprap but the result was absolutely useless as the resolution allowed by the printer is much less than the resolution of the scan.
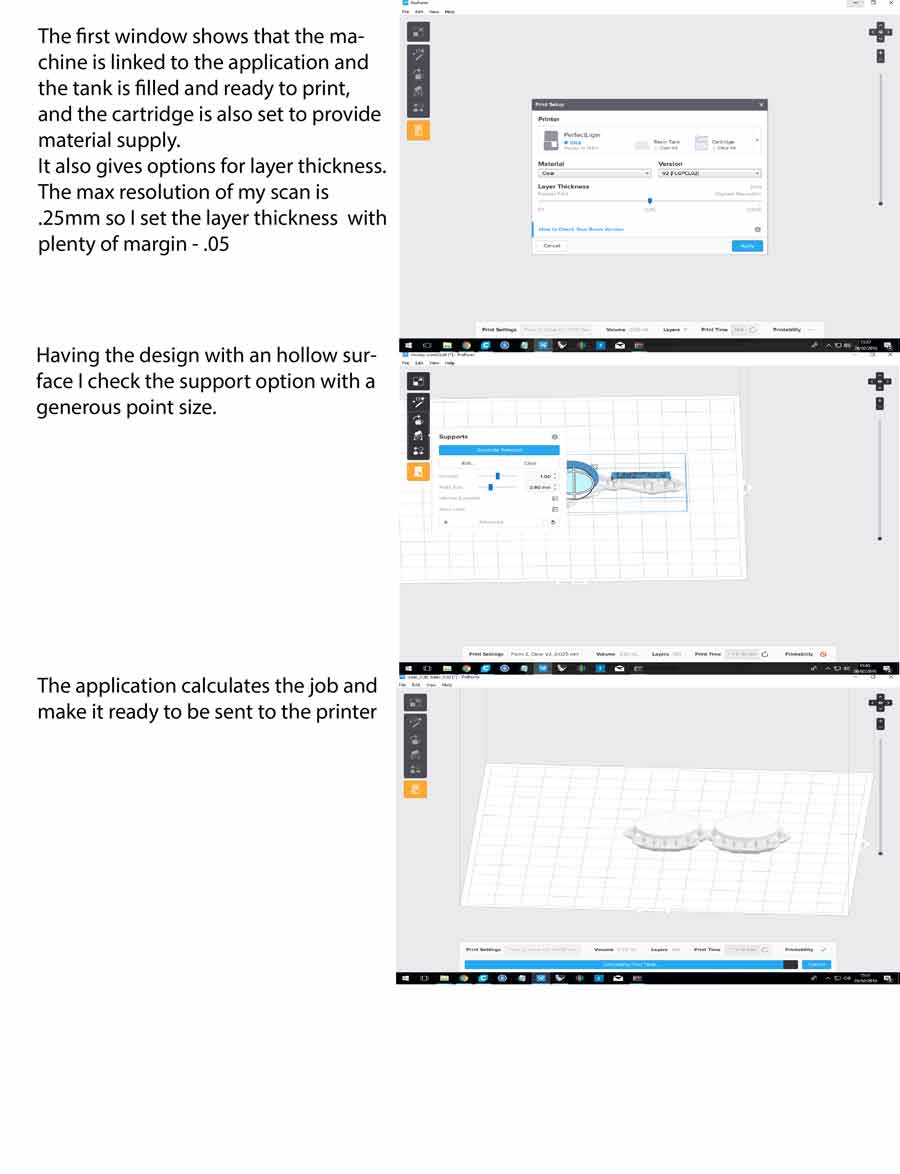
Seeing this result I moved on to make a print test with the < a href="https://formlabs.com/">Formlab printer which prints using SLA (Stereolithography) technology giving much higher print quality than additive desktop 3D printing. The material used is photopolimer resin that gets fixed in tiny layer through a reacting with a laser beam. The whole process happens inside the machine and it is difficult to document.Formlab has its own application PREFORM that comes with presets. It actually analyzes the file and prepares it almost completely automatically. Only few parameters needs to be set manually.
Once the file is sent the printer needs to heat the resin bath to 31º and automatically starts. It tooks 57 min. to print the 2 coins.
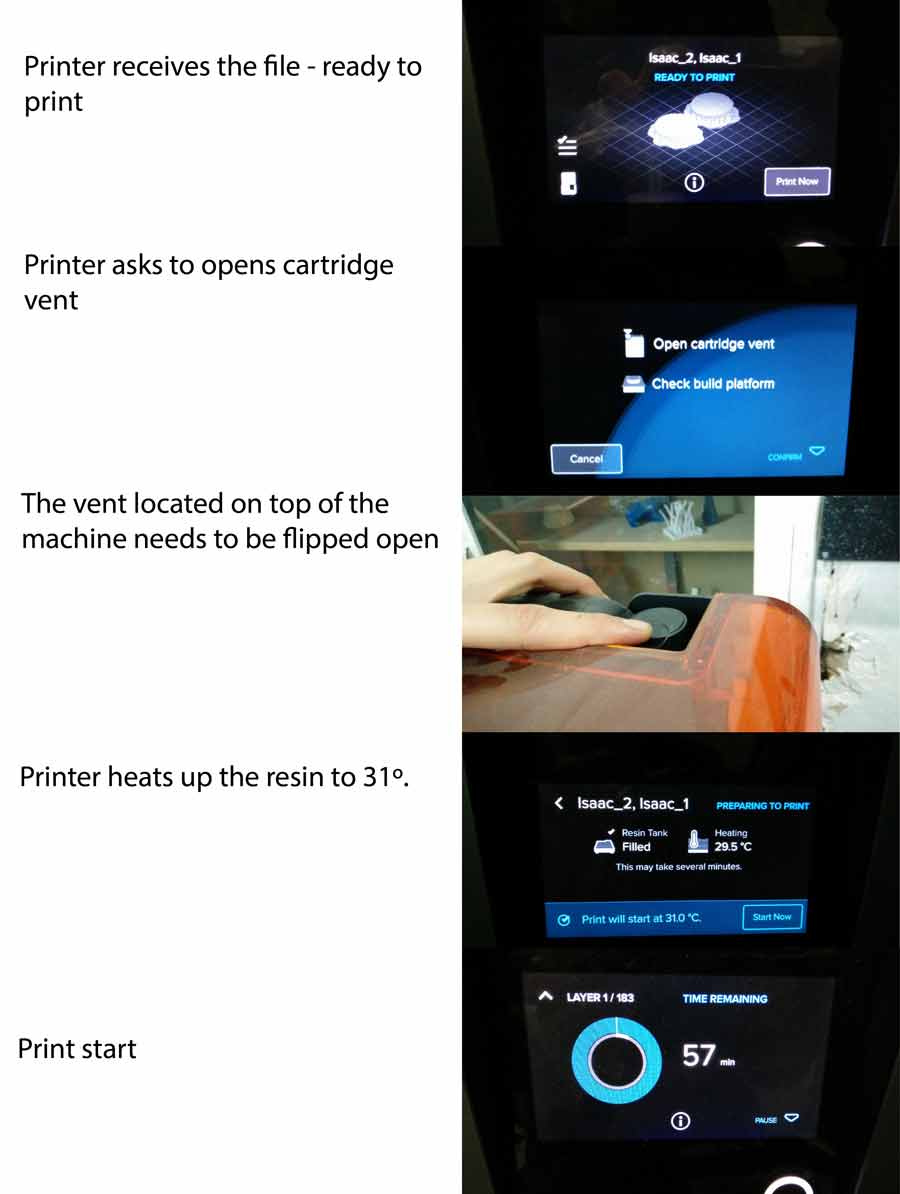
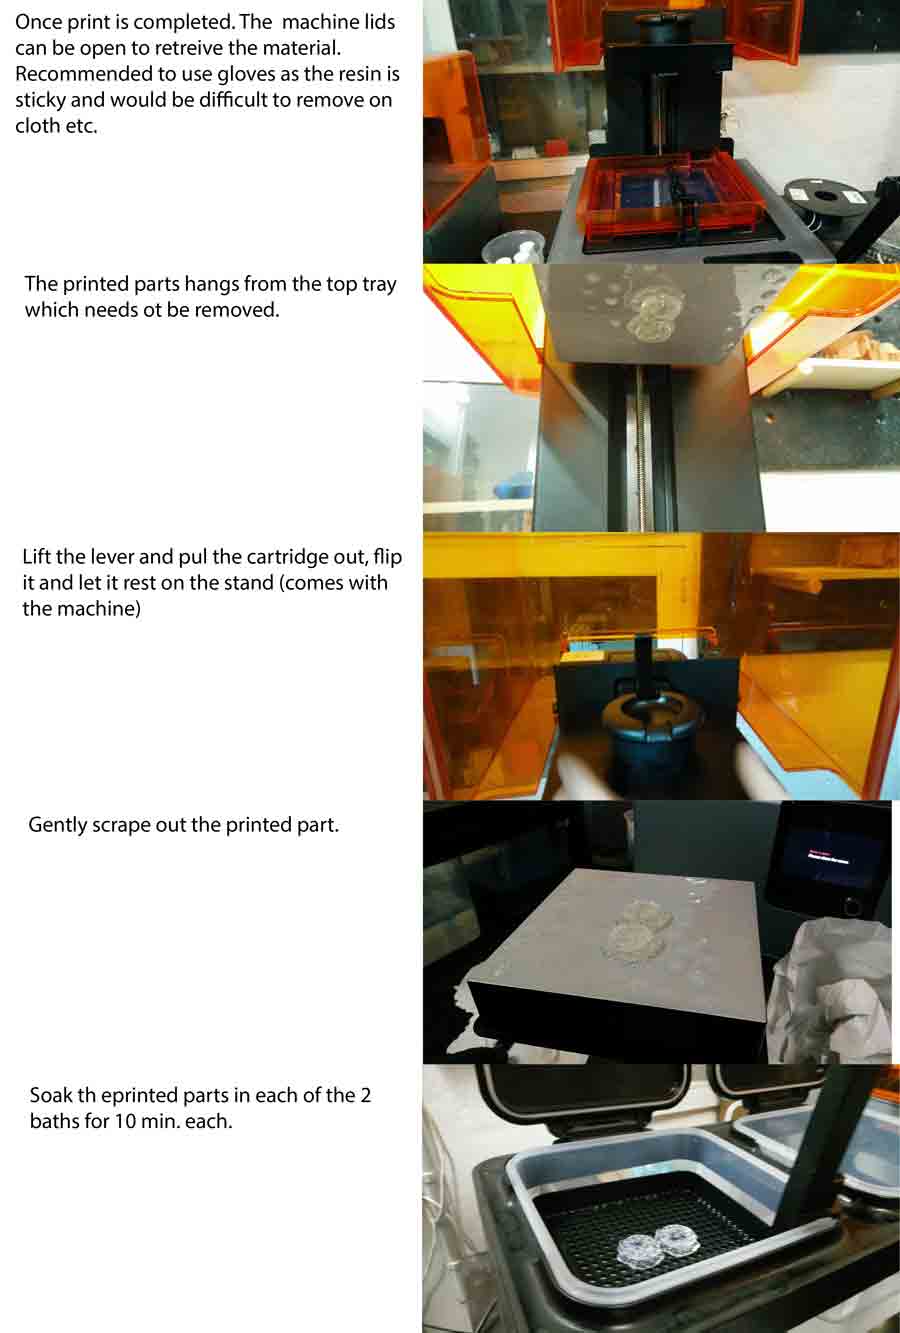
Once the print completed, the lid can be opened and the printed part retreived from the printer. To clean the resin off the printed parts they need to soak in 2 consecutive bath for 10 min. each.
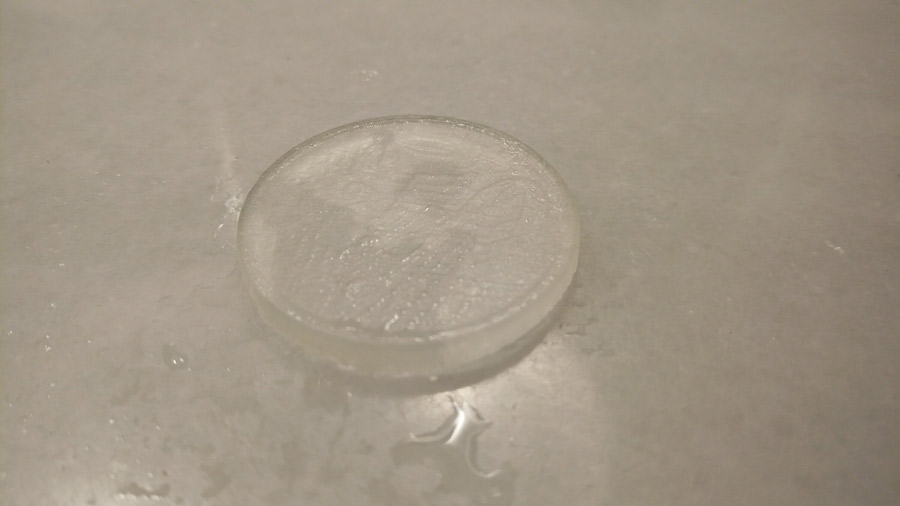
It was difficult to see the texture on the surface printed. One of the reason is because I used white translucid material which did barely let see any shadow.
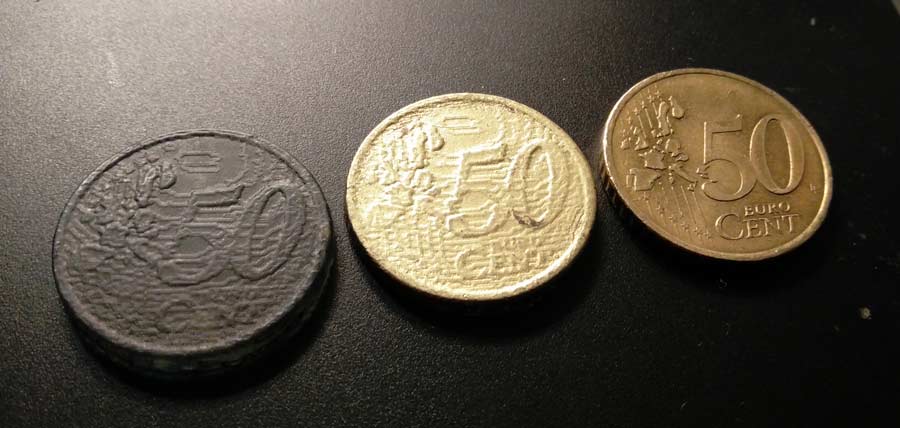
To better show the texture I applied shoe polish to the printed coin. That made the texture show much better. I also spray painted one of the coin is a goldish. The difference between the .5 and the .25 resolution scan cannot be appreciated though. They actually look pretty much the same. And there is quite a margen between the real and the scanned coins. But the difference lays in the scan not in the print. Looking closely I can see in the scanned files the same imperfaction as in the print. This experience is very helpful to see how precise the scan with the modela can get. To get a realistic finish it would require a .025 resolution scan which could add up to 24 hours (approx) and a huge file size.
Conclusion
Over all through this assignment I have taken quite a bit of experience in the workflow from design to 3D printed objects. I have worked with 2 different Reprap printer, Ultimaker2 and 3, and the formlab. The Fiormlab gives lots of precision but time consuming and somehow cumbersome. Ultimaker and Reprap are comparable in terms of quality. I feel it mostly depends of the experience and expertise of the user in preparing the g-code and setting the actual machine.
In terms of application I learned some Rhino, got familiar with the new version of Cura, Kinect, overviewed the Meshmixer interface, and played around with Scan3D (an androïd application) which worked well to scan small object.
