
Week 16: Interface and Application Programming
 THIS WEEK´S FILES
Write an application that interfaces with an input and/or output device.
Tools
- Arduino IDE 1.6.5.: Arduino´s IDE for programming Arduinos and Fabduinos.
- Proccesing: To create the interface that controls the Fabduino.
- MIT App Inventor 2: To create apps for Android.
Process
Processing Interface to control 1 motor
I decided to start out small by creating a simple interface with Processing, with simply two buttons to turn one DC motor either in clockwise or counterclockwise direction. For this, I used my Fabduino plus a motor board.
To use Processing with the Fabuino, it is necessary to install Firmata protocol first.This enables to use software to communicate with the host computer.
To make my interface I just took the sample pinout doce in Processing library and modified it to operate just 2 pins with either HIGH or LOW, and send that signal to my motor board to power up one motor.
import processing.serial.*;
import cc.arduino.*;
Arduino arduino;
color off = color(4, 79, 111);
color on = color(84, 145, 158);
int[] values = { Arduino.LOW, Arduino.LOW, Arduino.LOW, Arduino.LOW,
Arduino.LOW, Arduino.LOW, Arduino.LOW, Arduino.LOW, Arduino.LOW,
Arduino.LOW, Arduino.LOW, Arduino.LOW, Arduino.LOW, Arduino.LOW };
void setup() {
size(470, 120);
println(Arduino.list());
arduino = new Arduino(this, "COM18", 57600);
for (int i = 0; i <= 13; i++)
arduino.pinMode(i, Arduino.OUTPUT);
}
void draw() {
background(off);
stroke(on);
for (int i = 12; i <= 13; i++) {
if (values[13] == Arduino.HIGH)
fill(on);
else
fill(off);
triangle(30, 50, 60, 30, 60, 70);
if (values[12] == Arduino.HIGH)
fill(on);
else
fill(off);
triangle(100, 50, 70, 30, 70, 70);
}
}
void mousePressed()
{
int pin = (450 - mouseX) / 30;
// Toggle the pin corresponding to the clicked triangle.
if (values[pin] == Arduino.LOW) {
arduino.digitalWrite(pin, Arduino.HIGH);
values[pin] = Arduino.HIGH;
} else {
arduino.digitalWrite(pin, Arduino.LOW);
values[pin] = Arduino.LOW;
}
}
A short video of it working.
Android App for two motors
I also start working on an Android App for controlling 2 motors for a side project I´m doing. The idea is to make a moving table. Thus I want to send instructions of movement from my cellphone to a Fabduino using a bluetooth module.
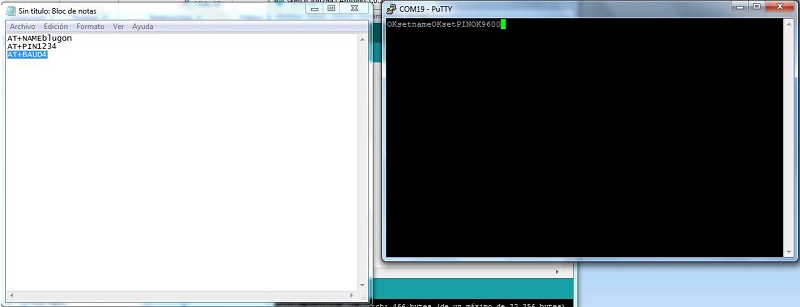
For the bluetooth module, I configured a prebuild bluetooth module using PuTTY. With this software you configure the module itself so it can be detected by a cellphone. When it has been detected and correctly paired, using S2 Terminal (Android) the individual MAC Address for the BT module can be obtained; this address is used whem creating the APP in the App Inventor.
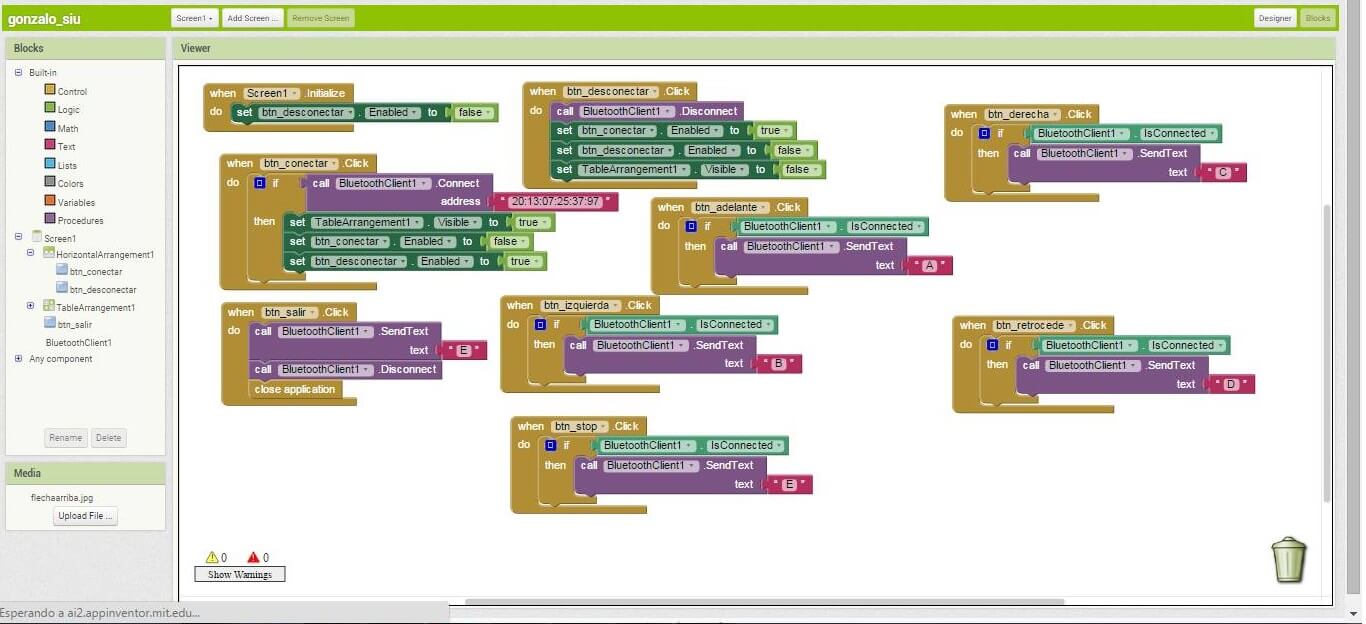
What I have done until now is the following, using App Inventor. The App basically has 2 buttons to "Connect" and "Disconnect" the BT module, plus the following buttons "Forward", "Backwards", "Turn Right", "Turn Left" and "Stop" which send signals to the Fabduino, which in turn convert those signal into signals for the motors (through and H-bridge) to move. To finish, a "Close" button.
The current version .apk can be found in my files.