Computer controlled cutting
Laser cutting
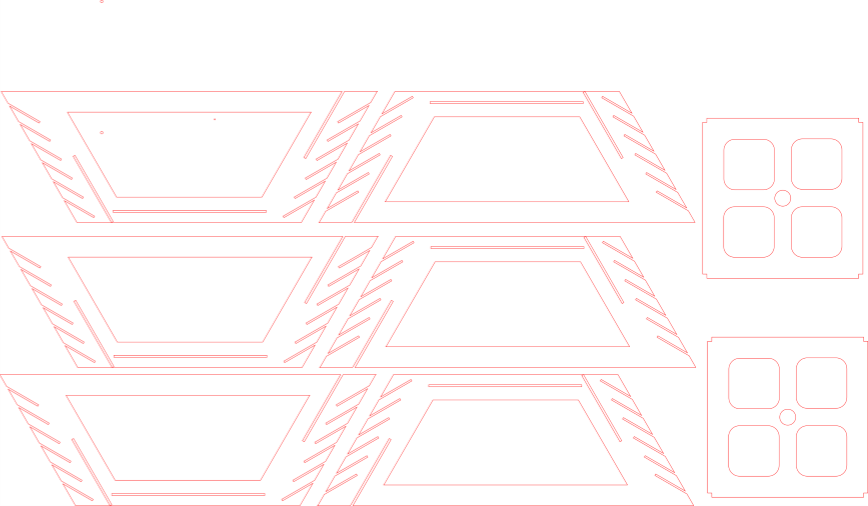
My profession has often to do with lamp shades. I always try to create this kind of devices in a different way. This time I applied laser cut cardboard.The design is made in INKSCAPE. Using the print option in INKSCAPE in order to activate the laser cutter was a real eye opener for me. Never thought operating a digital machine could be so easy.
The procedure steps for laser cutting:
1 Import the SVG file into the INKSCAPE on the PC next to the LASERPRO laser of The Waag
2 Open the file in the so called 'DAVE CLEAN' template
3 Remove all colors (make all strokes: 0.001), as thin as possible
4 Use red for cutting and black for engraving
5 Open the print option in INKSCAPE
6 Print settings are different for different materials: Carboard can go high speed (100)
The resulting laser cutting time only took 5 minutes. This is amazing fast. Hereby the laser equipment is fastest in the full fablab environment! Maybe to mention: there is always a smell (exhaust is required) and one should watch the process carefully because of too much heat in flameable materials. Cleaning the laser head is a maintenance procedure which has to be managed correctly.
Next time Chamfers should be made in the design in order to make slitting in of the fit-press constructions easier.
.
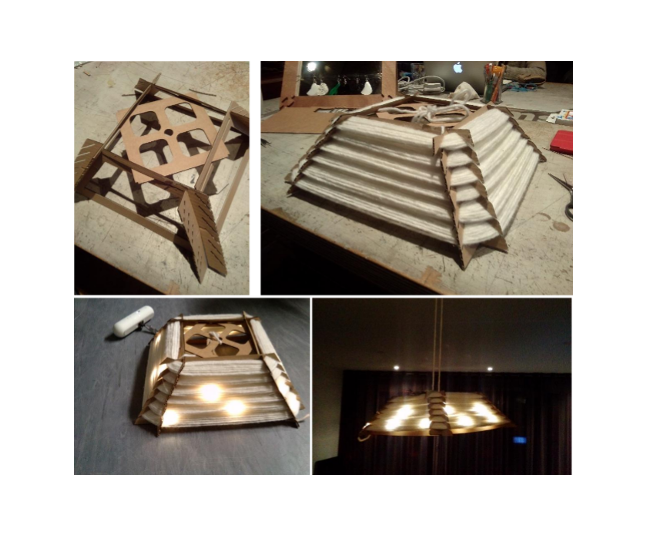
Technology gets exciting when an application is clear. Often an application is build with different technologies. To demonstrate this I've used the cardboard parts for making the full lampshade. The lampshade is soft and has a natural appereance. It can only be made as cheap with the laser cutting technology and cardboard, however this technology is in balanse with the other material: wrapped thread. The lampshade construction is assembled right after laser cutting. Laser cutting took 5 minutes. Assembly cardboard another 5. Wrapping the thing with thread took me about 30 minutes. Another reason to focus on automated wrapping! I've added some LEDs in order to express the final application.
Press fit constructions
The 2.5 mm wide slots in the cardbaord design fit very well. Also the slots for wrapping threads are a kind of press-fit construtions. The thread is pulled (gets thinner) while attached in the slot. When reliefed to the static state, the diameter of thread expands and it clamps around the slot. The same principle as press fit.
In the machine building assignment I repeated laser cutting by cutting plywood (5mm). The adjustment for press-fit is tested before the full machine frame was laser cut. We found out that 0.4 mm reduction in dimension on one side give the perfect fit.

Vinyl cutter
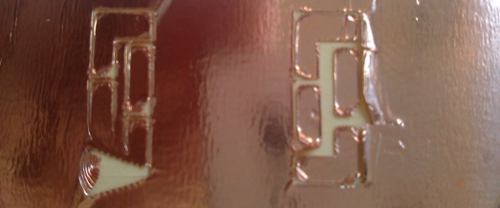
An alternative for the laser cutting is the Vinyl cutter. Alhtough I do not see this machine as occupied as the laser in the fablab. Nevertheless this machine is very accurate and can be applied on many materials. A low cost Silhouette Cameo vinyl cutter is available in my Philips lab. Link Silhouette Cameo vinyl cutter.. I had to get it operated by installing software and figuring out how PNG files could be applied in the specific tools of the machine. I practiced a day with this machine in order to cut copper circuitry. It is necessary to trace the picture file in order to derive the cutting lines. This works pretty easy, although the button for tracing is not easy to find. I found it difficult to know where the starting point (reference point) on the cutting mat is located. It is an easy machine to adjust different materials and the blade lenght. Cutting paper is easy. Cutting copper or aluminium foils is more difficult. The adhesive is influencing the cutting results.
Finally this was not all succesfull. I think this machine is less popular because the final result depends a lot on settings of the machine ,the state of the blade and the adhesion layers applied. Many variables which make the process window quite small.
Conclusion
Operating a laser cutting machine is very easy. No debris. Nothing to clean (only the head once in while). Easy to start. Very few interface buttons on the machine. One can iterate very fast and parts from the laser are net-shape. No additional processes have to be applied (sanding etc). A large variety of materials can be cut. THis are many good reasons why this machine is almost always occupied!
Press-fit in intself is a perfect process. Making connections without the use of temperature and time is a very economical solution for many applications. Making bondings is always a mixture of temp, time, pressure and eventually additional material (glues, bolts and nuts). Temperature and time and additional material are in general most expensive. That is why I later applied this click connections when making parts with 3D printing as well. I think the fablab academy put me again thinking of this bonding technology in the right spotlights. New machines make designs possible!