week13
Networking and Communications
For this week assignment, we had to design and build a wired and/or wireless network connecting at least two nodes.
Here are the steps that I followed to complete this assignment:
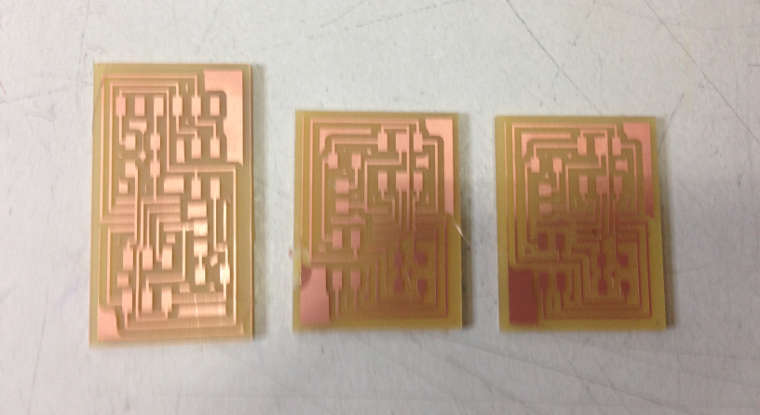
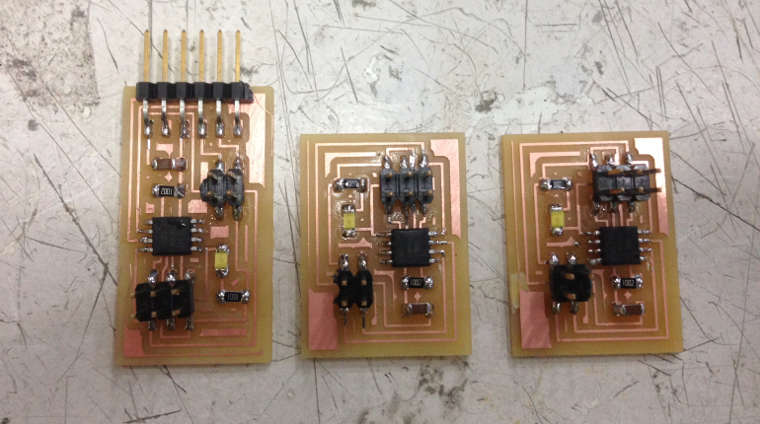
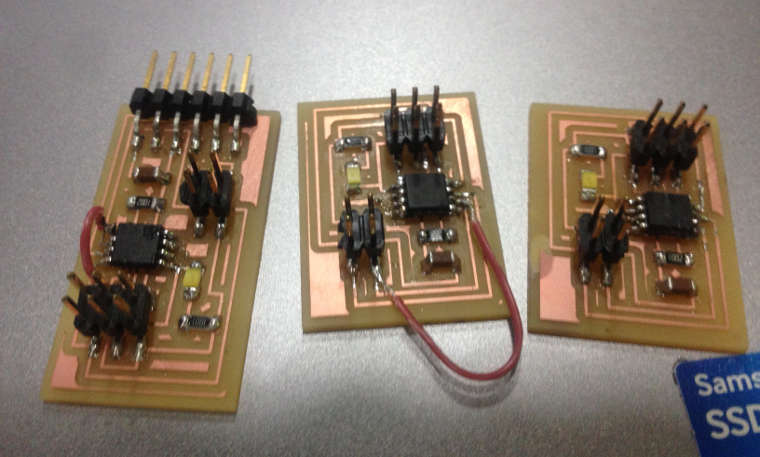
I have made three boards to build a networking system that uses a bridge to transmit data between two nodes using an asynchronous bus communication.
Design, mill and solder the boards
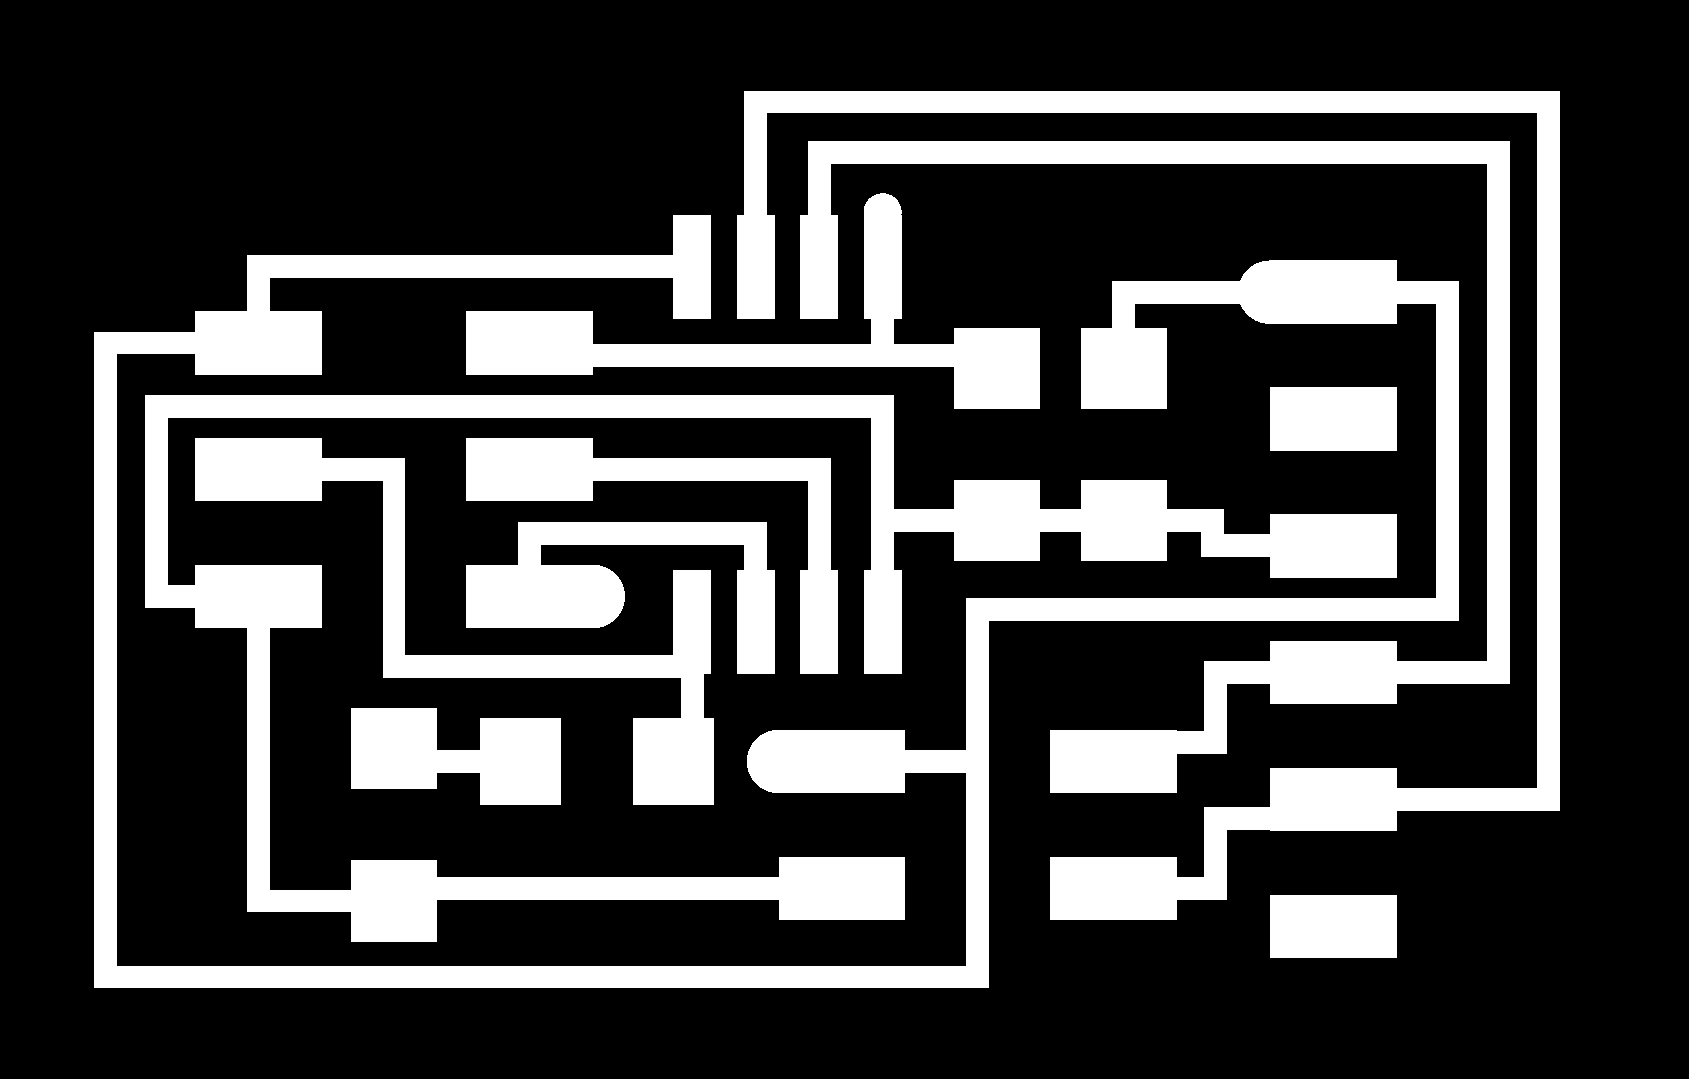
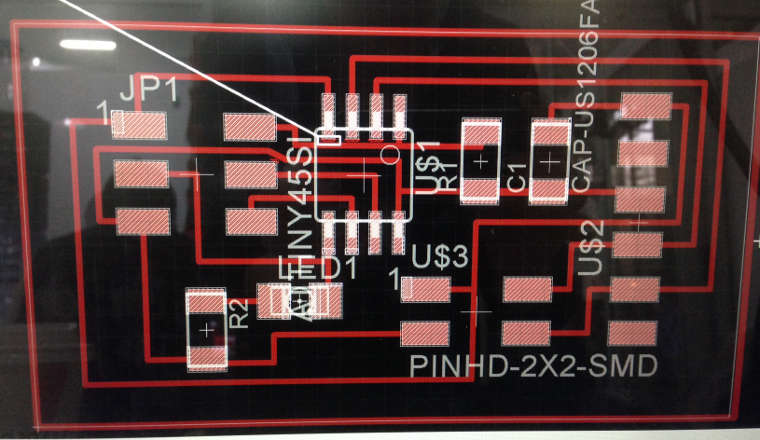
I downloaded the boards traces and redesigned them using the software Eagle.
Then, I have milled the boards on the Roland milling machine SRM-20 and solder them. Here is the list of components used for the boards:
Hello.bus.45 bridge
Hello.bus.45 node
Programming
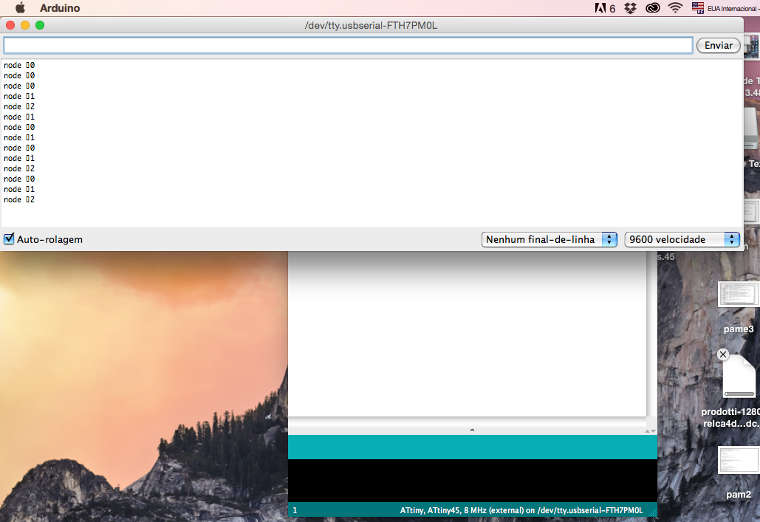
I started by downloading the C code and the Make file, then I have programmed each board on its own as they are different from each other. Each node have a different node ID number which should be changed in the C code. The following line should be changed: #define node_id '0'. Once the node ID is defined for each board, I have typed on the command:sudo make -f hello.bus.45.make program-usbtinyI have enter the following ID numbers for my boards:
Bridge board: #define node_id '0'
First node: #define node_id '1'
Second node: #define node_id '2'

Use the Serial Monitor in Arduino to Talk to Your Network
After programing the 3 boards with different node numbers, the bridge board should be plugged into the computer with the 2 nodes connected with a cable as well.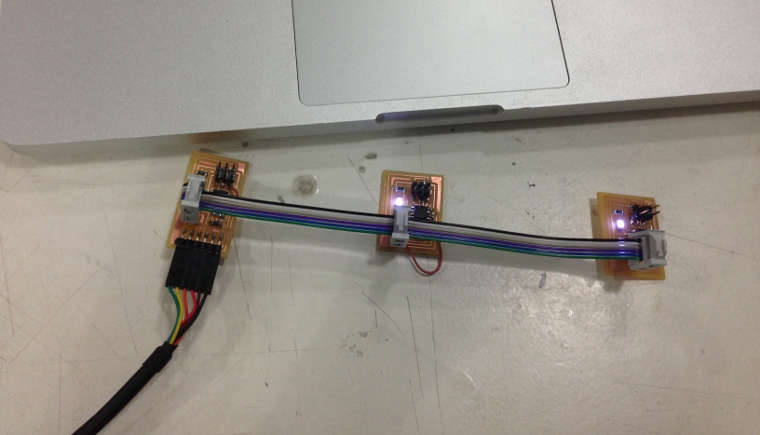
asynchronous from Pamela C. on Vimeo.
Download the files here : Asynchronous Bridge and nodes files