Week 1 : Principles and Practices, Project Management
Project management - the application of processes, methods, knowledge, skills and experience to achieve the project objectives. General. A project is a unique, transient endeavour, undertaken to achieve planned objectives, which could be defined in terms of outputs, outcomes or benefits.
Assignment :
1) plan and sketch a potential semester project
2) build a personal site in the class archive describing you and your final project
I have to say that this is something really new to me. All I know is about facebook, instagram and stuffs related to social networks. Haahaahaa...!!! I never think that there will be a day that I am going to design my own webpage.
I will need to design my own webpage and put up on to the internet. I am looking forward to it. I started designing my webpage using Dreamweaver CC and I find it quite fun interesting but a bit tough.
The below screen shot taken is a logo for dreamweaver and the starting page.
I enjoyed uploading the photos up to the webpage but I hated when I need to edit my photos when I find my photos are too big in sizes eventually I got used to it. I am also not really good at writing because I have poor grade for my English, this will polish up my English. Haahaahaa...!!!
After all this writing and uploading, I am having problems with putting up my webpage to fablab academy website because I am using windows. I am supposed to use Cygwin with Mercurial to put up my pages but I was not able to do it after many times of trials and errors.. I really suffering a lot using windows that I nearly switch to using macbook.
Thanks to my teammates, Roy and Walter. They managed to use Virtual Box and input Ubuntu to Virtual Box. Roy taught me how to use it and I am starting to get used to it. It is pretty troublesome but worth doing because better than not doing anything. Two Thumbs up for my Teammates...!!!
Below are logos for Virtual Box and Ubuntu.
Below are screen shots of my steps that I used Ubuntu to push up my webpages to the Fablab Academy Server.
1) After install Virtual Box and Ubuntu, open Virtual Box , select Ubuntu and click on arrow
2) Require to log in with password
3) Select Ubuntu Terminal, key in desktop and access to Archives
4) Zip files before send out
5) Select the zip files and attached it to the mail
6) Require two email accounts, send zip files through one email to another email
7) Open zip files in Ubuntu through internet (different OS, USB cannot be detected by Ubuntu)
8) Unzip files and copy the files to folder with my name in the Archives folder
9) Upload the files to Fablab Academy Server using the commands taught online
10) Make sure there are changes to the files and complete the uploading
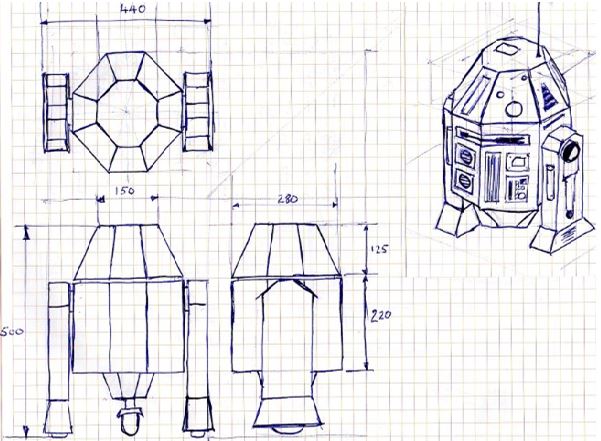
About my project, My Buddy Roy who is in the course together with me, is a Big Fan of Star Wars and hopes to build an Astromech so that the students may be inspired to do the same at the the FabLab.
I was convinced by him to build the Astromech together. The Astromech will be separated into two parts, basically the head and body. Roy will be in-charge of the head and I will be in-charge of the body.
ASTROMECH

The initial plan to build the structure of the Astromech body will be build using Aluminium Profiles, Aluminium Square bars, Aluminium Sheet Plates, Aluminium Brackets, Acrylic Sheets and Wheels. As for the internal parts, I will be using a few motors, sensors and micro-controllers to move the Astromech for the start before I try anything else.
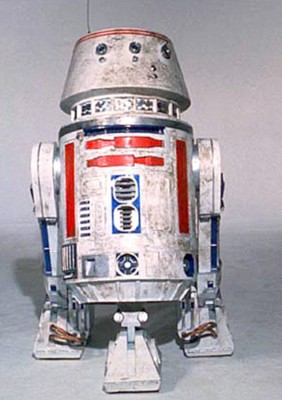
Below is a picture of how the Astromech looks like.
