Mechanical design,Machine design
Time Lapse Machine
Assignment task:Make a machine, including the end effector
build the passive parts and operate it manually
document the group project and your individual contribution.
Students :Apeksha bochare. Suyog warghade.
Suhas labade.
Machine:Time Lapse Machine
Main objective of this machine is to make photography of moving object,live things with 360 degree rotation.e.g.Plant growth photography in verticcal garden.
Mechanical Fabrication
This weeks assignment task is Make machine and. we three has decided to make 'Time lapse machine'. This machine will have slider connected to the Stepper motor so it will give linear motion and on top of the slider we are fixing another motor with camera holder so we can rotate camera in angle 360.also using Gestalt boards.
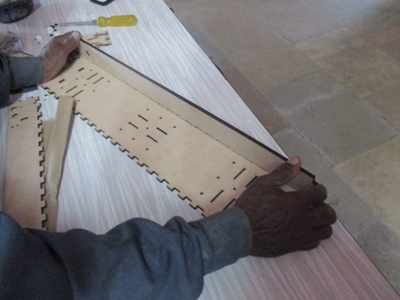
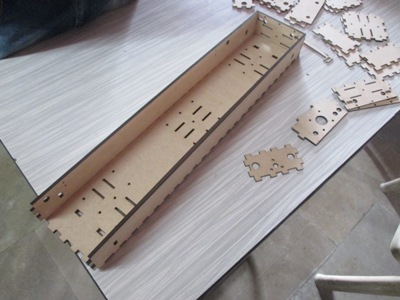
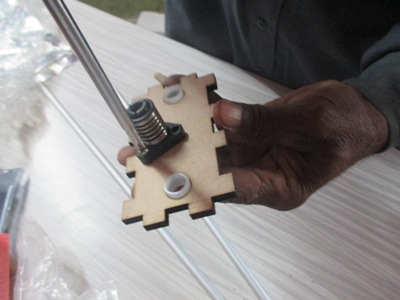
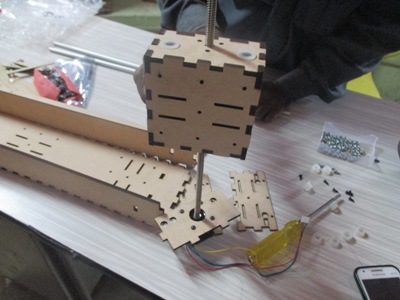
We got 2D profile cuts from the tutorial and used Epilog Laser to cut these parts and fixed one stepper motor on x-axis direction i.e Linear motion of the slider. On the slider we fabricated another box which will rotate with another stepper motor and also it will hold the camera
How we can assemble this?
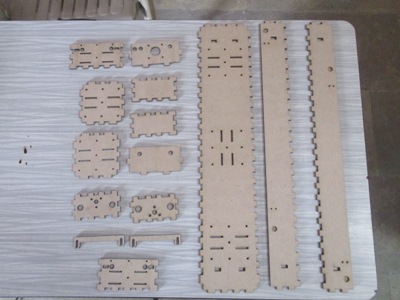
To make this Time lapse machine we first downloaded 6mmLinearSlide.pdf we got this file for laser cutting from Jason, teipei fablab help us.Its mainly having box structure ,bed and holders for x- direction movement. You can download this file from here.we cut this design on laser cutter with following settings on 6mm MDF material.
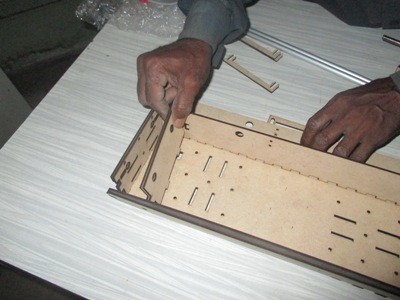
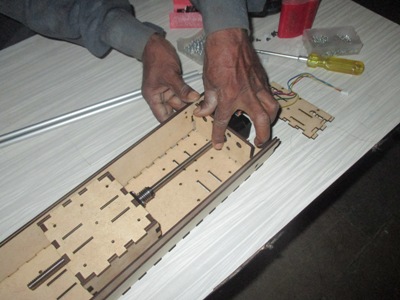
 Assembling steps:
 |
 |
 |
 |
 |
 |
Electronic Fabrication, Gestalt Board
we prepared FabNet board initially and suyog milled this board and soldered colored USB cable, the 4*2 connectors and the Power supply Connector.I also need Power supply output 12 Volt and Current rating 5A
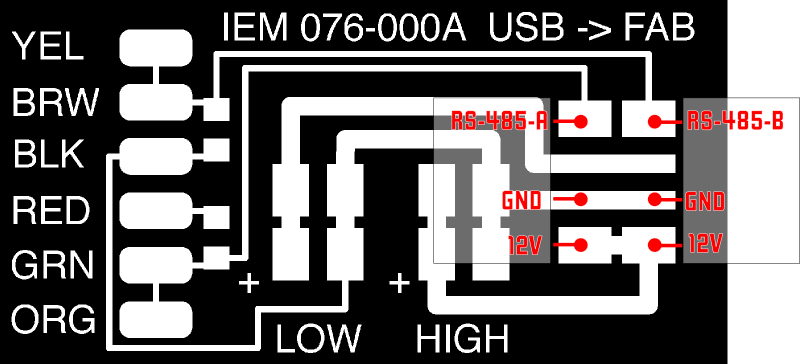
Power supply with above rating connected to high terminal of the Fab Net board(ignore the LOW).
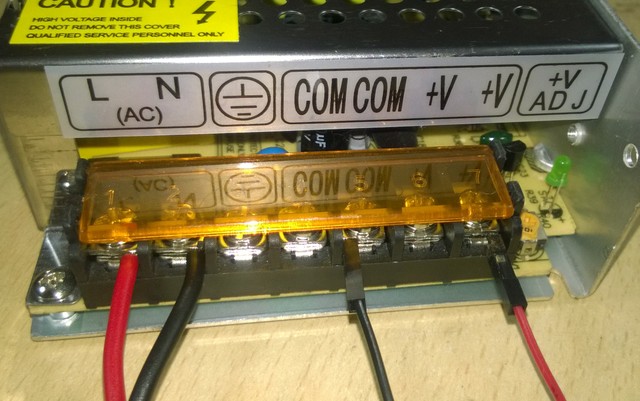
Note: See the VCC and GND are connected Perfectly.
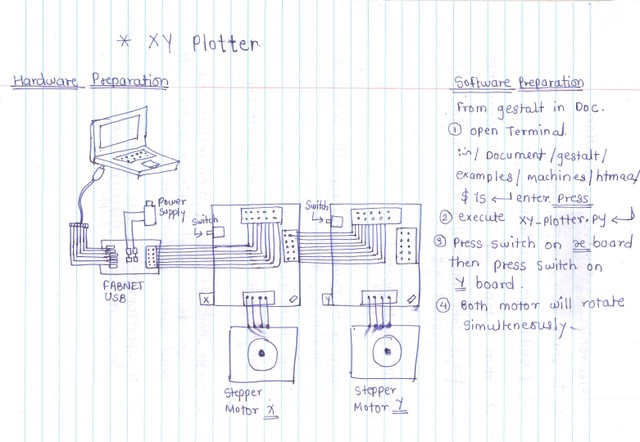
Now from Fab Net board make connection on the Gestalt board.Here we faced problem because Fab Net board connectors are 4*2 and on gestalt board there is 5*2 connector so here we could not use the ribbon connector directly. We used the female burge strip to make this connection
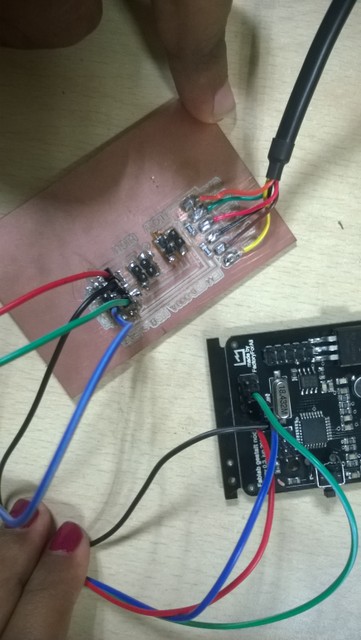
Here exactly opposite to the 5*2 connector there is 4 pin white connector- we connected this white pin connector to the motor which we have fixed to the mechanical assembly. Following drawing Shows how to connect the fabNet board and the gestalt board to Stepper motor with power supply
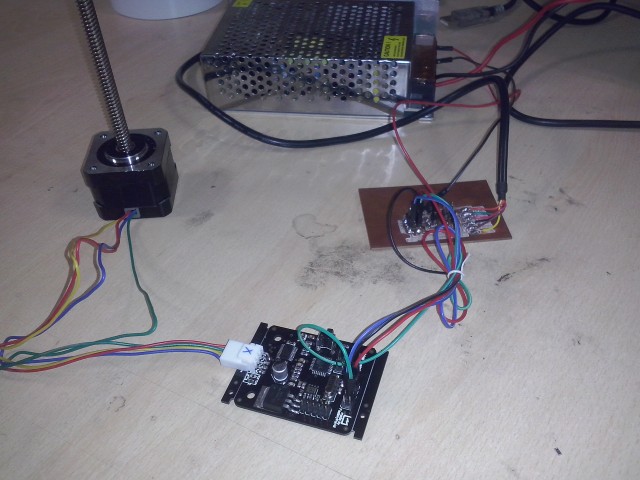
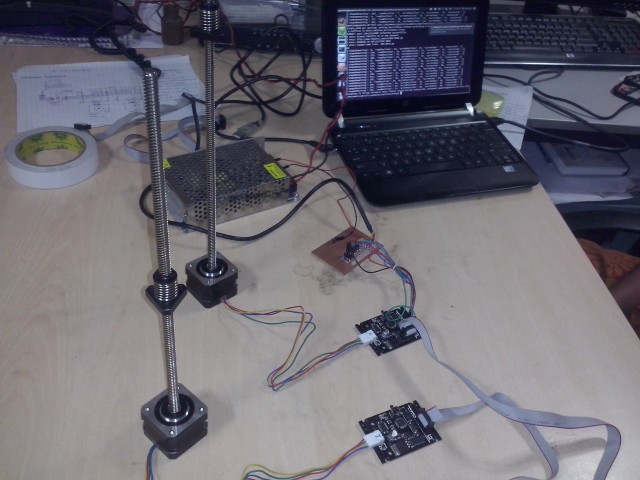
Following Figure shows actual setup
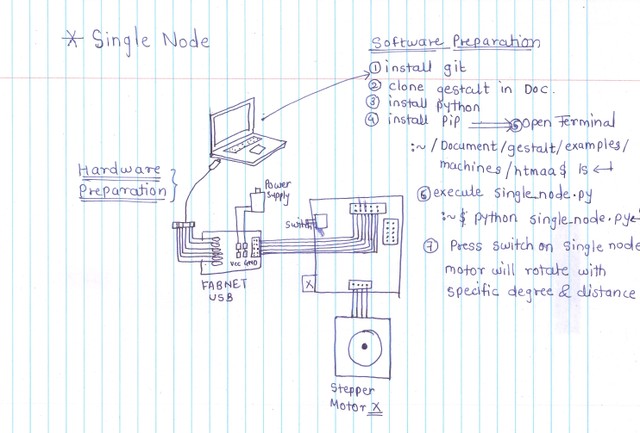
As shown in above figure we prepare electronics and mechanical setup. Now We downloaded Gestalt and cloned it in Document folder. From htmaa folder we got example program which is written in Python Language.As We made all connection ready.Switched ON the power supply and intially executed the program as it is. we loaded the program on gestalt board. intially the Pink LED will blink and press the switch on gstalt board.now motor is rotating in x Direction i.e Linear motion.and We prepared same setup for two motors
Following Figure shows actual setup
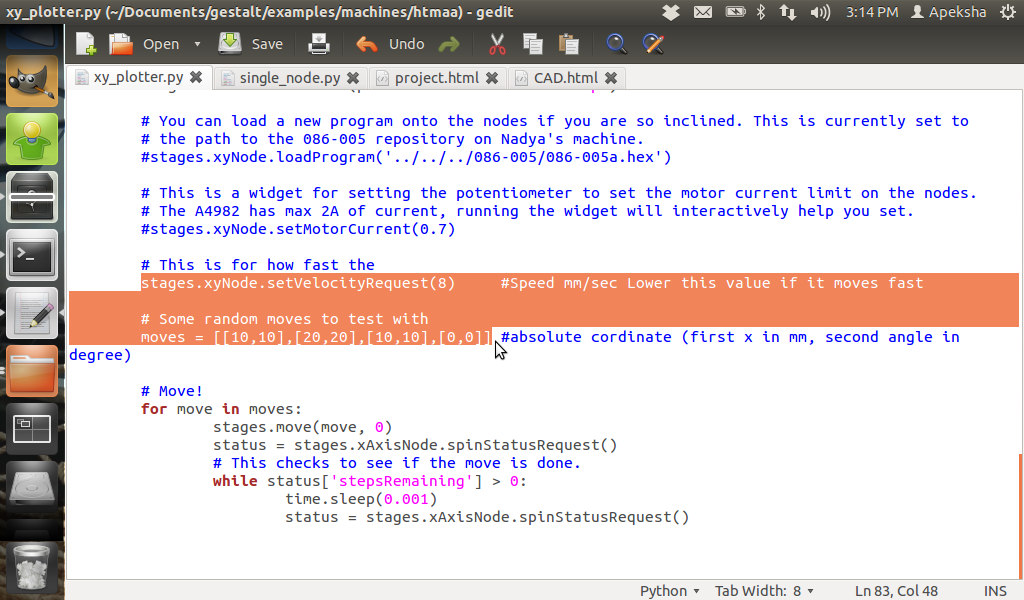
In the programing we tried original program from examples and later we modified few lines to vary speed, distance and the angle.That was specified in velocity, mm and Degree respectively.
Final Working Video
Time Lapse Slider