wk9 | molding and casting
Assignment :
- design a 3D mold, machine it, and cast parts from it
Download : stl & rhino model - balljoint & mold
My notes :
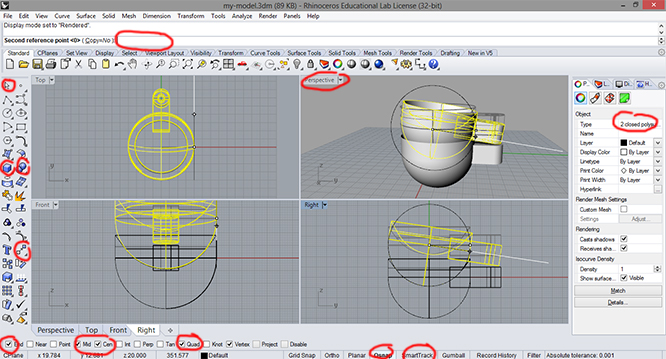
27 march 2014 | introduction Rhino
For this design I want to have some specific measurements.
And since Blender isn't capable of that, I will try out Rhino.
After installing it on my laptop. I started out with watching some YouTube's
to give me a impression about the general layout of the program.
- What I really like about Rhino, is that you have a GUI interface,
but beside all the button's there is a good shortcut system (with a properly working autofill).
- Rhino have 4 view ports, 1 in perspective and the others 3 are flat views of you design.
You can change those to you liking. (double click on the left top corner to get one big view).
- When done designing a shape, it's important to check in the properties menu (on the right or F3)
if it's a waterproof.
(needed for the milling process later on).
- On the bottom of the screen there are a lot of snapping option's.
Try different setting's to help you snap the right line.
And also the smarttrack tab at the bottom, can (sometimes) be helpful.
- join : to join object into one object. (for 2D objects)
- trim : to cut pieces of a object away (for 2D objects)
- booleanunion : merge & subtract shape's (3D object's)
- repeat the last step again : right mouse button
- hide and show command (like a layer option, to get objects out of the way).
- showselected : To select a hidden object back into view.
- offset : to offset a line
- loft : a 'plane' union between 2 non matching shapes, like a square and a circle.
- cap : to close a non complex open shape (to get it waterproof).
- explode : to detached a object into faces.
- polararay : To duplicate a shape several times in a radius
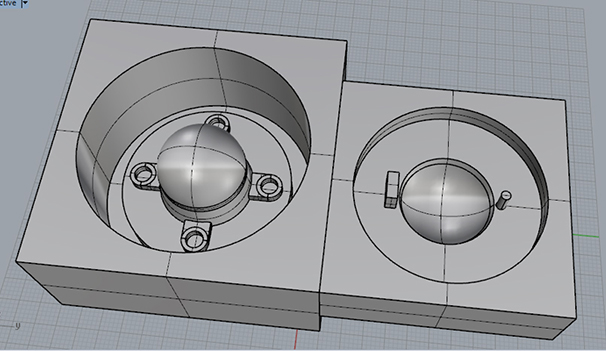
28 march 2014 | designing the mold Rhino
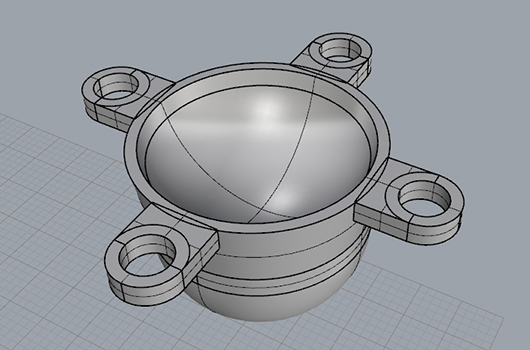
What I want to make, is a second version of my (cardboard) hinge design.
I want to create a ball and socket joint, so movement can be controlled 4 way's instead of 2.
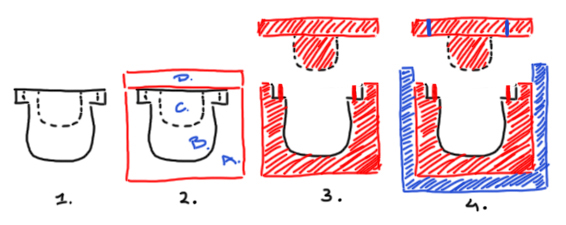
step 1 : create a 3D design
step 2 : invert the design (create a mold of a mold).
- the finished model
- draw a box around you design and apply 'boolean difference' (A+B).
draw a second box on top of you design (D). 'boolean union' the interior of the design with that box (C+D). - result is a split between the interior and the exterior.
- add air holes and a 4 poring hole to the interior design, and to the exterior add a 'tube' shape (with a high edge).
The end result of this step :
step 4 : invert the design again (to create the mold for machining).
Turn both shapes upside down.
And draw another box around it and apply 'boolean difference'.
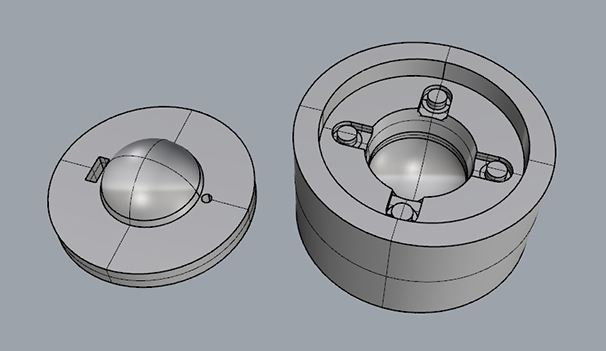
step 5 : export selected as a .obj
Export the selected shapes and open the obj file in PartWorks 3D. Here you can edit the 3D toolpath
in preparation for the shopbot.
31 march 2014 | machinable wax
After discussing witch my tutor, we decided to do the ruffing toolpath and the finishing toolpath
with the same flat nosed tool. End Mill (o,125 inch)
A ball nose tool would do a nicer job in finishing the round surface,
but we would also loose the nice sharp corners in the design.
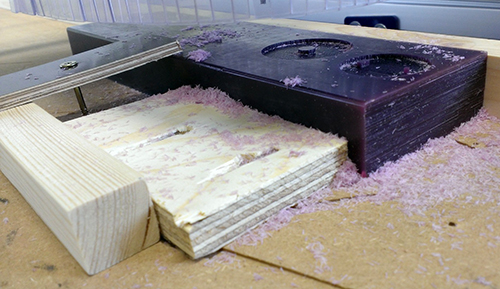
Because the machinable wax is a soft material, securing it with screws like you would do with wood
is not a option. In stead you clamp it down.
Also make sure the shopbot is clean (no wood dust etc) because the wax splinters can be re-used.
(So don't turn on the extraction.)

Sadly, the little air vent was to fragile and didn't survive the milling process.
To replace the broken one I carefully drilled out the hole (by hand) and put in a a small nail as temp replacement.
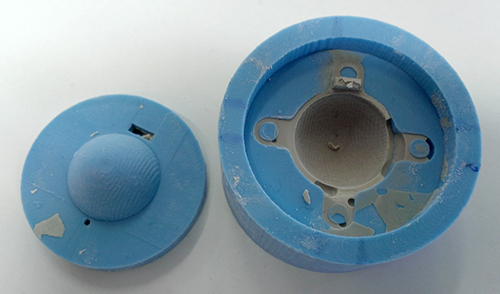
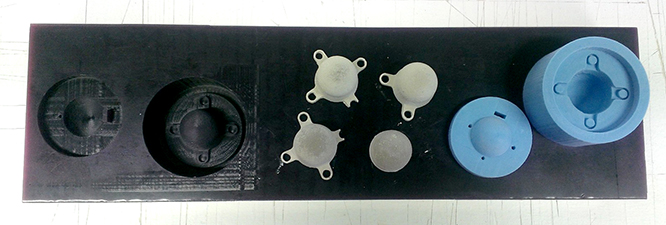
31 march 2014 | oomoo cast
Next step is casting oomoo into the wax mold. Oomoo 25 is a silicone rubber compound.
To know how much oomoo to prepare, I need to know how much volume my design contains.
Open up the original design (from step 1).
In the commandline you will see the volume calculation.
Volume = 3557.0903 (+/- 0.0012) cubic millimeters
cubic millimeters can be converted to ml, and ml can be converted to grams.
Which is useful because we can measure that by scale.
So now I know how much oomoo I should prepare.
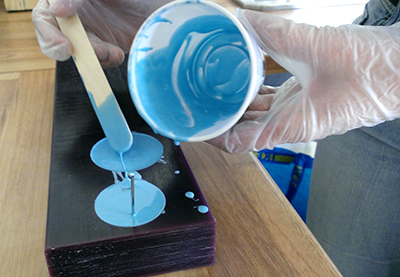
And after waiting for 75+ somewhat minutes ...
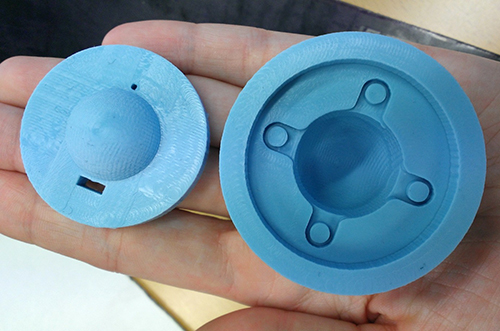
Repeat the same trick but now with a hydrostone cast.
I tried a couple of time's but sadly I keep ending up with bubbles in my cast.
After the second time I drilled 2 more air holes into the oomoo mold, hoping this would help.
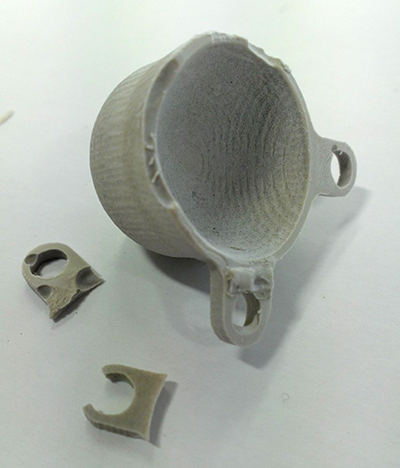
I think I should have placed the air holes at the end of the little rings in stead of in the middle.
And as a second design flaw; the little rings are flat and should maybe have been slightly askew.
(Because air bubbles always travel to the highest point.)
Neil gave me the advise I should have some more patience while mixing the hydrostone.
Wait a few minutes, let it set a bit before casting the mix into the mold.
Tried again, and this time I got a cast with 4 complete rings, and used one tiny bubble.