wk3 | Computer-controlled cutting (about vinylcutting)
Assignments :
- Learn/test/try/experience the vinylcutter & lasercutter
- Make a pressfit kit with cardboard
Download : illustrator koifish layered design file
My notes :
25 feb 2014 | Vinylcutting
Last week I didn't really get around to test out how my drawing would look in vinyl,
so here's my chance now...
I already have some experience in transferring a vinylcut sticker to OSB (wood).
(And how to sticker on glass windows)
Back then we learned that the design really needs enough sticky surface to keep stick to this
kind of wood. A to small font
or a to thin lettering won't work.
In the end, for that project we decided to varnish the wood, transfer the sticker,
pray-varnish it again as protection for the delicate pieces.
So...
For this learning experience I wanted to make a vinylcut multicolored detailed image.
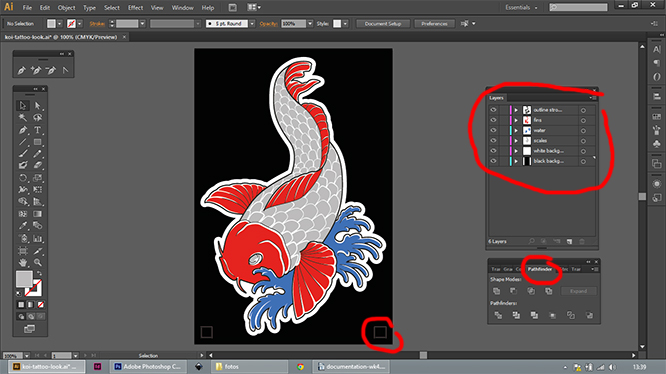
Step 1 : Prepare a vector drawing.
Since I'm good in working with illustrator, I prepared my drawing with that program.
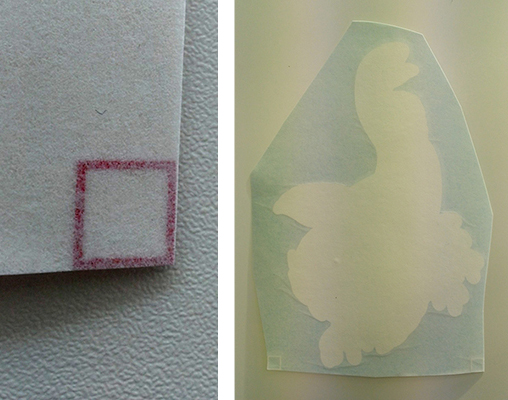
What's imported is that every color should be on a separate layer.
Every layer should have at least 2 squares drawn on them on the same spot
(used for alignment of the sticker later).
And every line should be properly cleaned up by using (at least) the pathfinder tool.
Step 2 : Save as PDF.
Every color of the drawing should be saved as a separate pdf file.
Then copy all the files to the computer that's hooked up up to the vinylcutter.
Step 3: Vinyl cutter settings.
Load the vinyl roll into the machine, put the machine setting on 'edge'.
Open up the pdf, click print to open up the printer settings.
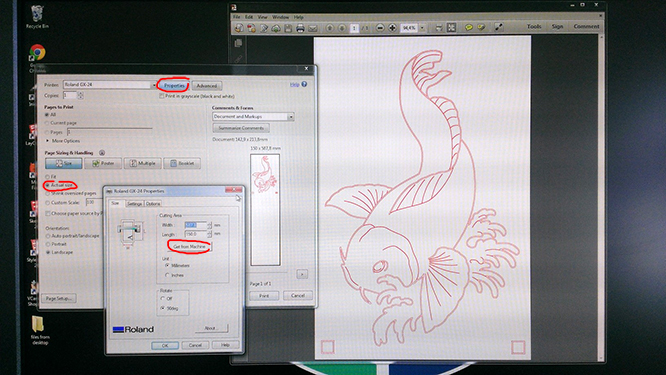
Take care to first go to the properties button, and click on the 'Get from machine' button.
This means you get the proper width of the roll you have used loaded. (it measures the width between the 2 little black wheels).
Before pressing print, make sure the printer options are set on actual size (to prevent re-scaling your design).
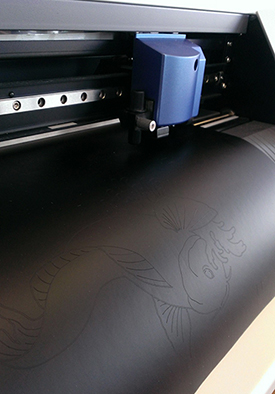
Note : when you are not sure if the blade is dull (or the cutting head is filled with earlier vinyl derby)
first cut out a test square before cutting out your design. Press the 'test' button on the machine to do this.
Step 4 : Removing the sticker pieces you don't want.
After the machine is done cutting you should have 6 vinyl stickers in different colors.
Start by taking away the pieces of the sticker you don't want. Use the tweezers for the little pieces.
When you're done every piece should look like original drawing.
(only when you're prepping for a silkscreen you remove the opposite pieces).

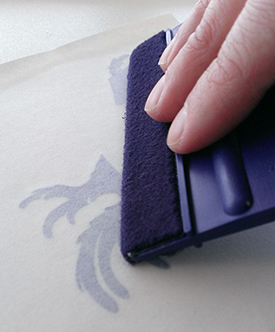
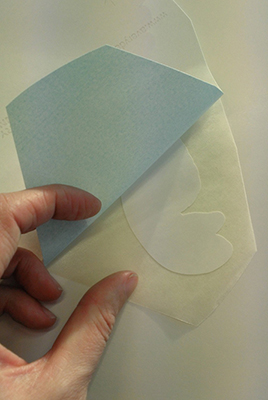
Step 5 : Add masking tape.
Take the roll of masking tape, and tape over the prepared sticker.
Use the purple tool to work out any air bubbles.
The glue of the masking tape sticks better,
when a bit of pressure has been applied, so rubbing all over the sticker is good.
You can use scissors to cut away any execs material.
The only place where you want to cut as closely as possible around the sticker is near the square.
(this helps you with placing of the sticker later on).
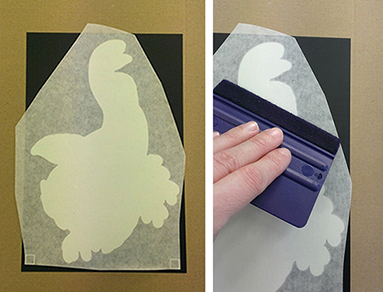
Step 6 : remove the back of the sticker
Before placing the sticker, make sure the surface where you're placing the sticker is clean
(no sand, dust or anything else).
Then remove the back of the sticker and place it (with the masking tape).
Step 7 : Placing the sticker
So, my surface this time is a piece of cardboard.
I've place the black background on first. Then I place the white shape over it (with squares).
Use the purple tool again to remove any air bubbles you see.
(when placing a sticker on a glass surface you can spray it (a bit) wet,
which makes placement easier).
Step 8 :
Gently pull away the tape at a steep angle.
You can also use the plastic side of the purple tool as a helper.

Step 9: placing the rest.
Repeat previous steps and continue with placing the other sticker layers.
Use the little squares as a help to again all the layers in the right place.
When you're done you can peel the squares off as well.
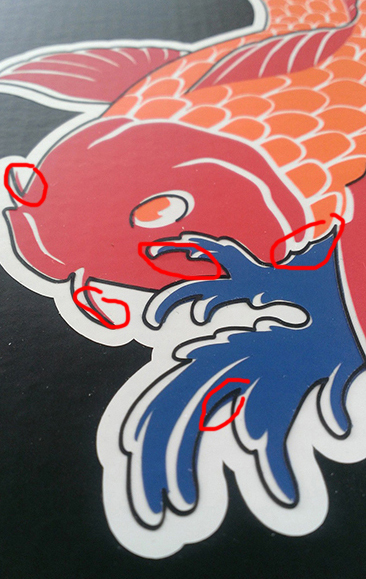
Sadly, the left close-up you can see that I've misplaced (not properly aligned) the final layer a bit.
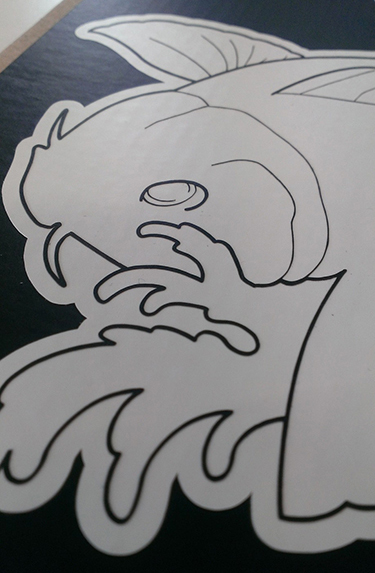
And in this close-up you can see how thin the lines are.
When the surface you place the sticker on has enough friction,
you can really make the lines in the design super thin.
However, the hair lines do become extremely fragile for placement.
I did manage to place most of them, but that is more a luck thing.
For example you can see how I damaged a bit of the hairline in the eye.
So, I would say that the line design shouldn't be thinner the 3 points (illustrator).
Which in this design are the 'thick' black outlines of the drawing.
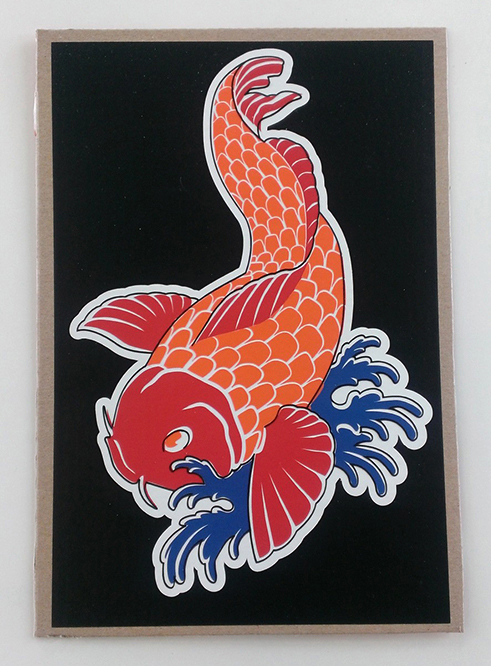
Endresult :)