W14 - MECHANICAL DESIGN
W14 - REFERENCES
link: GENERATION _ gh plugin
link: ISO screw thread _ gh definition
W14 - DOWNLOADS
For this week assignment it's time to design our final project components. In order to draw the mechanical parts of the drone and the gimbal I decide to follow the same logic: generate a parametric model that will give flexibility in terms of customization, sizes and design to us and all future users of our product.
The main tool used to desing is in both cases Rhino grasshopper.
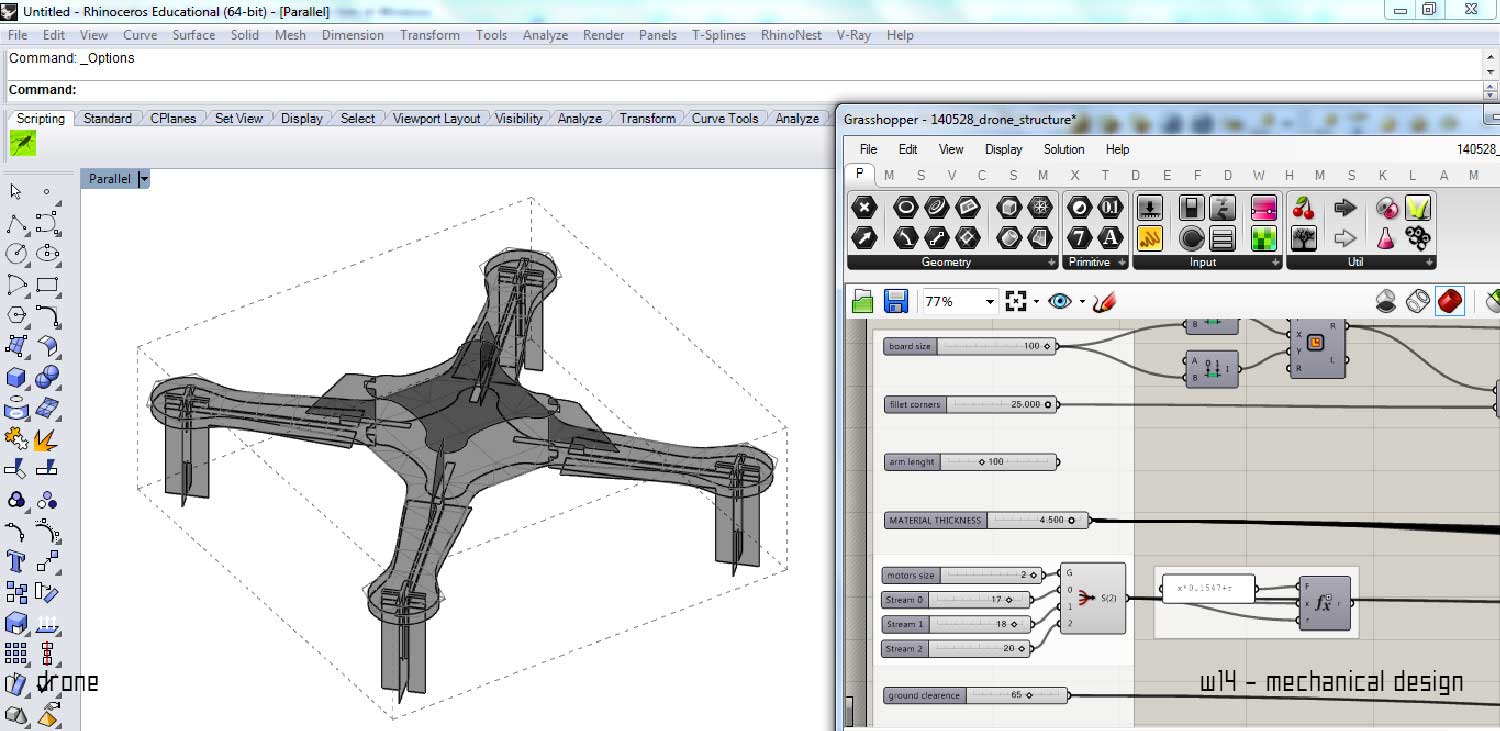
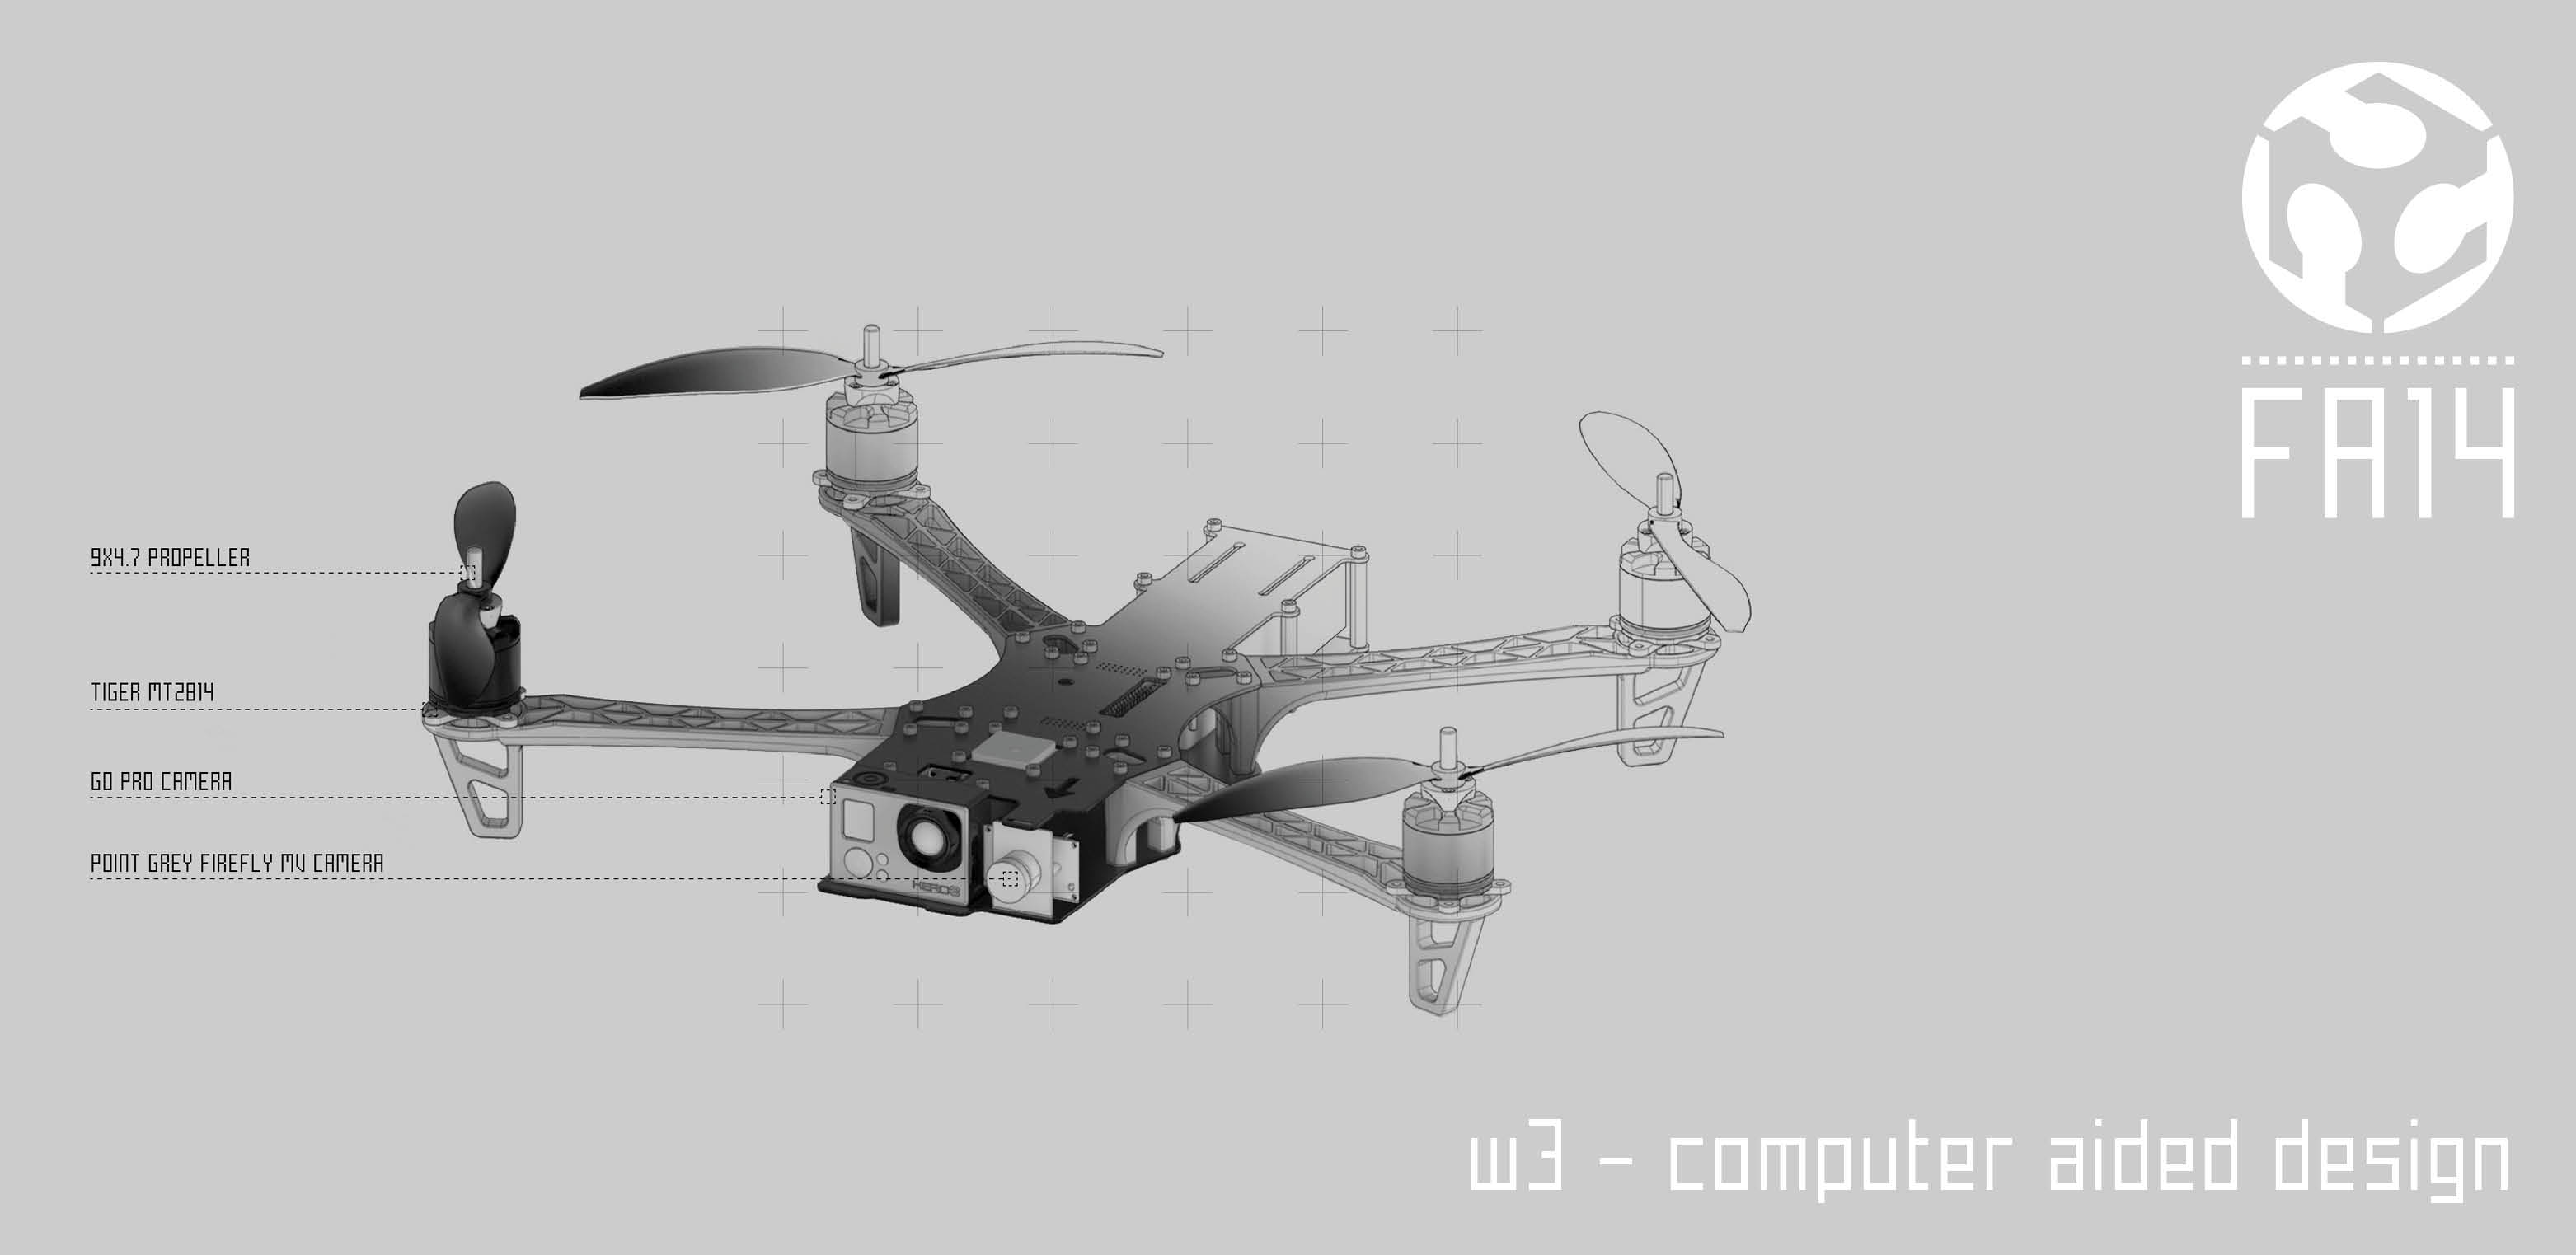
drone - design in rhino-grasshopper
In the definition of the drone the variables defining the design are related to the size of the board, the lenght of the arms, the material thickness, the size of the brusheless motors, the dimension of the ground clearence.
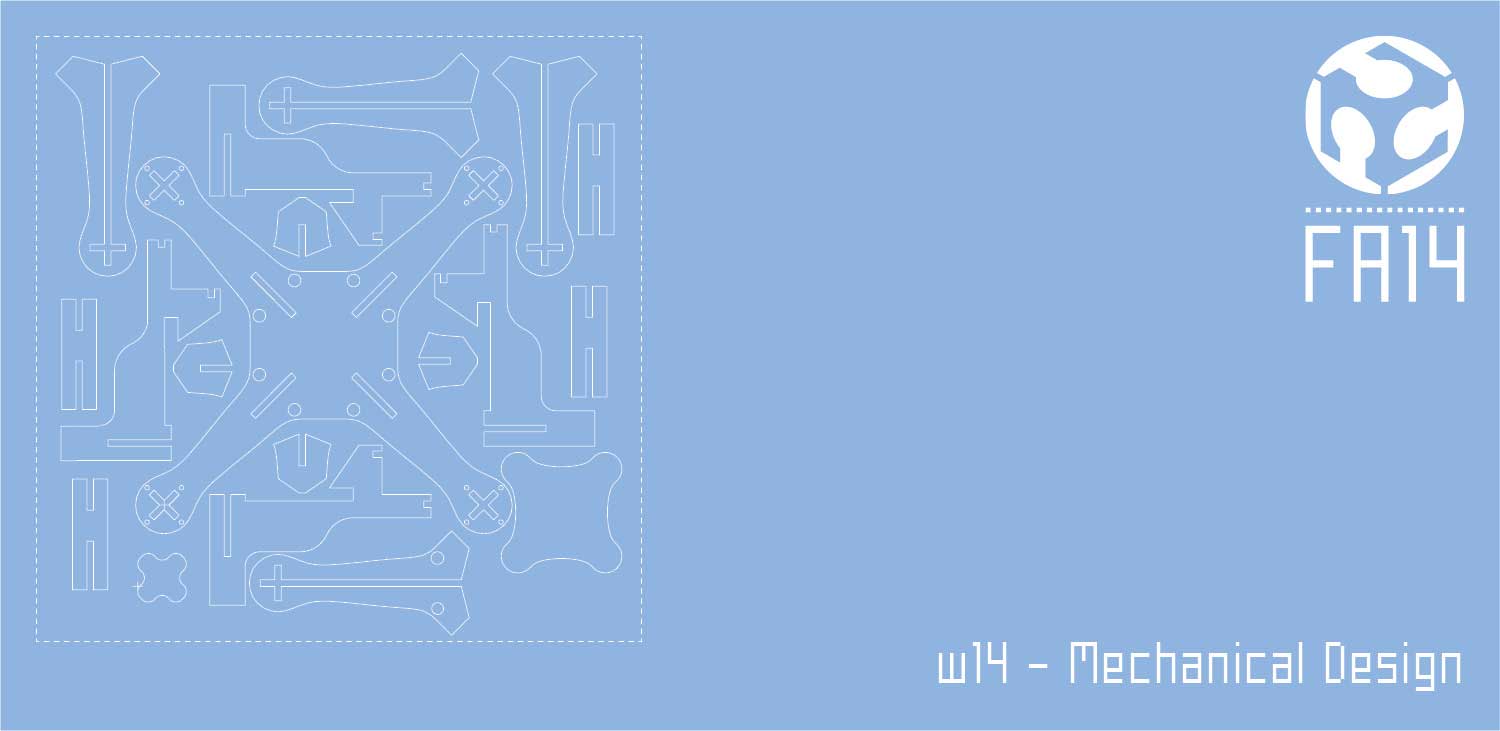
To fabricate all the pieces the next step is to nest all the components in a cutting sheet. It has to be no more than 50x50 cm. Why? Because we want to reduce to the minimum size the waste of material of course!
To do that we have several options. We can buy rhino nest (that is an amazing tool and in my case I received with Rhino5 itself) or we can use an open source plugin for grasshopper called GENERATION. In the specific the component is called nesting.
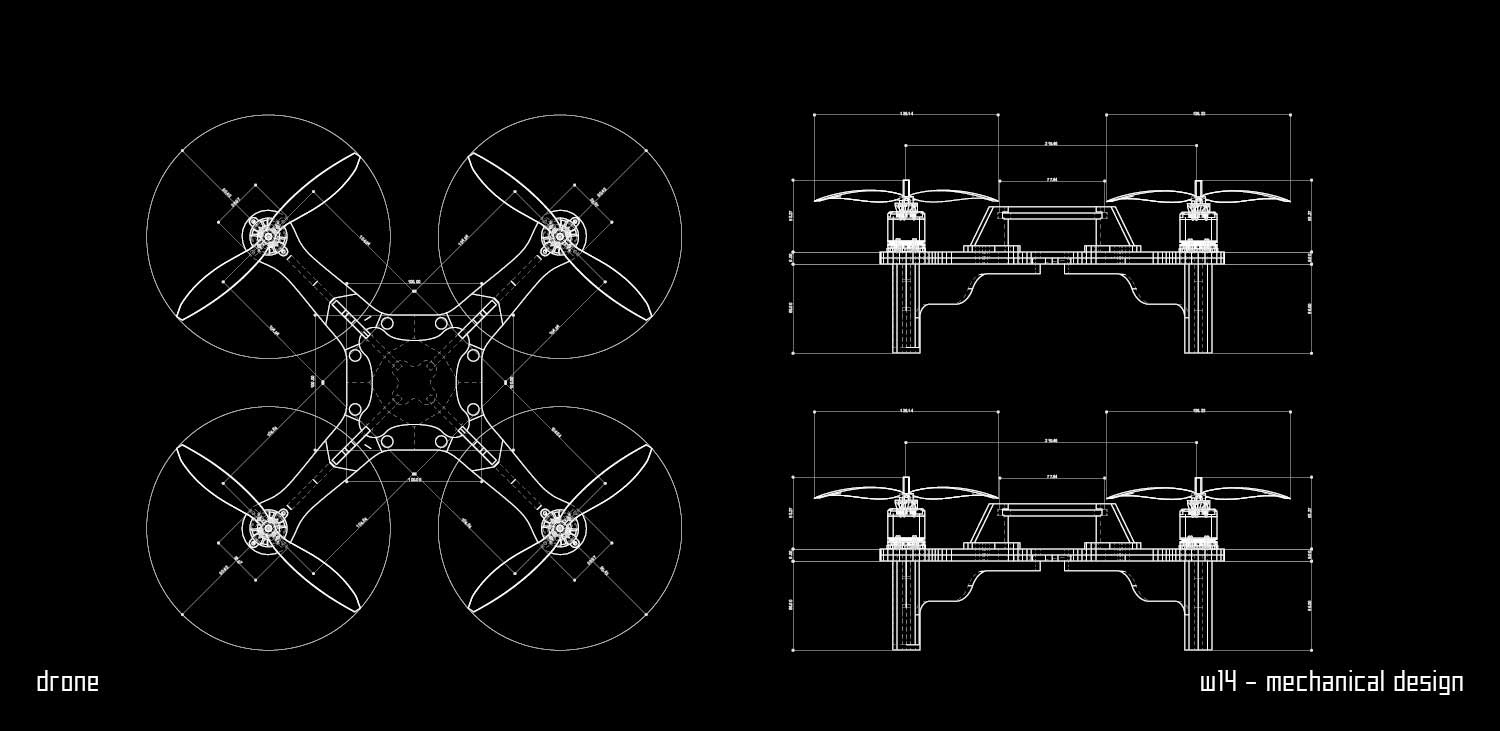
drone - technical drawings
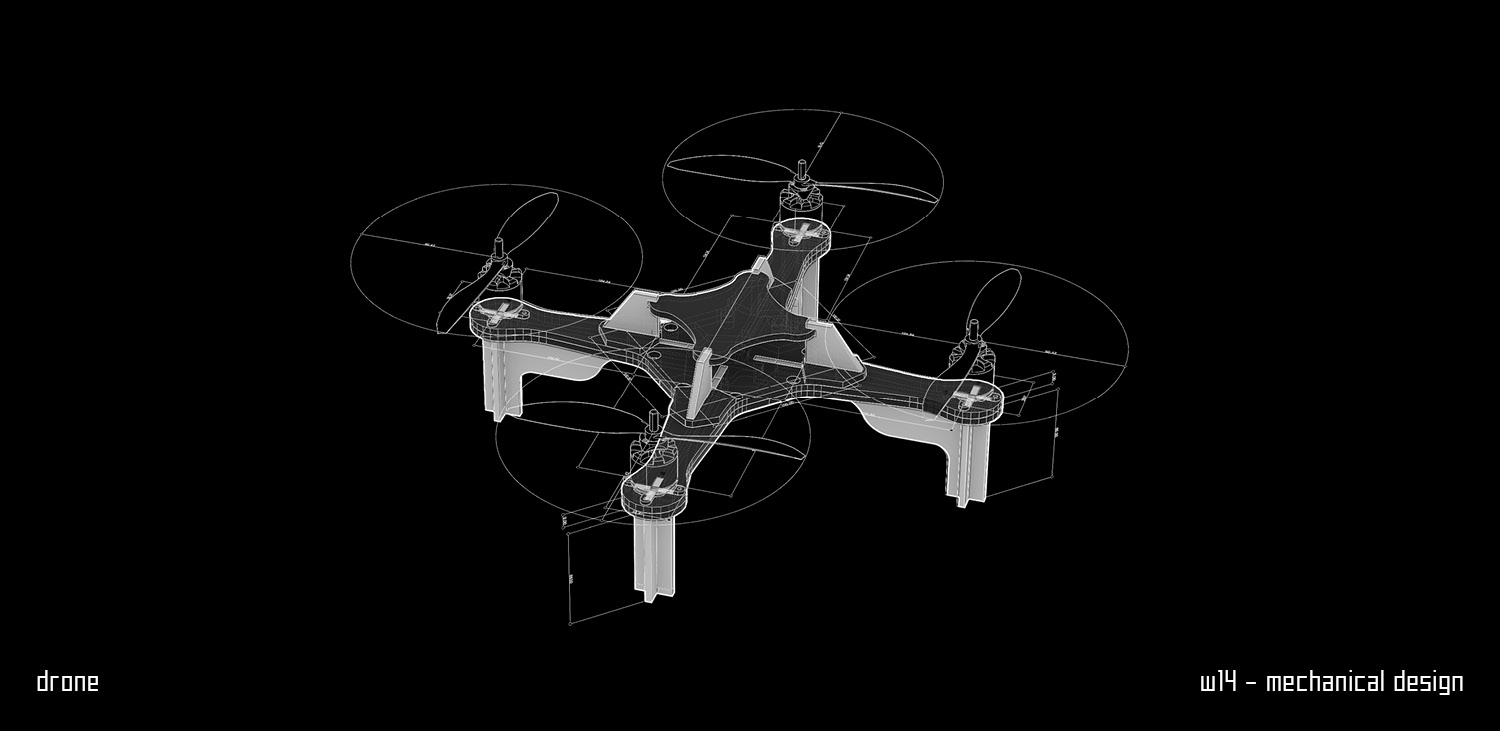
drone - render

gimbal - design in rhino-grasshopper
The definition in this case is focused on the screw system that will connect the gimbal to the main structure of the drone. The definition generate a spiral surface. By scaling and doing a boolean operation we can get the female. Once the process is over next step is to 3d print all! The problem in this case is that everything took more time since the piece was very small and it was difficult to desing from the beginning all the pieces taking into consideration the best position or connection to the servo motors or the drone. We actually did a lot of differents tries. But here is it the final design.
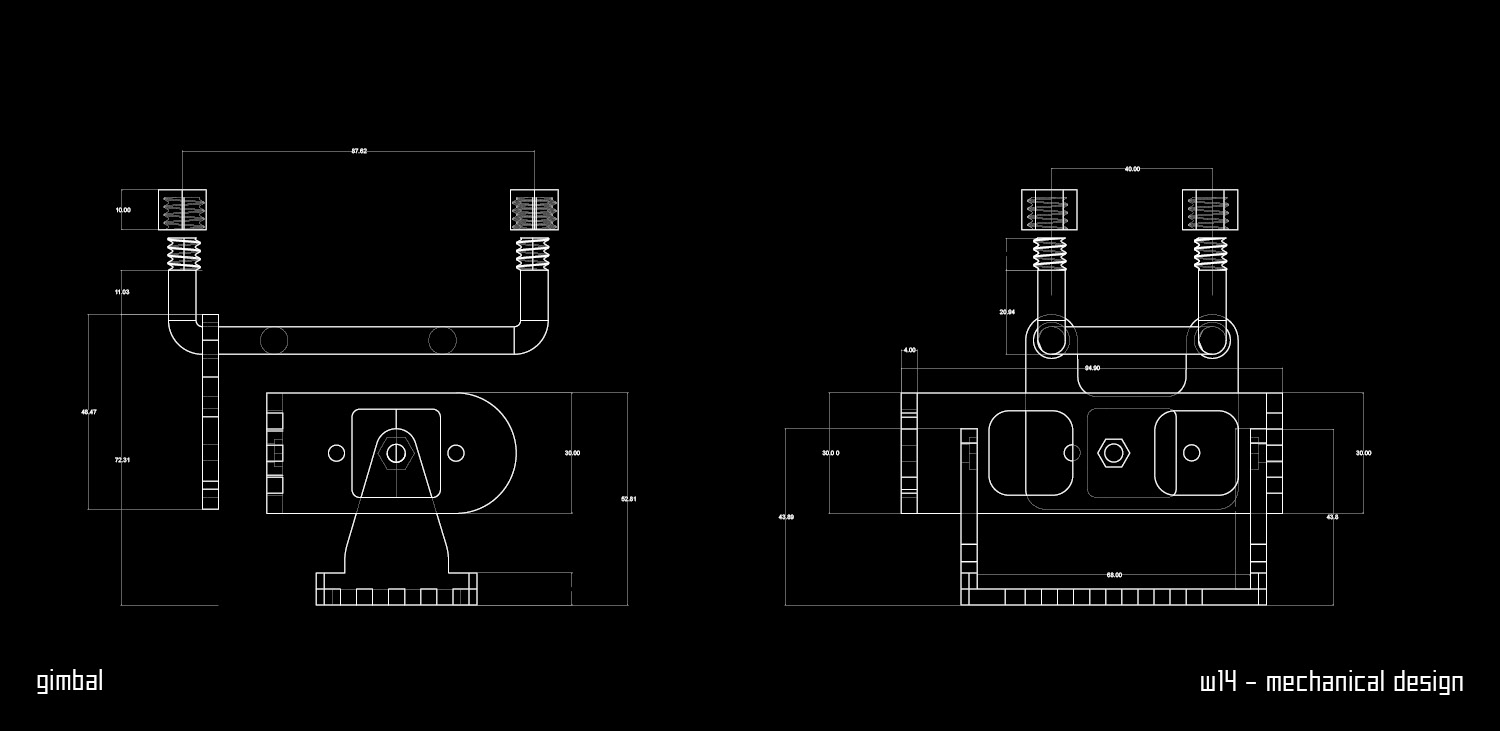
gimbal - technical drawings
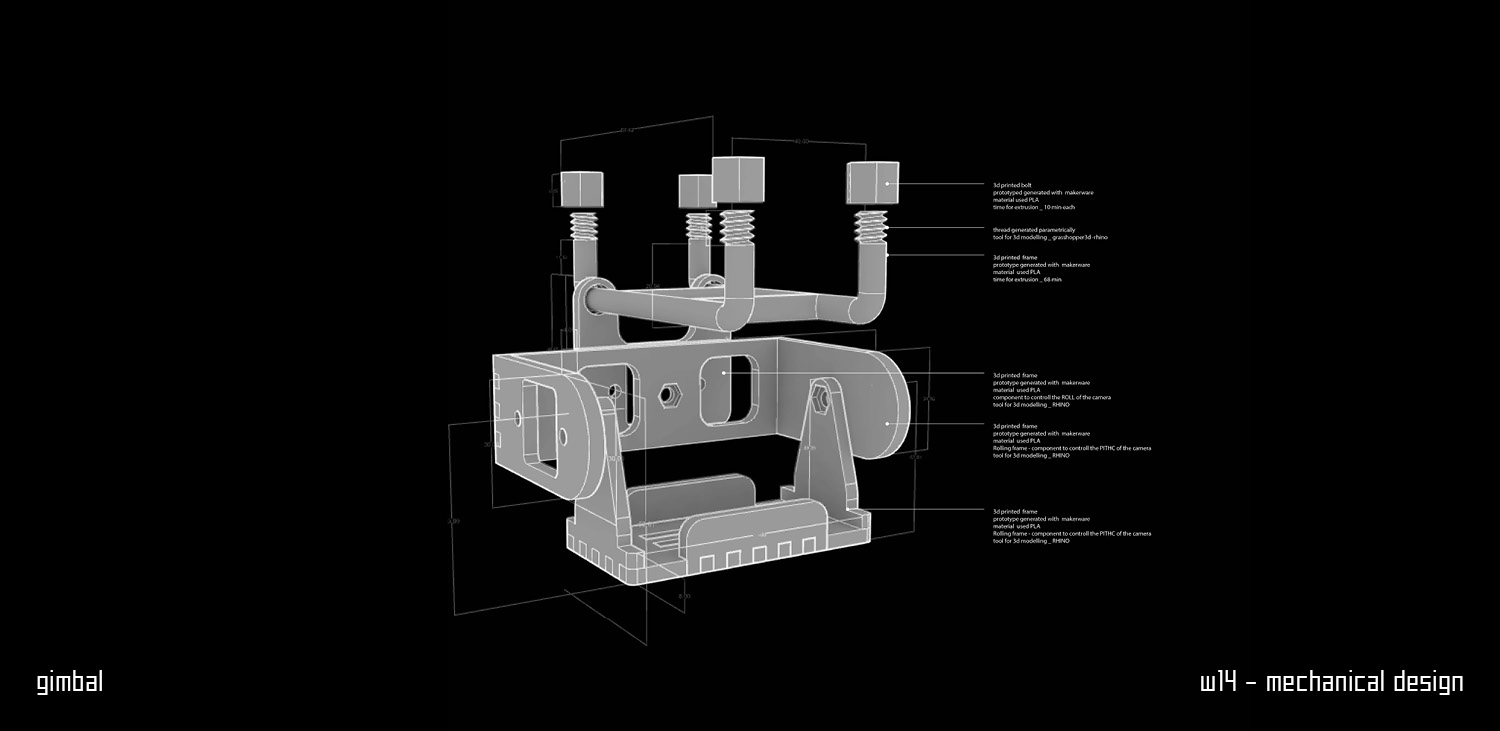
gimbal - render
Weekly Assignments