


For this week’s assignment I need to use a CNC router to cut a piece of foam and create a mould for my composites assignment. The router available in out lab is not capable of cutting large billets (e.g. the cutting depth is maximum 5 CM). On the other hand we only have foams with the dimensions of 20 * 15 * 5 CM. Therefore the dimensions of the final product is going to be limited to these sizes. For this weeks assignment I am going to design and make a small plate using plaster and metal wires as reinforcement.

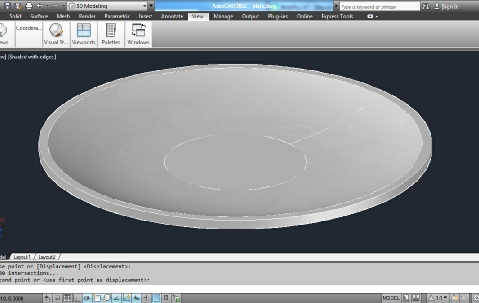
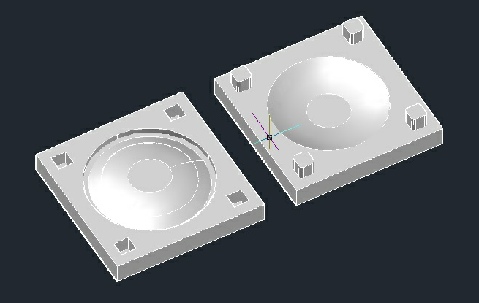
First I need to design the negative and positive parts of the Mould that I am going to cut using foam. Learning from my mistake in the ‘moulding and casting’ assignment I added four positioning guide on each component of the mould which then are going to lock together. The edges of these guides are not rectangular and are curved by 3 mm similar to the radius of the cutter head I am going to use in this job. Since the cutter is round shaped it cannot drill holes with rectangular edges.
By clicking on this link you can access the CAD file.
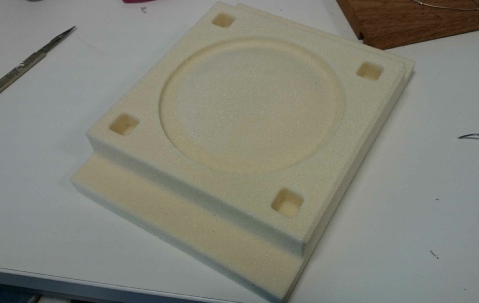
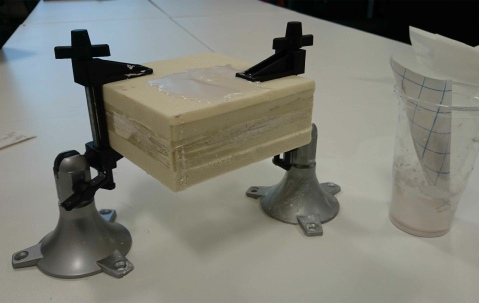
For cutting the mould I followed the same process as I did in the Moulding and casting assignment. The only difference was that during the milling process the machine stopped moving but the tool path blocks were going forward on the app. The great option here is that I could stop the process, choose the tool path block that the machine stopped working and go back to it and resume the process from that point which is much better than restarting the whole process!! Here is the first half of the mould ready.
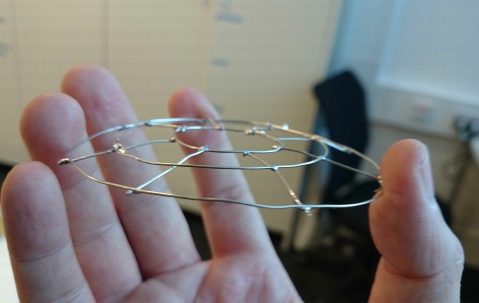
While the machine is cutting the second half it is a good time to start soldering the wires together and make a mesh which would be the reinforcing agent in the final product. Because the final product is very thin (5 mm) it is important to try to adjust the wire mesh fully to the shape of our product in order to avoid any deformation and prevent wires to stick out of the plaster layers.
After preparation of the two-
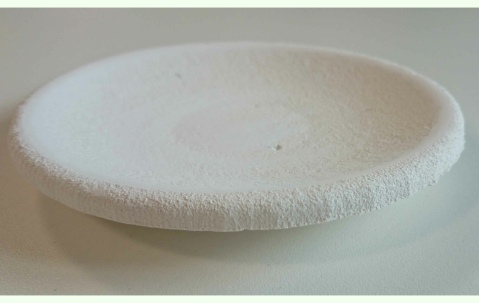
After almost an hour the plaster is hard enough to allow us to remove the top piece of the mould. It is better to allow the product to rest for few hours to completely dry. Removing the top piece will speed up the process. Because the foam surface has thousands of small holes on it and the foam may slightly absorb the casting material it is a good idea to cover the foam with a thin layer of paint or Teflon to make the mould water proof and also enable us to remove the final product from the mould much easier. Here is the final product. As it can be seen the surface is slightly rough similar to the foam surface.
