


Since I am considered a beginner in programming, for this week I am going to write two rather simple programs. For this purpose I used the ‘Atmel Studio’ application. After downloading and installing the app from their website (http://www.atmel.com) and running the app I started a new project and chose C++ as the program language. Next I chose the micro controller type which in this case is the ‘Attiny44a’. I am going to use some of the templates from the library.
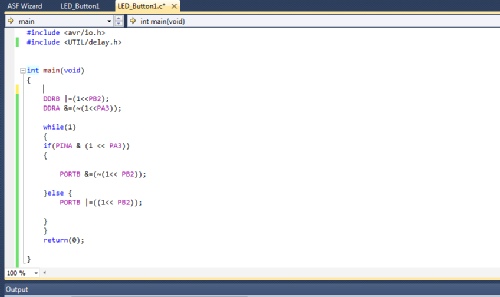
First, I am going to write the simpler program. The expected result is to turn the LED on after pushing the switch on the board.
The program can be seen in the front picture. Basically I defined the pins that the LED and switch are connected to. Afterwards I define the action which should happen by pushing the switch.
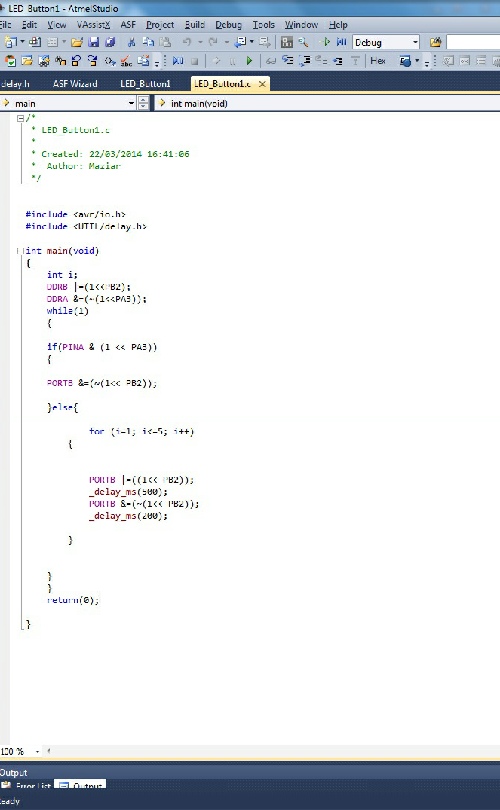
The next program is a little bit more complicated compared to the first one. The aim is that the LED will blink for a defined number of times after pushing the switch (in this case five times).
The program and definition of each command line is shown in front.
#include <avr/io.h> // include the required libraries
#include <UTIL/delay.h>
int main(void)
{
int i;
DDRB |=(1<<PB2); //set port B pin 2 direction as output for LED
DDRA &=(~(1<<PA3)); //set port A pin 3 direction as input for button
while(1) // read the status of button continuously
{
if(PINA & (1 << PA3)) // read status of button by checking the PA3
{
PORTB &=(~(1<< PB2)); // if PA3=1 turn off LED
}else{ // if PA3=0 Blink LED for 5 times
for (i=1; i<=5; i++)
{
PORTB |=((1<< PB2));
_delay_ms(500);
PORTB &=(~(1<< PB2)); // blink LED in this for loop
_delay_ms(200);
}
//PORTB |=((1<< PB2)); //if button is not pressed LED OFF
}
}
return(0);
}
