
| Week8 | Embedded programming |

| 8-Bit Microcontroller Advanced RISC Architecture | - 120 Powerful Instructions and 32 x 8 General Purpose Working Registers. | I/O and Packages | - Available in 14-Pin SOIC and PDIP - Twelve Programmable I/O Lines |
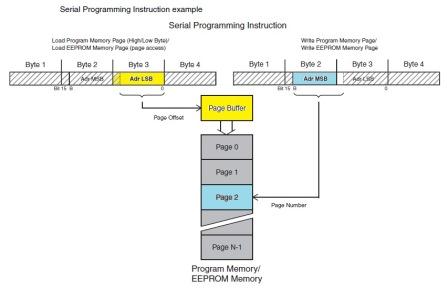
| Non-Volatile Program and Data Memories | - Program Memory Flash of 2/4/8K Bytes (Endurance: 10,000 Write/Erase Cycles) - Programmable EEPROM of 128/256/512 Bytes (Endurance: 100,000 Write/Erase Cycles) - Internal SRAM of 128/256/512 Bytes (Data Retention: 20 years at 85°C / 100 years at 25°C - Programming Lock for Self-Programming Flash & EEPROM Data Security) | Special Microcontroller Features | - DebugWIRE On-chip Debug System - In-System Programmable via SPI Port - Internal and External Interrupt Sources: Pin Change Interrupt on 12 Pins - Internal Calibrated Oscillator - On-chip Temperature Sensor |
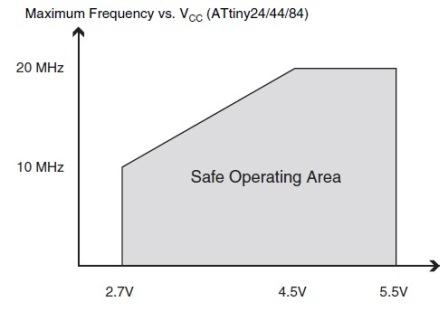
| Peripheral Features | - One 8-Bit Timer/Counter with Two PWM Channels - 10-bit ADC - Universal Serial Interface | Speed Grade | - ATtiny44V 0 – 4 MHz @ 1.8 – 5.5V 0 – 10 MHz @ 2.7 – 5.5V - ATtiny44 0 – 10 MHz @ 2.7 – 5.5V 0 – 20 MHz @ 4.5 – 5.5V |
| Operating Voltage: | 1.8 – 5.5V for ATtiny44V 2.7 – 5.5V for ATtiny44 | Industrial Temperature Range: -40°C to +85°C Low Power Consumption | - Active Mode (1 MHz System Clock): 300 μA @ 1.8V - Power-Down Mode: 0.1 μA @ 1.8V |


 |  |
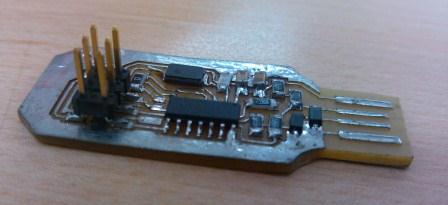 | FabISP in-circuit programmer: Assignment 4 Electronics production |
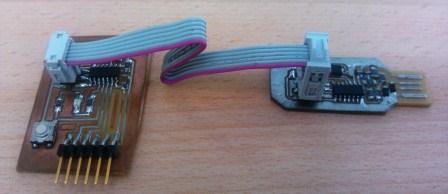
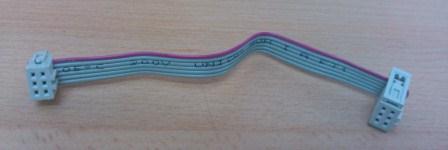 | To connect the controller using the ISP (J1) terminal to the board microcontroller, I built a connection cable, (I had to be very careful on identifying the terminals in order to avoid malfunctions). |
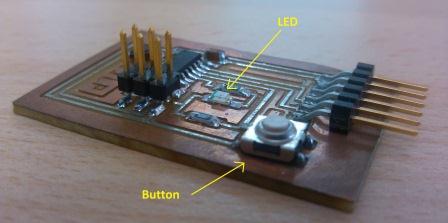 | Echo hello-world board,: Assignment 6 Electronics design |
| 1. Get the arduino program | Download and install Arduino Software Version 1.03 or newer. |
| 2. Get ATtiny microcontroller driver | Download the ATtiny Master.zip |
| 3. Unzip the attiny master.zip file. | It should contain an “attiny-master” folder that contains an “attiny” folder. |
| 4. Copy the folder "attiny" | Copy the “attiny” folder from the unzipped ATtiny master.zip to the “hardware” folder inside the Arduino Folder. That contains the file boards.txt and another folder called variants. |
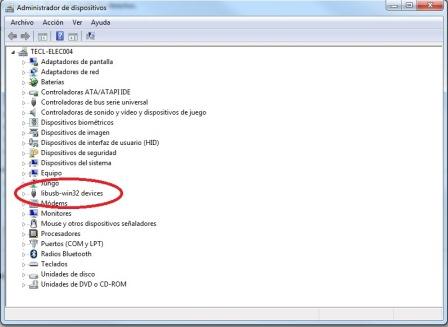
| 1. Get the Driver usbtinyisp_libusb-win32_1.2.1.0 | To use USBTinyISP with the 64-bit versions of Windows 7 or Vista |
| 2. Install the Driver | There is still a warning that “Windows can’t verify the publisher of this driver software” but there are no more errors about digital signatures and the new drivers appear to install and work correctly |
| First we need to set the type of microcontroller used. | 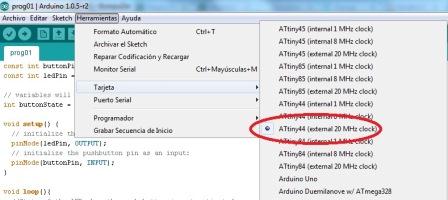 |
| Second we define the com port used by the programmer. | 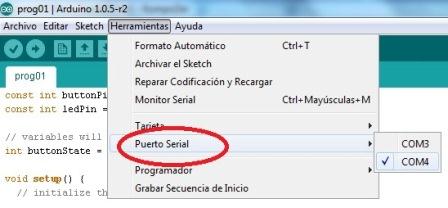 |
| Third, we must select the type of programmer: "USBtinyISP" | 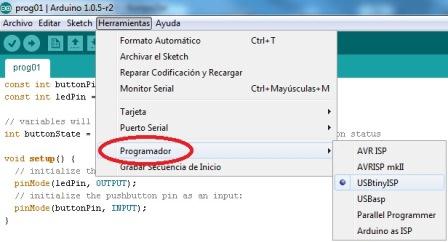 |
 |
|
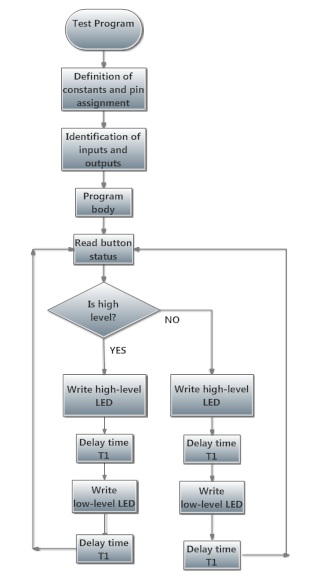
| The program structure is shown in the following flowchart. | The program in Arduino |
| 1. Download ardublock-all.jar | Download link: http://cloud.github.com/downloads/taweili/ardublock/ardublock-all.jar |
| 2. Location of the downloaded file | Include
all.jar ardublock-file in the tools folder of the Arduino IDE ".... /
arduino-1.0.1/tools/ArduBlockTool/tool/ardublock-all.jar" You must create folders: /ArduBlockTool / tool / |
3. 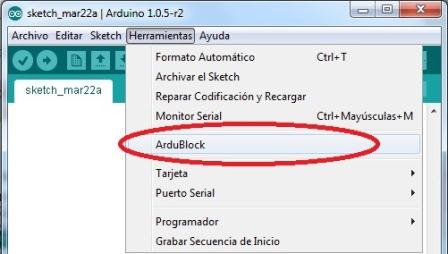 | After installing and open the Arduino IDE in the "Tools" menu you can find the link to Ardublock |