

Week 5. 3D scanning and printing
Design and 3D print an object
The first assignment for this week was to design a 3D object which can only be made with a 3D printer, and then of course print it.
A pair of years ago, when 3D printers were not so popular as they are nowadays, I visited a company which had several of them, and I got amazed with their potential. One of the things that shocked me was the possibility to create one piece inside a second one, and that it is not possible to extract unless you break it.
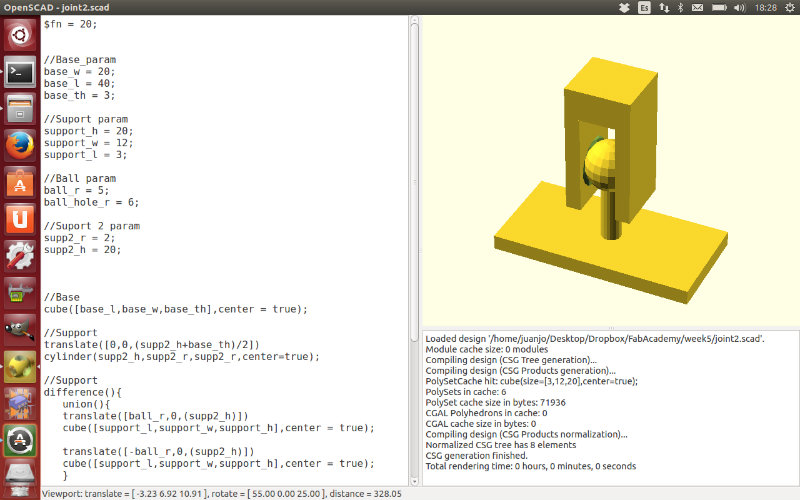
I looked for some ideas to make something similar, and I finally decided to design and build a ball and socket joint, where the ball is initially built inside the socket, and it is not possible to take it out without breaking it. You can see in the picture below the design in OpenSCAD.
|
|
|

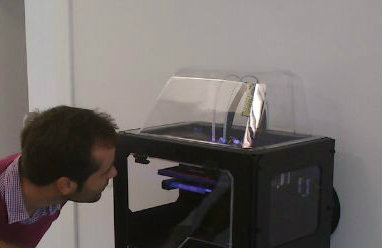
When the design was ready, it was the moment to send it to the printer. In my case, I was using a Makerbot Replicator 2X, a dual extrusion printer which is optimized for printing in ABS plastic.
|
|

To send the design to the printer, I used MakerWare, a free software especially designed for Makerbot printers which allows you to define the resolution, create raft or support structures and resize your design among many other things.
To load my design in Makerware, I needed to export it to a .stl file so it could understand it. Then I fixed the main parameters, and I exported the file to a SD card I used later on to print my design. I needed to include some supports in order to be able to print my design, but this is something Makerware is doing for you.
|
|

Once you have exported the file from the software, it is not possible to modify printing parameters, as they are included in the file. For me, it will be more useful if you could edit some printer parameter from the printer, so you don't need to create a new file for each new print part.
Finally, it was just the moment to put the SD card in the printer and ask it to do its job. I realized that watching the printer do its job is more entertaining than many tv shows!!.
|
|
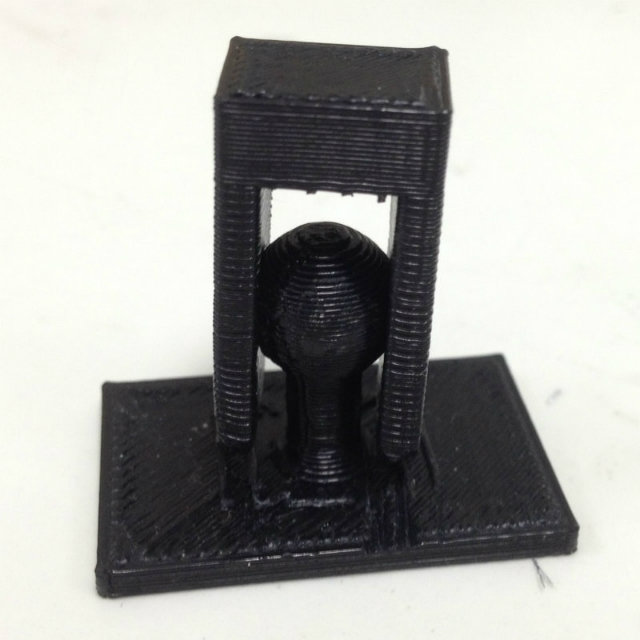
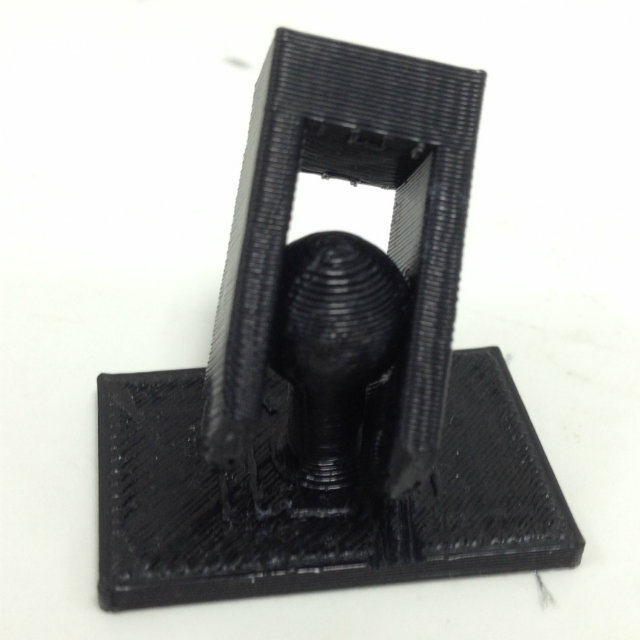
You can see in the images below my design built.
|
|
|
|
|


3D scan an object
The second assignment for this week (but not last if you want some extra credit) was to 3D scan an object. I evaluated the different possibilities, and I am going to start with Autodesk 123D as it seems quite easy to use.
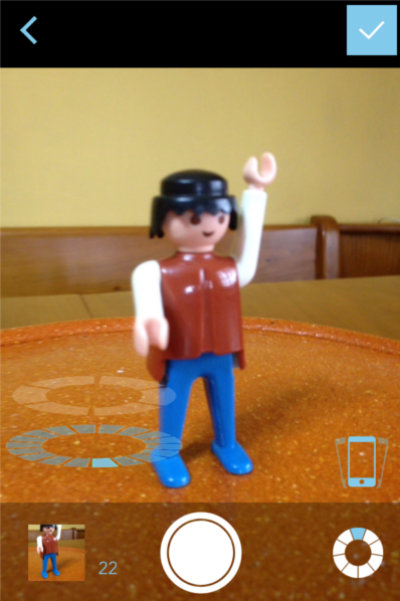
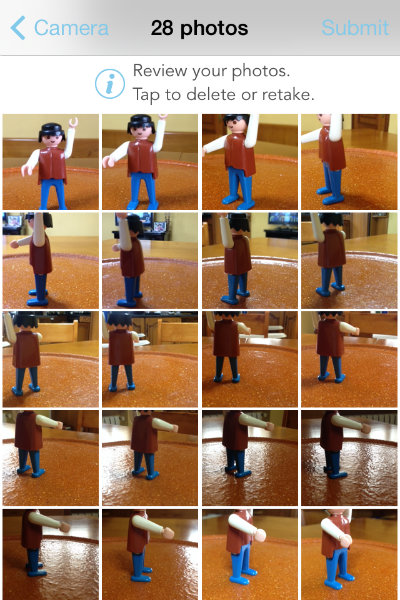
This software offers you different versions you can use depending on the OS and device you are using. In my case, I used the iOS version, which is very intuitive: you just need to move your device around the object, following the indicators in the screen. Once you finished the scan all along the object, the software will create the 3D model.
The first thing I didn't like about the iOS app, is the time it took to upload the pictures. Although I was using a good DSL connection, it took about 30 minutes to upload all the pictures and be able to create the 3D model!!!
|
|
|
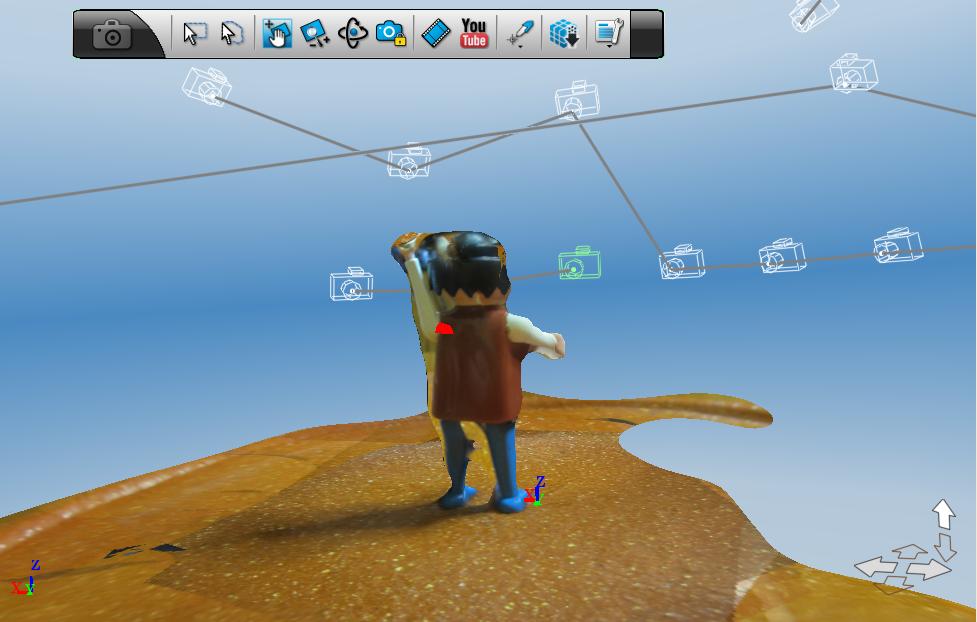
I did some attempts but the created model was not so good, so I needed to install the PC application which allow you to edit the mesh. I made again the pictures with my camera, and I copy them to the computer. After some modifications with this application, the model was improved.
|
|
|

|
|
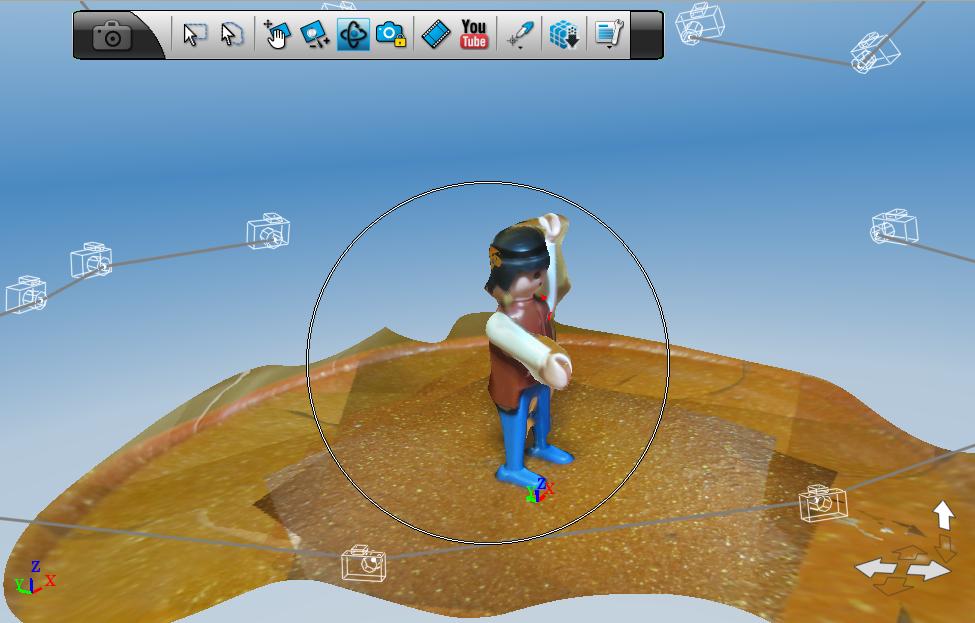
This application, 123D Catch, is very easy and intuitive to use, but the results obtained are quite far of a good 3D model. You need to spend time editing the obtained model in order to have an accurate one. You can download the file generated here.
When I finished modeling my object with 123D Catch I realized I ran out of time for this week, so I couldn't test any other scanning technology. In the future I would like to spend some time playing with Xbox Kinect, as I have been told it is quite easy to do some funny things with it.