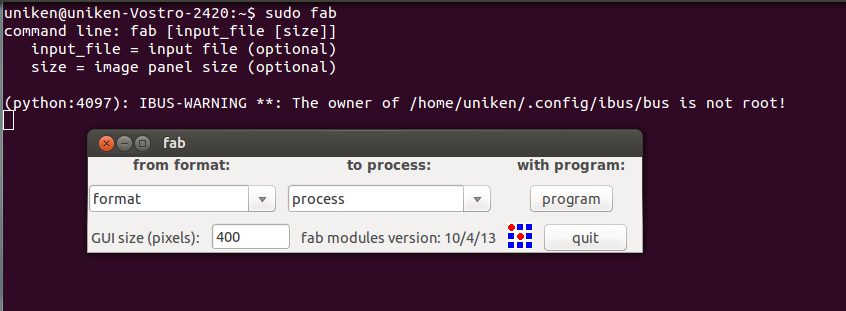
Image 1 – Fabmodules, as it runs the first time.
Setting up Fabmodules
Fabmodules is a set of software tools, integrated together, under a single UI. Fabmodules can be used for digital fabrication (- the driving concept of Fablabs) using various machines.
Following is the description of experience while setting up machines at Fablab, Vigyan Ashram (Pune Officce).
Installation of Fabmodules
|
Index |
Setup Parameter |
Details |
|
1 |
Target Machines |
Roland CAMM – 1, Roland Modela |
|
2 |
Operating System |
Ubuntu 13.04, 64 bit |
|
3 |
Software tools |
Fabmodules |
Following
installations, prepare the target machine (PC) for Fabmodules
to run successfully.
a)
sudo apt-get install python-dev python–numpy python-pip
python-wxgtk2.8
b) sudo apt-get install gcc g++
c) sudo apt-get
install libpng3 libpng12-dev
d) sudo apt-get install libgif-dev
giflib-dbg
e) sudo apt-get install bash
f) sudo apt-get install
okular
g) sudo apt-get instal libboost-thread-dev
libboost-system-dev
h
Following instructions install the Fabmodules on the target machines.
1)
Download the
fab_src.zip.
2) Unzipping this same, should provide with a folder
named “fab_src”.
3) Using Terminal cd
to
fab_src
4)
Assuming the machine is prepared already, following commands are to
be executed in order to setup fabmodules.
a)
make fab This commans builds the fabmodules using the source code
from fab_src folder.
b) sudo make install while, this is not a
must
command,
this will allow a user to execute “fab”
command
from any place, through Terminal.
c)
sudo fab to test if fabmodules is installed correctly. “fab”
is
an enctry-point for rest of the modules to be accessed, easily.
Following
screenshots show a successfully installed fabmodules.

Image
1 – Fabmodules, as it runs the first time.
Why “sudo fab”
eventually (meaning not at the entry point), fabmodules access system device – COM Port, and even before that during “make.path” it does somehting (could someone explore this?) for which root permissions are desired to be granted. Hence, not initiall, but during its course, to allow fabmodules ti execyte to the fullest, it is necessary to do “sudo fab”
With
Vinyl Cutter
We
found it a bit tricky to set-up Vinyl Cutter. While, the setup above,
did work with Modela with no modifications and/or settings further
(hence, talked about later in this document), Vinyl Cutter did not
work in the first go.
a) Pressing “send it” on the fabmodules threw up lpr: The printer or class does not exist error.
b) After a few random trials (such as setting up the PRINTER="vinyl" variable and using lpr command directly) we ended up in a realisation that a printer named "vinyl" should be present on the machine in order to succeed ahead.
c) So, using Ubuntus "Add Printer" facility, a "Generic" printer named as "vinyl" was added.
d) Only once – we came across this error lpr: Transport endpoint is not connected and never afterwords.
d)
After doing this "send it" did work!
With Modela
|
|
Image 3 – We had company..
We hope to meet him soon. |
|
|
< > |
Laser Cutting
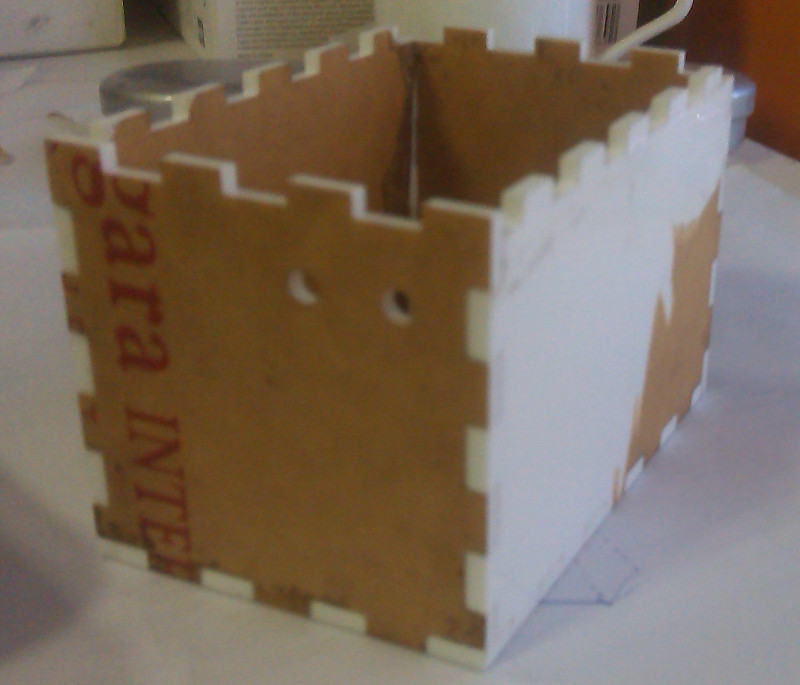
It was a huge struggle for me, to identify some object that I would be happy (capable?) to draw and carve out using Laser Cutter. Painfully, I did not complete this in time. Hence, back then in the 3rd week, worked out a simple press fir box - Just a quick link here.

Image
5
– Press
fit Enclosure
Finger
joint has been tried out here. A Dovetail Joint seems interesting
and is the next approach.
The Press-fit box was fabricated in
an external facility. Hence, as such Cutting myself remains pending.
This
week (Feb 20 – Feb 26), though, I could take out something that I
would be happy (not sure if capable ...) to make. A Table Lamp with
press fit joints. Ofcourse, the ideas come from internet .. still the
design and assembly was extremely interesting and enriching
experience.
|
Image 5 – Table Lamp – Concept Design
Way long to go ahead!! |
< > |
|
Note – These are not actually fixed to each other yet. A suitable joint is still being thought over. |
|
|
|
Note – While taking these photographs last night (Feb 25, 2014) one of the bars was broken. Seems the support structure is not spaced to suitable distances or the length can be decreased. |
For a long time now, Finger Joint based Press-Fit objects, had been my only resort. For first time, any other shape than a box has been tried by me! Inkscape was, as usual, of great help. Following are the techniques I used, again for first time ever, and hence, I am enjoying the process (let me recognise the lamp is still in making...)
Cloning
of objects – Cloning
saved a lot of time. The design for the lamp is symetrical one.
Hence, designing 3 of the individual pltes was sufficient. Earlier,
I used to copy the completed part. However, any changes to the
original would not be rflected and copy-paste business was the only
resort. Not with Cloning – anymore.
What
I am stuck at is:
When
I group a few object together, e.g. a single plate with all the
deisred holes, slits etc. And Clone, the expected cloning effect
does not take place, on the cloned object. Yet to understand why.
Editing
paths by nodes – This
whole experience of editing paths by node is like a eureka moment to
me. I took some time to understand this conceptually. “Converting
Objects to Path”, now seems natural to me, however, I did not
figure it out earlier. And then adding the nodes was obvious.