Fab Lab Barcelona SuperNode /Fab Lab Sevilla /Jose Perez de Lama
Week 12 / interface & application programming / 10.04.2013
[assigment]
Write an application that interfaces with an input &/or output device.
Class syllabus::
http://academy.cba.mit.edu/classes/interface_application_programming/index.html
[assignment development]
Very little experience before interfacing electronic devices with a computer-desktop; just a bit with Grasshopper-Firefly-Arduino, but mostly as spectator; ath one of the workshops Jens Dyvik has given at Fab Lab Sevilla...
So, once again, considering the time available i tried to go for some low-middle difficulty task. I had been reading a Python manual - Jason Briggs' Python for Kids, a great manual by the way - and went for the tkinter chapter, which i hadn't yet read. I followed the tutorial, and then went to study Professor Gershenfeld's scripts. I chose to work with the hello.temp board [input device] and python script, as i thought it would be rather intuitive to interact with temperature. Two of my colleagues decided to work instead with Processingand the other boards we had made in former weeks, and we thought that towards the end we could share whatever we had learned working with both languages.
[what i learned]
_ Basic Python [versions, modules, basic operations, variables/objects, placeholders, functions...]
_ Basic use of tkinter Python module [lines, rectangles, colors, arcs, polygons, texts, displaying gifs, basic animation and basic interactivity with keyboard]
_ Some about the Fab Academy python script: the general structure of it [serial module, tkinter module, data flow...]
- How to use the data collected by the hello.board+C-script to show them in a desktop visual-textual interface using Python; including rectangles, ovals, gif-images, dynamic shapes, texts...
_ I learned how to use the "recordmydesktop" application to record a little video of my interface in .ogv format...
_ I recovered some forgotten Processing, and learned how to introduce data through the serial port into Processing. [Here we followed Natalie Haddad's Fab Academy 2012 site, which once again was very useful. Thanks Natalie!]
Tinkering with the hello.temp.45.py script
[analysis of hello.temp.45.py]
I will comment here my interpretation, and also some questions on the script i used as a base to modify. My own comments start with // and ar in blue. Here is a link to the original hello.temp.45.py file. This is the commented file then:
#
# hello.temp.45.py
#
# receive and display temperature
# hello.temp.45.py serial_port
#
# Neil Gershenfeld
# CBA MIT 3/27/12
#
# (c) Massachusetts Institute of Technology 2012
# Permission granted for experimental and personal use;
# license for commercial sale available from MIT
#
//importing some elements (*) from the Tkinter module. It is curious that in other //version, tkinter is written without capitals.
//importing log from the numpy module, a scientific mathematics module that we have used //in fab //modules as well.
//importing the serial module for serial communication trhough the FTDI cable
from Tkinter import *
from numpy import log
import serial
//sets the constant WINDOW that will be used to size the canvas and place the various //elements in the interface
//eps as the comment says is a time constant that will be used by filter; filter is a //Python //built-in function; however here it might not be used as a built-in function but //as a variable [?]
//filter seems to process the data provided by the board in a way that is not completely //clear to me. It is given an initial value of 0.0
WINDOW = 600 # window size
eps = 0.5 # filter time constant
filter = 0.0 # filtered value
//defines the function idle with two arguments parent and canvas
//declares two global variables filter and eps, _ Is this what it actually is?
def idle(parent,canvas):
global filter, eps
#
//describes the routine of the idle function - see transcript of professor Gershenfeld's //class explaining this part of the code [*]
//ser.flush() is a function of the serial module described like this: "Flush of file like //objects. In this case, wait until all data is written."
//Even after listening to professor Gershenfeld's explanation in class i don't understand //what exactly it does. Understanding it better would allow to makes use of these data in //a more meaningful way.
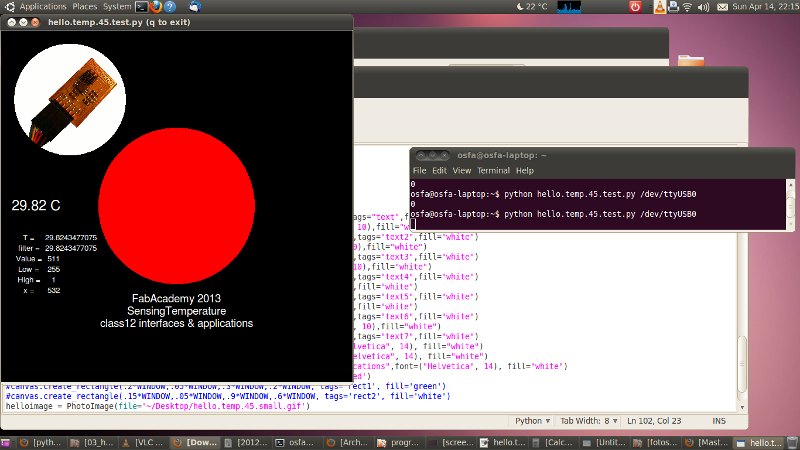
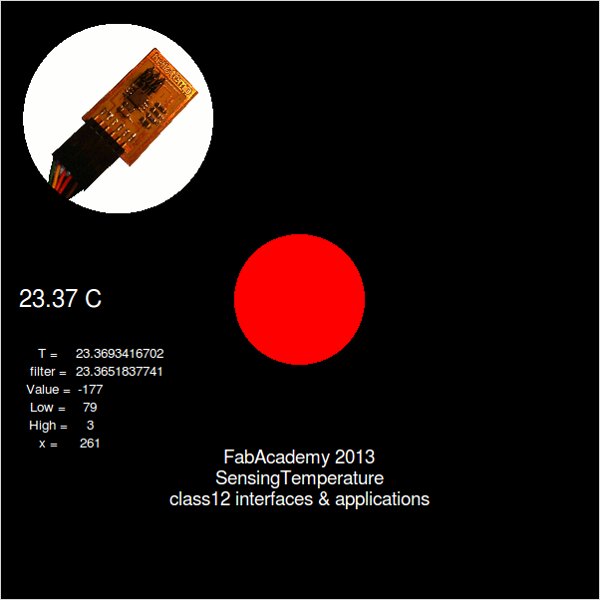
//ord(ser.read()) reads the data through the serial port. ord is a Python built-in //function that is described like this: Given a string of length one, return an integer //representing the Unicode code point of the character when the argument is a unicode //object, or the value of the byte when the argument is an 8-bit string. It seems to me //that in this case ord(ser.read()) gets and argument which is an 8-bit string and returns //the vaule of the byte, actually 0 to 255 in the //case of low. It might be different for //high which returns mostly 0 and 1 values and only seldom, as in one of the interface //images at the end of this post, it has reached a value of 3. But then it might be that every time i have been //reading temperature, they were in the low side [higher temps].
# idle routine
#
byte2 = 0
byte3 = 0
byte4 = 0
ser.flush()
while 1:
#
# find framing
#
byte1 = byte2
byte2 = byte3
byte3 = byte4
byte4 = ord(ser.read())
if ((byte1 == 1) & (byte2 == 2) & (byte3 == 3) & (byte4 == 4)):
break
low = ord(ser.read())
high = ord(ser.read())
//now the script takes "high" and "low" and generates a new parameter "value". Observing //the returns of the script and the actual definition of value, when high is "0", value //="low"; but when value is "1", automatically "low" becomes half of the number it had //right before when high was "0". This again i don't understand. It might have to do //with a way to measure the voltage comparing how much time it is over a certain //thershold and how much time it below...
//then there is an if that says, if value > 511 which is 256*1 + 255, the max value of //"low", the value -=1024. This is the logical operator AND, which is equivalente to say //value=value-1024; for example, for value = 600 > value = 600 - 1024 [=-444]; but i //cannot imagine what this would mean.
value = 256*high + low
if (value > 511):
value -= 1024
//Now, the script generates values for V and R, that are then used to generate "T", - //temperature in degrees Celsius, i think (C=K+273.15) -, and "filter". The numeric //values of "T" and "filter" are actually very close to each other if not the same. The //formulas here, as i think Neil said, are standard formulas for the conversión of the //NTC thermistor values to actual temperatures. R25 and B seem to come from the NTC data //sheet o NTC regulation, for certain temperature ranges. I haven't been able to find //the source. I haven't looked for it too hard either.
V = 2.5 - value*5.0/(20.0*512.0)
R = 10000.0/(5.0/V-1.0)
# NHQ103B375R5
# R25 10000 (O)
# B (25/85) 3750 (K)
# R(T(C)) = R(25)*exp(B*(1/(T(C)+273.15)-(1/(25+273.15))))
B = 3750.0
R25 = 10000.0
T = 1.0/(log(R/R25)/B+(1/(25.0+273.15))) - 273.15
//Once T is obtained, using R, R25 and B, filter is calculated using its former value //plus the eps time constant defined at the beginning of the script. Being eps=0.5, for //filter = (1-0.5)*filter + eps*T; in instant 1, filter = 0 + 0.5*T, growing from then //on until it gets close to filter = T, as can be seen in the returns of the board.
filter = (1-eps)*filter + eps*T
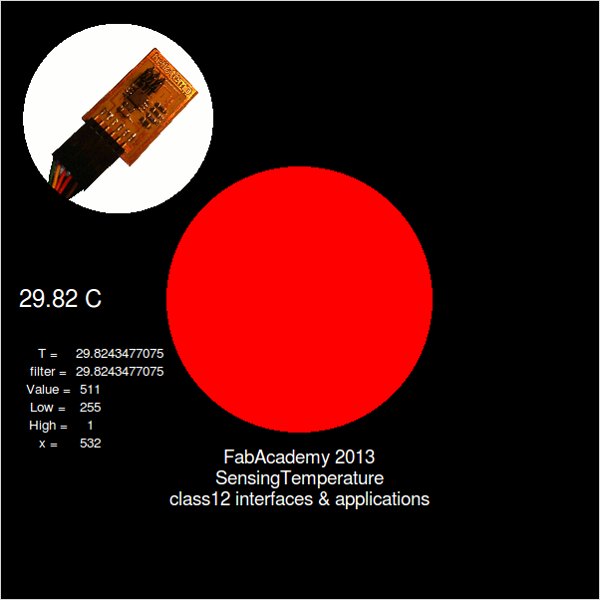
// Now x is described, which is the dimensional parameter controlling the size of the //rectangles that show the temperature change. The variable used is filter; it begins //with .2WINDOW which the x1 of the rectangle that will represent temperature value //adding to it a certain amount which si proportiona to filter-20, which means that when //filter = 20 x will be .2*WINDOW, that is the bar length will be 0. The top value of //the bar would happen for filter = 30, where x would be .9*WINDOW. For some reason the //board gets blocked before this happens, when filter = 29.82. This coincides with //low=511, so it looks like this is related to the "framing" performed above...
x = int(.2*WINDOW + (.9-.2)*WINDOW*(filter-20.0)/10.0)
canvas.itemconfigure("text",text="%.2f"%filter)
canvas.coords('rect1',.2*WINDOW,.05*WINDOW,x,.2*WINDOW)
canvas.coords('rect2',x,.05*WINDOW,.9*WINDOW,.2*WINDOW)
canvas.update()
parent.after_idle(idle,parent,canvas)
// after describing x, come the code lines describing the dynamic / interactive elements //of the interface. canvas.itemconfigure is a Tkinter command that modifies the //attributes of a certain element, in this case the element "text" which is coded later //on. text="%.2f"%filter means the following: the text to be printed " " is the value //[number] of the placeholder %.2f [two digits after the point], the variable that fills //the place holder is the one rith after %filter, that is the value of the filter //variable.
//A similar thing happens with canvas.coords, that changes the values of rect1 and //rect2, the rectangle bars that represent temperature. There is no placeholder here, //but direcly the variable x
//canvas update seems to be obvious, it changes the canvas values for those above
//parent.after_idle, is not so obvious to me. parent refers to another widget where this //one is integrated; the "root" canvas below probably; after_idle(callback, *args): //Registers a callback that is called when the system is idle. The callback will be //called there are no more //events to process in the mainloop.
// The idle routine [perfomed by the idle(parent, canvas) function is finished now
//The next code section reads the command line [terminal]. It checks whether all the //arguments have been supplied, file name and serial port that for Ubuntu tends to be
// _ /dev/ttyUSB0
//It then opens the provided port and starts the communication DTR: Data Terminal Ready
#
# check command line arguments
#
if (len(sys.argv) != 2):
print "command line: hello.temp.45.py serial_port"
sys.exit()
port = sys.argv[1]
#
# open serial port
#
ser = serial.Serial(port,9600)
ser.setDTR()
#
//And now it "starts plotting". This is basic Tkinter using the canvas widget
//It created a Tk [parent] object, that is called root, creates the canvas using WINDOW //as the dimensional reference, plots the text, and the two rectangles that will be then //modified in the idle routine
//Then canvas.pack puts the different elements within the canvas
# start plotting
#
root = Tk()
root.title('hello.temp.45.py (q to exit)')
root.bind('q','exit')
canvas = Canvas(root, width=WINDOW, height=.25*WINDOW, background='white')
canvas.create_text(.1*WINDOW,.125*WINDOW,text=".33",font=("Helvetica", 24),tags="text",fill="#0000b0")
canvas.create_rectangle(.2*WINDOW,.05*WINDOW,.3*WINDOW,.2*WINDOW, tags='rect1', fill='#b00000')
canvas.create_rectangle(.3*WINDOW,.05*WINDOW,.9*WINDOW,.2*WINDOW, tags='rect2', fill='#0000b0')
canvas.pack()
//The next line, "root.after" calls back the routine, - idle, root, canvas - after 100ms
//Eventually the script calls mainloop: "This method must be called, generally after all //the static widgets are created, to start processing events."
root.after(100,idle,root,canvas)
root.mainloop()
[preliminary conclusions & questions]
This comments have been made after testing quite a lot the script and modifying it in various ways. The main questions remain related to the way the data from the hello.board are read.
_ The byte reading and frame definition at the beginning of the idle routine.
_ The use of the built-in function "ord" for "ser.read()". I guess here i should go back to the c file and try to see what kind of data the board is sending out; but i just couldn't make it this week.
_ The meaning and use of high and low; again the same as in the question right above.
_ The if (value > 511): [...] part of the code.
_ The use of filter
_ And eventually the temperature range-framing, that makes the device stop giving returns when it reaches 29.82 "degrees"
A further set of questions come out after testing the light board with a processing script. Apparently in this script it only uses int height = serialPort.read(); and then the data read in the serial port are directly used to inform the interface visualization, with not high-low, if etc. Does the import processing.serial.*; module brought in at the beginning of the sketch perform all these tasks, or is it a different, simpler, way to process serial data?
[programming my own python interface application]
After all these writing what i managed to do was make some changes and additions to professor Gershenfeld's hello.temp.45.py file, and making it work on my Ubuntu.
The changes and additions i made are the following:
[1] I changed the size and color of the canvas and moved the previously existing text [filter] appending to it the letter C [Celsius degrees]
[2] I changed the window title.
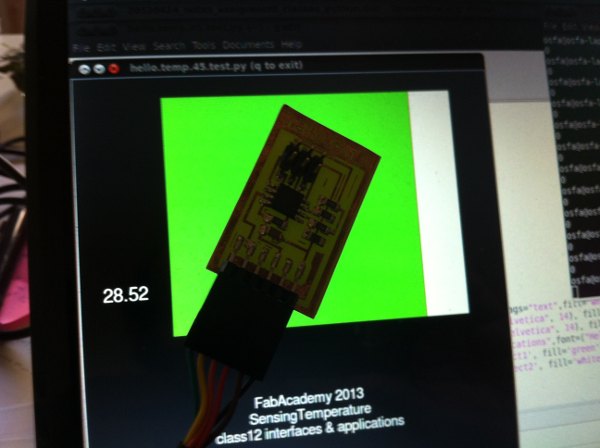
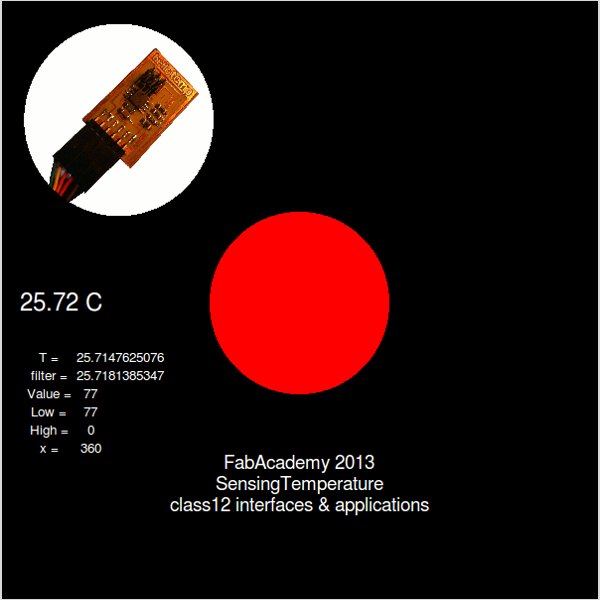
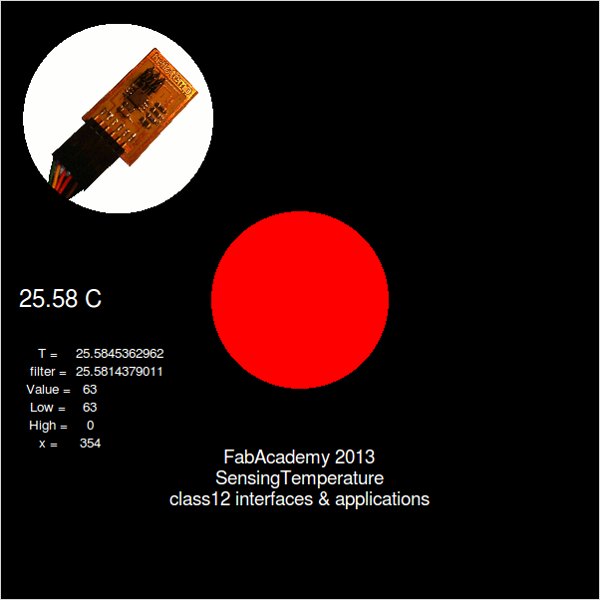
[3] I turned the main visual element that changes its size with temperature variations into a circle [oval]. The radius of it is proportional to the filter value. I placed it at the center of te canvas.
[4] I added some texts explaining what the interface is.
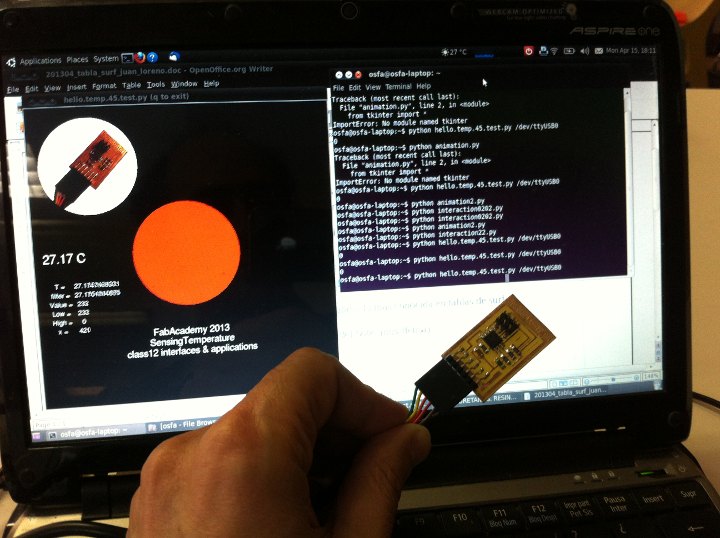
[5] I added five dynamic text elements, that show the various variables/parameters that are affected by the varying voltage of the NTC: low, high, value, T and filter
This allowed me to better understand - but not fully - their actual values, variation and relationhips between them.
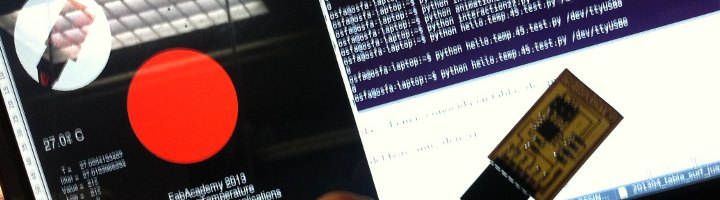
So, what the interface does, is showing a red circle whose radius is proportional to the temperature sensed by the board, which is shown in its numeric value to the left of it. It shows too, the changing values of the succesive variables used in the script: low = ord(ser.read()); high = ord(ser.read()); value; T; and filter.
This is then my python file, hello.temp.45.test.py, and here are some pictures and a link to a video of my interface. The py files i called from the home folder; i still need to explore a bit more how to place them in other moe convenient folders. The gif image i placed in the Desktop, also as an easy way to handle it in my first test.
Link to ogv video [can be watched on regular browser]
[other things done during the week]
Eventually i was helping some of my colleagues, teaching them what i had learned about Tkinter and Neil's python scripts, and helping them with connecting Processing to the serial port.
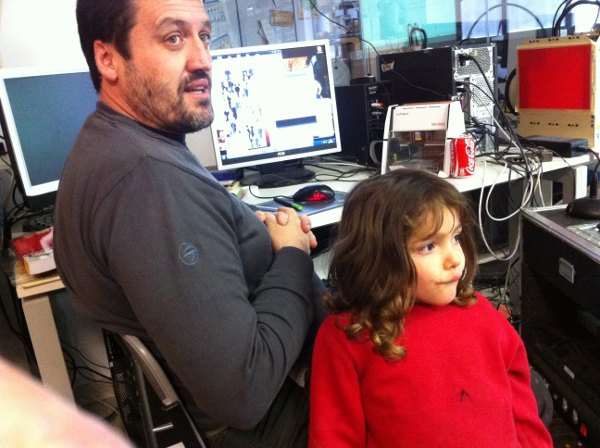
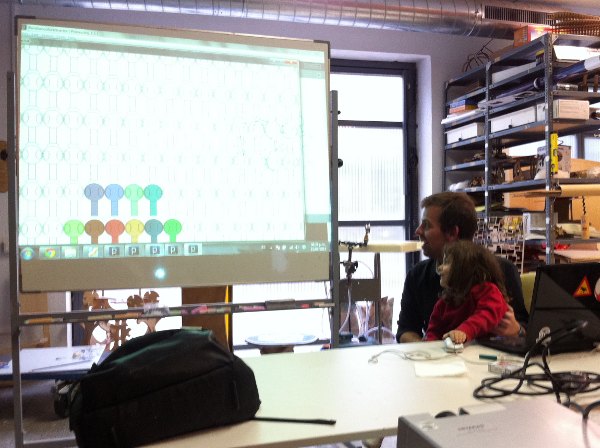
We did start the assignment week with a Processing class by Juan Carlos Venegas, which was attended, too, as can be seen by Juan Carlos P. Juidias's children, Adriana and Darío. In this tutorial session we revisited some of the classics of Processing 101 such as "the multiplying aliens".
[files download]
Unless otherwise stated, information and files in this page are downloadable under a Creative Commons Attribution-Share A Like license; attribution: Jose Perez de Lama / Fab Lab Sevilla / Fab Academy 2013

# hello.temp.45.py [.py] by Prof. Neil Gershenfeld
# hello.temp.45.test-py [.py] link updated; modification of NG's file by JPL
# video_interface_class12 [.ogv] / can be seen on a regular browser
Software:: Python, tkinter, serial.py, Processing, recordMyDesktop
Hardware:: hello.temp.45 board, FTDI cable
previous class:: 11 composites / next class:: 13 output devices
return home /perezdelama.jose
//
[*] Transcript of professor Gershenfeld's class explaining the serial data readings in the hello boards:
Section: Device interfaces
[mins 7:50 to 9·59]
RS232 for serial communication
[...]
Example: software implementation
The c code for the tiny44 echo board
In the program there is a routine to send and receive characters serial,
a routine to put a character out from the microcontroller out to a host
in RS232
there is initially a start bit [min 9:00]
then there is 8 data bits
and then a stop bit.
So, in this loop
I am setting the line high or low
then I have to wait a fixed amount of time
based on the baud rate I am using
I have written it unroll not as a loop, but as eight separate chunks of code
because the loop timing isn't predictable in C; it is in assembly.
And so that is sending it out,
This is the [...] routine
For each bit I wait the delay and I read the bit size to get the start [9:36]
to get the start bit, the eight data bit and the stop bit.
So that's the microcode for serial communication
What's nice about that it is that you can do it on anything?
What's not nice is that you pile up the processor... So you can use the hardware USART to do serial communication with the processor for you to do other things...
So that's on the processor side [9:59]