Introduce
I was sales person before attending this class.
I didn't have skills of engineering and design.
I learned all skills which how to make a product through this class.
I'd like to try that a person who don't have skills any more can make a electronics device through this class.
What I made
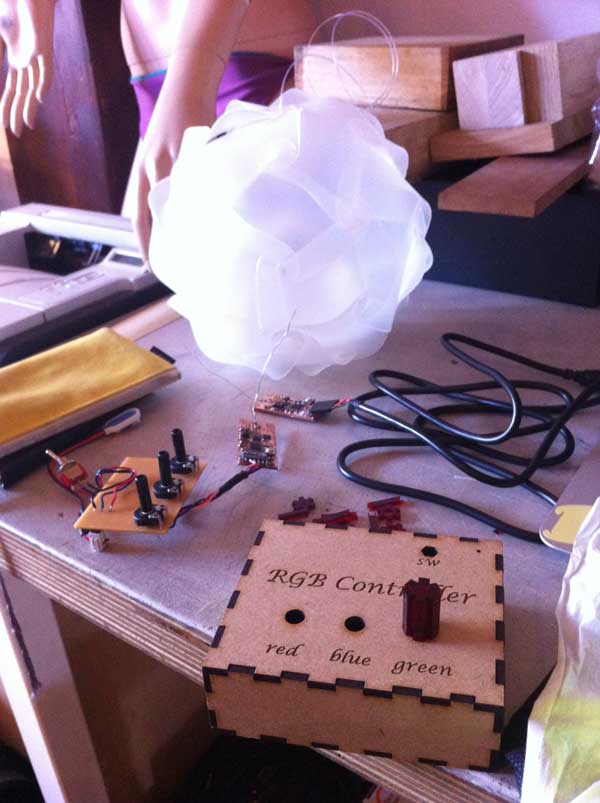
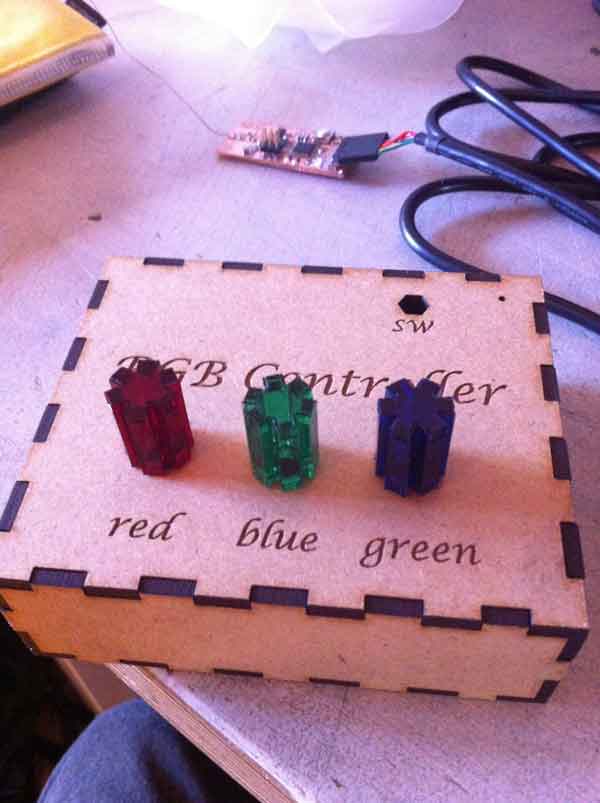
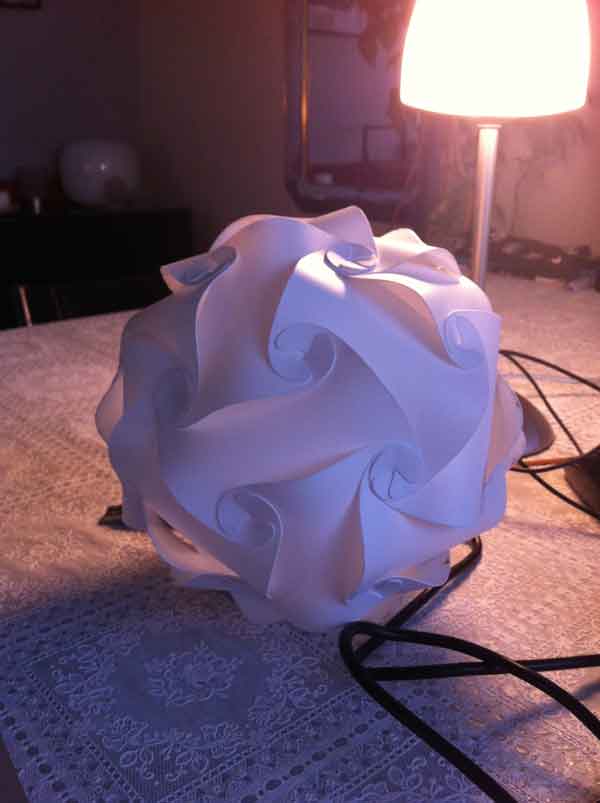
I made a RGB Controller and a small adjustable illumination object.
This controller can control RGB color through wireless network.
That's why I decided to make it, I wanted to learn a lot of things through final project.
I thought if I make it, I can learn wireless communication, sensing, electricity and computer controlled cutting.
Especially I interested in wireless communication.
1 .Make Physical Parts
Through this part, I learned to adjust size of objects using the CAD when I made up.
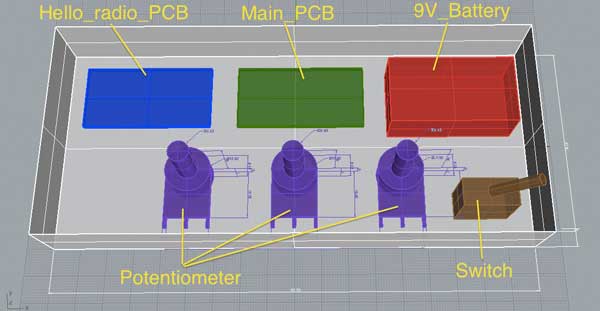
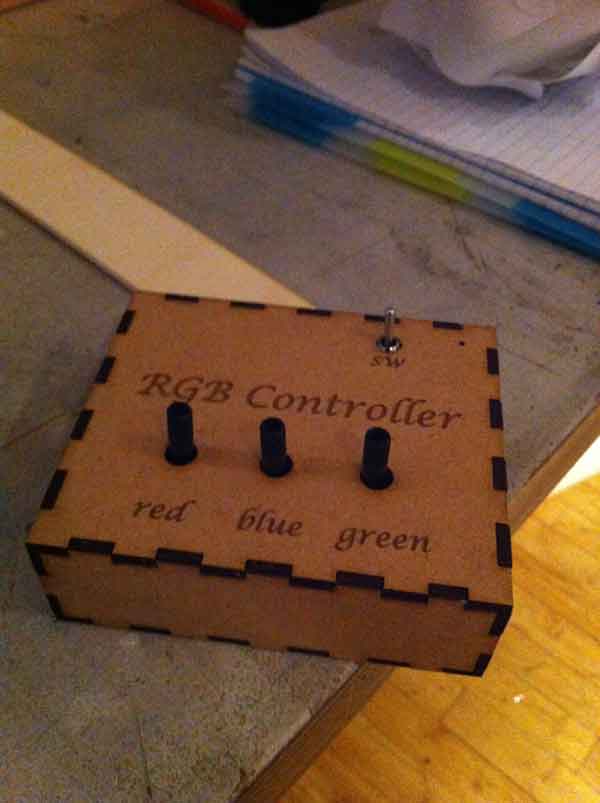
1-1 .Controller Case [Design : Rhino] [Machine : Laser Cutter]
I used 3mm MDF of the material.
For connecting precisely, one of each parts make bigger 0.2mm than other parts.
>> Download LightControllerCase.ai

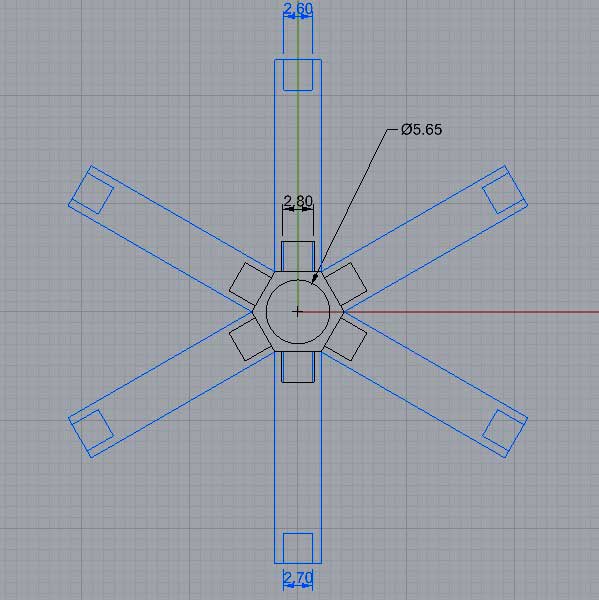
1-2 .Potentiometer Cap [Design : Rhino] [Machine : Laser Cutter]
I made a very small caps for potentiometers using 3mm acrylic.
I thought I'd have used 3D printer of this part.
Because made thinness parts cut by the Laser Cutter is very weak.
But consequently I was able to make small beautiful cap.
>> Download PotentiometerDesign.ai

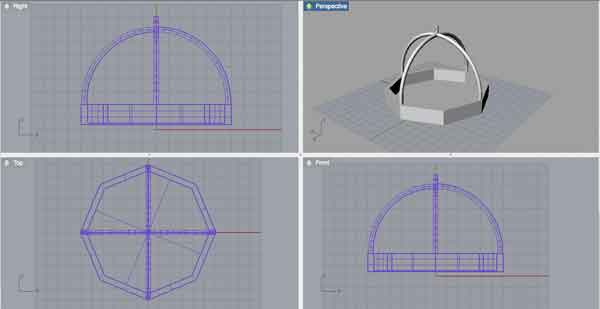
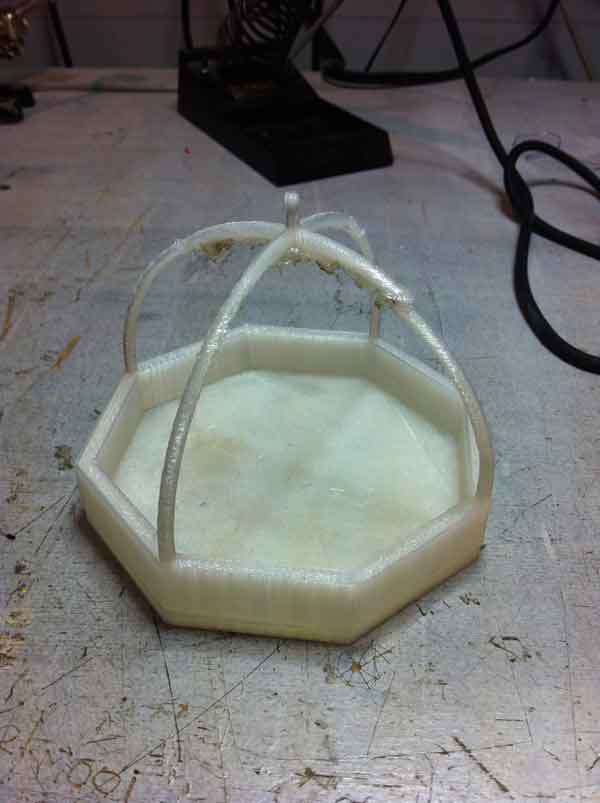
1-3 .Lamp Cage [Design : Rhino] [Machine : 3D Printer]
I made it using by transparency ABS.
This parts is 70mm width
So I needed a lot of time making it using 3D printer.
I thought I should use the Laser cutter almost all parts of this object.
And one connecting hole for putting a fishing wire should be made using 3D printer.
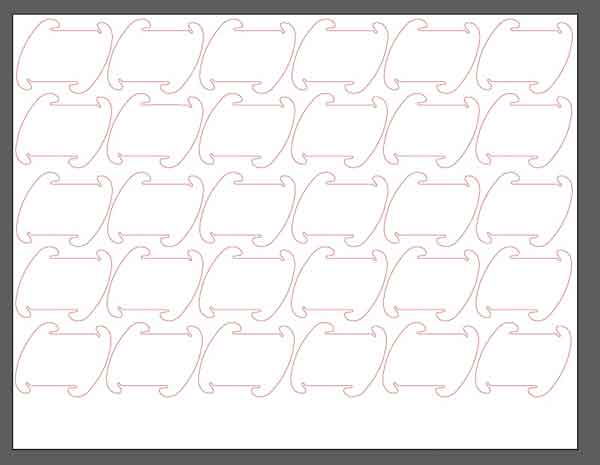
1-4 .Lamp Design [Design : Illustrator] [Machine : Laser Cutter]
I made a lamp shade using very thin polypropylene paper.
I used two materials transparent one and white one.
At the beginning, I thought when I put into the light transparent material is more beautiful than white.
But white one is more beautiful.
Because a leak of light through clack is more beautiful than directly.
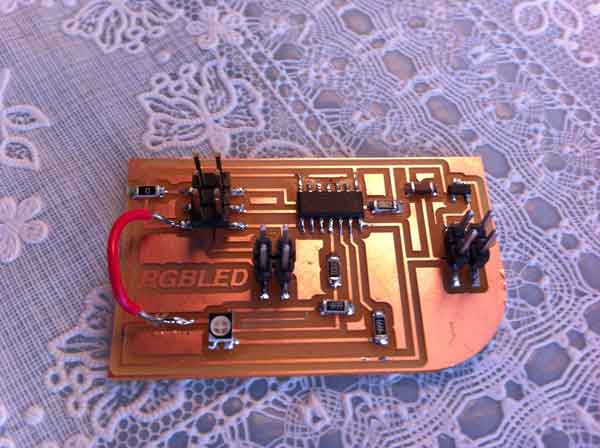
2 .Make PCB
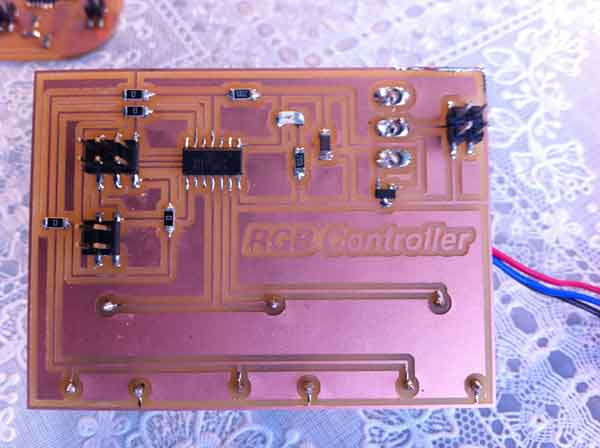
I had some mistakes making PCBs.
I sometimes connected to wrong place, and circuit was shorted.
So I failed to connect, I had to remove wire and reconnect it.
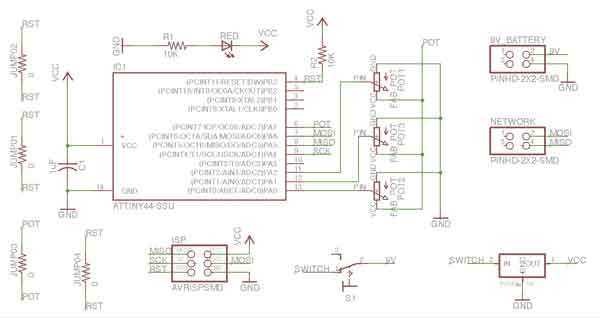
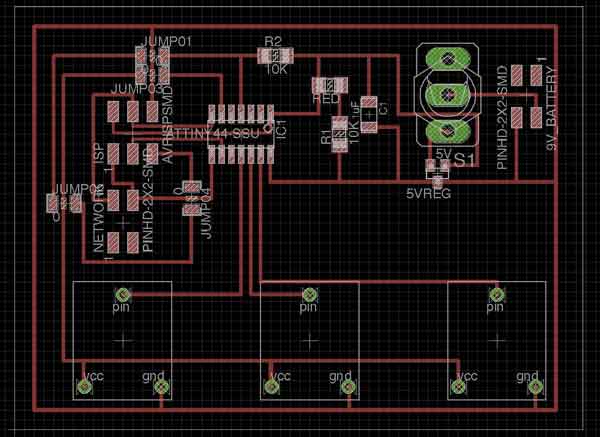
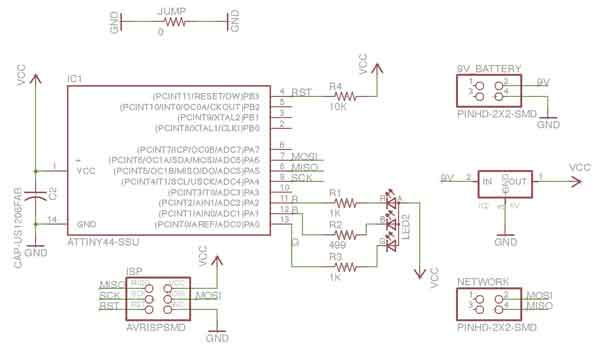
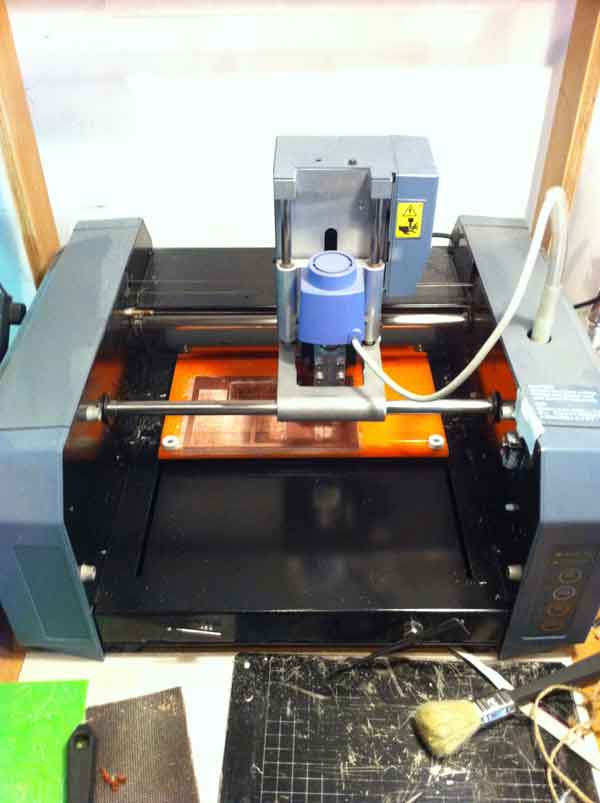
2-1 .PCB Design (Controller) [Design : Eagle] [Machine : Small Milling Machine]

2-2 .PCB Design (RGB LED) [Design : Eagle] [Machine : Small Milling Machine]
 ../../../../academy.2013/Web/students/mio.kato/htmls/18.html
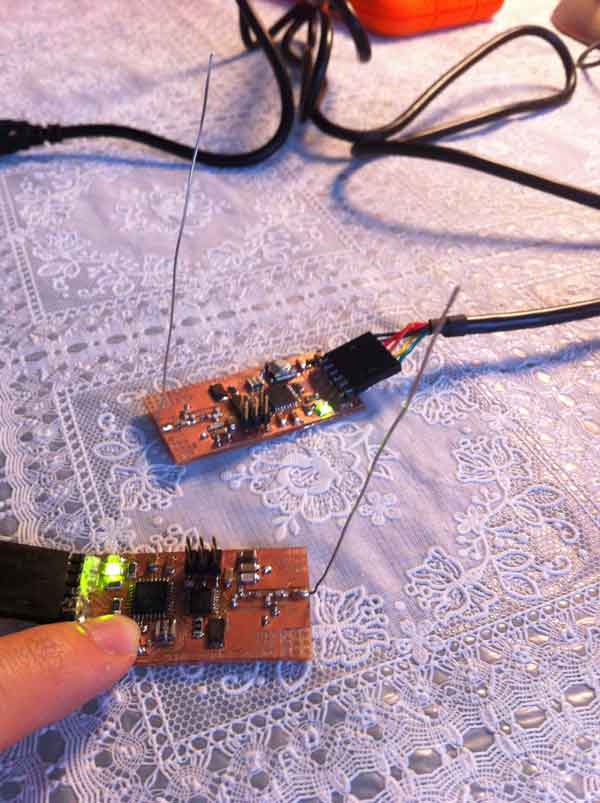
2-3 .PCB Design (Wireless Device) [Design : from hello radio board] [Machine : Small Milling Machine]
I used "hello_radio_board" introduced at the "Network and Communication weak" for communicating the controller and the light.
Thank you Brian Mayton, David Cranor, Rehmi.
>> This is "hello_radio" link.

3 .Programming
I had the hardest time of this part through my project.
I had a lot of problem through writing codes.
Each my codes copied to below link.
I used some codes from each weak assignment and "hello_radio" page.
>> 3-1 .Programming (Controller) [C Language]
>> 3-2 .Programming (LED) [C Language]
>> 3-3 .Programming (Wireless Network hello radio TX) [C Language modify hello radio code]
>> 3-4 .Programming (Wireless Network hello radio RX) [C Language modify hello radio code]
4 .Completed
I didn't do in final project
I used a small RGB LED of my final project.
Because I didn't have a skill which manage to supply big currently to the LED.
After class, I'm going to study electricity, and I'm using strong LED.
5 .After Class
I'd like to new lab in Japan.
So I'm going to see some labs around the world.
I refer to the way which how they manage some Fablabs.