First of all, I had to install several libraries because my computer messed up and I had to purchase another laptop (Window 7 and Ubuntu with VMware Player).
For the electronics units in the Fab Academy, I had to install software for AVR Programming:
- Avrdude (for programming AVR microcontrollers)
- GCC (to compile C code)
So, from Terminal (Ubuntu):
sudo apt-get install flex byacc bison gcc libusb-dev avrdude
sudo apt-get install gcc-avr
sudo apt-get install avr-libc
sudo apt-get install libc6-dev
For the Networking and Communications assignment, I made the hello.serial.bus with 1 bridge and 2 nodes.
The purpose of this example is to network several boards together (serial bus). The bridge board is connected to a computer via a FTDI cable and the two node boards are connected to the bridge board, receiving power and signals via the bridge.
So, the bridge will power the 3 microcontrollers (ATtiny45) trough FTDI cable and will send the signals from PC to the other 2 nodes:
Tests:
- Signal sent to node 0 (bridge), the LEDs on all the boards light up once, after that, just the node 0 lights on the LED;
- Signal sent to node 1, the LEDs on all the boards light up once, after that, just the node 1 lights on its LED;
- Signlal sent to node 2, the LEDs on all the boards light up once, just the node 2 lights on its LED;
To achieve this purpose we may proceed this way:
Download the necessary files from:
http://academy.cba.mit.edu/classes/networking_communications/index.html
With Ubuntu we need to download the following files:
bus
asynchronous
components
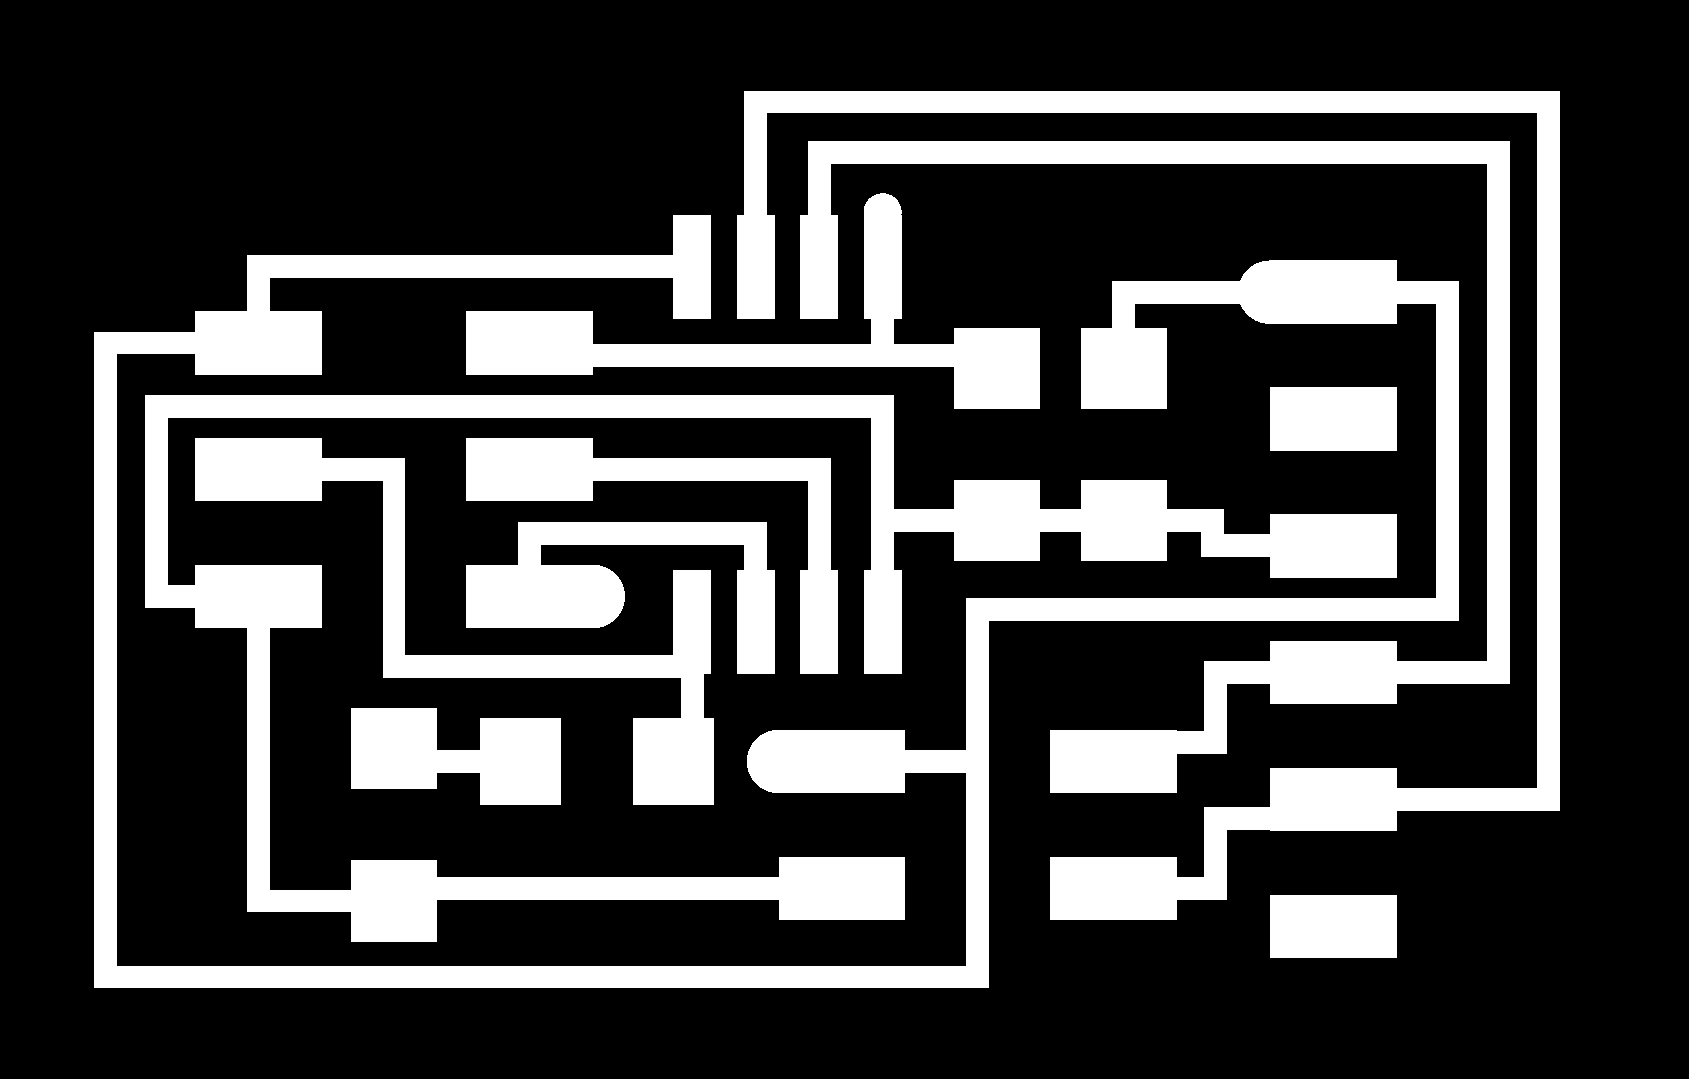
hello.bus.45.bridge - board traces interior
hello.bus.45.node - board traces interior
hello.bus.45.c (same for node and bridge, basic c file), makefile (to compile c files)
I followed one of the great tutorials from Anna Kaziunas page:
http://www.as220.org/fabacademy/tutorials/networking_serial_bus.php
Note: for c file, download instead the zip file from this location.
Mill and stuff the boards (images on the right side of this page).
Programming bridge board with FabISP:
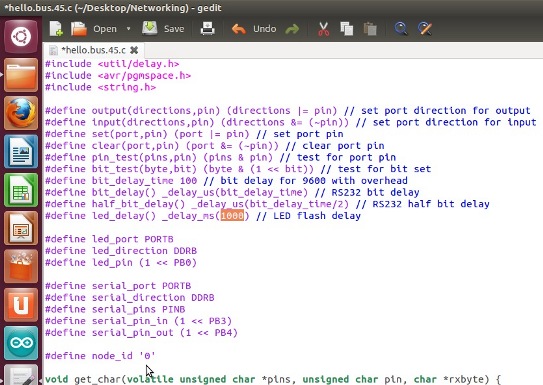
I edited the original hello.bus.45.c file and changed delay time to 500 ms instead 100 ms. (the image below shows 1000 but I saved 500 value). Next to the mouse cursor shows node_id '0', for bridge (node 0).
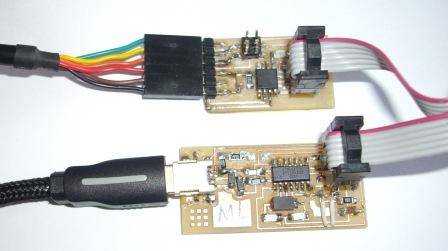
Connect FabISP and don't forget to power on the bridge board with FTDI cable connected to PC.
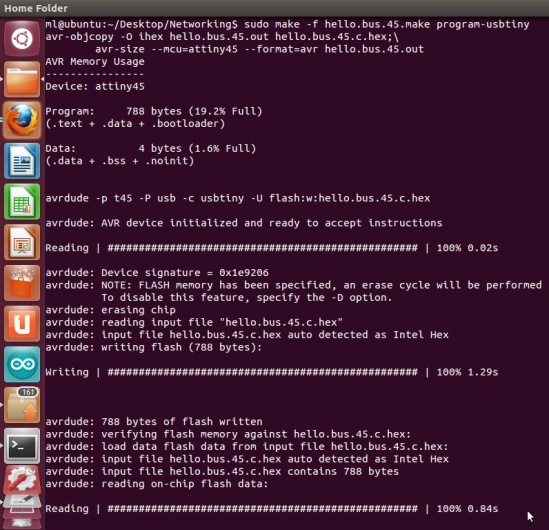
In Terminal, move to the directory that contains hello.bus.45.c and hello.bus.45.make files and type sudo make -f hello.bus.45.make program-usbtiny to compile c file and send it to the helloboard (ATtiny45) through the FabISP (usbtiny).
The output from terminal it's shown below.
Proceed with the same procedures with nodes 1 and 2. Edit hello.bus.45.c and change node id (one board with id 1 and the other node with id 2), program the boards (don't forget to power on the Atiny through FTDI cable, for example, like shown on right image).
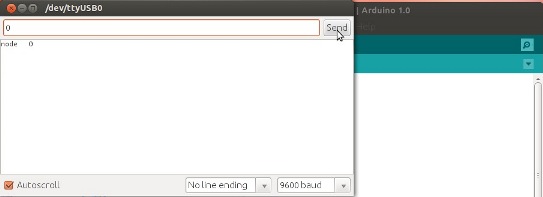
Finally, open the arduino, and serial monitor on it, adjust the baud rate to 9600 (same as the c file) and type 0 followed by enter or send.
The next video shows the output. Signal sent to node 0 (bridge), the LEDs on all the boards light up once, after that, just the node 0 lights on the LED; furthermore, the circuit board returns the signal with the message "node 0".
The analog behavior is observed for signals sent to node 1 and node 2. Videos on the right side of this page.
|


