And here we are: molding and casting. The most fun week, a lot of people told me; well, not for me, not in the beginning at least.
The most difficult part of this week was to make the files. I basicly worked with 3 programs this week. Blender, google sketchup and Rhino. In the end Bjartur helped me out with Rhino and I could finaly start with molding in the modela.
The part where I had problems with in Blender was the boolean tool. Even if I did everythig that I needed to do it just didn't want to work. I found out how to fix some things. It was all correct, but I didn't know it because since this is the first time that I did molding and casting, I didn't know that your object also could stand out of the box. I always wanted to put it in.
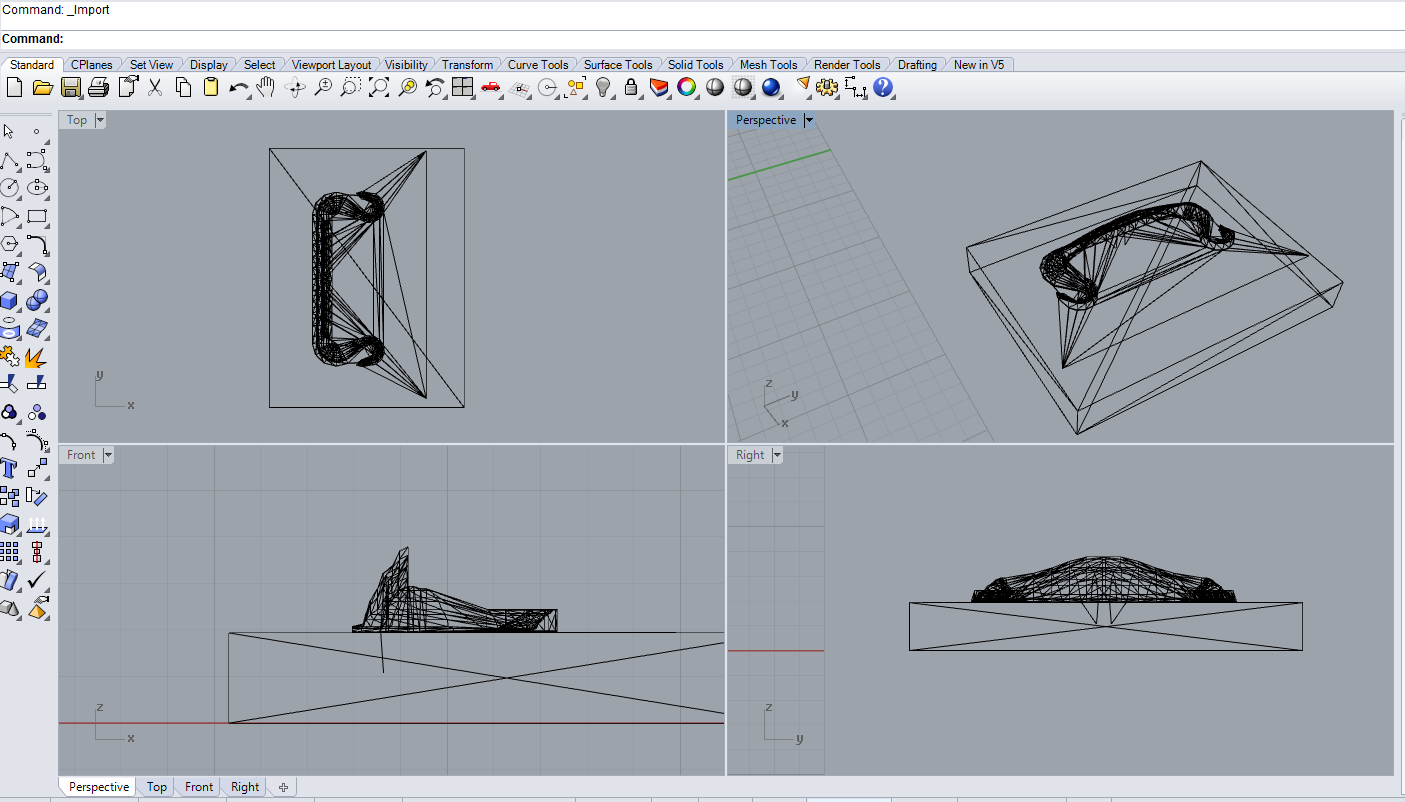
You open rhino and import the file that you want to change to 'mold form'. You first need to cut, in my case the boat, in two parts. So for cutting objects you go to Surface -> plane -> corner to corner. Put the plane where you want to have it. So in the middel of the ship. When you want to change the hight or the length you can change from vieuw.
After you did this you go to mesh -> mesh boolean -> boolean split. This makes that you split the object. You first need to slect the plane that you made, then boolean (difference, union, intersection), and rightclick. After that you do the same with your object. Normally you should be able to move the two parts now.
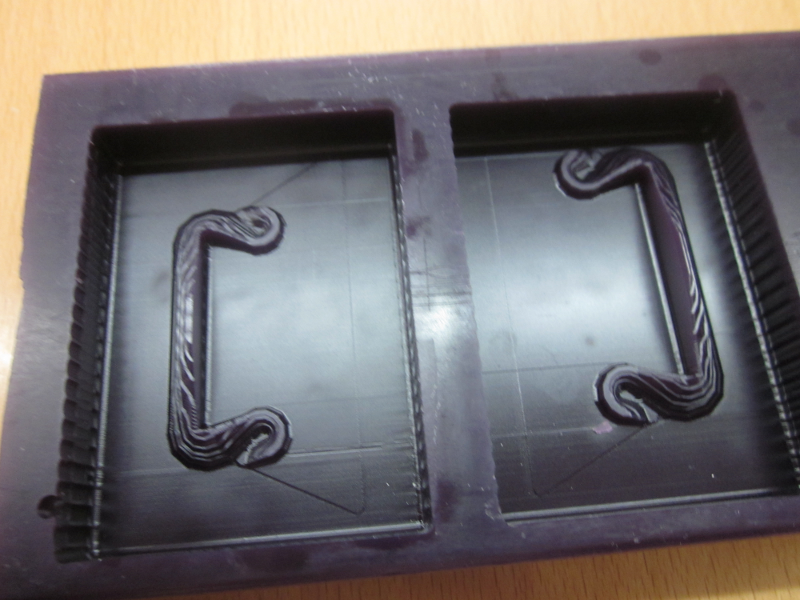
Now you rotate them so that the side that you've just cut is facing the ground. After you've done that you make a box under the object. Make sure they touch each other. You can also add some extra points that will keep the mold in place later while casting. One of the thinking mistakes that I made was that I was thinking that you already needed to make the object deeper than the box. It doesnt have to be. The modela changed it.
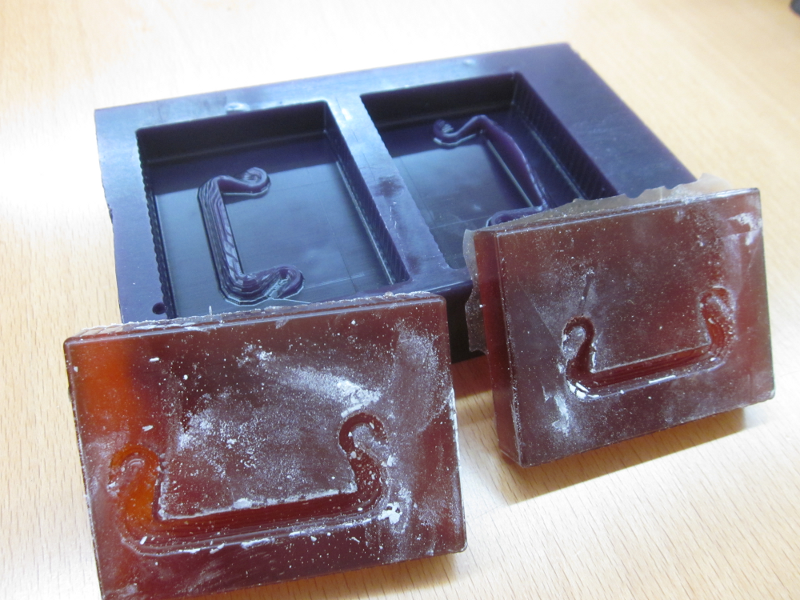
During milling out in the wax only one thing changed: the seize of the object in the mold. The second part of the ship is a little bit biger than the first one I made. Though, I've rescaled them together, so I have no idea where I did something wrong.
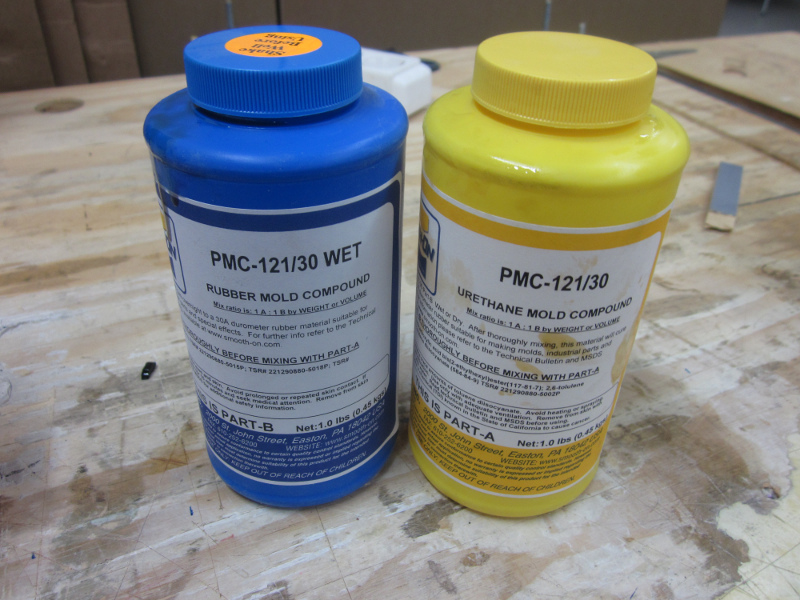
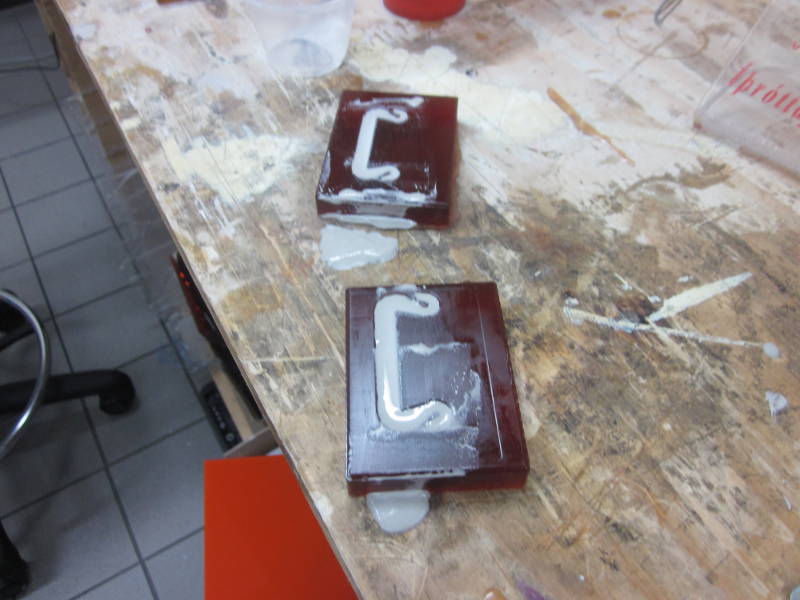
Then the fun part came: the fluids. Though it ended up beeing a little bit messy on the table it all worked out fine. This time I listend to more experienced people and didn't use plastic, only gips. It turned out really good. Thoug Once again, I need to learn NOT to make TINY FINE things like vikingships. As finishing touch I went over the borders with sanding paper. This made the borders soft and took extra gips away. Also after I poored the gips into the mold I went over it with a stick to take away all the extra matereal.
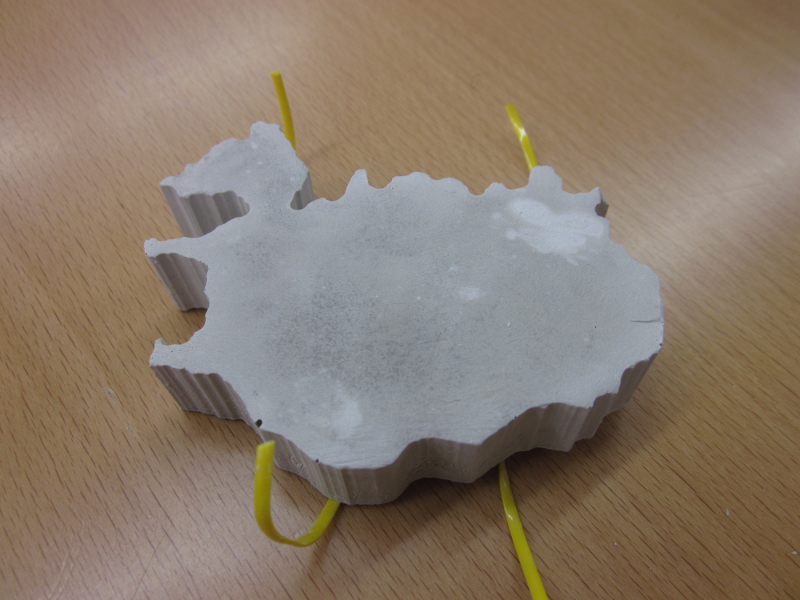
Since this object was new to me in this way, I only started coming up with better ideas and experiments on tuesday. Thats the bad side about being new in all of this. With little hope that the experiment would work, I found a mold of Iceland. so I went searching for a cord and tried to put it in the middle of the mold. Since I'm not using the materials that I'd like to use, it didn't want to stay at the same place, but it's a try. I didn't want to ruin the mold by making holes in it to fix the wicks. When I was a kid I've got a candle maker box. This reminded me of it, but now I had to make the molds myself. What I was trying to make was an easy version of a candle. Thoug I switched the candle wax with gips and the wick with a cord that I've found somewhere in the lab. I'll make a mold in Fablab Gent when I'm back in Belgium and try to make it.