1. The Idea
My plan is to make a model of automata. Originally I started with 7 kinds of automata, but I ended up with one. Partly because of the time management but also because of a lack of knowledge.
I've got the idea to make an automata around 2 weeks before the end of the semester. Wich gave me 2 weeks to make something from scratch. The original idea changed a lot, and now, it looks easy to make, but it wasn't.
The lack of knowledge was a pain point for me. I've never had mechanics in school. Nor am I good in mathematics. Nor was I anything with everything that I learned in school for the past years. It' not really possible to apply the theory about mimetic desire on gears. So what was I with my psychology (and art) knowledge.
And if I would have more time and more experience, I'd make my plan different. The box could have been made by the shopbot. The gears by the laser cutter. The elves could have been molded and casted or 3d printed in 3D. The only problem there is the weight. I don't know how much the motor can carry.
2. Why?
Over the past 4 months I've been working as an intern in Fablab Vestmannaeyjar. When the kids come in, they go to the easy stuff. Making stickers or laser cutting something. In the time that some kids have been spending here, they could have made far bigger projects than just making tons of stickers. A second reason is that in Belgium I'm studying to be a teacher. Because of the Fab Academy I've put that on a hold but I'm still in touch with friends from there. One of them told me that he had to make an automata, to make the kids warm to make their own robot in the technology classes.
And so the idea grew. An idea to make an educational model that can be used in class, as in Fablab.
3. The automata
3.1. What is it?
An automaton (plural: automata) is a self-operating machine. Most of the time it get its power from you turning on a handle. More often these days it is connected to a motor. Though, the difference between an automata and a robot is the fact that the last one often has to do with electronics.
Within the automata we can see 7 groups. cams, cranks, gears, ratchets, levers, frictions and pulleys.
The automata that I ended up using all belong to the crank group. I've tried to make the crankshaft, but I got into problems with the upper part that needed to be kept stable. A second top layer could have been a possible solution.

I've also tried to make one of the cam. But without success. Also here I could have used a second layer to keep the vertical stick stable. The problem was that the vertical stick always fell of the cam. And with the jumping cam I also had the problem that the stick got stuck in getting up, to fall off the cam. This also went up for the friction wheels
One of the first ones that I've tried to make was an oscillating lever. The reason why I didn't put it into the final version of the final project was because I needed to find a way to connect it to the ground. It also took too much place on the box.
The ratchets were a lost case because of the shape of the automata.
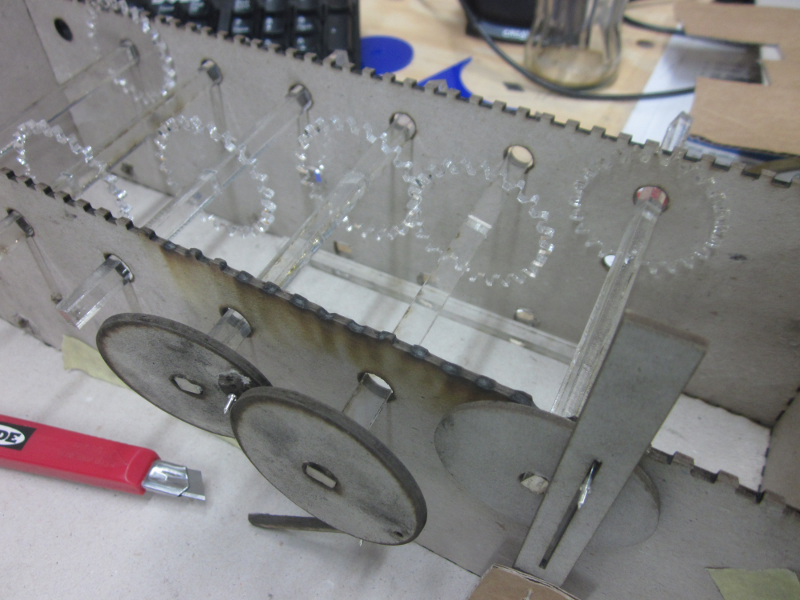
As last one I used gears. But only to make the movement of the engine connect to all the rest of the automata instead of just one.
The plan was to use 7 automata but I ended up with only one.
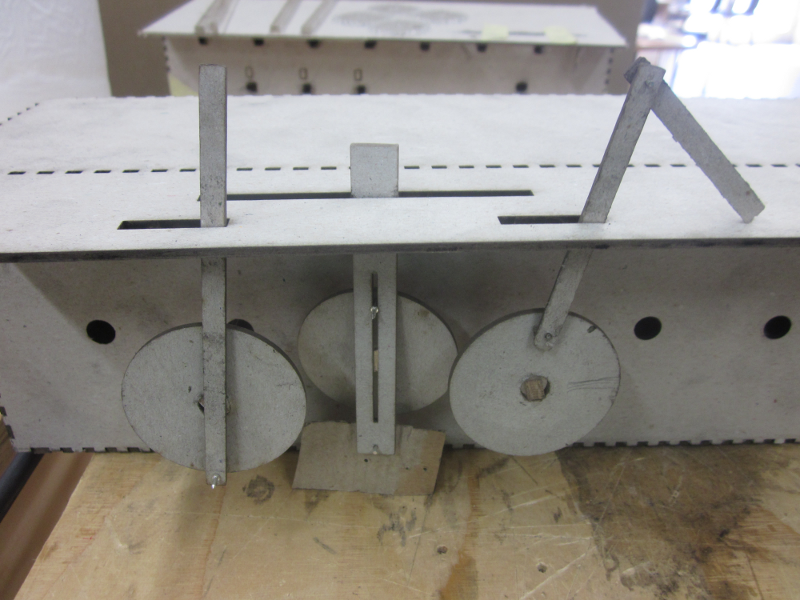
The last 3 kinds of automata that survived the selection.
4. Making the components
I could have made my whole project out of legoblocks and used picocricket as electronics, but since that's not the point of this final project, I made almost everything myself.
4.1. The tryouts
I've spend the most of my past two weeks on try outs. The first box looks like it survived a war, there are so many holes in it. Some laser cutted, some made by hand. But it learned me a lot. For example: the first plan was to have a stick going from left to right through the box. And have the automata on it with 90 degrees. Which meant a lot of trouble. It's only later that I realized the mechanism that I'm using now: putting gears next to each other, in the width of the box. It looks easy now to come to that conclusion, but it takes time to rise about your first ideas. And get insight in something.
Another part on which I spent a lot of time was making the 7 kinds of automata - to end up with one. Some of them even never made it further than the cardboard version. Others made it through the hard cardboard and the Plexiglas but were canceled last minute. I've been so busy with them that I almost feel sorry that they didn't make it into the final project.
4.2. The programs
The most used program this time was Inkscape. Though I also used blender and Google sketch- up.
I basically designed everything in Inkscape. Where I didn't have any feeling with the program a few weeks ago, now it is as good as possible in my fingers. Well, mouse movements and key combinations.
Google sketch-up was used to go from a 2d to a 3d design. And blender to make a .stl file. When I'll have more time - for example when I'm back in Belgium - I'll try to make the fairies in full 3D, not just a thick 2D layer like now.
The focus was - unwanted - on 2D.
4.3. The laser cutter
A tool that I used a lot during this project. Since everything was so small the use of the shopbot would have been out of place. Also the gears could have been made in the 3D printer, but since I was busy in the laser cutter, I've stayed with that.
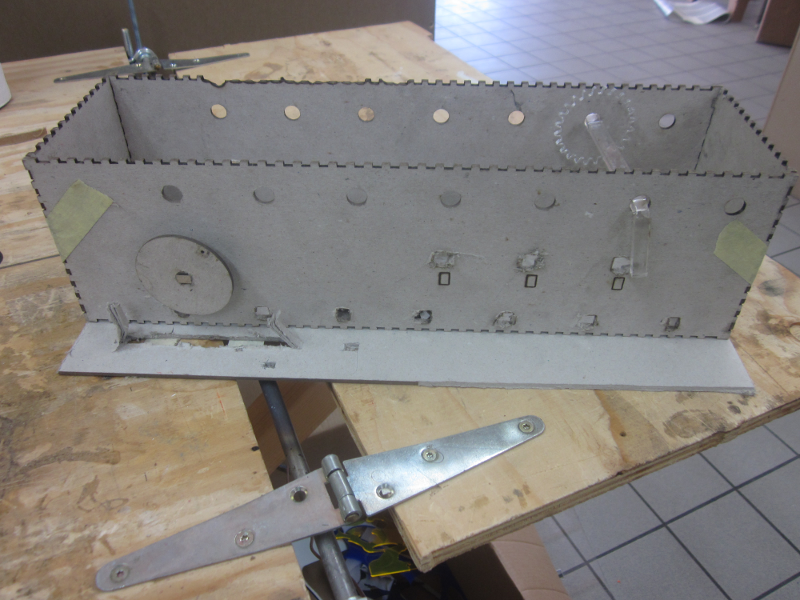
4.3.1. Box
The box was a very important part of this work. Everything needed to be exactly the same. If the bars from the automata would be a little bit more up or down the motor might reject to work. This also counts for the Plexiglas that goes up to the elves.
4.3.2. Gears
The gears were my saviors to make the project much more easy. Something extra to be added when I finish this project together with the electronics is to put the motor up higher and use different seizes of gears. So that I can regulate the speed with the gears instead of fully on the computer. But that will be for automata 2.0
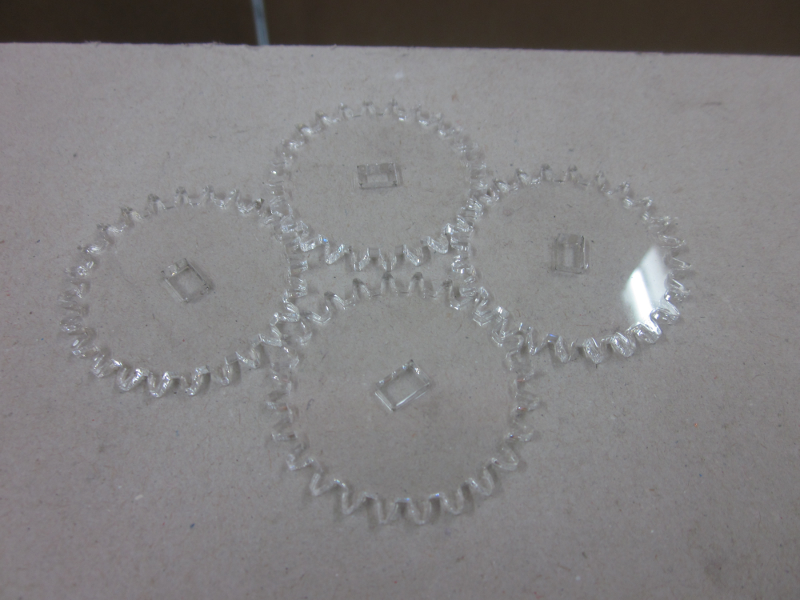
I did do some experiments with changing the seize of them, but because of a lack of time I didn't want to recharge everything on the box.
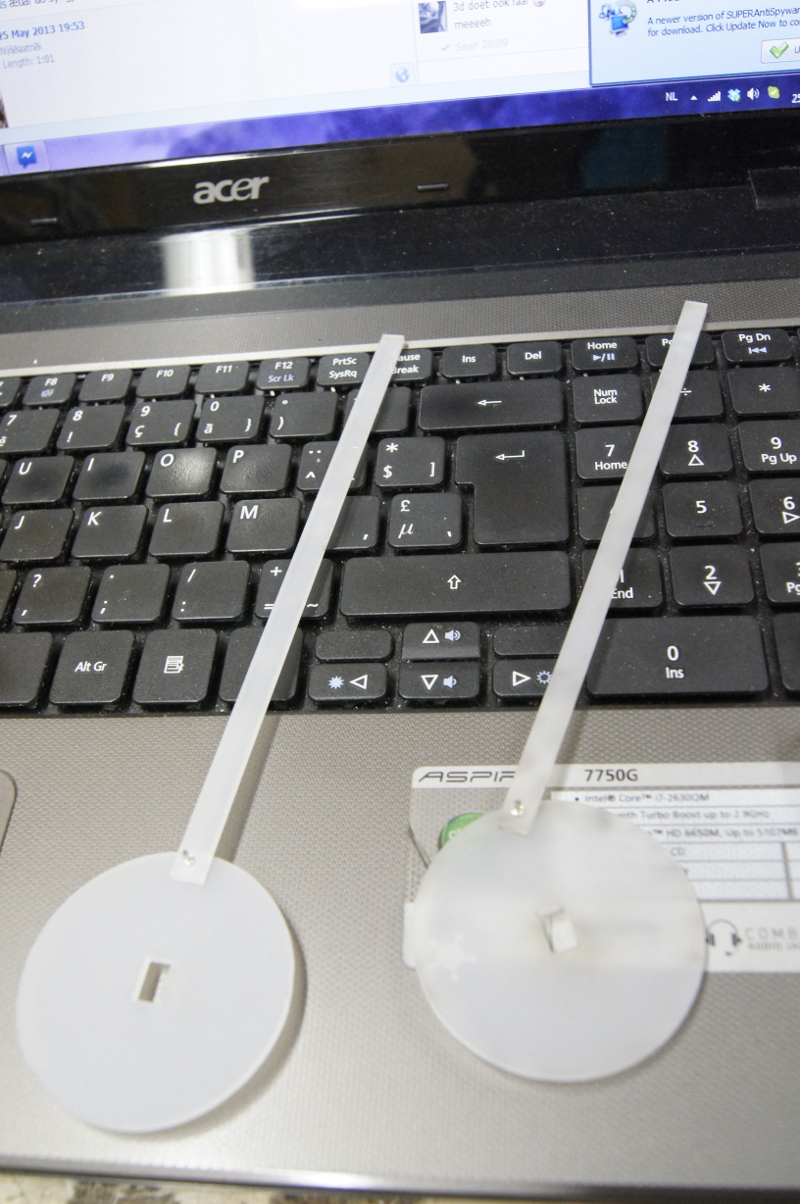
I've had a problem with the middle one. The circle that connected the engine and the elf wasn't perfectly put straight on. So every time that I tried to turn the motor on, the motor rejected to work because the force was to big.
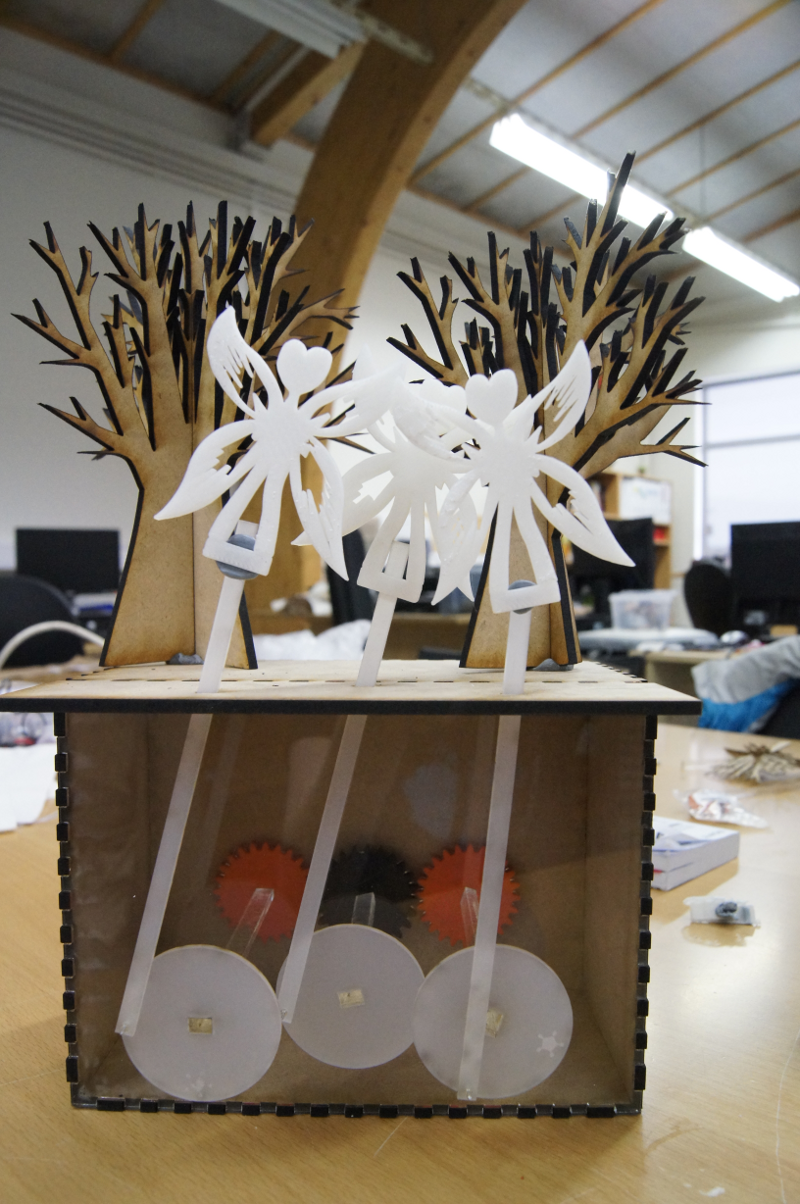
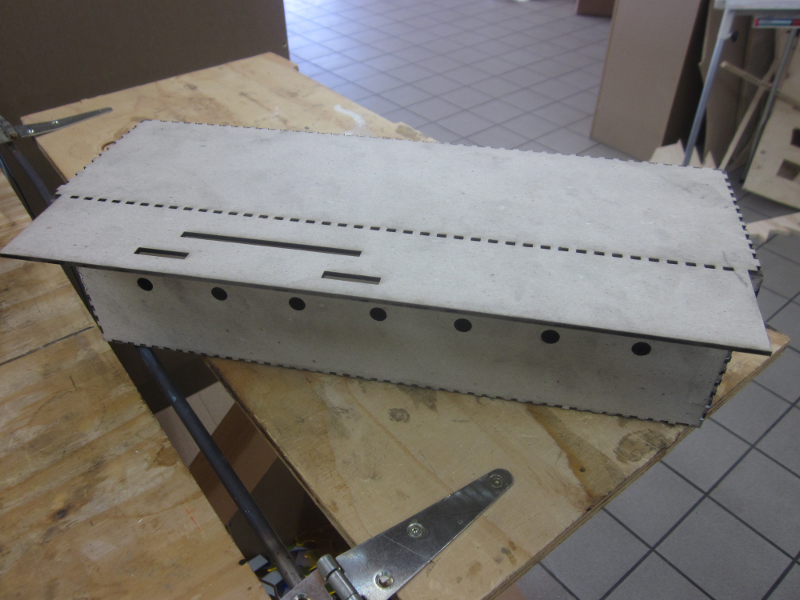
The box, adapted for the 7 gears.
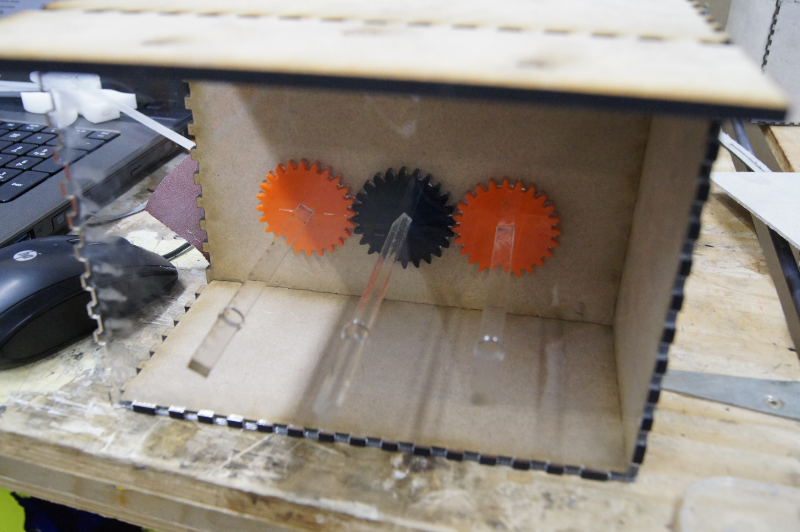
I've changed the colors of the gears inside the box so that you'd see them better.
4.3.3. Tree
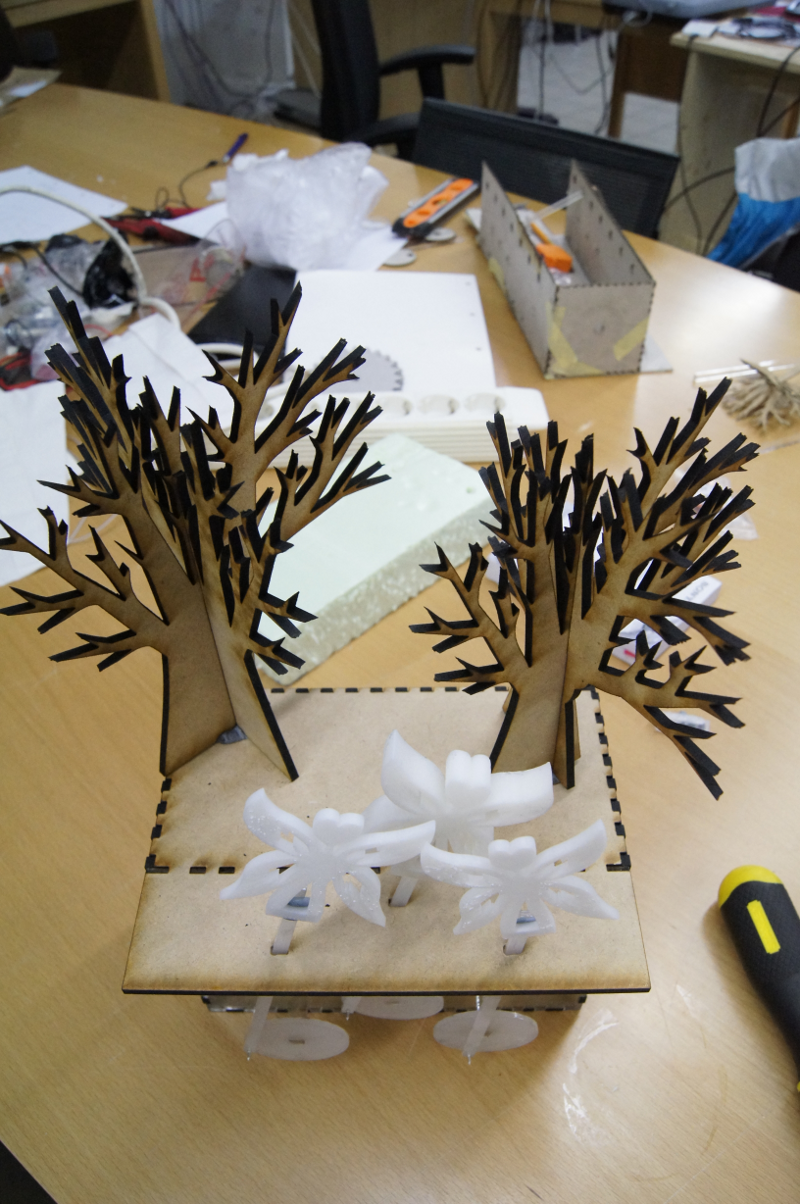
The tree on top of the box was first designed in Inkscape. And it was planned to be one of the moving objects on he automata. But when I was searching for more object to be moved, I decided to make two big trees and some elves dancing.
The tree started from a normal box in Inkscape. Then I went to path and object to path. After that I stated moving the dots around with the 'edit path by nodes' tool. Which gave this result. Two problems that I had with the tree were that the tree fell all the time and that it didn't fit. What I also noticed was that the tree isn't symmetric. So it had the habit to fall down to one side. I've solved this problem by changing the tree trunk a bit.
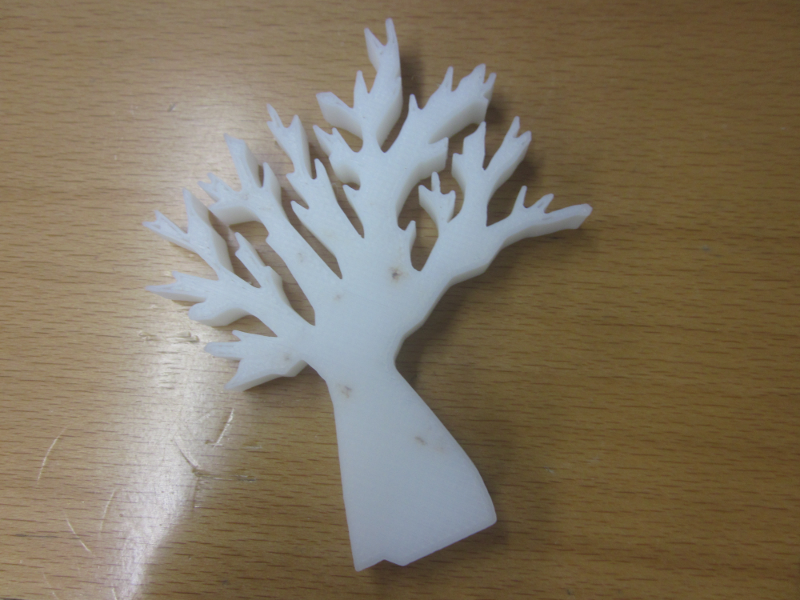
The tree was first designed to be moved by the automata. But I later decided to make it stand on top of the box as a forest.
4.4. The 3d printer: the elves
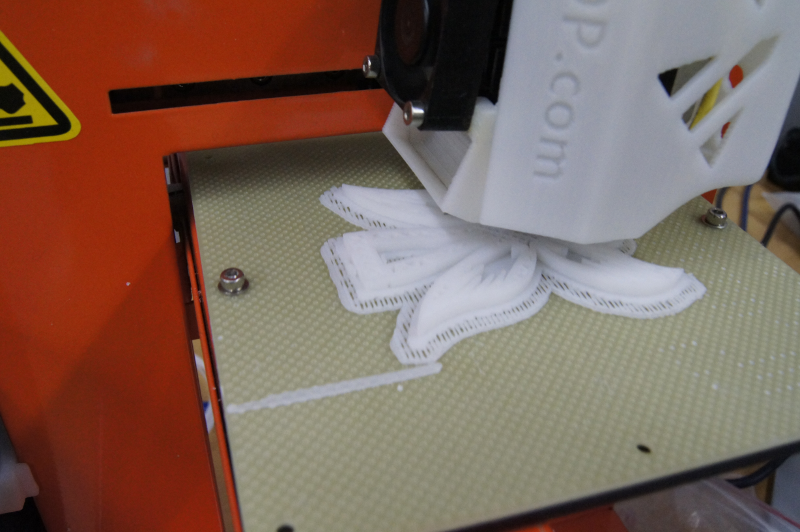
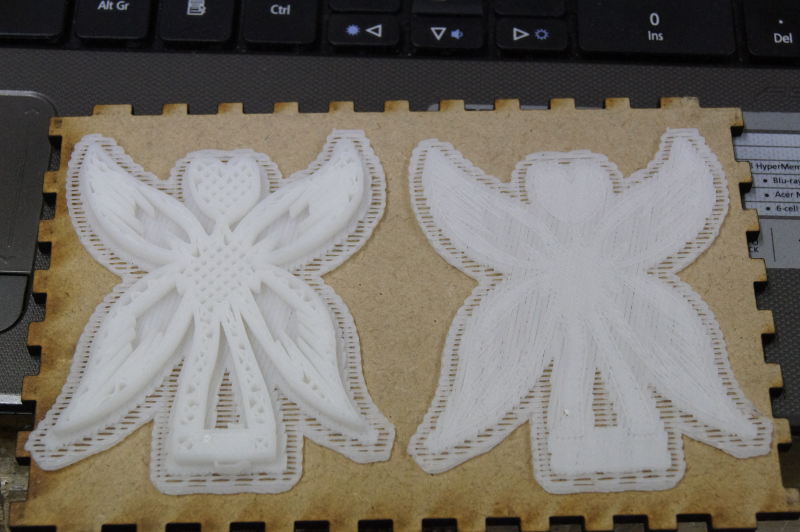
I've designed 2 kind of elves in Inkscape. One kind - the little elf - with more square wings. And the big elf, with 4 pointy wings. Also here I started from a random box in Inkscape.
Though while printing out one moment the printer just stopped in the middle of the job. And I wasn't that far yet in a 2 hour job. After a few tries I saw the error that the plate was too hot. And so I checked on the internet what could be the problem for causing this error. On a forum I found some possible answers: a bad connection, the motherboard that broke and can't regulate the heath anymore. Still being fixed
5. The electronics
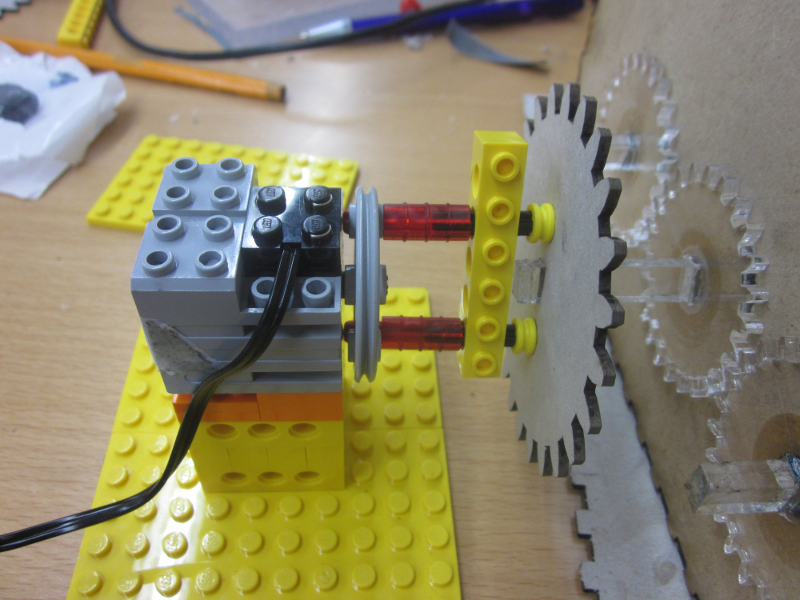
5.1. Picoblocks
Because there isn't enough time to finish the electronics, but still to much time left to start doing nothing. I started working with the picocricket.It proves that the design works. The only issue is the speed. Most of the time it turns to fast. But, it can be fixed with extra gears (bigger ones).
5.2. Hello world electronics
At the moment I'm still working in Eagle to re-design the circuit boards that I need. This job will be finished in Belgium and I hope to get into a Belgian lab soon.
I'm trying to redraw the servo motor board and the microphone board. The servo will make everything move. While the microphone will be the input for letting everything move.
6. The final result