Project Sessions
WEEK 6 (27 February 2013)
[Electronics Design - Eagle]
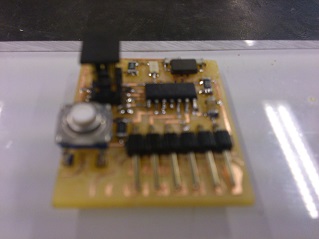
This week we hadd a button and LED to the echo hello-world board, this week is also the continuation of week 4
To make this task we were introduced to Eagle. This software let make a layout with all the components. We can defined path thickness and routes.
Getting Started With Eagle:
- Step 1. Download and Install Eagle
- Step 2. Sample Echo Board Schematic / Board
- Step 3. Download and Install the Component Libaries
- Step 4: Edit the Schematic
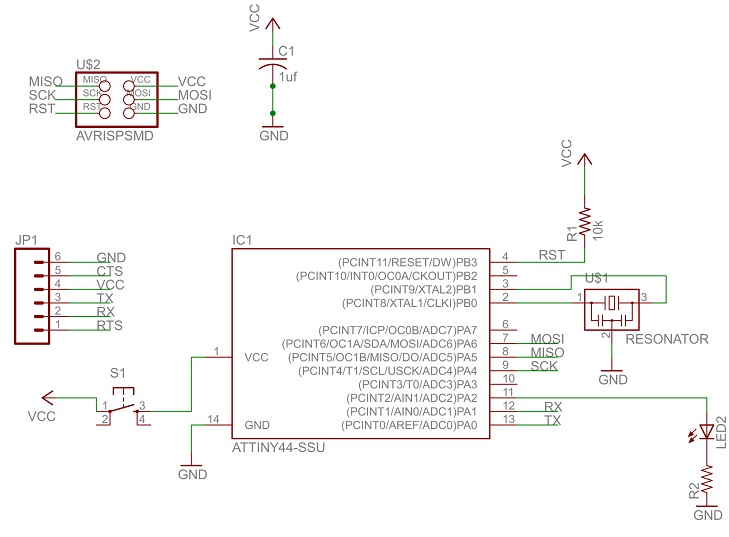
This is the schematic echo hello-world board.
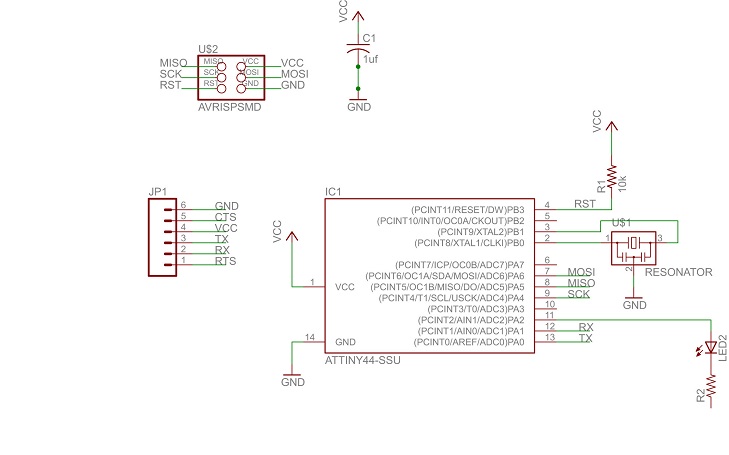
We downloaded the files of the board "Hello Echo". we opened the diagram and follow the steps to add the missing components, resistors, LED and button.
The components:
Resistor - A resistor is part of an electrical circuit that resists the flow of current.
Capacitor - A capacitor is a device used to store an electric charge, consisting of one or more pairs of conductors separated by an insulator. Capacitors are often used as filter devices to remove voltage or signal spikes in electronic circuits
Led - Light-emitting diode, a semiconductor diode that glows when a voltage is applied.
Vcc (Power) - Is positive relative to ground.
We will add components to the schematic view and create connections between them
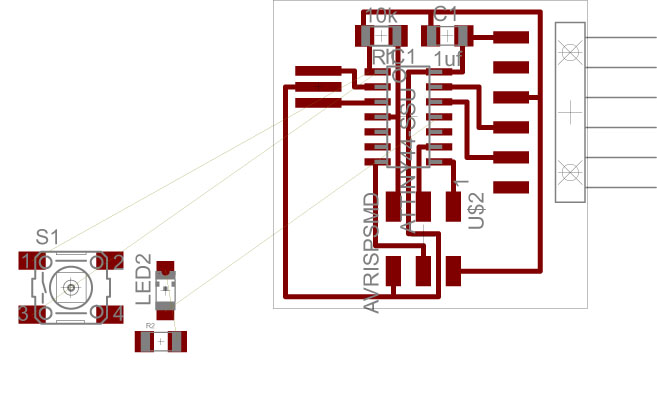
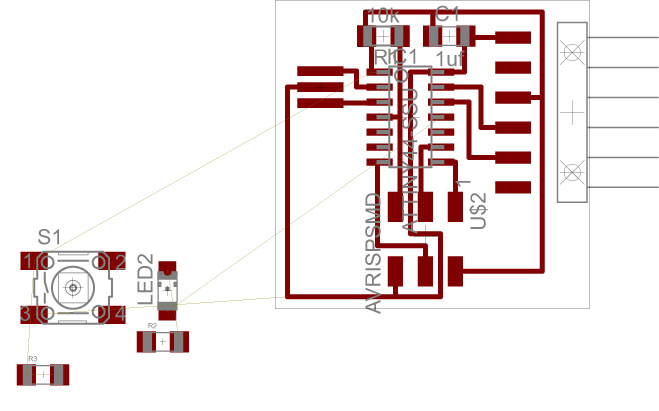
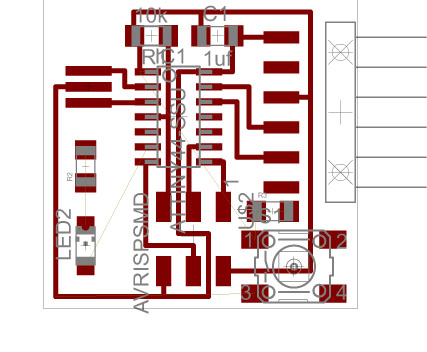
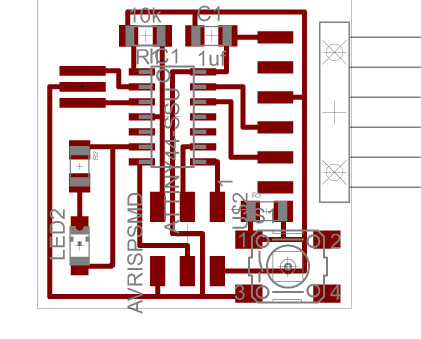
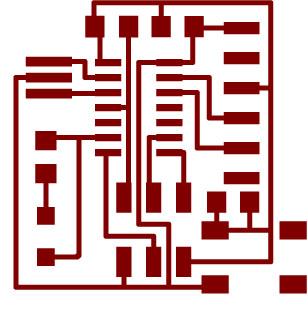
The board layout shows how the electrical componets and traces will be laid out on the board.
Example Schematic with LED and button added with appropiate resistors and connections to power and ground:
After we finish connecting the components and fixing any errors, we will go into the board view and place the components and route the traces.
STEP 1
STEP 2
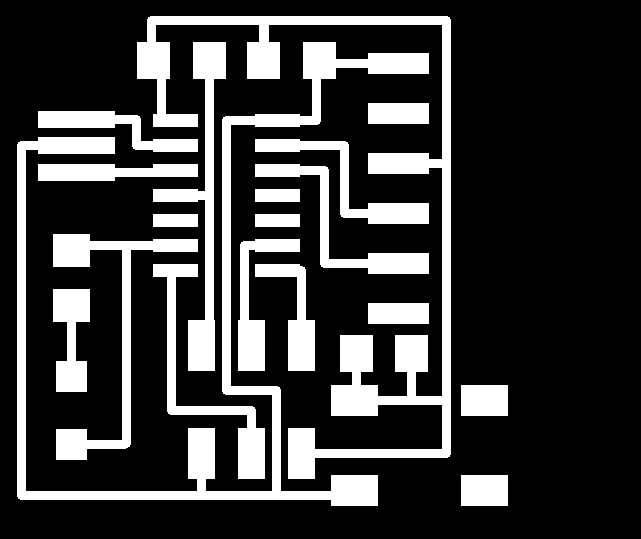
Exporting the board design to be used with the Modela machine.
We must have to put the board in monochrome and 500 dpi, this will export a image with white traces. We also must be sure that the color mode is set to greyscale.
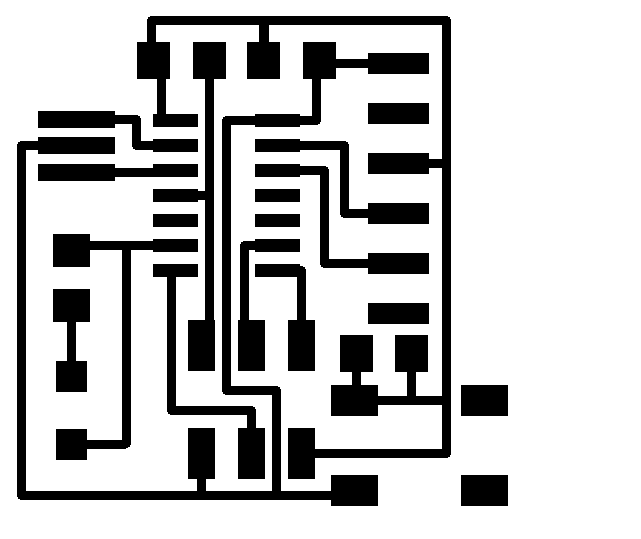
Exported PNG
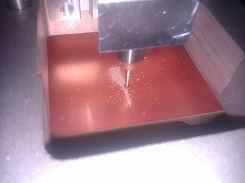
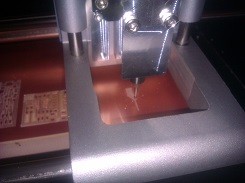
Now we are ready for milling with the iModela and FR1 boards.
Milling:
Miling process worked with the "fabtools"
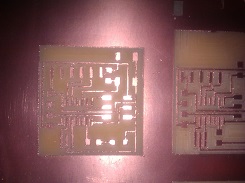
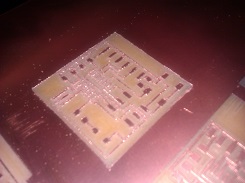
The final result:
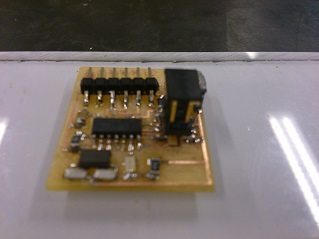
Final step
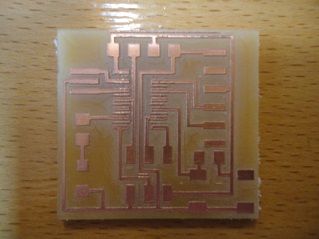
Soldering
And the final board.