Week 3 we were asked to being using 3D modeling software. I have alot of experience with 2D/3D drafting and modeling. My two favorite programs to design in are ACAD (Automated Computer Aided Drafting) and SolidWorks. ACAD is a drafting program can be can be used in 2D or 3D, depending on the version. I use the most recent edition of ACAD (2012) almost exclusively for creating 2D pictures, layouts, architectural drafting's and some mechanical design. ACAD is also a great program to use when trying to create precise patterns that need to be fed into a laser cutter or sent to shop to be built.
SolidWorks is the 3D design software that I use. I use SolidWorks as a tool to do mechanical design, 3D design/assembly and some design layout work. SolidWorks is a great tool with a multitude of features that allows the user to not only perform animated tests of objects working together. The program also has a robust set of material testing software that allows for pressure and ware tests to be done digitally.
A third piece of 3D modeling software is Google Sketchup. Sketchup is a great tool for beginners and professionals alike. It has a very user friendly learning curve as well as a vast number of tutorials and how-to's. I have helped many people to learn how to use Sketchup in the past and I feel that it is a great introductory tool in learning the basics of 3D design.
Below I will be going over my ACAD and SolidWorks designs that I am currently working on as part of my final project. Before I do I wanted to talk about another program that I will be using in conjunction with ACAD and SolidWorks. I will be using third 2D/3D modeling program called Pepakura. Pepakura is a Japanese paper craft program that been becoming more and more popular over the last few years. Pepakura allows for users to import 3D files that can be broken down into planes. These planes are laid out onto paper, allowing the user to cut out and refold the planes into 3D objects. I want to use Pepakura to unfold and print my SolidWorks models in order to help to speed up the process of prototyping the frame and body of my project. While paper may not seem strong enough to create a rigid structure that is only 1 ply thick, using card stock weight paper that will receive a fiberglass inside and a resin outside will provide the needed support to create a rigid structure.
Before I begin, I would like to say that I am not going to go into details on how this will be built on this page. I am currently still working out the build details in both materials and plans.
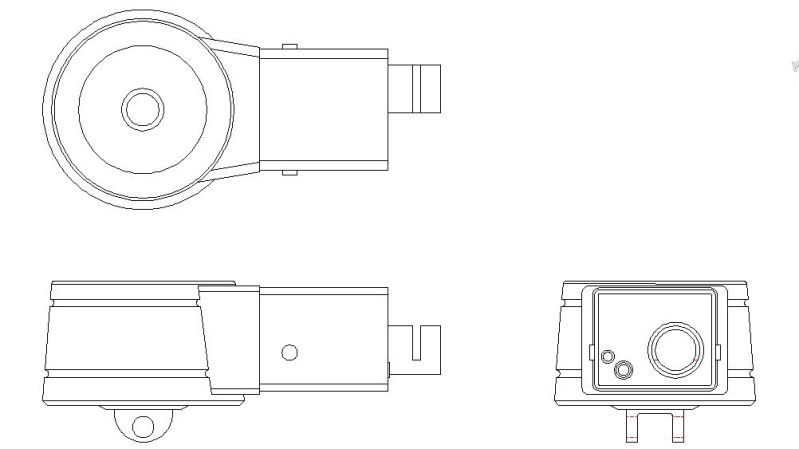
The image below features the Front, Right and Top views of the Sentry Head. I drew this using Auto CAD 2012 and I based the drawing off of several images that I took using a model viewing tool that the game's developers put out. Everything in the drawing is in 1:1 scale so that I can easily transfer files and parts to CorrelDraw for laser cutting.

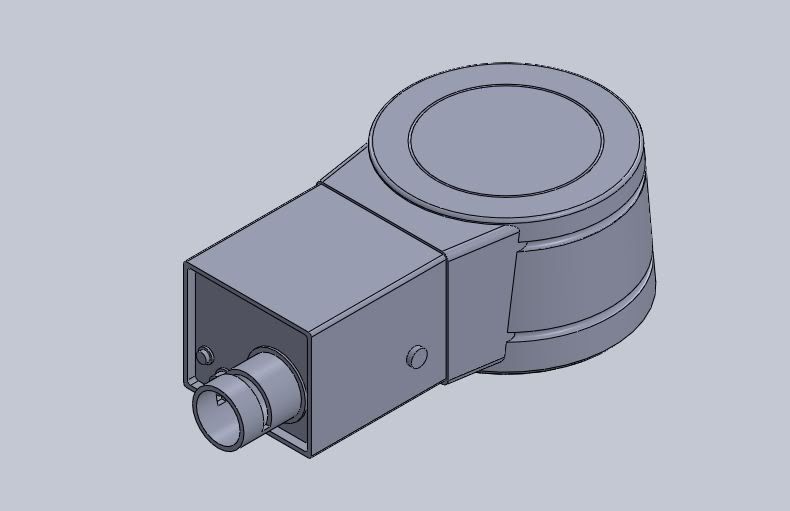
Below is an image of the same Sentry Head that was modeled in SolidWorks using the three views seen in the ACAD drawing above.

There are a few secondary objectives that I am looking to accomplish with this project as well. These are secondary objectives because they are more time consuming in both fabrication and in programming. The first of these is being able to fire Nerf darts at tracked objects. The second is to be able to move up and down along a Z axis. The reason Z axis movement is the last objective is because it requires the use of more motors, which means a higher power usage. More power usage means a shorter run time.
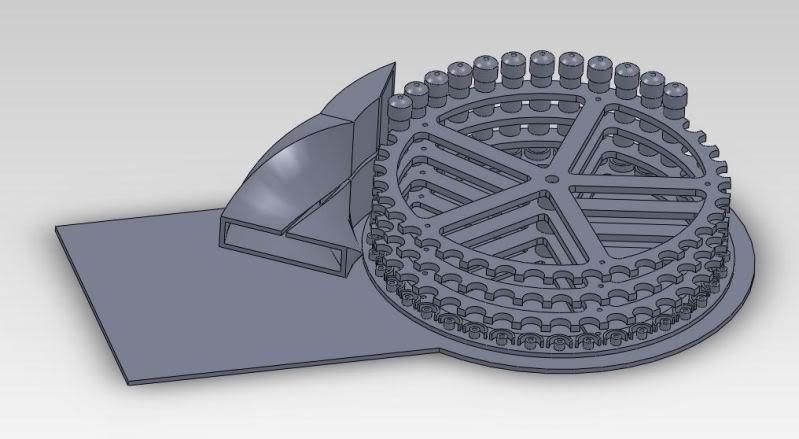
The image below is a rough model of the Nerf firing mechanism that is loosely based around the Nerf N-Strike Raider Drum. The drum that I have designed would hold approximately 40 rounds with a currently unknown rate of fire. The biggest challenge that I have faced with this design is getting the darts from an upright position to a firing position.
