Electronics Design
This assignment I have developed in ubuntu,I used "eagle" and I did it in 3 parts --Design
--Milling
--Soldering
Progress Description:
Design
Beginning of the next board:
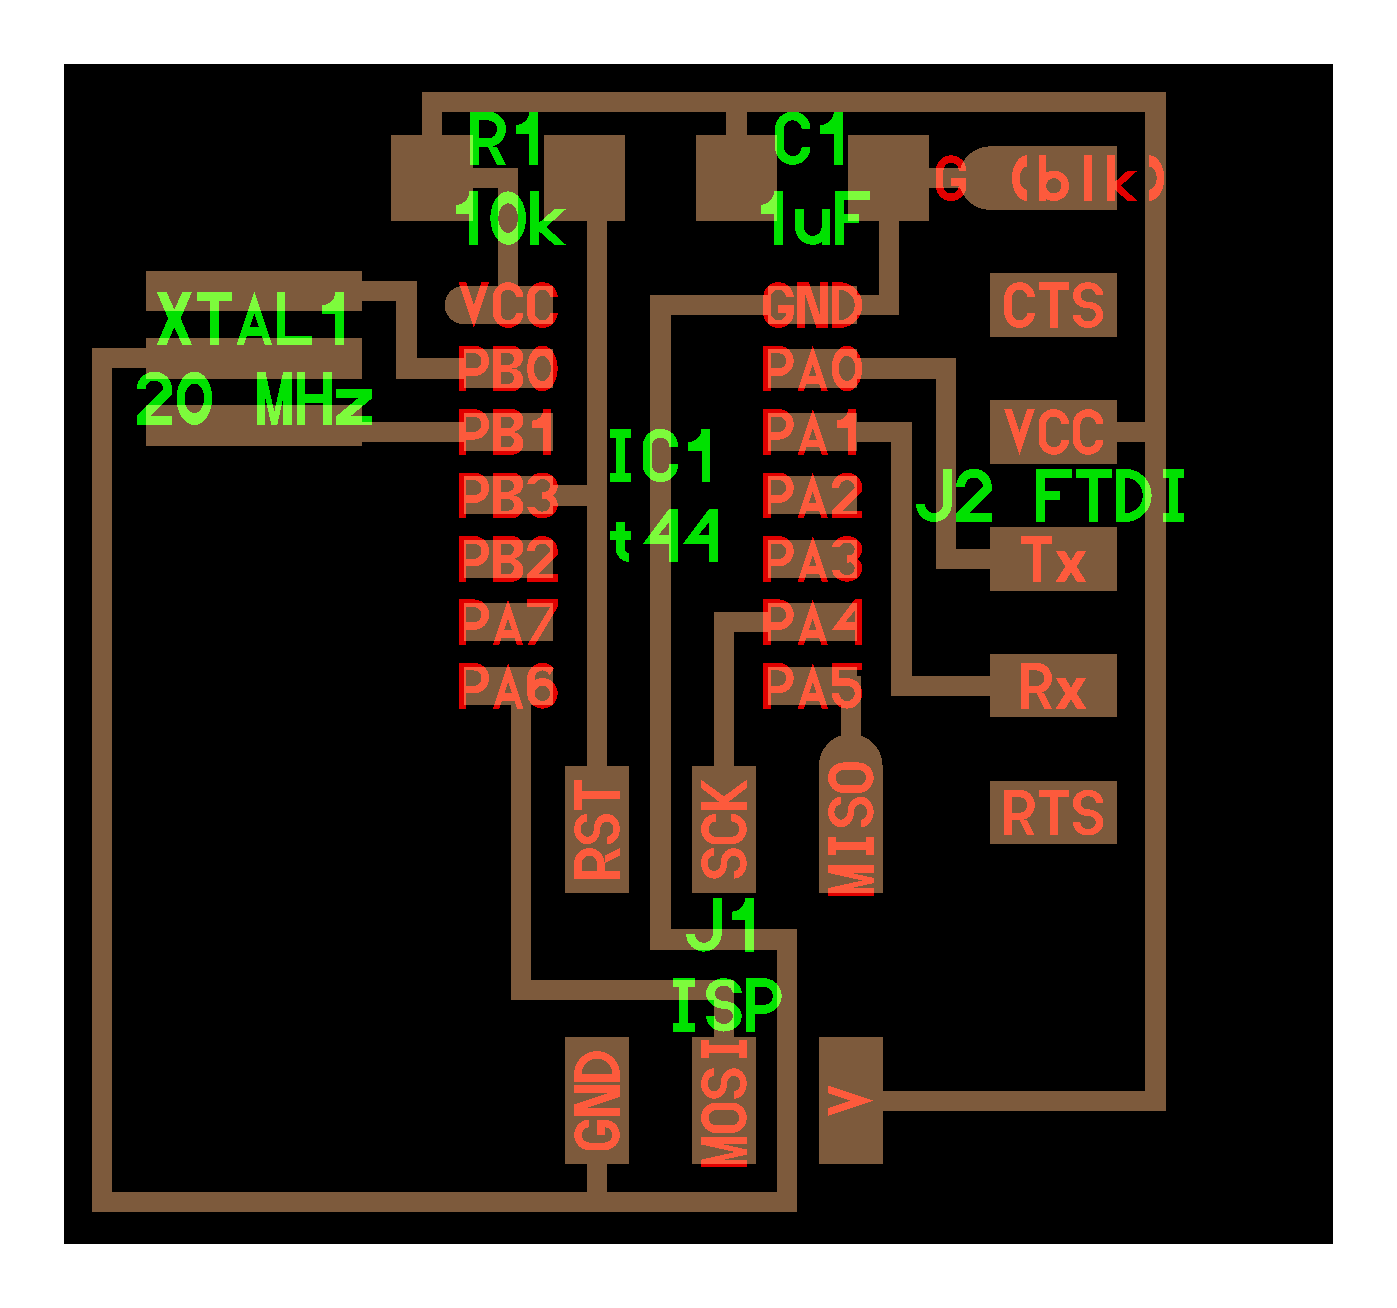
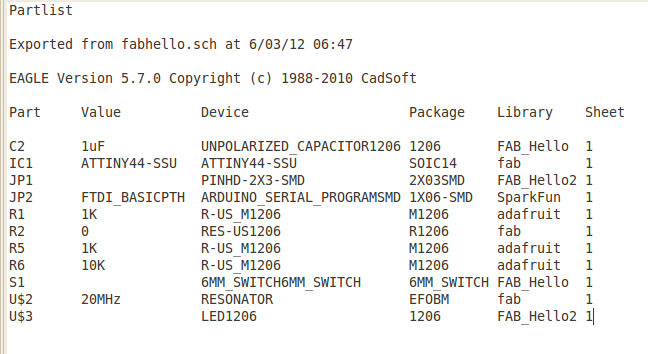
The board is composed of: 1 Attiny 44, 1 Resonator, 1 header, 1 resistor, 1 capacitor, 1 ftdi_arduino. All libraries are posted on the course, except the connection ftdi that is in the library Sparkfun, it can be downloaded from here. Diseñe el esquematico, but the hardest part is the generation of board, but always follow the same logic, in the schematic only matters who is one with whom, on the board only as are joined. Suggestion, almost all components must be connected to VCC and ground, place them around the board so it is easy.In my case I use a bridge, using a resistance of value 0
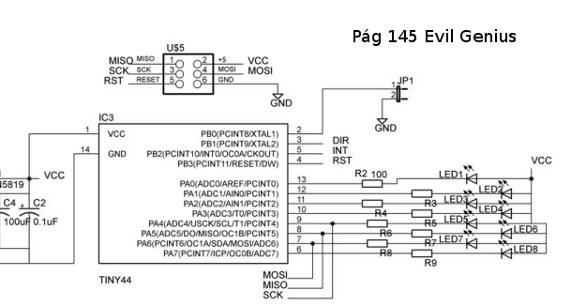
To learn how the ATtiny, and learn to "pin" connecting, my partner Roberto had the brilliant idea of studying the book "Evil Genius" on page 145 has information on the structure and design. Learned this little lesson, I design the schematic and board:

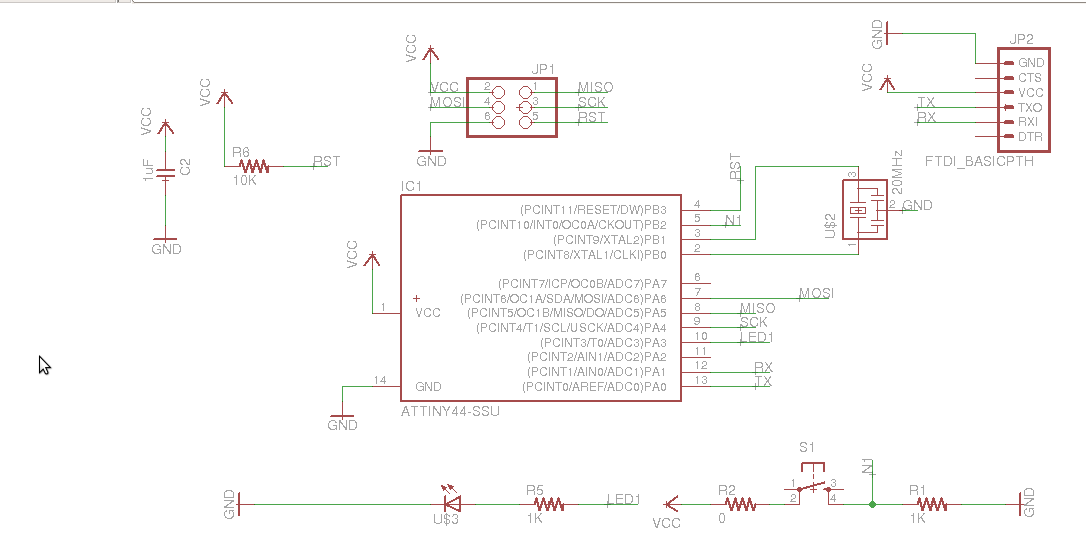
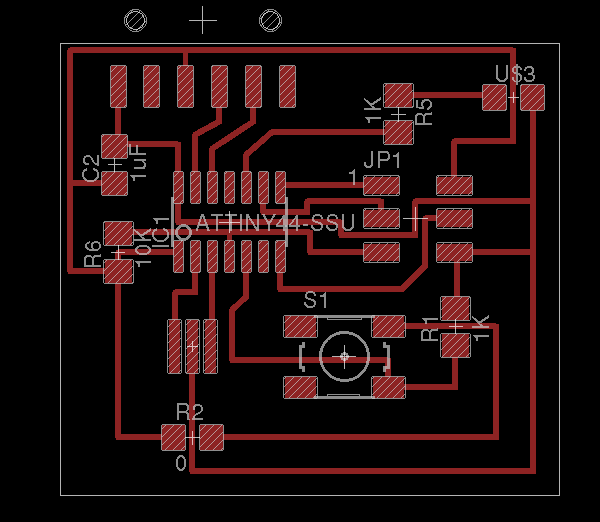
I'll add a LED and a switch, I used .012 inch connections, I created some problems working with the 3mm mill, I recommend it to 0,016. After the schematic and board, image export, Eagle has a menu option to "export", selected as a image, monochrome, and 500 DPI. Files can be downloaded
Esquema
Board
Milling
Miling process worked with the "fabtools", here the process graph.
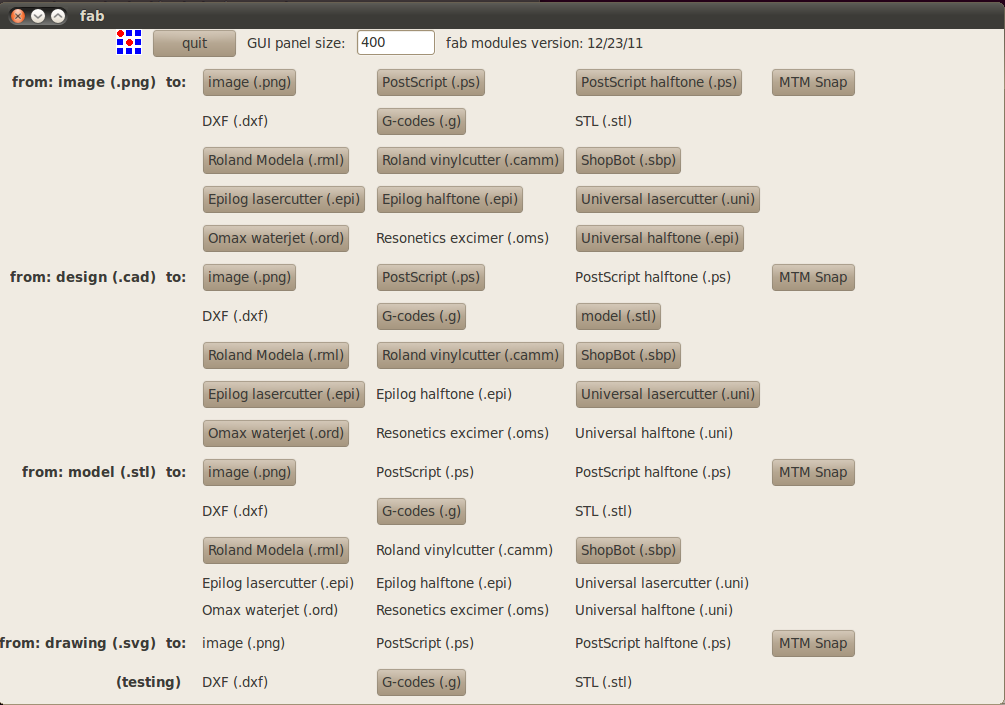
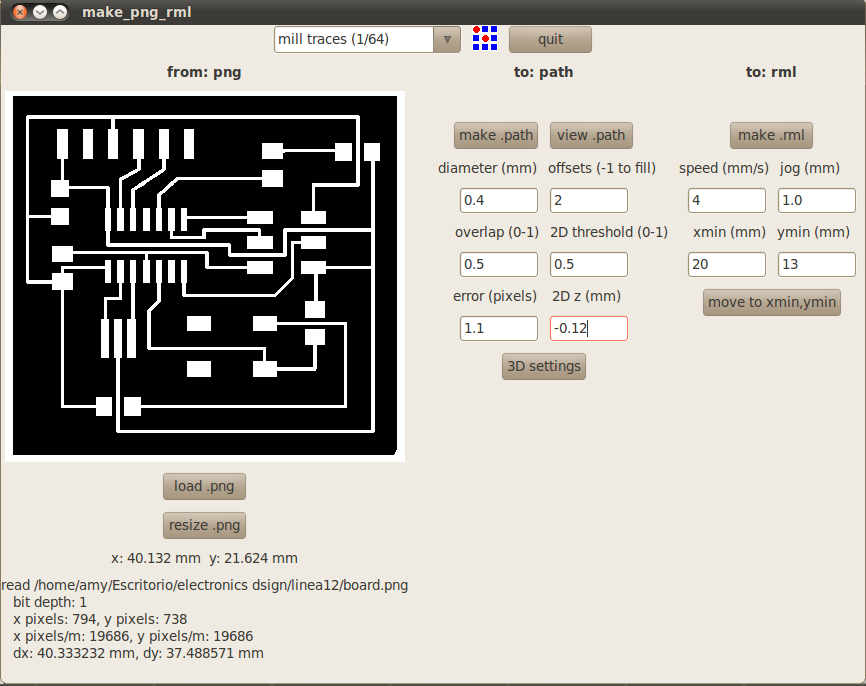
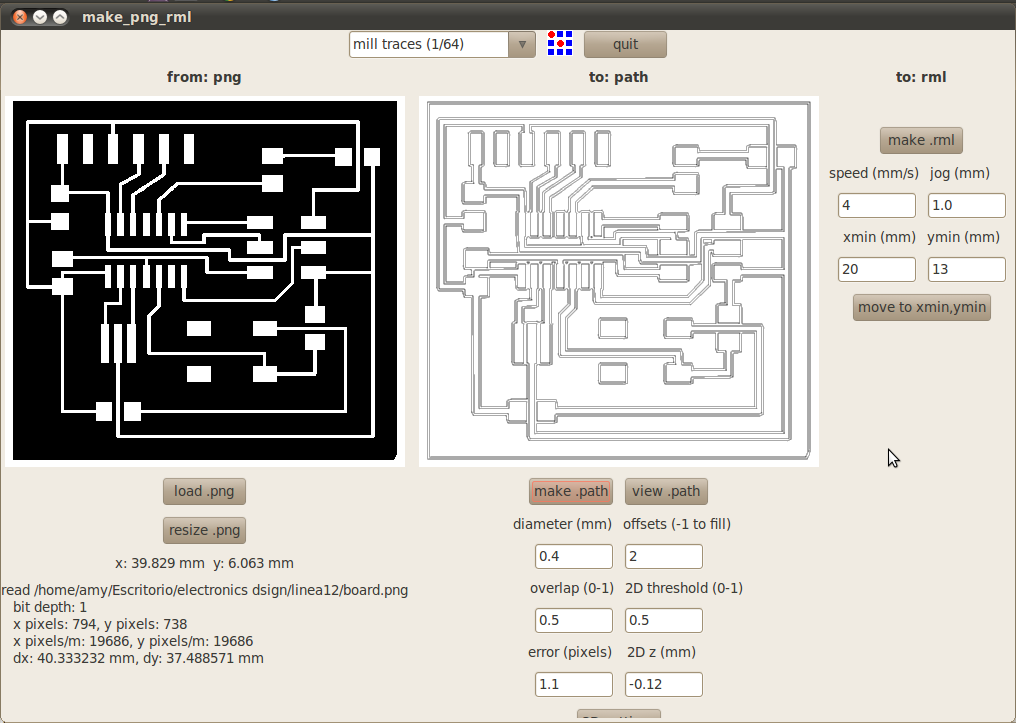
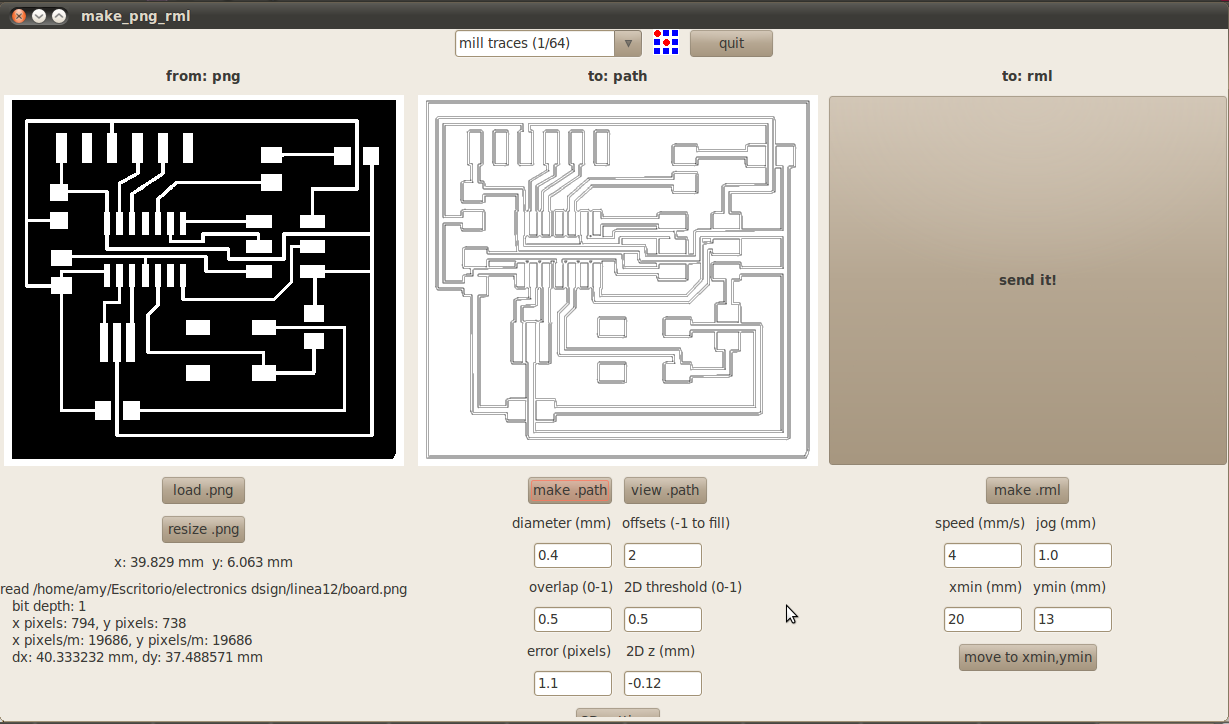
From left to right:
---In image 1: Select "from image" and submenu "Roland Modella"
---In image 2: Sets "-Z = 0.12" y "offsets= 2" (the offset is the time to pass the mill), select option "mill traces 1/64) finally the option "make path"
---In image 3: Sets the axis X and Y in ny case (20;13) will be observed as the trace and select "make rml"
--- In image 4: We click on "Send it"
Soldering
Sfollowing materials are used


The soldering process, is always difficult, because of the components that are very small, therefore the design must be small to medium, be careful with the LED, where the cathode must be attached to GND, the final result is.

can watch the video