Fab Academy 2012
About Me
My Project
Classes
Molding and Casting
Making the Solid Model
The assignment this week was to cast a model from a silicon mold. To do this I first had to make a solid model and save it as n .stl file.
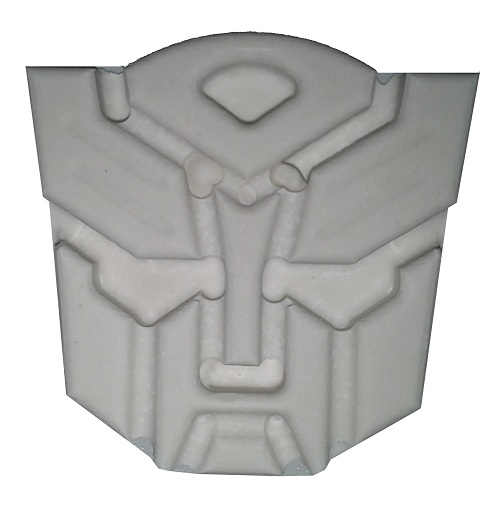
I wanted to cast the Autobots logo from the Transformers cartoon and movie series, I started with a bitmap image that I had and used Inkscape to trace over it with vector lines. I then deleted the bitmap and exported the image as a.dxf. I openned the .dxf in SolidWorks and imported it as a sketch. The original bitmap is shown below:

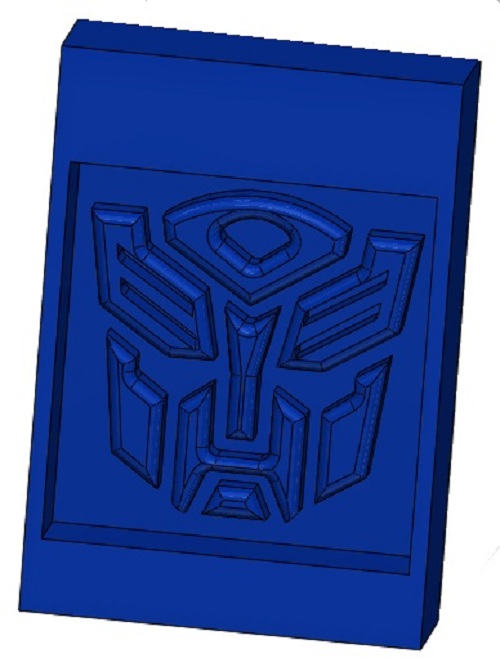
With a new part created and containing the sketch I extruded the sketch to create a solid body.
I could have saved the model at this point and exported it as a .stl file and used the router software to create a border around the model for making a mold, but I wanted to have more control over the shape of my mold than the software allowed so I extruded a frame around my part that matched the size of my billet and then exported this as a .stl
Machining
I used the Shopbot router with 1/8th" tools to machine the wax. I used an end mill for the roughing path and a ball nose cutter for the finishing path
I used Partworks 3D to create the toolpaths and although I found this software easy to use I did make a couple of mistakes.
So that I would not need to machine the top of the billet flat, to use as a reference point for the Z axis datum when changing tools, I used the base of the billet as the Z.
My mistake here was that I forgot to tick the box that tells the software of my decision to use the base, because of this error the router struck my billet and broke a corner off. Luckily the tool did not break as it was the spindle that hit the billet, not so lucky was the fact that the X axis had stalled and was out by a couple of steps.
This led to my 2nd mistake, having stalled the X axis I should have changed the X axis offset, not doing so caused one of the walls of my mold to be very thin but the mold was still workable.
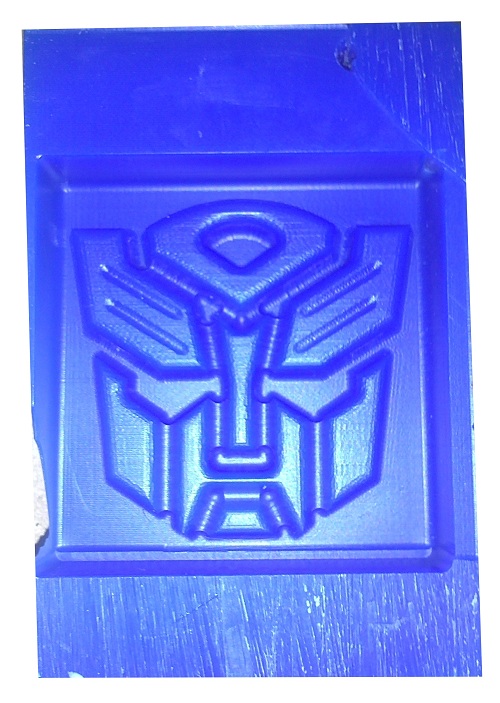
The damage to the wax mold can be seen in the picture below.
Fixing the Billet to the Router
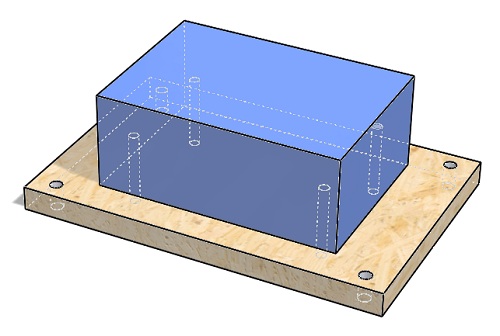
To hold the wax billet to the bed of the Shopbot router I first fastened it to a wooden board by drilling blind holes in the base of the wax and through holes in the wooden frame, I fixed the 2 together with self taping screws and then fixed the wooden frame to the bed of the router. A picture paints a thousand words and below is an illustration to show how the frame and wax were fixed
Casting
I first used silicon to pour into my wax mold, this was simply a matter of mixing the solution to the parts specified in the manufacturers instructions. I poured from one corner of the mold and let the silicon flow over the whole mold, this method should have displaced any air and prevented bubbles. I left the mold to set for 6 hours before removing the silicon from the wax, the silicon had taken well, but unfortunately there were a couple of air bubbles which do spoil the finish a little.
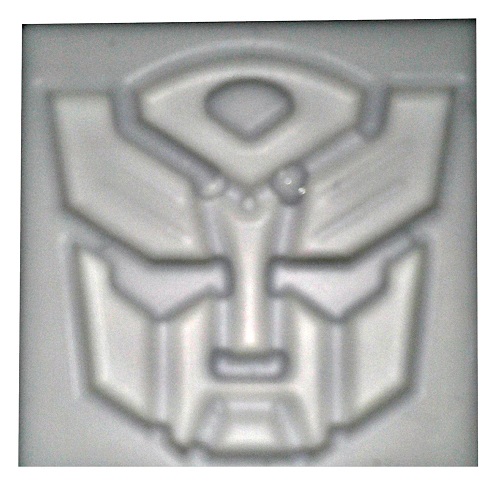
Next I used stone plaster which once mixed I poured into the silicon mold and left it to set. The instructions stated a setting time of 25 minutes, I left it for 40 minutes and the plaster cast came cleanly out of the silicon without any problems
Learning Outcome
Previous to this weeks assignment I had no experience of molding and casting and I enjoyed the process very much. I had thought the wax would be much softer and expected to be able to machine it much faster than I was able to.
I used the Shopbot router as I new it would be able to remove material much faster than the Roland Modela and this made me more familiar with the Shopbot as I had previously only used it once for 3D routing.
As the design I routed was not my own I merely traced it and it had to fit within the billet I overlooked the size of the gap between the features. Normally when designing I take into account the tooling and the material I will be using and I ensure that the tooling will fit around all parts of my model. This oversight meant that the tool was unable to machine to the full depth on some of my models features and removed some of the detail I had modelled. I will be sure not to make that mistake again.