Fab Academy 2012
About Me
My Project
Classes
3D Scanning and Printing
3D Scanning
I have used a number of different 3D scanning options in the past and they are listed below:
Structured light - for this I used a Pico projector with a webcam and some open source software called Threephase
Laser scanning - I have used 2 systems for this type of scanning the first was the open source David laser scanner and the second was the Next Engine laser scanner. Both systems produced impressive scans, but the Next Engine was the most impressive and for this reason I have ordered one for Fab Lab Airedale
Photogrammetry - For this type of 3D scanning I used Project Photofly, now known as Autodesk 123D Catch, this uses cloud computing power to turn a series of images into 3D data. I have had some good scans from this and would say it is definately worth a look.
Digitizer Probe - The Roland Modela has a digitizer probe available which locates the dimensions of an object by physically touching it. Whilst very slow it does have its advantagages over the other systems such as its ability to scan highly reflective surfaces which the other methods do struggle with.
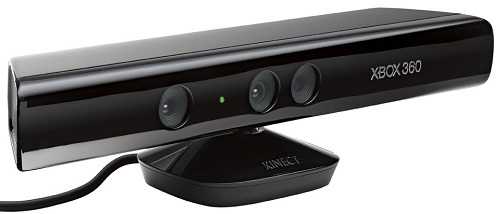
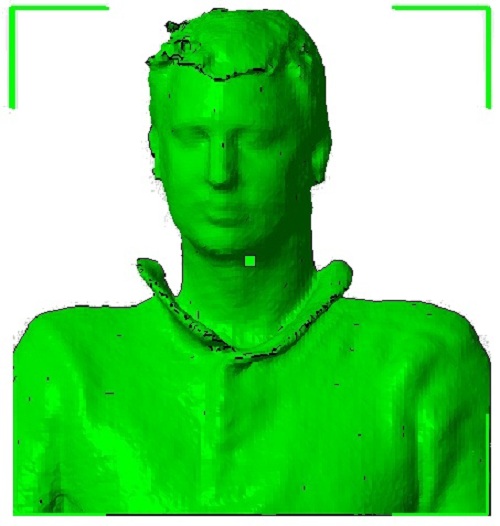
The image above may give you an idea as to which method I used for 3D scanning this week, it is the Microsoft XBox Kinect this uses IR structured light to build up an 3D model of objects infront of it and is intended to be used as a game controller.
Fortunately Microsoft saw fit to release a series of SDK's for the Kinect and some interesting 3D scanning programs have emerged. This week I used a program which is still at the beta stage and produces some reasonably good 3D models, that program is Reconstruct Me I used this program to scan myself and it produced an stl file of me, although the model was of reasonable quality it did require some cleaning up and for this I used Blender and Netfabb.
Printing
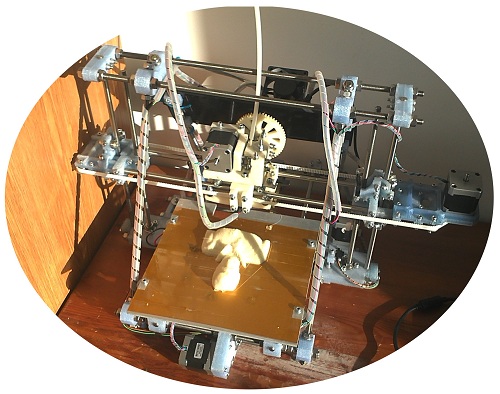
To print my 3D model I decided to use my RepRap Mendel which I built recently
This 3D printer has a heated bed to prevent parts from warping and I use PLA as the build material.
Software
To convert my 3D model into a toolpath for my 3D printer I used Skeinforge which is an opensource CAM program which once configured produces very nice prints.
To control my printer I used another opensource program which is Printrun, I have found this to give me very good control over my printer.
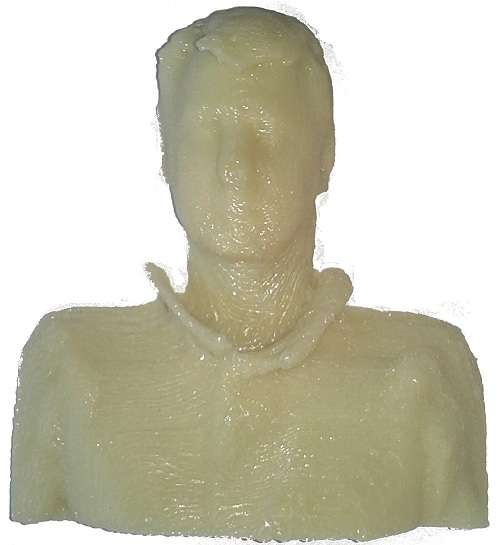
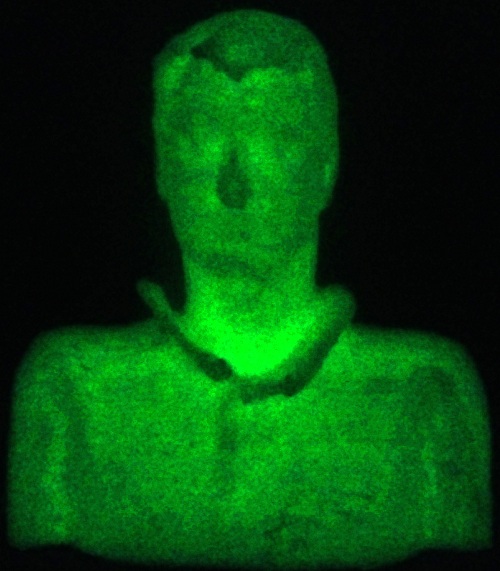
Above is an image of my printed part which took around 2.5 hours to print, it is printed uses 3mm glow in the dark filament and can be seen glowing below
Learning Outcome
This week was the first time I had printed an object that I had scanned myself and also the first time I had used the Kinect as a 3D scanner. The process of scanning and printing did not present any problems but there is a fair amount of post processing to be done on the scans before they are ready to print and this represented to biggest challenge.