Week 12 - Interface And Application Programming
16 April 2012 13:35 Monday
This week's assignment is to write an application that interfaces with the input device you make in week 11 - input devices. Use the Processing programming language to visualize the data from the sensor on your input device board.
I'm going to skip this section for now and work on it at home so I can do the soldering and troubleshooting necessary for week 13: Output devices"
14 June 2012 7:30 am
I have started the 1st processing tutorial located here: http://processing.org/learning/gettingstarted/
And immediately ran into problems as soon as I tried even the most basic command: ellipse(50, 50, 80, 80);
when I run this command, it does in fact bring up the expected result, but it also brings up a string of error messages:
Jun 14 07:38:30 c-24-147-168-116.hsd1.ma.comcast.net java[399]: CGContextGetCTM: invalid context 0x0 Jun 14 07:38:30 c-24-147-168-116.hsd1.ma.comcast.net java[399] : CGContextSetBaseCTM: invalid context 0x0 Jun 14 07:38:30 c-24-147-168-116.hsd1.ma.comcast.net java[399] : CGContextGetCTM: invalid context 0x0 Jun 14 07:38:30 c-24-147-168-116.hsd1.ma.comcast.net java[399] : CGContextSetBaseCTM: invalid context 0x0
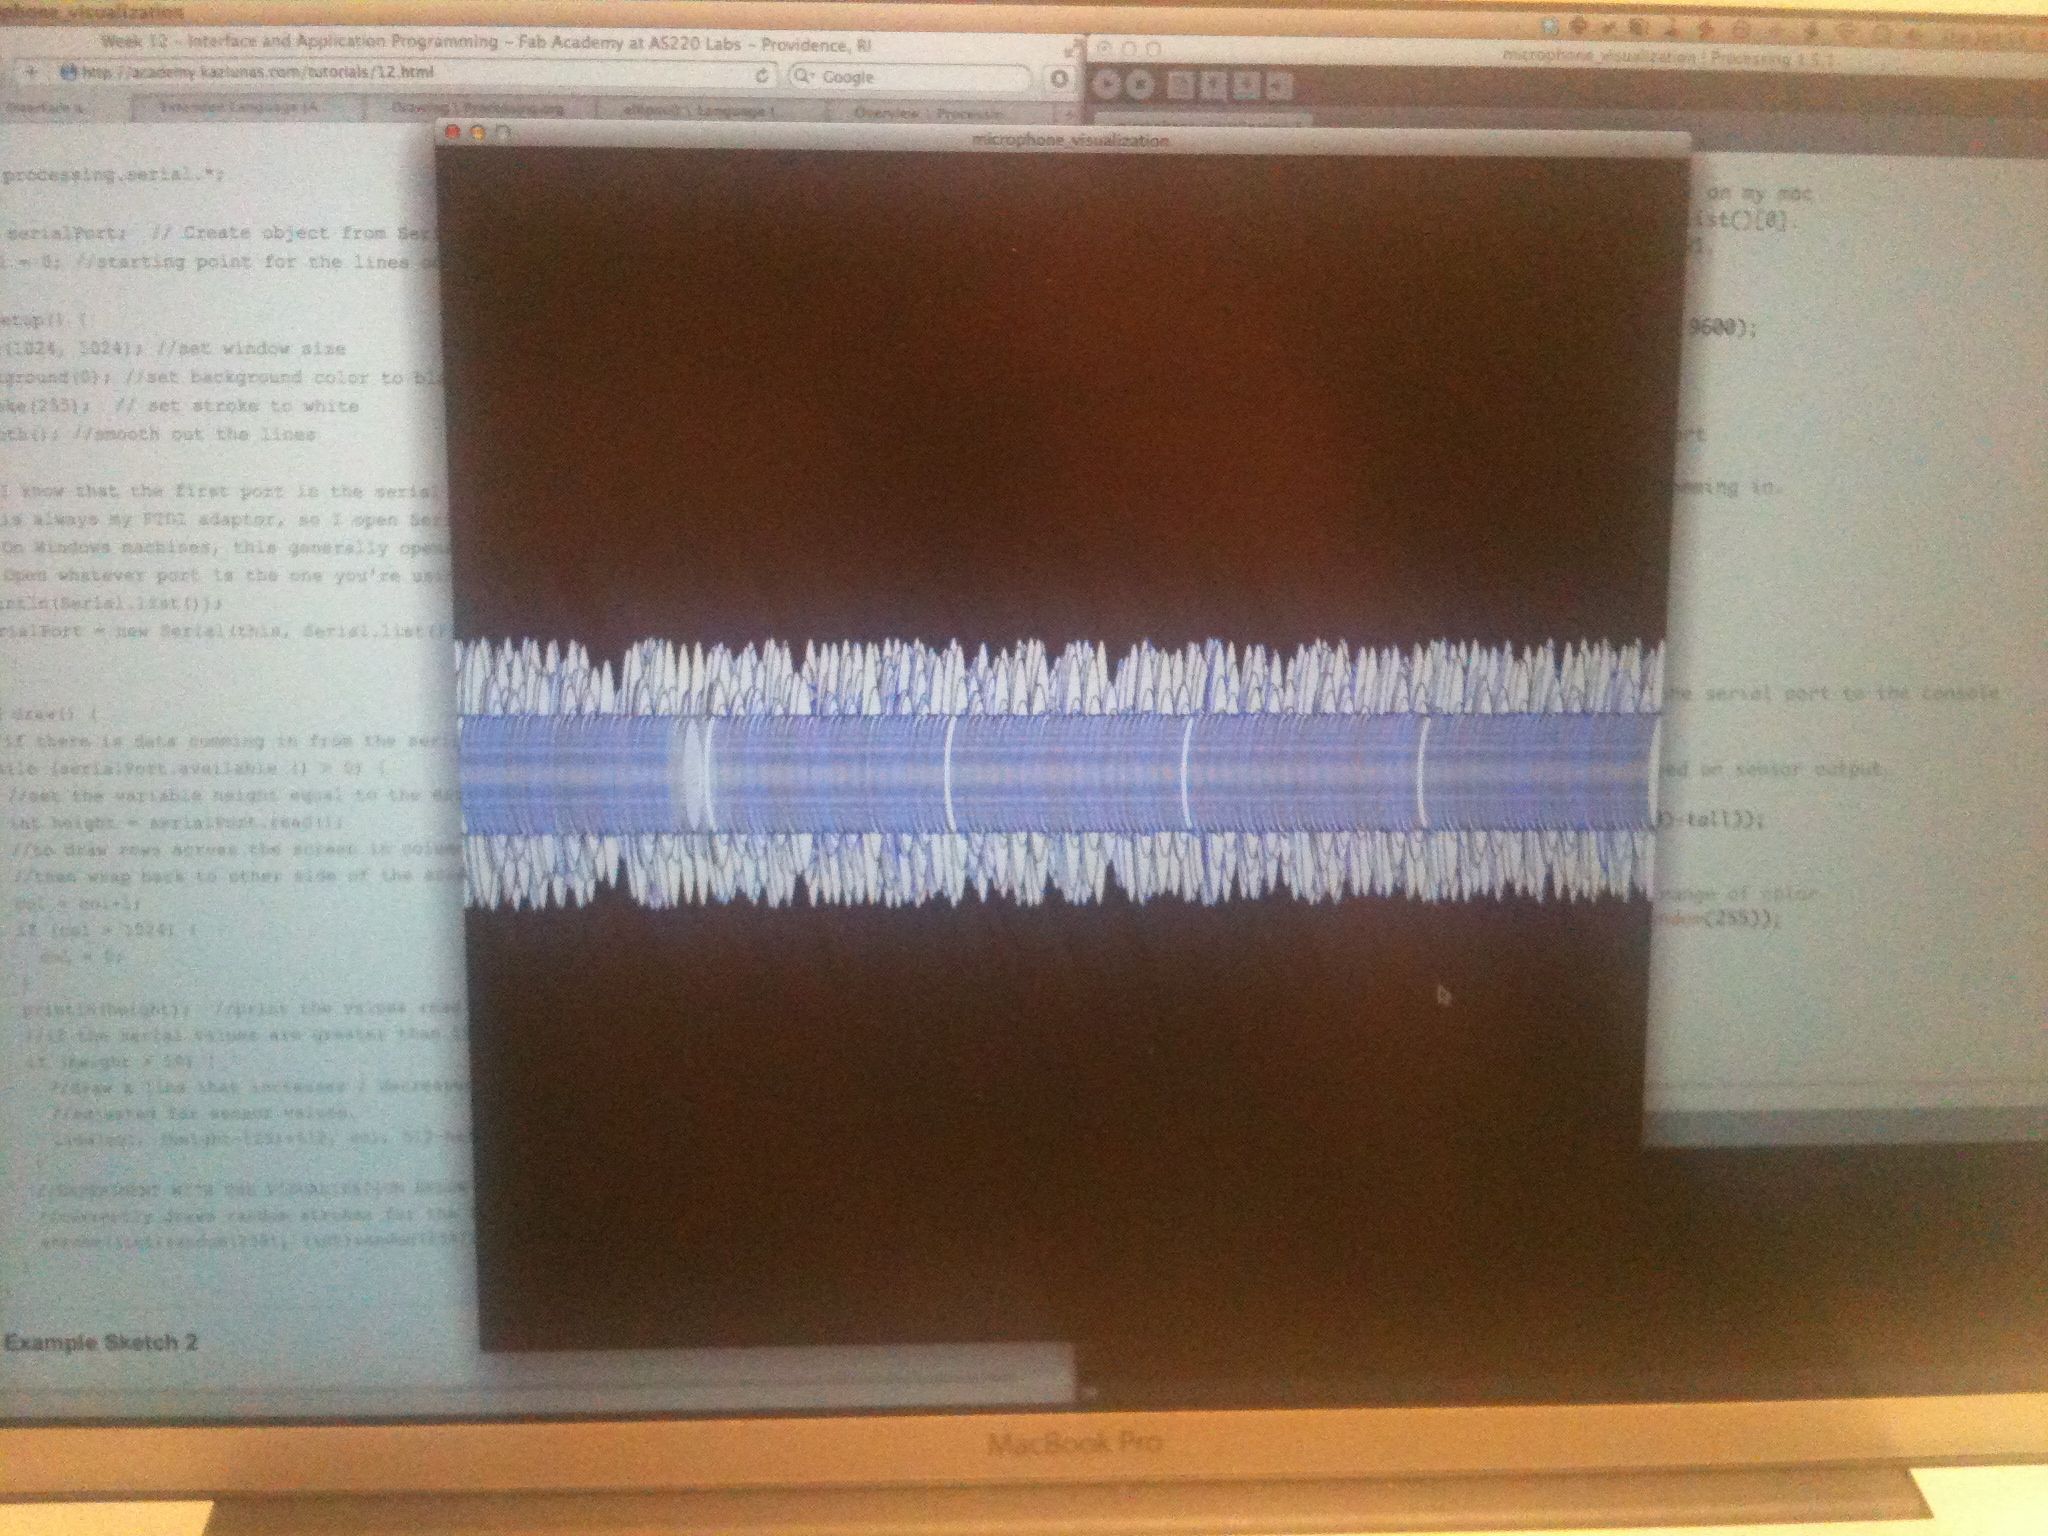
/**
 * Serial Input to Randomly Colored Lines
 *
 * Read data from the serial port and changes the color of a lines drawing across the screen
 * the height of the lines changes relative to the values recieved from the sensor.
 *
 * written by Shawn Wallace
	* updated / commented by Anna Kaziunas France
 */

import processing.serial.*;

Serial serialPort;  // Create object from Serial class
int col = 0; //starting point for the lines on the screen

void setup() {
  size(1024, 1024); //set window size
  background(0); //set background color to black
  stroke(255);  // set stroke to white
  smooth(); //smooth out the lines

  // I know that the first port in the serial list on my mac
  // is always my FTDI adaptor, so I open Serial.list()[0].
  // On Windows machines, this generally opens COM1.
  // Open whatever port is the one you're using.
  println(Serial.list());
  serialPort = new Serial(this, Serial.list()[0], 9600);
}

void draw() {
  //if there is data comming in from the serial port
  while (serialPort.available () > 0) {
    //set the variable height equal to the data comming in.
    int height = serialPort.read();
    //to draw rows across the screen in columns
    //then wrap back to other side of the screen
    col = col+1;
    if (col > 1024) {
      col = 0;
    }
    println(height);  //print the values read from the serial port to the console
    //if the serial values are greater than 10
    if (height > 10) {
      //draw a line that increases / decreases based on sensor output.
      //adjusted for sensor values.
      line(col, (height-125)+512, col, 512-height);
    }
    //EXPERIMENT WITH THE VISUALIZATION BELOW
    //currently draws random strokes for the full range of color
  stroke((int)random(255), (int)random(255), (int)random(3*tall));
fill((int)random(255), (int)random(10), (int)random(255), 60);
  }
}
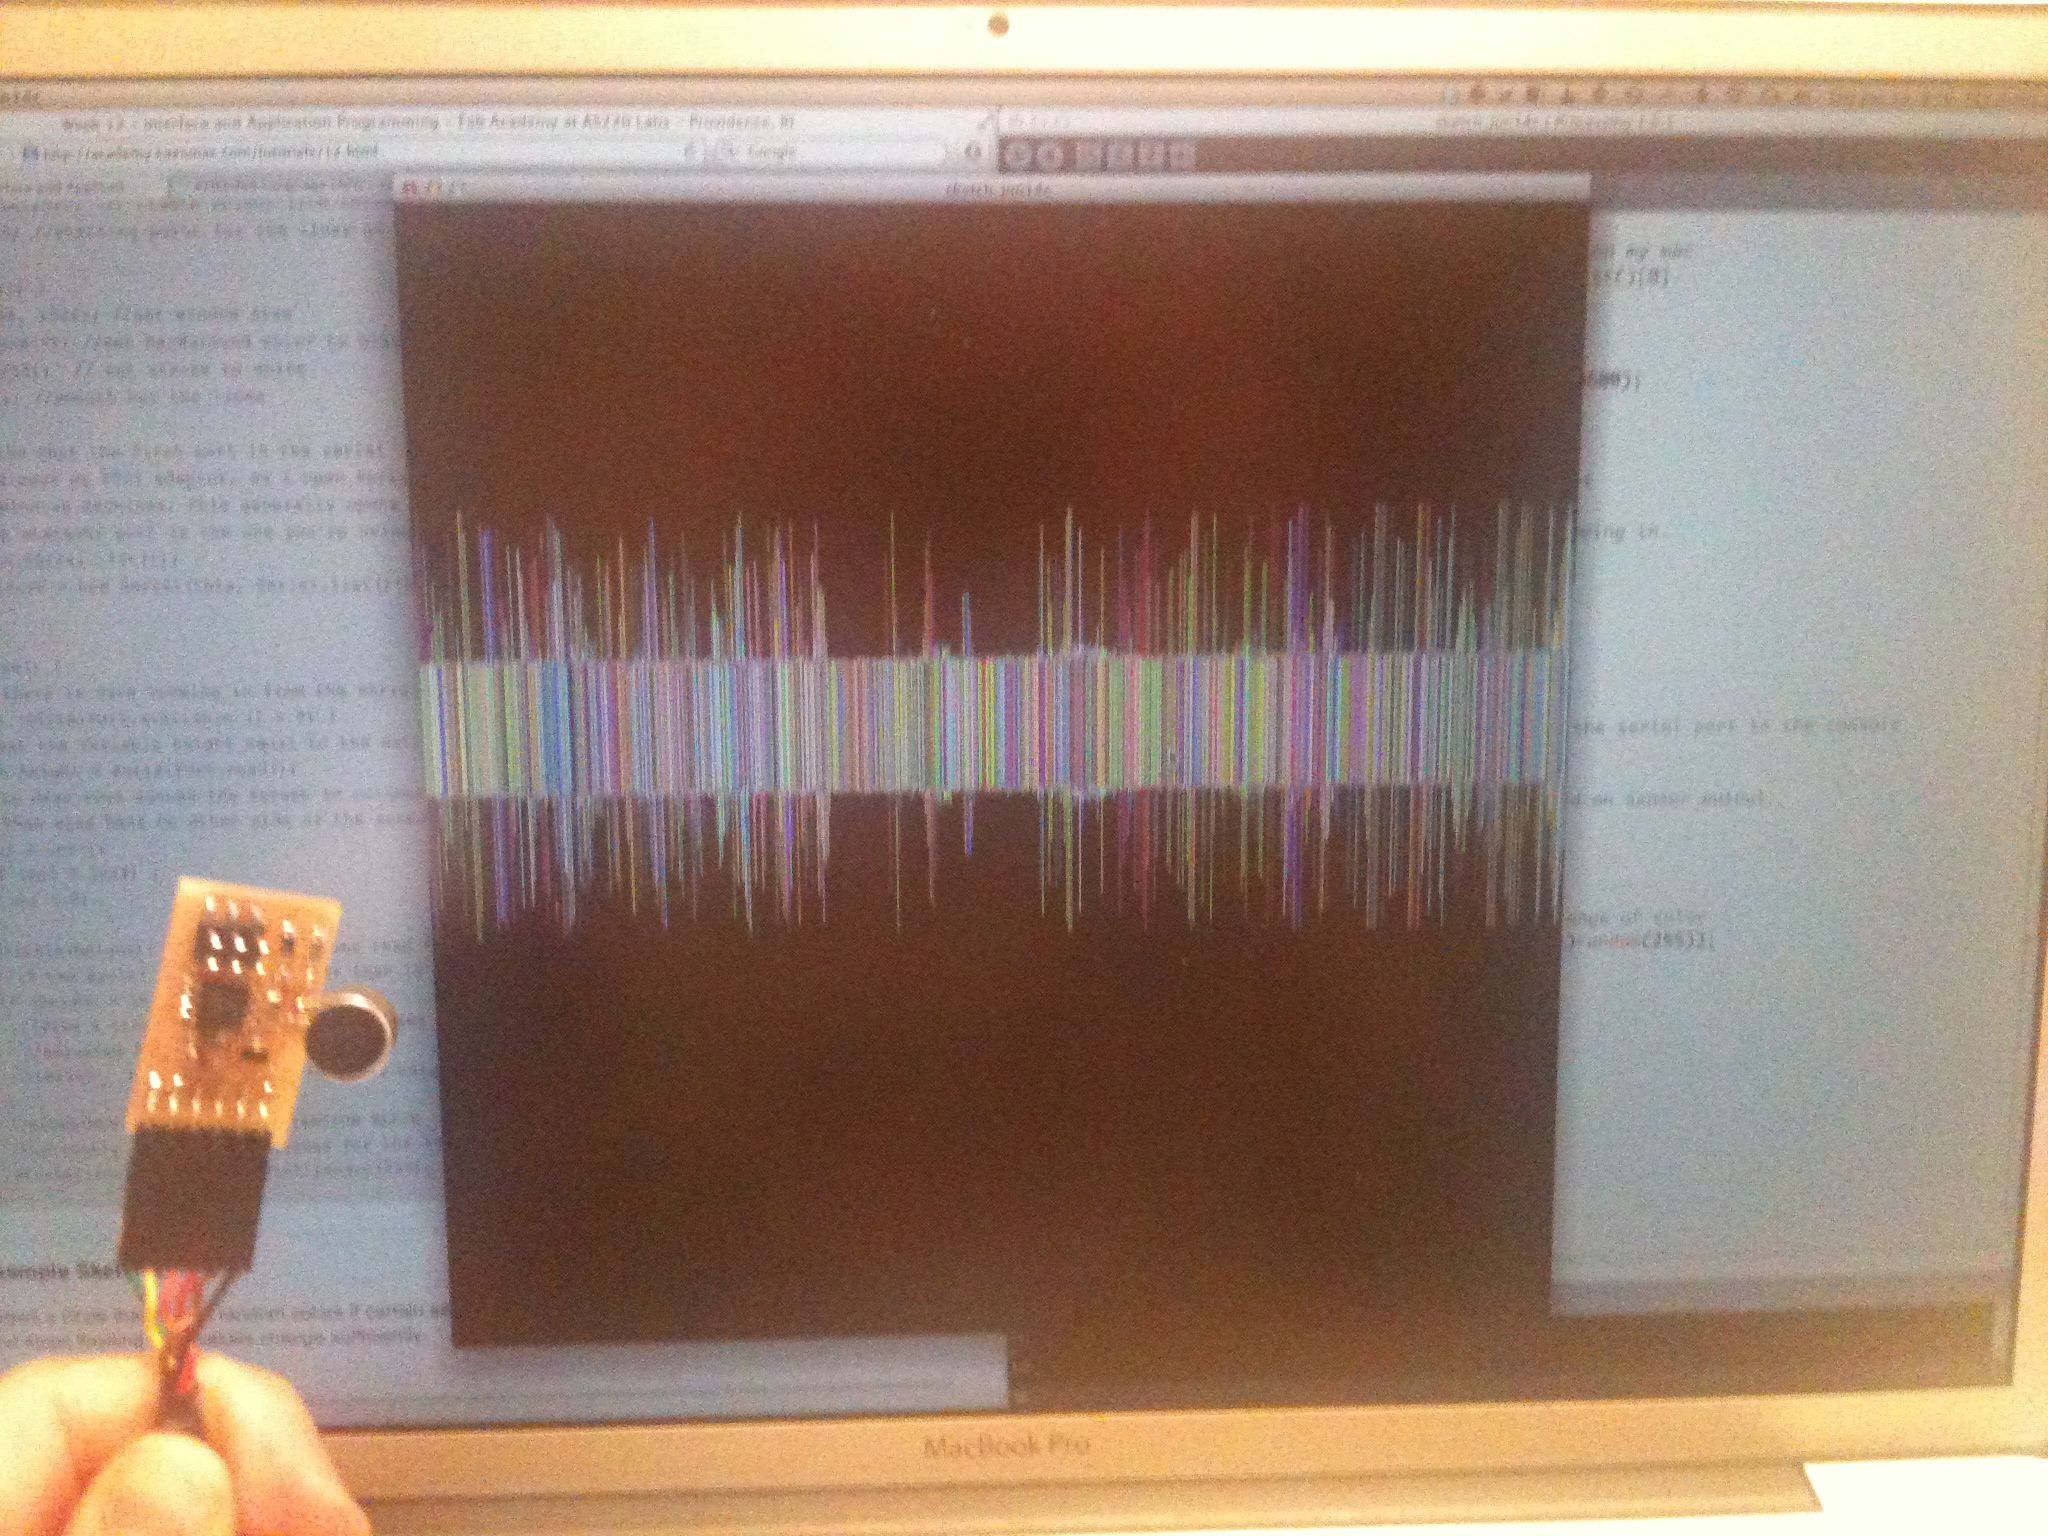
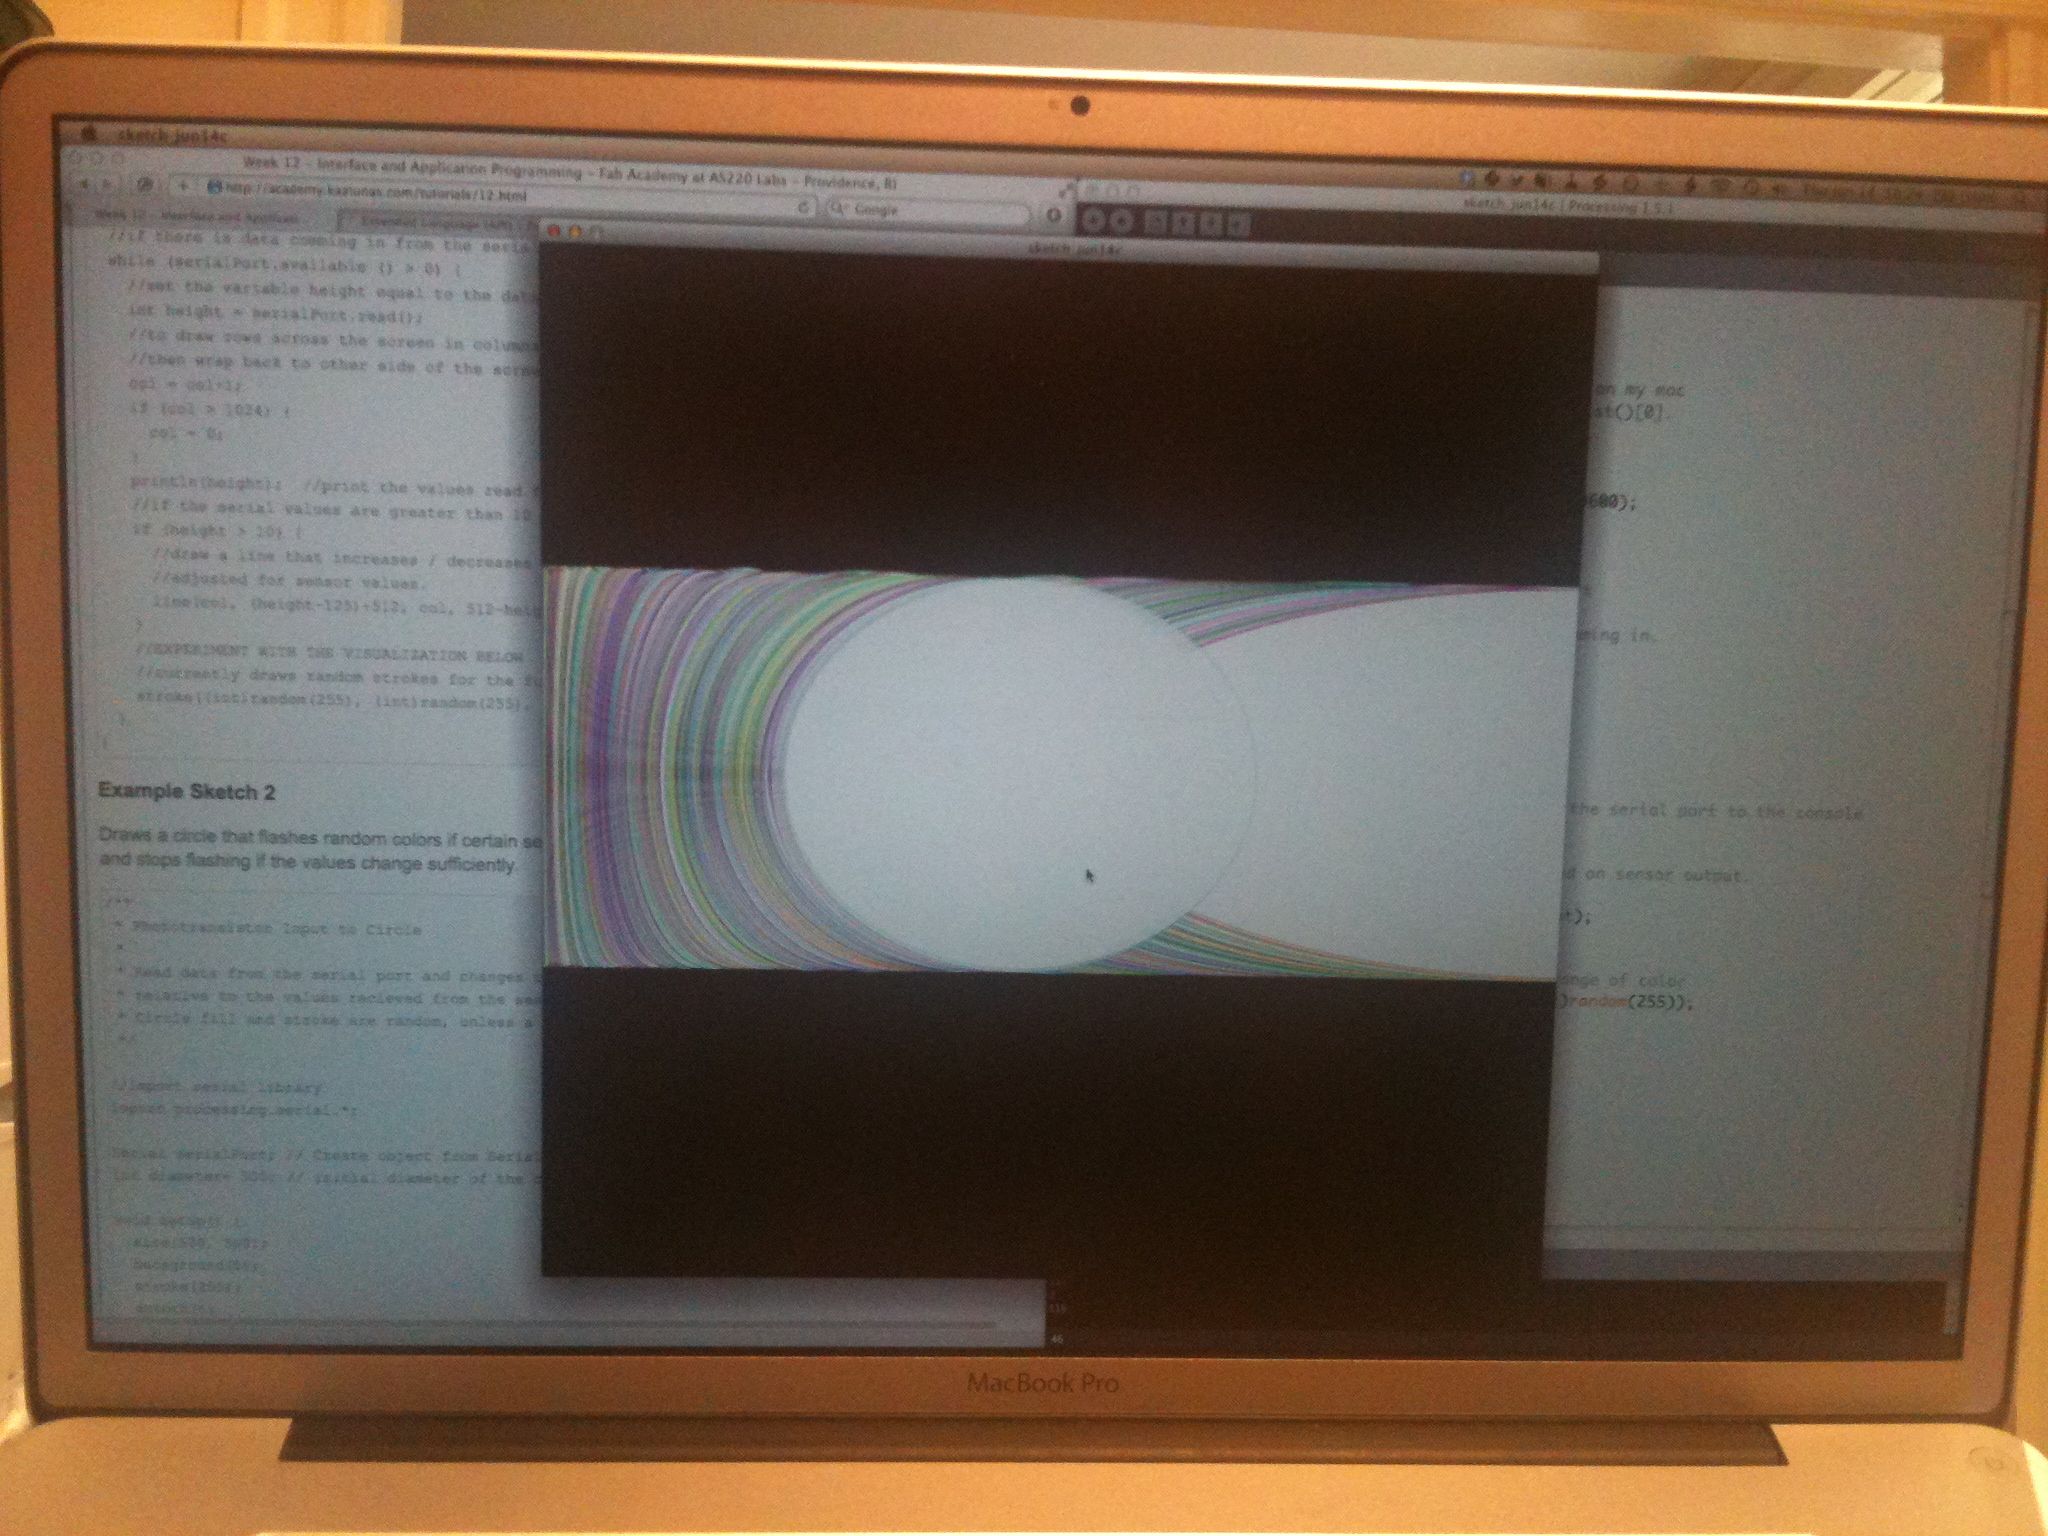
/**
 * Serial Input to Randomly Colored Lines
 *
 * Read data from the serial port and changes the color of a lines drawing across the screen
 * the height of the lines changes relative to the values recieved from the sensor.
 *
 * written by Shawn Wallace
	* updated / commented by Anna Kaziunas France
 */

import processing.serial.*;

Serial serialPort;  // Create object from Serial class
int col = 0; //starting point for the lines on the screen

void setup() {
  size(1024, 1024); //set window size
  background(0); //set background color to black
  stroke(255);  // set stroke to white
  smooth(); //smooth out the lines

  // I know that the first port in the serial list on my mac
  // is always my FTDI adaptor, so I open Serial.list()[0].
  // On Windows machines, this generally opens COM1.
  // Open whatever port is the one you're using.
  println(Serial.list());
  serialPort = new Serial(this, Serial.list()[0], 9600);
}

void draw() {
  //if there is data comming in from the serial port
  while (serialPort.available () > 0) {
    //set the variable height equal to the data comming in.
    int tall = serialPort.read();
    //to draw rows across the screen in columns
    //then wrap back to other side of the screen
    col = col+1;
    if (col > 1024) {
      col = 0;
    }
    println(tall);  //print the values read from the serial port to the console
    //if the serial values are greater than 10
    if (tall > 10) {
      //draw a line that increases / decreases based on sensor output.
      //adjusted for sensor values.
      ellipse(col, height/2, width/60, ((height/50)-tall));
    }
    //EXPERIMENT WITH THE VISUALIZATION BELOW
    //currently draws random strokes for the full range of color
    stroke((int)random(255), (int)random(255), (int)random(255-tall));
    fill((int)random(255), (int)random(255), (int)random(255), 60);
  }
}

void mousePressed() {
  background(0);
}