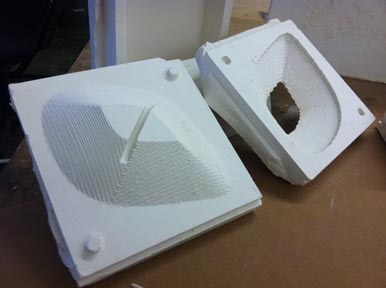
I then cut the mold using a series of horizontal roughing cuts and then 3d projection pocketing cuts. I also created a channel along the edge to help the mold align correctly and also to catch any resin should it seep through.

Once the mold was cleaned up, I began to coat it with mold release and mix the resin. Mizing the resin was tricky, i had to pour the proper amount for the volume of the mold and then match the correct amount of hardware. Since i modeled the shapes in rhino3d, i was able to analyze the shape and get the volume digitally, so the amounts calculated were pretty accurate. I also added an orange die to the resin.

I then clamped the mold and began to pour the resin.


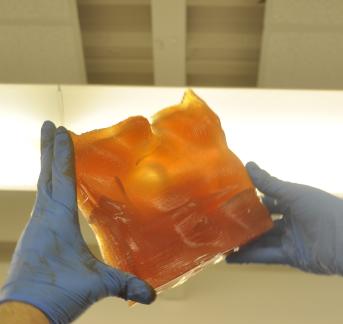
Pouring the resin slowly allowed the air to escape. I then vibrated the sides of the mold in order to force any bubbles to the surface. It took about 6 hours for the resin to dry. Once i was able to remove it from the mold i noticed a few things. First, I initially did not have the mold held down to the table properly and halfway through my cut the piece of plaster shifted. The shift caused me to have an error in my mold which allowed resin to seep through the bottom. Once it began to harder, the resin stopped seeping. Once i removed the mold, i found multiple cracks throughout. My thoughts are that the mold's surface was complex and with the way resin cures, it was unable to properly form. I think if i add less hardener to the mix i will be able to produce a solid form with no cracks.
src="m6.jpg" width="50%" height="75%" alt="6" />


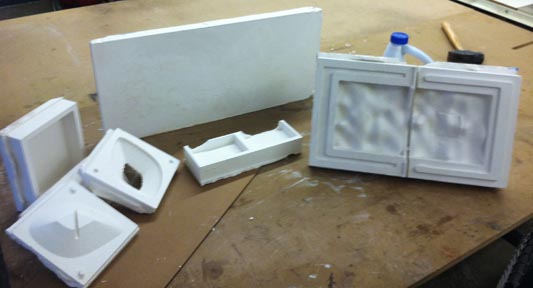
I have created more molds. A replica of the initial mold with no CNC errors, a 2 part bowl shaped mold to be poured from the bottom, and a couple blanks. The blanks were made with intentions. I would like to pour the bowl shaped mold and then pour a resin blank of the encompassing size so that i can then mill the resin blank on the CNC. By doing so, i can compare the differences of the finishing and the surfaces of each process. The other blanks are so that i can test laser cutting resin. Also, a larger blank as a bigger block for CNCing. The new set of resin will be poured over the next few days, as when i milled the forms on the CNC i noticed it was not quite dry enough to accept the resin.


