final project presentation
presentació
del projecte final
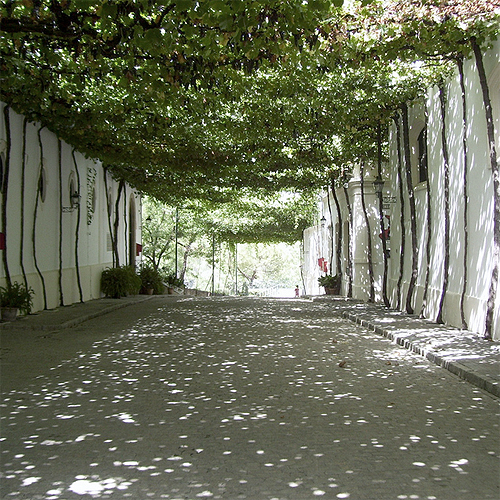
Mediterranean skin. Light structures for ambient control
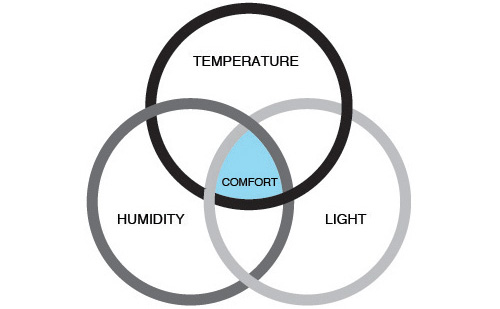
The project is a textile screen that controls different inputs like temperature,
and solar radiation to generate comfort in the interior of the building.
Depending the wheatear, the season and the orientation of the building,
every window needs specific conditions of radiation and ventilation.The
Mediterranean skin has to be able to adapt the holes to help the building
to save energy.
The project will be the maximum flexible and adaptable. For this reason I have designed a flexible slat system that is modular in height and width. Rather than using a big tissue sheet with cuts this new system allows to be placed in a big range of windows holes or balconies and could be adaptable to the different building shape conditions.
Intelligent
Infrastructure for Energy Efficiency
Neil Gershenfeld, 1 Stephen Samouhos ,1,2 Bruce Nordman 3
"Buildings use 40% of the primary energy supplied in the United States,
and more than 70% of all generated electricity (1), primarily for heating,
cooling, and lighting. About 20% of the energy used by buildings can potentially
be saved by correcting faults, including malfunctions and unnecessary
operation (2). Initial deployments of advanced control systems currently
in development suggest that they can save an additional 10 to 20% (3).
The energy efficiency resource recoverable through such improved building
controls and fault detection corresponds to the output from hundreds of
power plants, equivalent to more than one-third of the coal-fi red power
production in the United States (1). Realizing these substantial savings
will require introducing intelligence into the infrastructure of buildings,
to distribute the optimization of their operation and detection of their
faults. Intelligent infrastructure extends "smart grid" initiatives that
seek to save energy by allowing utilities to manage loads, such as turning
off air conditioners during peak demand (4). However, a grid cannot be
smart if it is connected to dumb devices."
www.sciencemag.org
01. the project
Final video presentation. Prototype 1.0
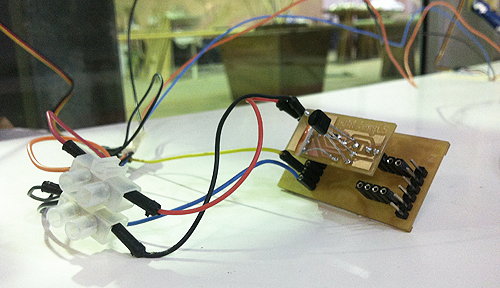
Servo motors
I used a RC Servo. They have a 3-pin 0.1" female header connection with
+5V, ground and signal inputs. The motor shield simply brings out the
16bit PWM output lines to 2 3-pin headers so that its easy to plug in
and go. The interesting part is the control signal. An RC servo motor
doesn't just run when you give it power. It's an intelligent device, and
you must tell it what you want it to do. You need something that drives
the servo with that control signal.
The servos I'm using require 5V, most of servo motors require a power
supply between 4.8V and 6.0V. The higher the voltage, the faster the servo
will move and the more torque it will have.
http://arduino.cc/it/Reference/Servo
http://www.ladyada.net/make/mshield/use.html
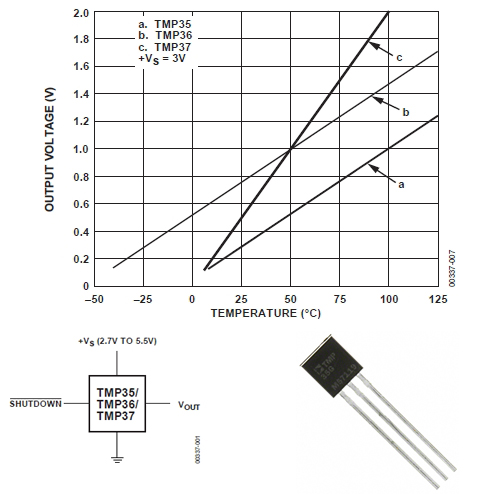
Temperature sensor
An analog temperature sensor is a chip that tells you what the ambient
temperature is. The temperature sensor use the fact as temperature increases,
the voltage across a diode increases at a known rate. By precisely amplifying
the voltage change, it is easy to generate an analog signal that is directly
proportional to temperature. LM35/TMP35 give you a celsius output
LM35 Temperature sensor provides 10 mV/ºC
So Temp (ºC) = V (volts) / 0.01
Temp (ºC) = (analogRead(0) * 5 / 1024.0) / 0.01
http://www.ladyada.net/learn/sensors/tmp36.html
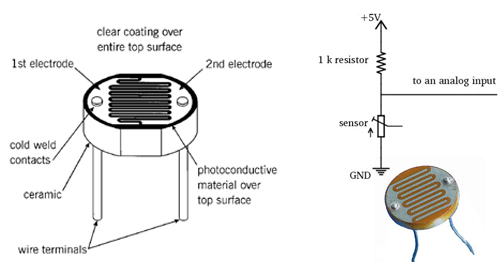
Light sensor
A light sensor (LDR or Light Dependent Resistor) is a simple component
that provides a variable resistance that changes with light, which we
can read into the Arduino board as an analog value.
We connect three wires to the Fabduino board. The first goes to ground
from one of the pins of the LDR. The second goes from 5 volts to one of
the pins of the 1 kohm resistor, the other pin of the resistor goes to
the free pin in the LDR. The third goes from analog input 2 to the LDR
pin that is connected to the resistor.
By changing the amount of light in the LDR, we change the amount of resistance
on the LDR, witch changes the voltage value, giving us a different analog
input. We'll read different values between 0 (for 0V) and 1023 (for 5V).
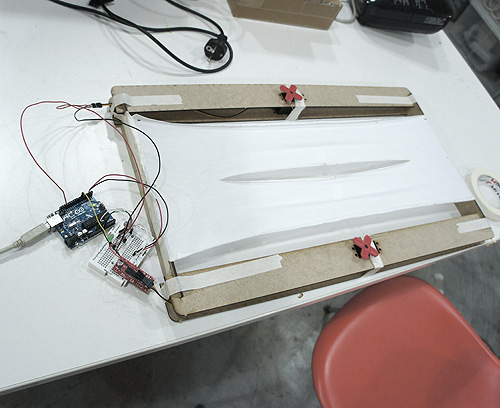
FabDuino
I had some troubles with the Fabduino. The voltage regulator (5V.)
only works when you connect the 9V. Battery. Using the FTDI wire the voltage
regulator warms.
I had also problems to upload the bootloader. Ihad to change the signature
for the chip ATmega168 because it is different from the one is in the
library of avrdude. For this you have to go to
\arduino-1.0\hardware\tools\avr\etc\avrdude.conf
Then you have to edit the signature from this
signature = 0x1e 0x94 0x06
to this
signature = 0x1e 0x94 0x0b
after that you can load the bootloader and the fabduino is ready to go.
Pin correspondance and the board
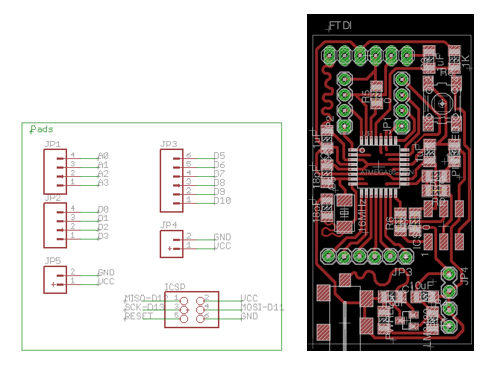

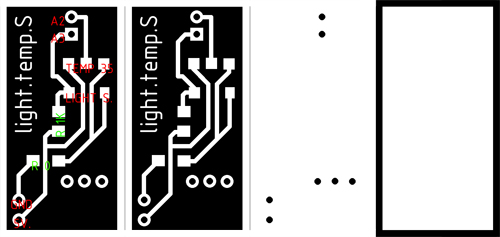
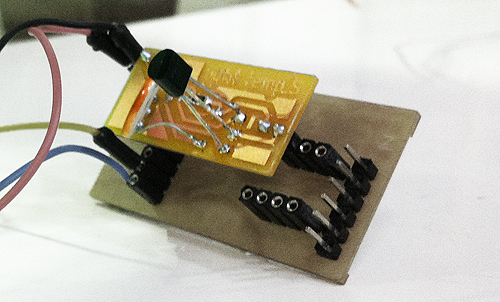
Light and temperature Shield
I designed a shield for the Fabduino to simplify the connections and group
both sensors in one shield.
Solar module
Solar flexible panel that, through the module and a battery, provides
5V to the sensor boards and the servo motors.
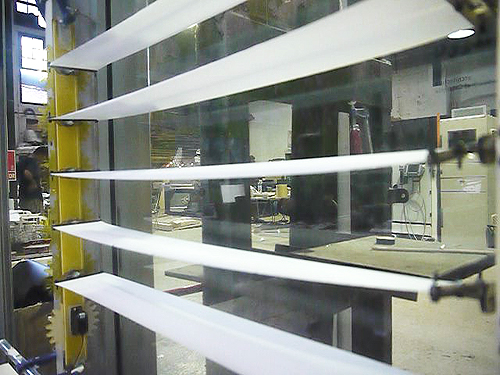
Polyamide Synthetic tissues
I cutted with the laser the different patterns and then I fixed the slabs
in the tracks.

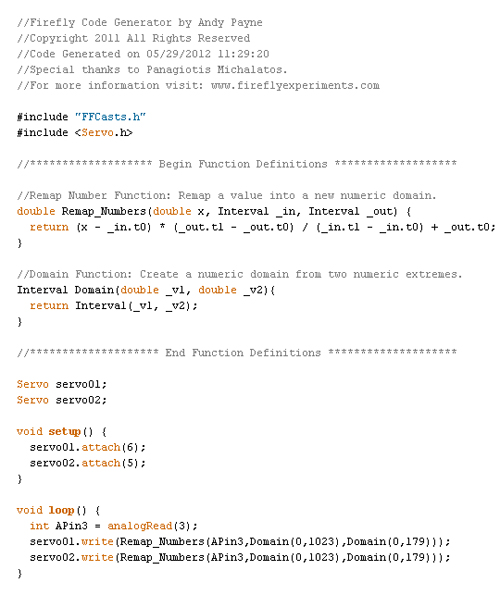
02. programming the fabduino. Using Firefly for Grasshopper
I generate different behaviors depending the Analog inputs, temperature
and light. I programmed to different situations depending the range of
temperatures. To 10ºC ( winter season) the system will open with the light.
From 10ºC (summer season) the behavior turns on the opposite way.
I also put a manual control. So you can control with a slider the amount
of degrees you need.
press the image to enlarge
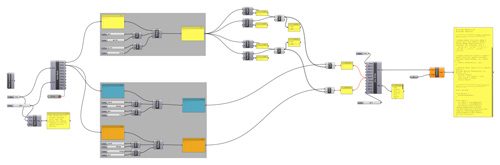
Firefly generate a code for arduino. I had to change the pins to fit with the Fabduino ones. Then you can upload the code.
www.fireflyexperiments.com/
www.fireflyexperiments.com/download/
03. the process (work in progress)
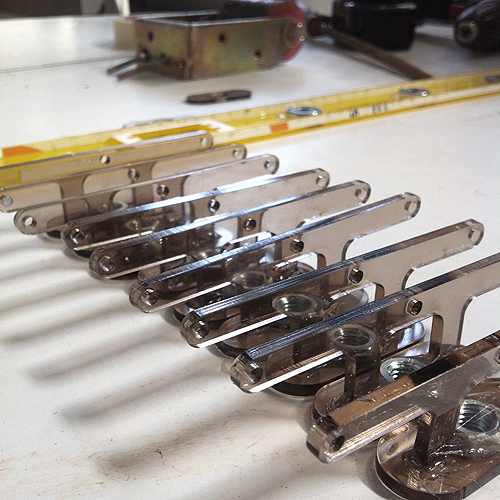
Testing the bearings
Testing the gears
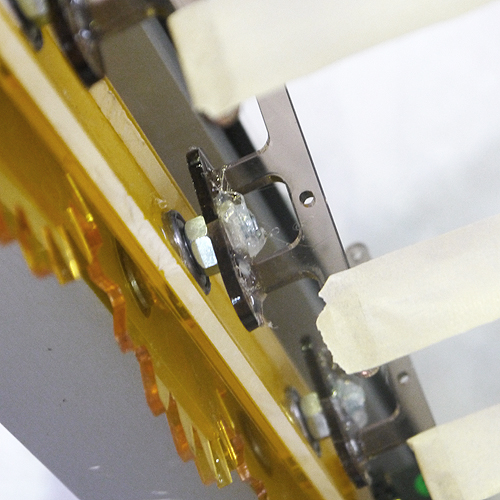
Assembling the gears
Testing the assembling with the servos
04. first attempts. Different concepts
some links related with my final project:
Flapping origami crane
http://fab.cba.mit.edu/classes/MIT/863.10/people/jie.qi/jieweek10.html
Urban sensor kit
http://wiki.fablabbcn.org/index.php?title=Urban_sensor_kit&oldid=7232
How to get what you want? http://www.kobakant.at/DIY/?p=2884
Smart Textiles Design Lab http://www.stdl.se/
http://makingfurnitureinteractive.wordpress.com/2007/10/11/muscle-wire/
special thanks:
Tomás Diez / Luciano Betoldi / Guillem Camprodon
and all FabAcademy mates :)