This week assignment deals with manufacturing circuit boards with sensors and microcontrollers used to measure a physical magnitude. We were provided with pre determined pcb designs files for light, temperature, sound and step response boards and also program files to test them.
I had some problems with this assignment, the first was that my FabISP board didn't work, I tried to fix it, I found a couple of open traces, but that wasn't the problem, so I had to mill another one.
For running the visulization files in Python I downloaded from the web, and installed Python 2.7, with pyserial for reading the data from the serial port, Tcl/tk for creating graphical interfaces, numpy for processing mathematical functions. All this set of program and applications were neccesary when testing the sensors boards.
For programming the Attiny45, I tried to use the fabISP in a Windows Arduino environment , but I couldn't load the files. So I used the terminal in Ubuntu. In this process were very useful the following tutorials: http://academy.cba.mit.edu/2012/labs/providence/tutorials/11.html http://academy.cba.mit.edu/2011/labs/urbana/mercedes.mane/Website/Input_devices/index_input_devices.html and http://academy.cba.mit.edu/2011/labs/urbana/Mary.Watson/website/deviceinput.html
For programming the boards I downloaded all the necessary files in one folder and followed the procedure with the commands for the light board. The procedure is the same for the other boards.
sudo make -f hello.light.45.make, for compile C file (I used this command in the terminal)
sudo make -f hello.light.45.make program-usbtiny, for flashing using make
avrdude -p t45 -c usbtiny -U flash:w:hello.light.45.c.hex, for flashing the board using avrdude (I also used this one)
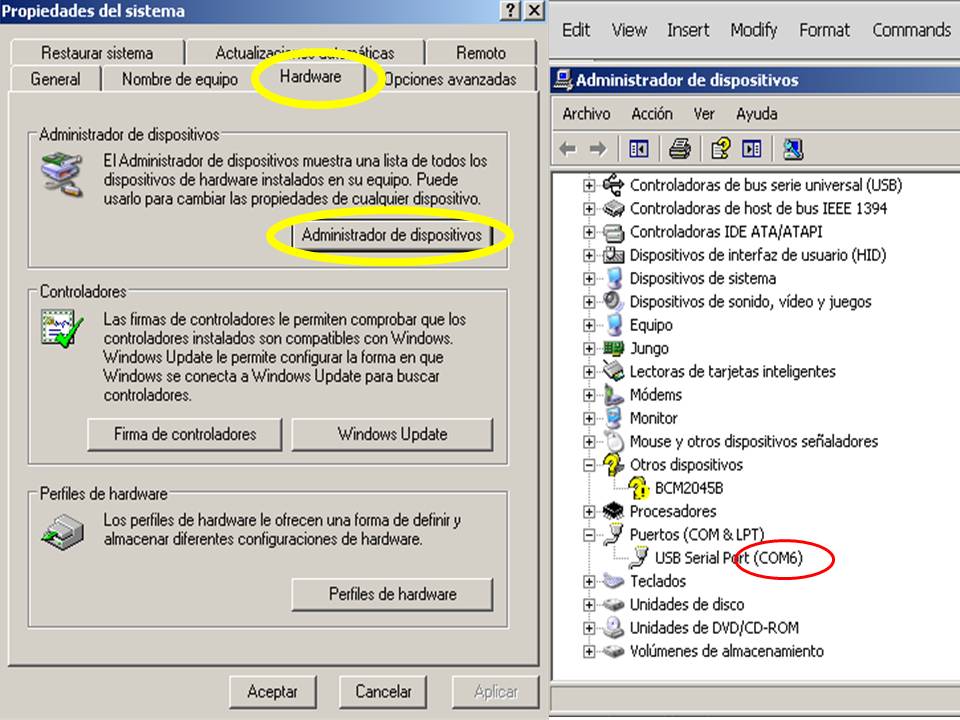
Once the program has been transferred to the microcontroller we have to establish the serial communication. I used Python programs installed in windows and ran the following command on the cmd shell: python hello.light.45.py comX, you get the X value going to the control panel in windows, double clicking the system icon and selecting the hardware tab and clicking the device manager button, as you can see in the following figure.
In Ubuntu to know the working serial port we ask to the terminal with the command ls /dev and we will the list of the devices connected for example ttyusb1
Once programmed, we disconnect the boards from the ISP and may test the sensors. Following you can see some of them.
This has been a very important assignment. At the begining it seems not to be difficult because we had experience programmnig the Attiny 45, but this time we couldn't run the Arduino and AVR environments (we have to work to do so), then we had to use Linux. Other possibility is to use LabView for visualization the board test.